Debug HomeKit Module Pairing
This topic describes how to debug the pairing functionality of the Wi-Fi HomeKit module by using the Module debugging assistant.
Set up the circuit
Check firmware information
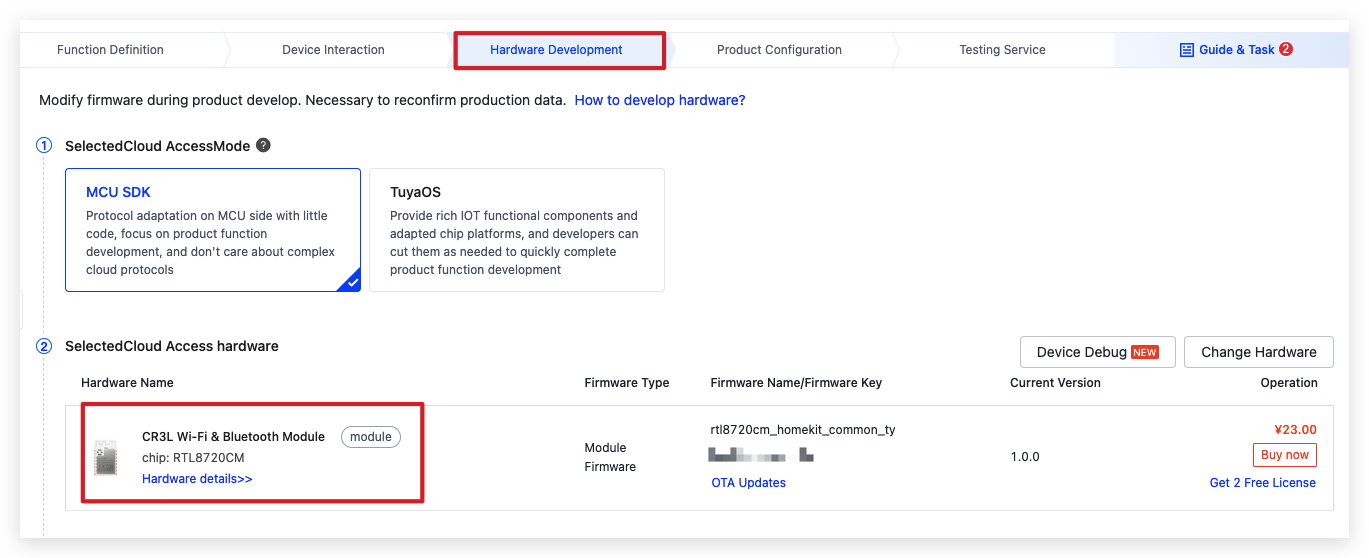
Three module models, namely TYWE3SE, CR3L, and CR3L-IPEX, can be used to develop Wi-Fi HomeKit products using the MCU SDK. The HomeKit in the firmware name indicates it is intended for HomeKit modules.
-
Log in to the Tuya Developer Platform.
-
Choose the target product and click Develop.
-
In the third step of Hardware Development, view firmware information.
Set up the minimum system
Prepare a USB to TTL converter, a HomeKit module that has been authorized and flashed with the correct firmware, and some jumper wires.
Wire connection:
- Connect the TX pin of the USB to TTL converter to the RX pin of the module.
- Connect the RX pin of the USB to TTL converter to the TX pin of the module.
- Connect the 3.3V pin of the USB to TTL converter to the 3.3V pin of the module.
- Connect the GND pin of the USB to TTL converter to the GND pin of the module.
Debug with Module Debugging Assistant
Prerequisite
-
Log in to the Tuya Developer Platform.
-
Choose the target product and click Develop.
-
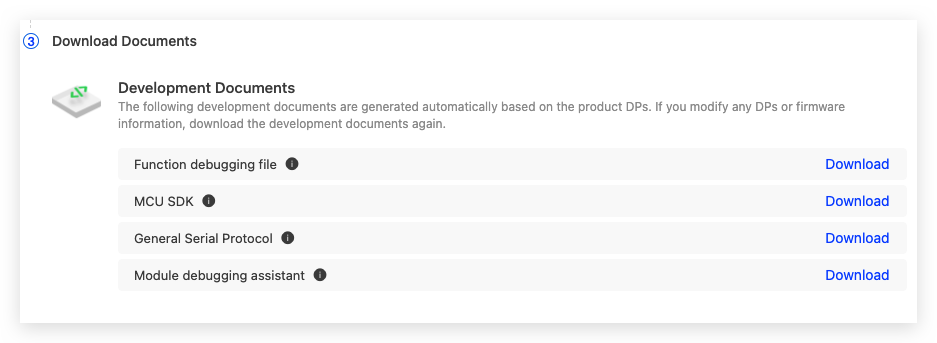
In the third step of Hardware Development, find Download Documents, and download the Module Debugging Assistant.
Install Module Debugging Assistant
System environment requirements
.NET Framework must be 4.6.1. Operating system requirements:
- Windows XP is not supported.
- Install .NET Framework 4.6.1 on Windows 7 or later, or earlier than Windows 10 version 1511.
- .NET Framework 4.6.1 is not required for Windows 10 version 1511 or later.
Install
Double-click the installer and complete the installation.
Open Module Debugging Assistant
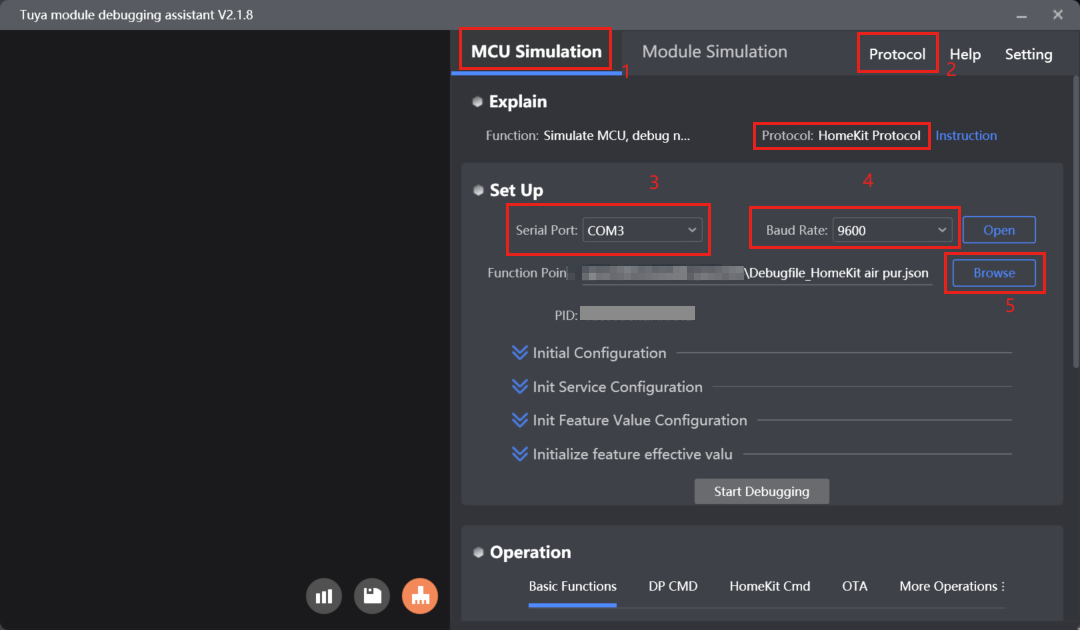
- Choose MCU Simulation: The host simulates the MCU to communicate with the module.
- Protocol: Choose HomeKit Protocol.
- Select a Serial Port.
- Select a Baud Rate: 9600 or 115200.
- Click Browse. Import the Function Debugging File in JSON format downloaded from the Tuya Developer Platform.
Configure HomeKit
Initialize configuration
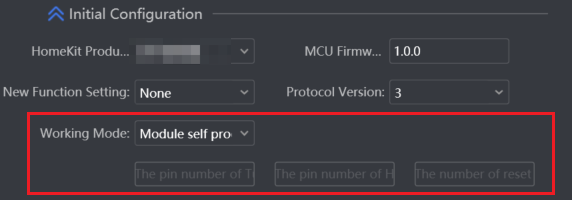
On the Initial Configuration page, select a HomeKit product. Make sure to choose the product category that the current firmware supports. Otherwise, initialization will be stuck in responding to product information.
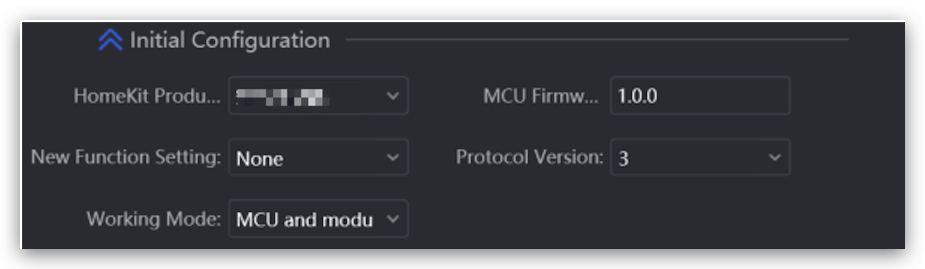
If you choose Module Self Processing for Working Mode, you need to set the pin number for the Tuya indicator, HomeKit indicator, and reset button respectively.
Configure services and features
On the Init Service Configuration page, configure services and features.

- Service configuration: Select the required service and enter the number manually. It is recommended to start numbering with
0and increment by1. - Optional Features: You can add an optional feature for service as needed. The required feature is added by default.
- Confirm: After you click Add, the No., Service Name, Service Mark, and Optional Features are displayed at the bottom of the screen.
Configure the initial value of a feature
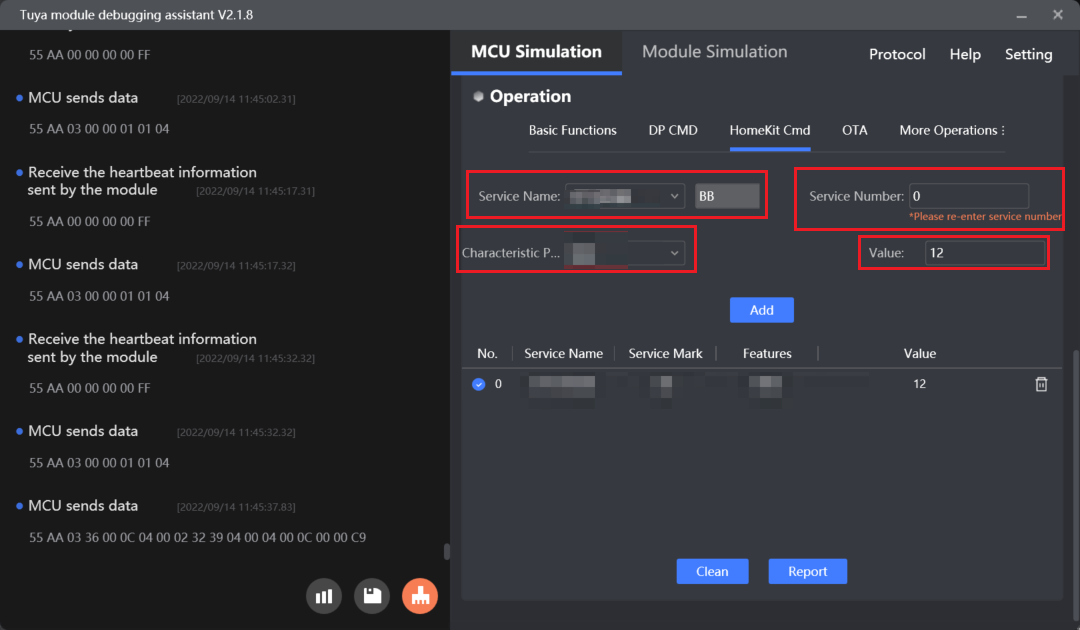
On the Init Feature Value Configuration page, select a service, enter a service number, select a characteristic, enter the initial value, and click Add.
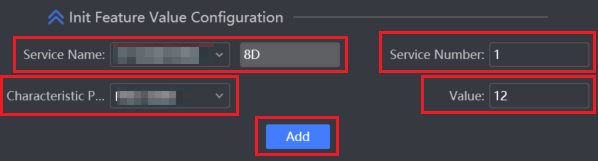
This step is optional. If you do not set an initial value, the device does not report the initial value of a feature.
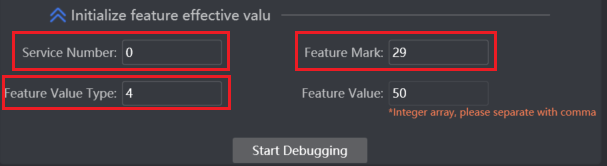
Configure the valid value of a feature
Based on the service and feature, configure the feature value type and feature value. For more information about the valid values, see the Serial Communication Protocol. In the debugging stage, you can skip this step.
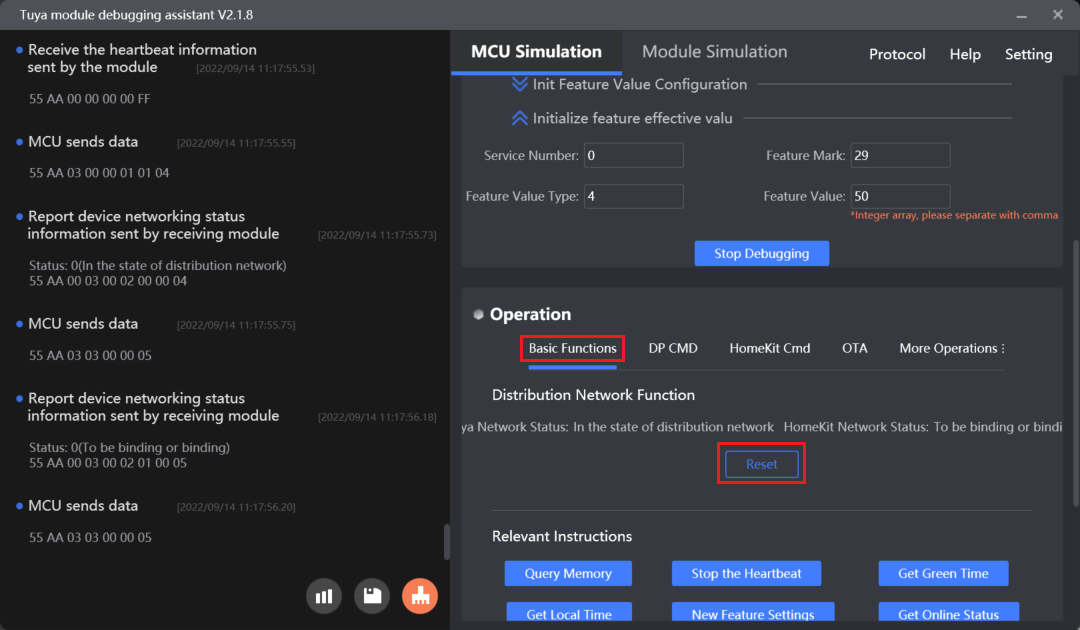
Debug pairing
Reset device to enter pairing mode
In the Operation section, click the Basic Functions tab. Click Reset to enable the device to enter the pairing mode for both Tuya’s module and HomeKit.
Pair the device using app
Connect to Tuya Cloud: Use the SmartLife app or OEM App to pair the device over Bluetooth.
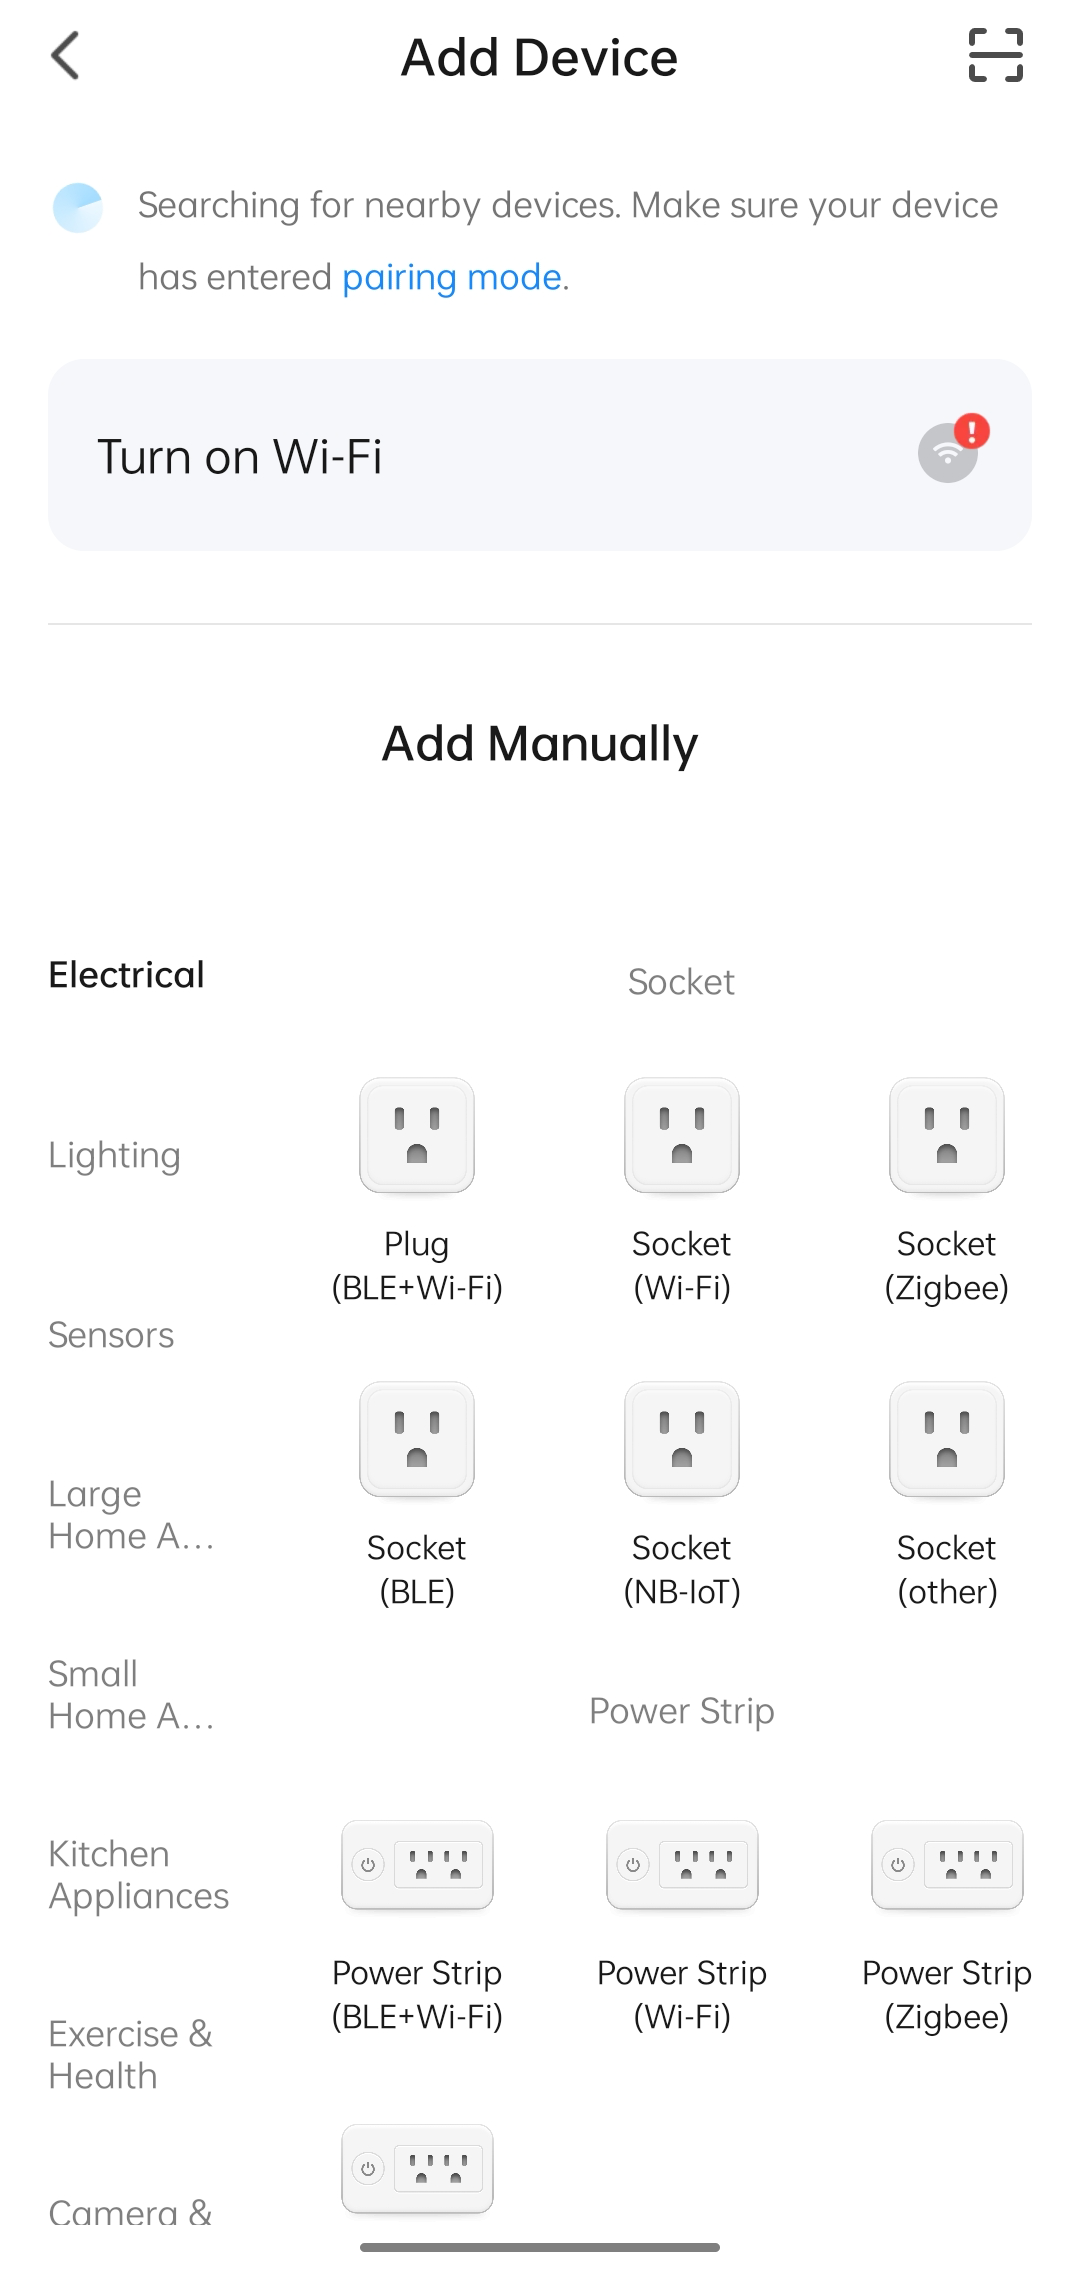
On the Add Device page, search for devices or manually add the device.
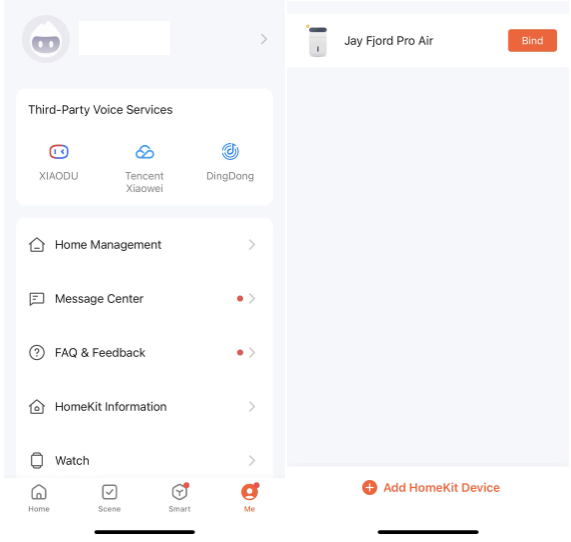
If the device has been connected to HomeKit, you can tap Me > HomeKit Information to bind the device with the Tuya Cloud.
Connect to HomeKit: Use the SmartLife app or Apple’s Home App to pair the device in AP mode.
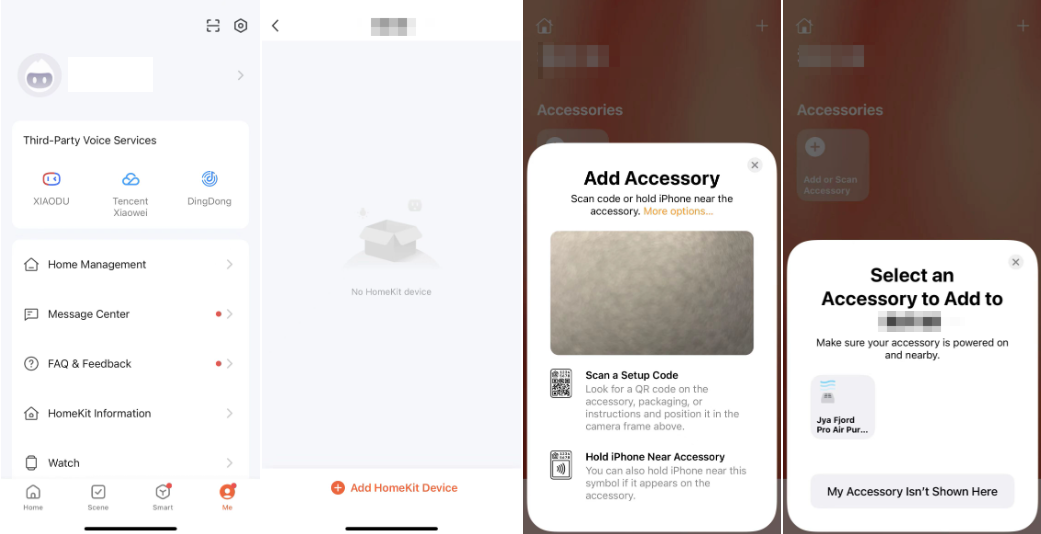
Use the SmartLife app to add a HomeKit device:
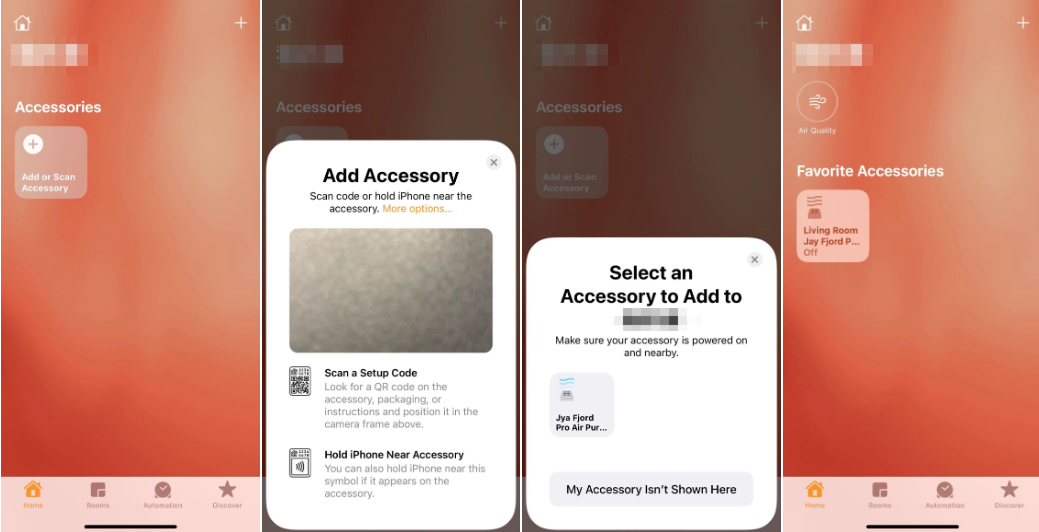
Use the Home app to add a HomeKit device:
Connection to Tuya Cloud and to HomeKit is separate. If a device is removed from the SmartLife app, it will not be removed from the Home app, and vice versa.
Open the control panel
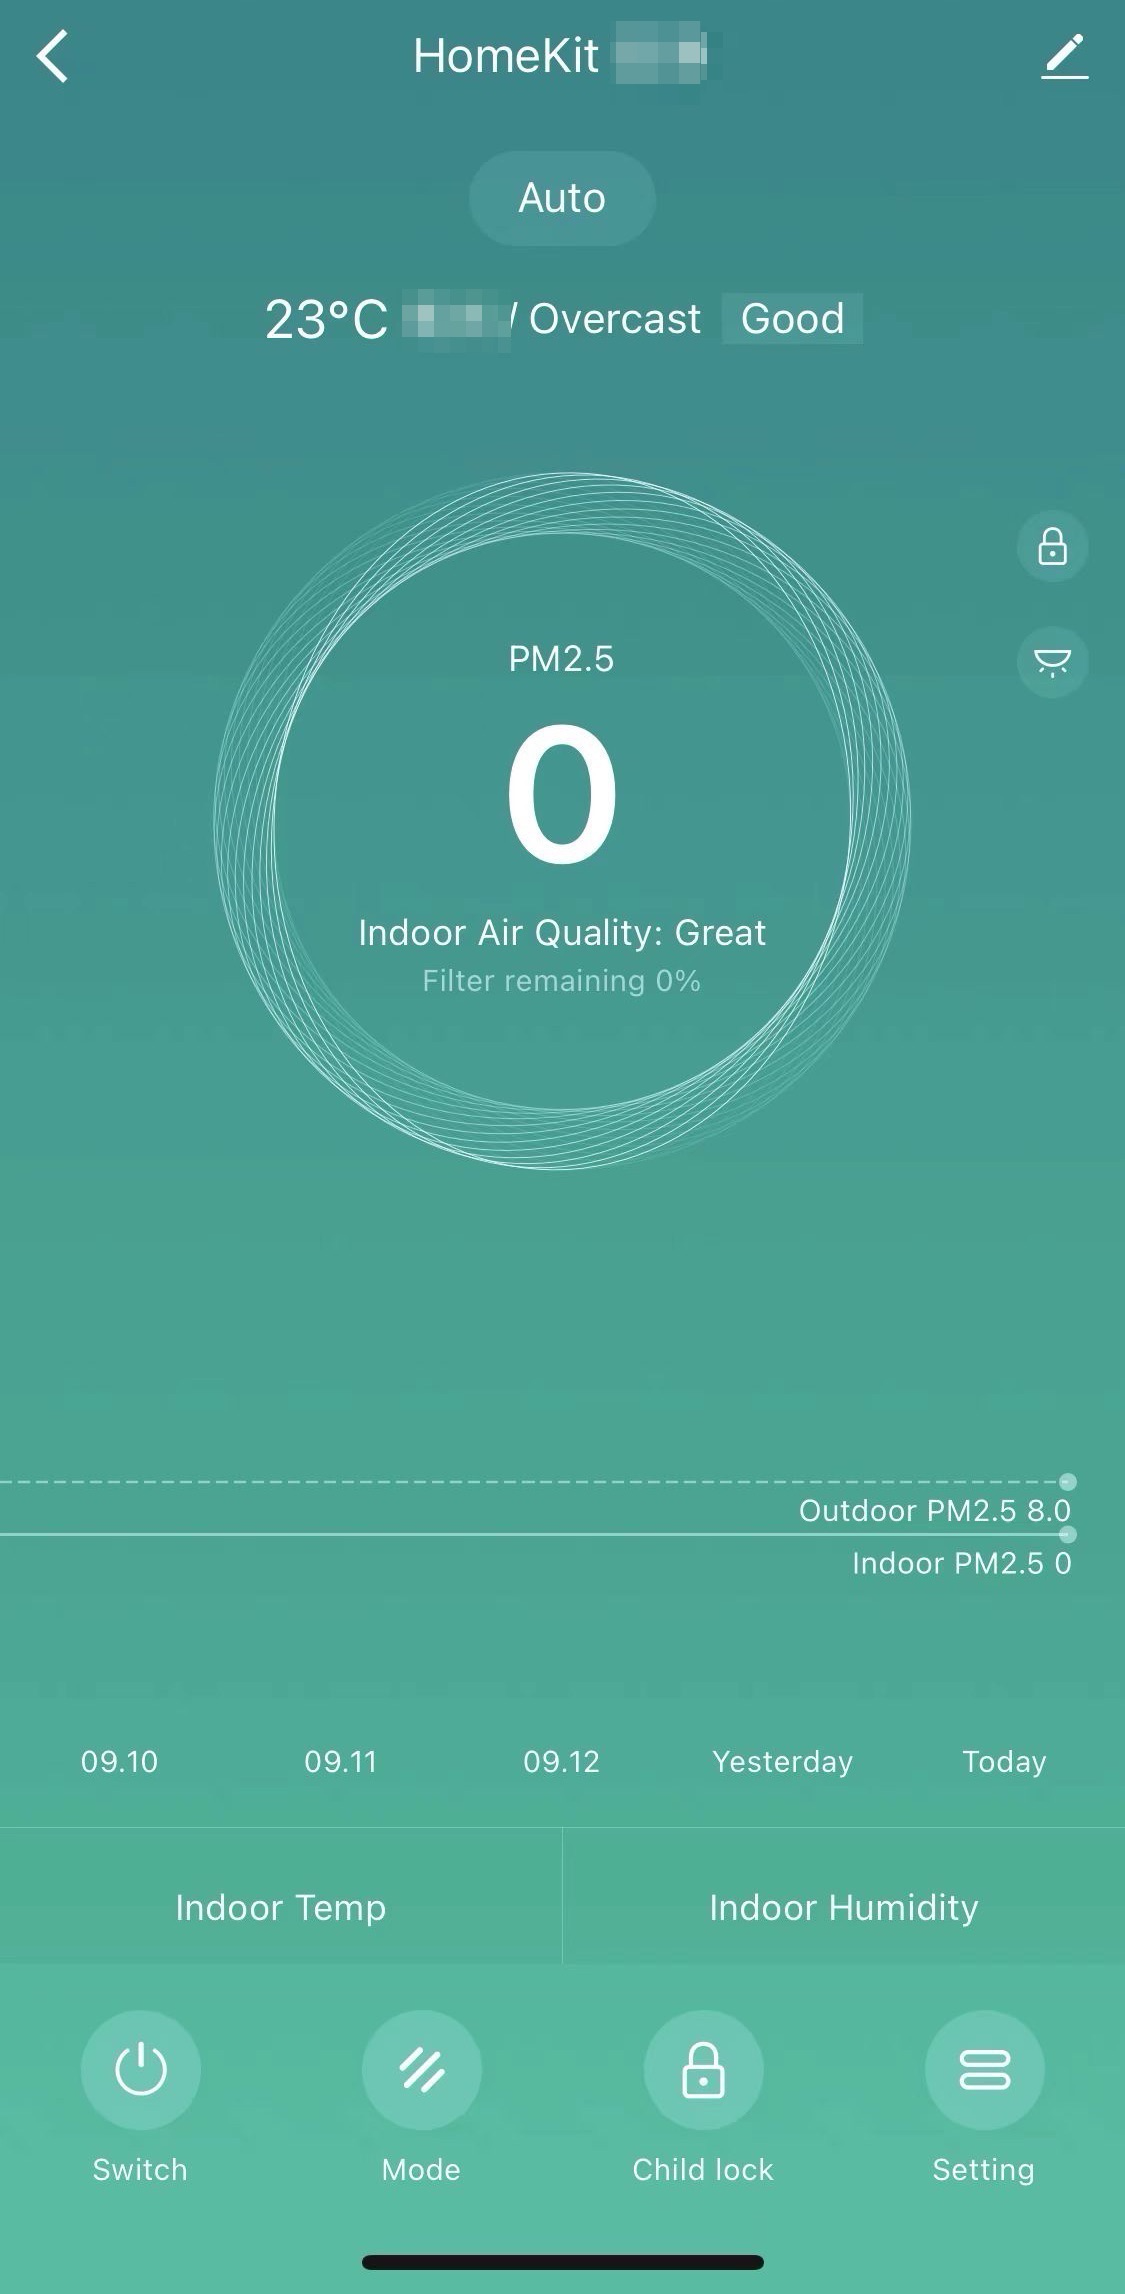
Control panel on the SmartLife app:
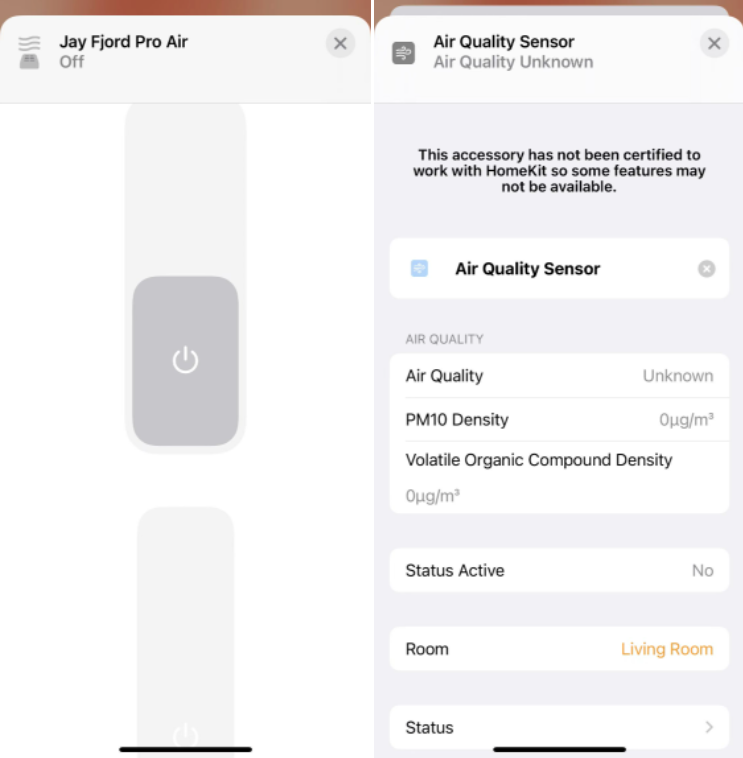
Control panel on the Home app:
Debug functions
Verify reporting DP status and sending DP commands.
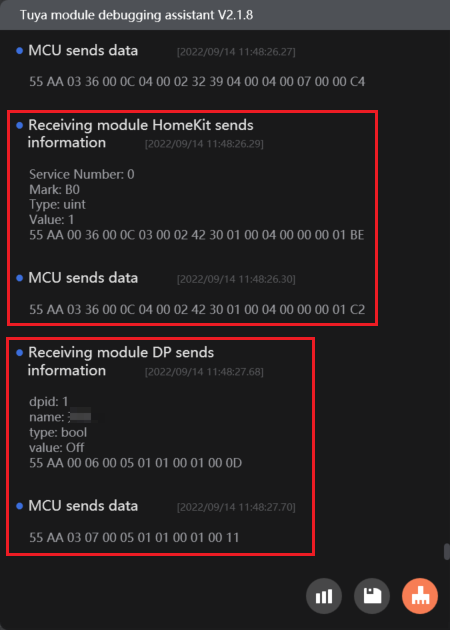
Report DPs and characteristics: The device reports Tuya’s DP status and HomeKit’s characteristic values separately. Tuya’s DP status and HomeKit’s characteristic values are separated from each other.
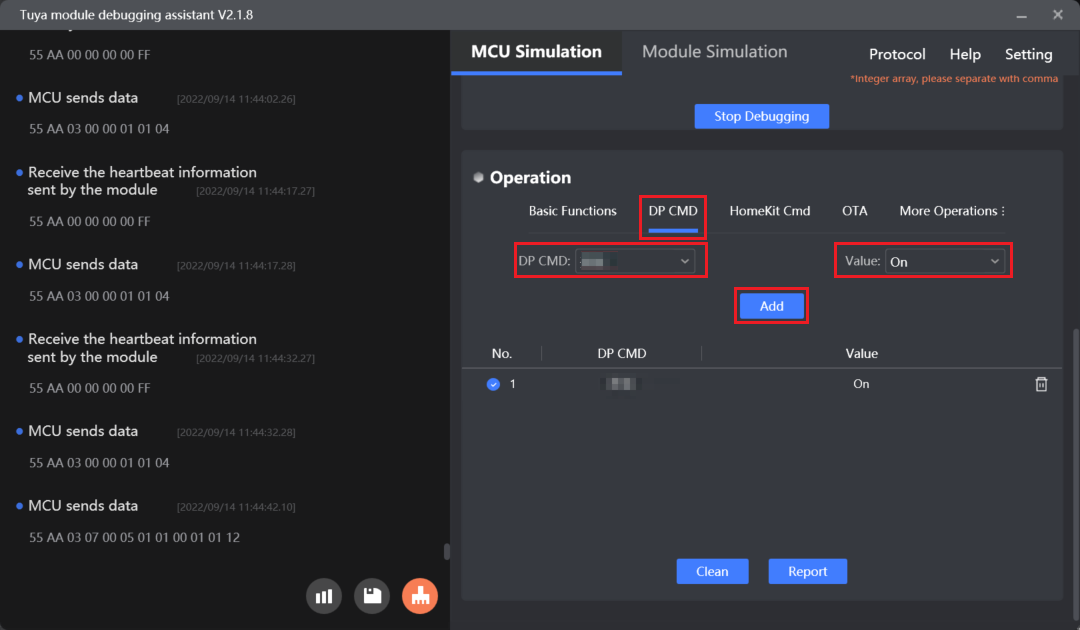
Report Tuya’s DP:
Report HomeKit’s characteristics:
Send DPs and characteristics: Send a command to the device using the control panel on the SmartLife app or the Home app.
Is this page helpful?
YesFeedbackIs this page helpful?
YesFeedback


