Create Product
Last Updated on : 2024-06-13 02:23:14download
This topic describes the entire process of creating a robot vacuum product on the Tuya Developer Platform. It will walk you through how to select a category, define functions, select a control panel and hardware module, and request a license.
Create a product
-
Log in to the Tuya Developer Platform. If you do not have an account, you need to register first.
-
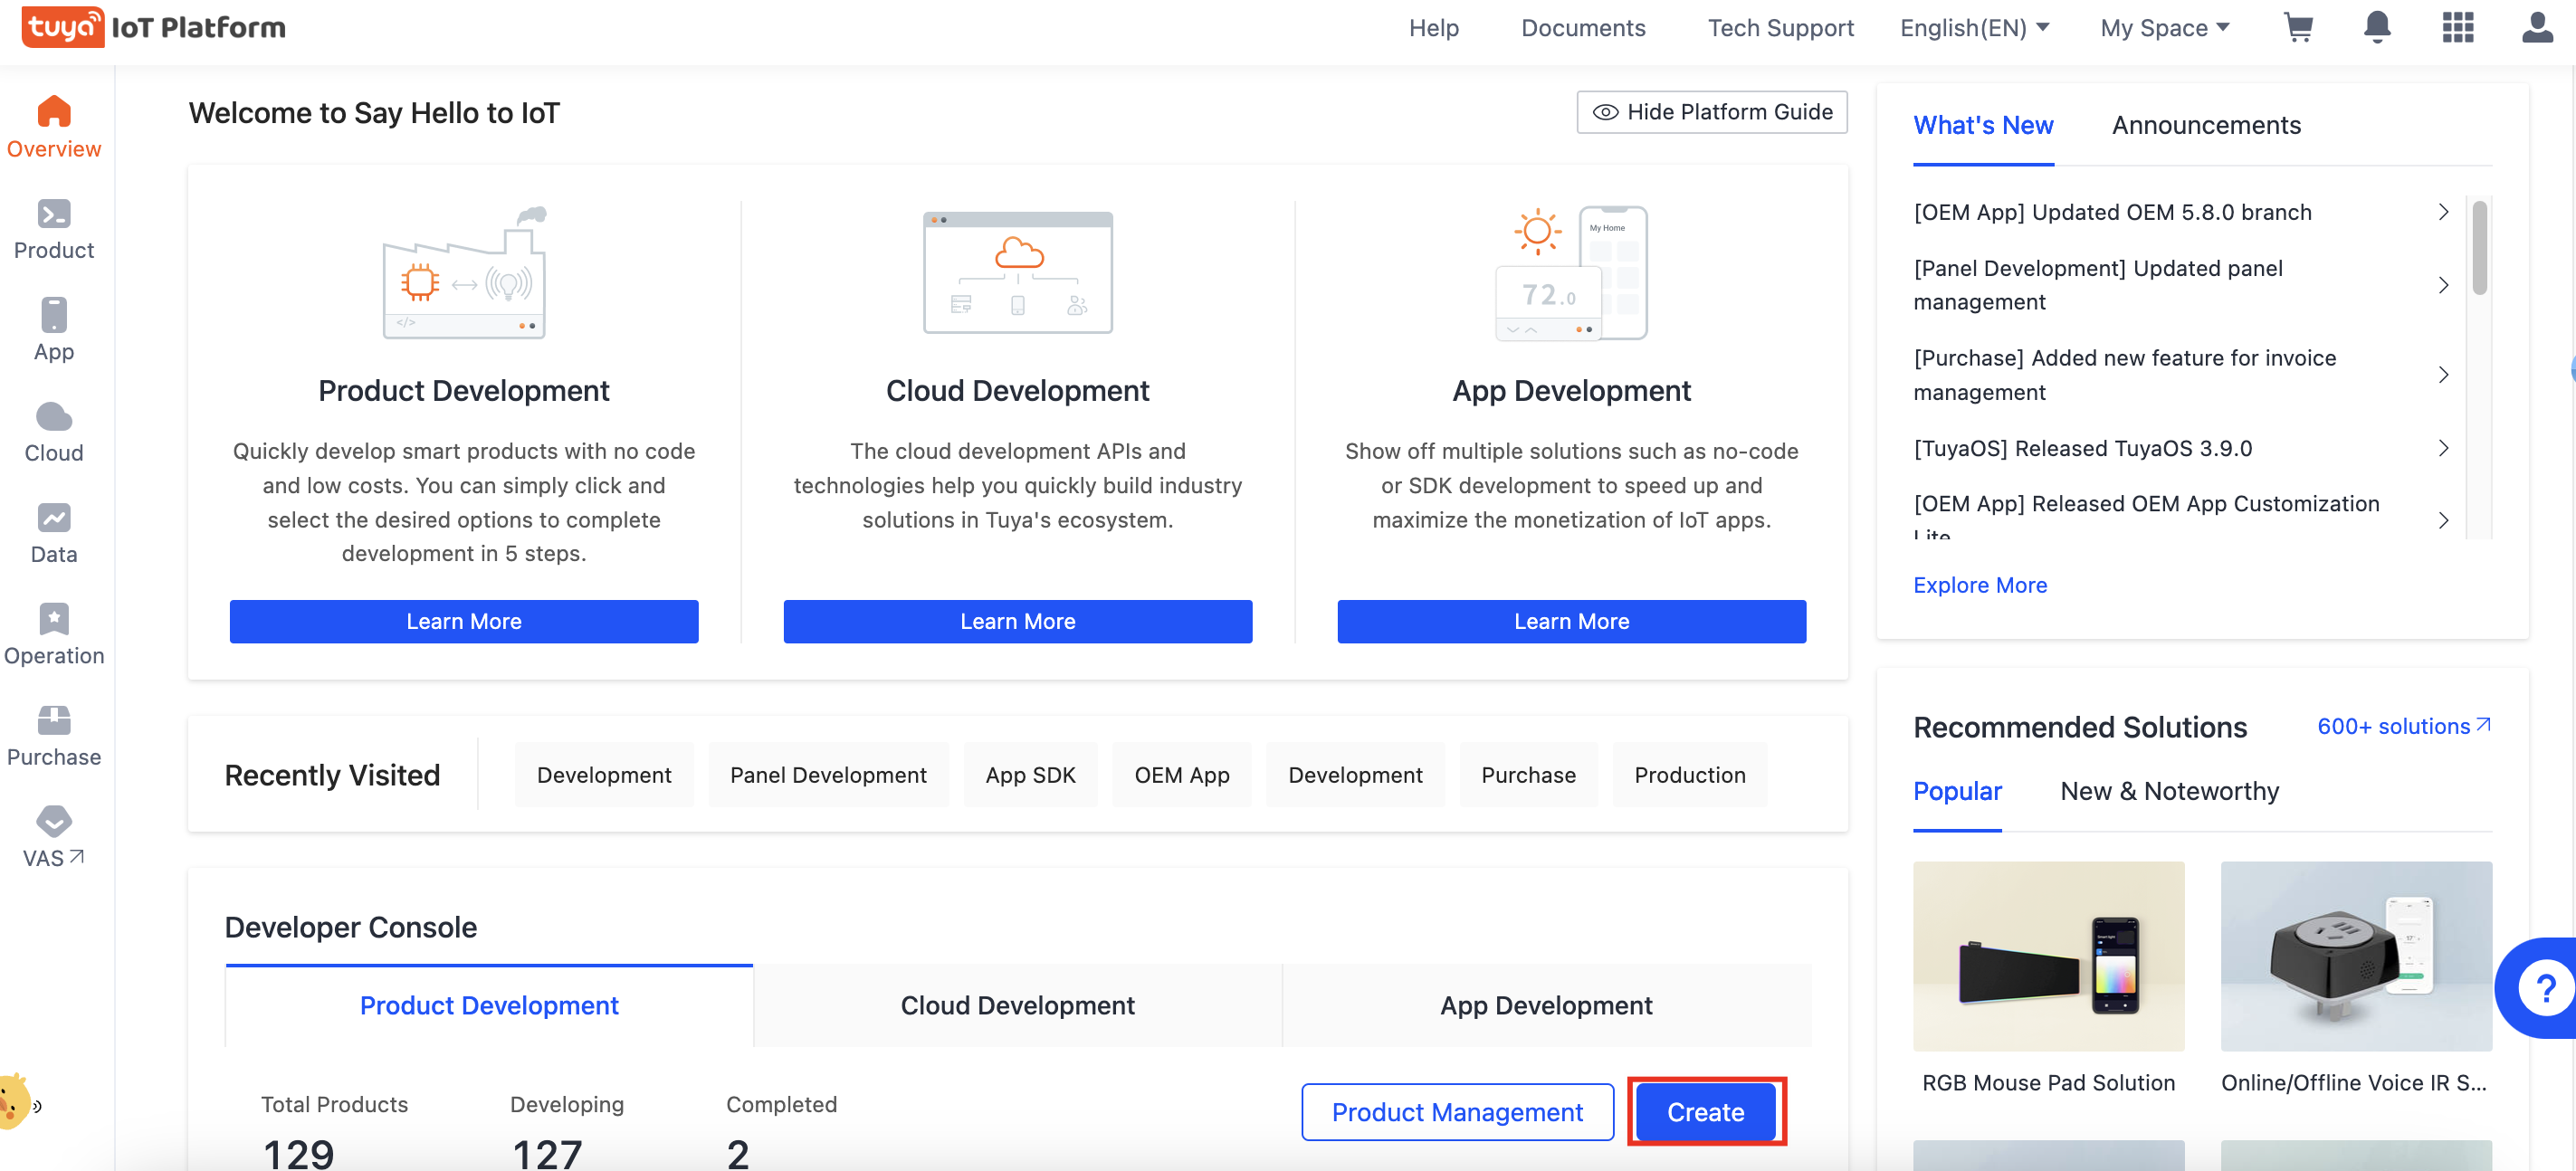
On the Overview page, click Create.
-
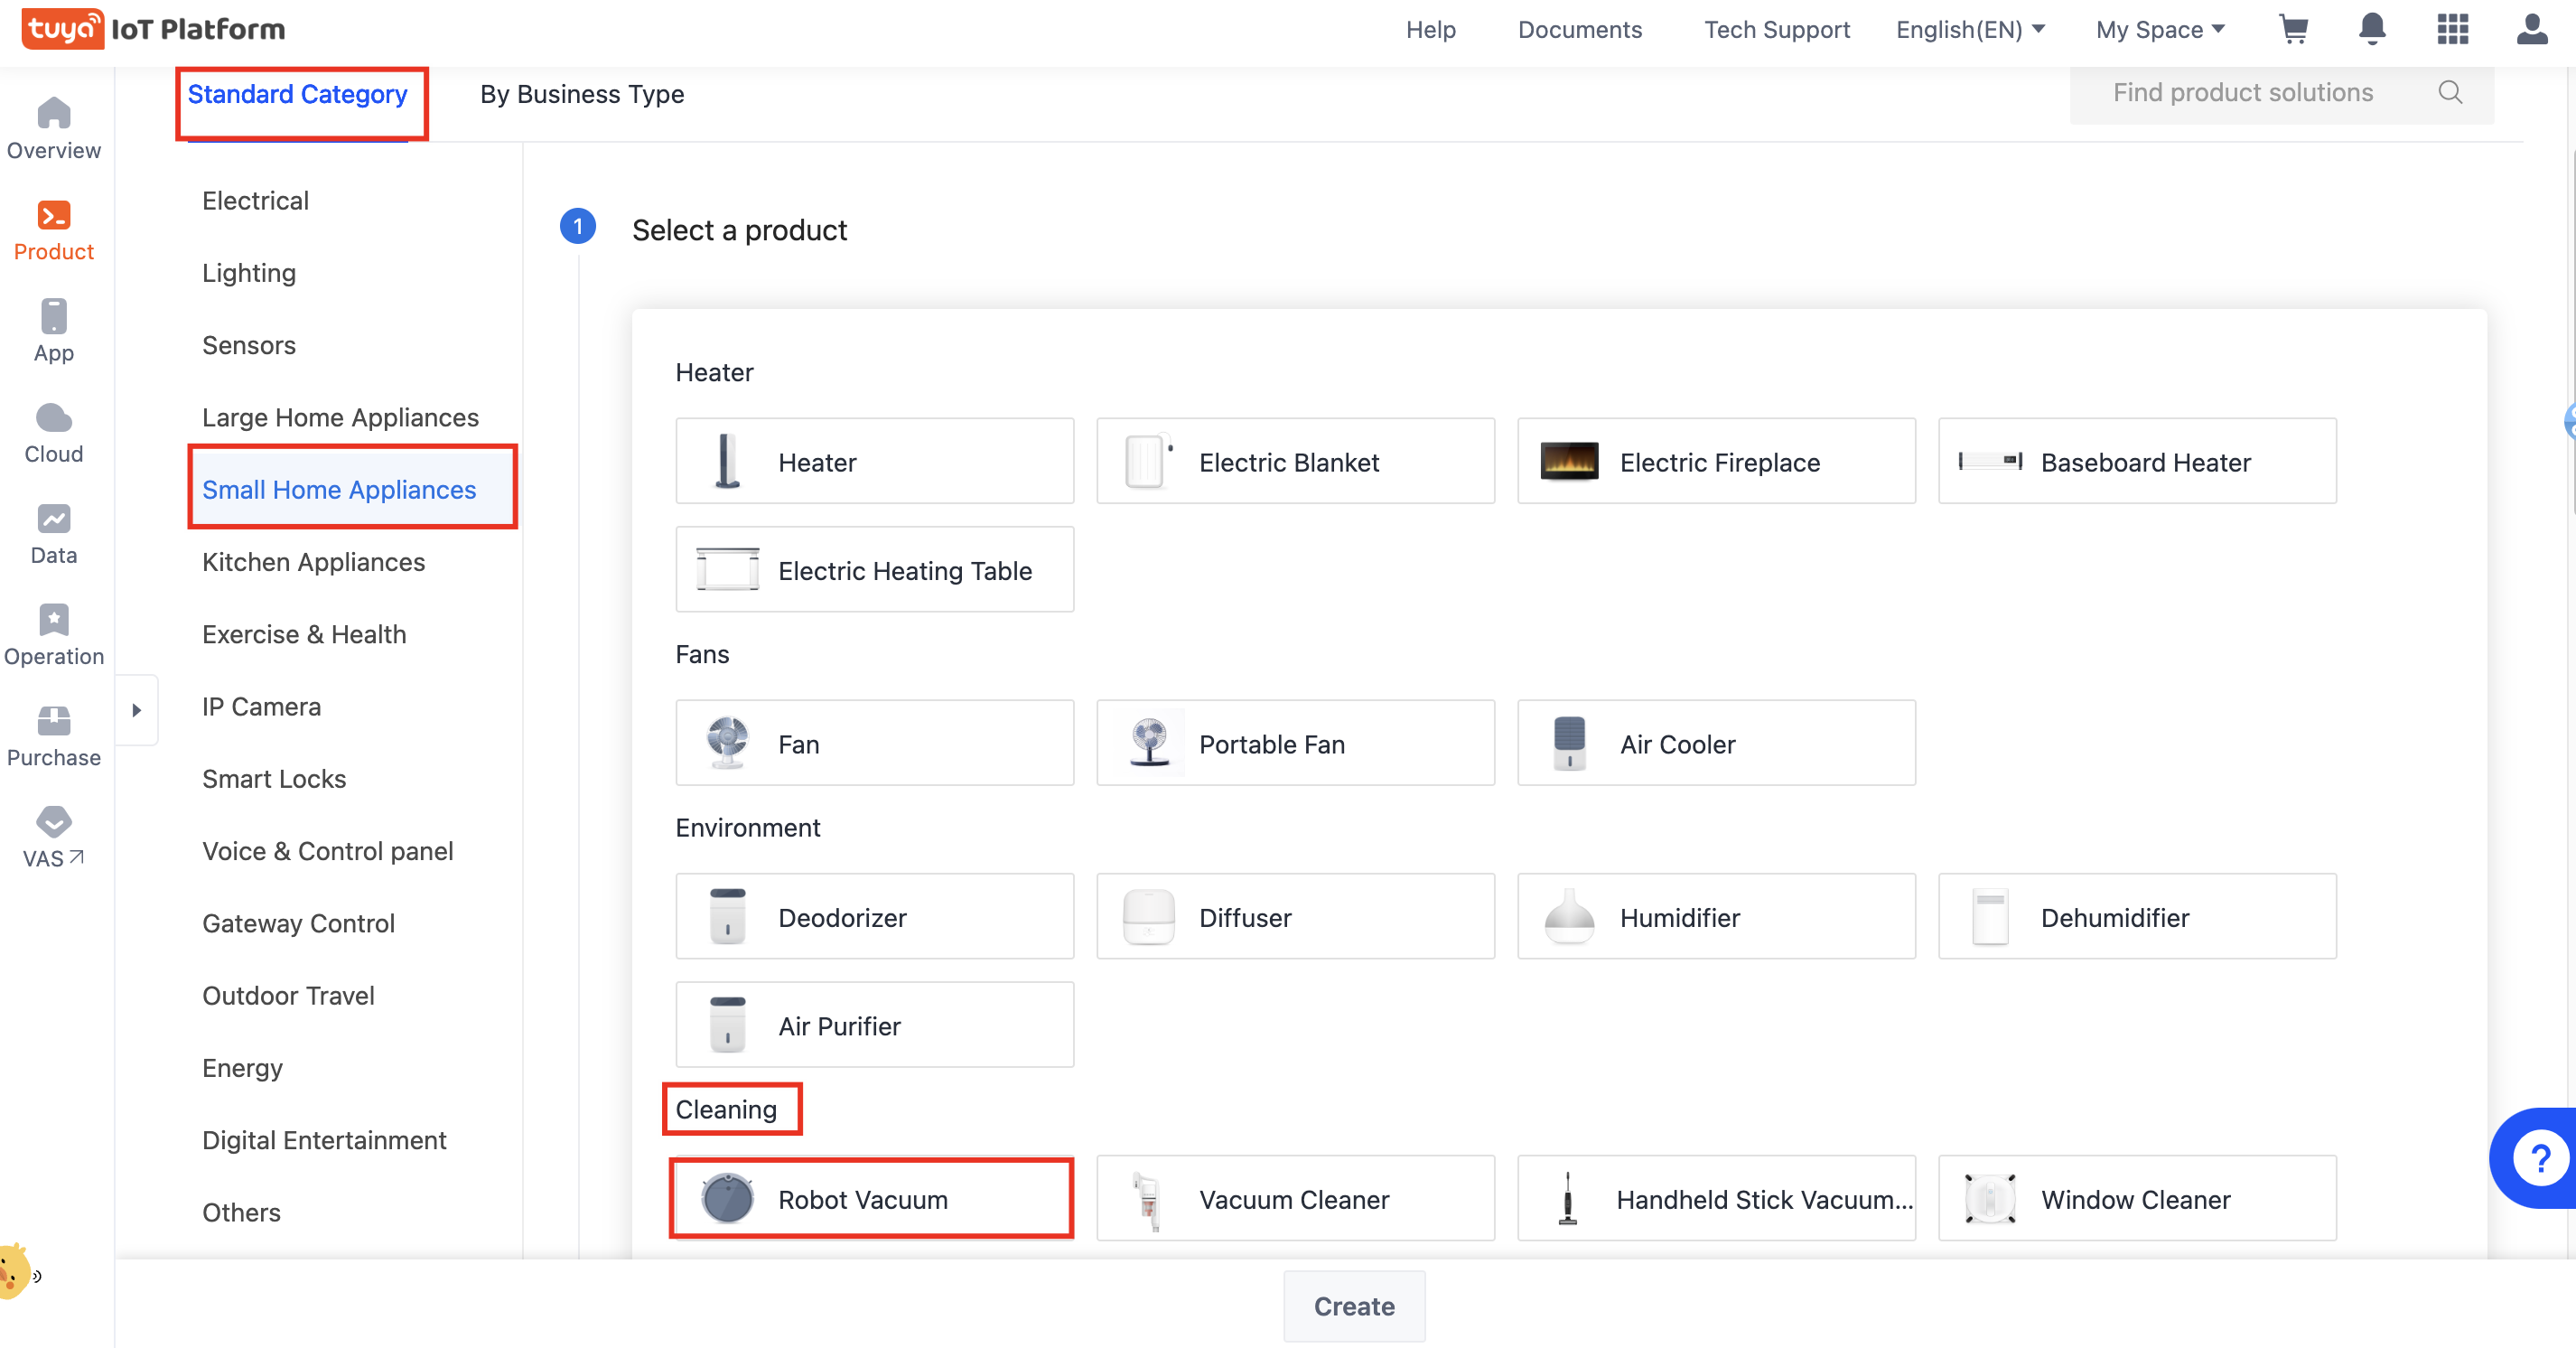
In the Standard Category tab, choose Small Home Appliances > Cleaning > Robot Vacuum.
-
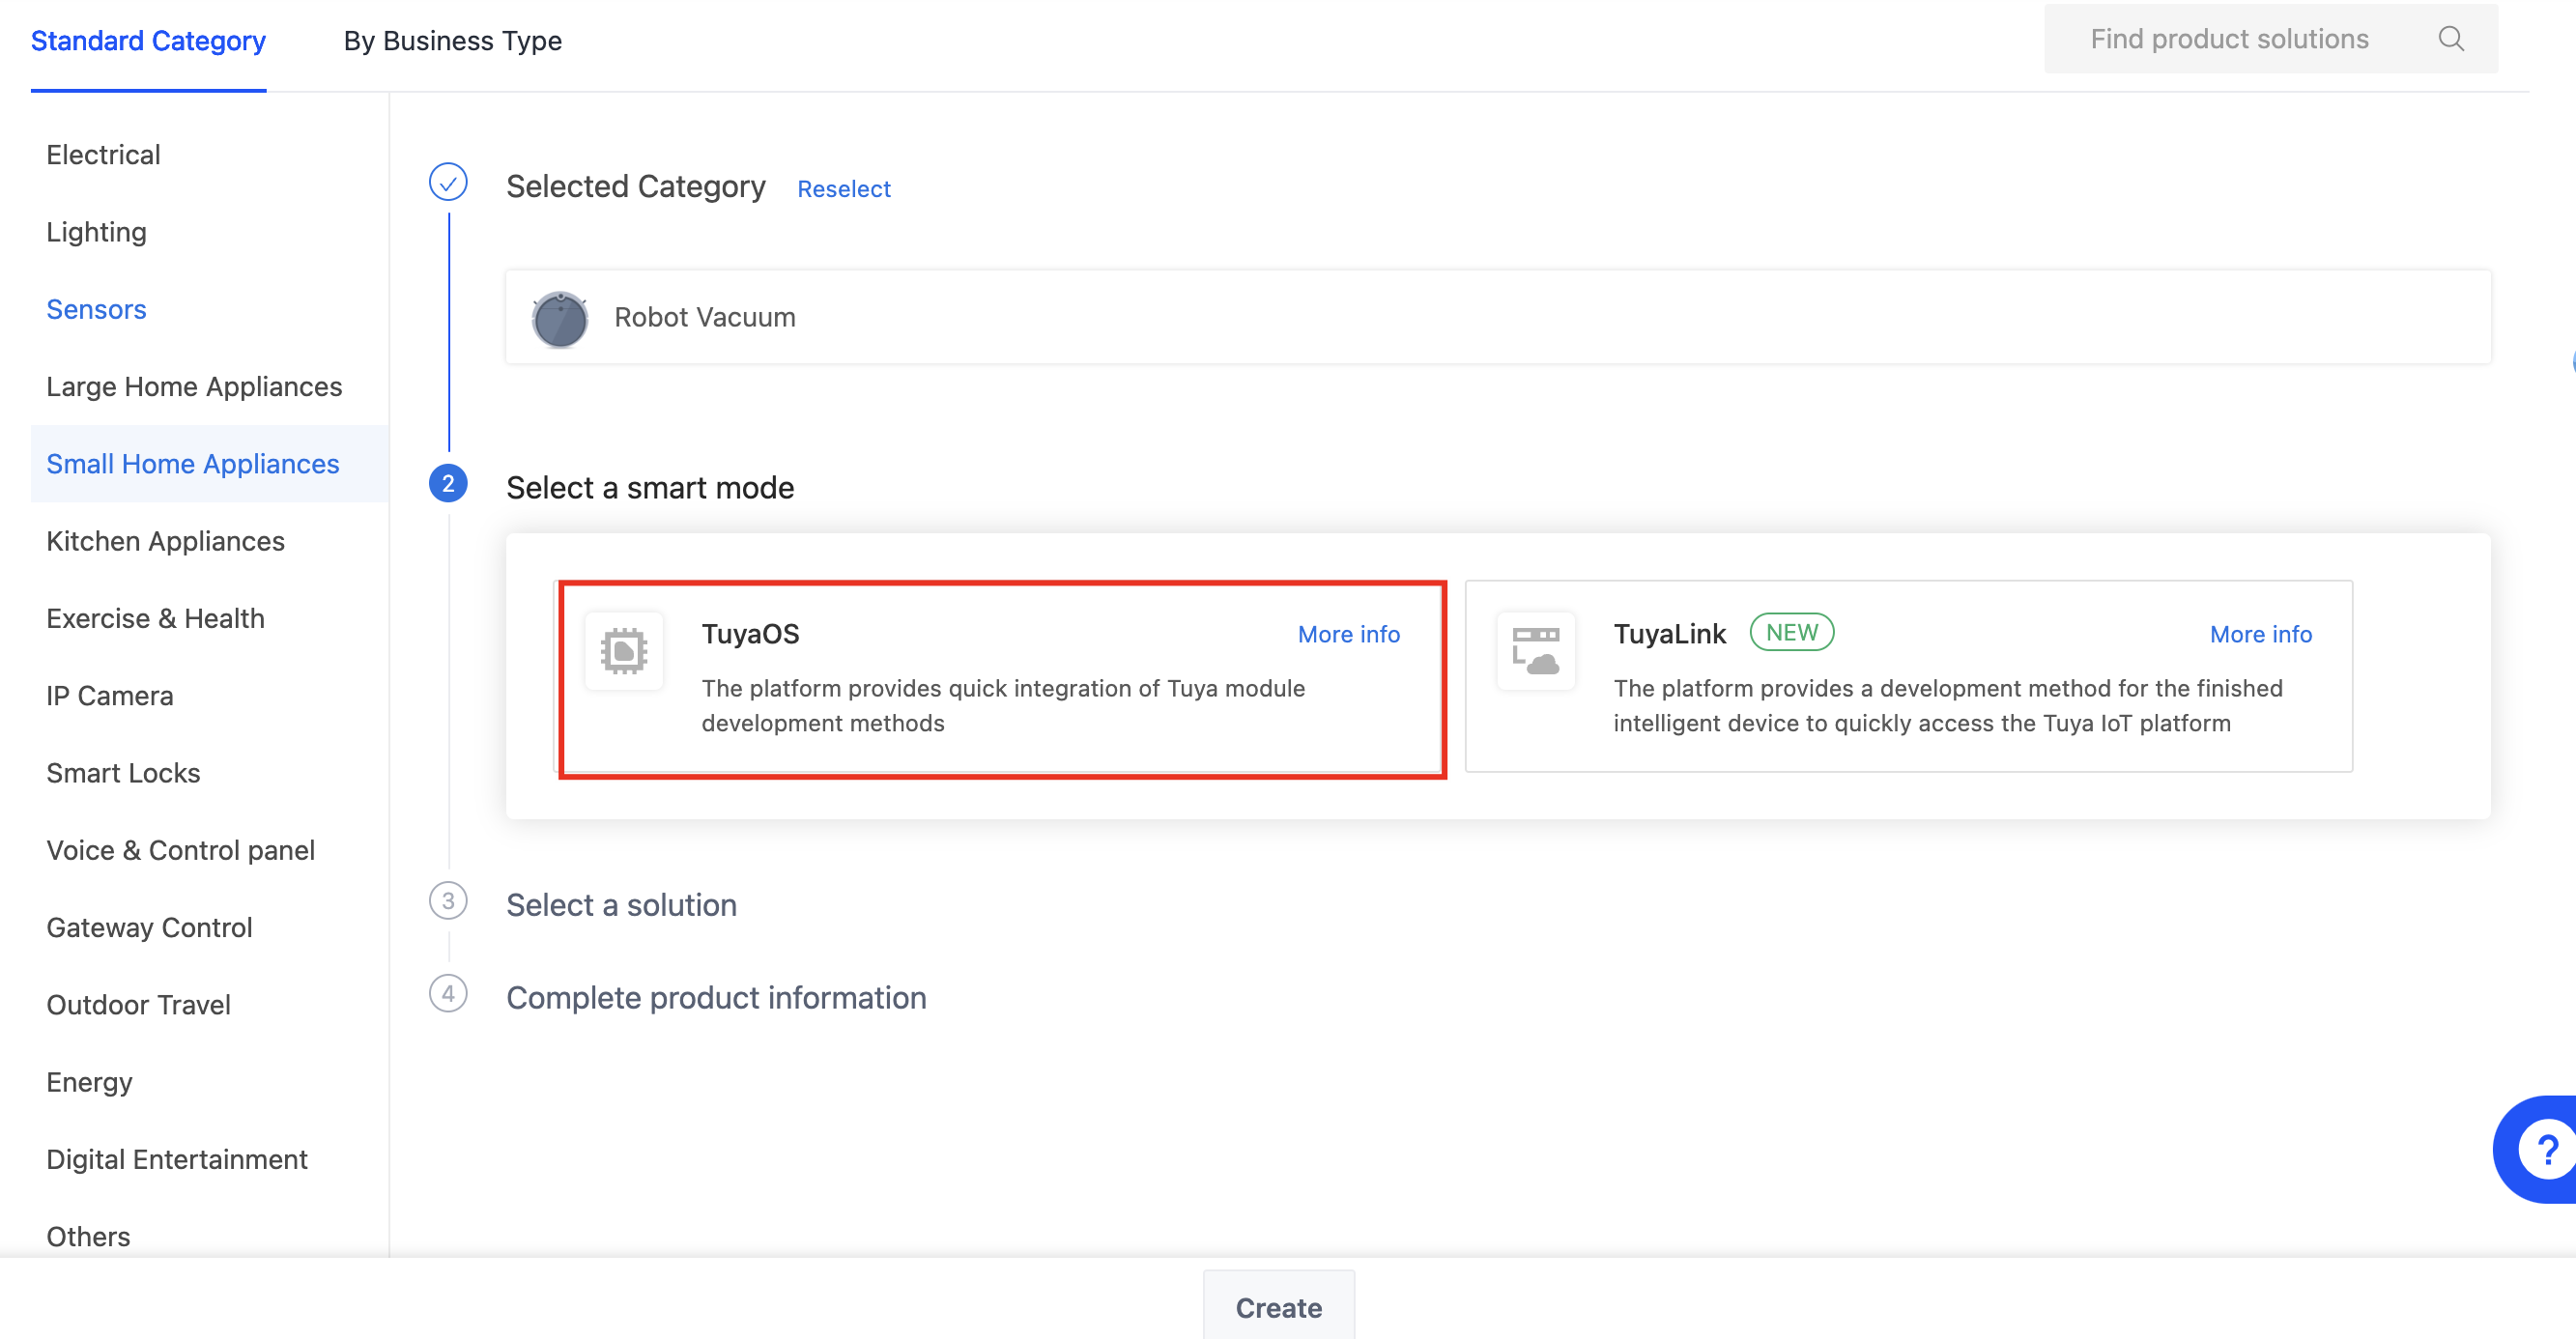
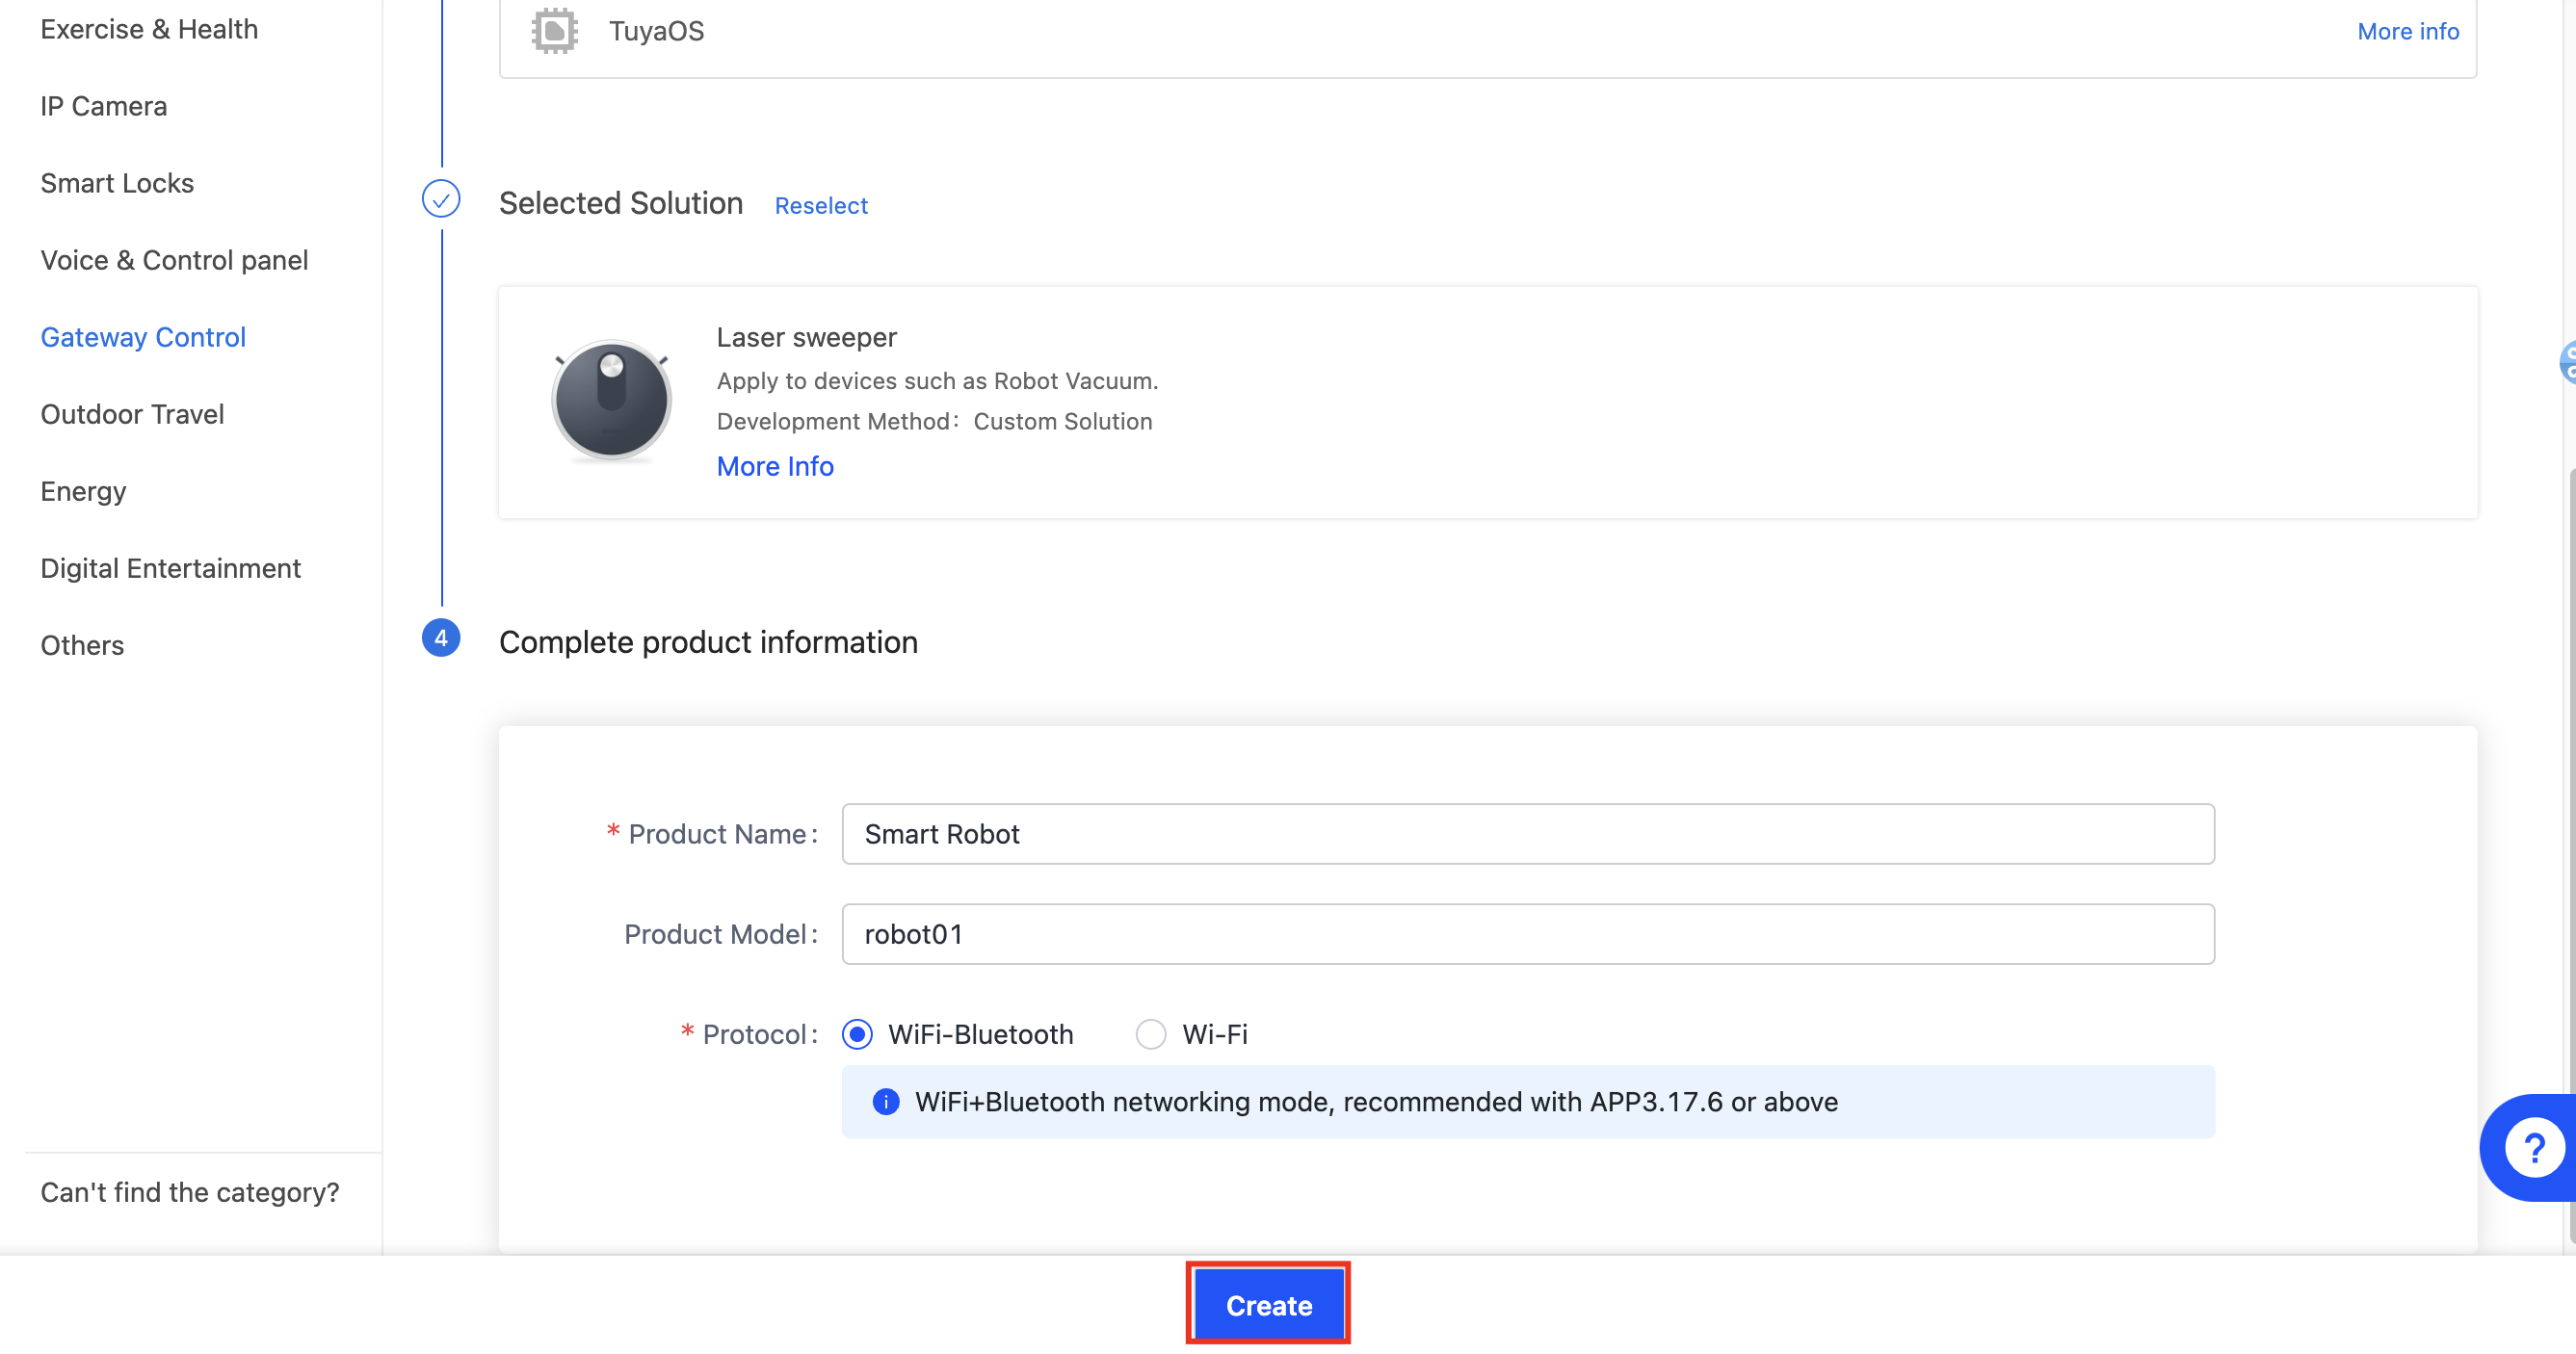
Choose TuyaOS for smart mode.
-
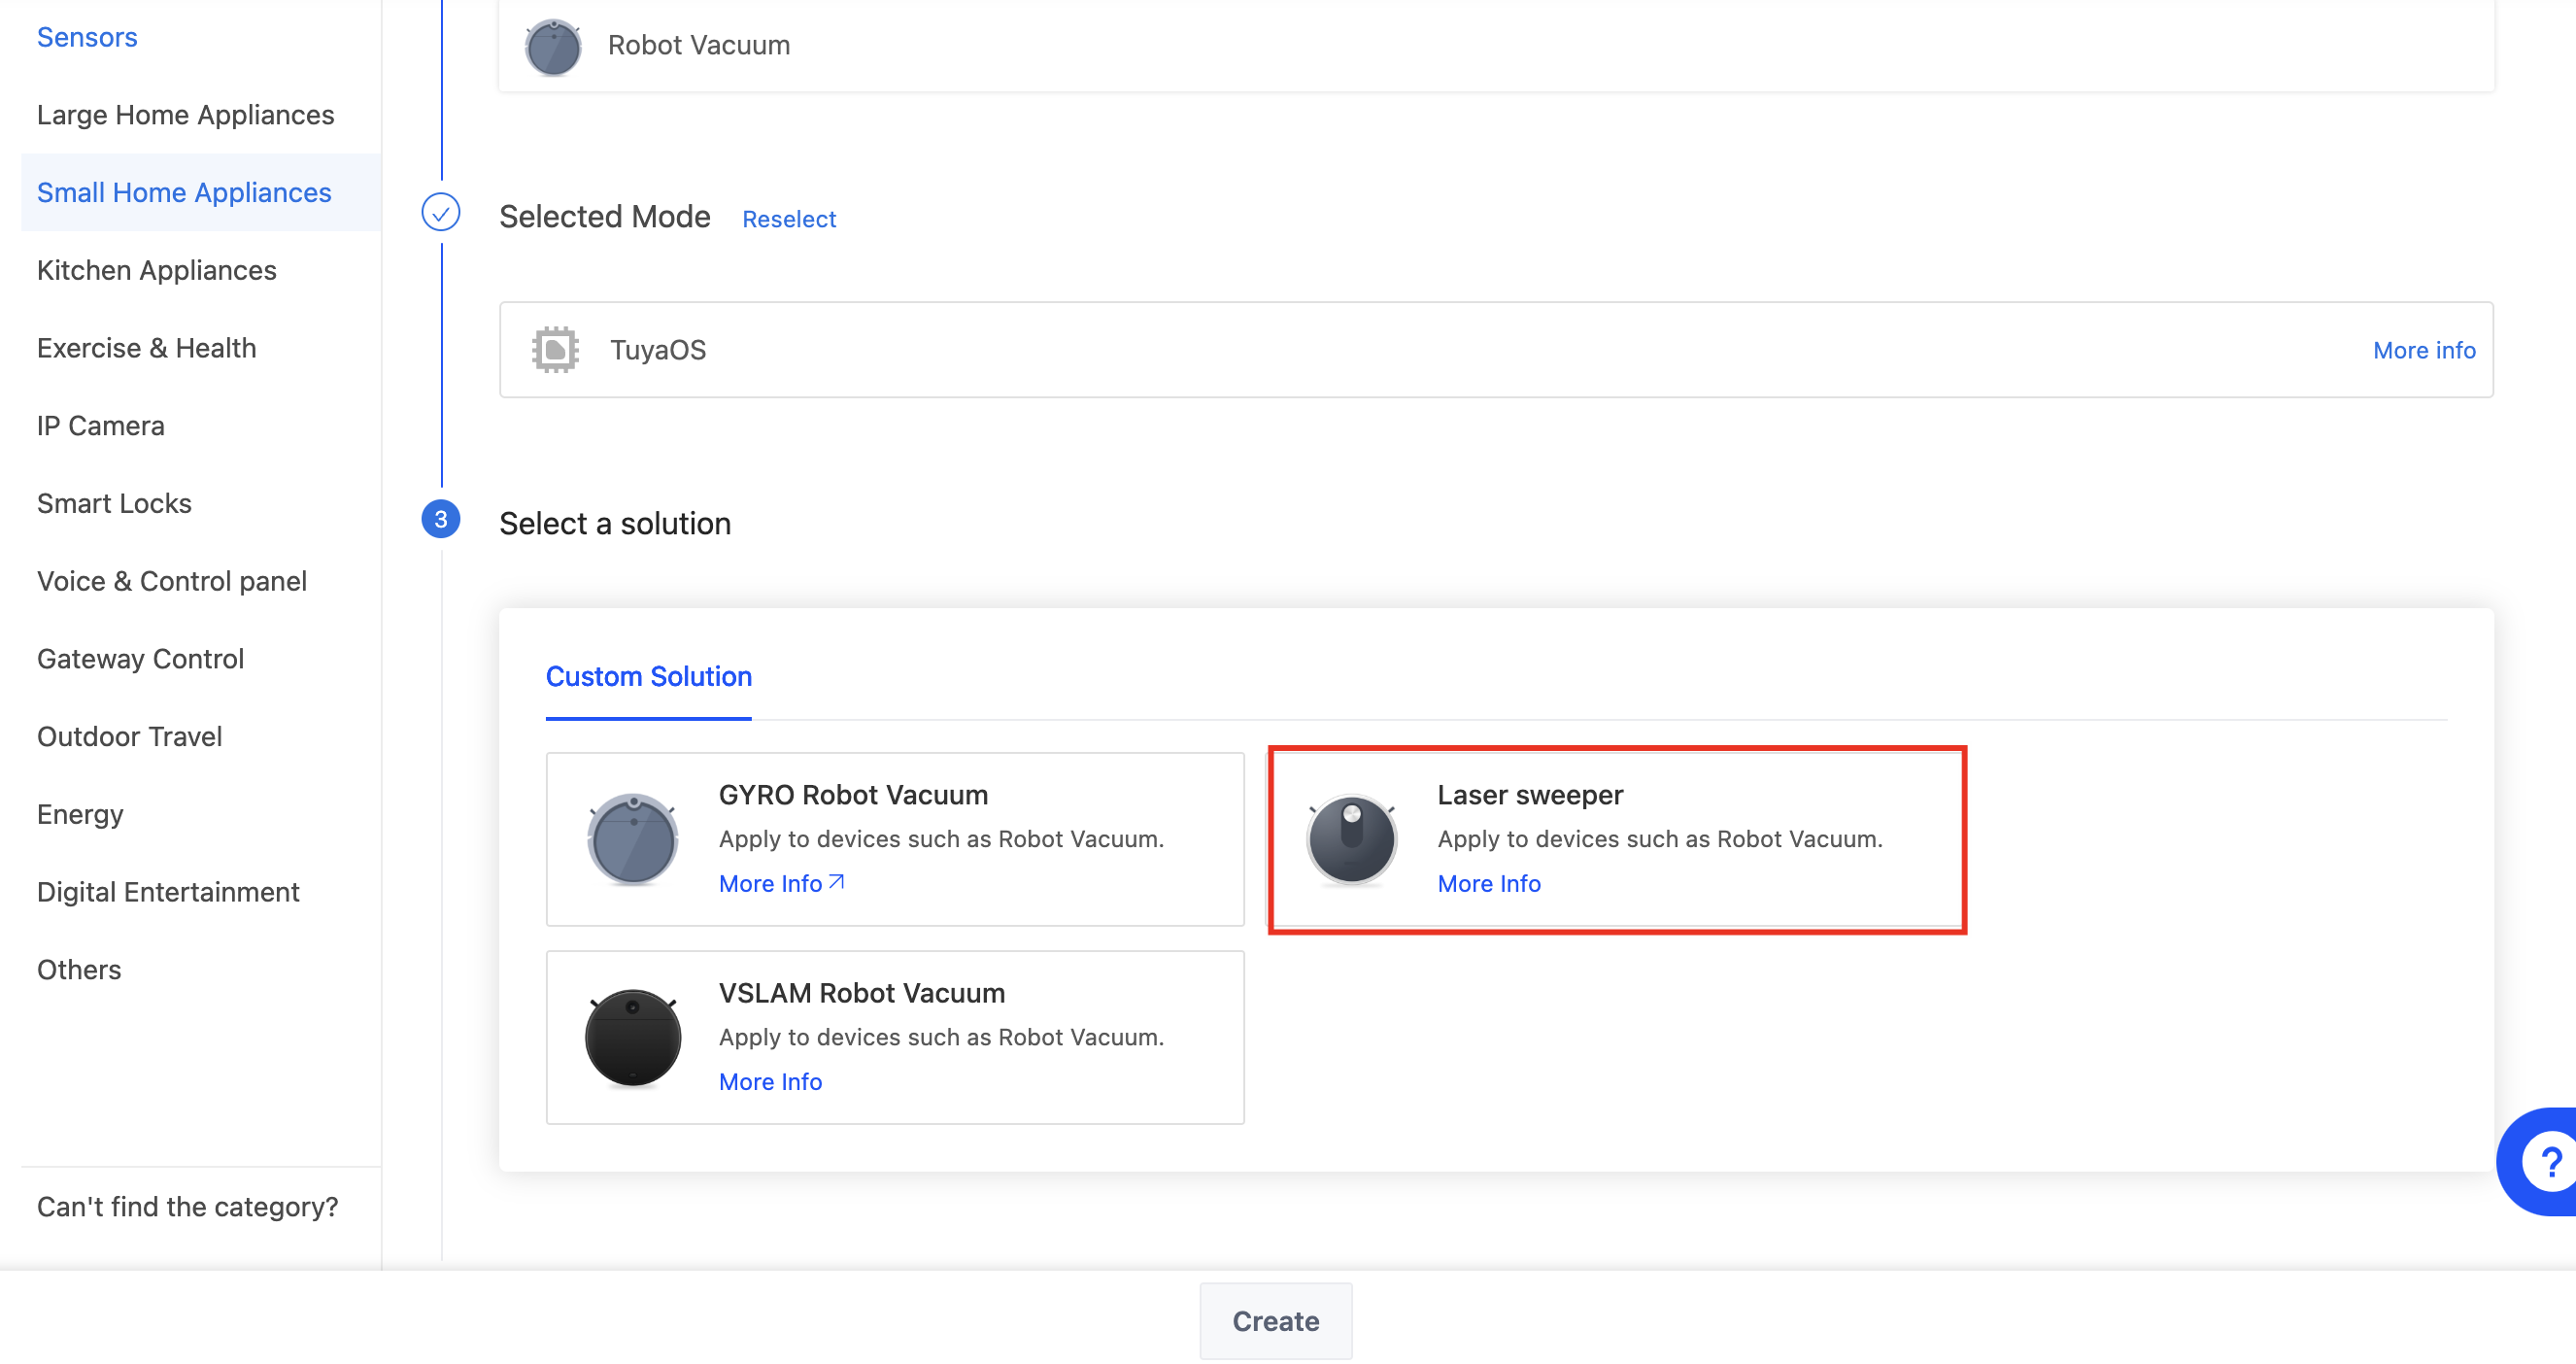
In the Custom Solution tab, choose Laser sweeper.
You can also choose other solutions. For example, gyro robot vacuums are mainly connected to Tuya modules, and VSLAM robot vacuums are similar to laser sweepers.
-
Complete the required information and click Create.
You can select the protocol based on your requirements. Wi-Fi-Bluetooth adds Bluetooth Low Energy (Bluetooth LE) pairing and control features on top of Wi-Fi.
Define functions
On the Tuya Developer Platform, a product function is the abstraction of a feature that is provided by a smart device. You can use product functions to describe the features and parameters of smart devices. Define product functions as needed. The UI on the mobile app for end users presents the data point (DP) you select or add.
- After you modify the DP value or add or delete a DP during the development process, be sure to remove the device first and then pair it again.
- If your product has completed development, do not modify the DP value or add or delete a DP.
-
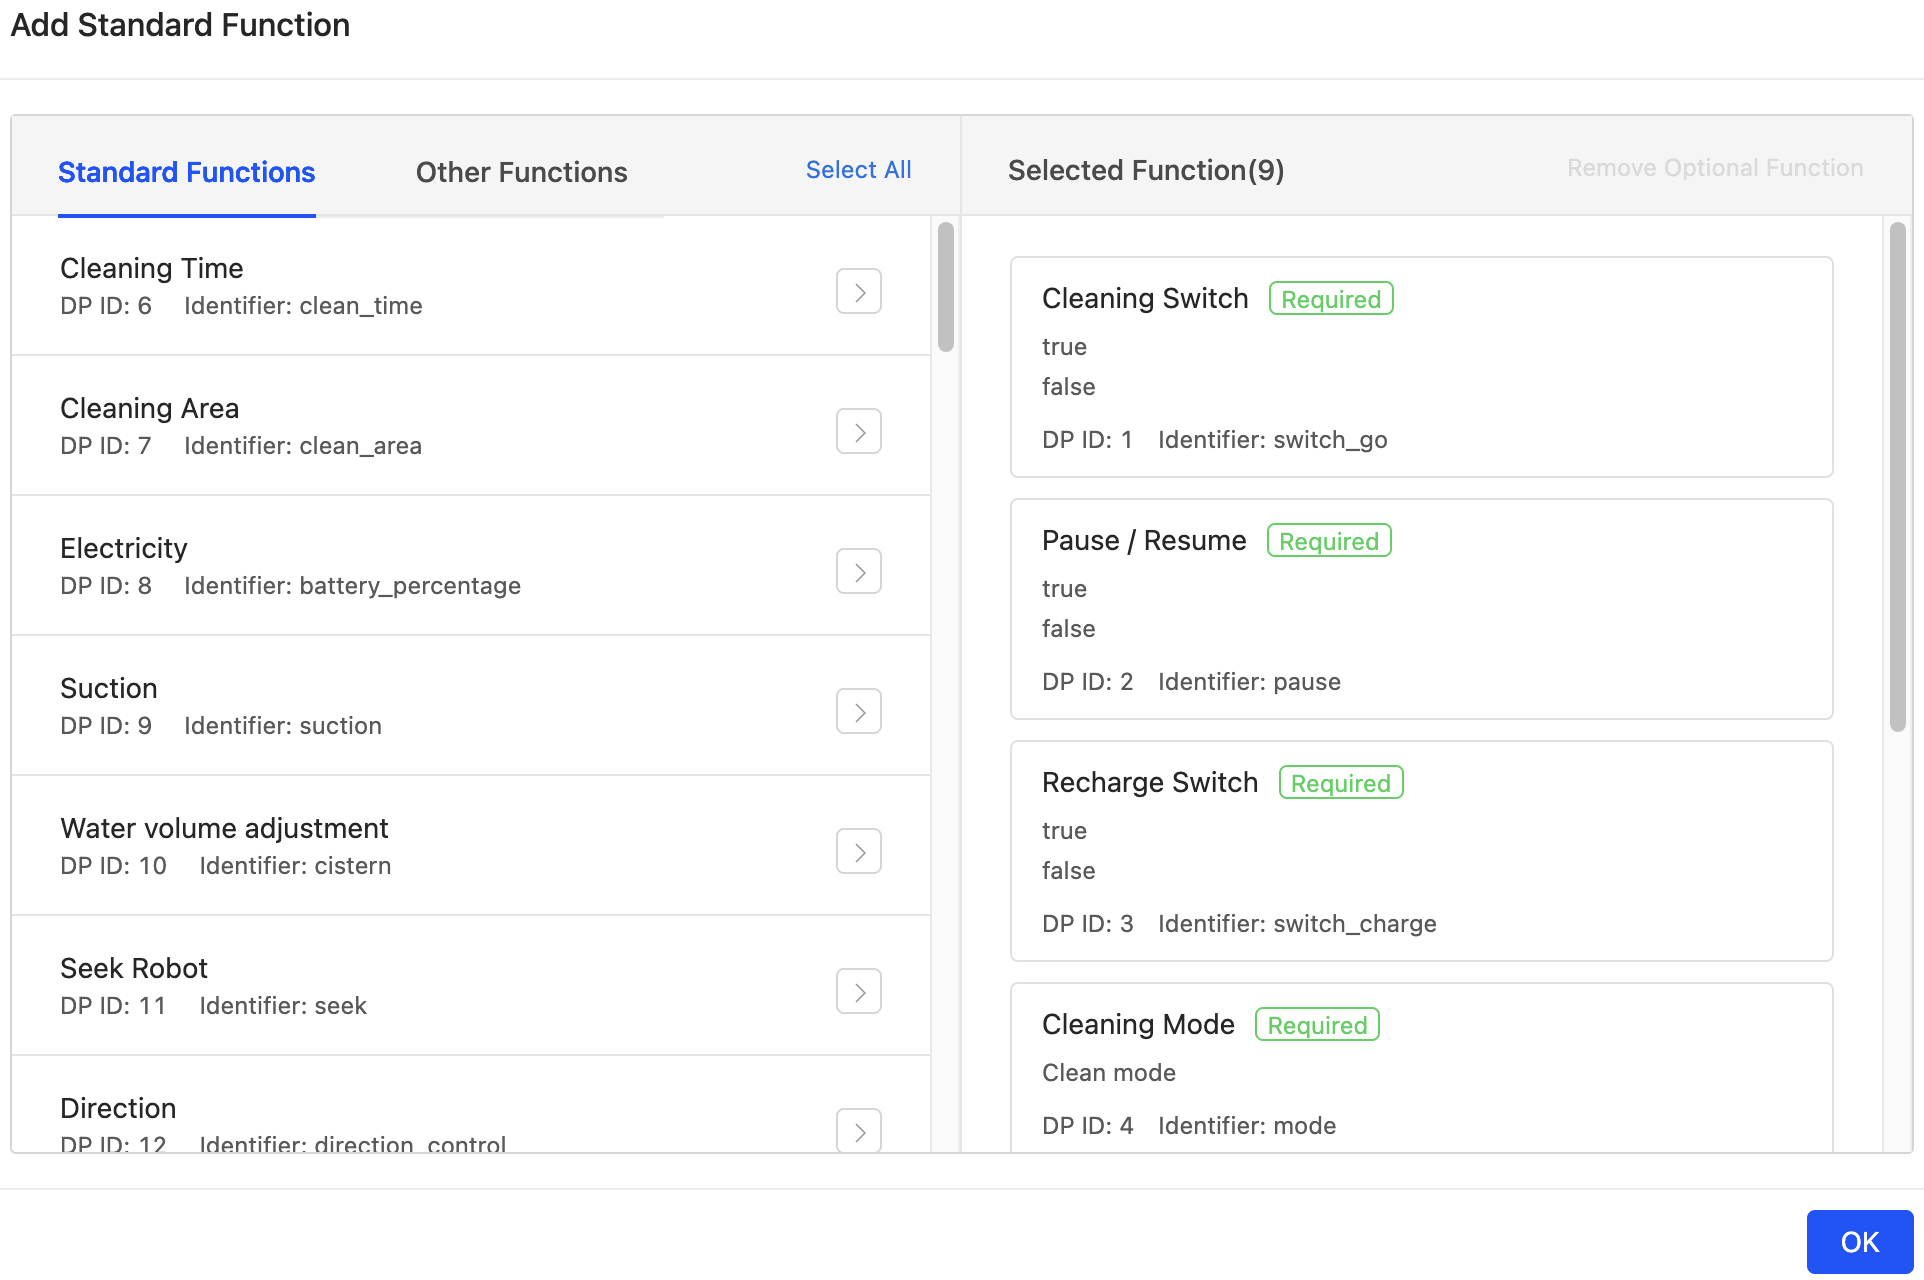
Select your desired standard functions and other functions, and click OK.
-
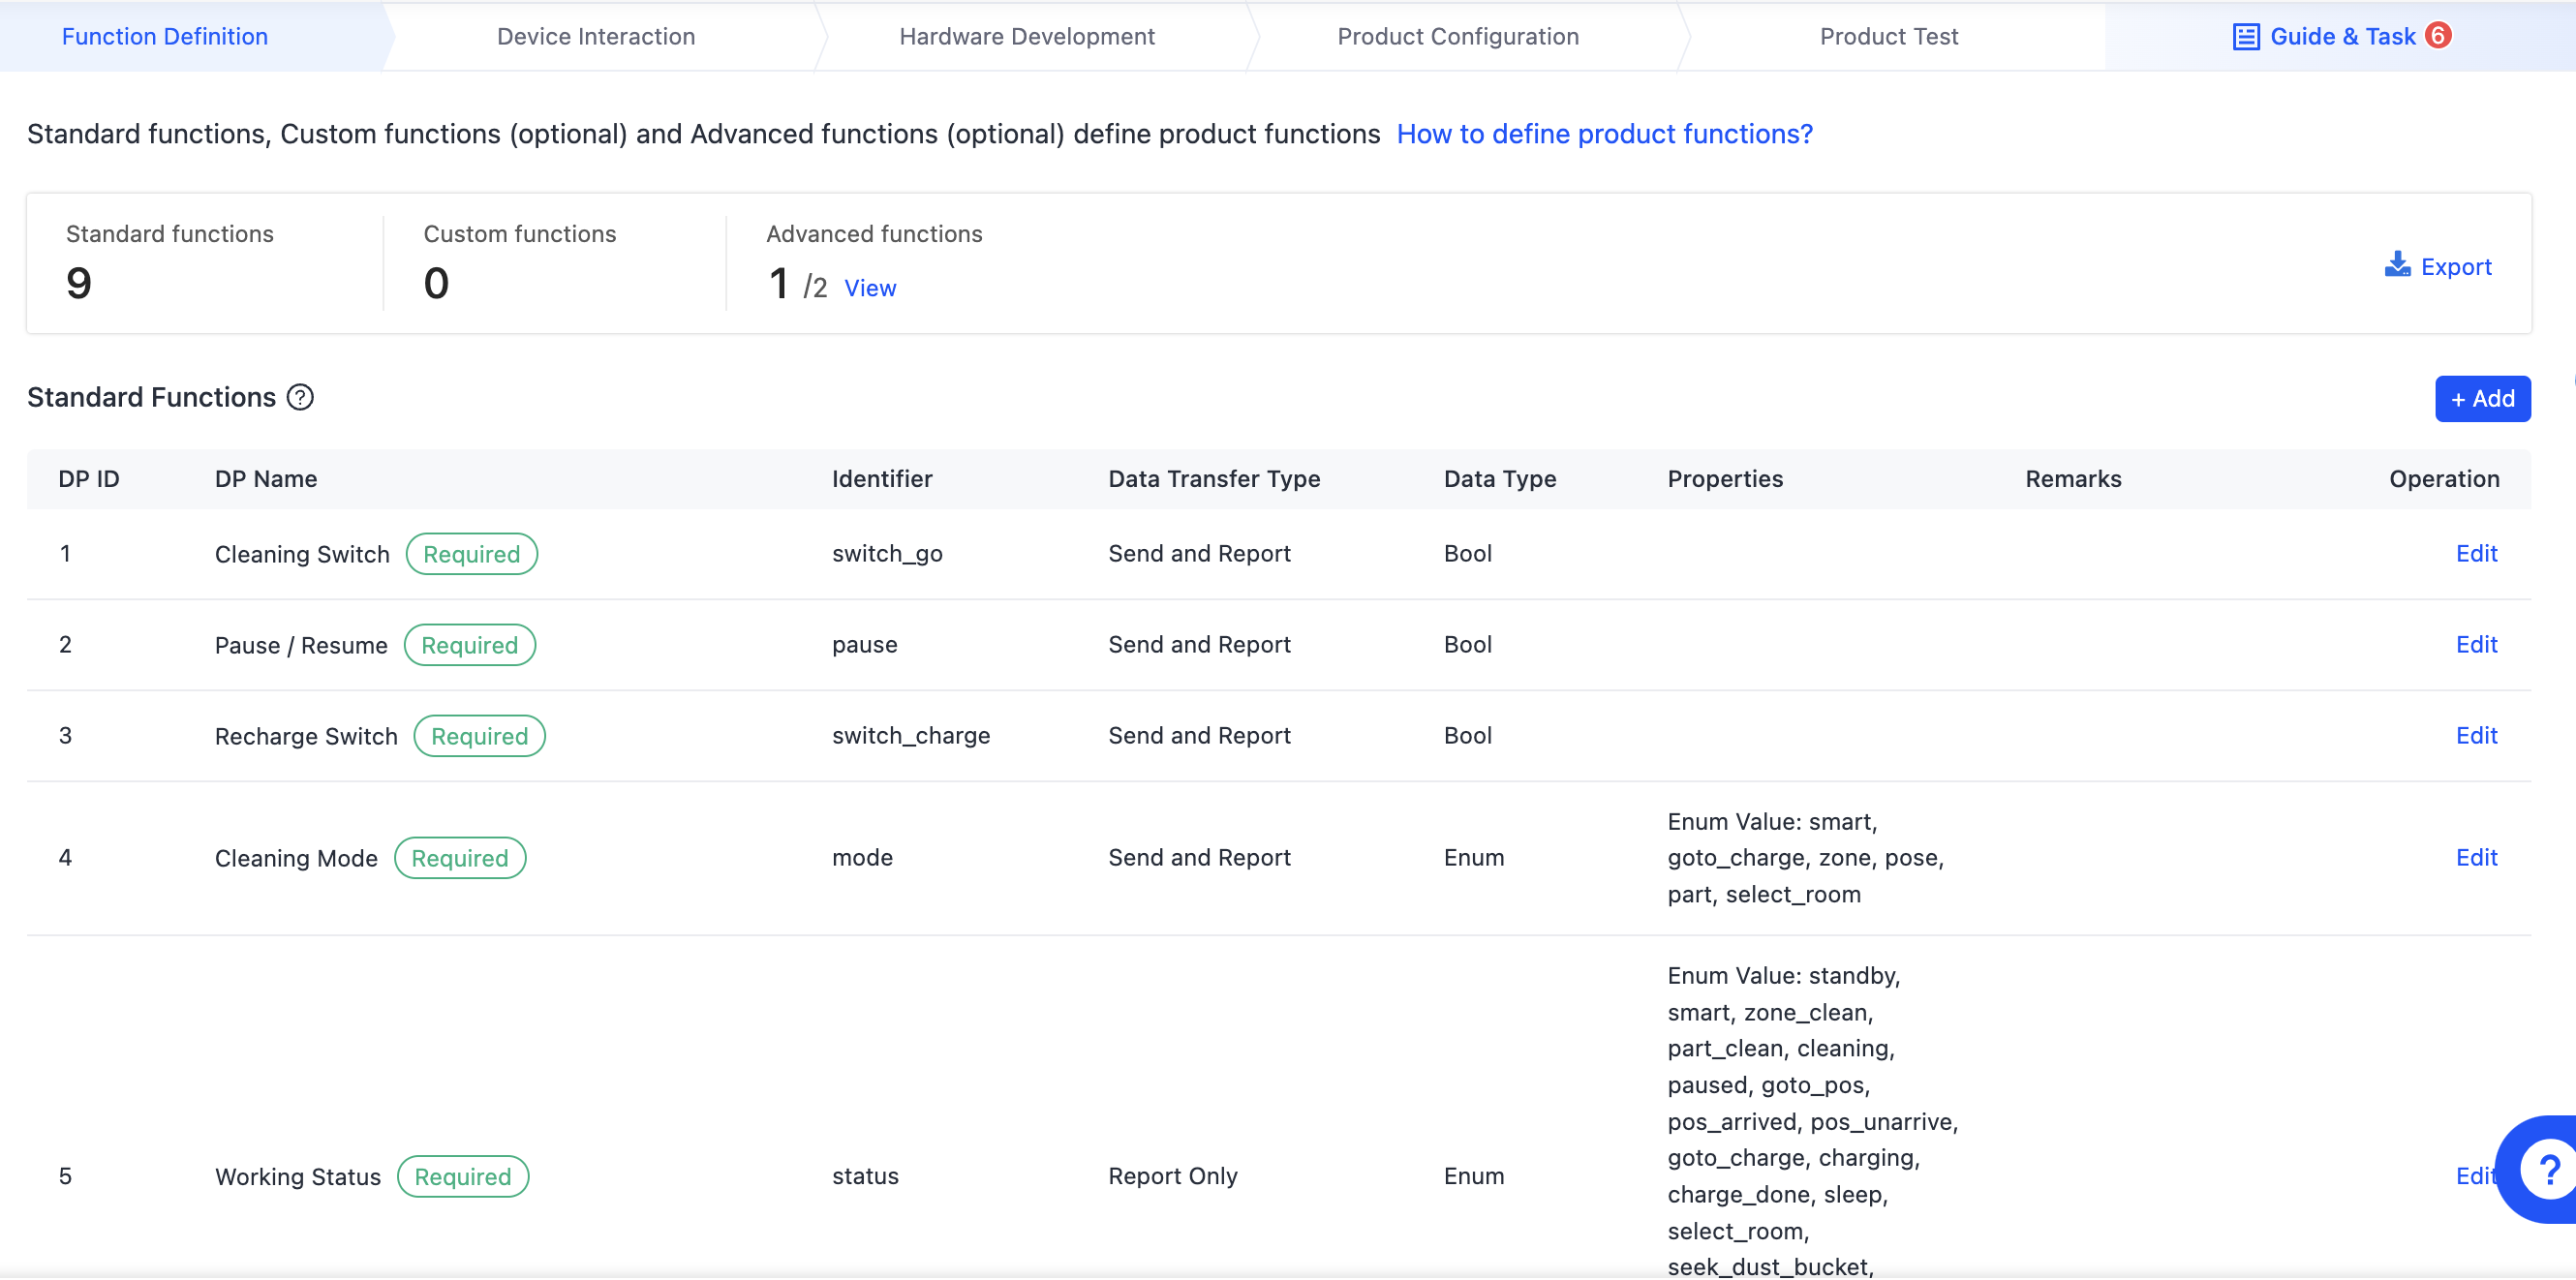
In the step of Function Definition, you can add and edit standard functions and custom functions. Also, you can enable or disable the specified advanced function as needed.
-
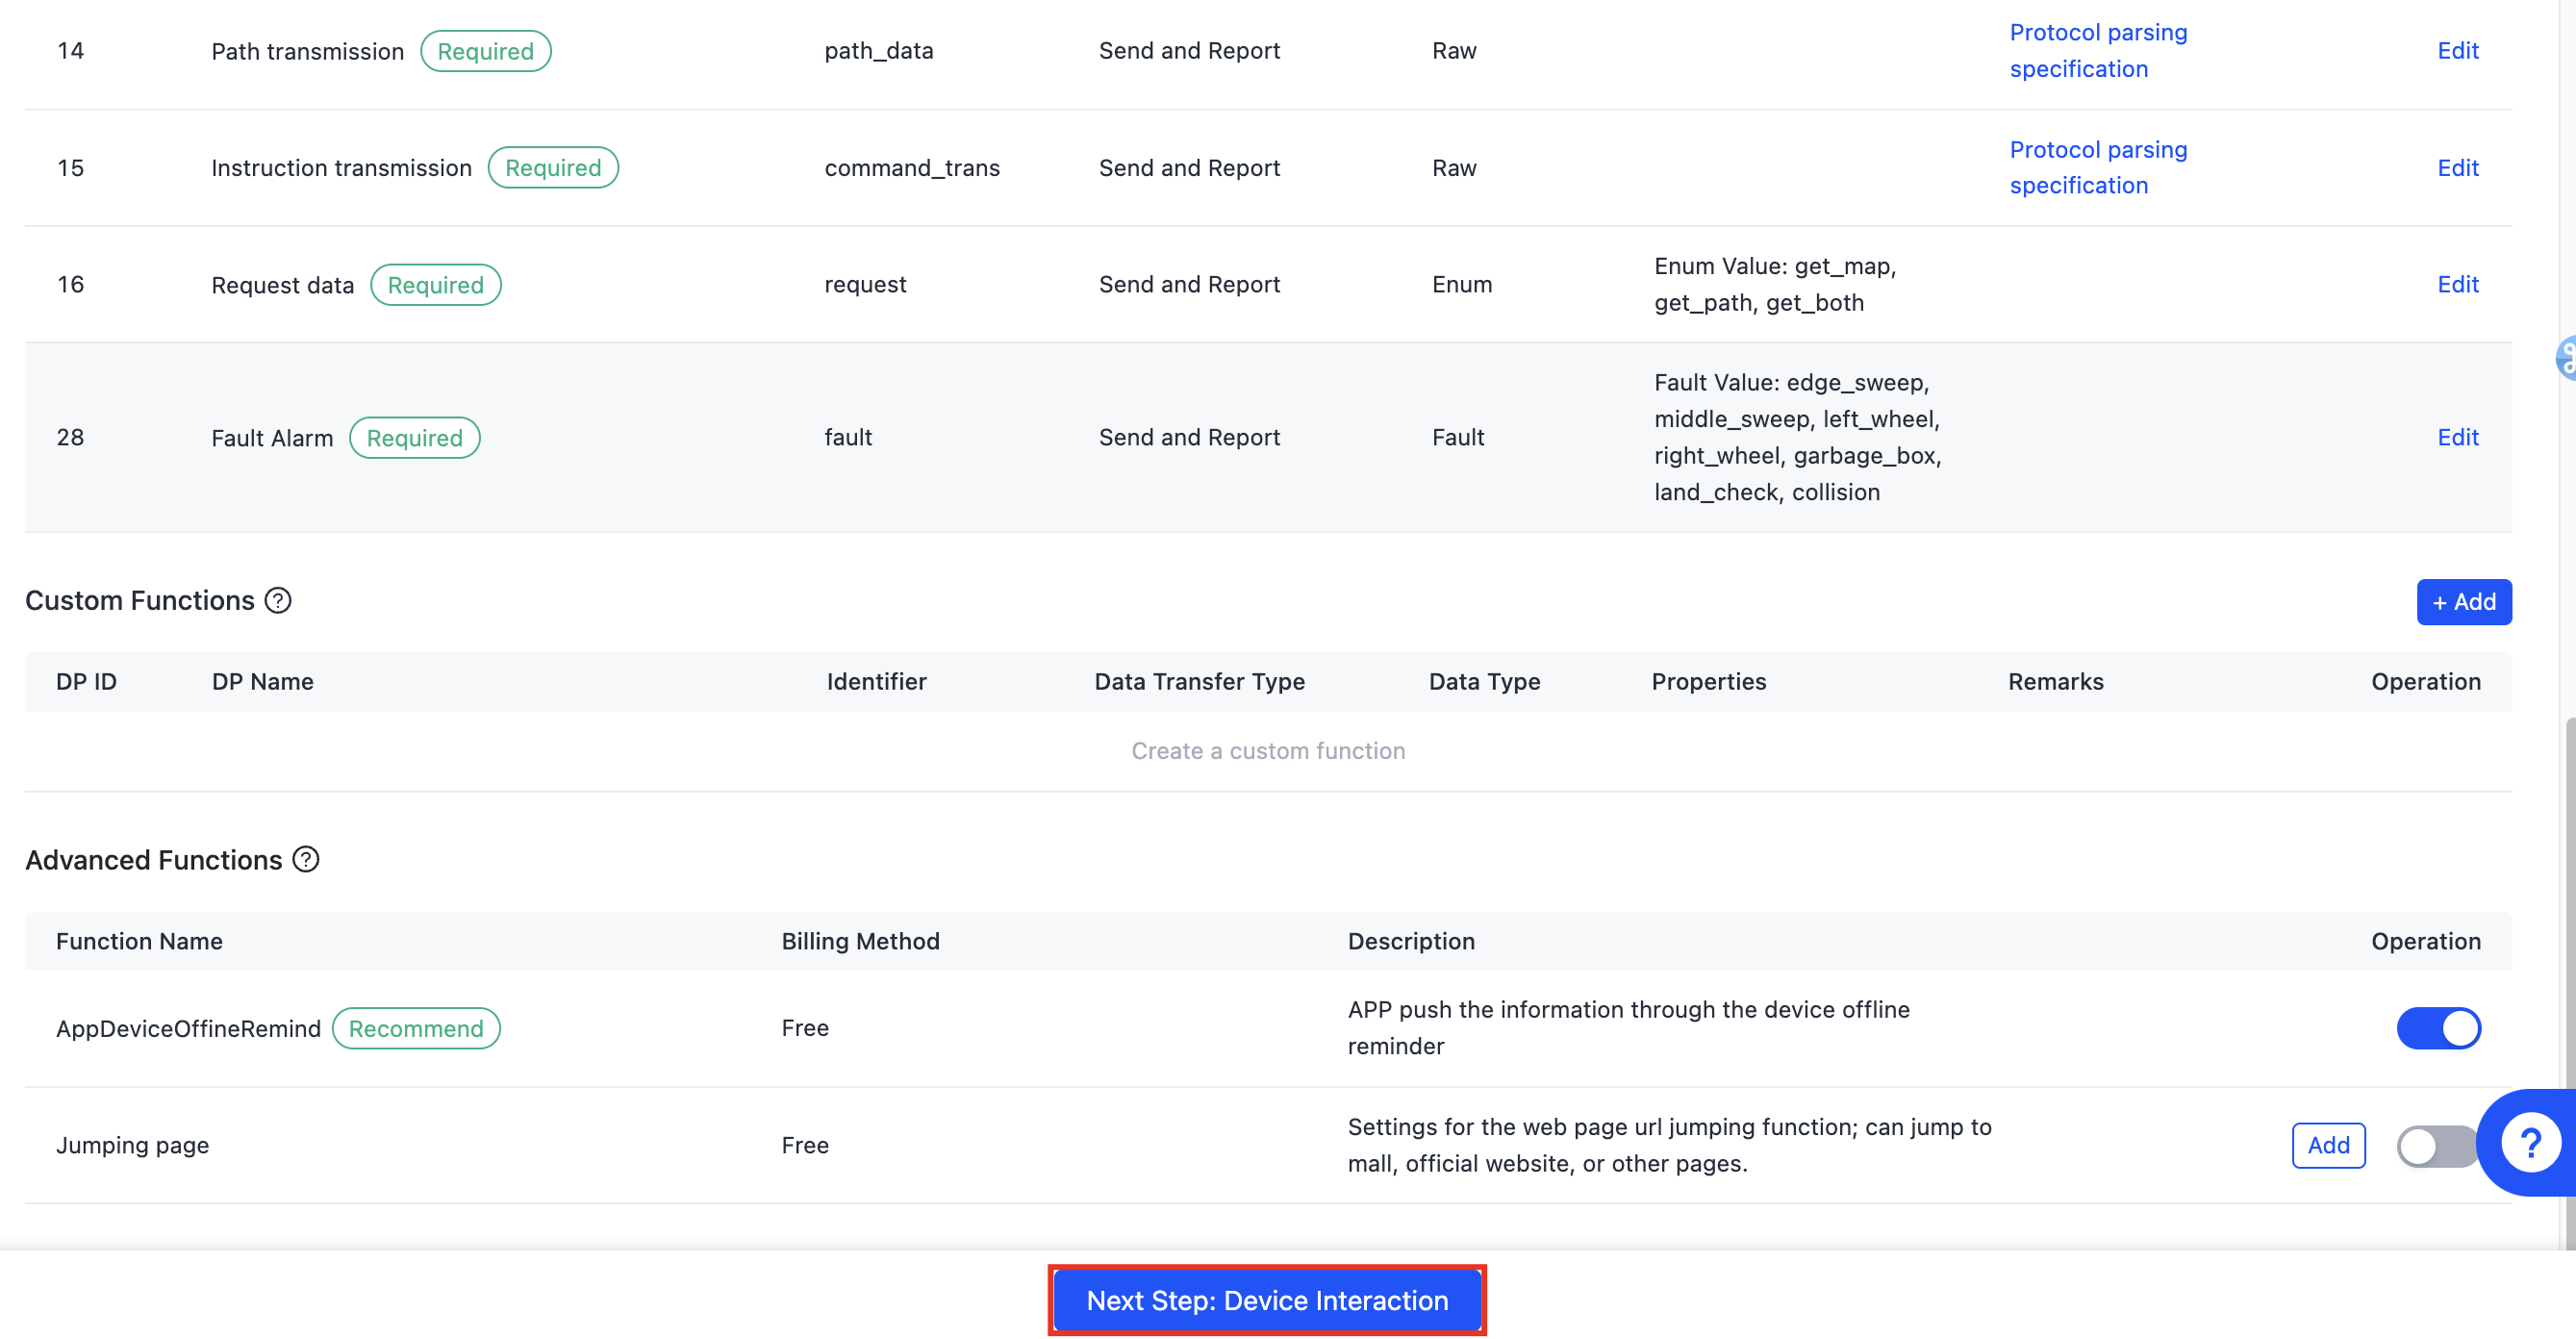
If the function definition step is done, click Next Step: Device Interaction.
Select a panel
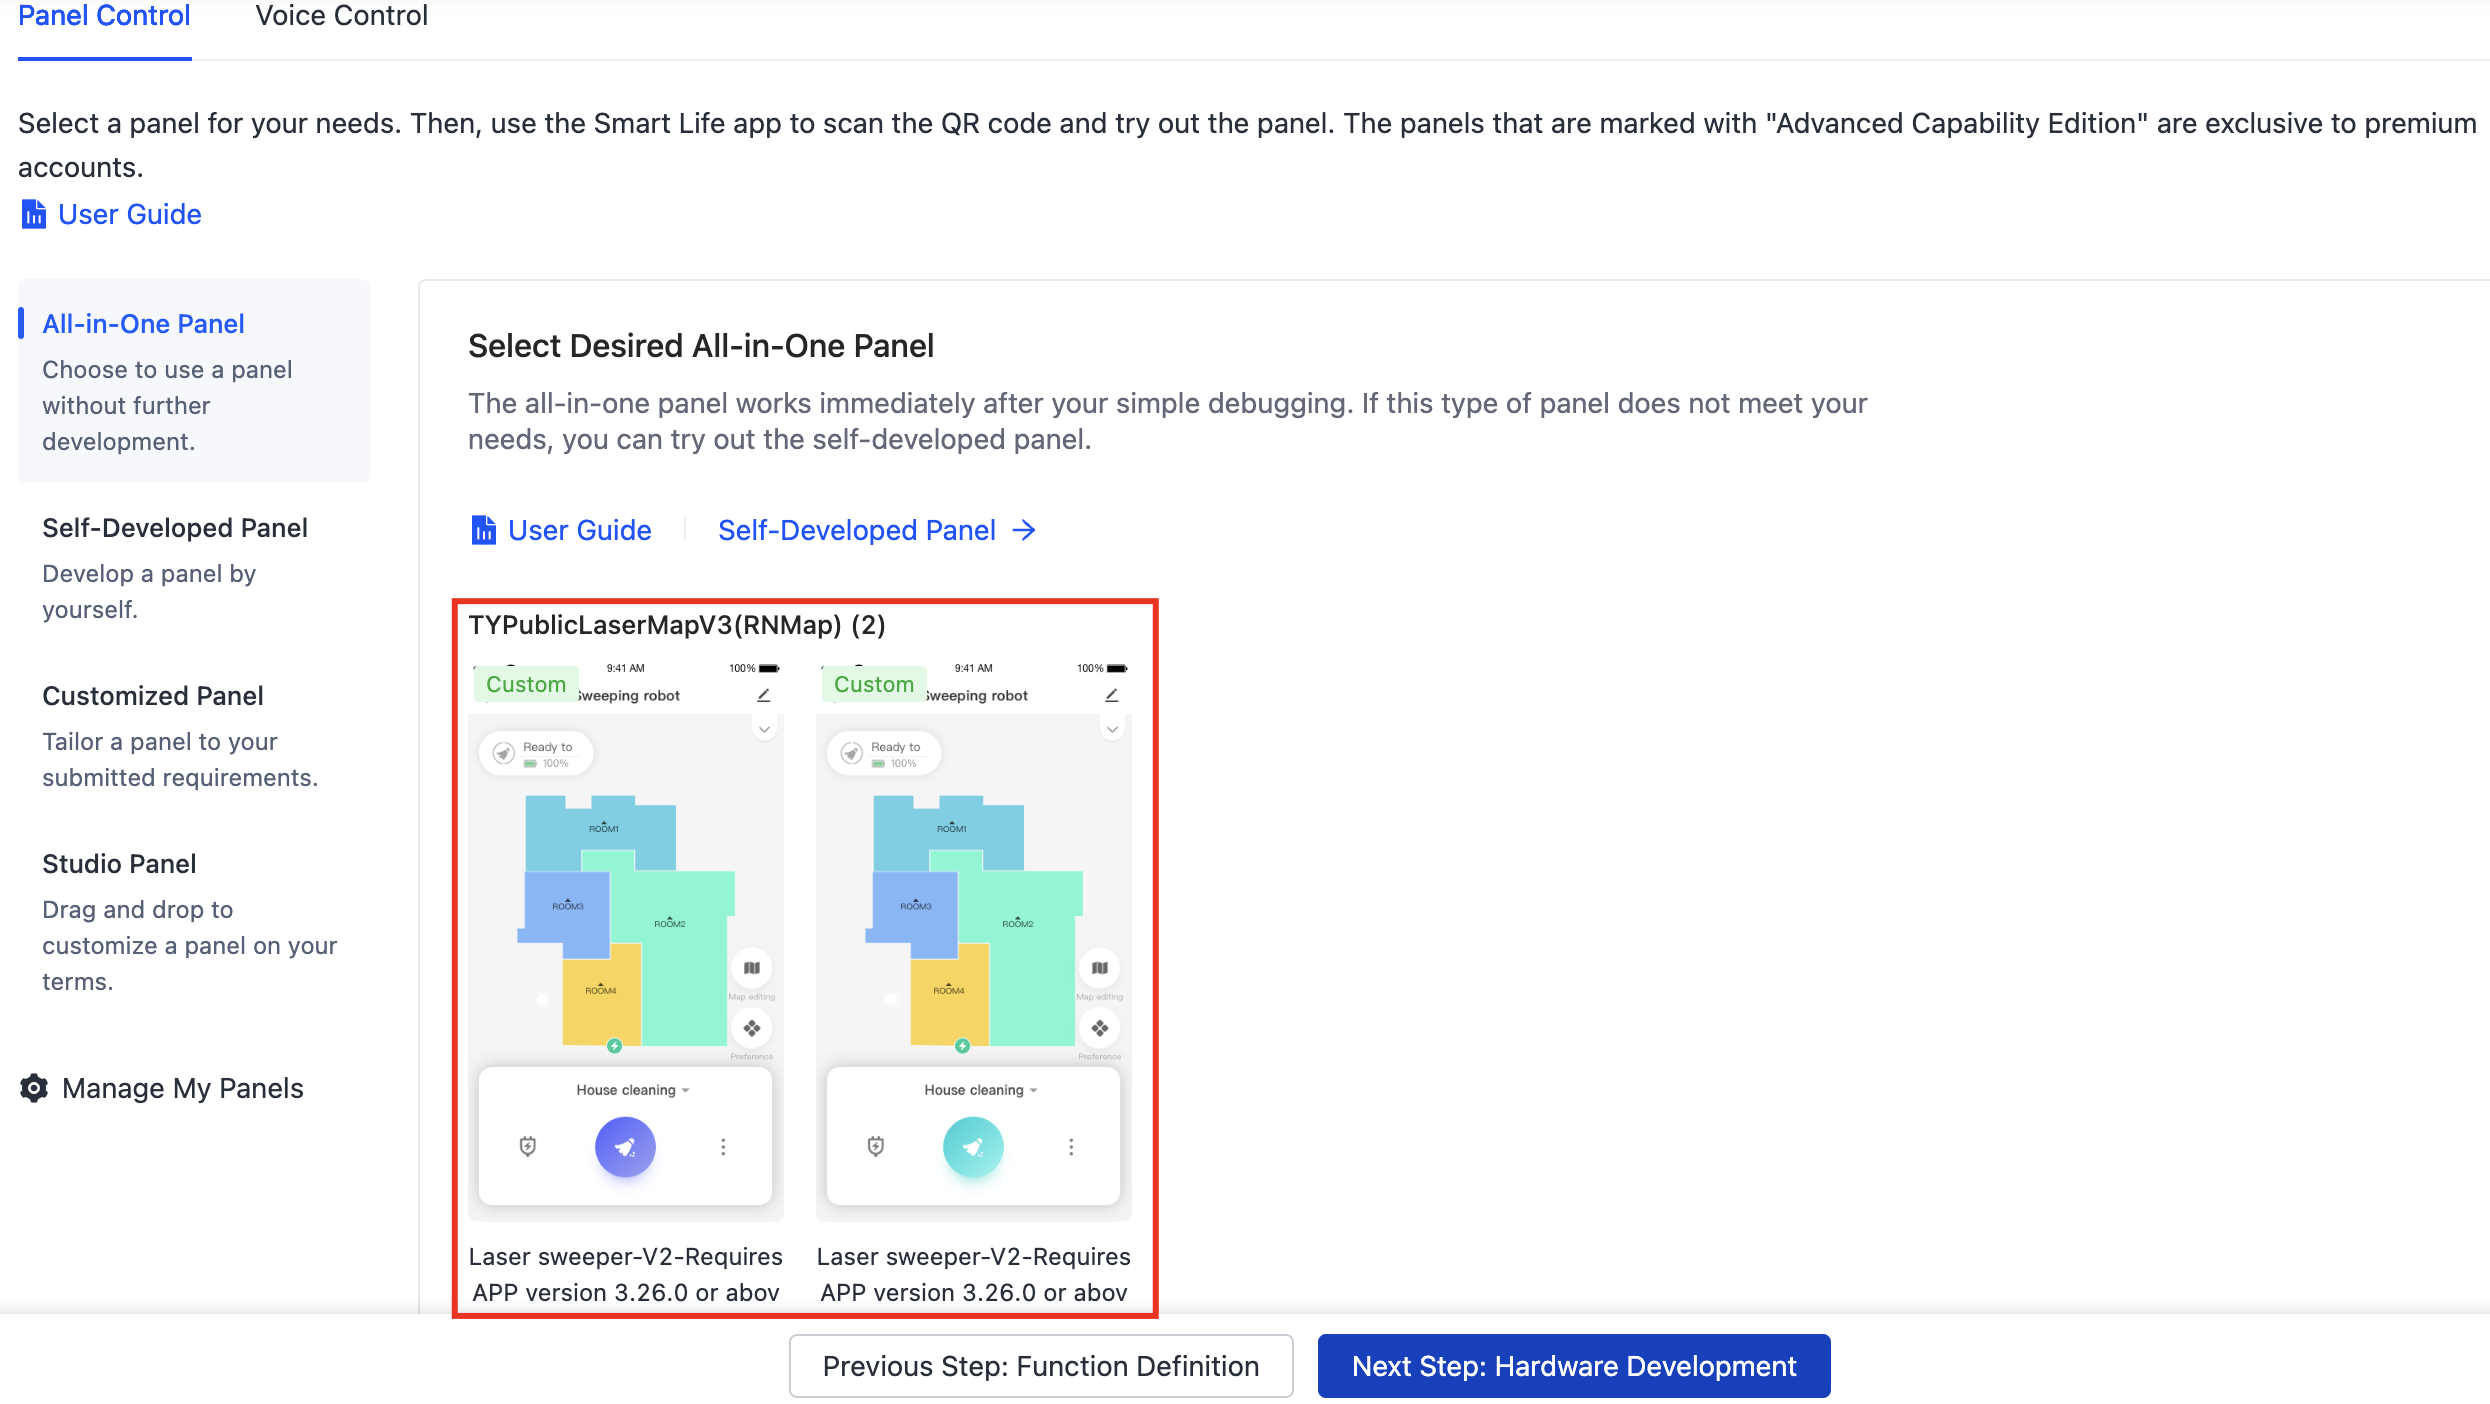
Select a panel that runs on the mobile app to interact with the product. For convenience, you can choose an all-in-one panel. Then, click Next Step: Hardware Development. If you need to customize the panel, check out the User Guide.
Develop hardware
-
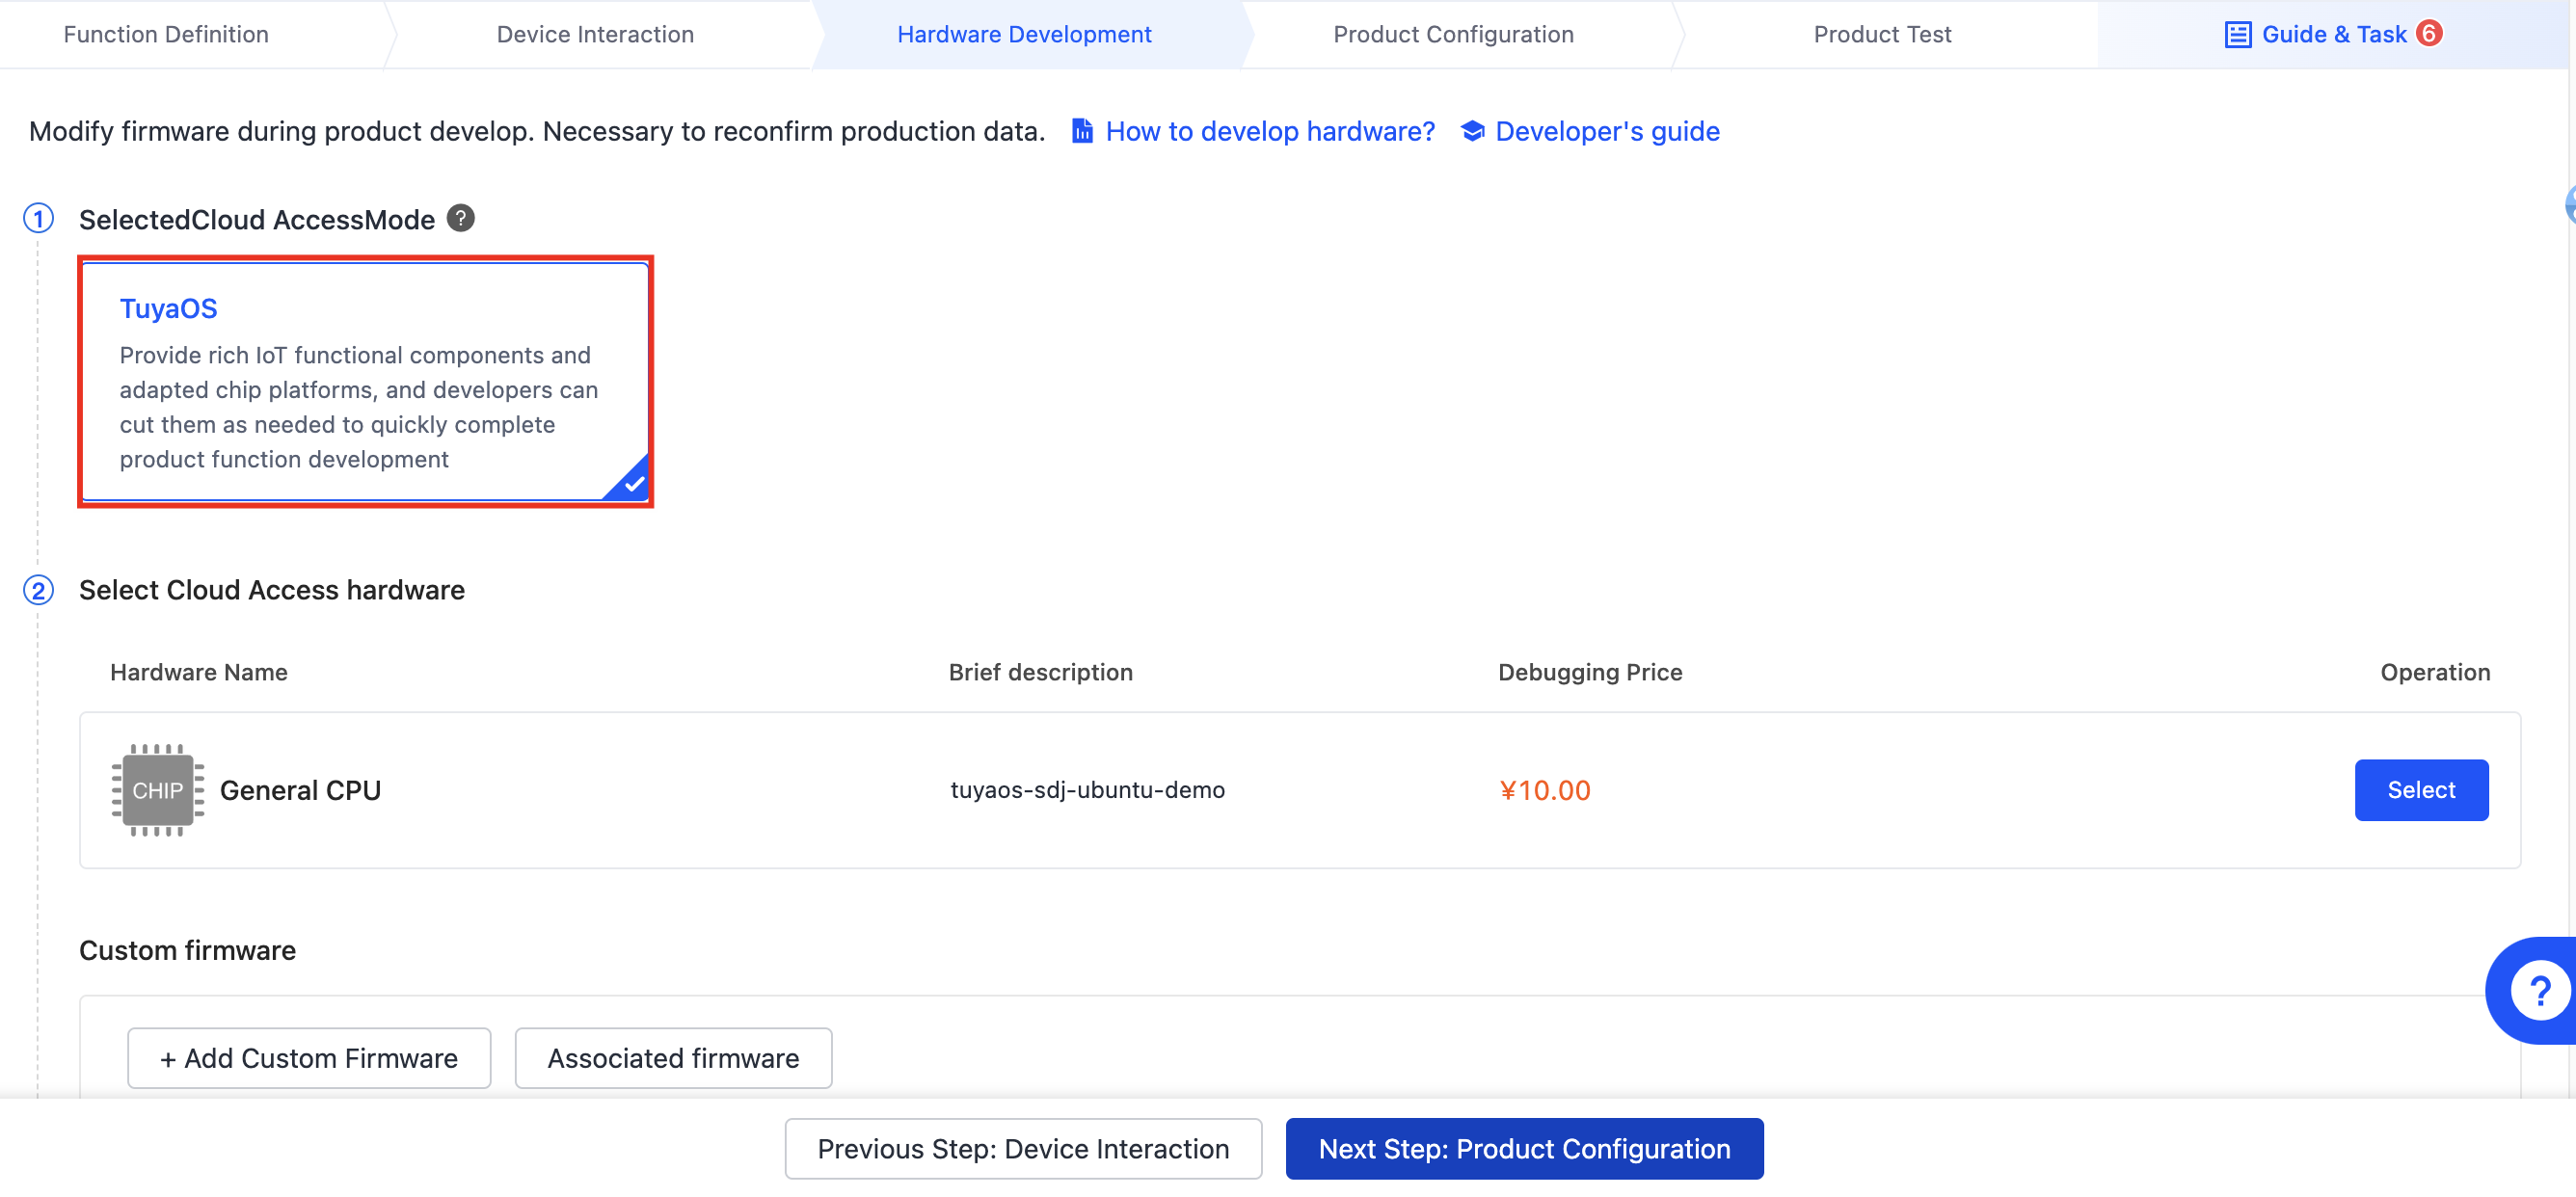
Choose TuyaOS for cloud access mode.
-
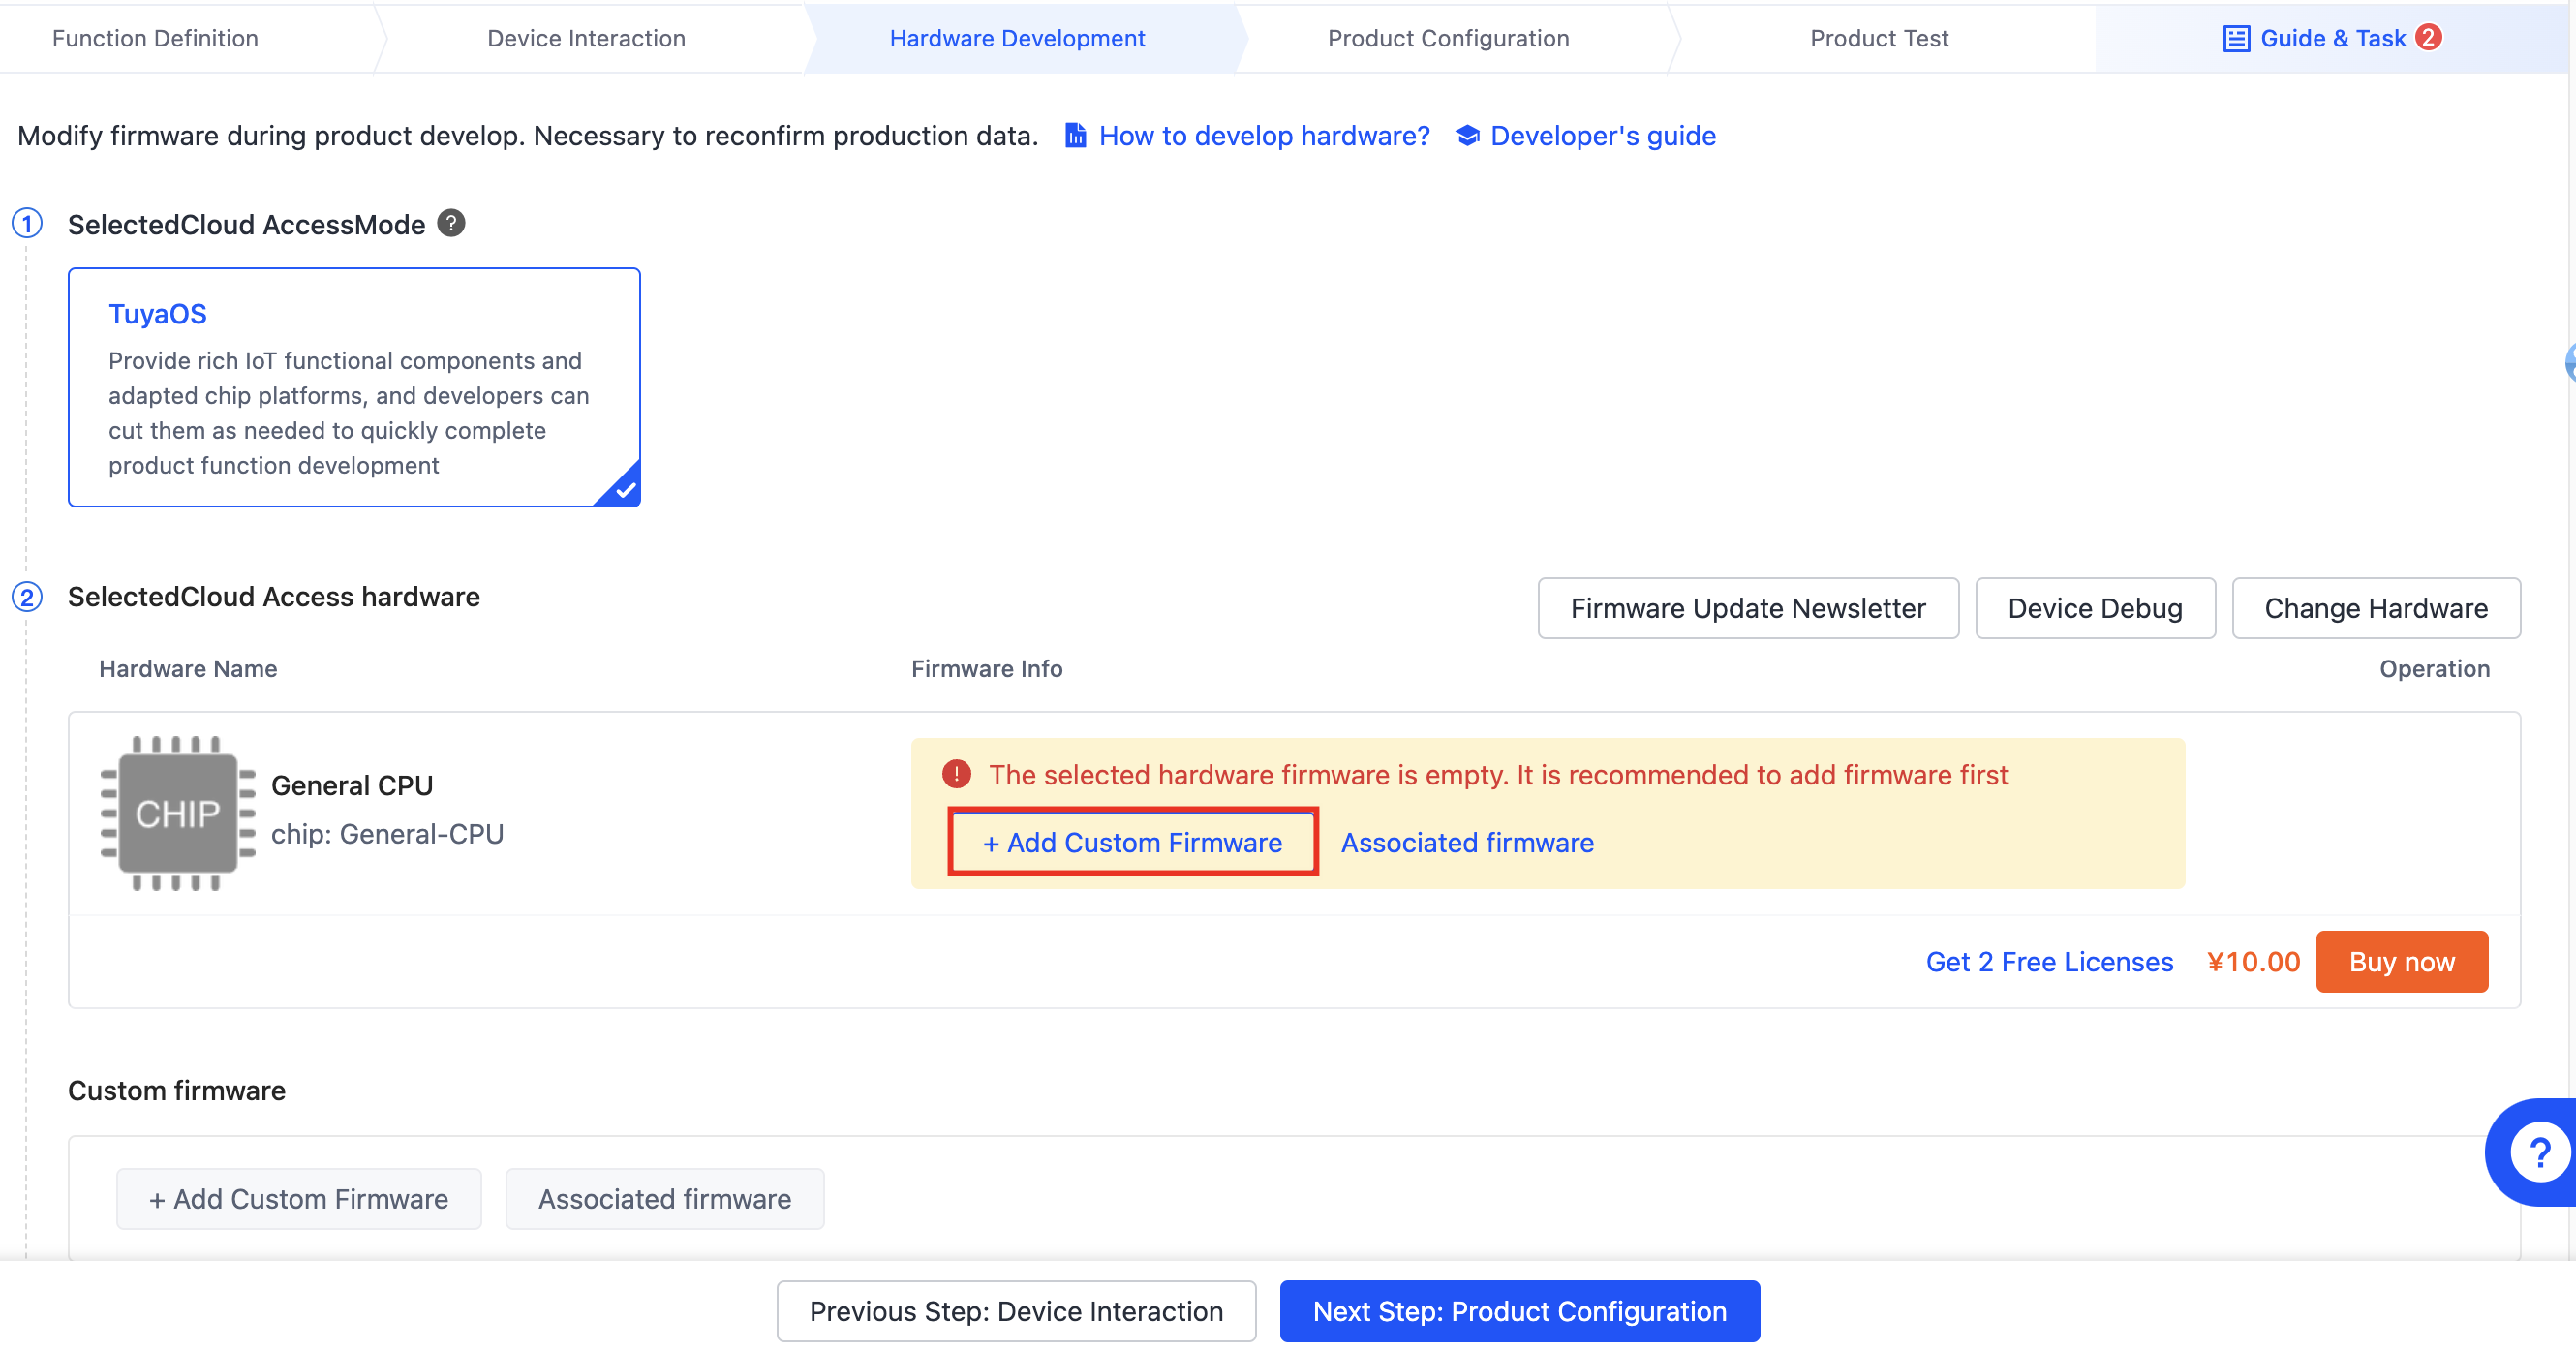
After you select hardware, click Add Custom Firmware to generate a firmware key for OTA update management.
-
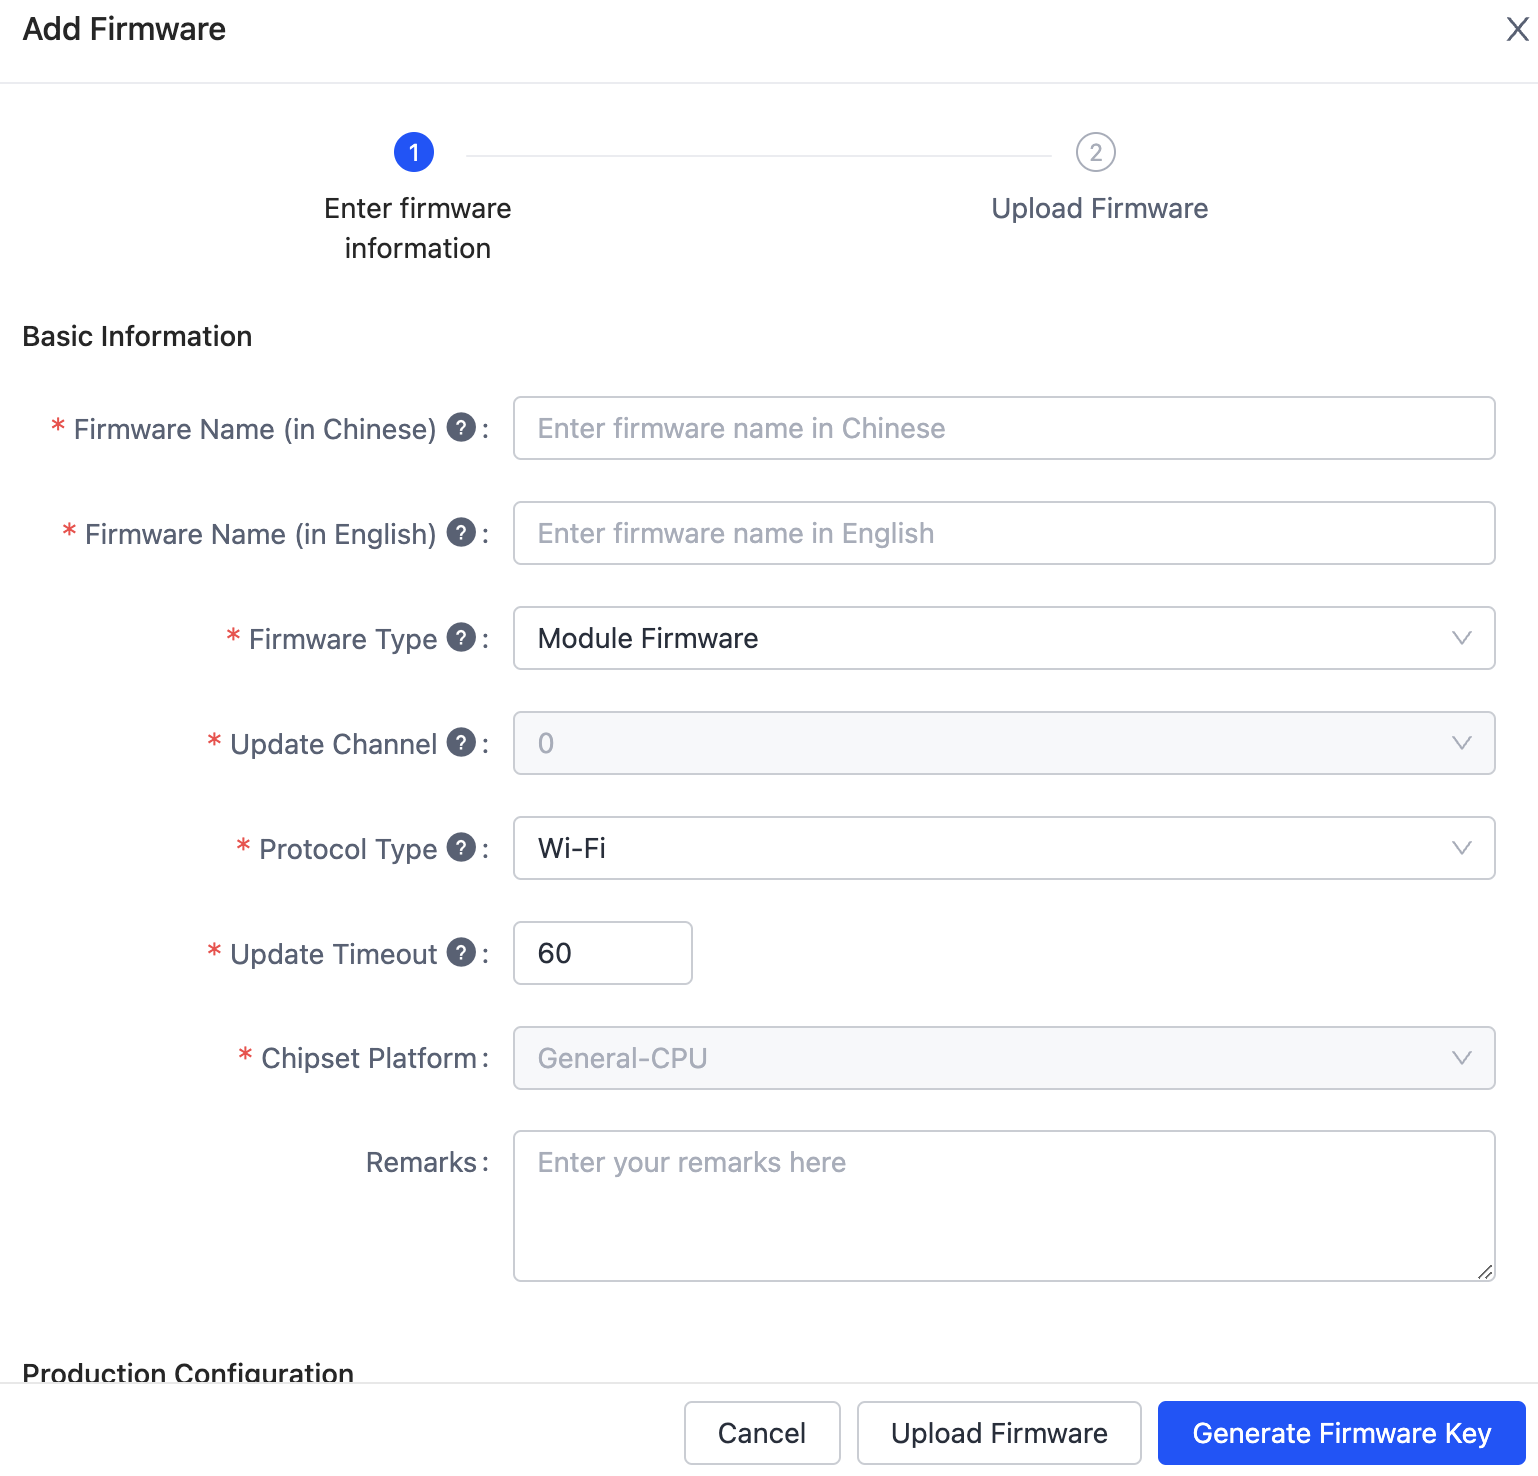
Complete the required information. Choose Module Firmware for firmware type and Wi-Fi for protocol type, and set the firmware update timeout in the cloud (unit: in seconds). Then, click Generate Firmware Key. Uploading firmware is not necessary for now. You can add a firmware version when you test the OTA update feature. For more information, see Manage Firmware.
-
Proceed with Next Step: Product Configuration.
Configure product
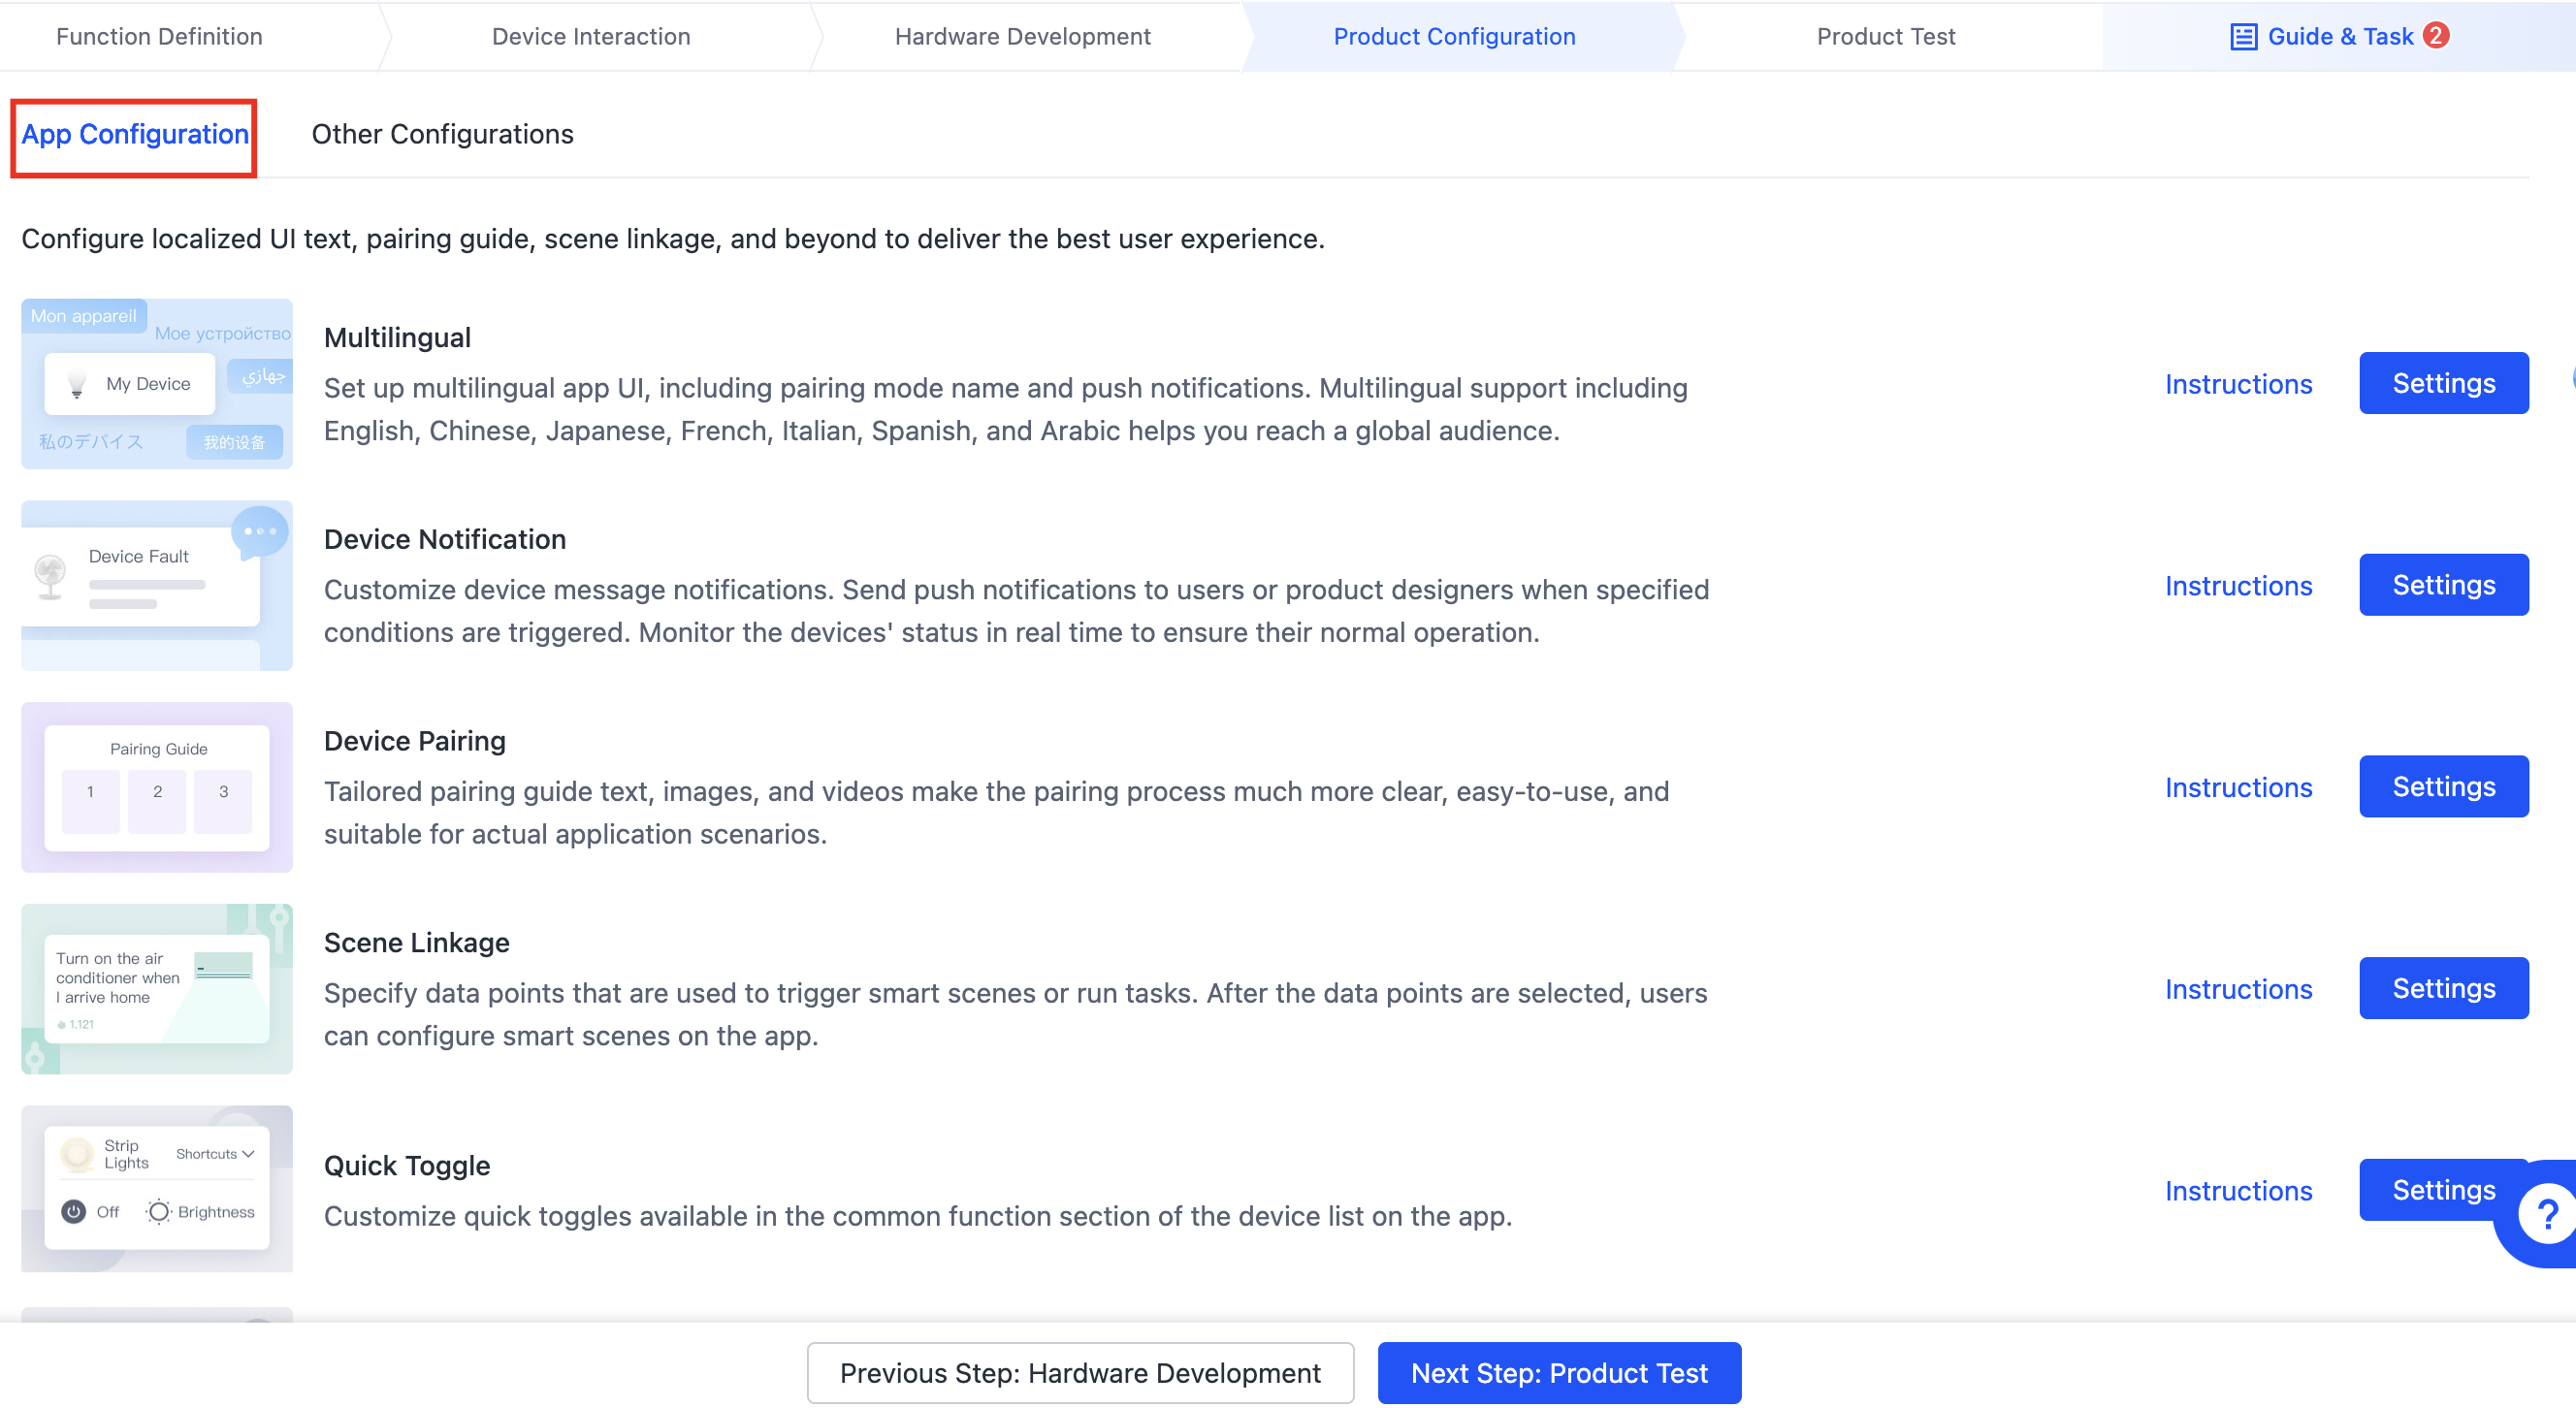
You can configure a range of features as needed, including firmware updates, multilingual UI, push notifications, pairing guides, quick toggle, smart scenes, and more.
You can click Instructions to check out the detailed description of each feature.

Get the license
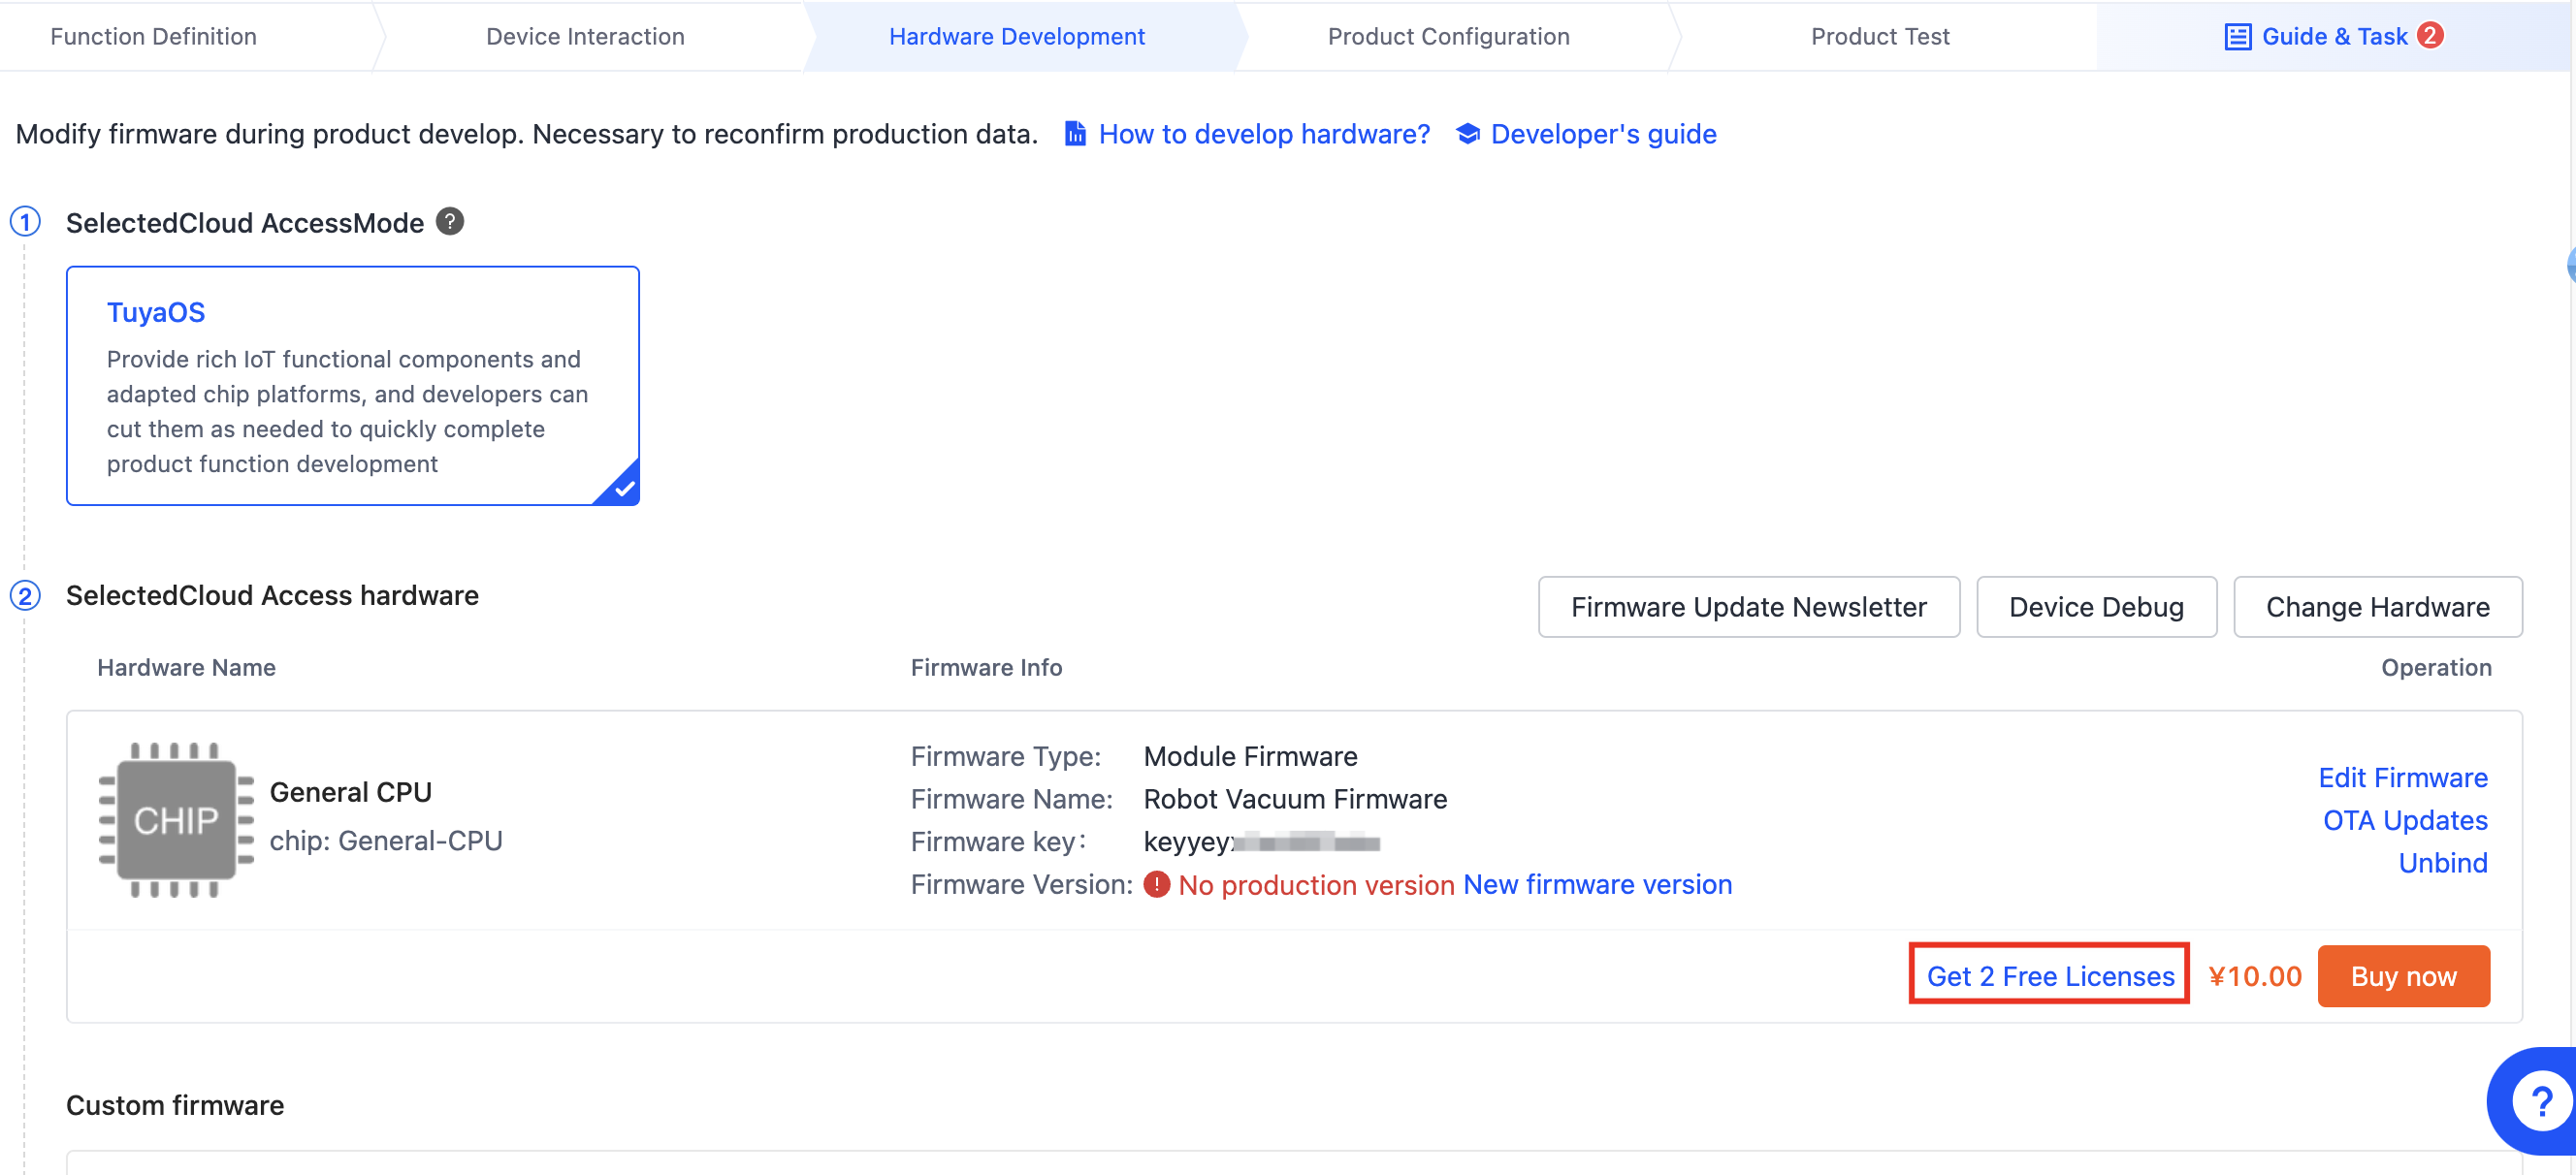
Each product is assigned a unique product ID (PID), which the cloud and mobile app use to identify a device and its features. You can request two free licenses. A single license consists of UUID and AuthKey and can be used to activate one device.
-
In the third step of Hardware Development, click Get 2 Free Licenses.
-
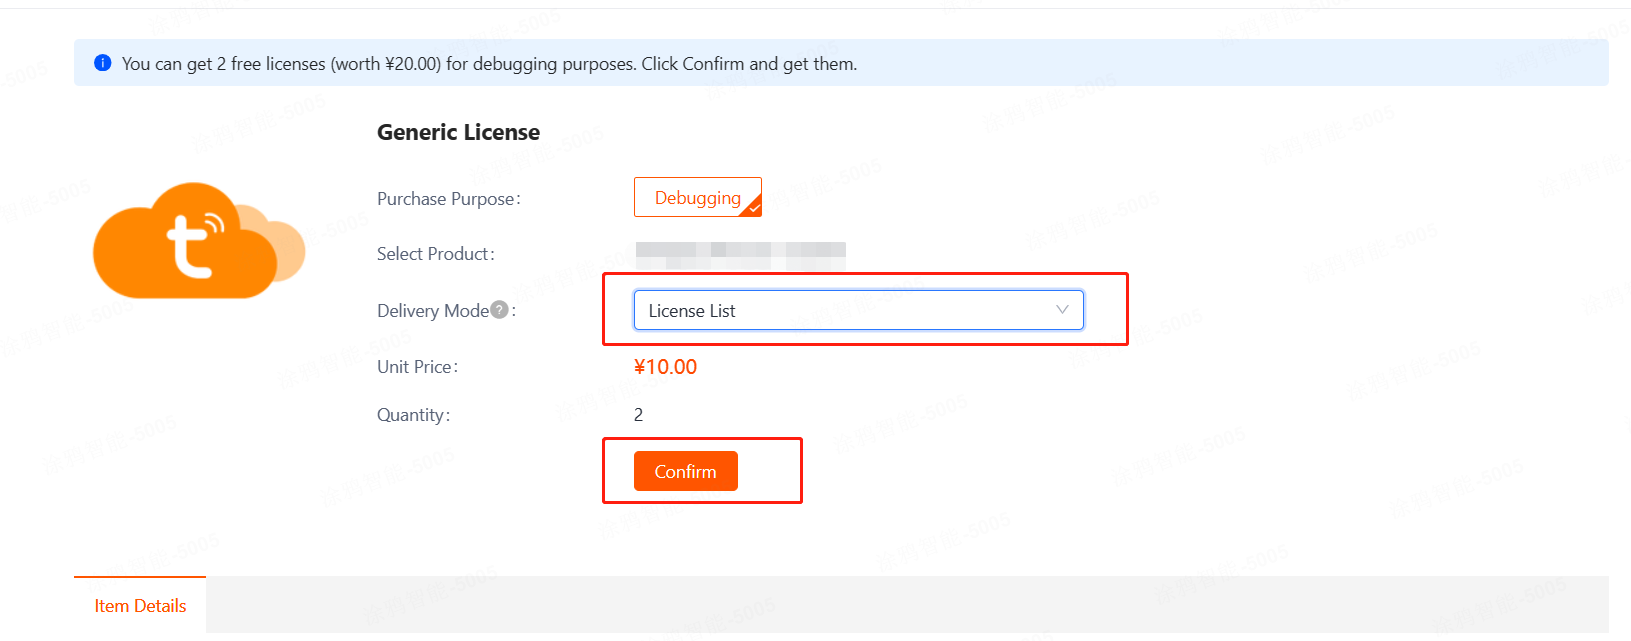
Choose License List for delivery mode, click Confirm, and then click Submit Order.

-
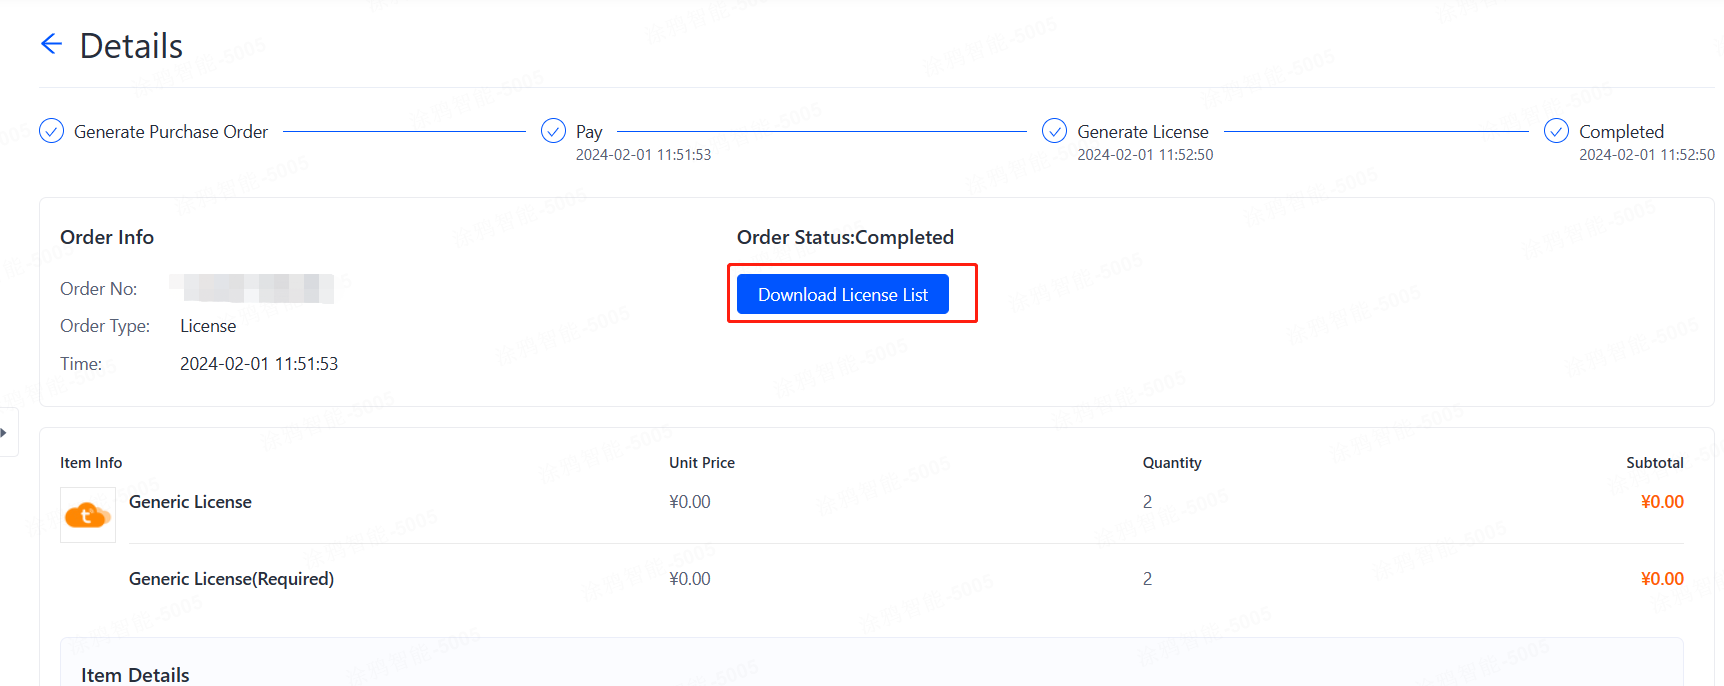
After the order is completed, you can download the license file on the purchase order page. Choose Purchase > Order > Purchase > Debugging & Sample Order and click Download License List in the Operation column.
-
Write the downloaded UUID and Authkey to the device, run the device, and connect to the Tuya Cloud.
Release product
If you have verified all functions, click Release Product in the upper right corner of the Tuya Developer Platform. Thus, the product status is changed from Developing to Completed.

Is this page helpful?
YesFeedbackIs this page helpful?
YesFeedback


