How to Migrate to Tuya v2
Regarding the installation of the new Tuya Home Assistant integration, we provide two options for different situations. The first option is to delete the old Tuya Home Assistant integration and migrate to the new version. The second option is to install the new version and keep the old version as it is, because the old and new versions can coexist. This topic describes how to migrate to the new version from the old version.
Background
We always strive to provide the best development experience possible and keep updating our Home Assistant integration capabilities. Since the old version of Tuya Home Assistant integration supports limited categories and control commands, now we bring you our new integration with extended support for more categories and commands.
Our new integration is built on Tuya’s standard APIs and tackles the limits of categories and accessible control commands. We deliver more development-friendly features including virtual device debugging, official authorization, and technical supports, which will help you efficiently work on development with the Tuya ecosystem.
The following table lists the differences between the old and new version:
| Items | Old integration | New integration |
|---|---|---|
| Supported category | Since the old interface only applies to voice control scenarios and six types of Tuya’s devices, the control commands and device types are obviously limited. | Built on Tuya’s standard OpenAPI, the new integration supports devices of all types and most of the control commands. Note: It supports all the devices that are controlled based on cloud-to-cloud connectivity. For more information, see Standard Instruction Set. |
| Driver development | Supports real device testing only. | Supports option for testing virtual devices, which improves the efficiency of debugging drivers for different categories. |
| Verification method | Not supports official verification. | Supports Tuya official secure authorization and verification to protect your account from intrusion. |
| Technical support | No Tuya official support provided. | Supports Tuya official technical support and integration iteration. If you have any problems, submit a service ticket to request support. |
| Operation on Tuya Developer Platform | No operation is needed on the Tuya Developer Platform. | Create a cloud project of Smart Home PaaS on the Tuya Developer Platform. |
| Installation | Official installation method of Home Assistant. | Two options: copy method and HACS installation |
| Integration initialization | Requires four items of information: Account of Tuya Developer Platform, Account Password, Country Code, and Mobile App. | Requires seven items of information: Region, Access ID, Access Secret, Mobile App, Country Code, App Account, and App Account Password. Note: Regarding the Mobile App, you must select the one you used to link devices on the Tuya Developer Platform. |
| App | Supports Tuya Smart, Smart Life, and Jinvoo Smart. | Supports Tuya Smart and Smart Life currently. To request support for OEM apps, submit a service ticket and let us know. |
| Response speed | Second | Millisecond |
Things to note
-
If you have never created a cloud project of Smart Home type on the Tuya Developer Platform, you can create one directly. For more information, see Create cloud project.
-
If you have created a cloud project of Smart Home type before May 25, 2021, you need to unlink devices in your old project and then go through the Link Devices process for your new project. For more information, see Migrate from old project.
Procedure
Note: During migration, the automation setup of the old Tuya Home Assistant Integration cannot run on the Home Assistant.
Operation on the Tuya Developer Platform
Create cloud project
Before installation, you need to create a cloud project of Smart Home type on the Tuya Developer Platform. For more information about project creation, see Tuya Developer Platform Configuration Guide Using Smart Home PaaS.
Migrate from old project (for project of Smart Home PaaS type created before May 25, 2021)
-
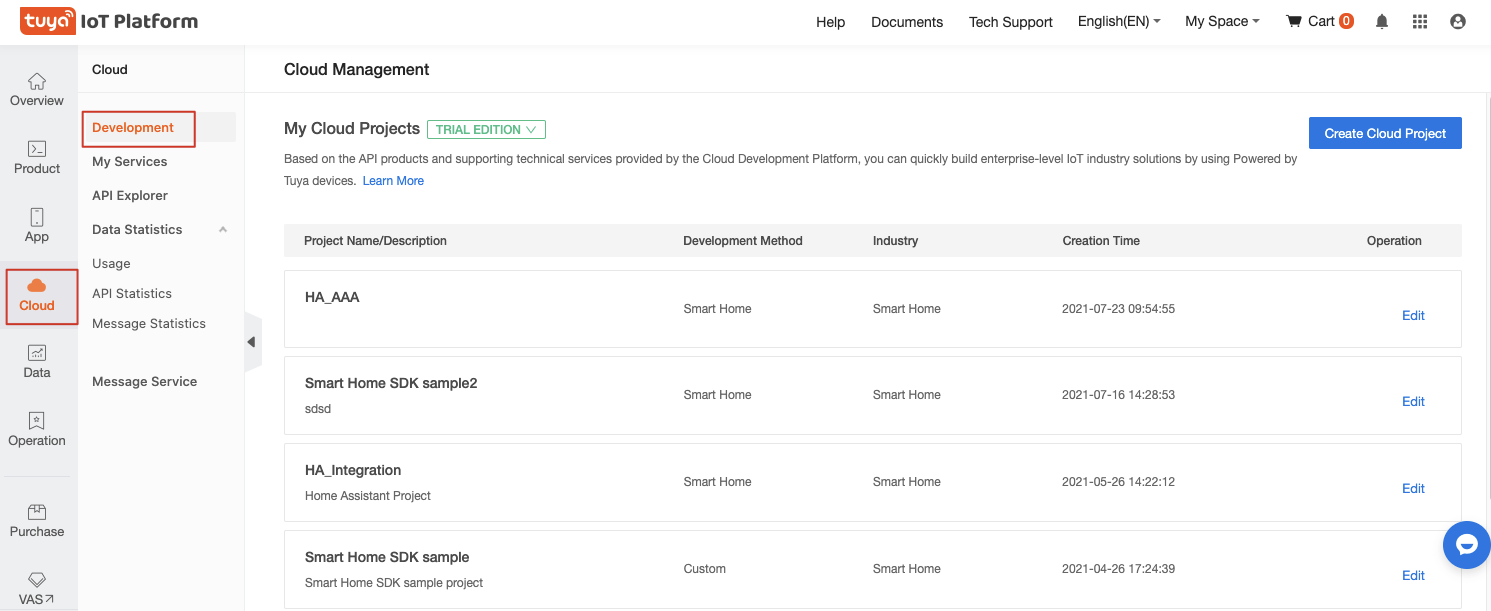
Log in to the Tuya Developer Platform.
-
In the navigation pane on the left, click Cloud > Development. Select your project of Smart Home type.
-
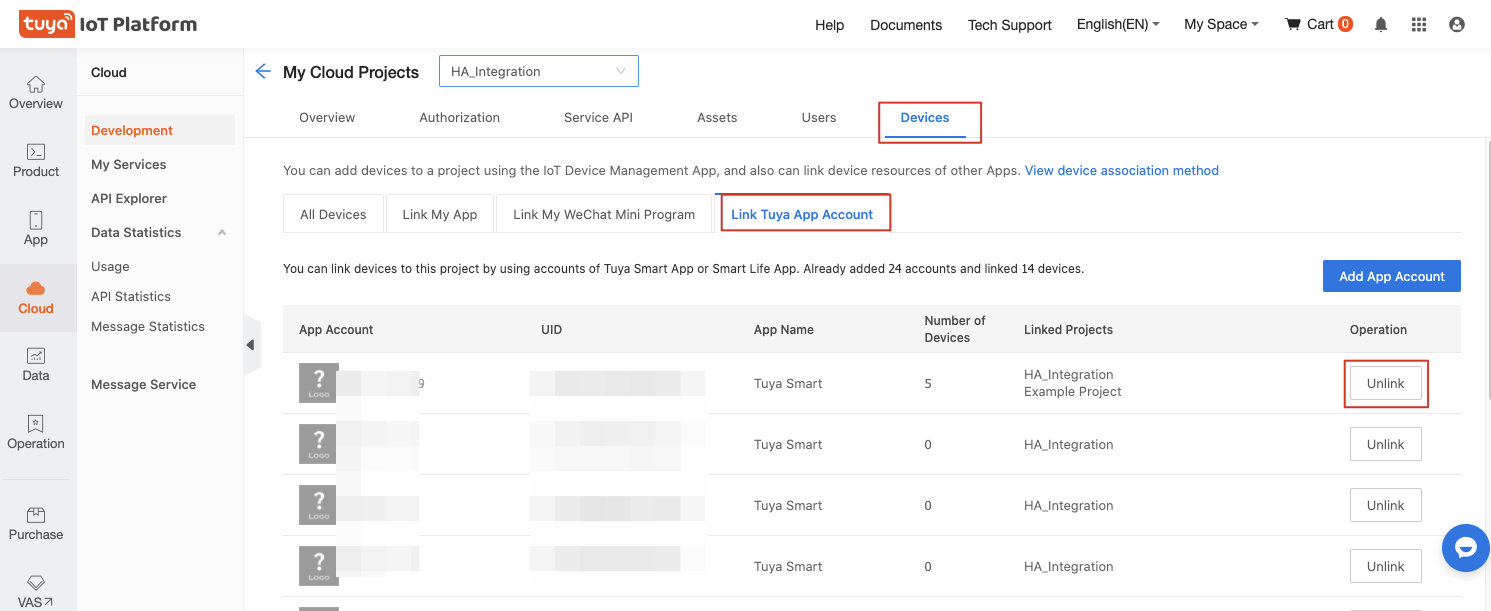
Click Devices > Link Tuya App Account and unlink the app.
-
Create a new cloud project of Smart Home type. For more information about the procedure, see Tuya Developer Platform Configuration Guide Using Smart Home PaaS.
-
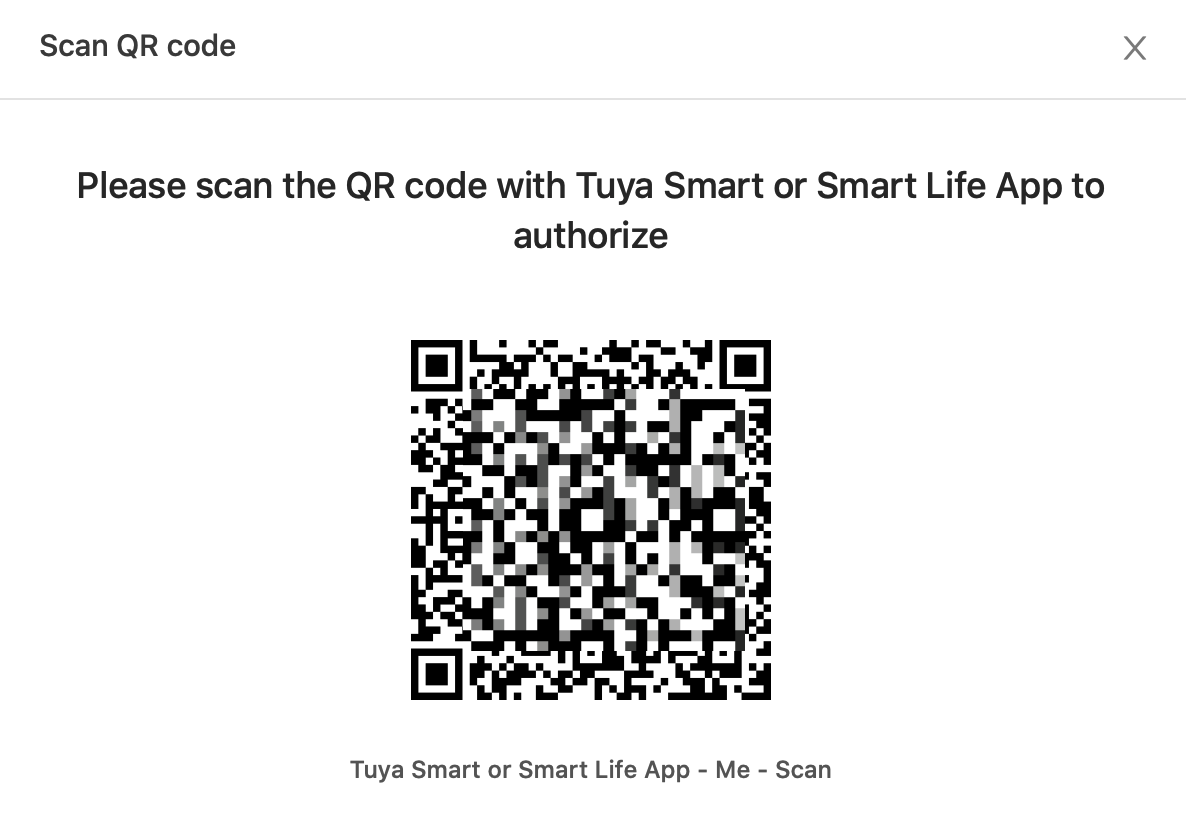
In your new project, click Devices > Link Tuya App Account. Click Add App Account and scan the QR code with the Tuya Smart or SmartLife app.

(Optional) Delete the old version
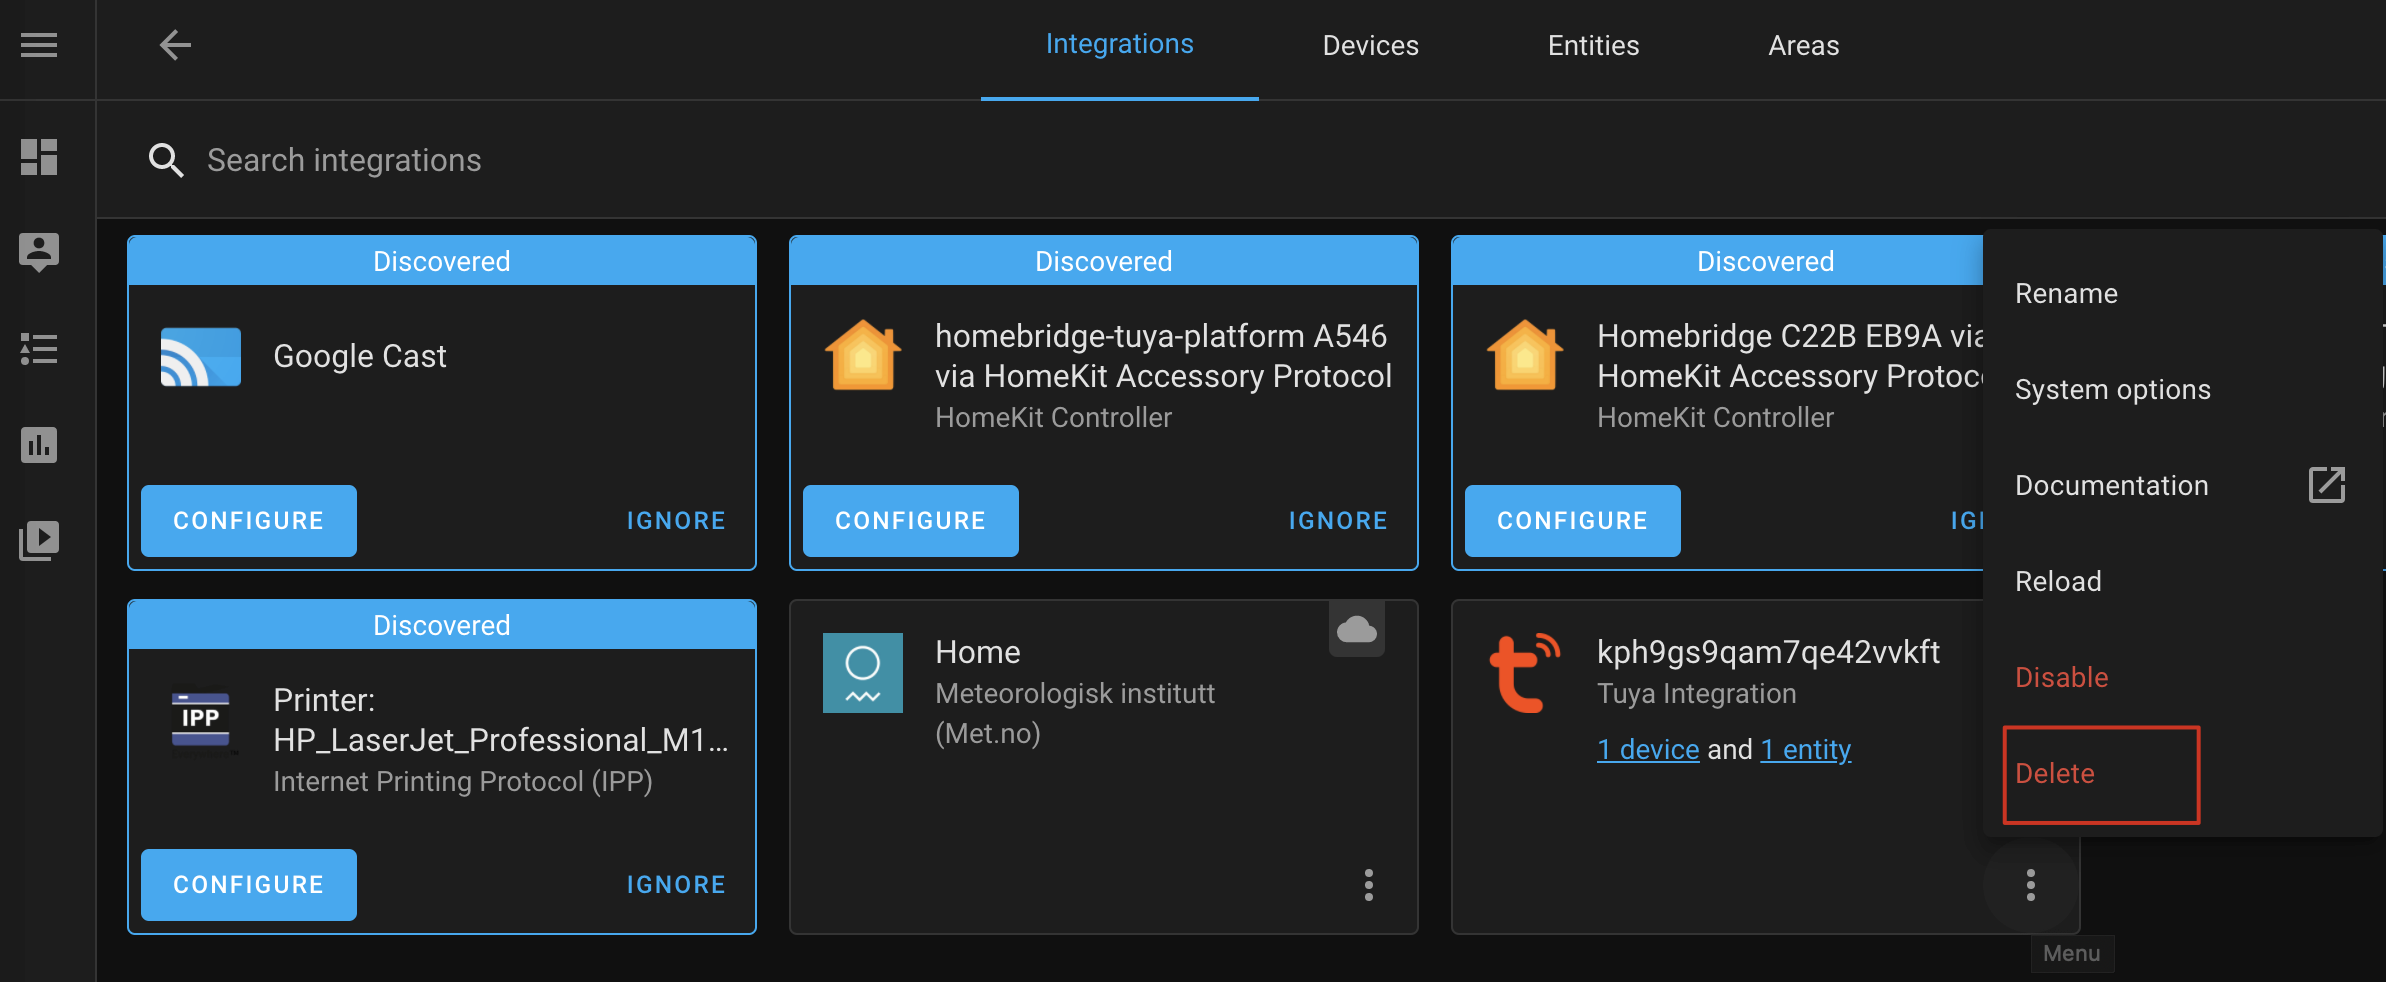
- Log in to the Home Assistant.
- Select Configuration > Integrations.
- On the Integrations tab, select ⋮ > Delete.
Install the new integration
For more information about installing new integration, see How to Use Tuya Home Assistant Integration.
Is this page helpful?
YesFeedbackIs this page helpful?
YesFeedback


