Quick Start
This topic describes how to quickly build a web application on the Tuya Developer Platform and further customize microapp development tailored to your specific features.
Preparation
-
Register an account on the Tuya Developer Platform.
-
Install the microapp development tool Node.js v14 or later.
In the terminal, run the
node -vcommand to check if you have the correct version installed.~$ node -v v16.16.0 -
Install the Docker environment. The Docker environment is used for local deployment of your custom microapps. For more information about Docker installation, see the Docker website.
In the terminal, run the
docker -vcommand to check if you have installed Docker.~$ docker -v Docker version 20.10.17, build 100c70
Process
The following sections take an example to describe how to create a solution on the Tuya Developer Platform. You can learn how to combine and configure basic microapps provided by Tuya, and develop custom microapps specific to your business scenarios to enrich your applications.
In actual use, if the no-code solution that you have created via Spatial AI already meets your business requirements, you can skip microapp development and integration steps.
The overall procedure of this sample scenario is as follows:
- Step 1: Build a Spatial AI solution on the Tuya Developer Platform.
- Step 2: Develop a microapp locally and launch it to the Tuya Developer Platform.
- Step 3: Integrate your microapp into the Spatial AI solution.
To sum up, by going through the above procedure, you can completely build an application system.

Step 1: Create a solution
You can create a solution, assemble Tuya’s existing basic microapps to adapt to your business scenarios, and manage permissions for the solution.
Create a solution
- Log in to the Tuya Developer Platform.
- In the left-side navigation pane, choose Cloud > Spatial AI > SaaS Management.
- Click Create Now in the top right corner. Then, on the Create Solution page, choose custom creation or create quickly with templates. For detailed steps, refer to Solution Management.
- If this solution already meets the requirements of your business scenario, you can skip the following microapp development and integration steps.
- Otherwise, you can go through the following steps to customize the desired features.
Step 2: Develop a microapp
This section describes how to develop your own microapp, integrate it into a web application, and run it in local mode.
Create a frontend project
-
Open the Terminal.
-
Go to the target directory where the project is to be created.
-
Run the following commands to quickly initialize the microapp project.
npx @tuya-sat/create-micro-app@latest demo -t react-tsIn case initialization fails, run
npm uninstall @tuya-sat/create-micro-appto uninstall the earlier version and try again. Available project templates include:react,react-ts,vue, andvue-ts. -
After the initialization is completed, a
demoproject is generated in the directory.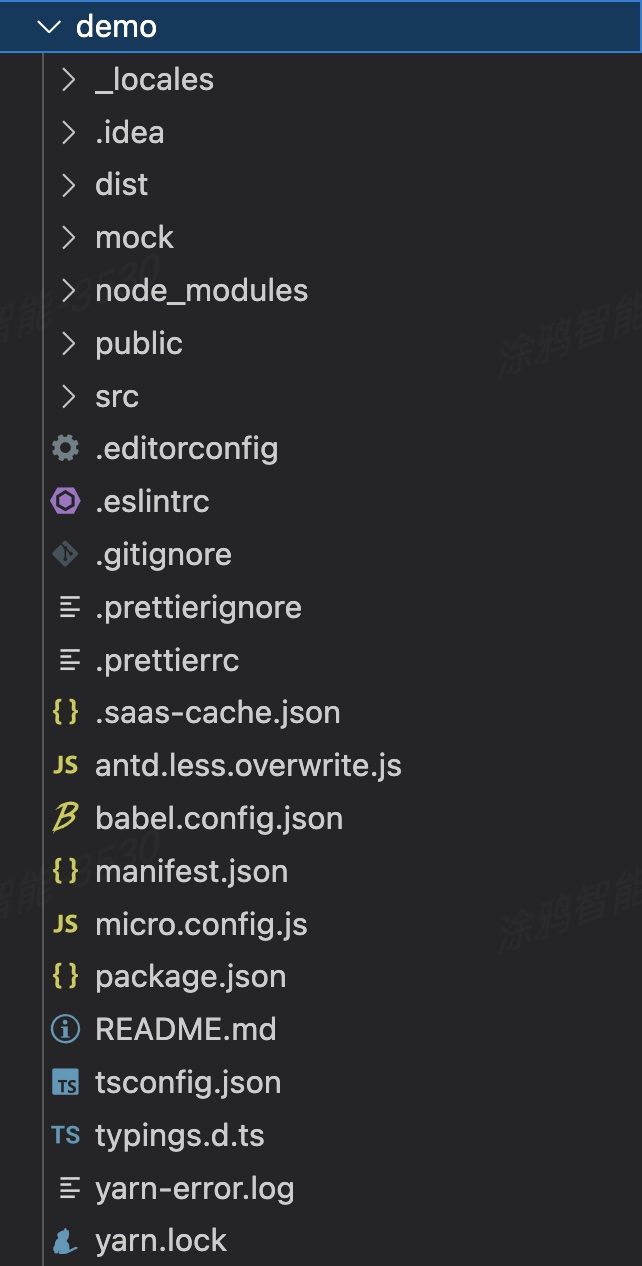
Configure and start the project
-
Open the
demoproject. -
Find the
micro.config.jsfile in the project root directory. -
Configure the newly built SaaS domain name, administrator username, and password to the
debuggerConfigitem, and save it.debuggerConfig: { target: 'https://<my-first-saas-host>', // SaaS domain name username: 'my-first-saas-username', // SaaS administrator username password: 'my-first-saas-password', // SaaS administrator password logSign: true, // Print the request header mockPermissions: ['REGISTER', 'EDIT', 'DELETE'], customApiUrl:'' // Backend service URL for local development and joint debugging } -
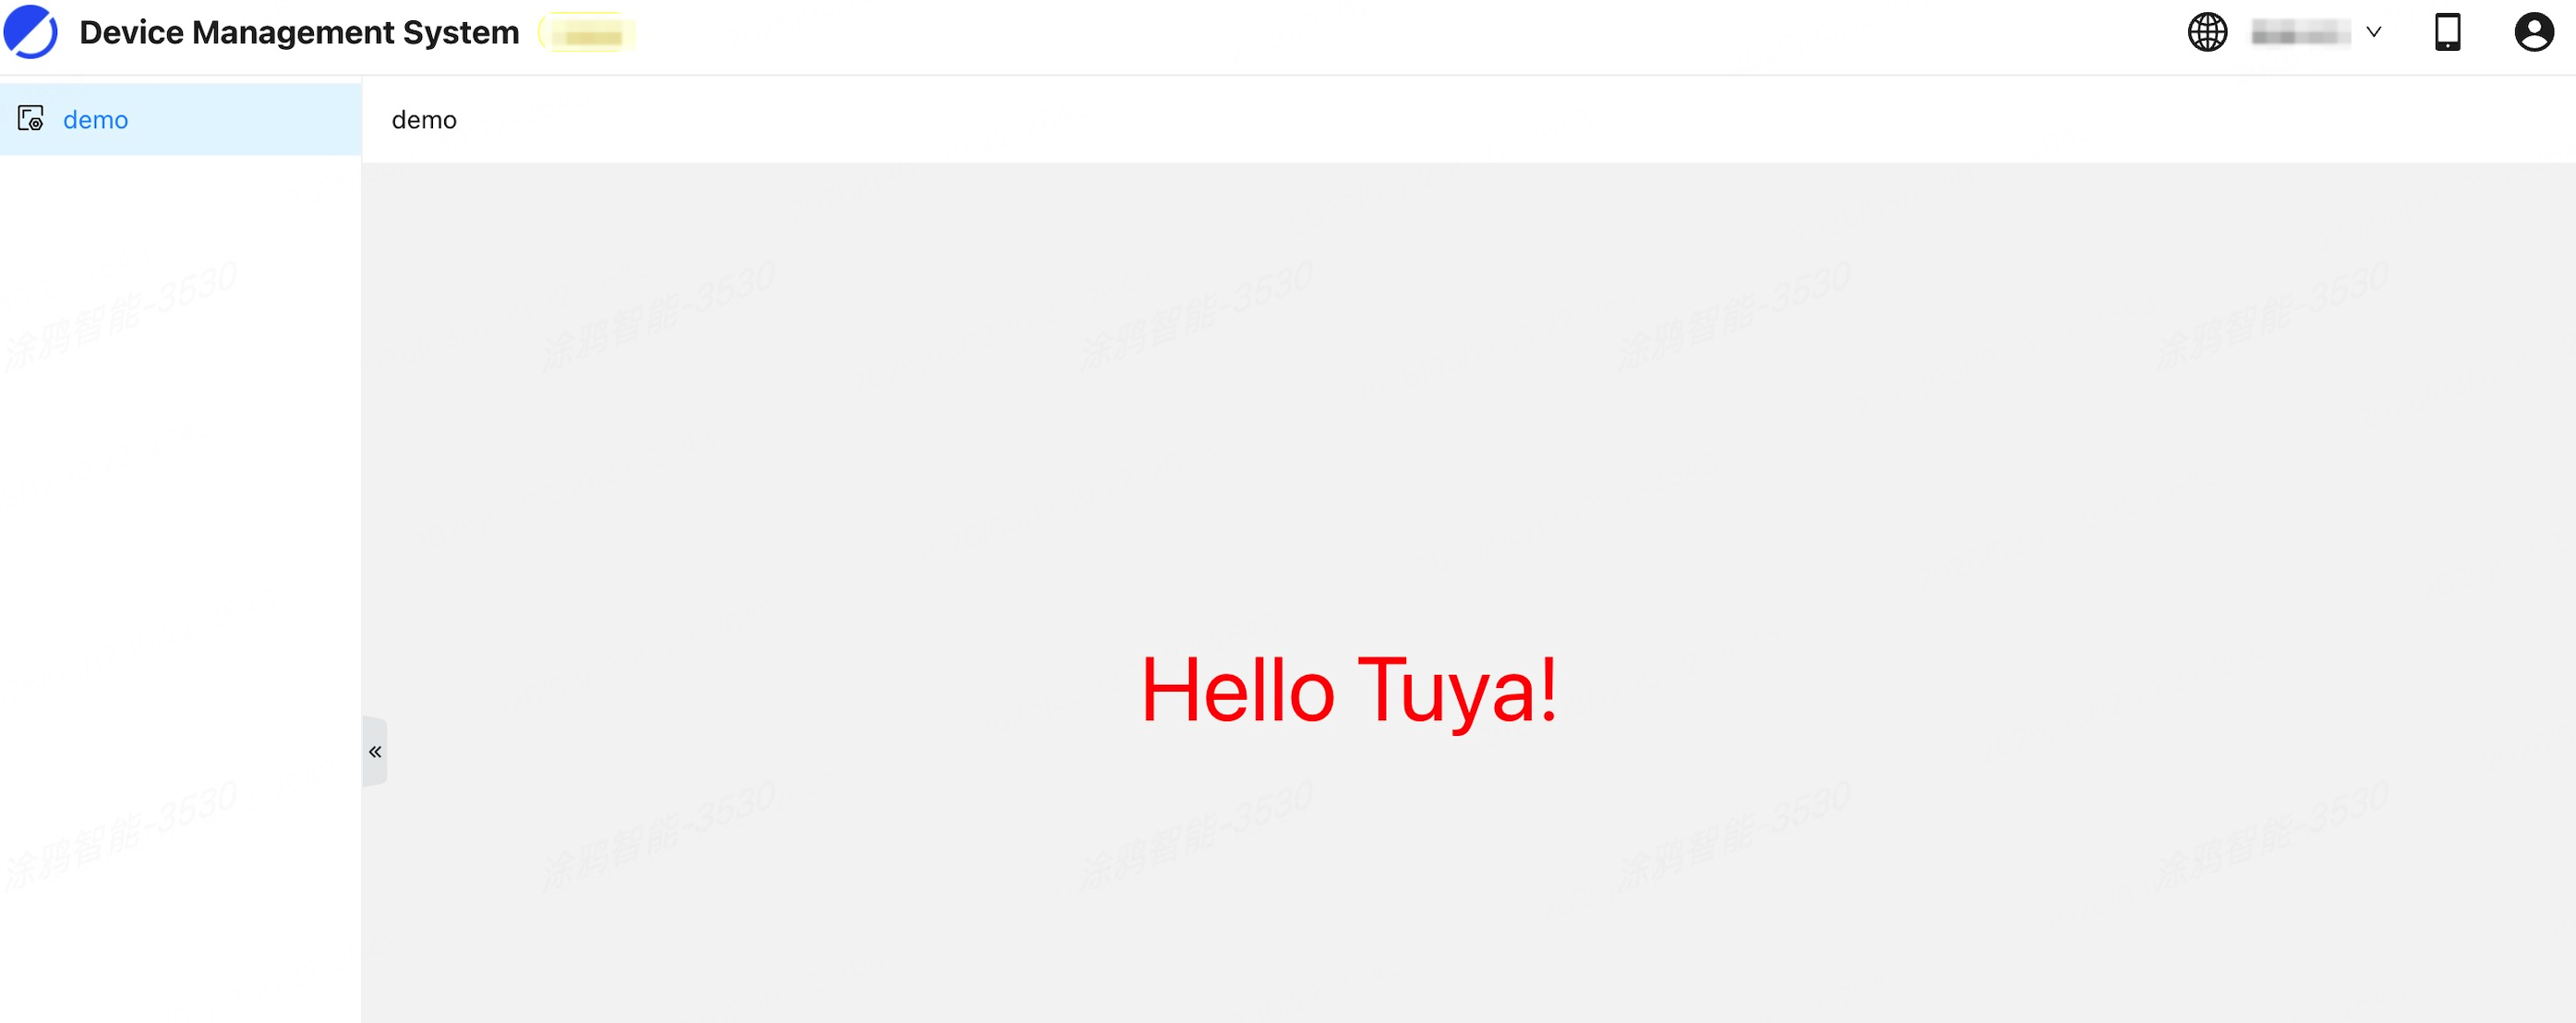
Run the following command in the terminal to start the project. If the startup is successful, the local microapp page is opened automatically with a browser.
npm run start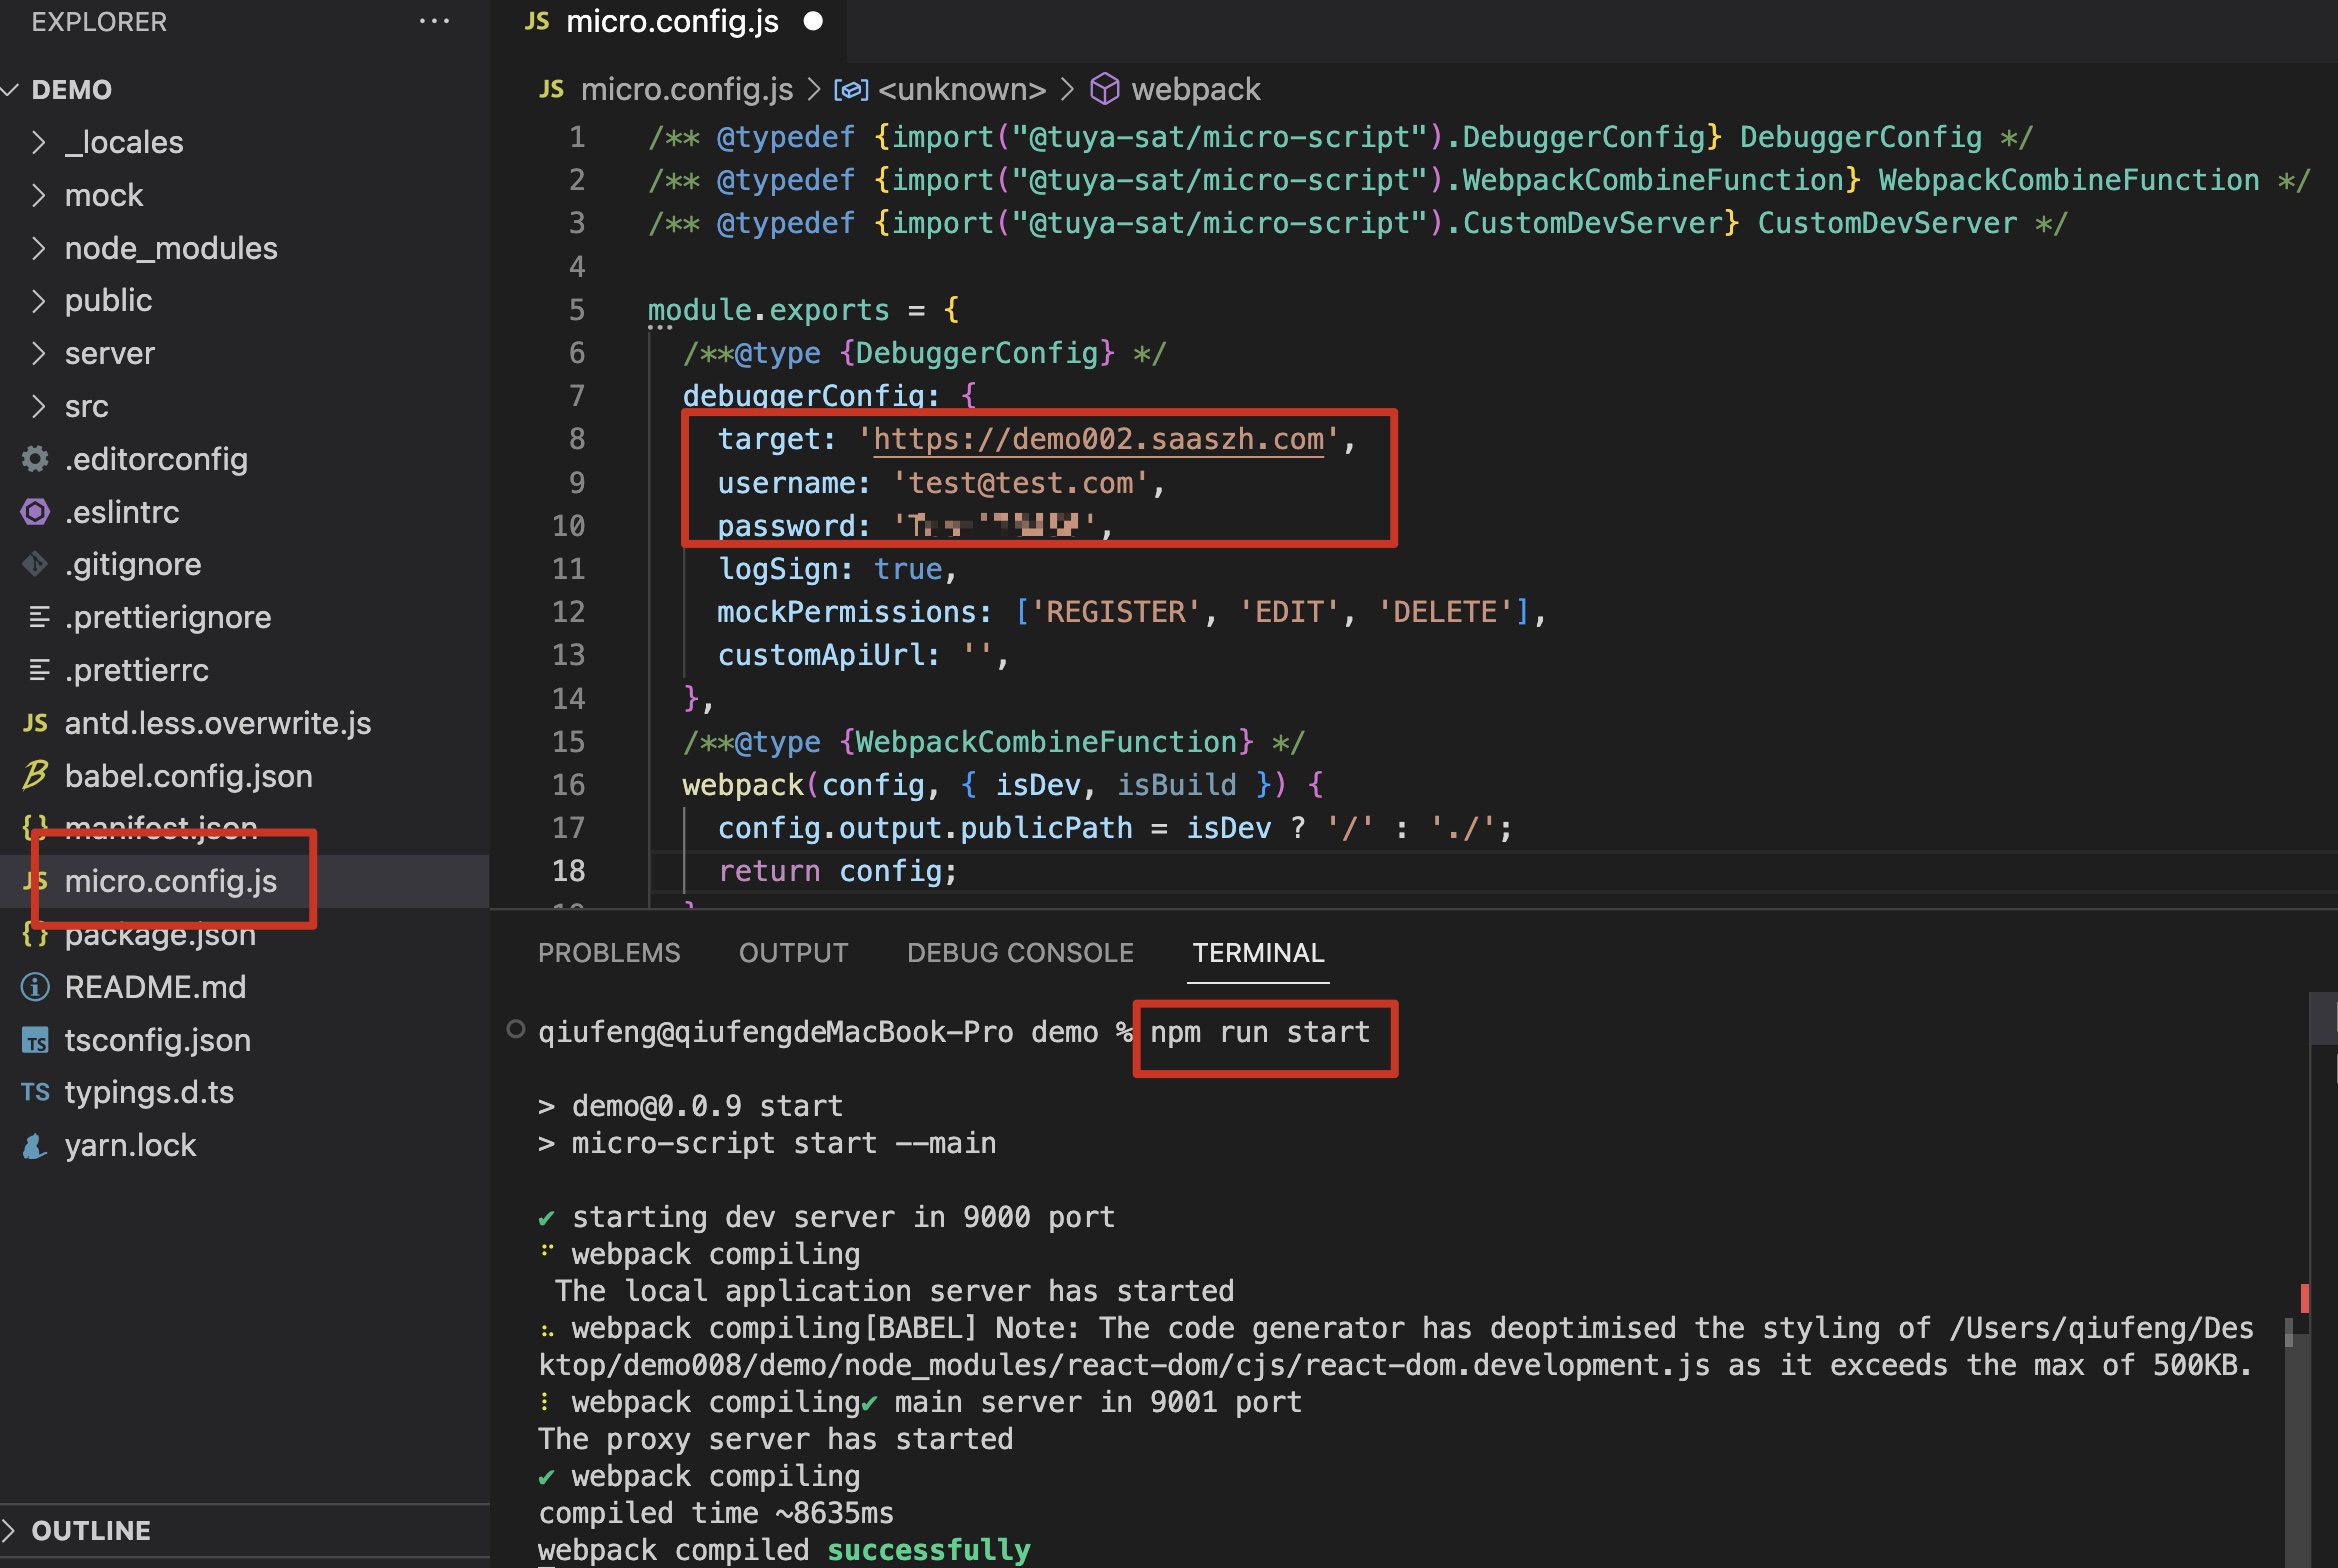
Custom development
-
Modify the frontend page.
You can customize the frontend pages. Here is an example of customizing pages to add, delete, query, and modify an asset.
-
Find the
src/pages/index.tsxfile under the project, modify thePagecomponent. -
Create an asset list page by introducing the
<TableList />component. Add, delete, query, and modify operations on assets are included in the<TableList />component.After the file
src/pages/index.tsxis modified, the code block looks like this:import TableList from '../components/Table'; import { microProps } from '../index'; import styled from './index.module.less'; const Page = () => { const { dynamicProps } = microProps; dynamicProps.setBreadcrumb([{ type: 'auto' }]); return ( <div className={styled['layout']}> <TableList /> </div> ); }; export default Page;
The APIs for customizing the microapp page start with
/custom-api. In the sample code, the asset query API/custom-api/assetsin the<TableList />component will be routed to the/assetsAPI of your own backend service when you initiate a request.function getList() { api.get('/custom-api/assets') .then(res => { setDataSouce({ data: res.result.list.map(item => { return { ...item, asset_name: decodeURI(item.asset_name) }; }), totalRecord: res.result.list.length, }); }) .catch(e => console.log(e)); } -
-
Implement backend services.
All page requests of your custom microapps require corresponding backend services. Take a simple Node.js backend service as an example. The external service is provided on port 8080 and APIs are available for you to add, query, modify, and delete assets. The server code is as follows:
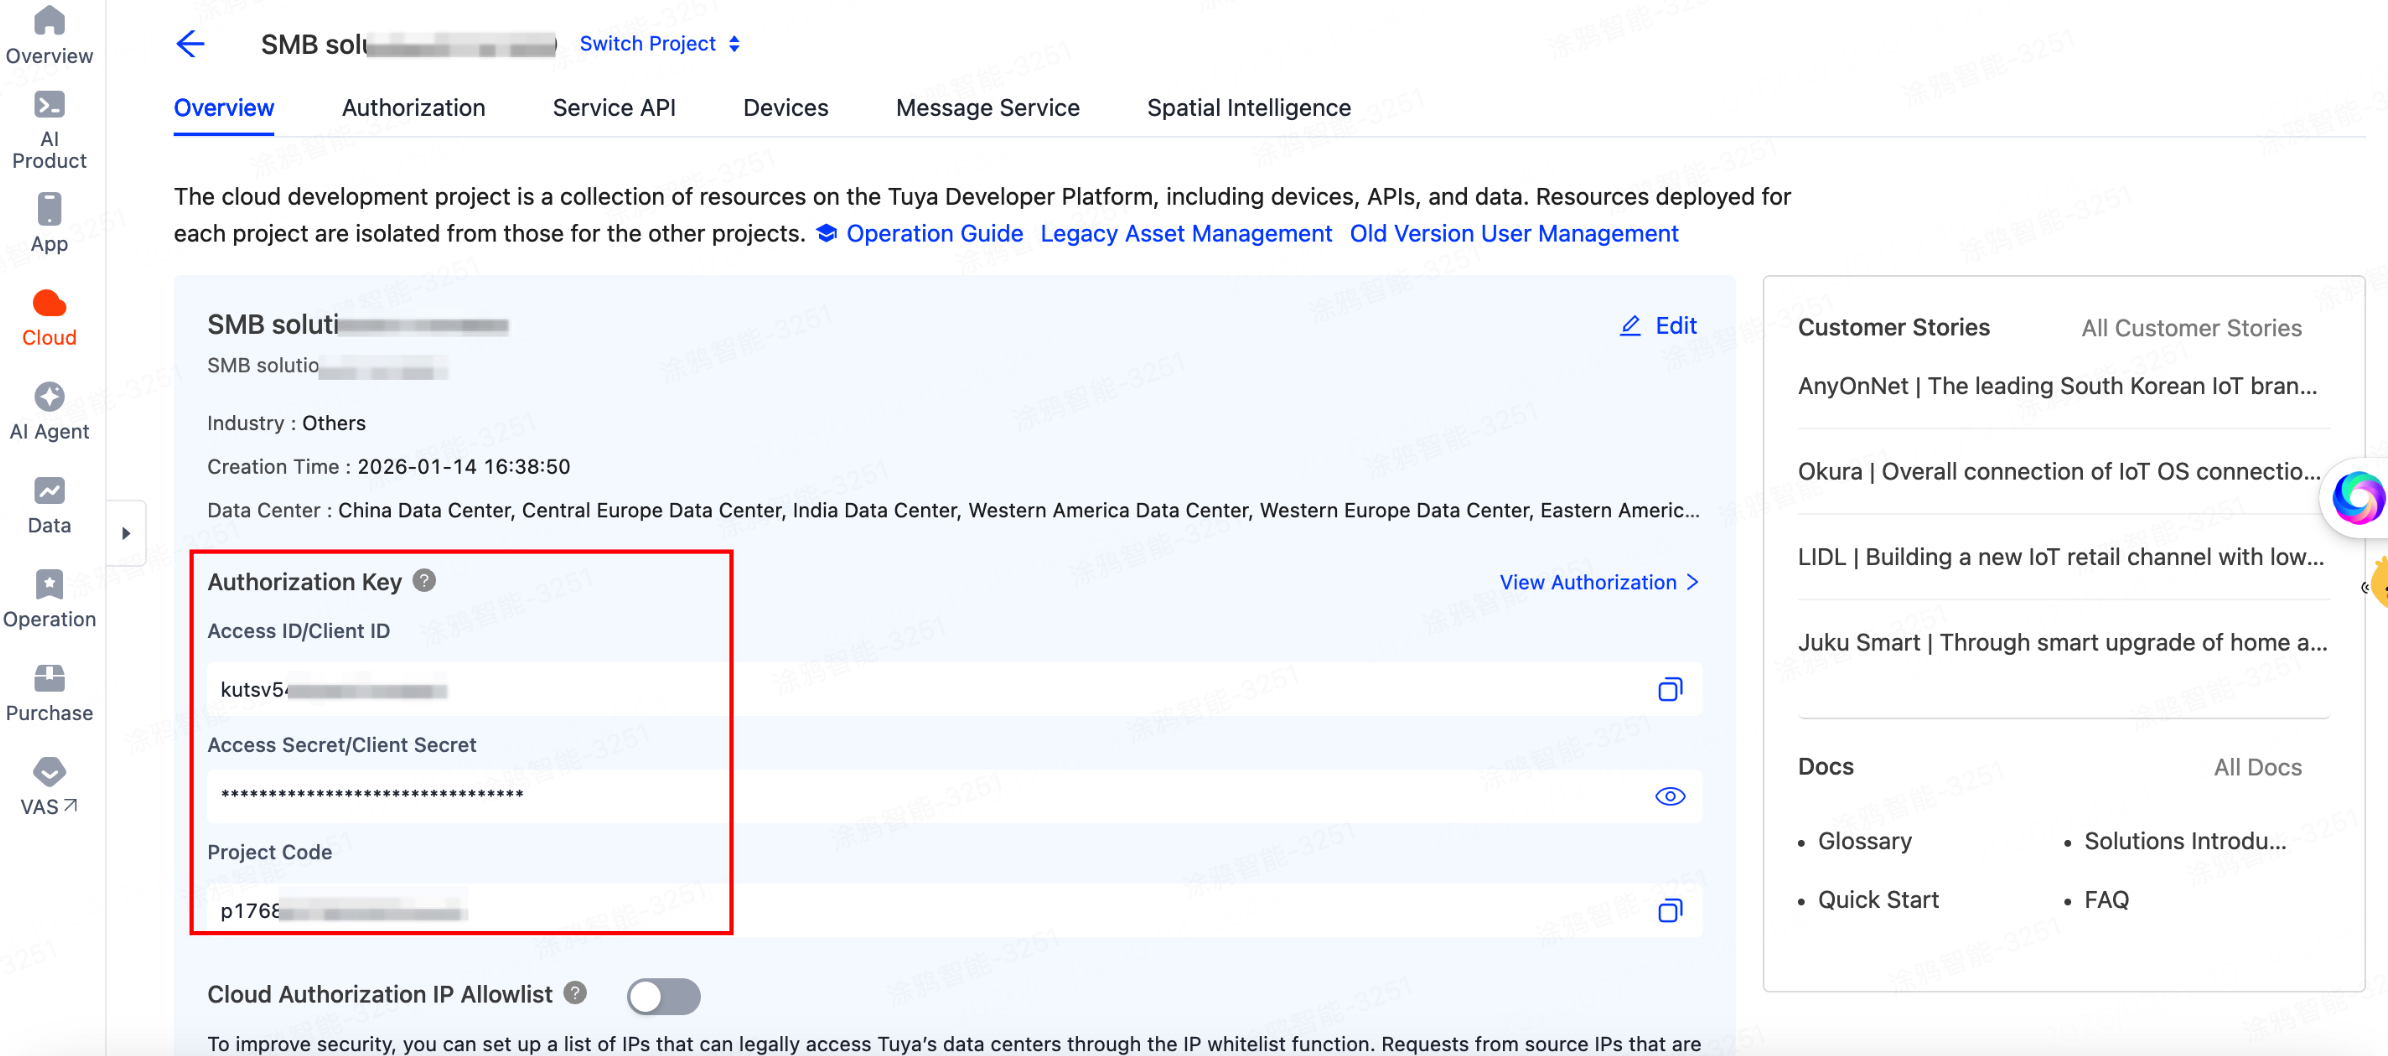
const http = require('http');
const { TuyaContext } = require('@tuya/tuya-connector-nodejs');

const hostname = '0.0.0.0';
const port = 8080;
const ClientID = '***'; // project Client ID
const ClientSecret = '***'; // project Client Secret

const tuya = new TuyaContext({
  baseUrl: 'https://openapi.tuyacn.com',
  accessKey: ClientID,
  secretKey: ClientSecret
});

async function assetsList() {
  return await tuya.assets.childAssets({asset_id: -1});
}

async function addAsset(params) {
  return await tuya.assets.add(params);
}

async function delAsset(params) {
  return await tuya.assets.delete(params);
}

async function update(params) {
  return await tuya.assets.update(params);
}

const server = http.createServer(async (req, res) => {
  res.statusCode = 200;
  res.setHeader('Content-Type', 'application/json');
  res.setHeader('Access-Control-Allow-Origin', '*');
  let result = {};
  if (req.url.startsWith('/assets')) {
    result = await assetsList();
  } else if (req.url.startsWith('/add')) {
    const paths = req.url.split('/');
    const assetName = paths[paths.length - 1];
    result = await addAsset({ name: assetName });
  } else if (req.url.startsWith('/del')) {
    const paths = req.url.split('/');
    const assetId = paths[paths.length - 1];
    result = await delAsset({ asset_id: assetId });
  } else if (req.url.startsWith('/update')) {
    const paths = req.url.split('/');
    const assetName = paths[paths.length - 1];
    const assetId = paths[paths.length - 2];
    result = await update({ asset_id: assetId, name: assetName });
  }
  res.end(JSON.stringify(result));
});

server.listen(port, hostname, () => {
  console.log(`Server running at http://${hostname}:${port}`);
});
You can copy and save this code snippet to the
server.jsfile in the specified directory, and then set the constantsClientIDandClientSecretin the code snippet to theClient IDandClient Secretof the cloud project corresponding to your SaaS respectively. You can find the corresponding cloud project in the solution configuration list.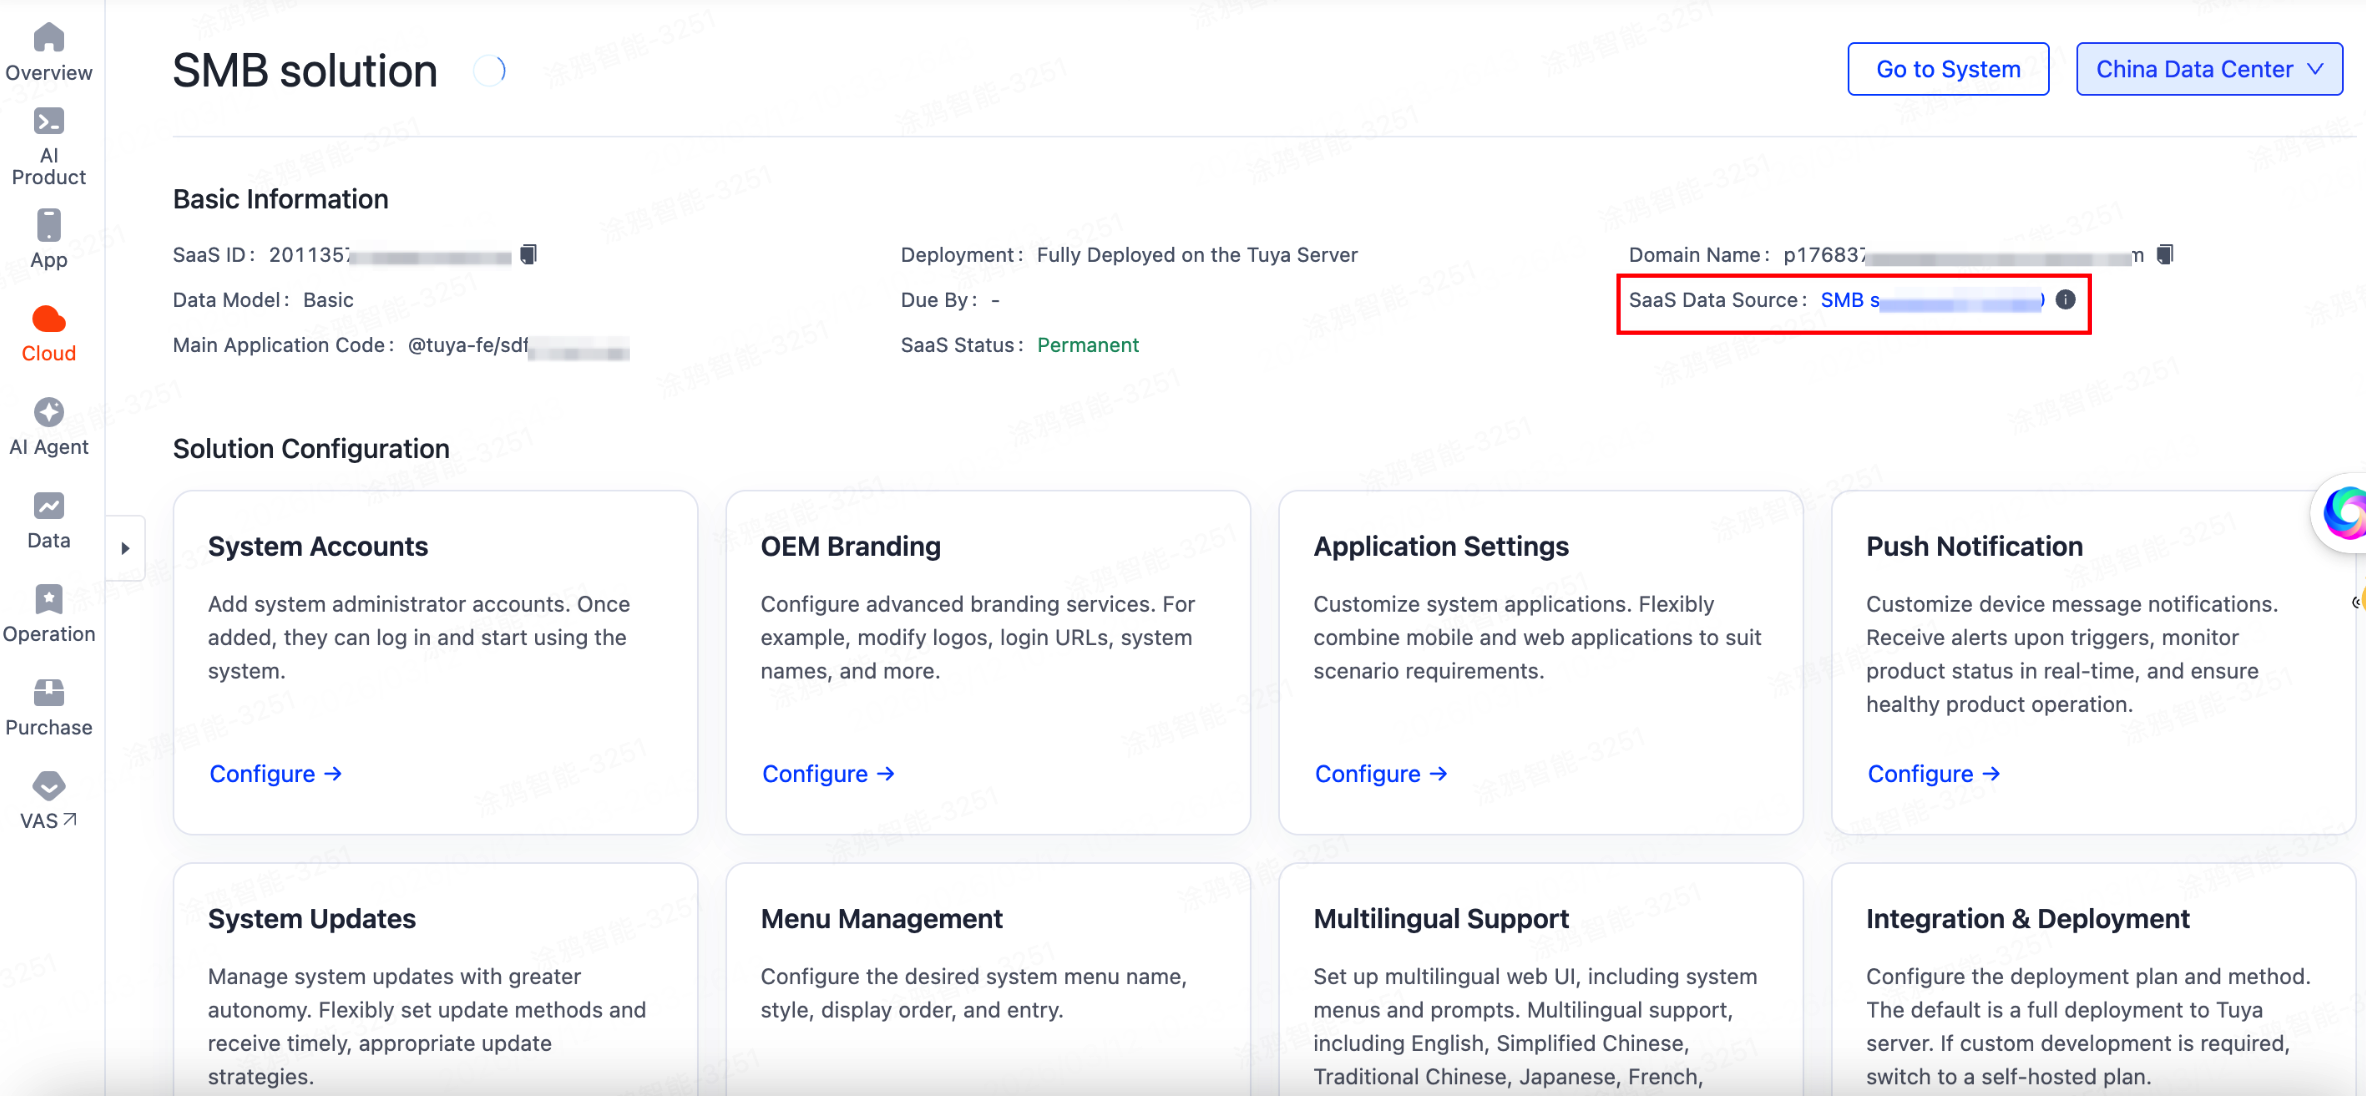
-
After you configure the key of the cloud project, run the following command in the current directory to start the service:
~ % npm i @tuya/tuya-connector-nodejs ~ % node server.js # Server running at http://127.0.0.1:8080 -
Meanwhile, modify the
micro.config.jsfile in the root directory of the frontend project, configure thecustomApiUrloption, and set the page request to be forwarded to the local service.debuggerConfig: { target: 'https://<my-first-saas-host>', // SaaS domain name username: 'my-first-saas-username', // SaaS administrator username password: 'my-first-saas-password', // SaaS administrator password logSign: true, // Print the request header mockPermissions: ['REGISTER', 'EDIT', 'DELETE'], customApiUrl:'http://localhost:8080' // Backend service URL for local development and joint debugging } -
Open your custom page on the browser to verify the custom development feature. You can see the developed asset management feature:
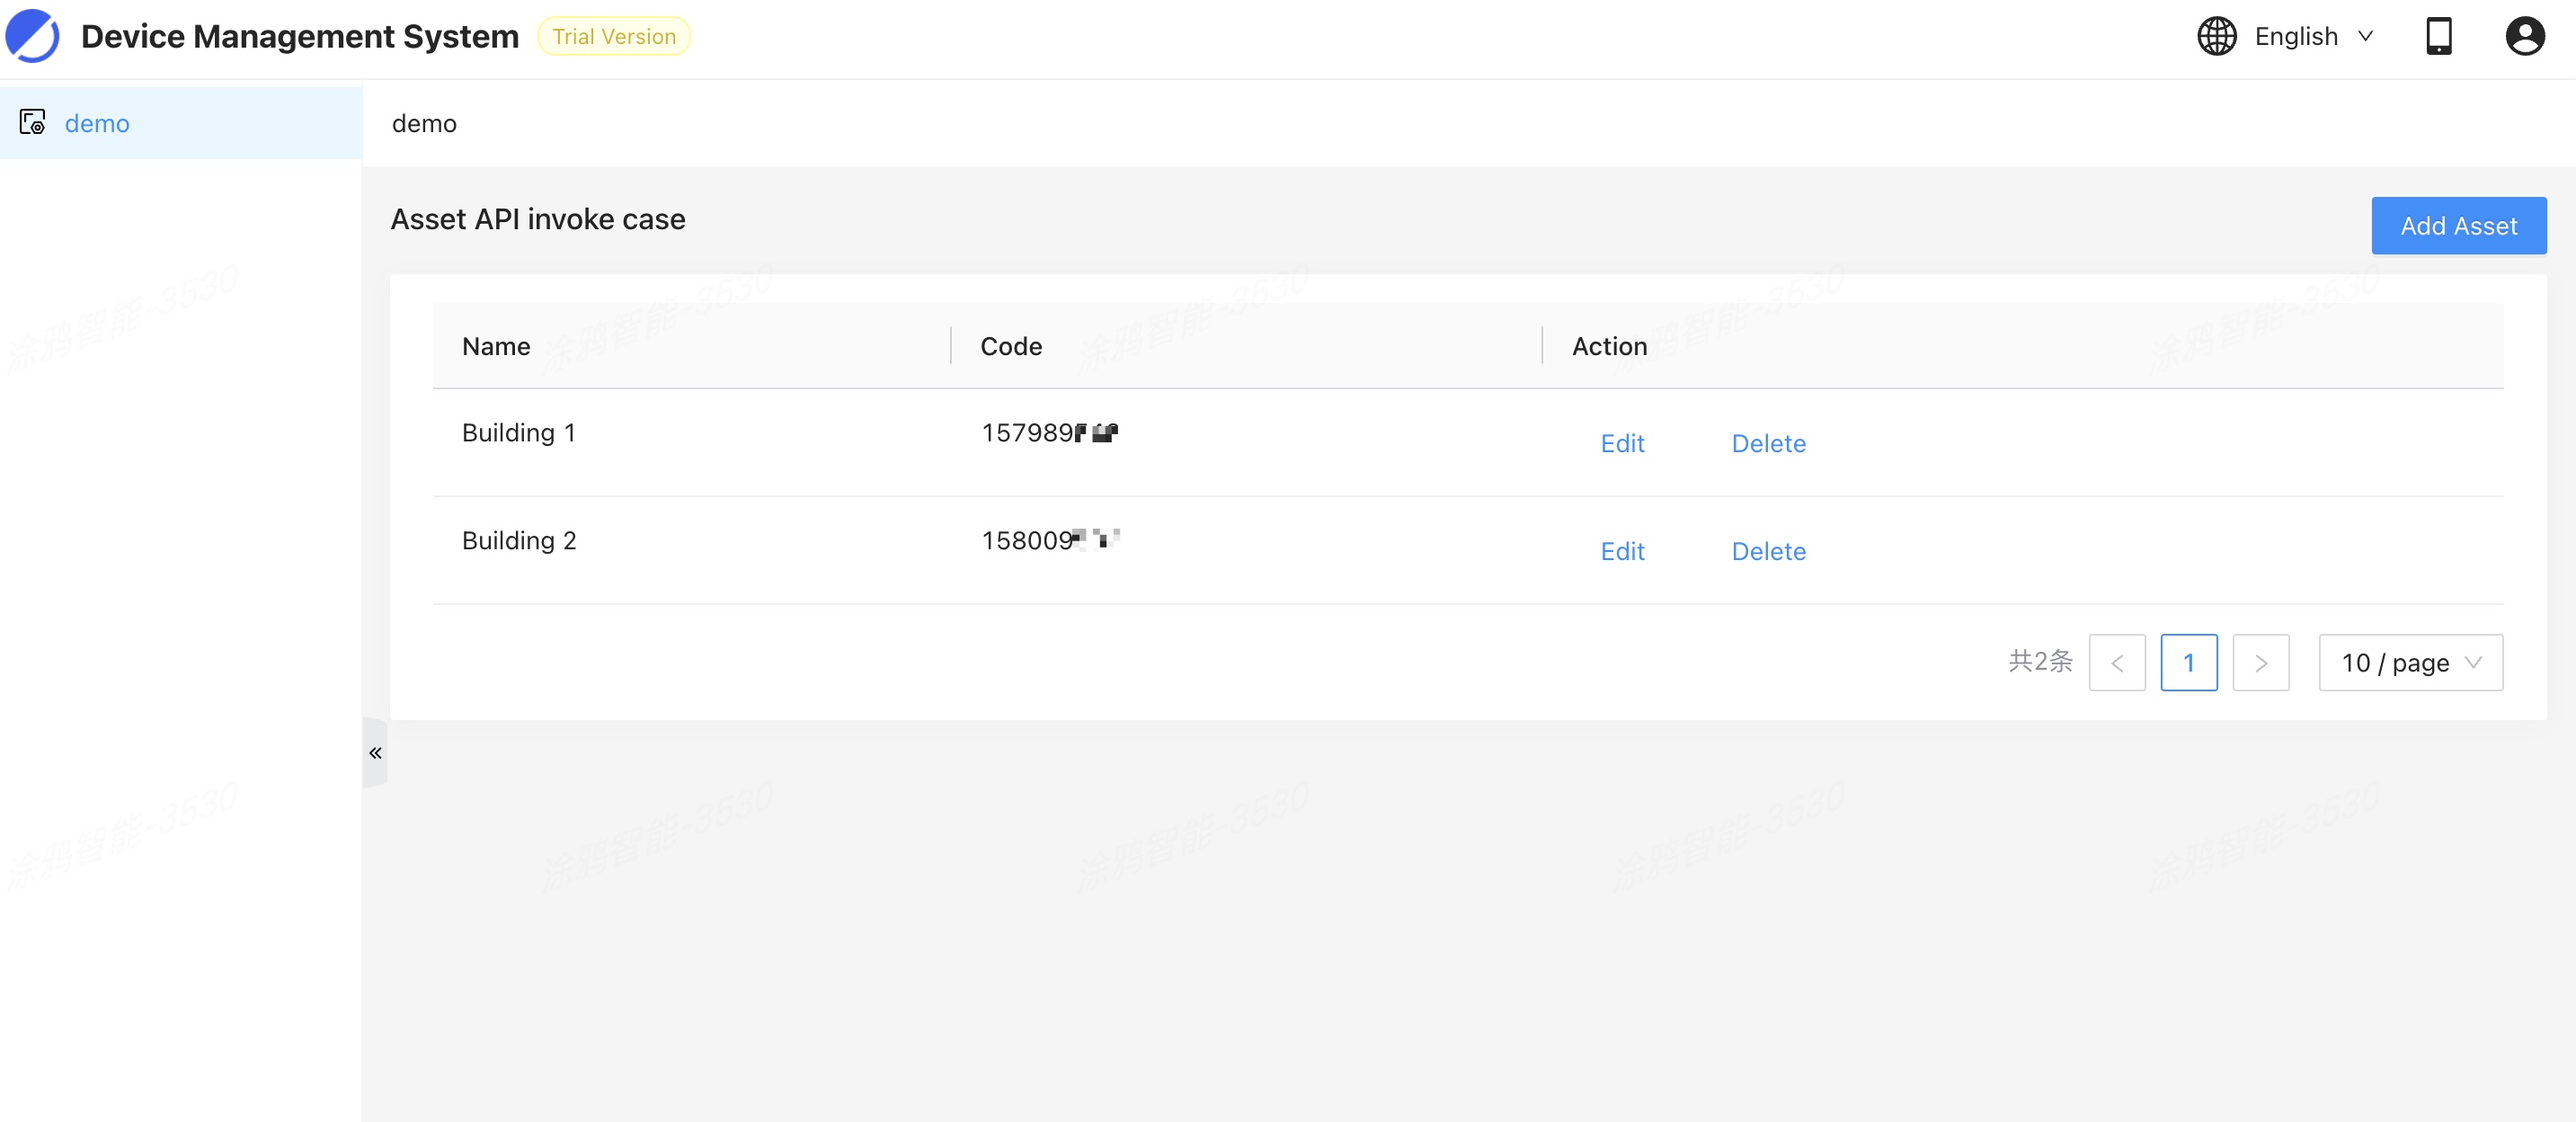
Now, you have completed the entire frontend and backend development process of a microapp.
The requests for your microapp page are sent to your own backend services. The backend services work across programming languages and development frameworks. You can choose the preferred technology stack. Through cloud-to-cloud integration, your backend services can also access Tuya’s open APIs and subscribe to messages. For more information, see Cloud Development.
Step 3: Integrate with the microapp
You can try out your custom microapps and integrate them into Spatial AI solutions. For this purpose, you need to push the microapps to the Tuya Developer Platform first.
Publish the microapp
-
Install the command line interface (CLI).
sudo npm i -g @tuya-sat/sdf-cli -
Run the
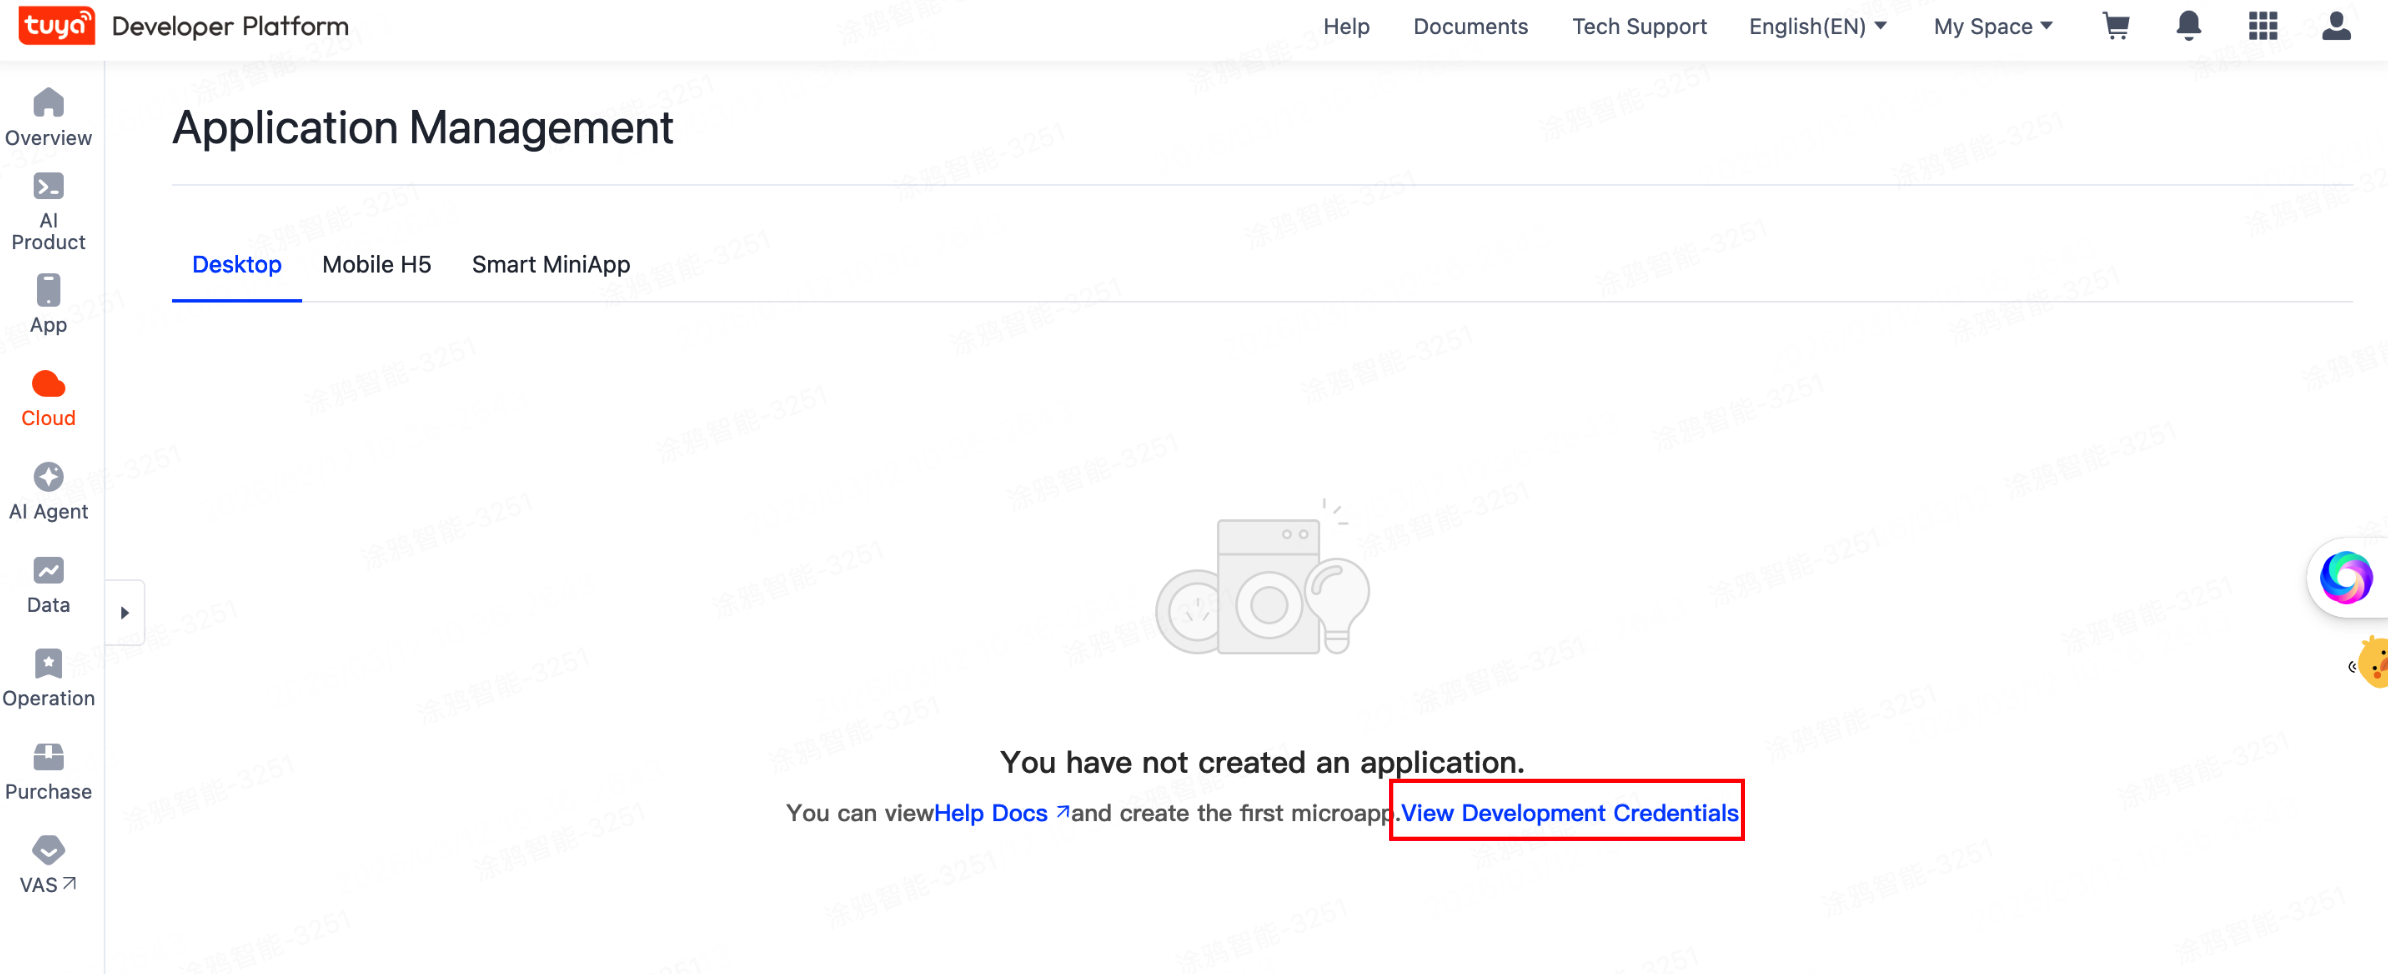
clicommand to configure the keys.# Enter App Key and Secret Key sdf config ? appKey: YTw ******** h2kn ? secretKey: pfo ***************************** 9kD ? endpoint: default ✔ config successGo to Spatial AI > Application Management and click View Development Credentials to get the App Key and Secret Key.
-
Publish the microapp.
npm run build -
After the
buildis successful, run the following command:sdf publish ✔ manifest validate success 🔍 ⠋ packing tgzextractLang path en.ts path index.ts path zh.ts ✔ pack success 📦 ✔ push success 🚀 ✔ publish success 🎉
Select microapps
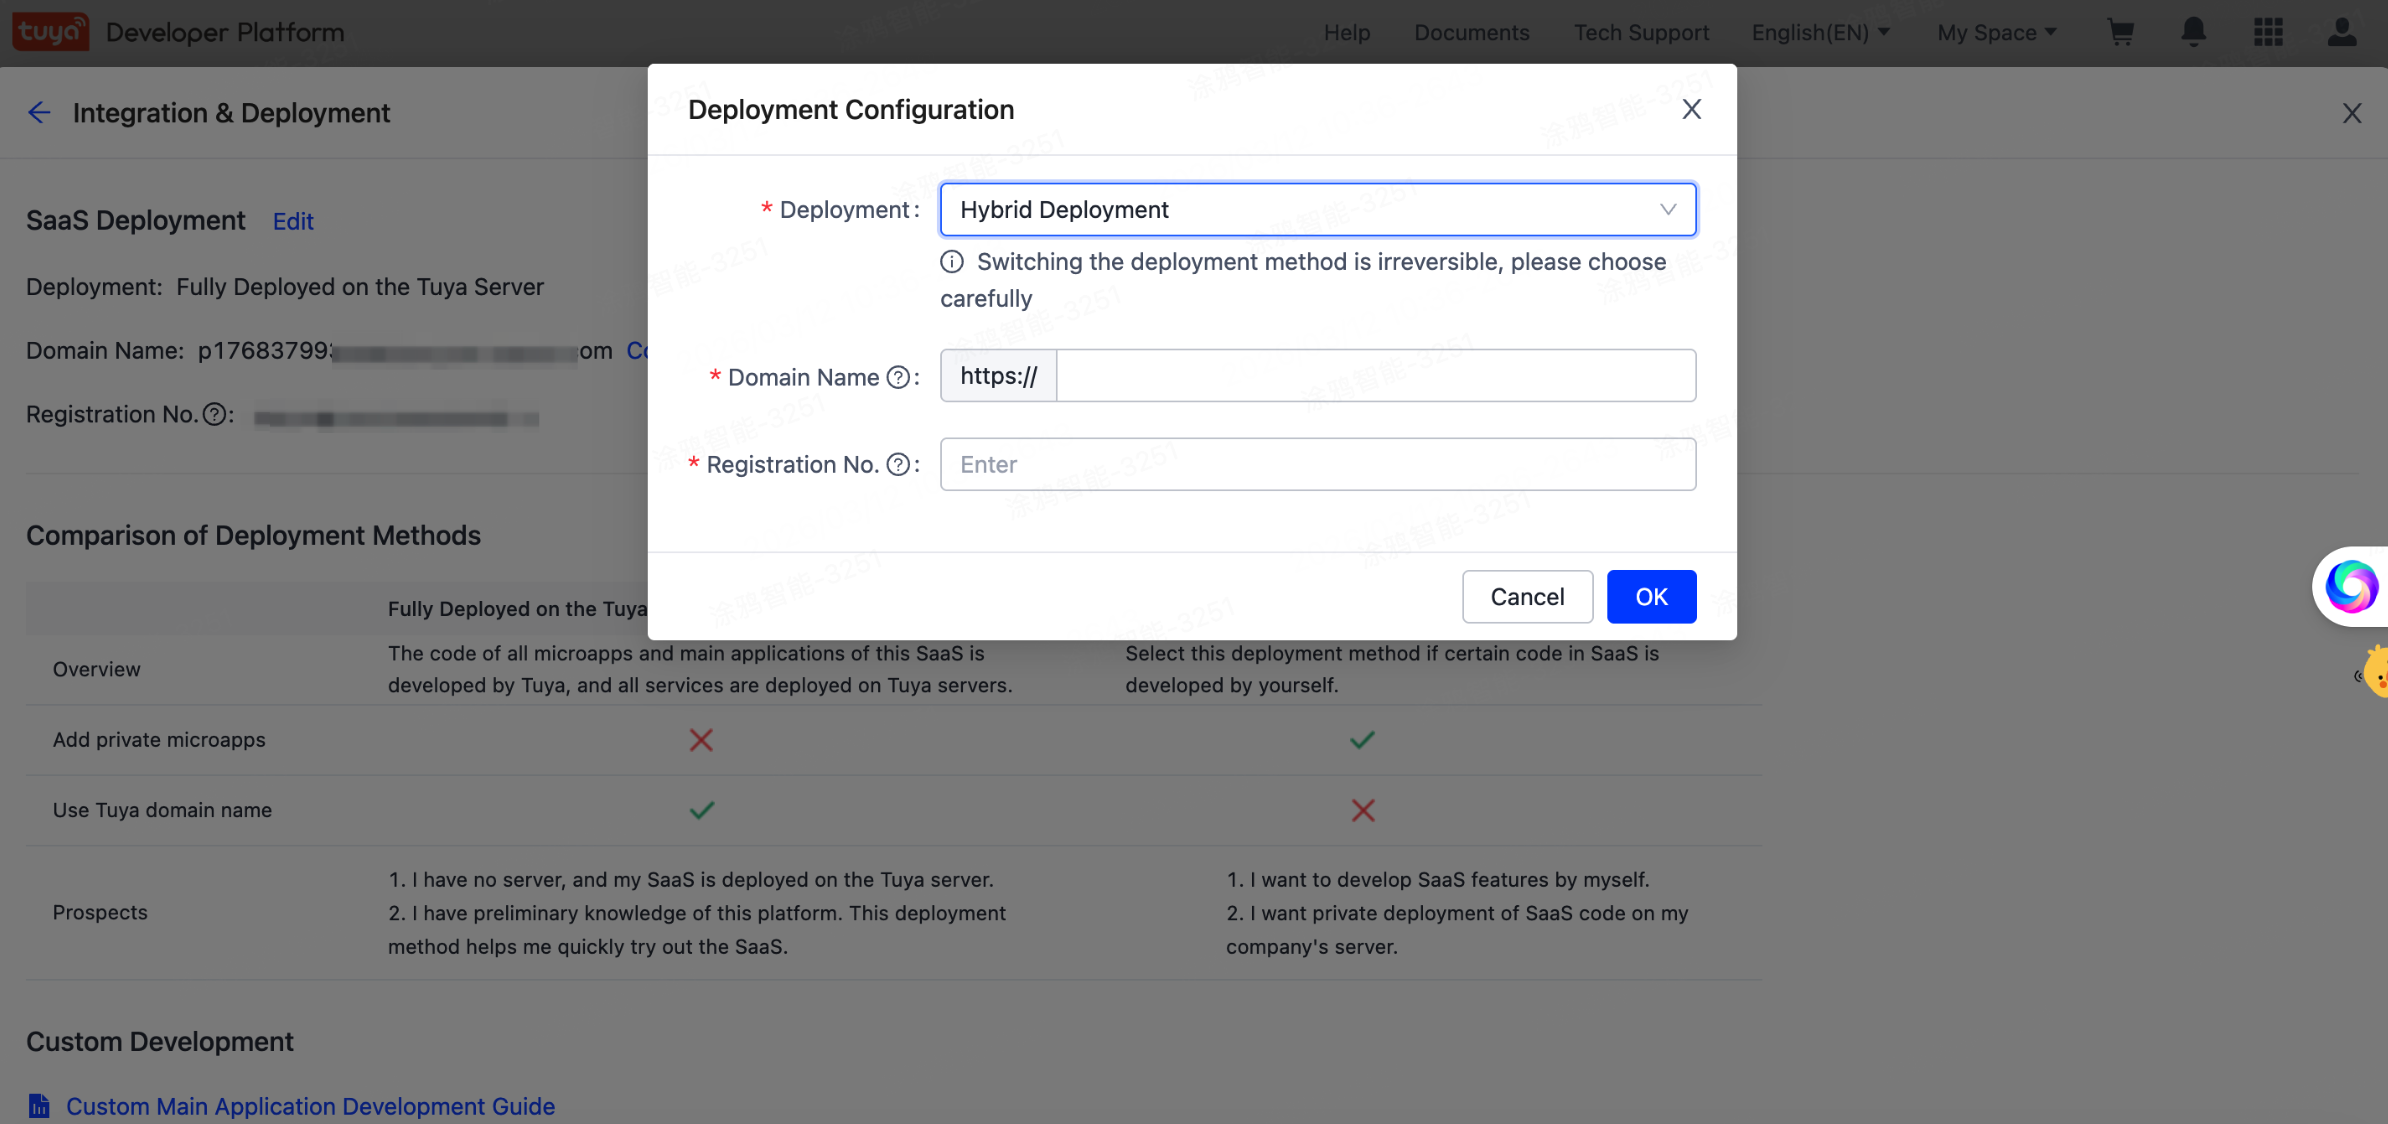
The backend services corresponding to your custom microapps are deployed on your server. Therefore, you need to change the SaaS deployment mode to the hybrid deployment mode and install the runtime environment.
-
Change the deployment mode.
- Go to Solution Setting and select the desired solution.
- In the section of Solution Configuration, choose Integration & Deployment > Configure.
- Click Edit, change the deployment mode to Hybrid Deployment, and then enter the custom domain name.
-
Select the microapps.
-
For a newly published microapp, you need to set a version label to distinguish between versions, so you can easily select the desired microapp.
After the microapp is published in local mode, you can go to Cloud > Spatial AI > Application Management to see the newly published microapp. Click Manage and go to Labels. Click Add Label, enter the label name, and then bind the label with the target version.
-
On the Solution Setting page, in the section of Solution Configuration, choose Application Settings > Configure.
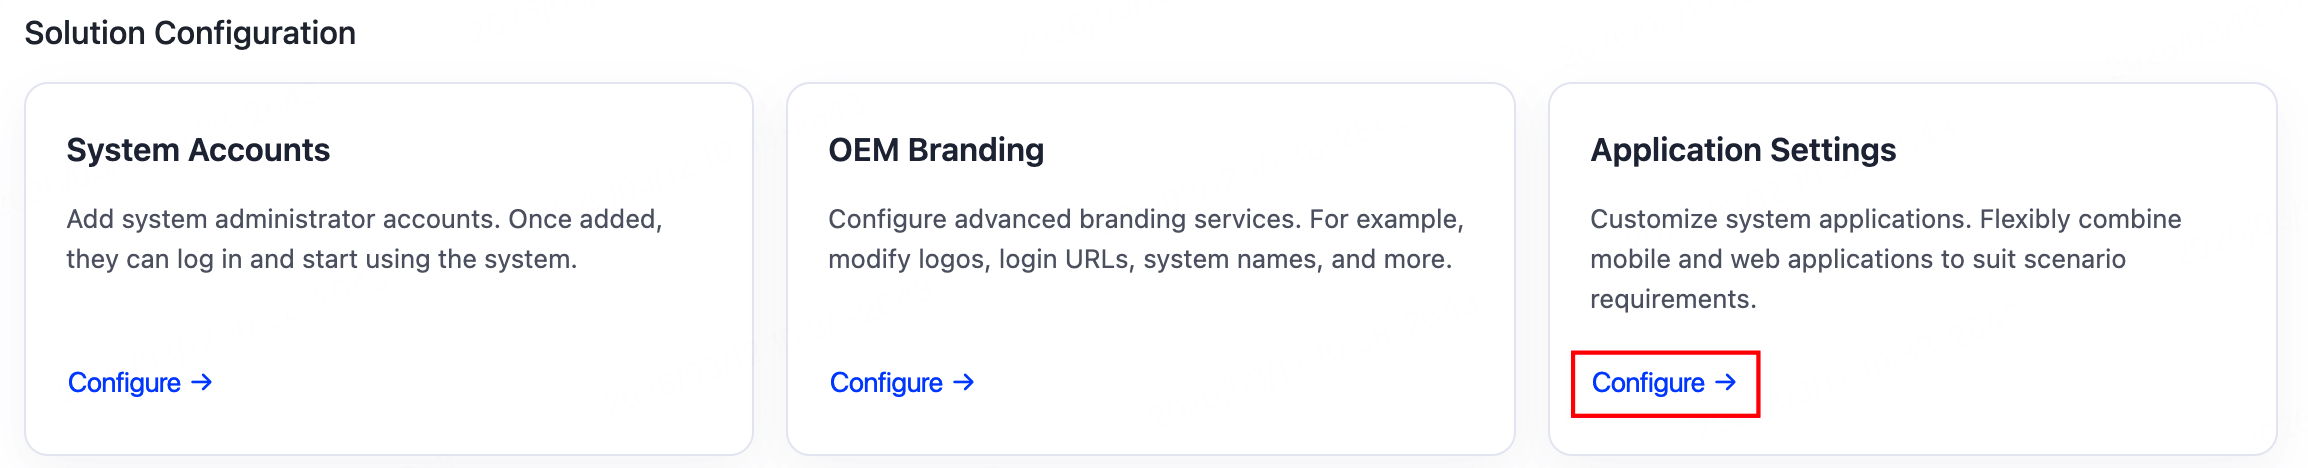
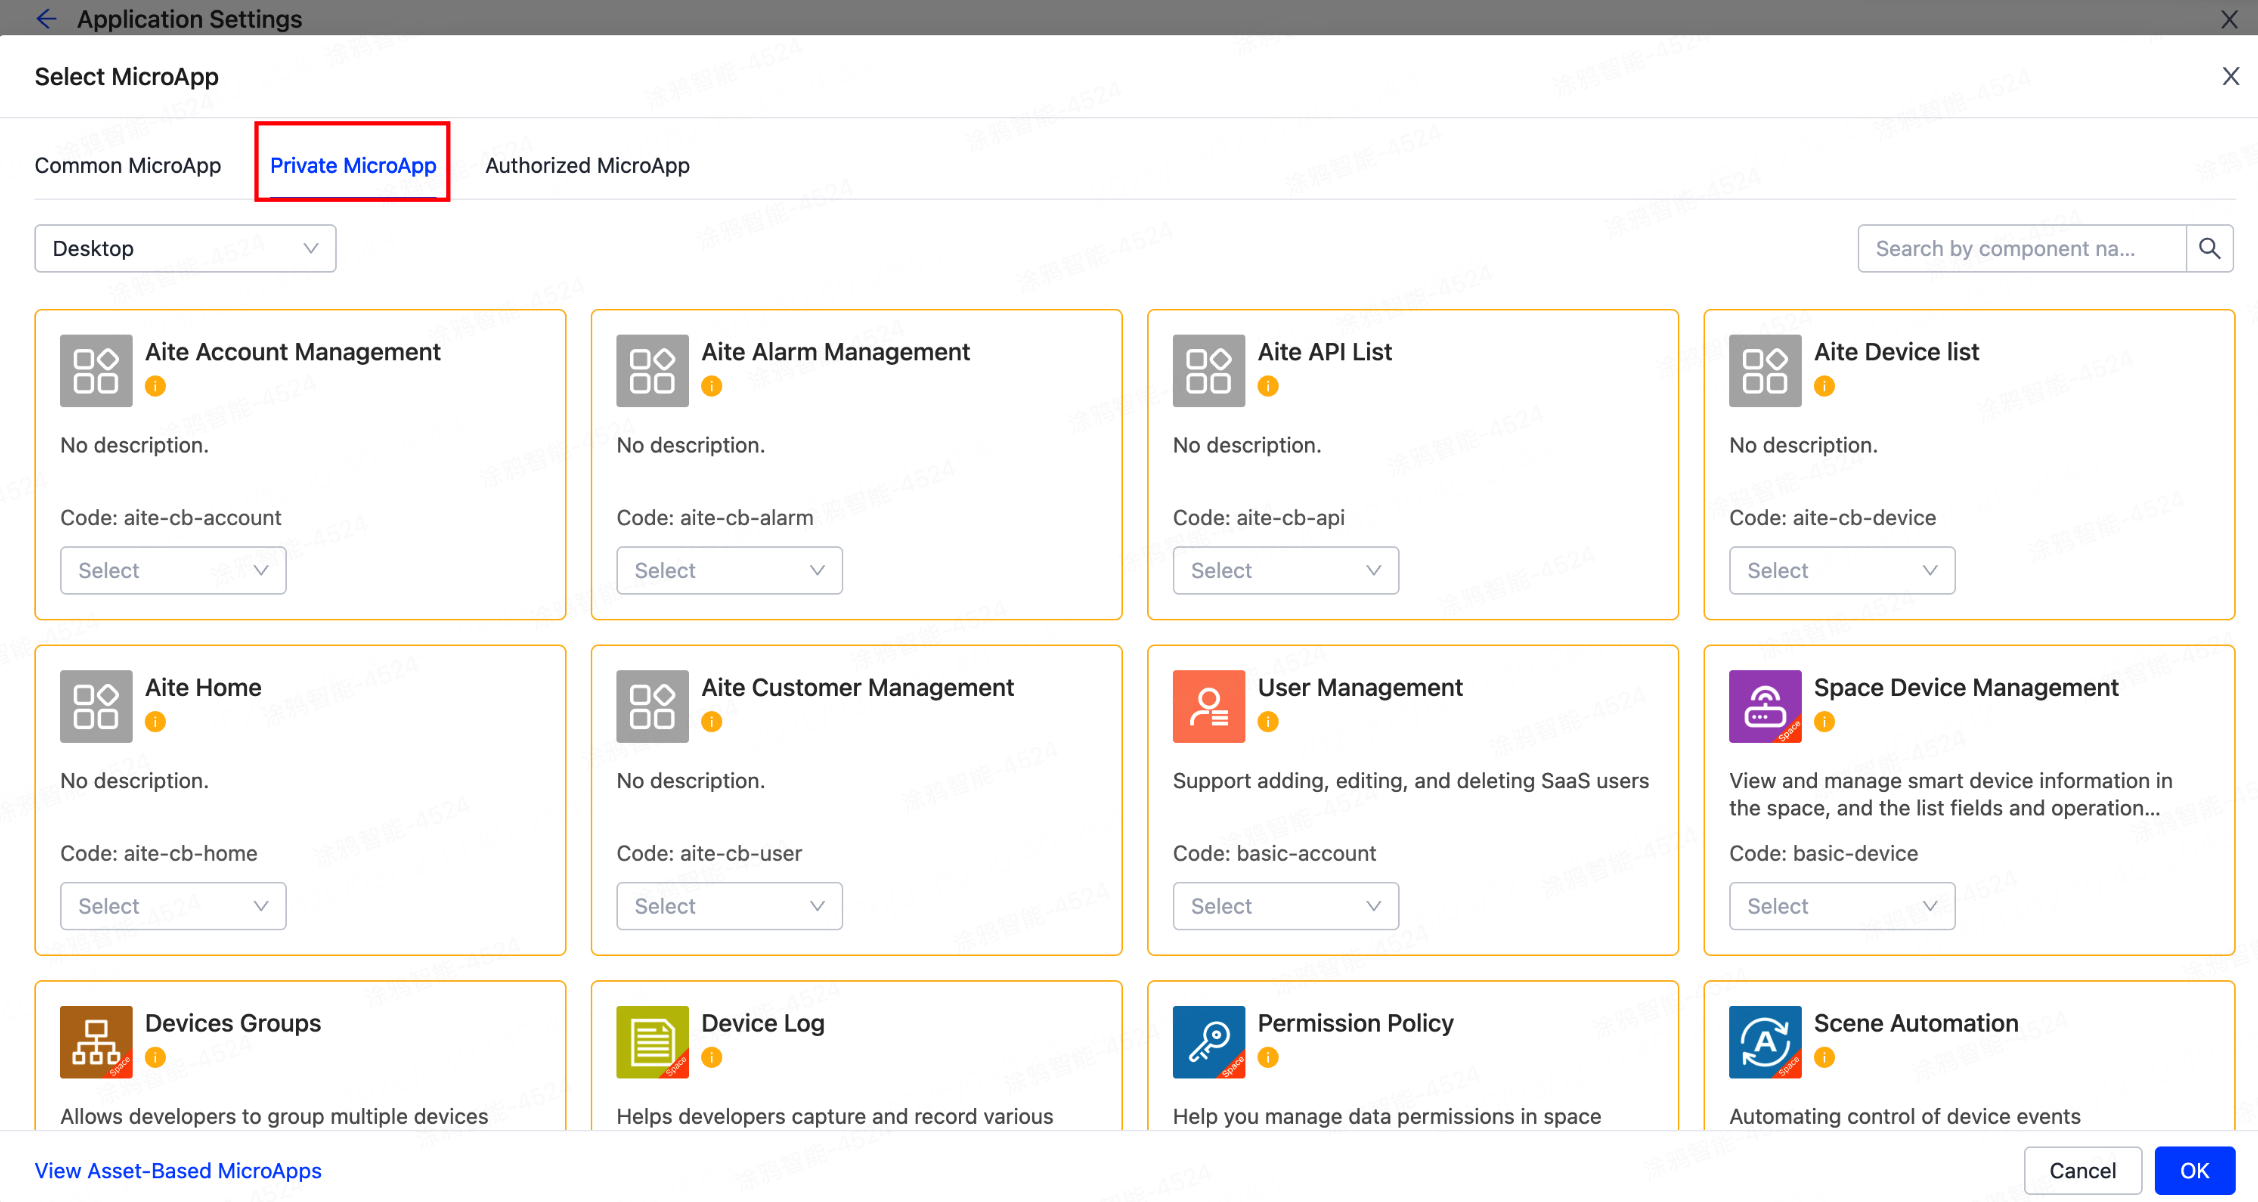
-
On the Application Settings page, click Select MicroApp. On the page that appears, switch to the Private MicroApp tab, select the desired microapps, and then confirm.
-
Run the application in local mode
-
Install the runtime environment.
-
Go to the target directory in local mode.
-
Run the download script and unzip the installation package.
# If you use curl curl -Ljo sdf-deploy-rt.zip https://github.com/tuya-sat/sdf-deploy/archive/refs/tags/rt.zip # If you use wget wget https://github.com/tuya-sat/sdf-deploy/archive/refs/tags/rt.zip -O sdf-deploy-rt.zip -
After download is completed, unzip the installation package.
unzip sdf-deploy-rt.zipAfter the package is unzipped, you can see files with the following directory structure:
# sdf-deploy-rt directory
├── LICENSE
├── README.md
├── docker-compose
│   ├── README.md
│   └── docker-compose.yml
│   └── redis
-
-
Configure the developer
App KeyandSecret Key.-
Go to Spatial AI > Application Management.
-
Click View Development Credentials in the top right corner of the microapp list to get the App Key and Secret Key.
-
Follow the steps below to configure the key and backend service address. The backend service is local, and all local service addresses are set to the local IP address.
The service address cannot be set to
127.0.0.1, because the Docker service cannot access external services through127.0.0.1.cd sdf-deploy-rt/docker-compose/ # Go to the docker-compose directory vi .env # Edit the .env file # developer Configuration information APP_KEY=Developer App Key SECRET_KEY=Developer Secret Key Backend service address CUSTOM_API_URL=http://172.16.120.224:8080
-
-
Run the following command to start the microapp container:
 docker compose up
 # For Docker compose of an early version, run the command docker-compose up

 # When mqtt MQTT client status: connect appears, it is started successfully

 [+] Running 2/0
  ⠿ Container sdf-redis Created    0.0s
  ⠿ Container sdf-fgw    Created    0.0s
 Attaching to sdf-fgw, sdf-redis
 sdf-redis | 1:C 08 Jun 2023 11:54:08.807 # oO0OoO0OoO0Oo Redis is starting oO0OoO0OoO0Oo
 ......
 sdf-fgw | 2023-06-08T11:58:15.500Z INFO microadmin request https://micro-app-admin.tuyacn.com/v1.0/sdf/developer/mqtt/auth
 sdf-fgw | 2023-06-08T11:58:15.518Z INFO mqtt MQTT client status: end
 sdf-fgw | 2023-06-08T11:58:15.627Z INFO mqtt MQTT client config:     {"clientId":"sdf_developer_key_clientid_52 ******** 3","username":"sdf_developer_key_username_523 ******** d","password":"6***5","wsUrl":"wss://mqtt-im.tuyacn.com:443/mqtt"}
 sdf-fgw | 2023-06-08T11:58:15.809Z INFO mqtt MQTT client status: connect
 sdf-fgw | 2023-06-08T11:58:15.909Z INFO mqtt MQTT client status: connect
 ......
Access the application
Your runtime environment is built locally, so you need to modify the hosts configuration and map the custom domain name of your web application to the local server. Then, verify your access to the web application with the domain name and the default port 80.
-
Modify the
hostsconfiguration:sudo vi /etc/hosts # 127.0.0.1 demo002.myhost.com # After the configuration is modified, you can ping demo002.myhost.com to verify the effect. -
Through the custom domain name and port, access the application at
http://demo002.myhost.com.Without a local certificate, you can access the application over HTTP only, instead of HTTPS.
Congratulations! You have tried out the complete procedure of solution build, microapp development, integration, and deployment.
Is this page helpful?
YesFeedbackIs this page helpful?
YesFeedback


