Quick Start
This document describes how to compile and run the Demo for the laser robot vacuum cleaner category, and how to verify its basic functionality. The process for other categories — such as wire-free robotic lawn mowers, pool cleaning robots, and pet robots — follows the same general steps and will not be covered separately in this document.
Prerequisites
In Tuya Wind IDE, you have requested access to the type development kit based on X86_64 development platform for the TuyaOS SDK development mode. For more information, see Get Development Kit.
Directory
The following table shows the directory of software/TuyaOS:
| Name | Description |
|---|---|
| apps | The application code. |
| build | The build configuration files (leave it as is). |
| include | The header files. |
| libs | The libraries. |
| Makefile | The Makefile. |
| output | The output directory. |
| scripts | The build framework (leave it as is). |
| vendor | The development environment. It is downloaded to the local computer when you execute the build command. |
| build_app.sh | The build script. |
Modify application
-
Populate the PID, UUID, and KEY with the value for the laser robot vacuum product you created on the Tuya Developer Platform.
The UUID you fill in must be unique and cannot be reused for other devices.
/************pid uuid authkey for testing only.************/ CHAR_T s_ty_pid[64]= "PID value"; // Set the PID of the device. CHAR_T s_ty_uuid[64]="UUID value";// Set the UUID as specified in the authorization. The unique UUID is bound with the specified device. CHAR_T s_ty_authkey[64]="KEY value";// Set the Authkey as specified in the authorization. The Authkey corresponds to the UUID. /************pid uuid authkey for testing only.************/ -
Create a storage path in non-volatile memory to save parameters of device pairing and activation. The implementation is as follows:
#define TY_APP_STORAGE_PATH "/tmp/" //Virtual storage path used for testing.
#define TY_SDK_ONLINE_LOG_PATH "/tmp/" //Virtual storage path used for testing.
/* Prepare the read and write storage path of the file system. For real devices, you need to fill in the path assigned locally by the device. */
TY_INIT_PARAMS_S init_param = {0};
init_param.init_db = TRUE;
strcpy(init_param.sys_env, TARGET_PLATFORM);
strcpy(init_param.log_seq_path, TY_SDK_ONLINE_LOG_PATH);  // Storage path for online logs.
TUYA_CALL_ERR_LOG(tuya_iot_init_params(TY_APP_STORAGE_PATH, &init_param));// Storage path for DATA_BASE files.
Build project
Option 1: Graphical user interface
-
In Tuya Wind IDE, right-click the demo directory under
software/TuyaOS/apps/and choose Build Project.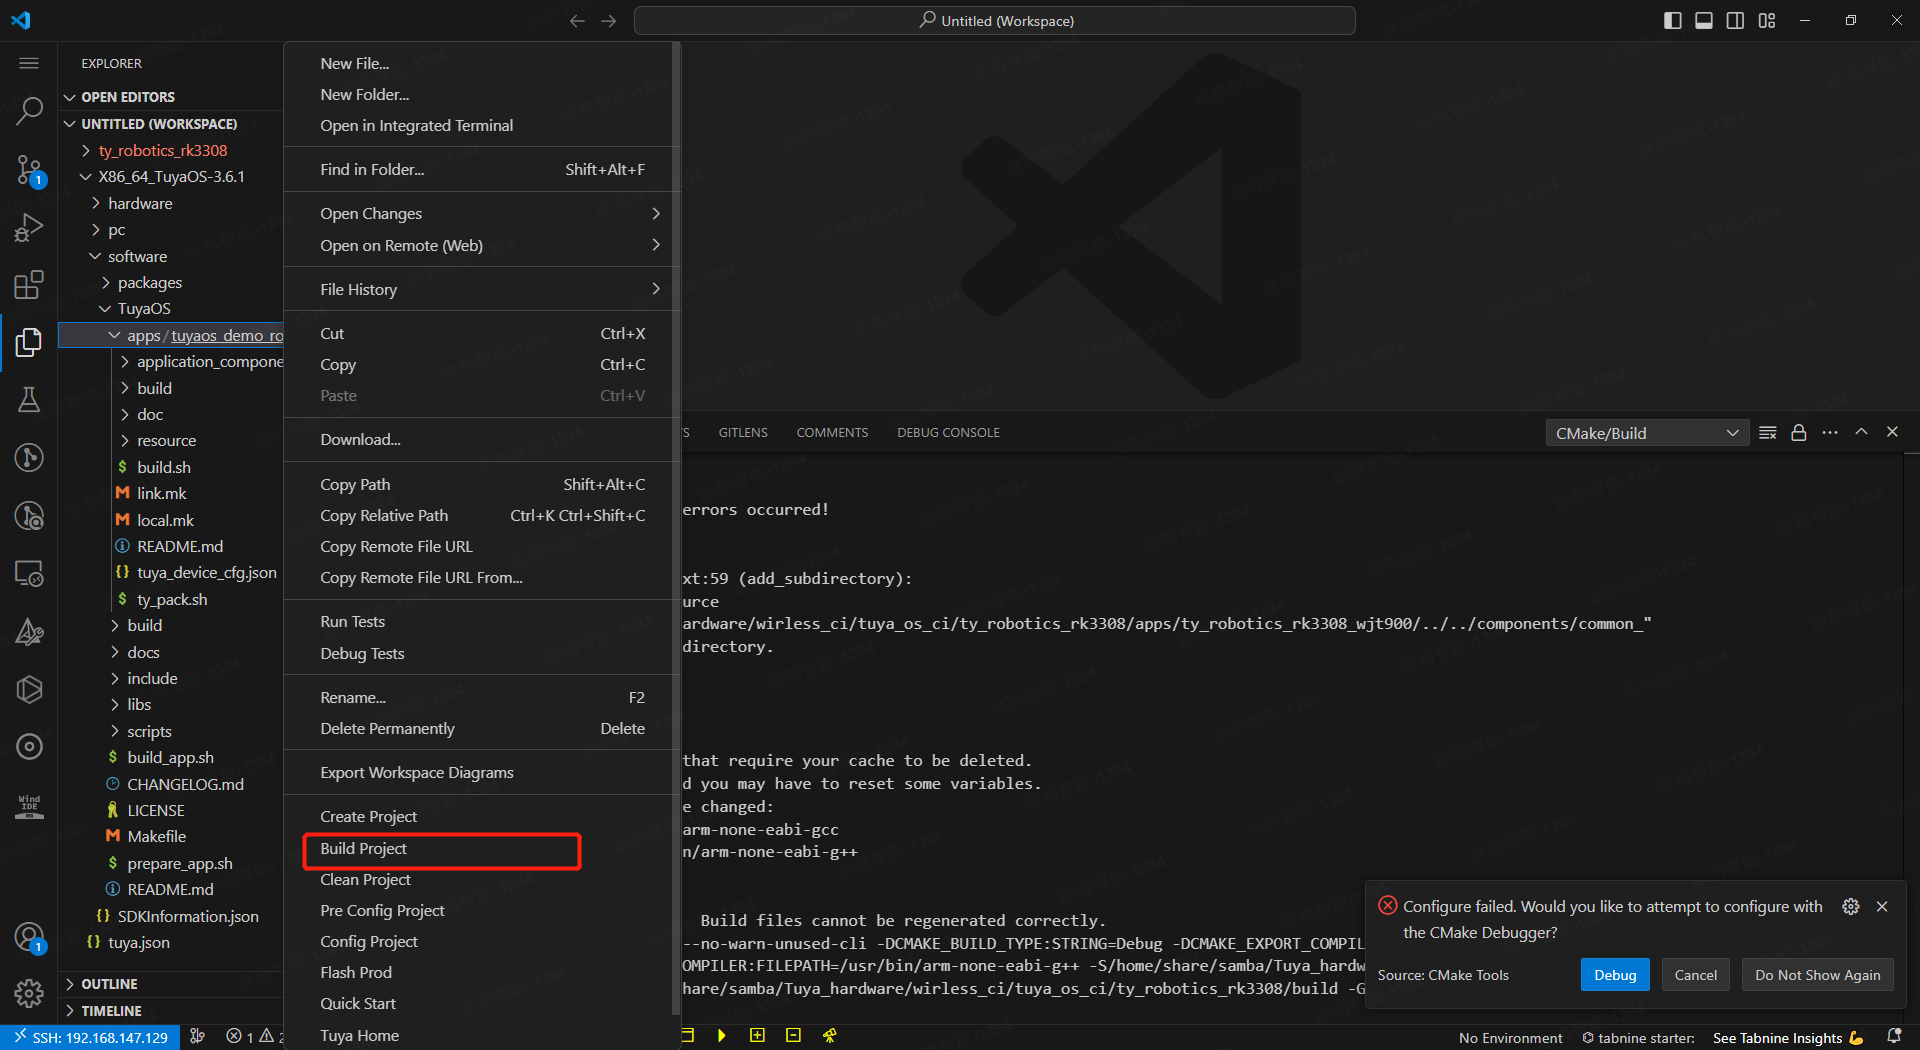
-
Enter the version number (in the format of
X.X.X, whereXis any number) and press Enter to start compiling.
Option 2: Shell script
Navigate to software/TuyaOS/ and run the following command:
./build_app.sh $1 $2 $3 $4
Among which:
$1: the path of the application project, for example,apps/tuyaos_demo_robot/.$2: the name of the generated application, for example,tuyaos_demo_robot.$3: the version number, in the formatXX.XX.XX, for example,1.0.0.$4: user command (optional), for example,clean.
Option 3: Makefile
On the command line, navigate to software/TuyaOS/, run make, and specify the application to compile.
Run program
Recommended start command:
./output/x86_64_tuyaos_demo_rvc/firmware/tuyaos_demo_robot -m 0 -t AYGFnn3je2Fi7I -r ./apps/tuyaos_demo_rvc
-
m: the mode. Select AP pairing to run the demo, and the corresponding value is0./* Tuya SDK definition of Wi-Fi start mode */ typedef BYTE_T GW_WF_START_MODE; #define WF_START_AP_ONLY 0 // only have ap-cfg mode #define WF_START_SMART_ONLY 1 // only have smart-cfg mode #define WF_START_AP_FIRST 2 // have both ap-cfg and smart-cfg. default is ap-cfg mode #define WF_START_SMART_FIRST 3 // have both ap-cfg and smart-cfg. default is smart-cfg mode #define WF_START_SMART_AP_CONCURRENT 4 // ap-cfg and smart-cfg is concurrent -
t: the specified token.-
On the homepage of the app, tap + > Add Device in the top right corner.
-
Choose Small Home Appliances > Clean > Robot Vacuum (IPC), and enter the Wi-Fi network name and password, which must be consistent with the Wi-Fi network of the environment where the demo is running.
-
Tap Next, and a pairing QR code will appear. Use a QR code reader to scan and parse the code to get data like this:
{"s":"N234","p":"12345678","t":"AYAq3v9OLa4FN9"}trefers to the specified token.- The token is valid for 10 minutes and expires immediately after the device is paired. When pairing again, you need to get a token again.
- The token you fill in is only for demo testing. During actual product development, you do not need to pass in the token value.
-
-
r: the directory of source files.The directory stores data such as maps and paths that need to be reported. It has been implemented in the demo, and no modification is needed.
Verify functionalities
This section verifies the basic functionalities of the demo. Before that, you need to pay attention to the following functions. These functions are registered in the TuyaOS SDK to receive status or data.
| Function | Description |
|---|---|
| ty_sdk_net_status_change_cb | The callback invoked when Wi-Fi connection status is changed. |
| tuya_sweeper_event_cb | The callback invoked when the real-time map and route transmission status is changed. |
| ty_cmd_handle_dp_cmd_objs | Object type DP interactions. |
| ty_cmd_handle_dp_raw_objs | Raw type DP interactions. |
| ty_user_upgrade_inform_cb | The callback invoked when the OTA update is in progress. |
| ty_dev_upgrade_pre_check_cb | The callback invoked when precheck is implemented before the OTA update. |
| ty_sdk_app_reset_cb | The callback invoked when the device is removed from the mobile app. |
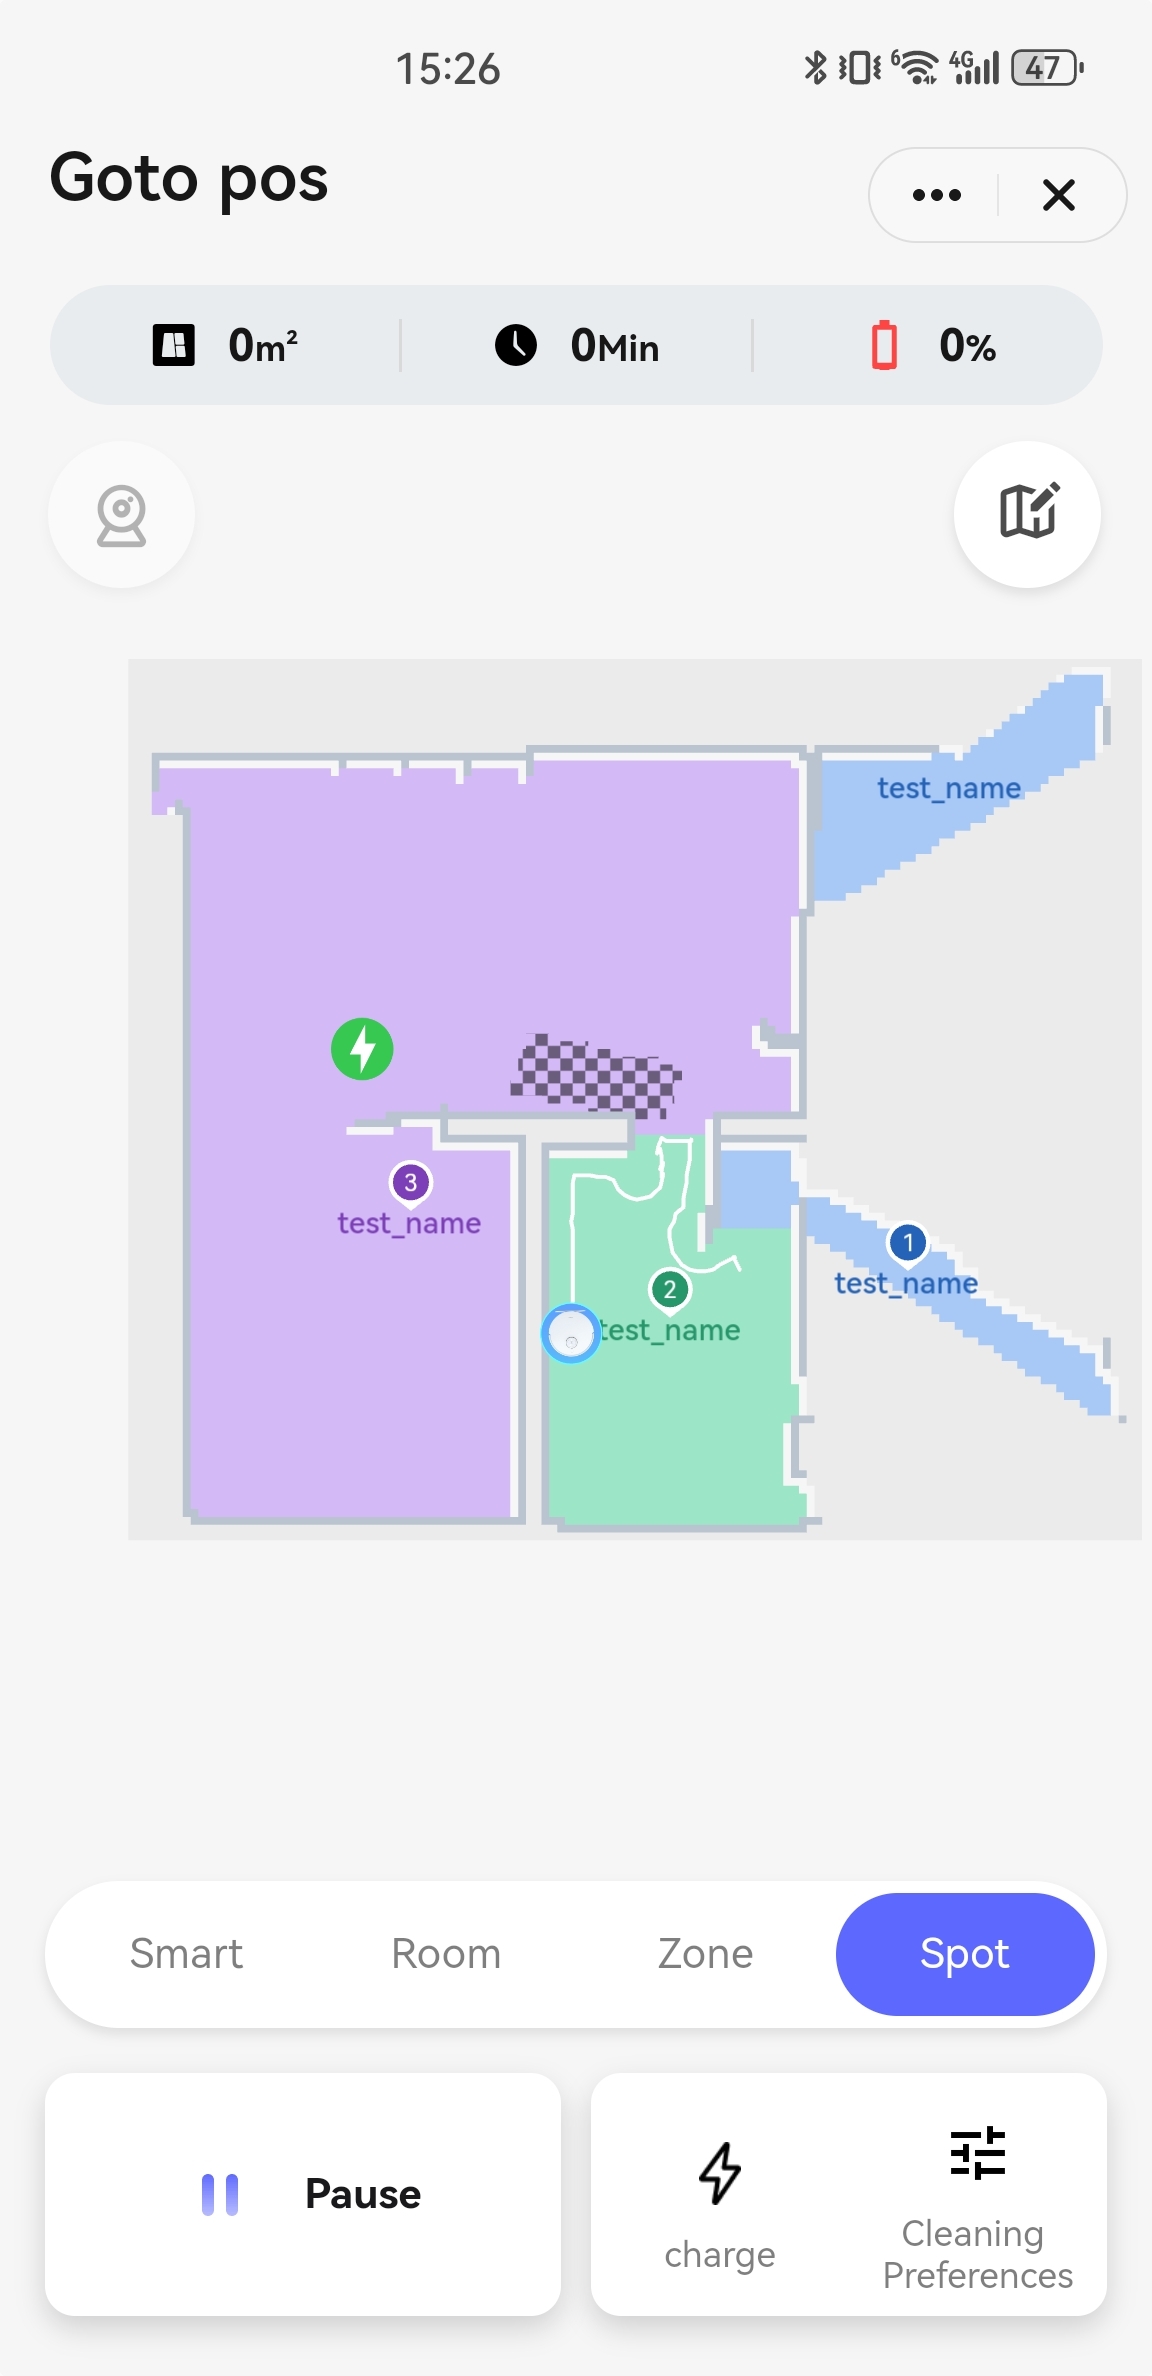
-
After the device is successfully paired and connected to the cloud, the icon will be displayed on the mobile app.
You can determine whether the device is connected to the cloud based on the status of the
ty_sdk_net_status_change_cbcallback. The log is printed as follows:
-
After you open the panel, real-time map and route transmission begins.
Real-time map and route data reporting requires obtaining download events within the
tuya_sweeper_event_cbcallback and performing asynchronous reporting. The log for real-time map and route reporting is as follows: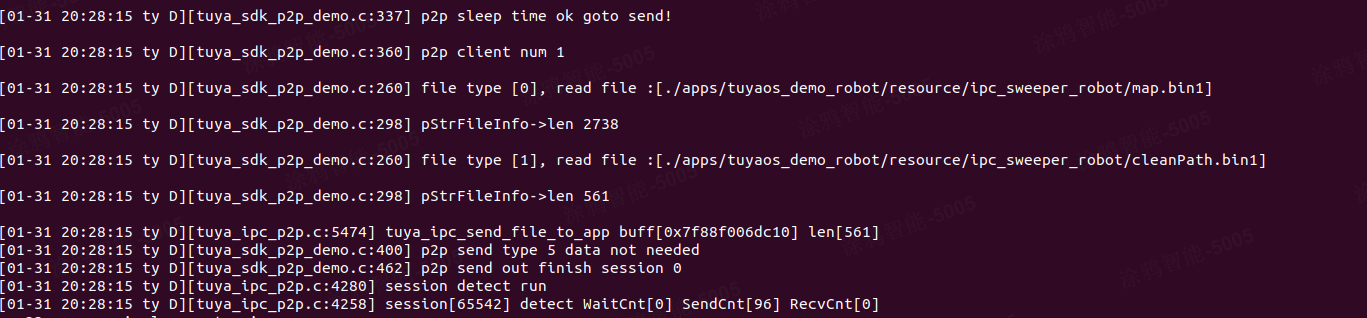
-
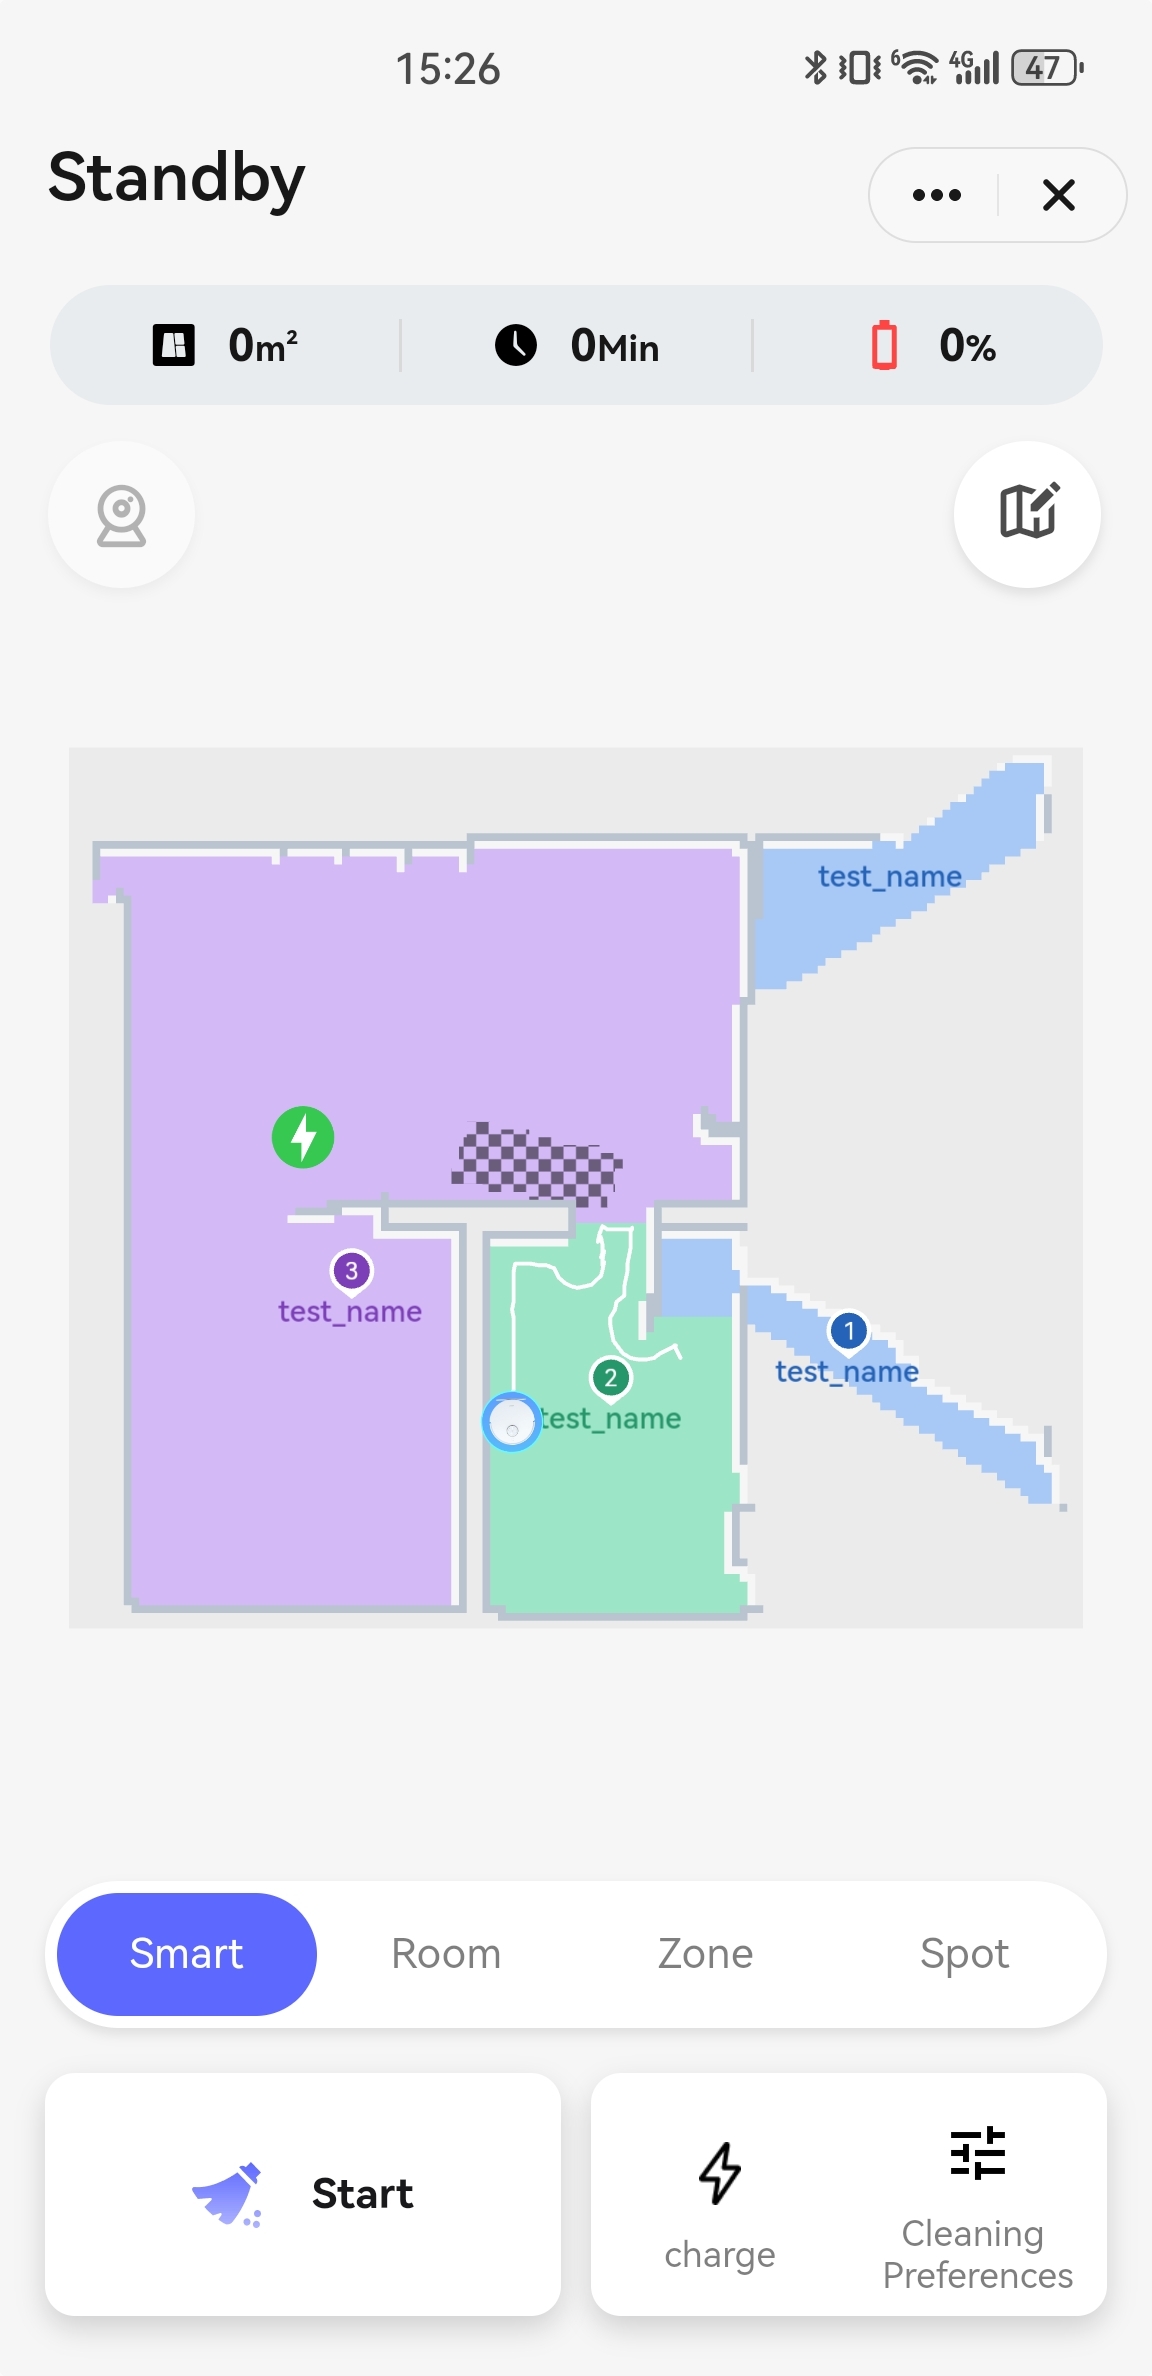
Verify interactions with object type DPs and tap the Start Cleaning button on the mobile app.
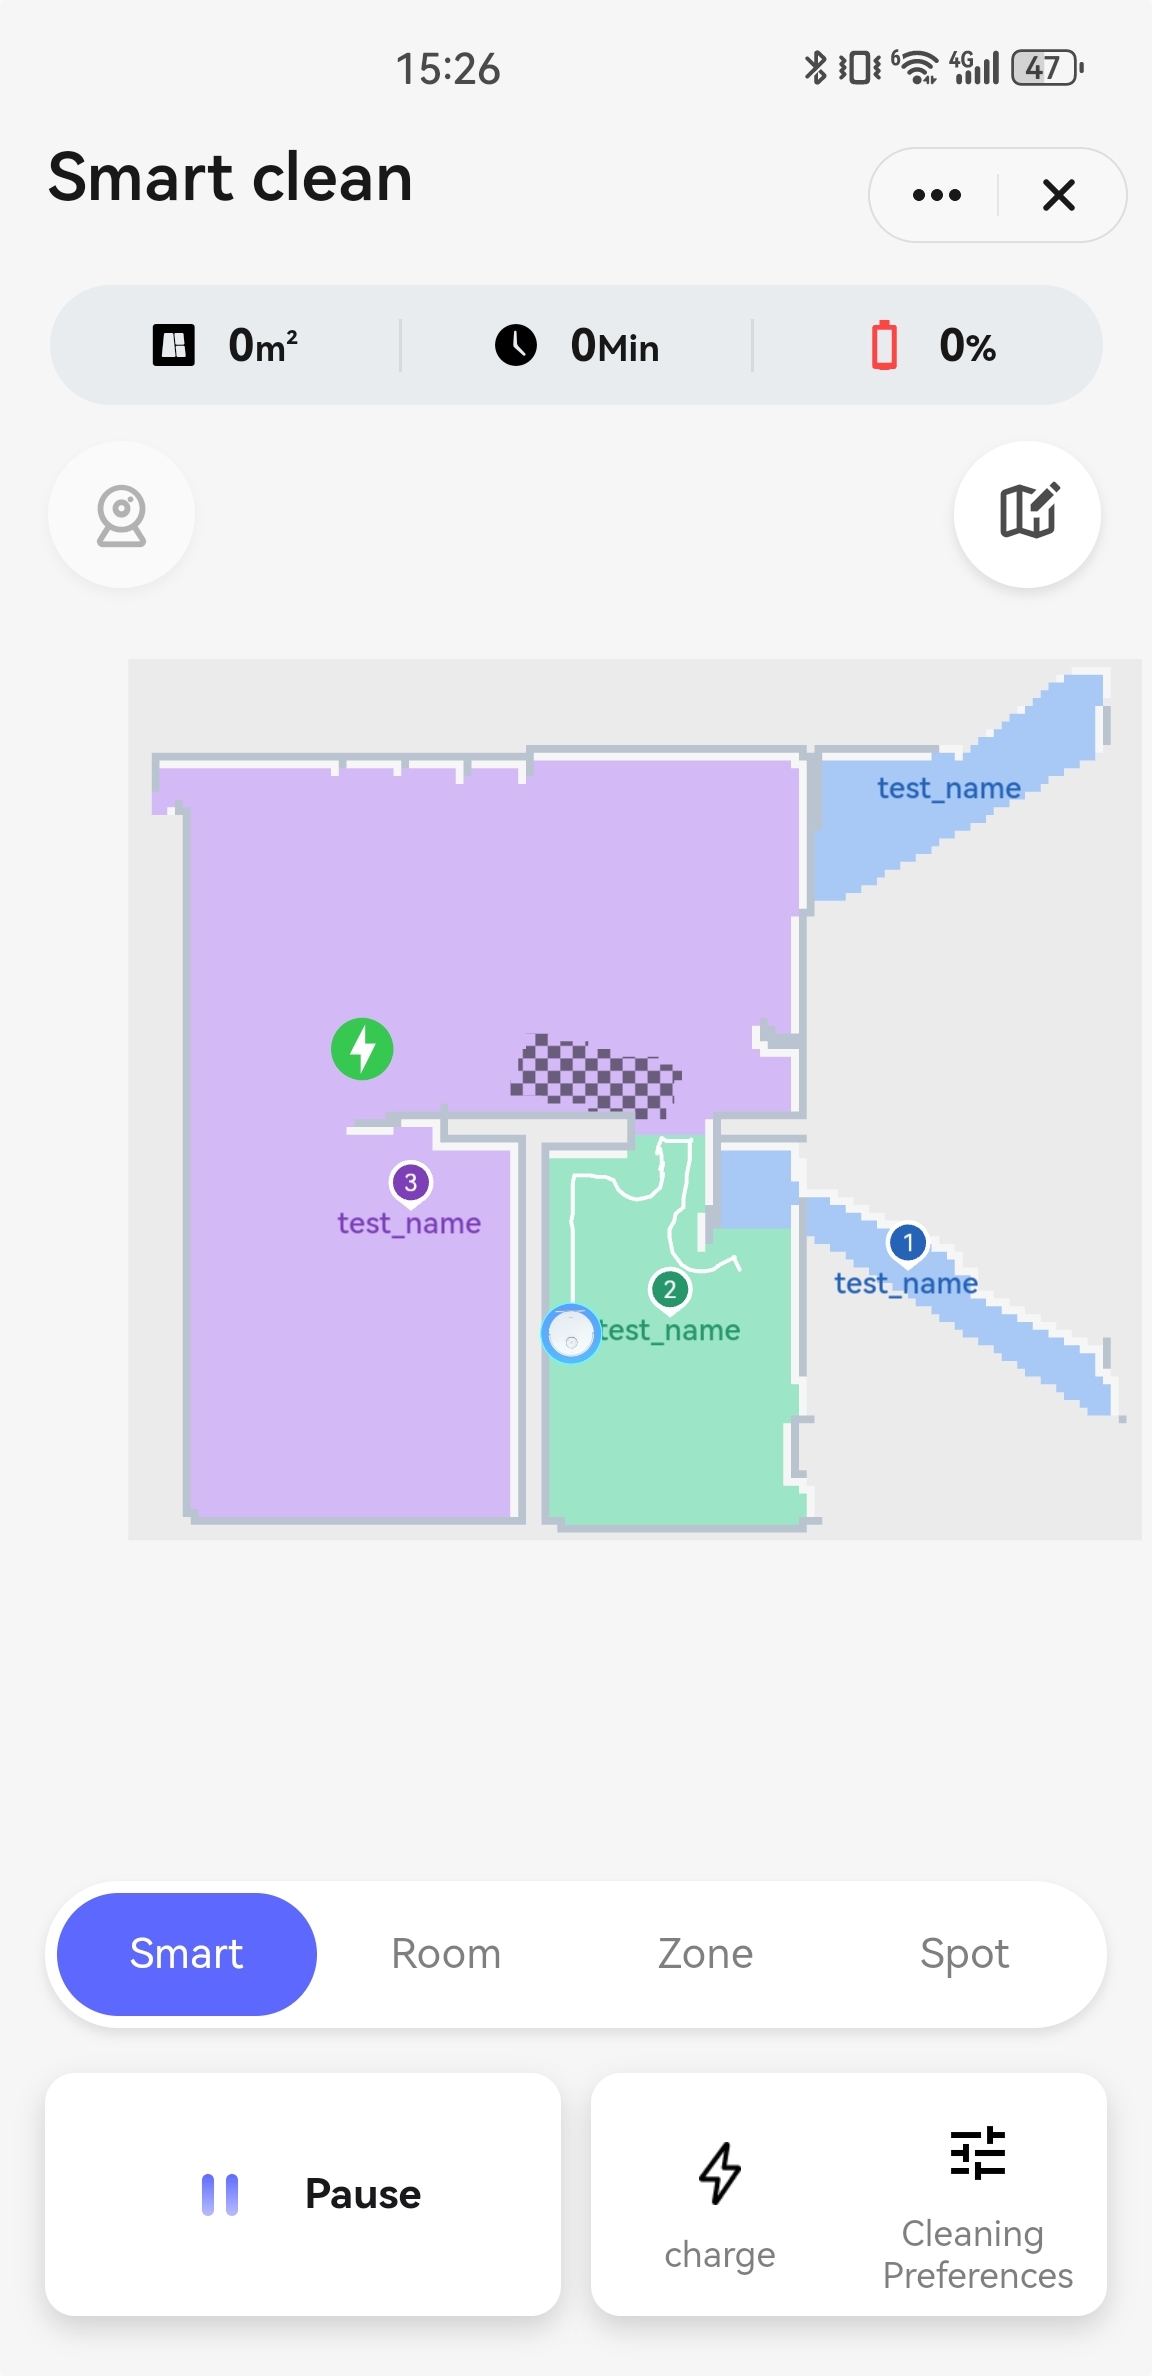
Object type DPs use the
ty_cmd_handle_dp_cmd_objscallback to exchange data. The DPs sent by the mobile app need to get a correct reply from the device before the mobile app can display them accordingly. The log is printed as follows: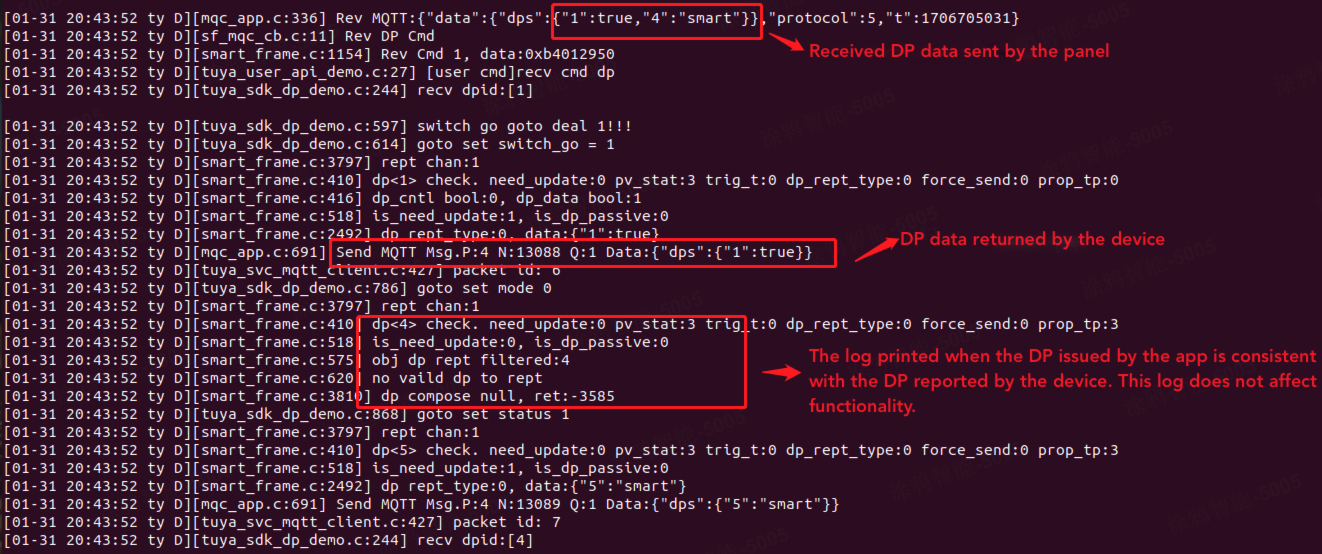
-
Verify raw type DP interactions and tap the Point and Go button on the mobile app.
Raw type DPs use the
ty_cmd_handle_dp_raw_objscallback to exchange data. The log is printed as follows: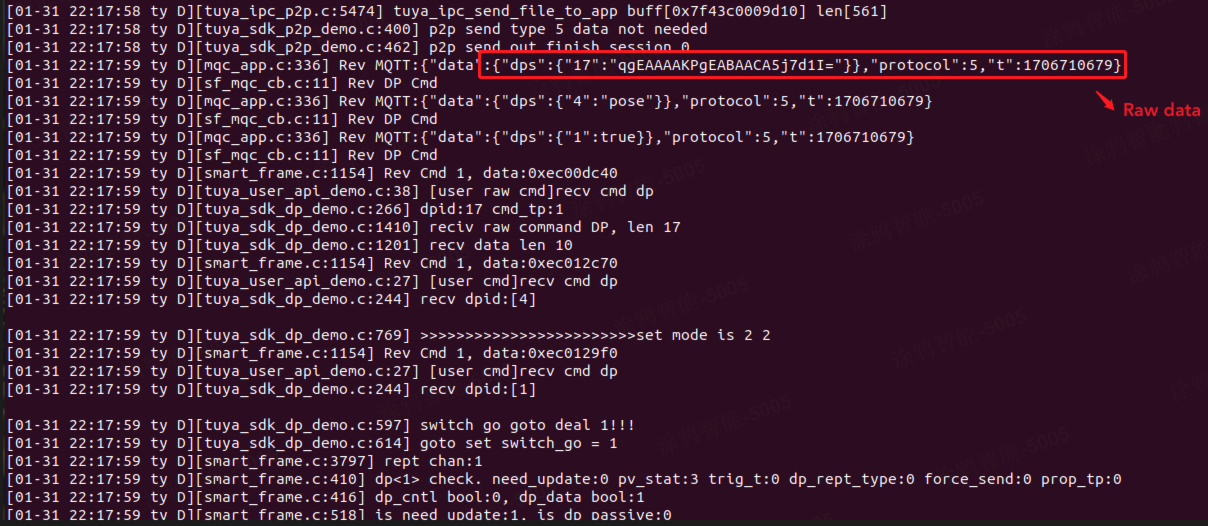
-
Perform device OTA update. Refer to Manage Firmware and fill in the firmware information. Afterwards, the mobile app will prompt you for available firmware updates.
During the OTA update process, the
ty_user_upgrade_inform_cbcallback is used to receive data. The log is printed as follows: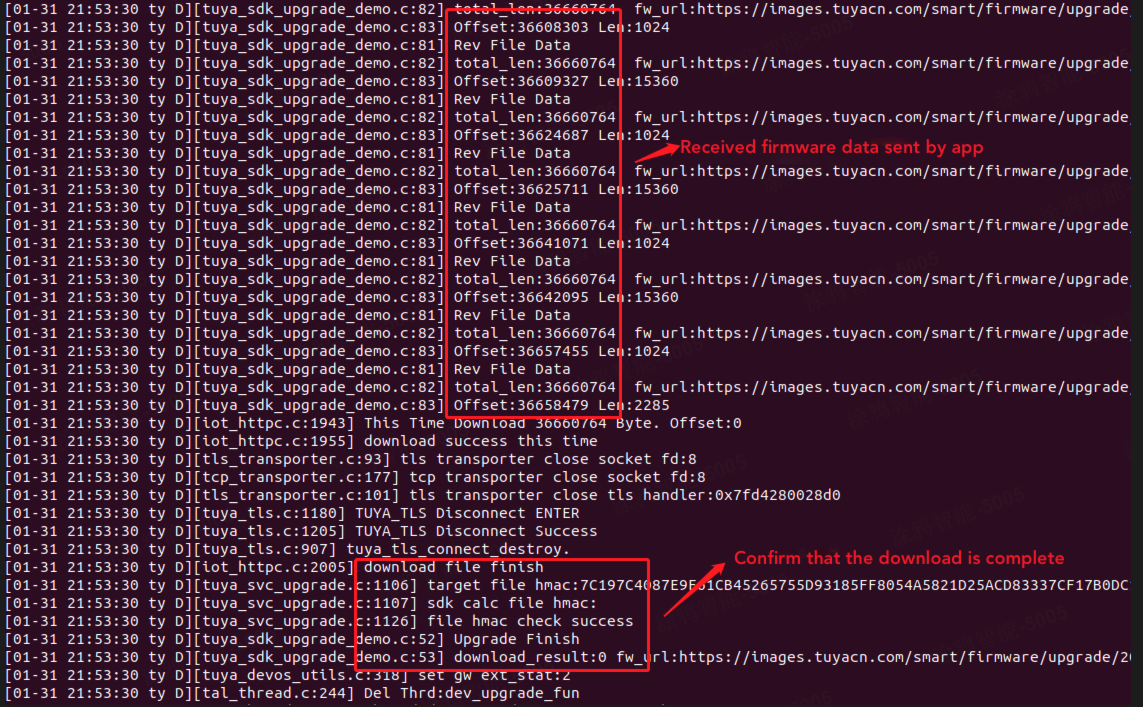
-
You can tap and hold the robot vacuum icon on the mobile app to remove the device.
The
ty_sdk_app_reset_cbAPI is called to remove a device. After the device is successfully removed, the log is printed as follows: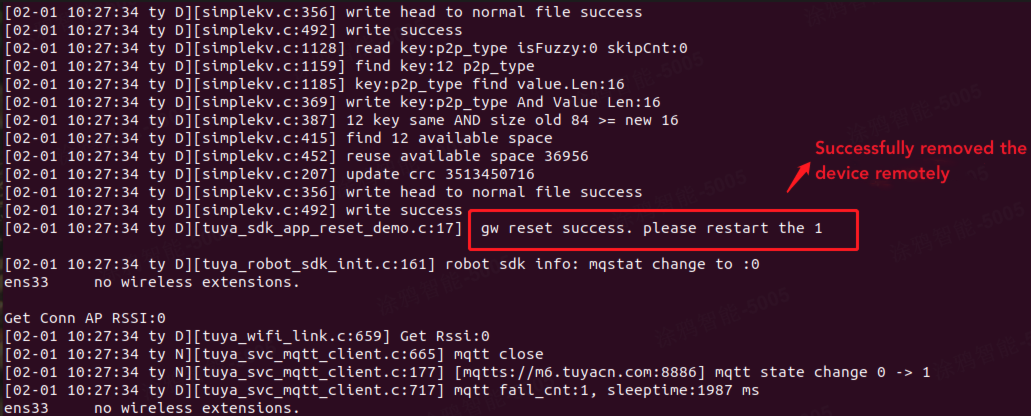
-
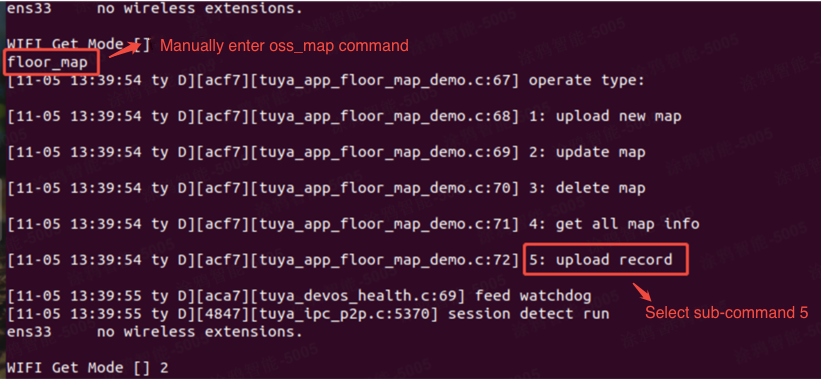
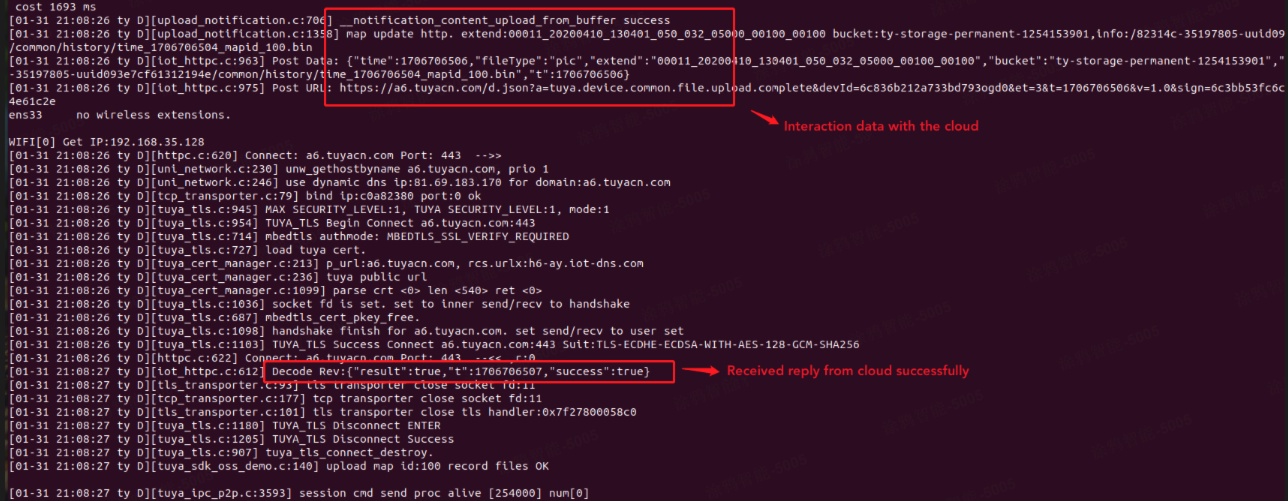
To report historical data, enter the
oss_mapcommand in the terminal where the program is running, and select the5subcommand to report cleaning history.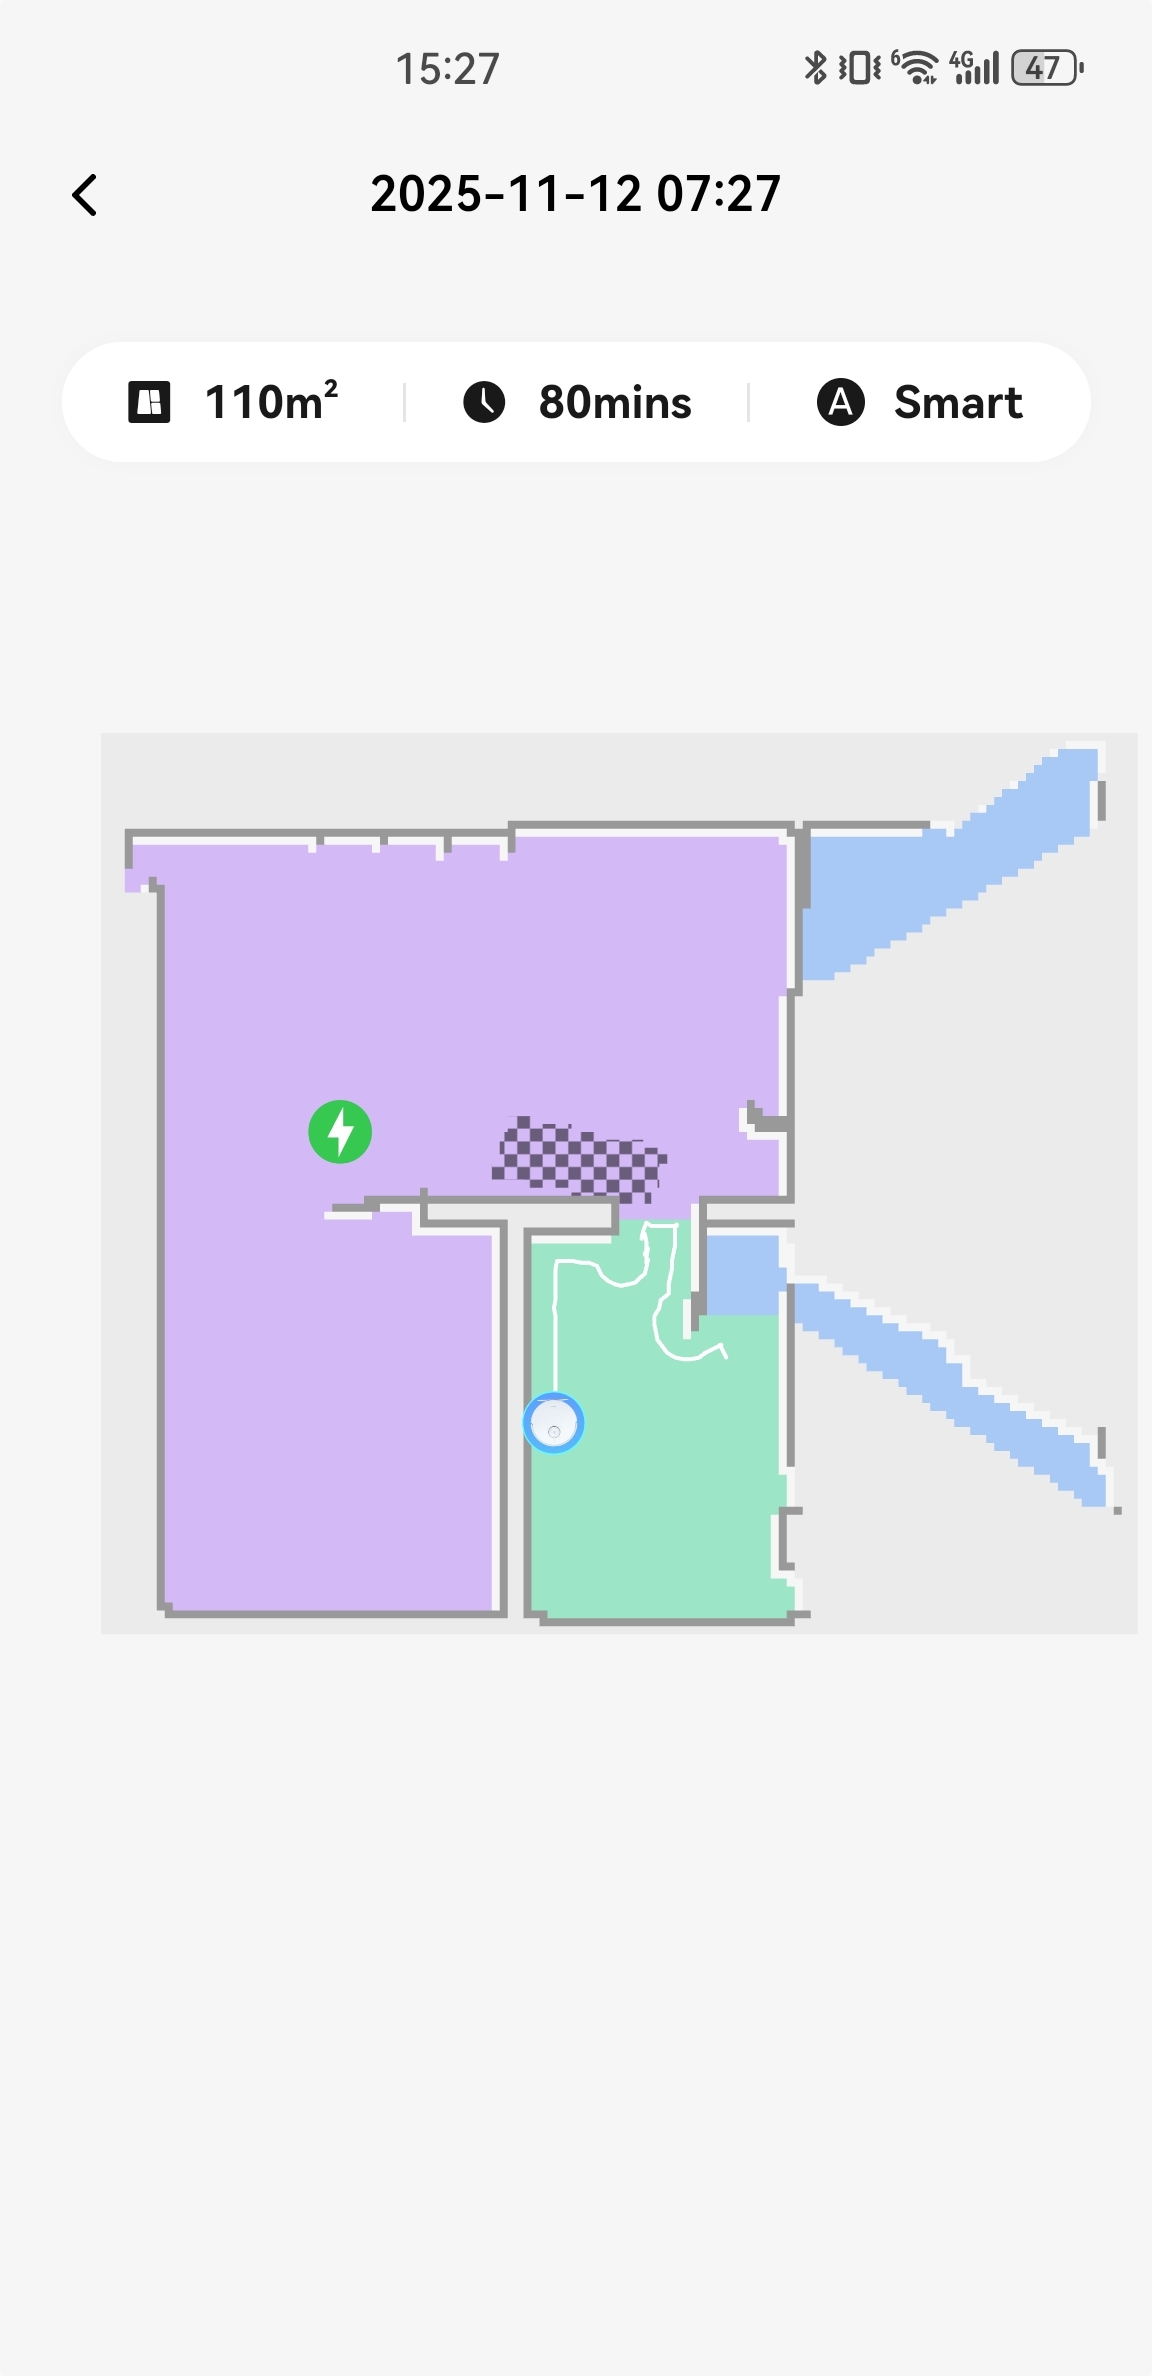
To report other relevant historical data, refer to the comments of the demo for verification. The cleaning history log is printed as follows:
-
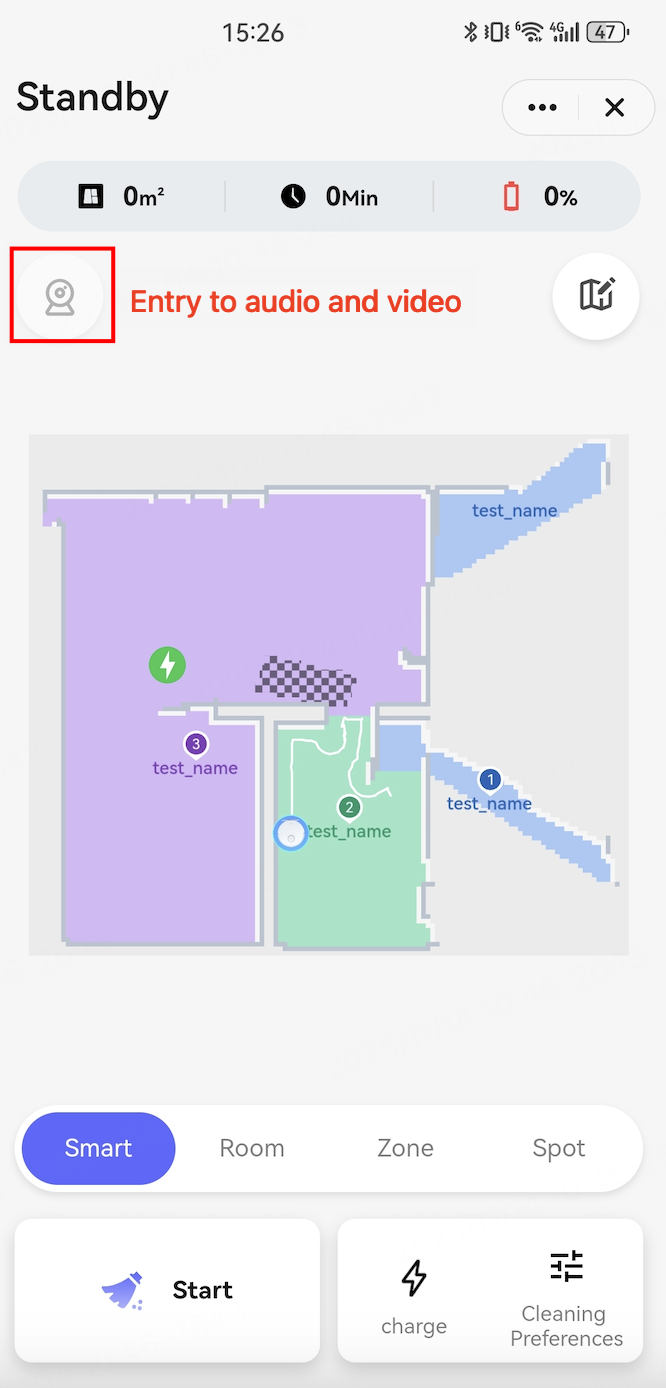
To test the audio and video feature, your product ID (PID) must have audio and video capabilities enabled. Refer to Audio and Video Capabilities to enable this feature. After the device comes online, you can access the panel and tap the video entry to preview the video.
-
For other features, refer to the comments in the demo and verify them accordingly.
Is this page helpful?
YesFeedbackIs this page helpful?
YesFeedback


