Configure All-in-one Panels
All-in-one panels support the configurations of products that are developed with systems on chips (SoCs) no-code solutions and microcontroller units (MCUs) low-code solutions. This topic describes how to configure the SoC-based and MCU-based products by using all-in-one panels on the Tuya Developer Platform.
Note: The final panel configuration effect is subject to the final display effect of the configured device.
Configure the panel for an SoC-based product
Common SoC-based products are electrical and lighting products. This section uses a Wi-Fi four-way power strip as an example to describe how to configure the panel of an SoC product.
Note: If you choose a no-code development solution to develop the product, you can only modify the appearance and text of the panel. Data points (DPs) of the product cannot be modified.
Function requirements
A four-way power strip includes two Chinese GB standard sockets and two USB sockets.
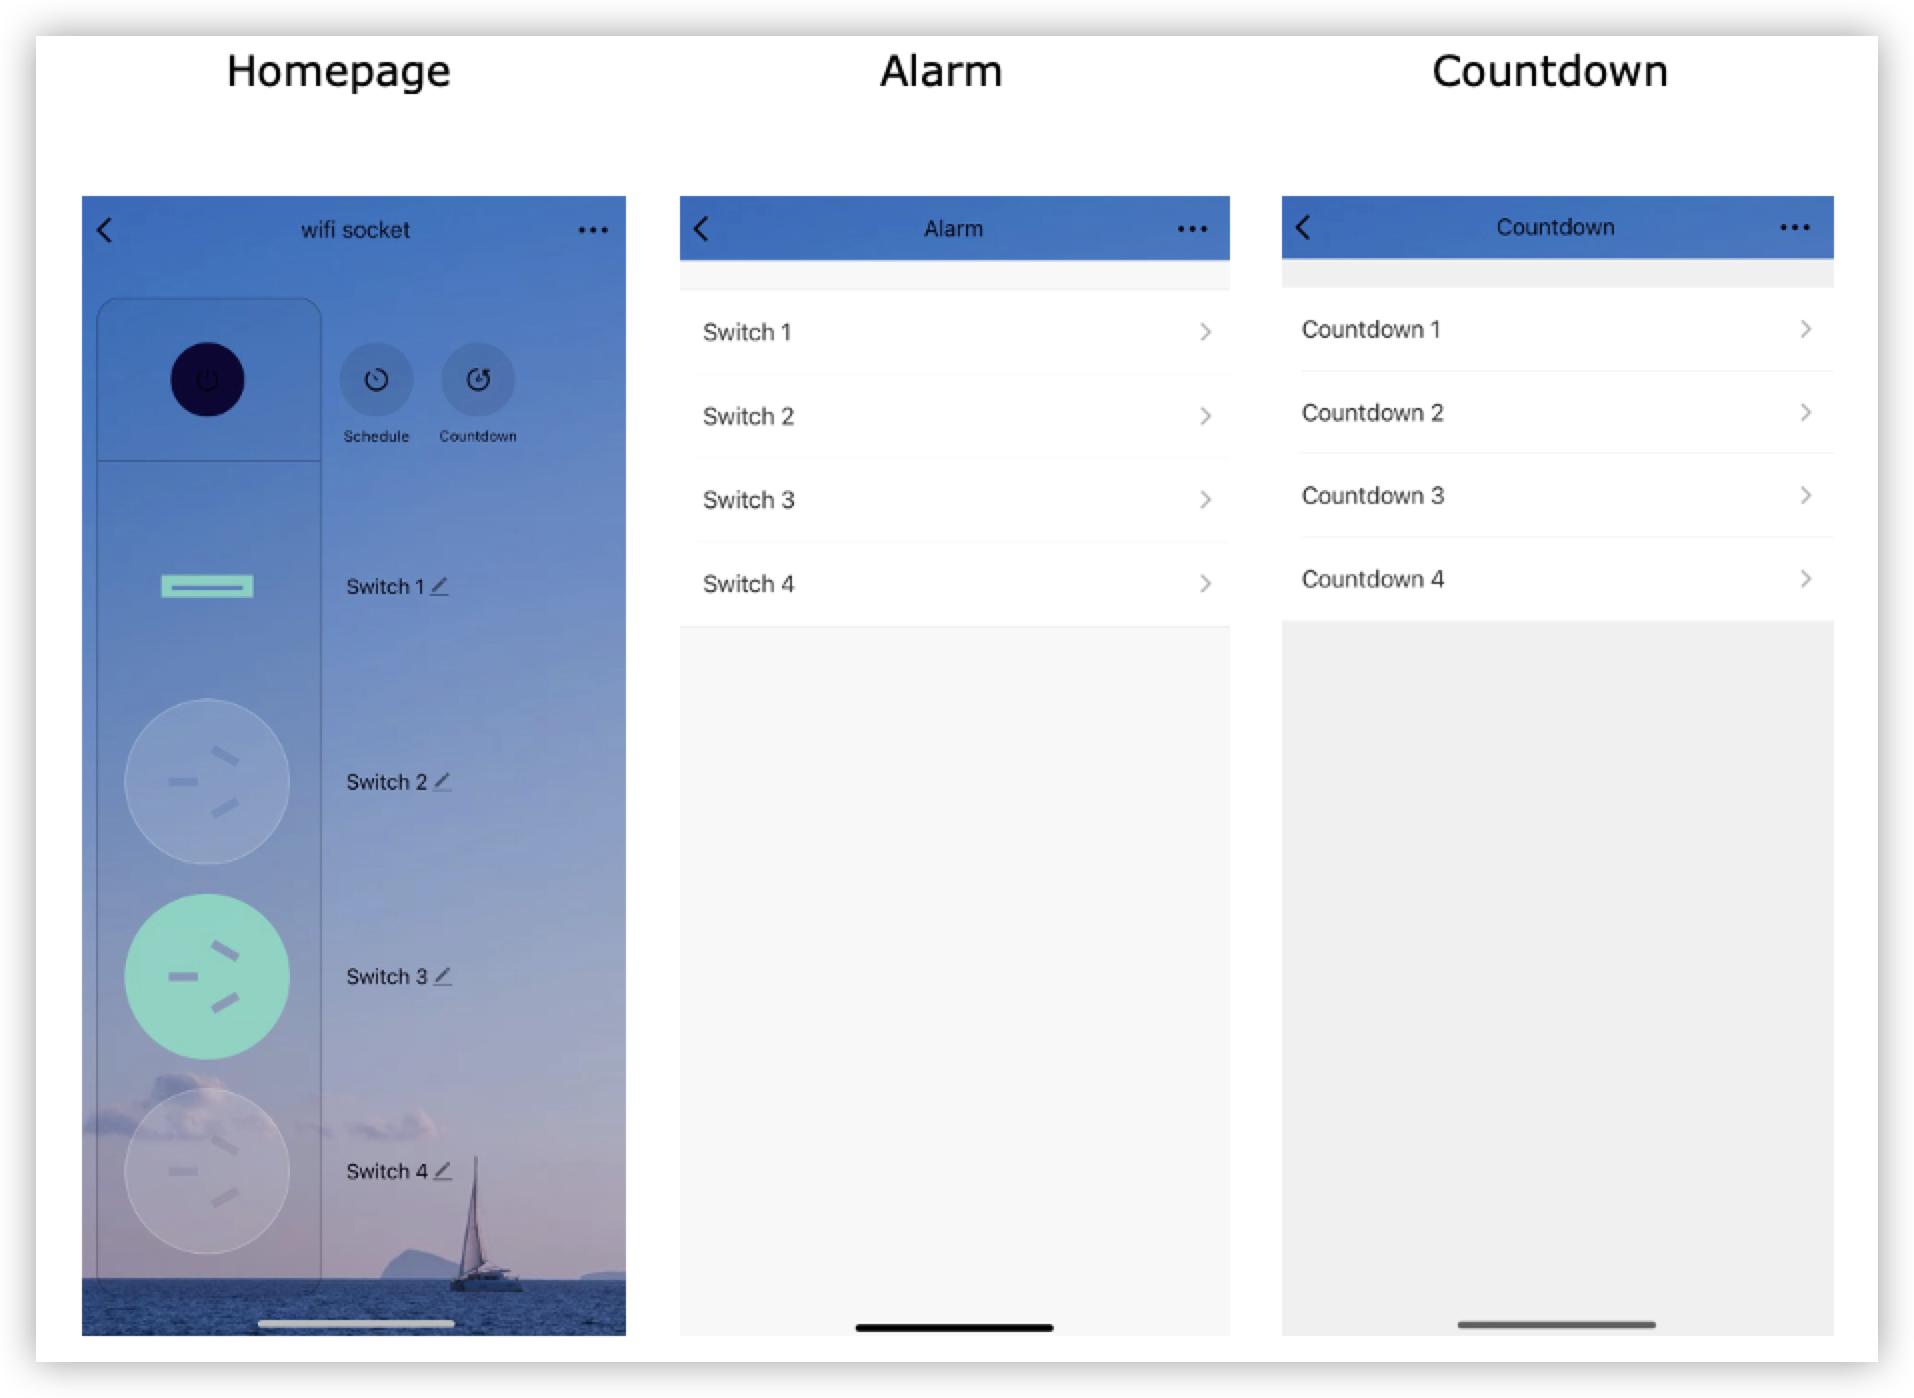
Panel preview
Procedure
Set the panel style
You can modify the pattern to set the panel style. Fixed templates and custom templates are available on the Tuya Developer Platform.
-
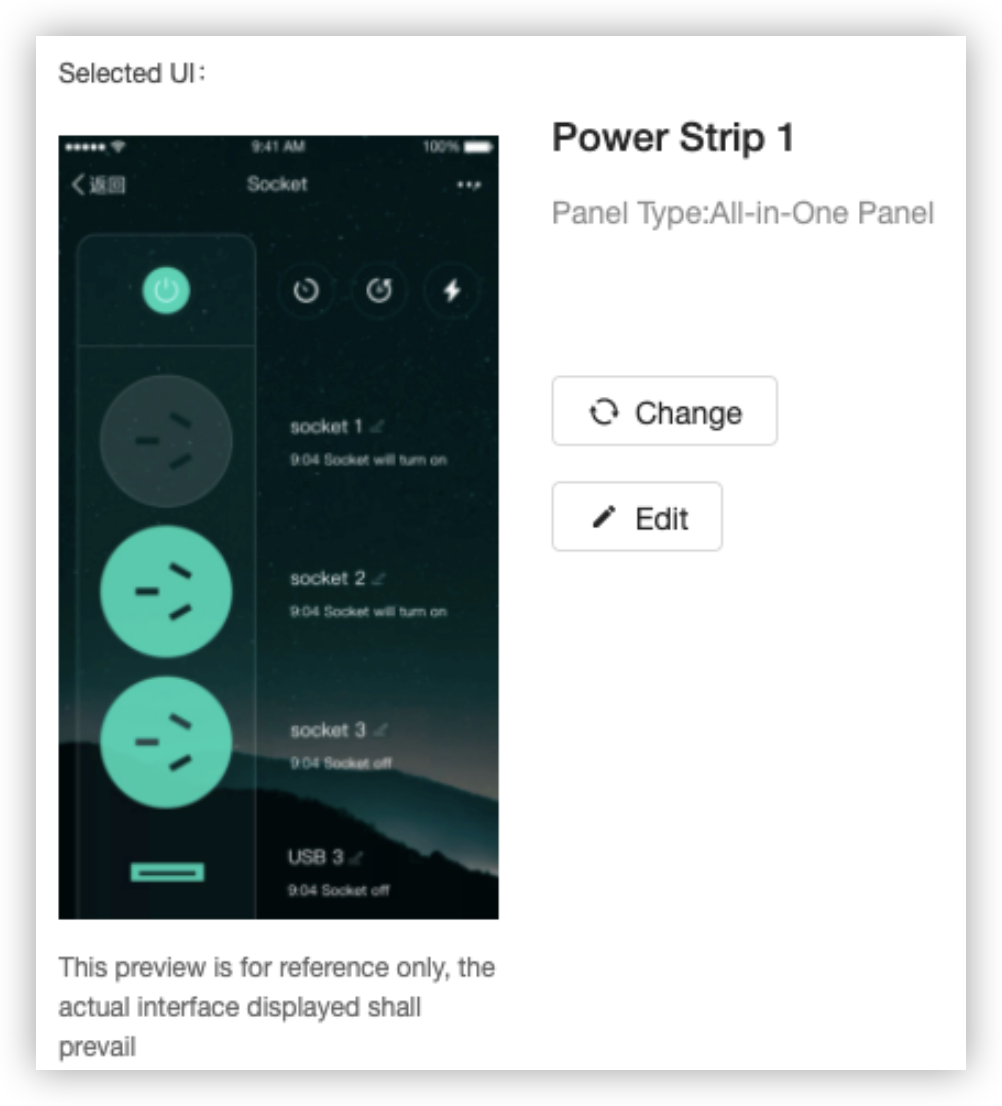
Click Apply on a preferred custom panel to select the panel.
Note: Only the panel that is marked with Custom in the upper left of the panel supports custom modifications.

-
Click Edit to enter the Interface configuration page.
-
Edit the background of the panel.
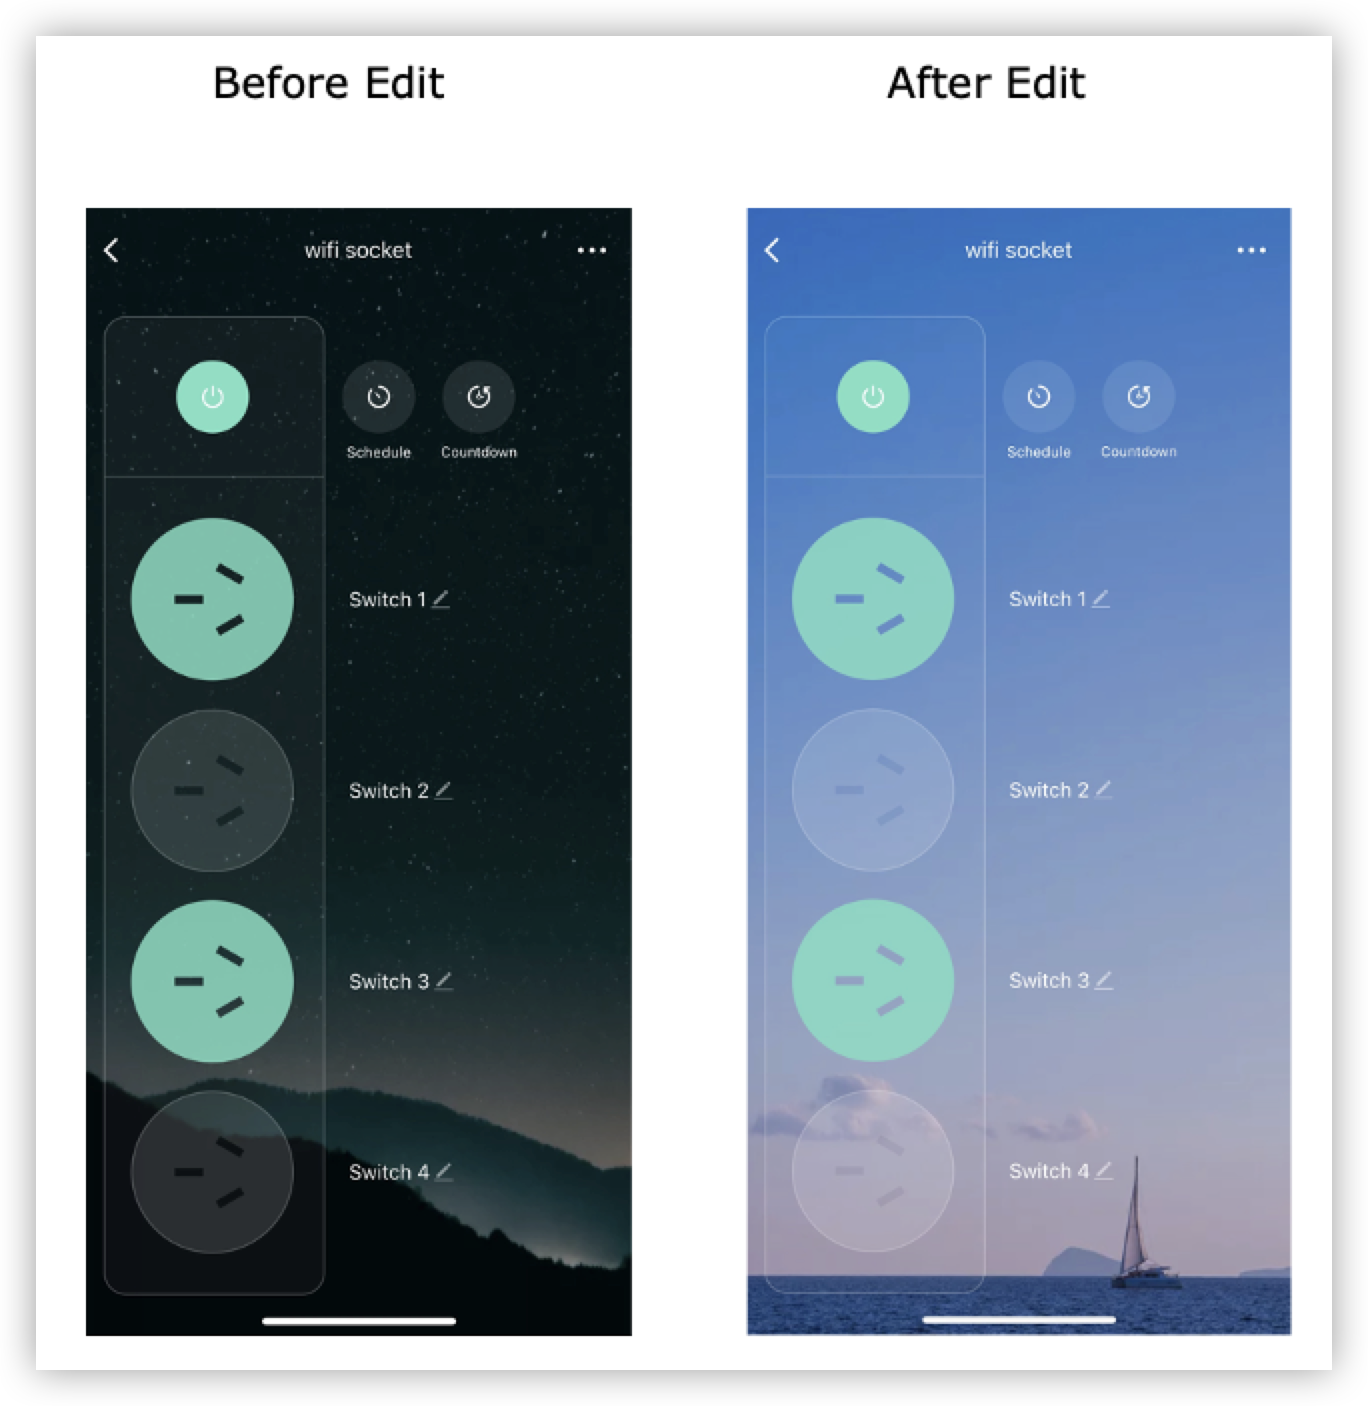
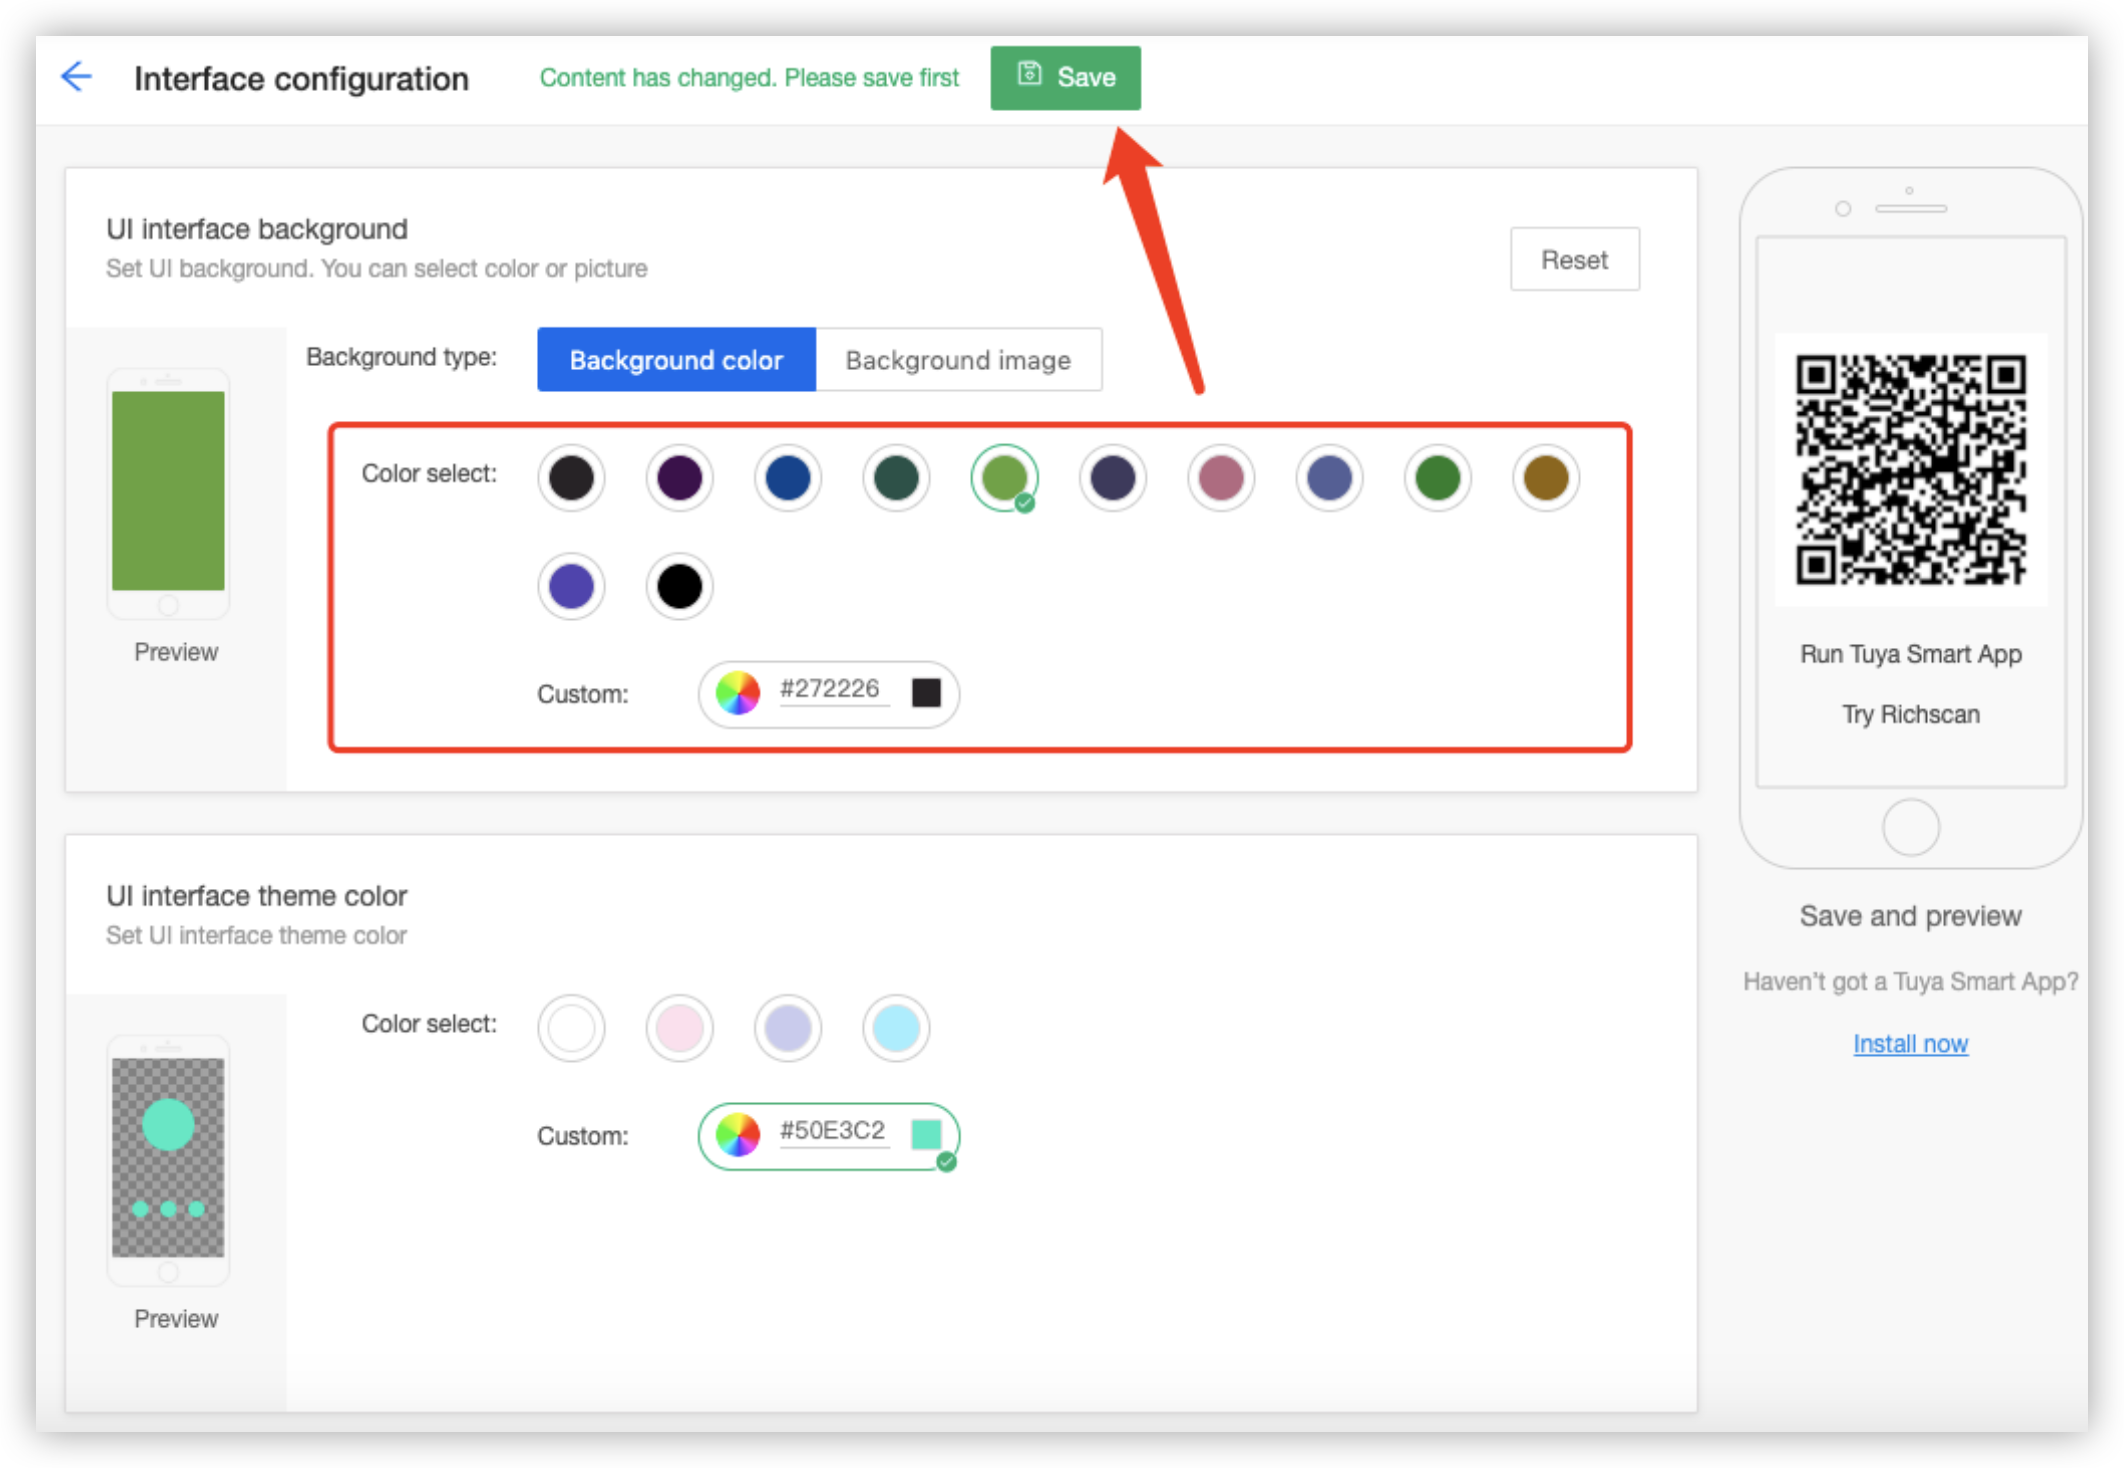
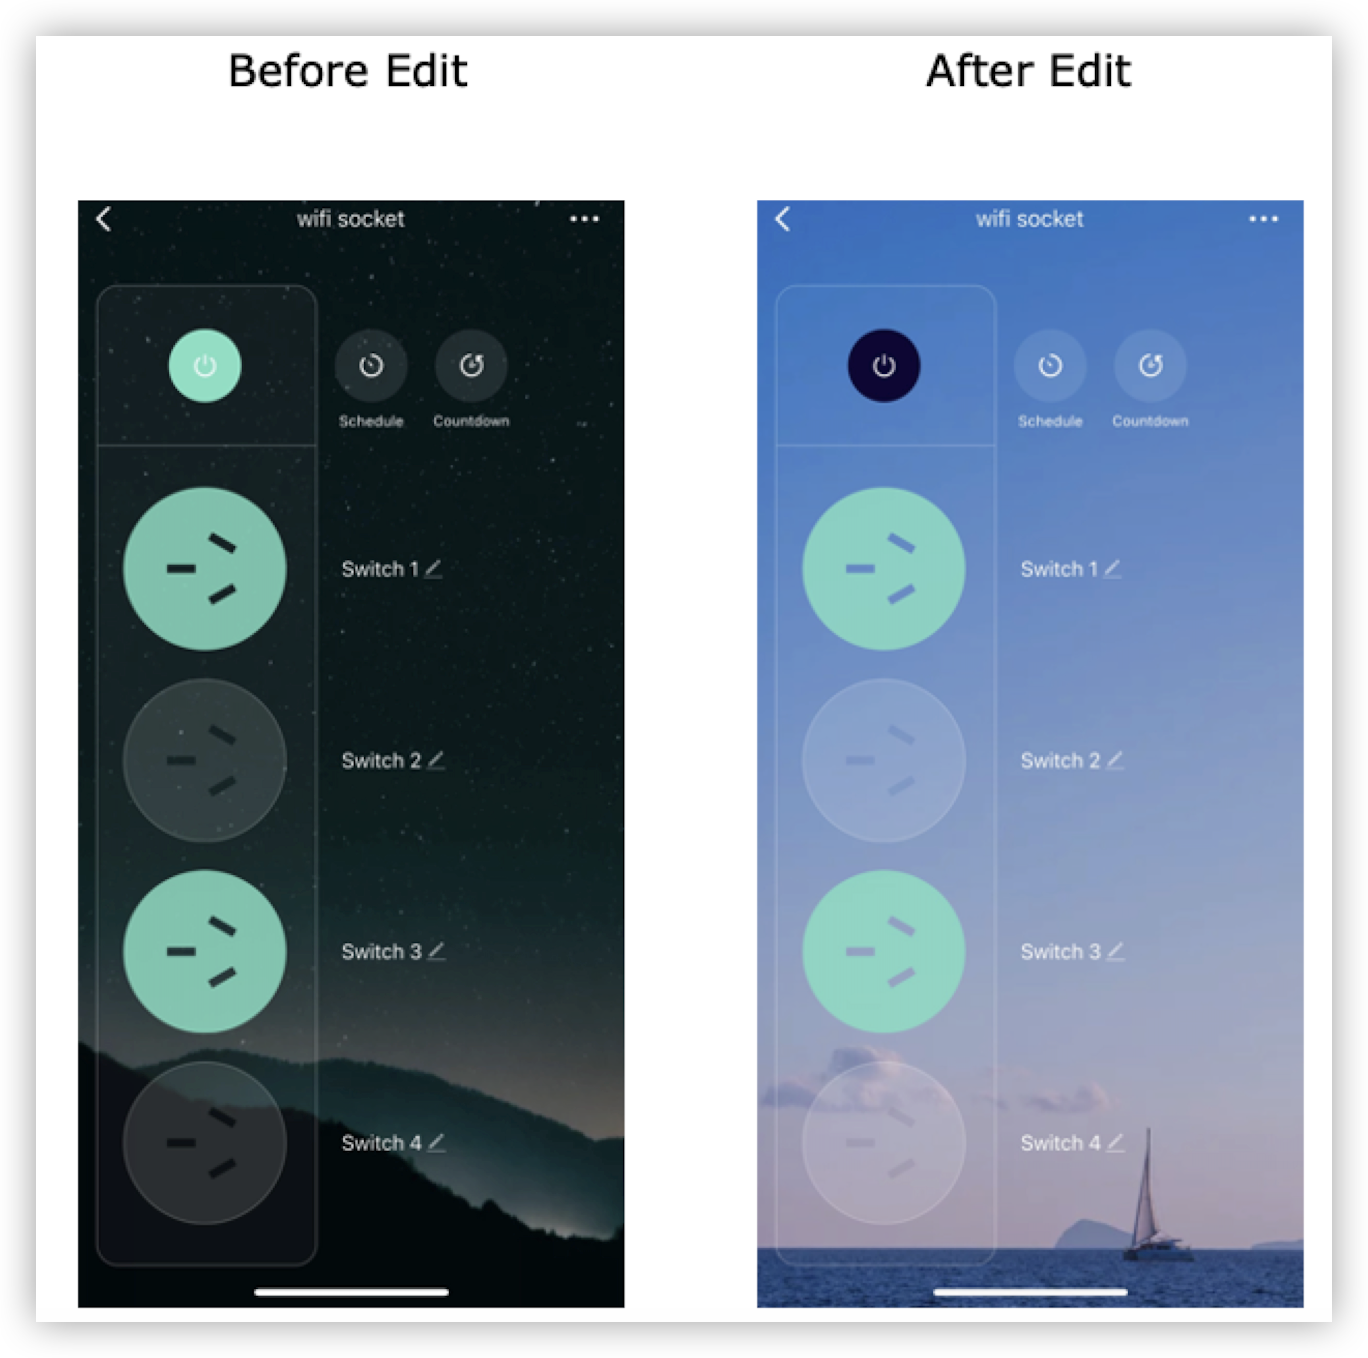
In the UI interface background section, you can set the background type to define the background style. You can specify a background color or a background image as the background. After the setting, you can scan the QR code on the right of the page to preview the background. The following figures show the comparison before and after the panel background is modified.
-
Background color: You can select a preset color, or enter a hexadecimal red, green, blue (RGB) color code. Then, click Save.
-
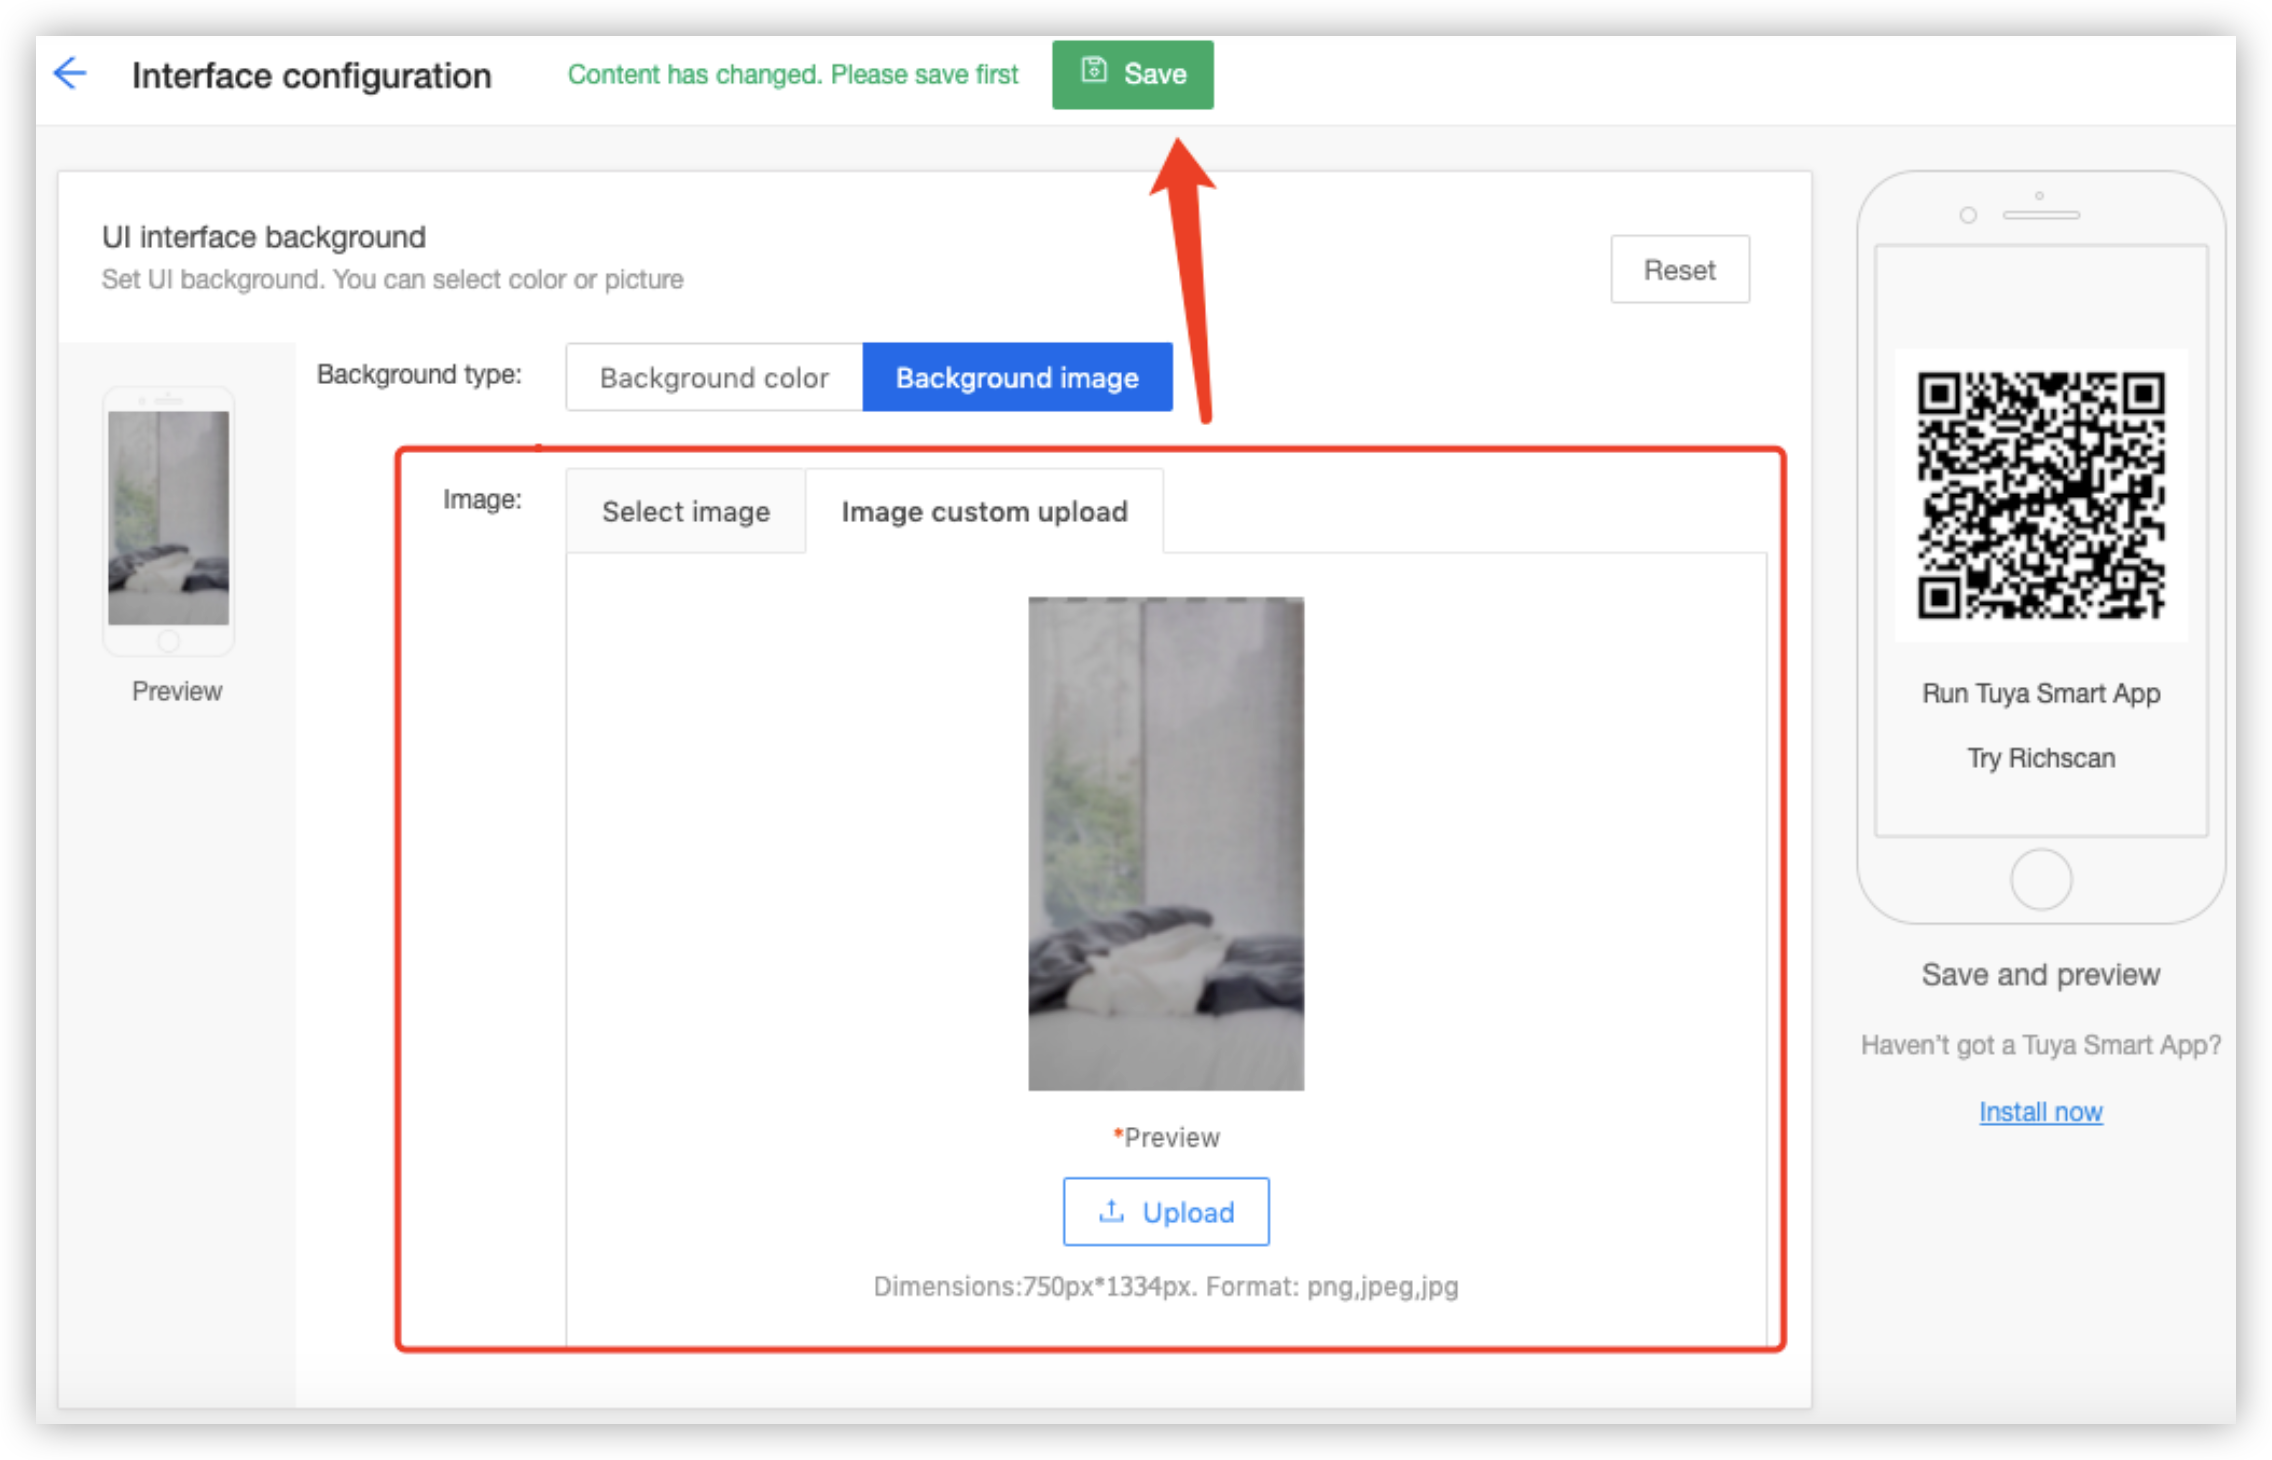
Background image: You can select a preset image or upload a custom background image. Then, click Save.
Note: The image dimensions must be 750 × 1334 pixels. The PNG, JPEG, and JPG formats are supported.
-
-
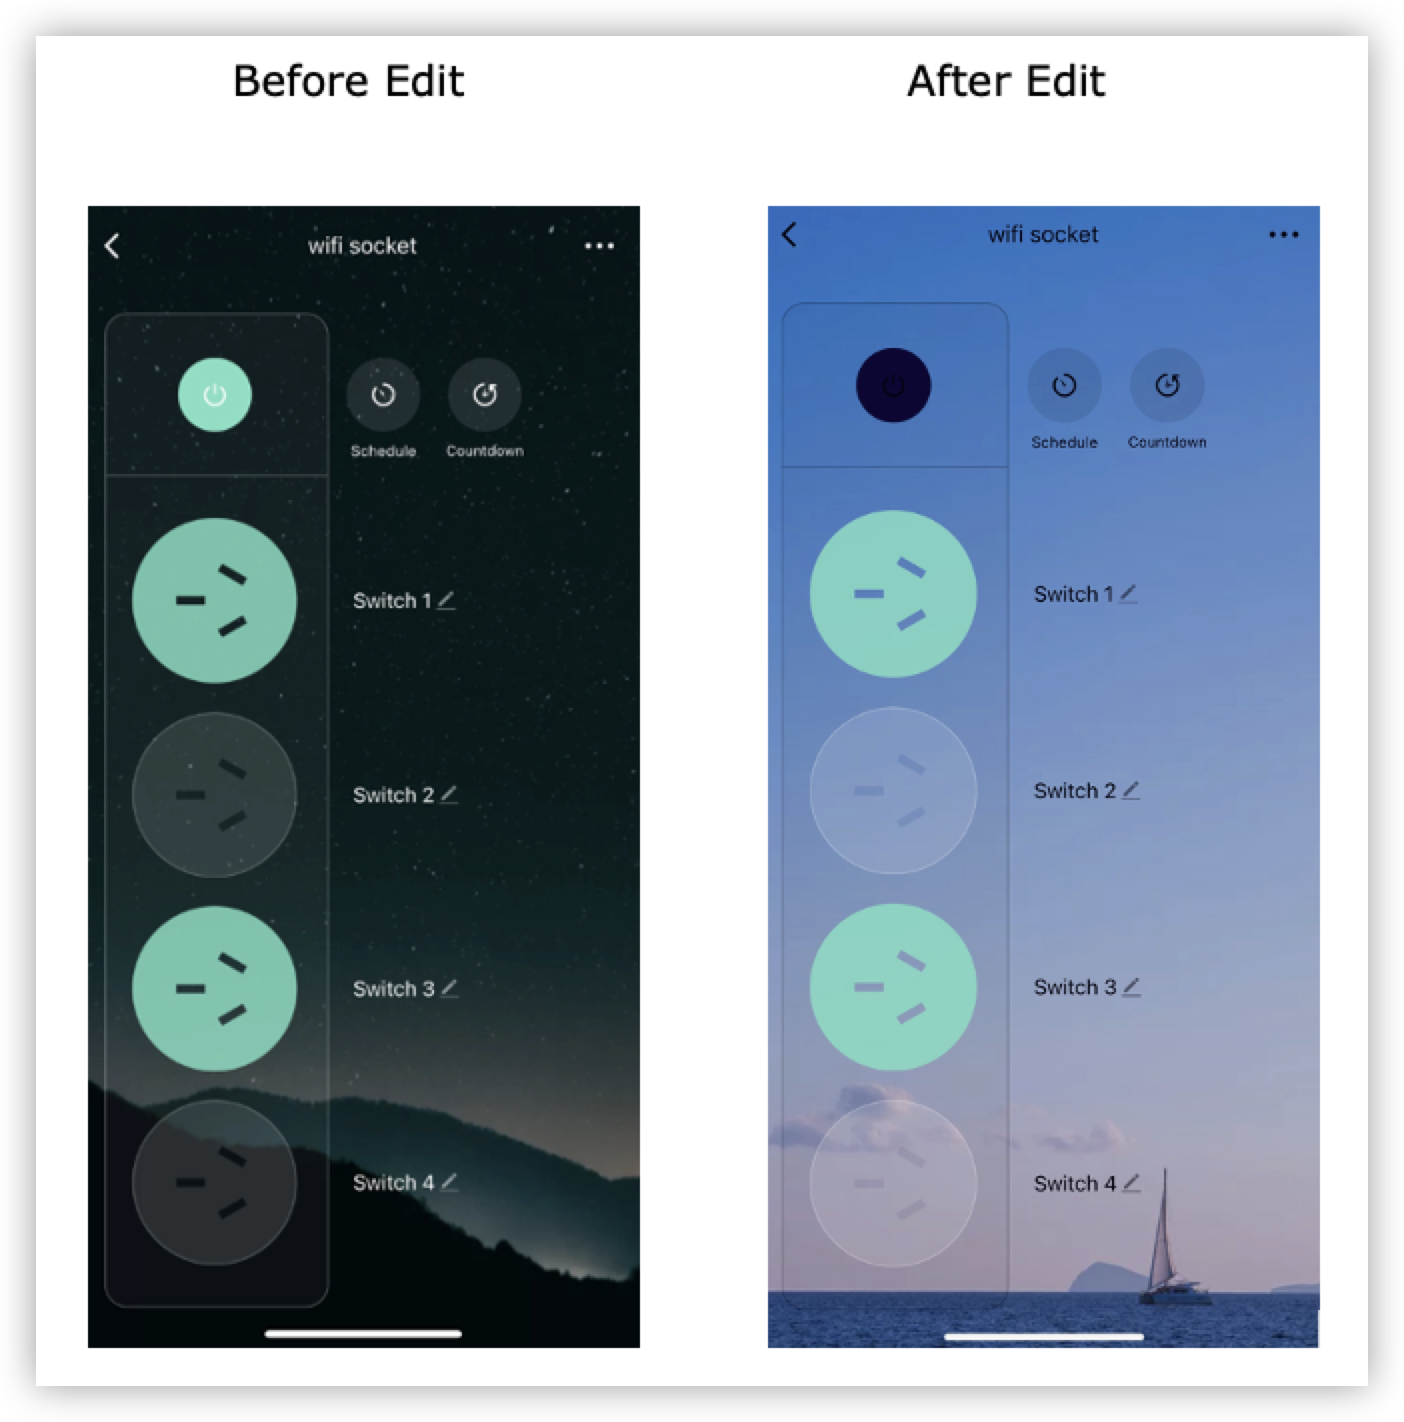
Edit the theme color of the panel.
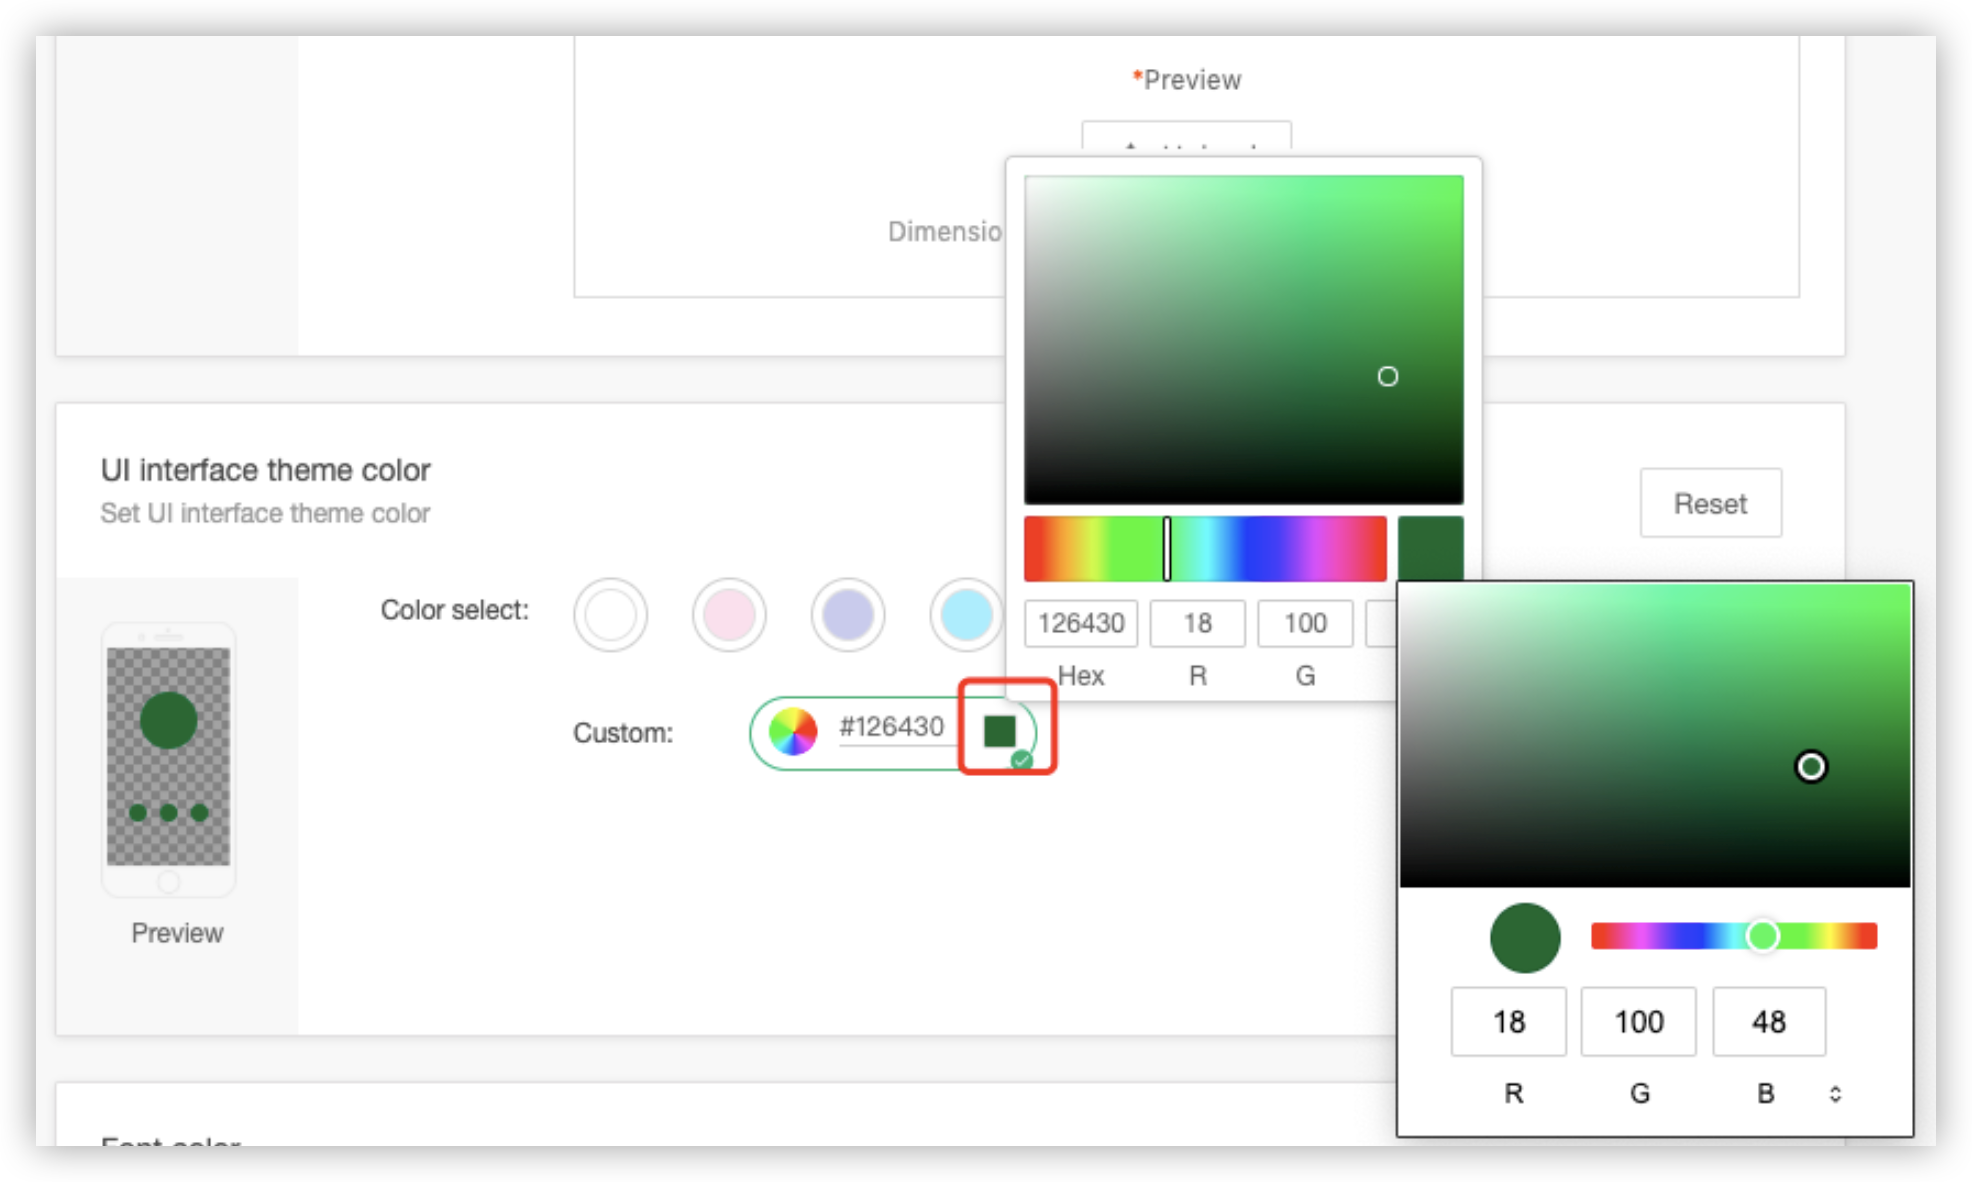
The theme color is displayed on the panel. You can set the theme color to define the background color of the master switch for the four-way power strip.-
UI interface theme color: You can select a preset color, or enter a hexadecimal RGB color code. After the setting, click Save. You can scan the QR code on the right of the page to preview the background.
-
The following figures show the comparison before and after the theme color of the panel is modified.
-
-
Enter the font color of the panel
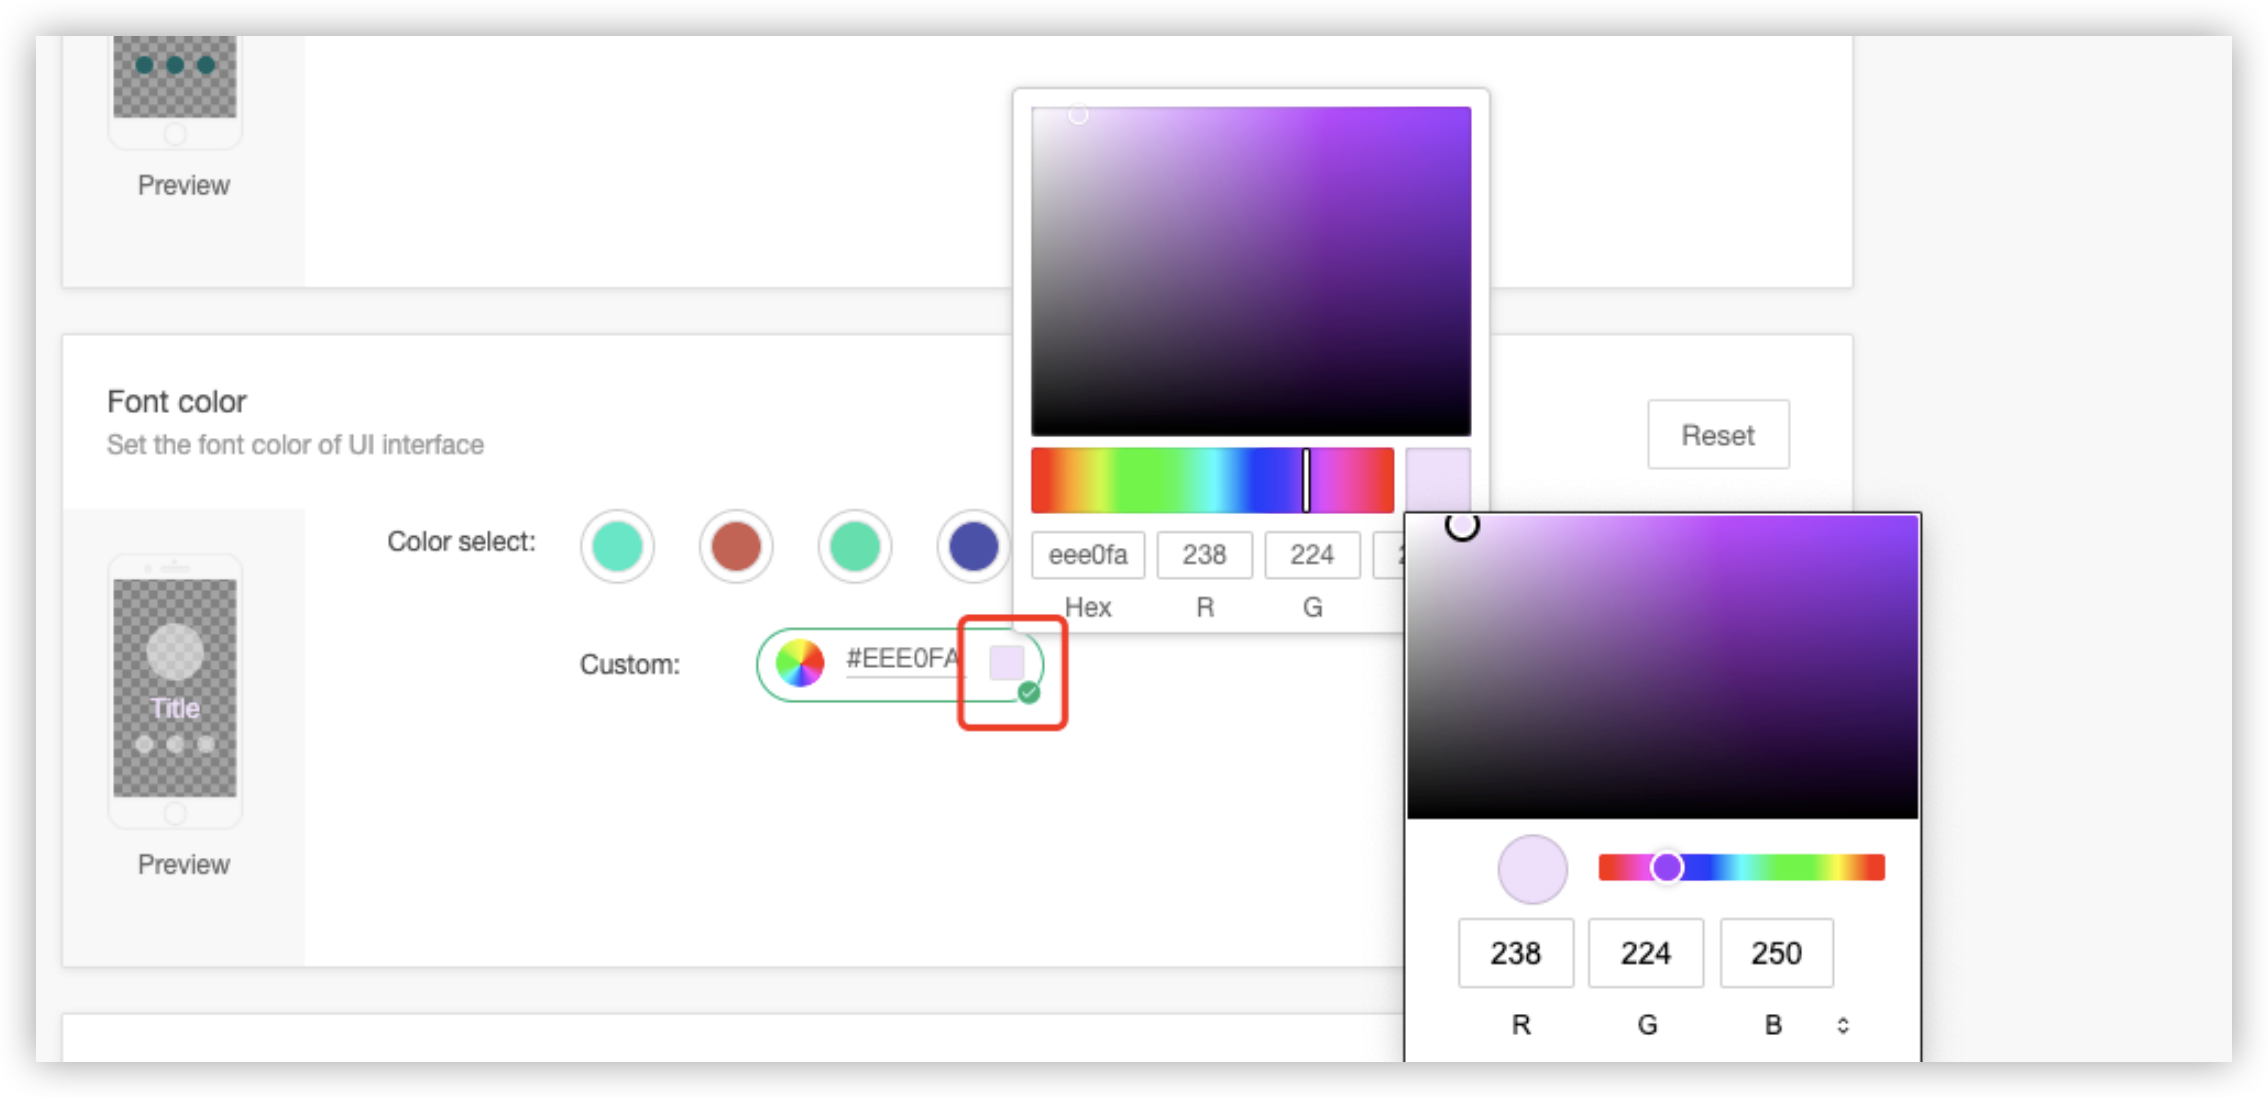
The font color is displayed on the panel. You can set the font color to define the foreground color of the buttons for the four-way power strip. Font color: You can select a preset color, or enter a hexadecimal RGB color code. In the Custom field, click the color block to open a palette and select a color.-
After the setting, click Save. You can scan the QR code on the right of the page to preview the font color.
-
The following figures show the comparison before and after the font color of the panel is modified.
-
-
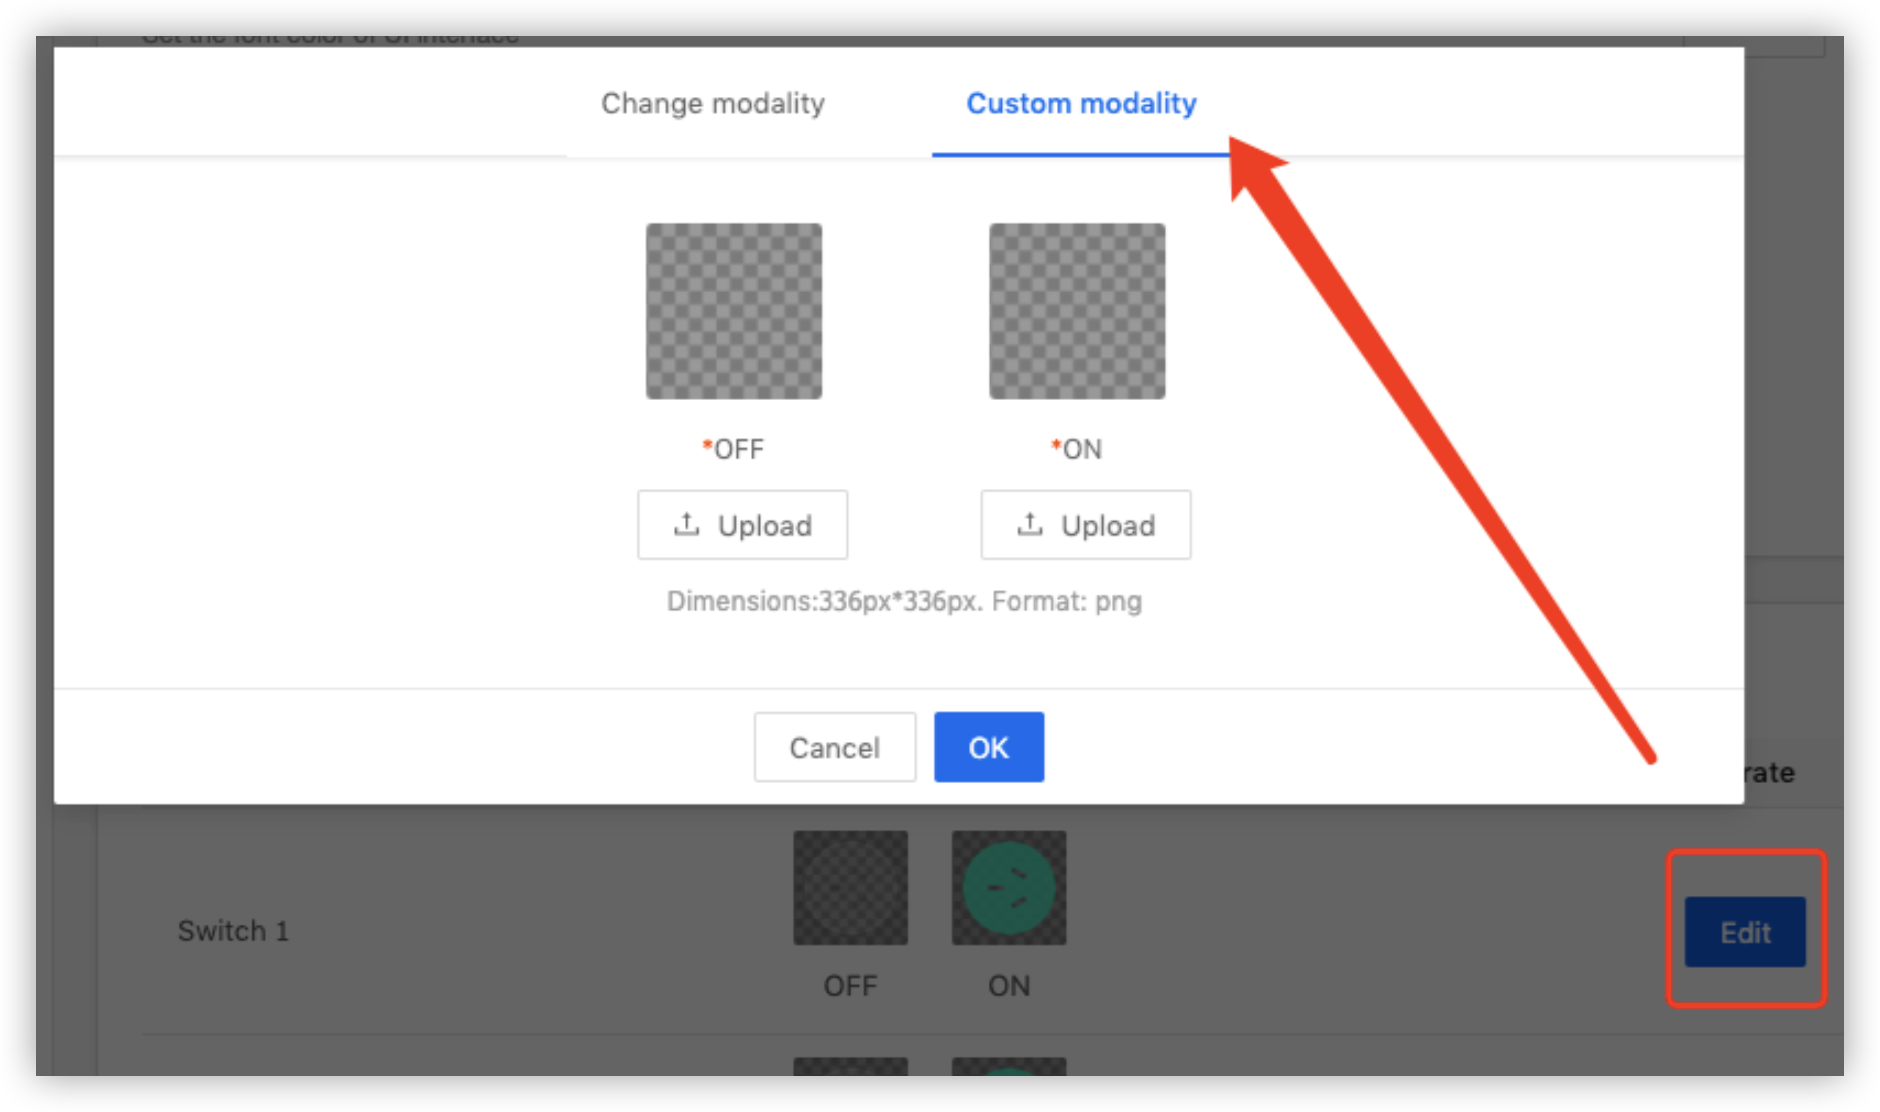
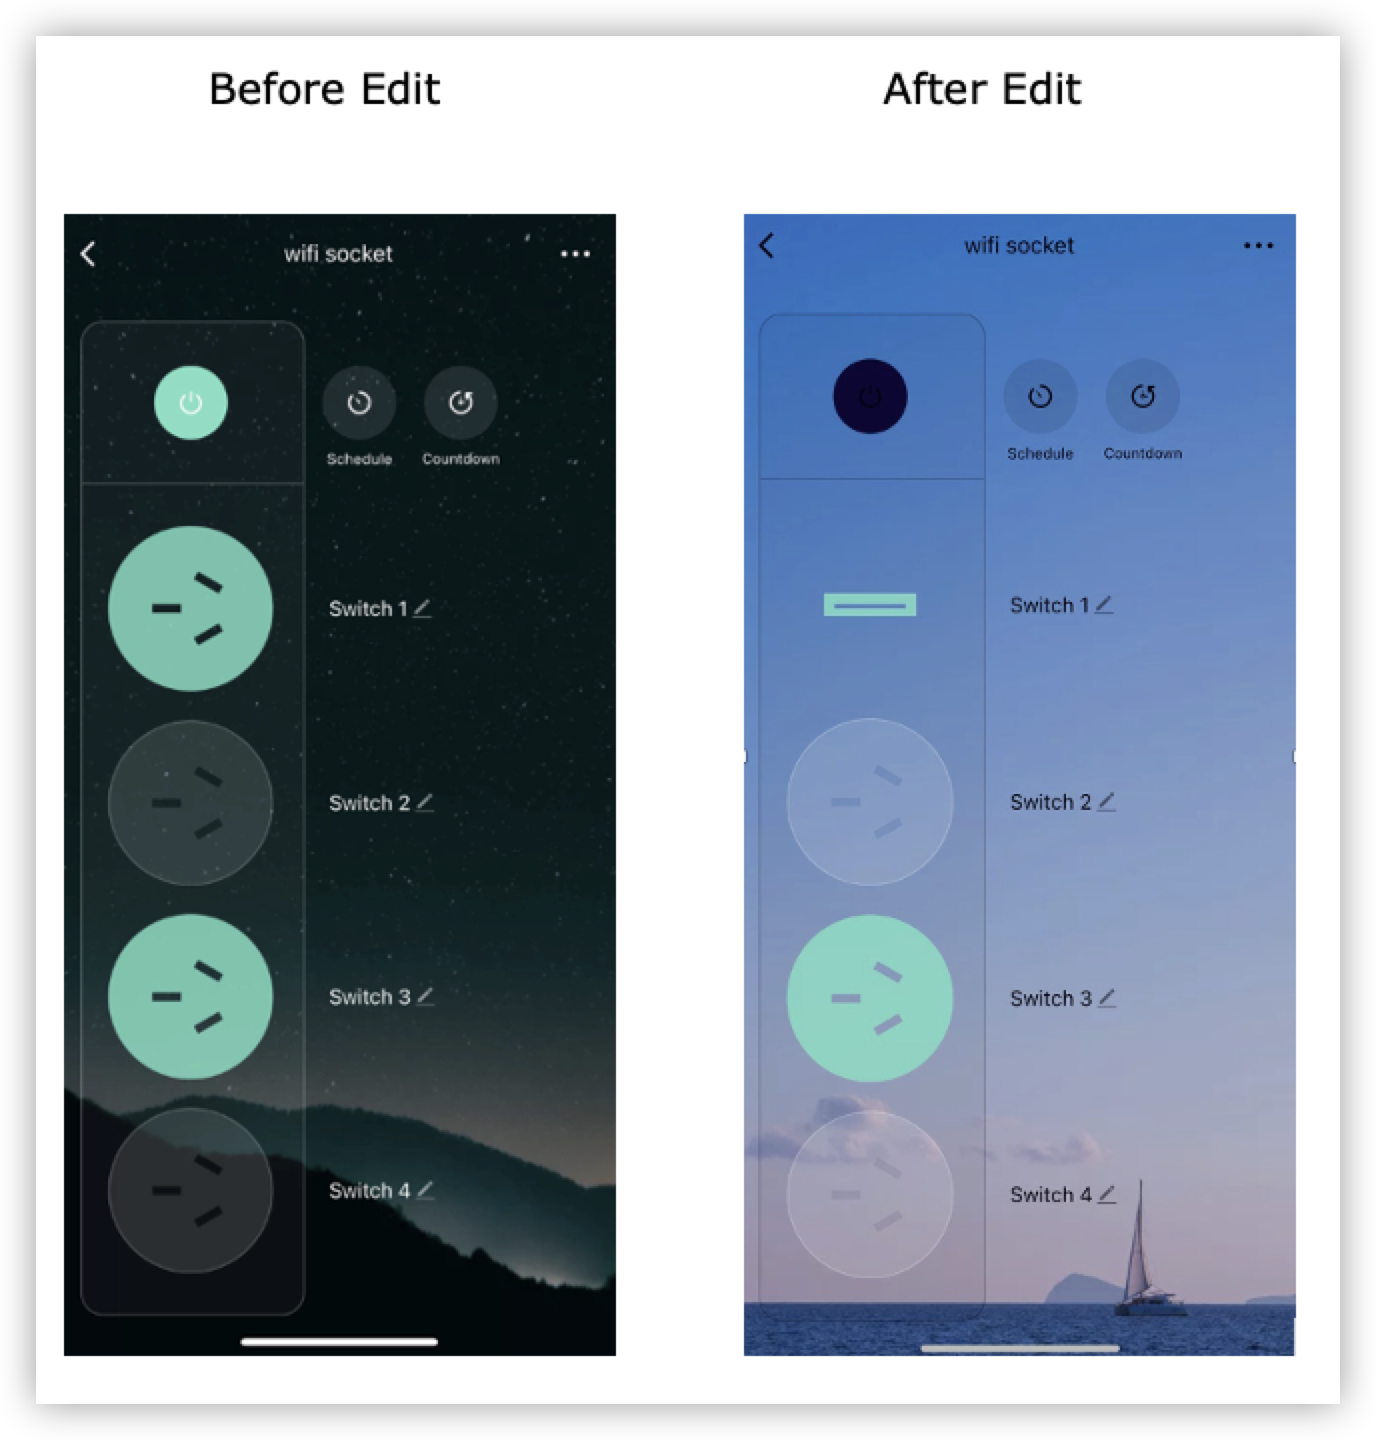
Edit the icon modality.
The icon modality is displayed on the panel. You can select a modality or upload a custom modality. You can set the icon modality to define the socket style for the four-way power strip.Note: The image dimensions must be 336 × 336 pixels. The PNG format is supported.
-
After the setting, click Save. You can scan the QR code on the right of the page to preview the background.
-
The following figures show the comparison before and after the icon modality of the panel is modified.
-
-
Set the panel text.
Note: If the text modification does not take effect, clear the app cache and try again or scan the QR code again to preview the text.
You can go to the step Product Configuration and click Multilingual to edit the text of the panel. Perform the following steps:
-
Click Settings to enter the Product Language module.

-
On the Data Point tab, edit the text of each data point (DP).
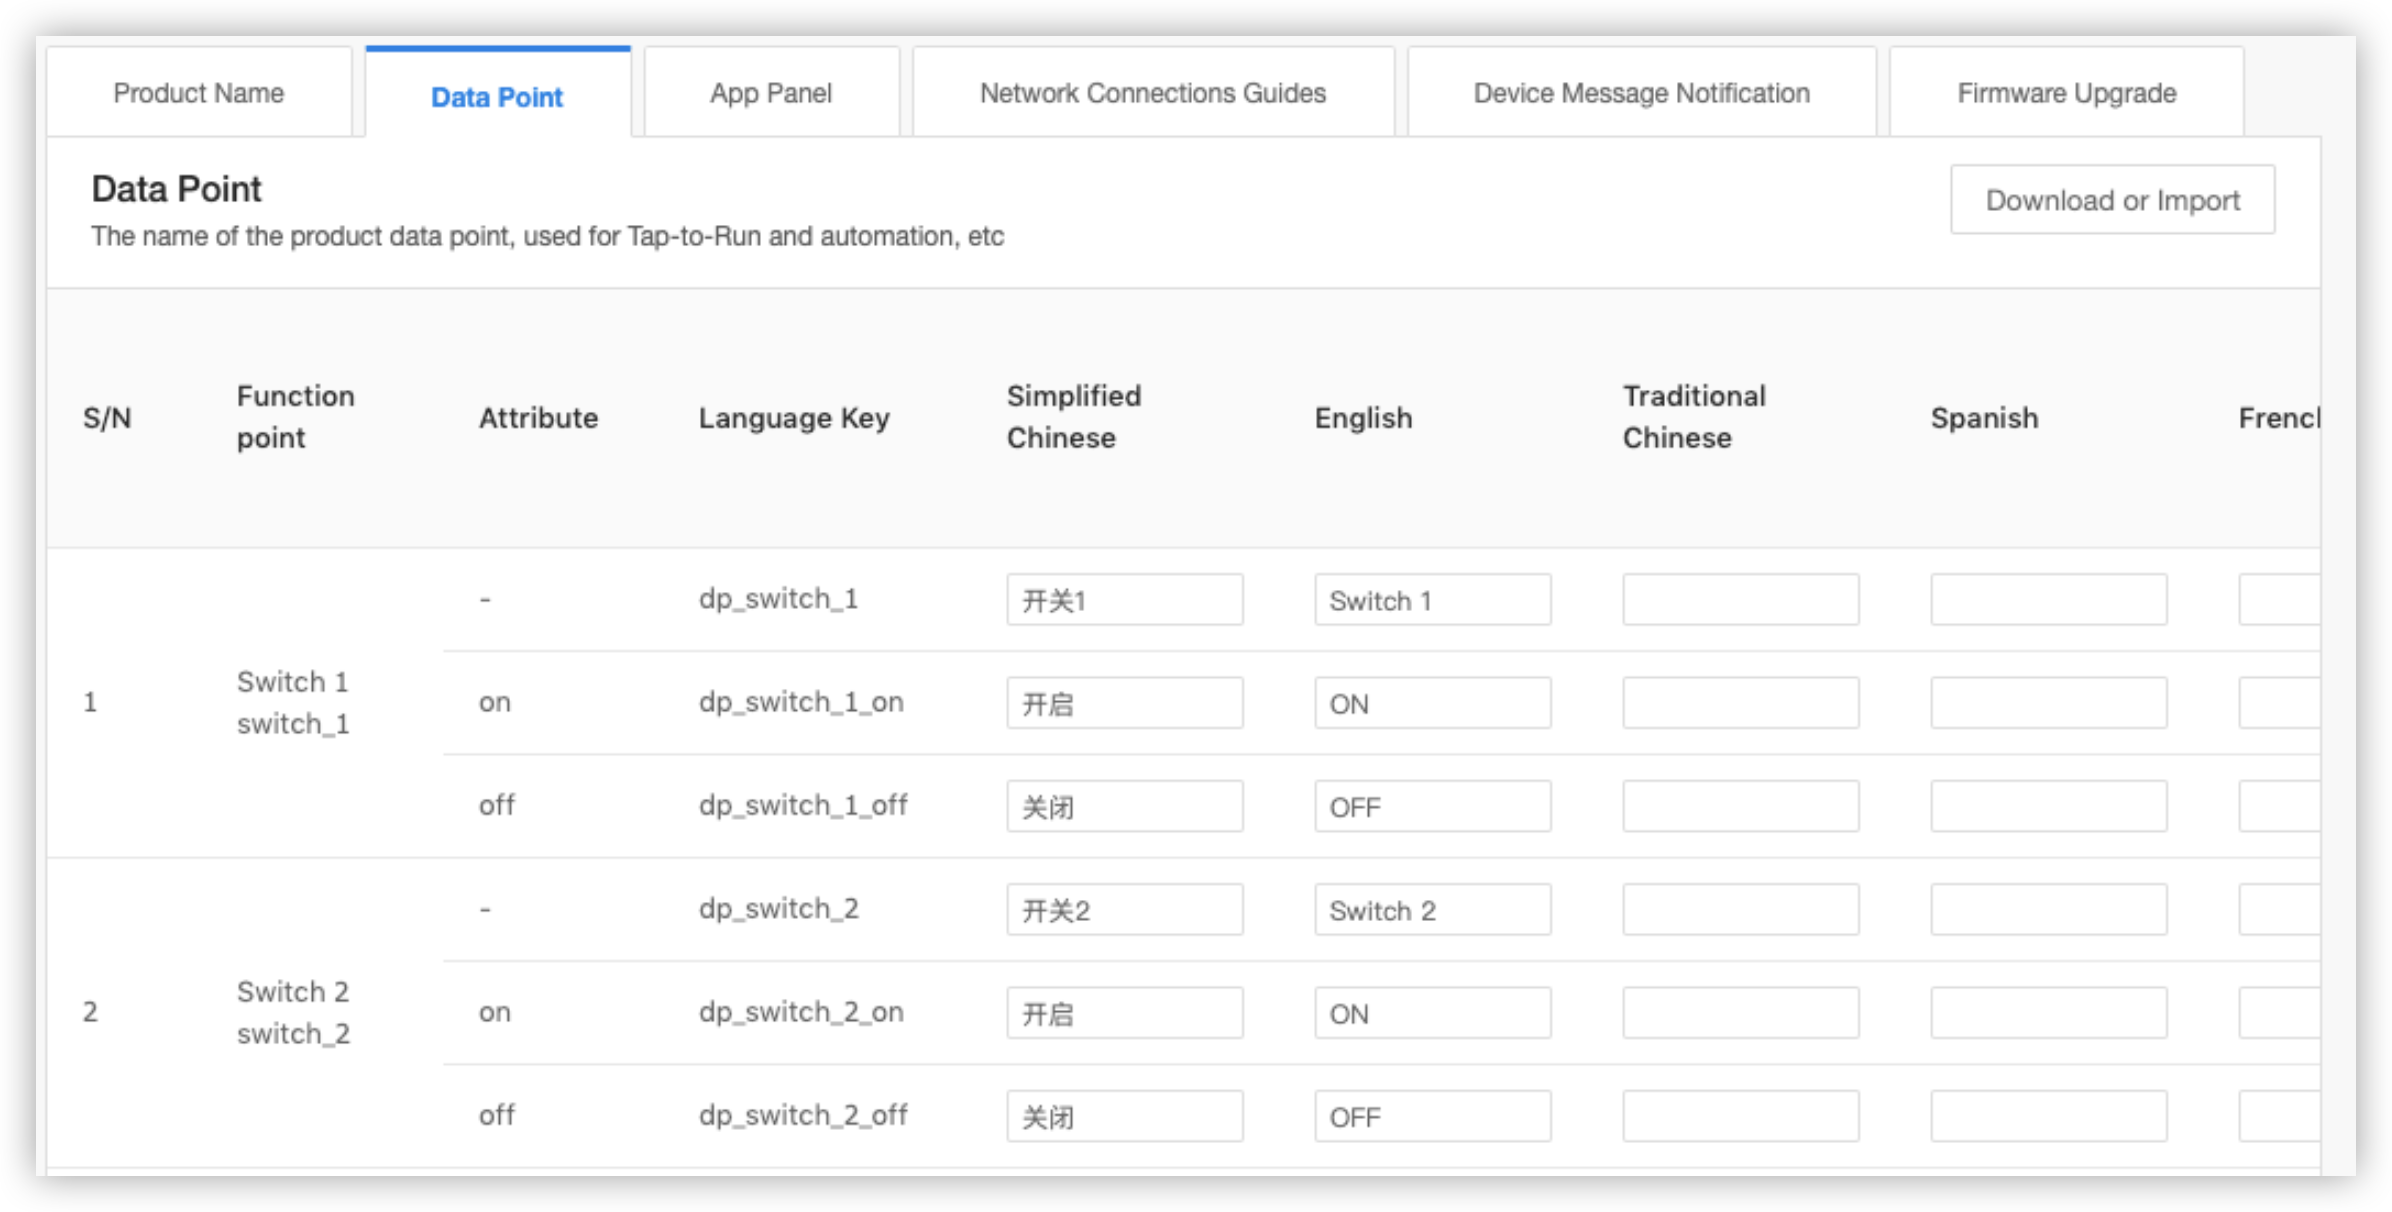
After the settings are saved, you can preview the app panel as shown in the following figure.
-
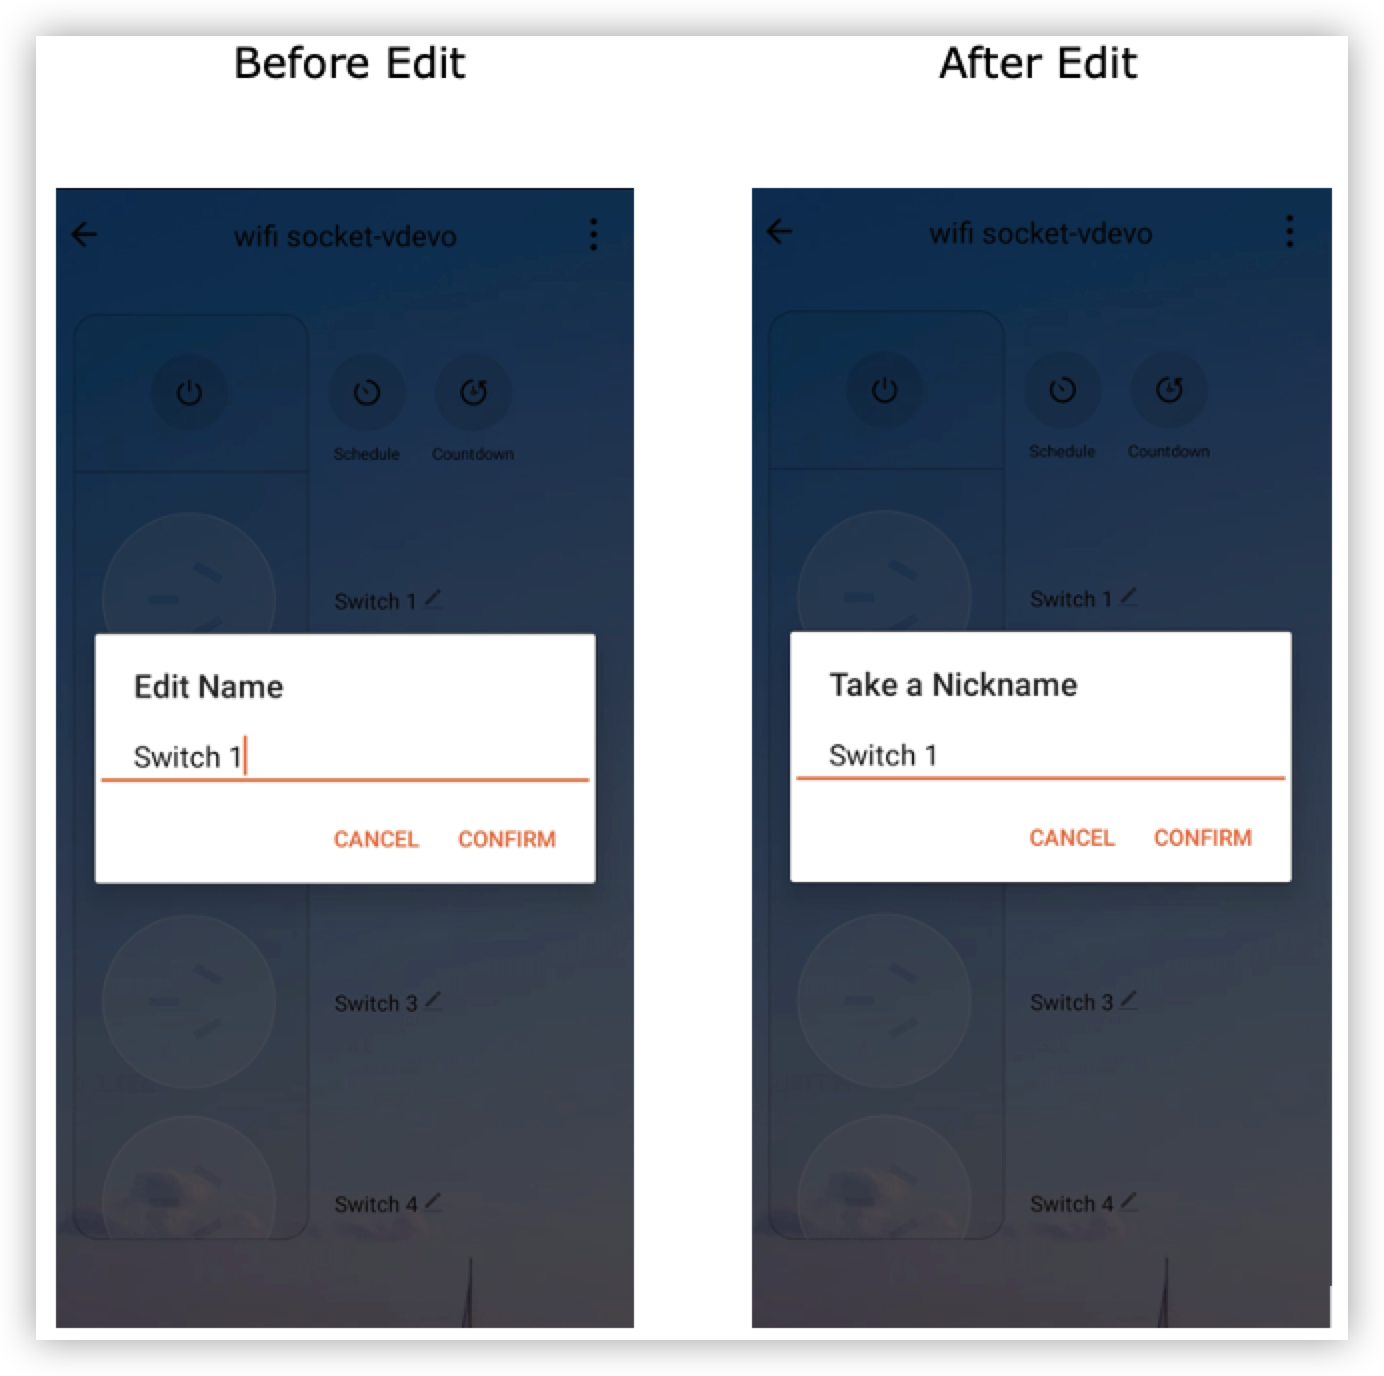
On the Device Panel tab, edit the text other than that of DPs.
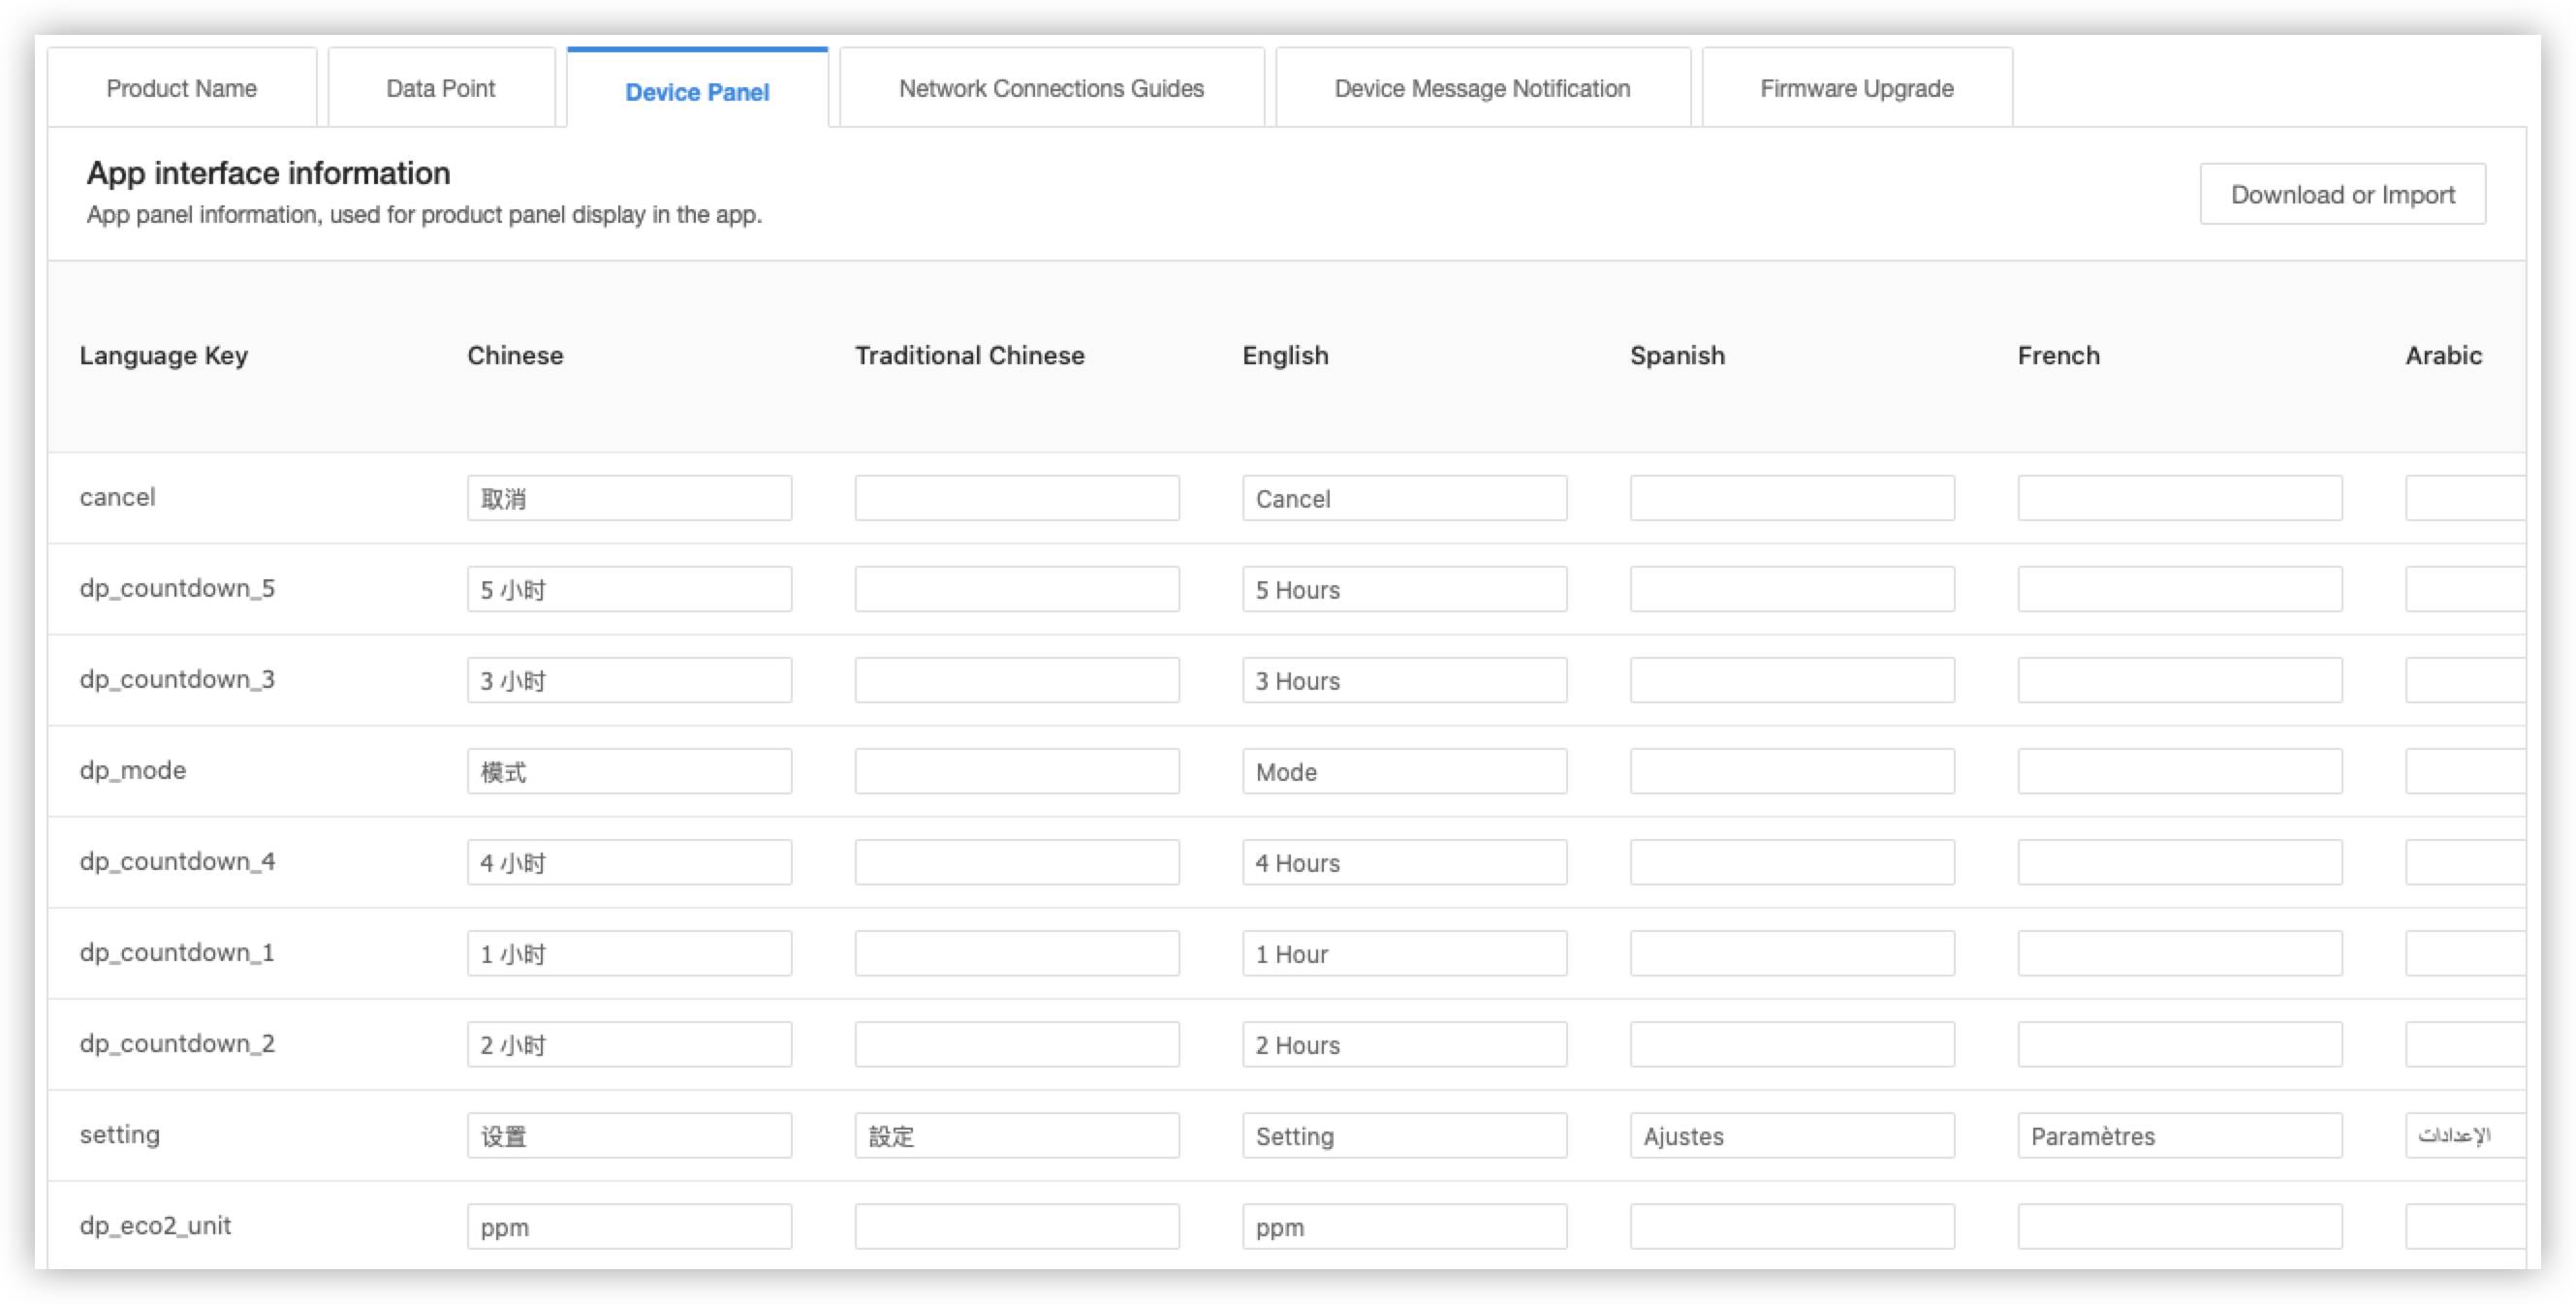
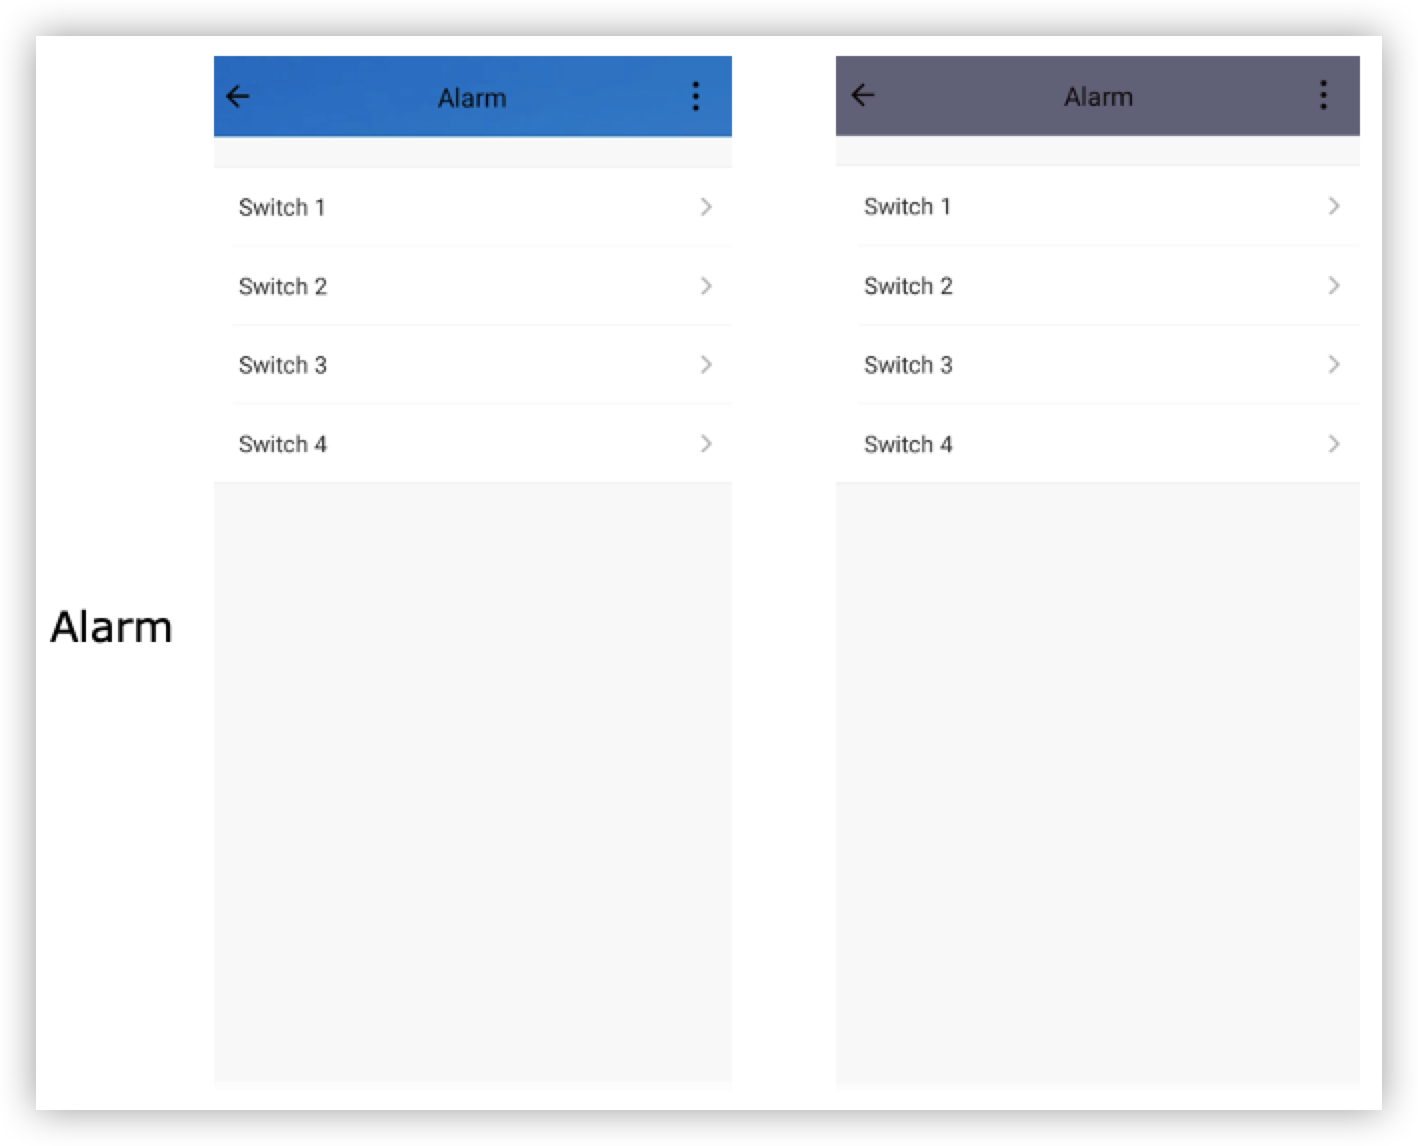
The following figures show the comparison before and after the text is modified.
-
Configure the panel for an MCU-based product
Note:
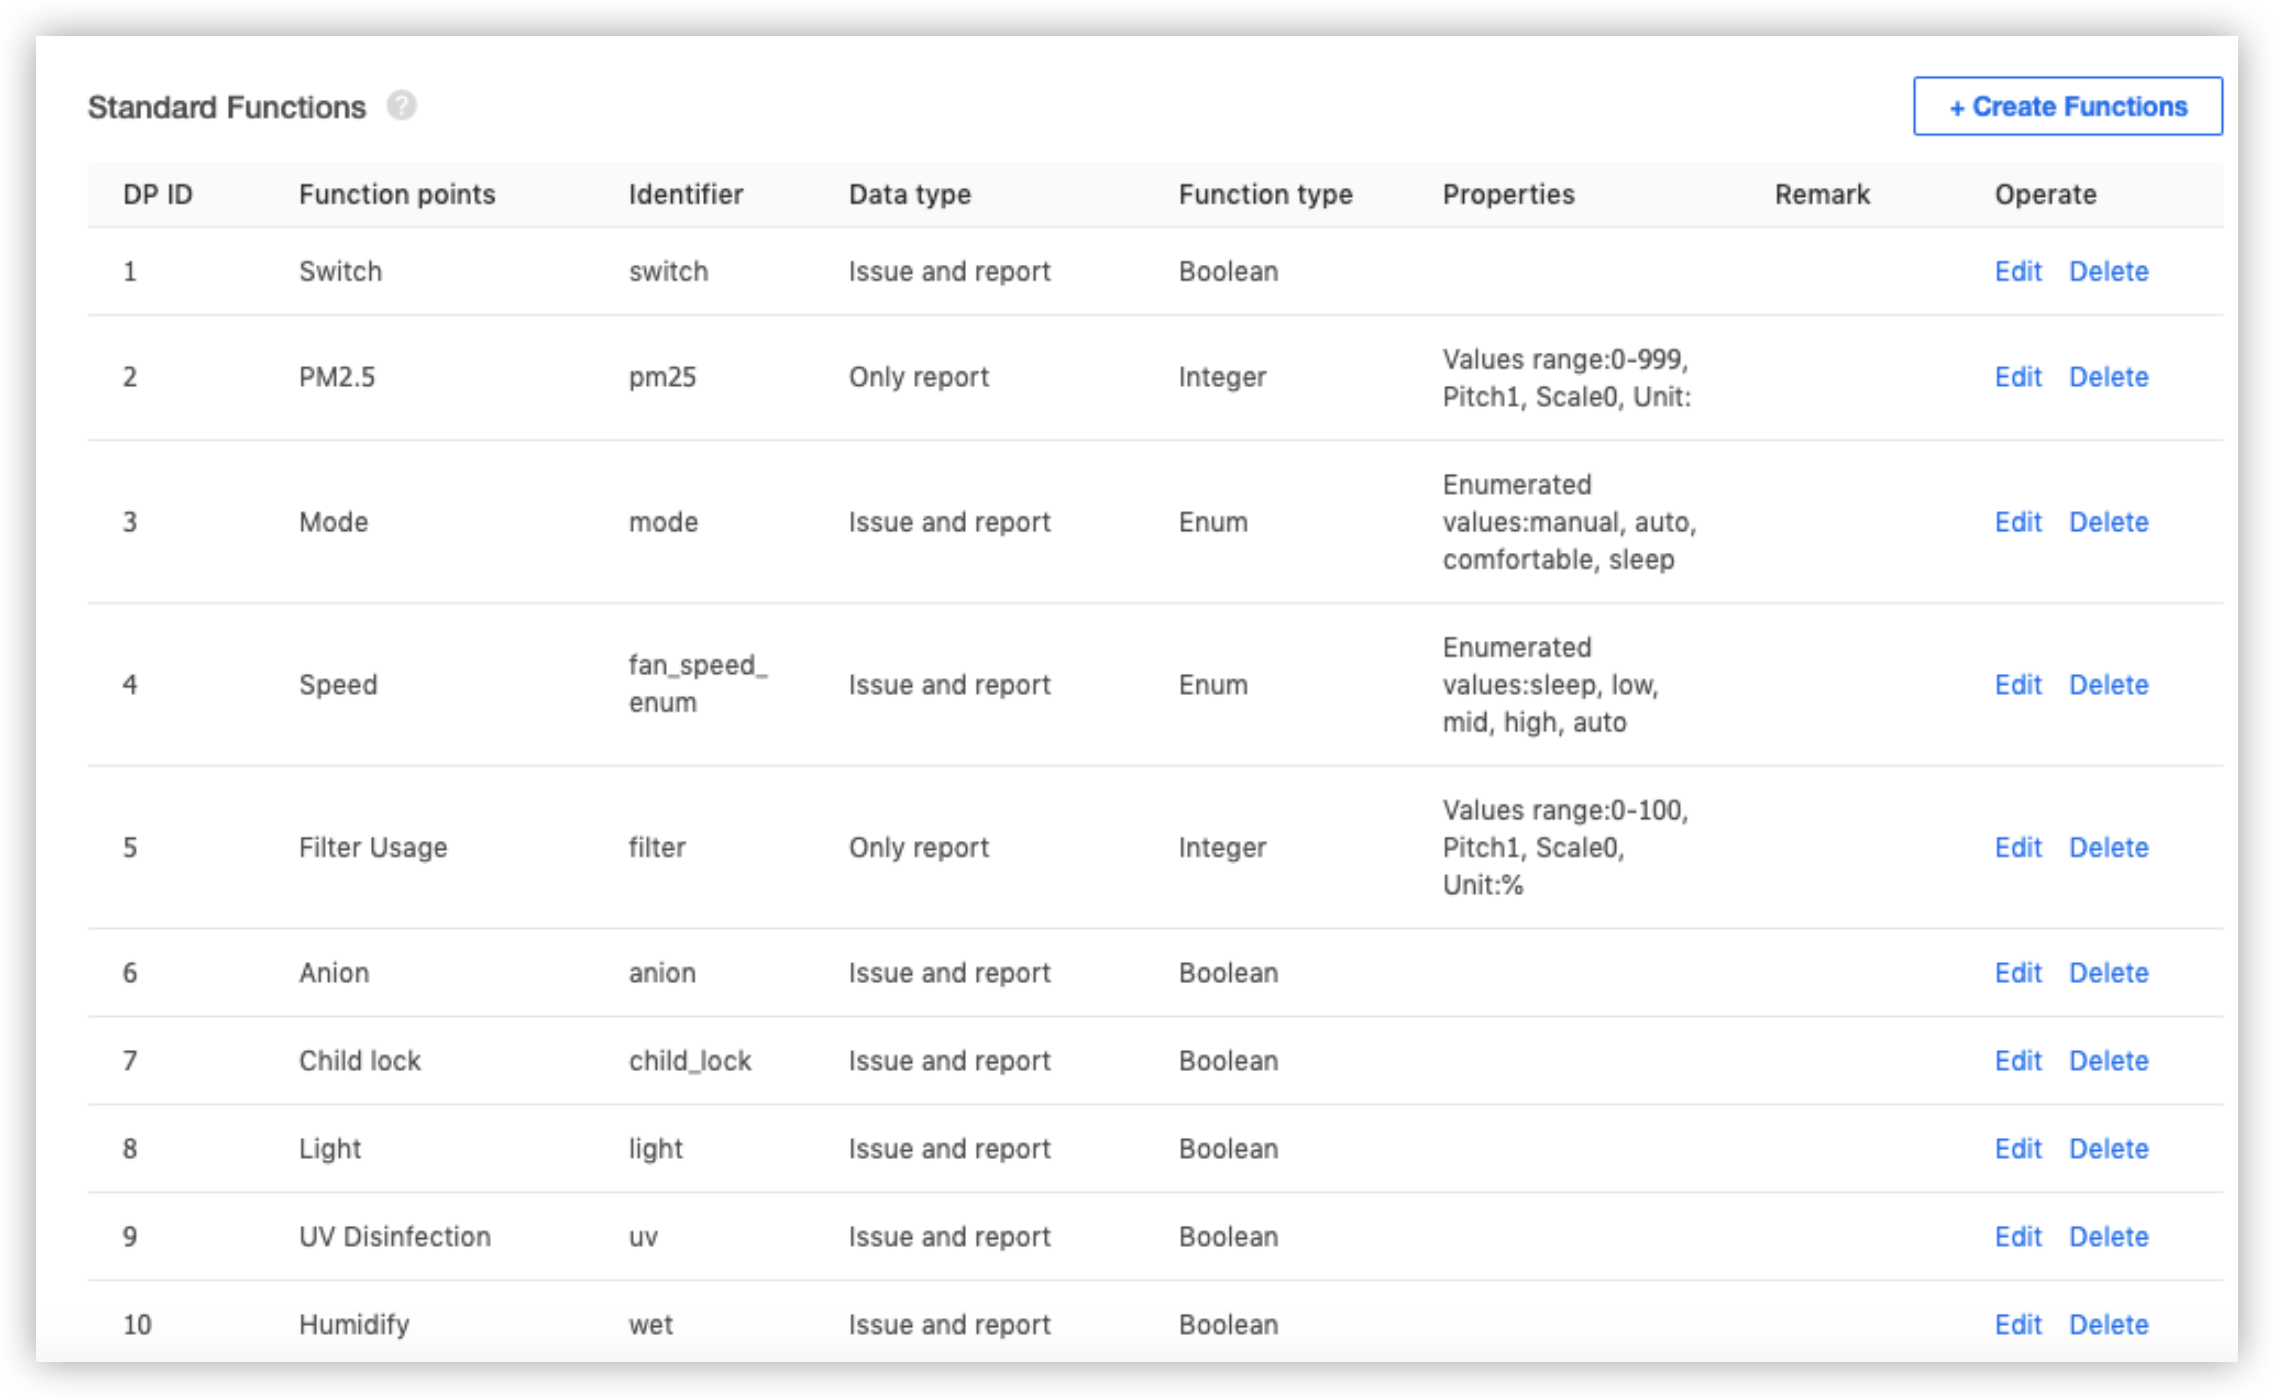
- Standard DPs of all-in-one panels cannot be modified. If certain required standard DPs are not specified, the panel cannot be loaded. If certain standard DPs are not specified, the panel cannot support all required functions.
- If you add more than 25 standard DPs and custom DPs to certain devices, device stability cannot be ensured. We recommend that you add up to 40 DPs for a device. This upper limit does not apply to cloud functions.
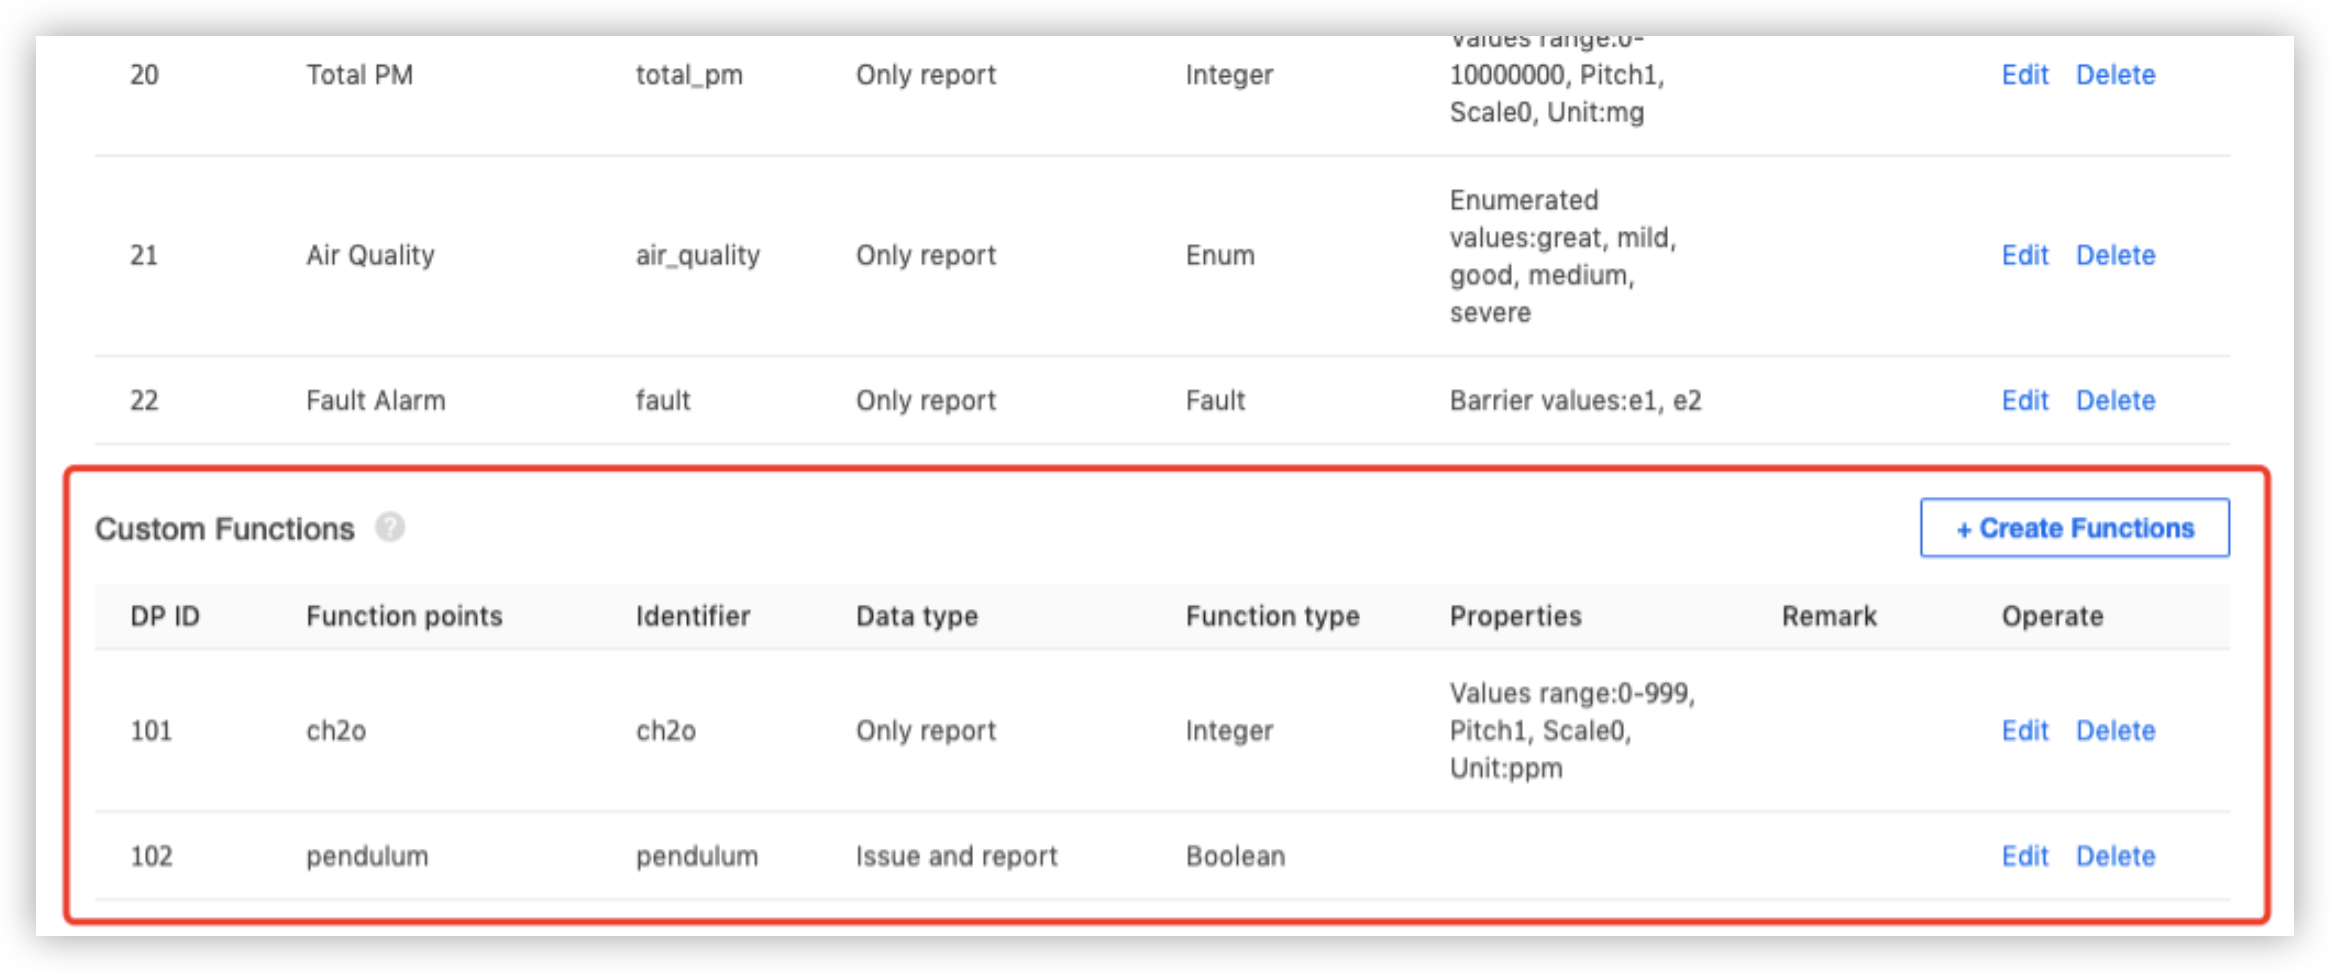
Common MCU-based products are small home applications, kitchen applications, and sensors. This section uses a Wi-Fi air purifier as an example to describe how to configure the panel of an MCU-based product. MCU products allow you to edit DPs. You can add or delete DPs based on certain custom all-in-one panels. For more information, see Custom Functions.
Things to note
- The data type of custom DPs cannot be set to Char type or Raw type. Otherwise, all-in-one air purifier panels cannot be available.
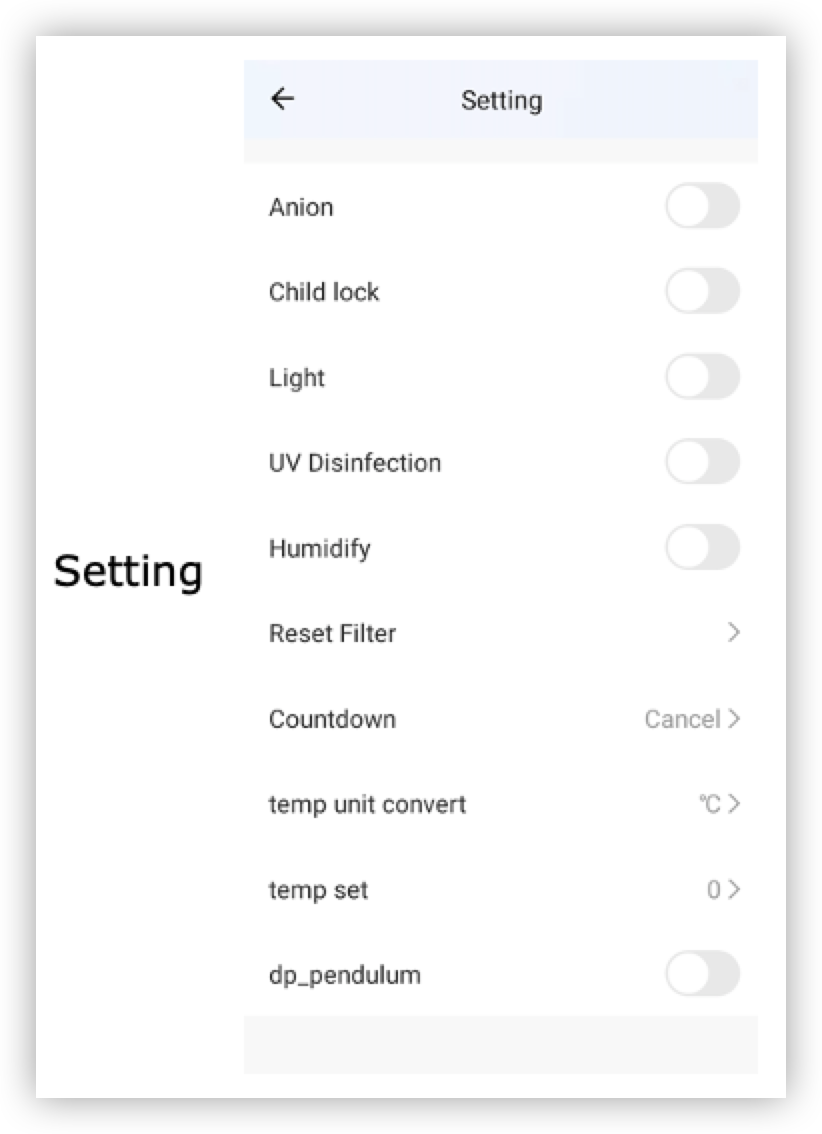
- The custom DPs for which the data transfer type is set to Only report are displayed on the homepage of the panel. The custom DPs for which the data transfer type is set to Issue and report are displayed on the Settings page of the panel.
- The DPs for which the data type is set to Fault are not displayed on the panel.
Function requirements
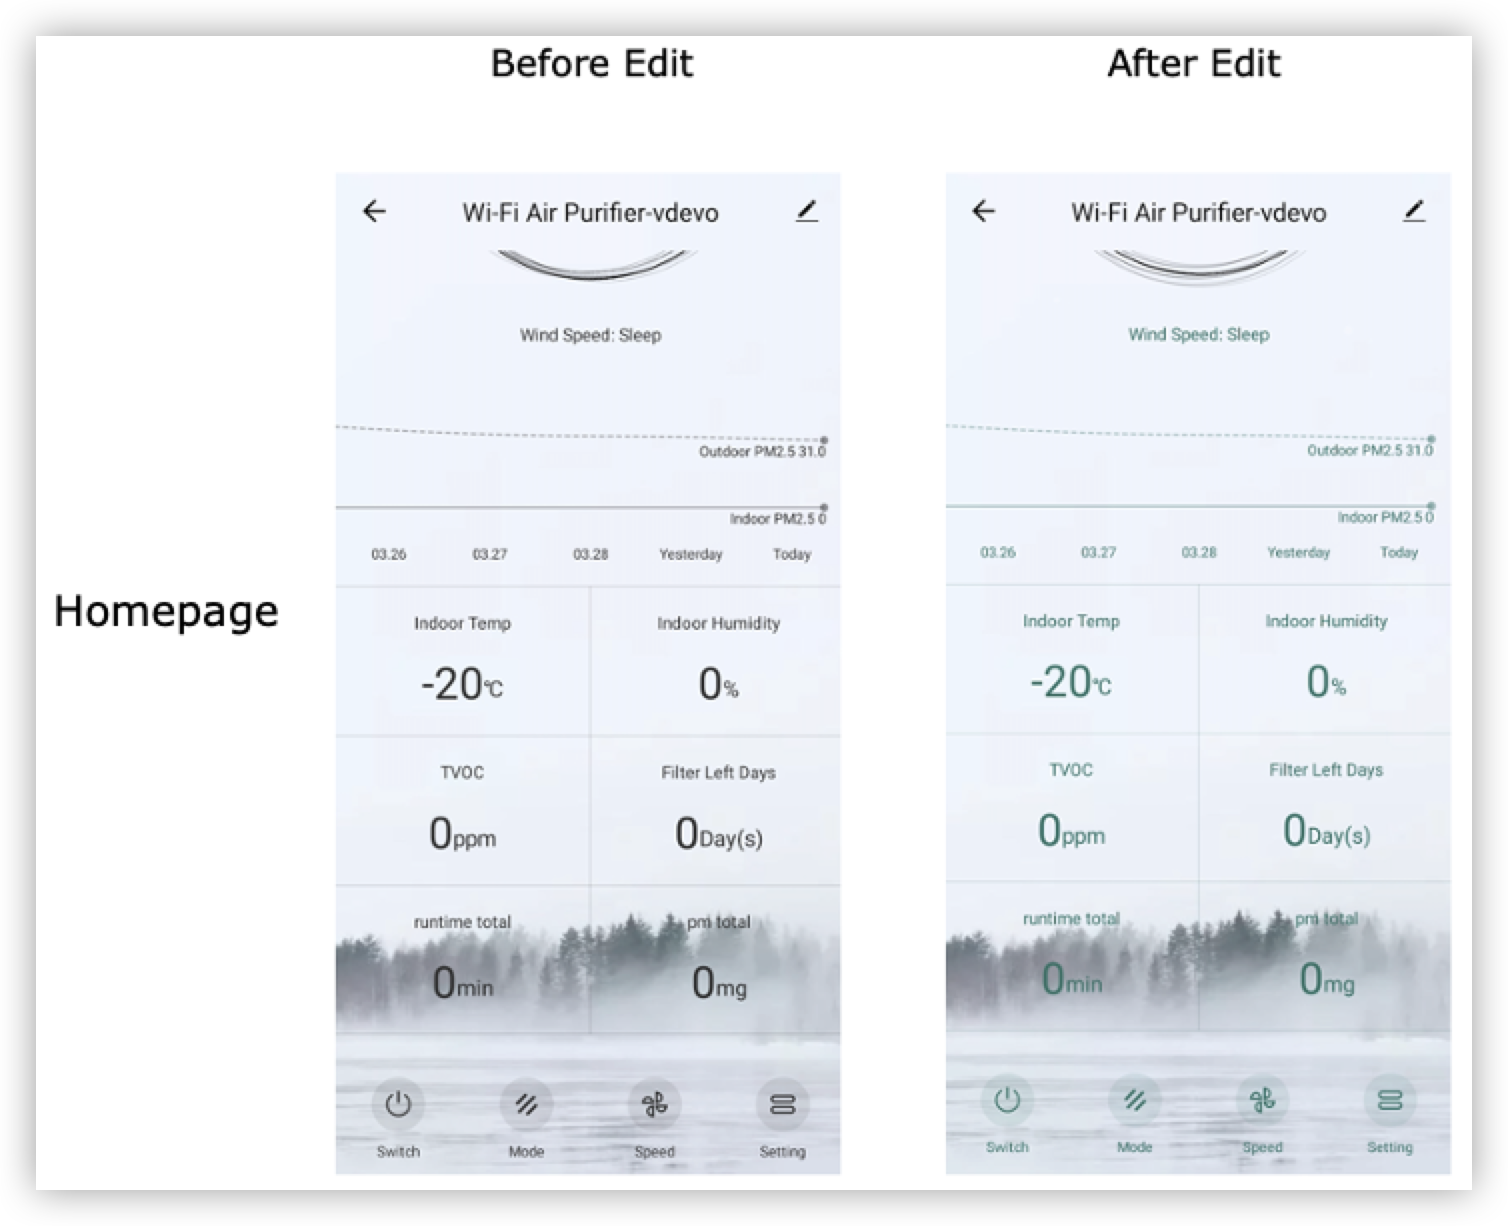
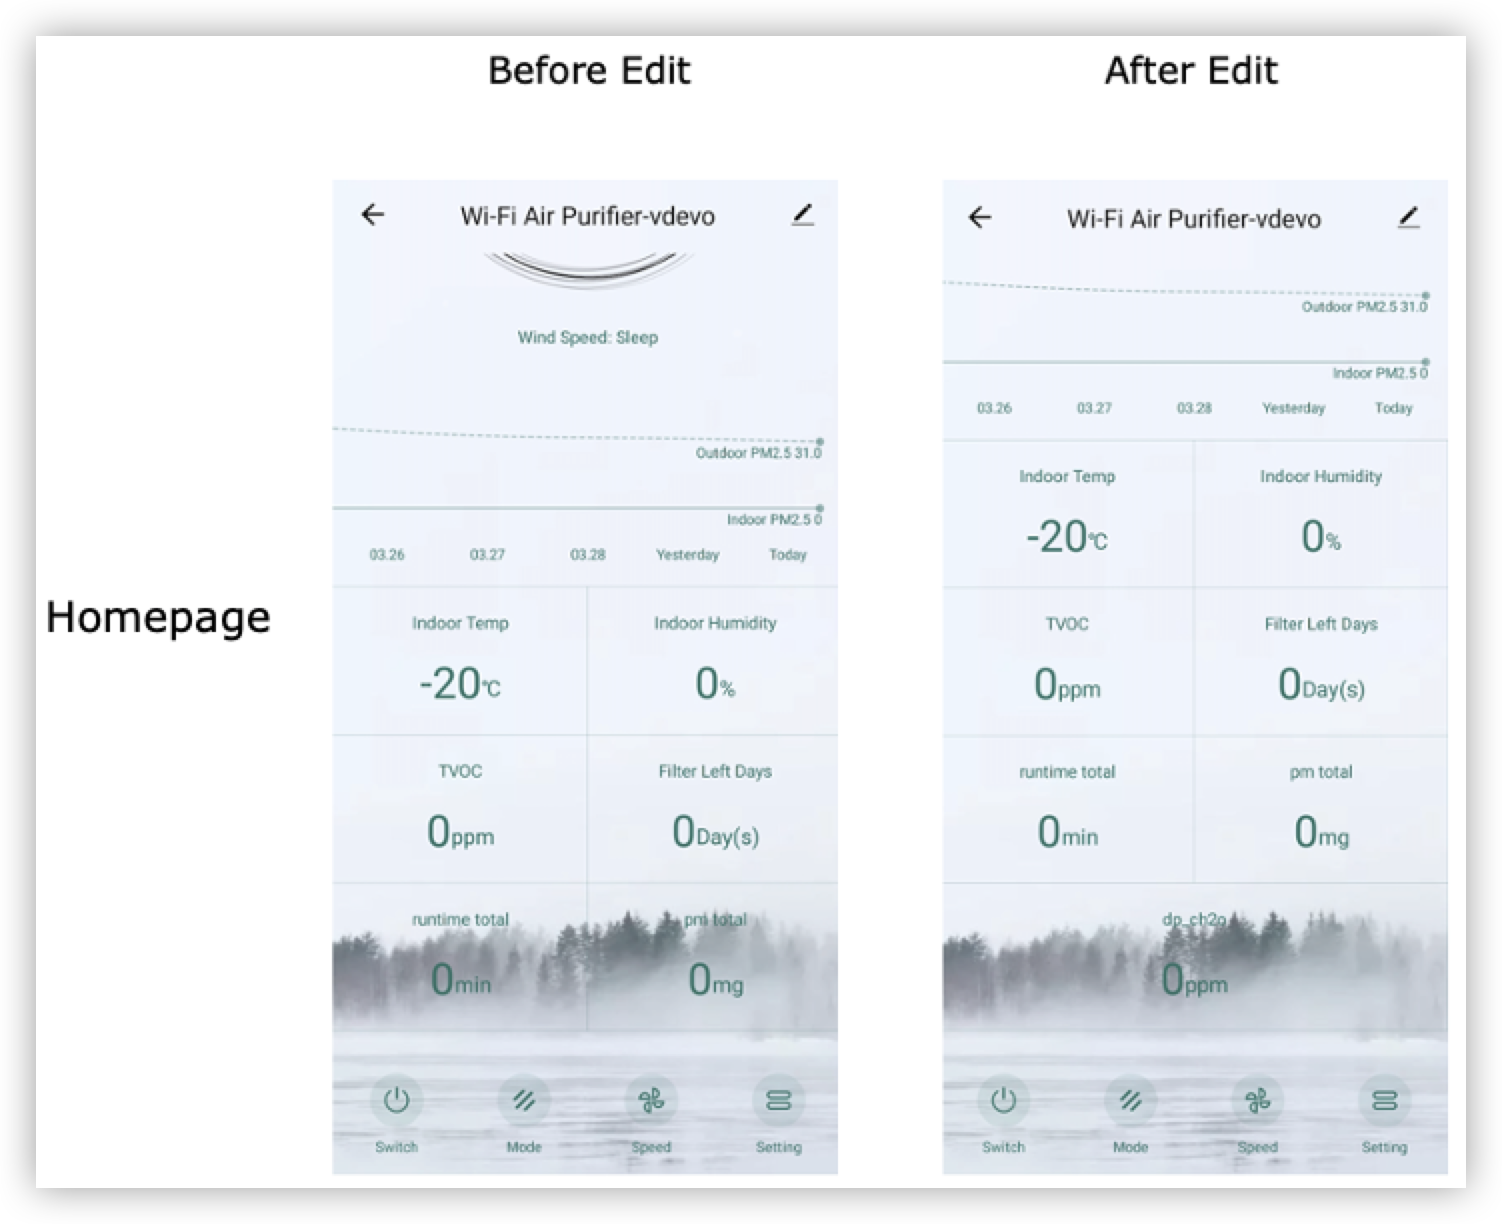
- The panel displays indoor temperature and humidity and the concentration of total volatile organic compounds (TVOC) and formaldehyde.
- A fan blade switch is added to the panel.
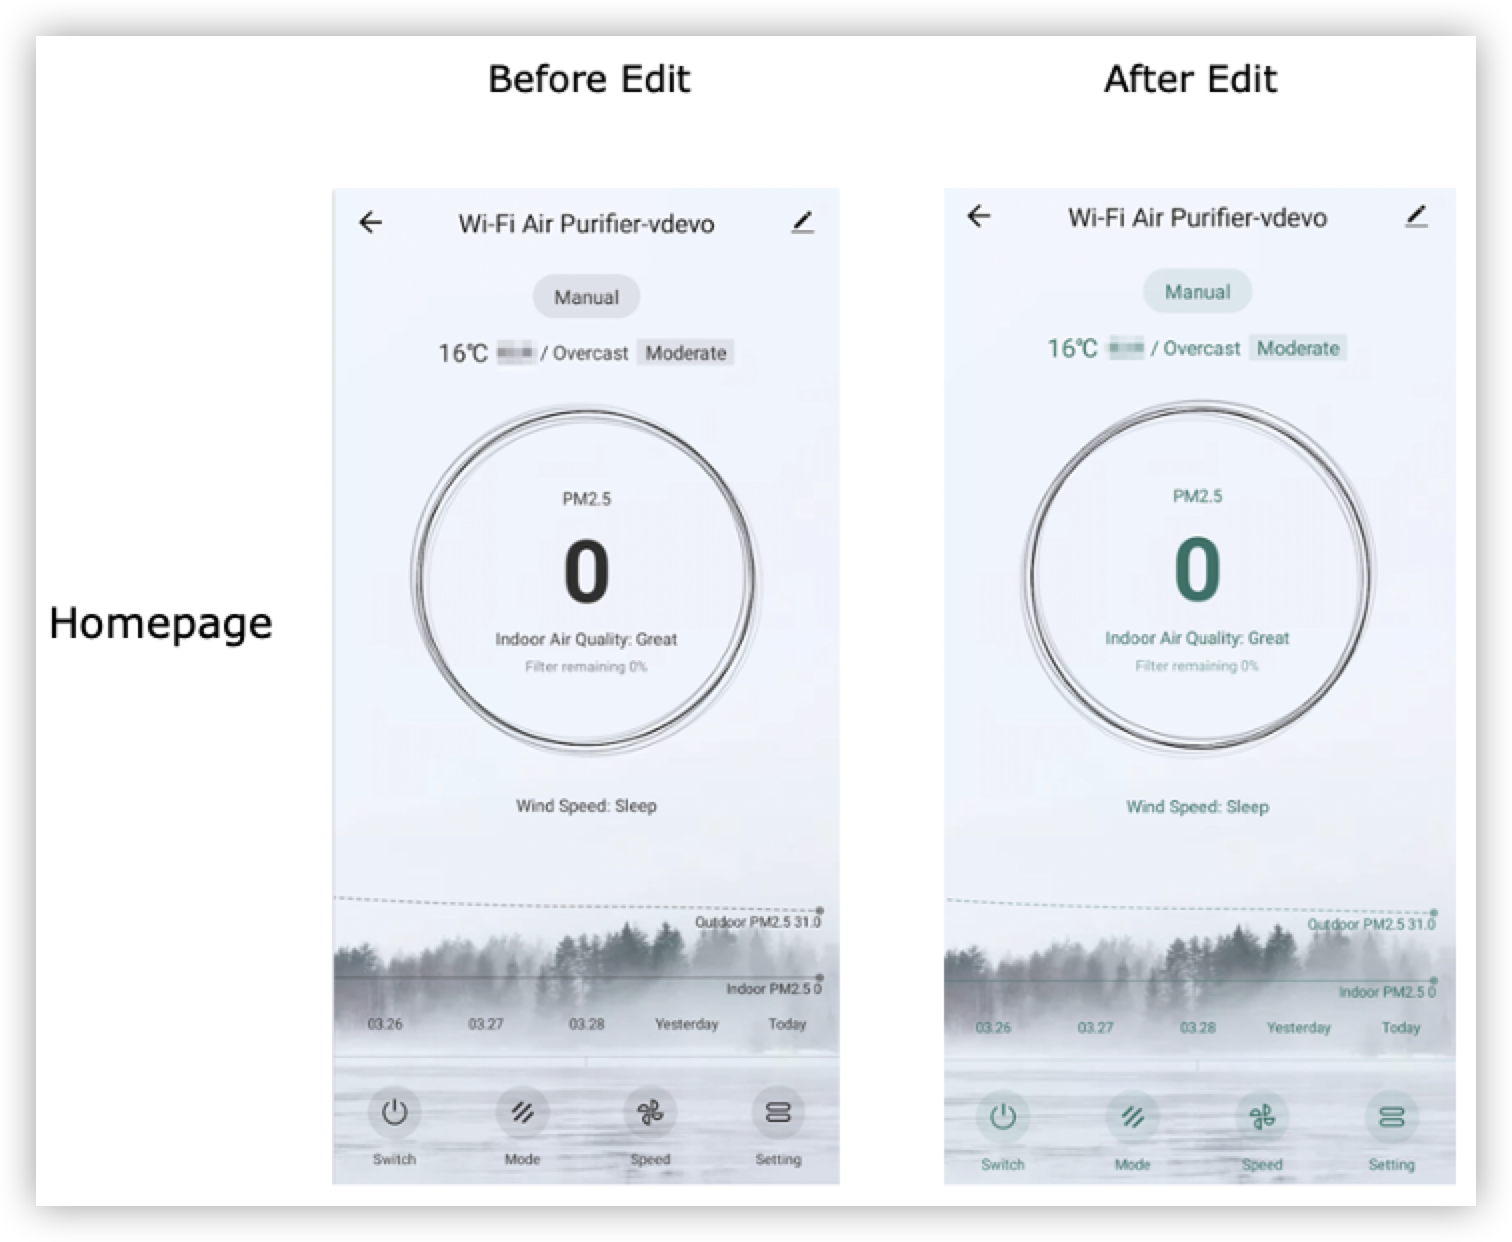
- The font color of the value that indicates the indoor PM2.5 concentration varies based on different value ranges. The font color turns green for the value from
0to50, yellow for the value from50to100, and red for the value larger than100. - Outdoor weather is indicated with weather icons.
- The curves of indoor PM2.5 concentration are canceled.
Panel preview
Procedure
-
Set the DPs.
a. Select the standard DPs that are required by your product.
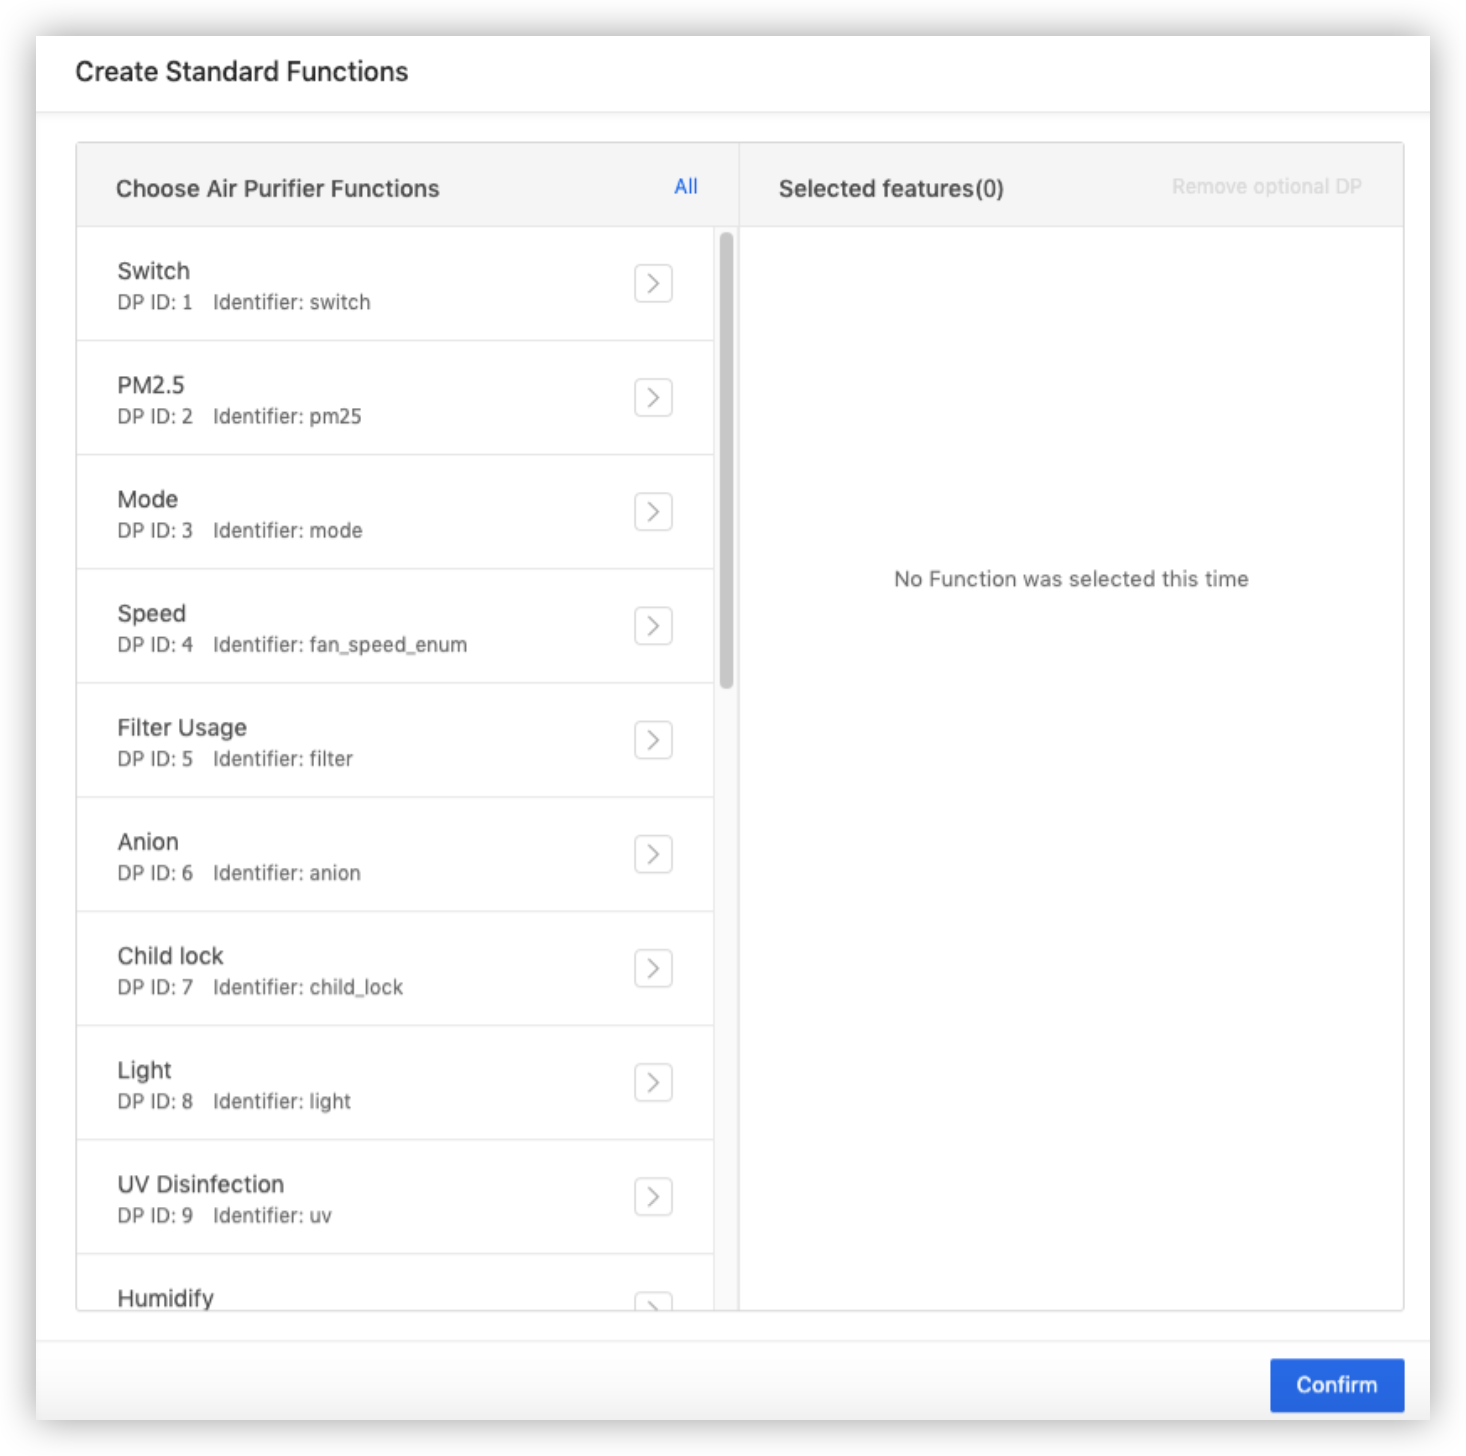
b. View the specified DPs.
c. Add the custom DPs that are required by your product.
d. Select a preferred all-in-one air purifier template.
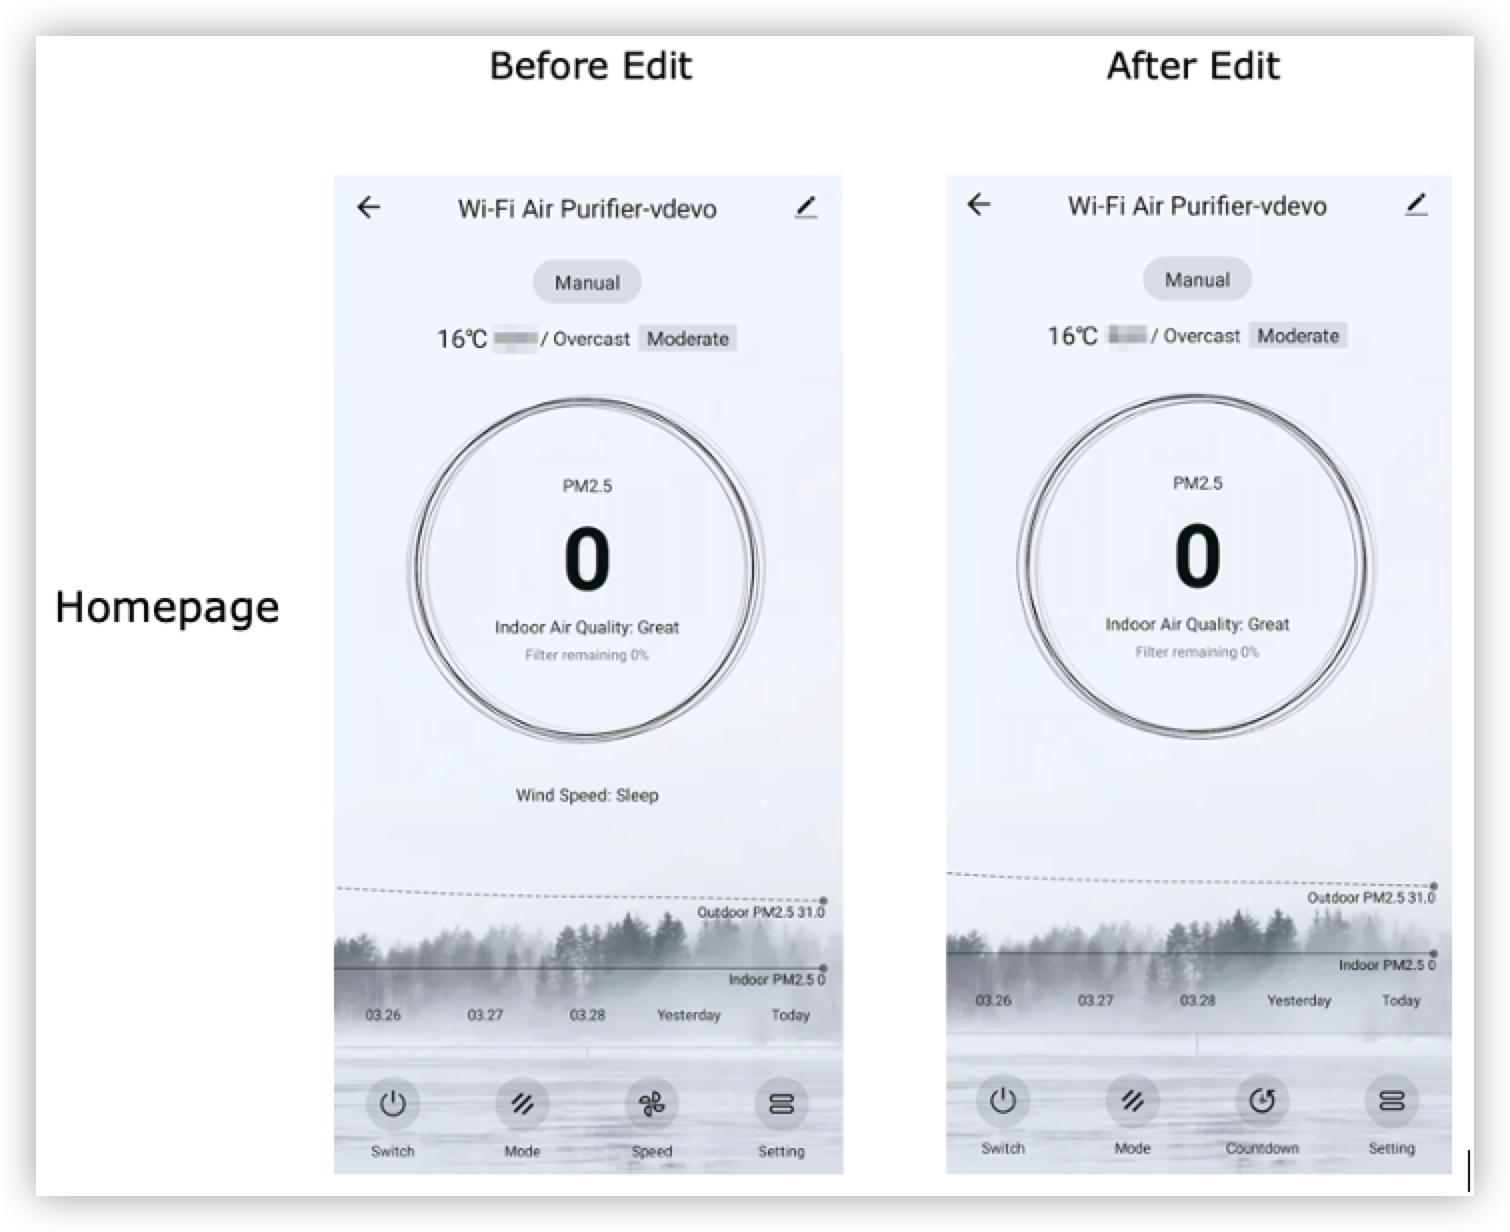
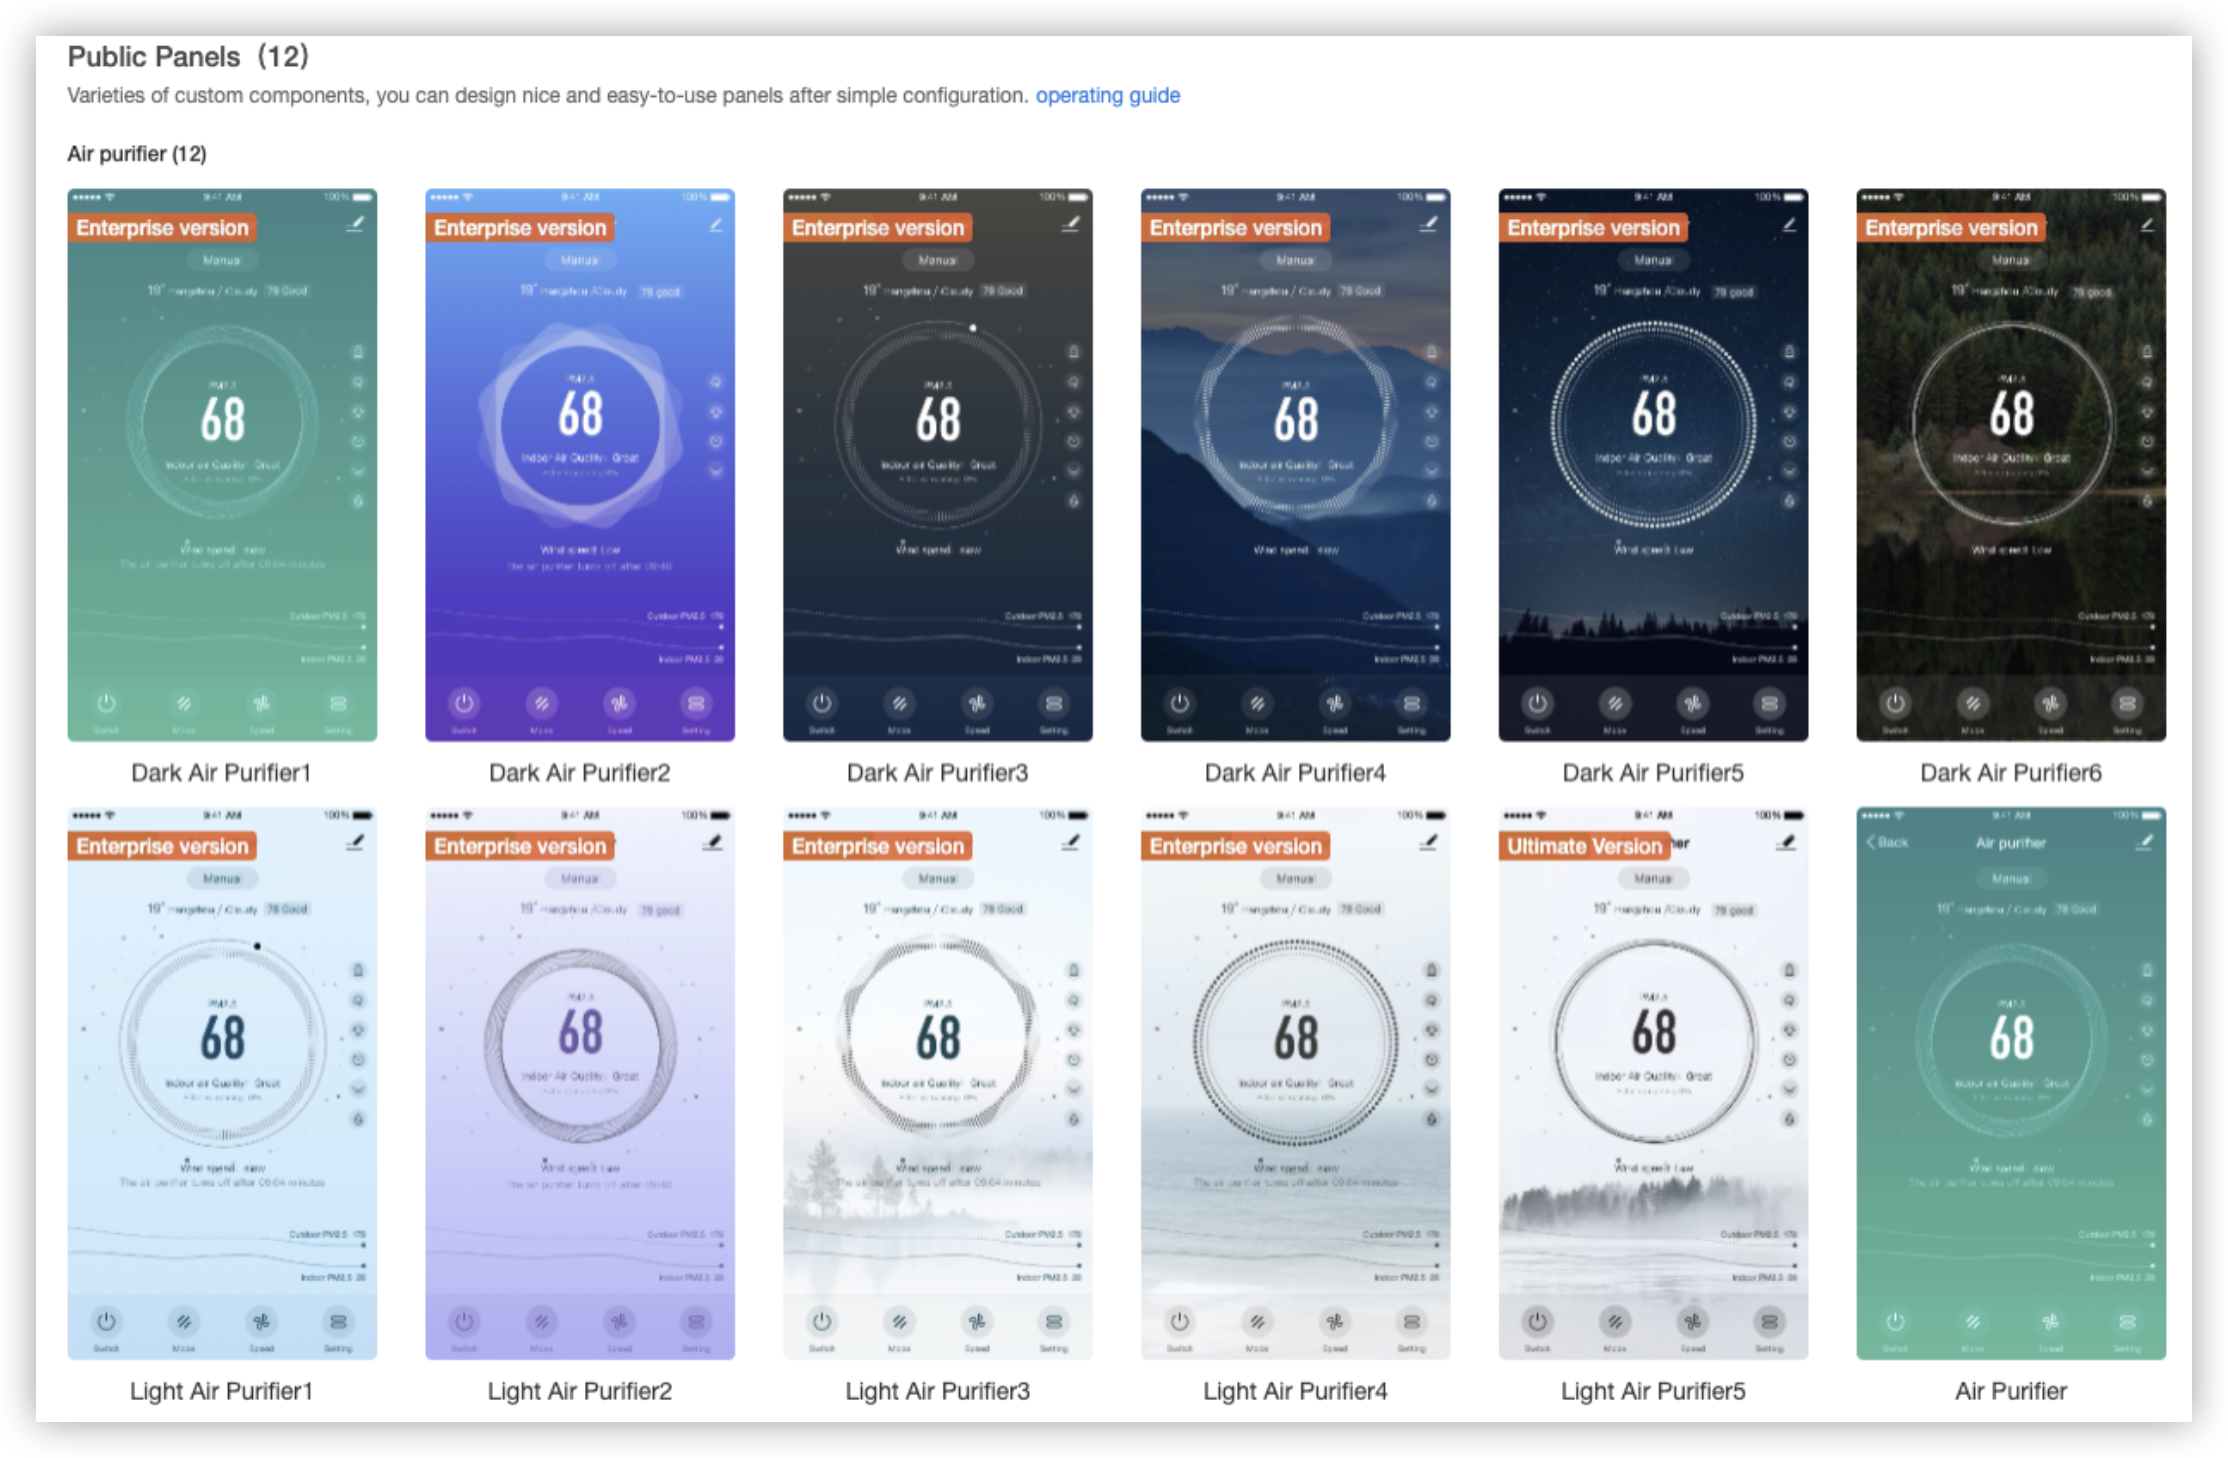 The following figures show the comparison before and after the panel style is configured.

-
Set the multilingual text.
Note: If the text modification does not take effect, clear the app cache and try again or scan the QR code again to preview the text.
-
Submit a ticket to require the panel modifications.
The font color of the indoor PM2.5 concentration value, the weather icon, and indoor PM2.5 concentration curves are configured based on the background coding by Tuya engineers. To configure these functions, submit a ticket.
Configure custom functions
The following table list the custom functions that are configured only after you submit a ticket. To configure these functions, submit a ticket and include the product ID (PID) in the ticket. 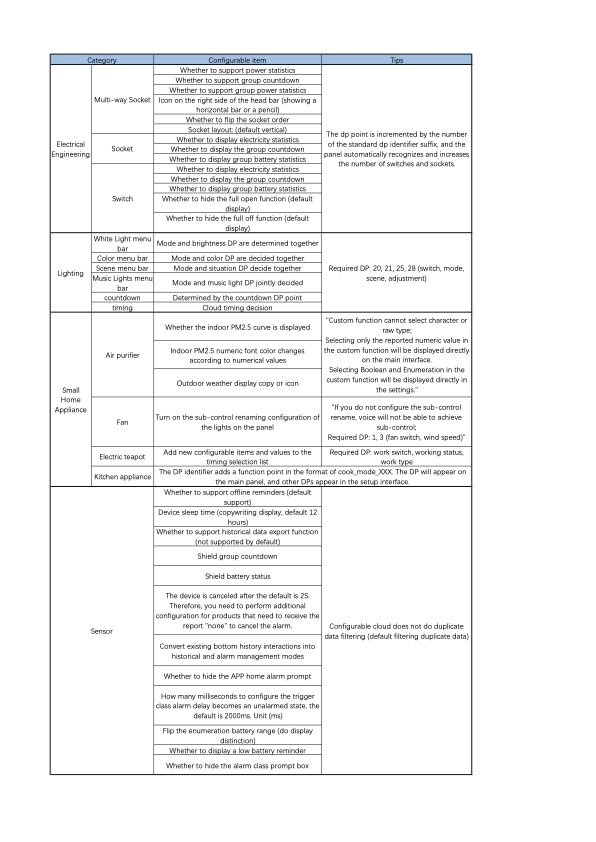
Is this page helpful?
YesFeedbackIs this page helpful?
YesFeedback


