Upload Firmware
If your product is connected with the Tuya ecosystem using the MCU integration protocol or SDK solution, you can manage custom firmware and deploy OTA updates on the Tuya Developer Platform. This topic describes how to upload custom firmware.
Custom firmware
Custom firmware is uploaded and maintained on your own in the Tuya Developer Platform.
Firmware type
Firmware types are divided into production firmware, user area firmware, and firmware updates.
- Production firmware and user area firmware: Required to be uploaded for products with firmware flashed by Tuya.
- Firmware updates: Used to deploy OTA firmware updates, applying to all products.
Preparation for custom firmware configuration
- Compile the firmware to be uploaded.
- Prepare a device sample for firmware verification.
- Create a product with the custom solution on the Tuya Developer Platform. Your account is granted permission to develop this product.
Upload and enable custom firmware
- Find the target product and enter the product development process.
- Select hardware.
- Complete the custom firmware information.
- Upload the custom firmware.
- Enable the custom firmware.
Procedure
-
Log in to the Tuya Developer Platform and open the Product Development page. Find the target product and click Develop.

-
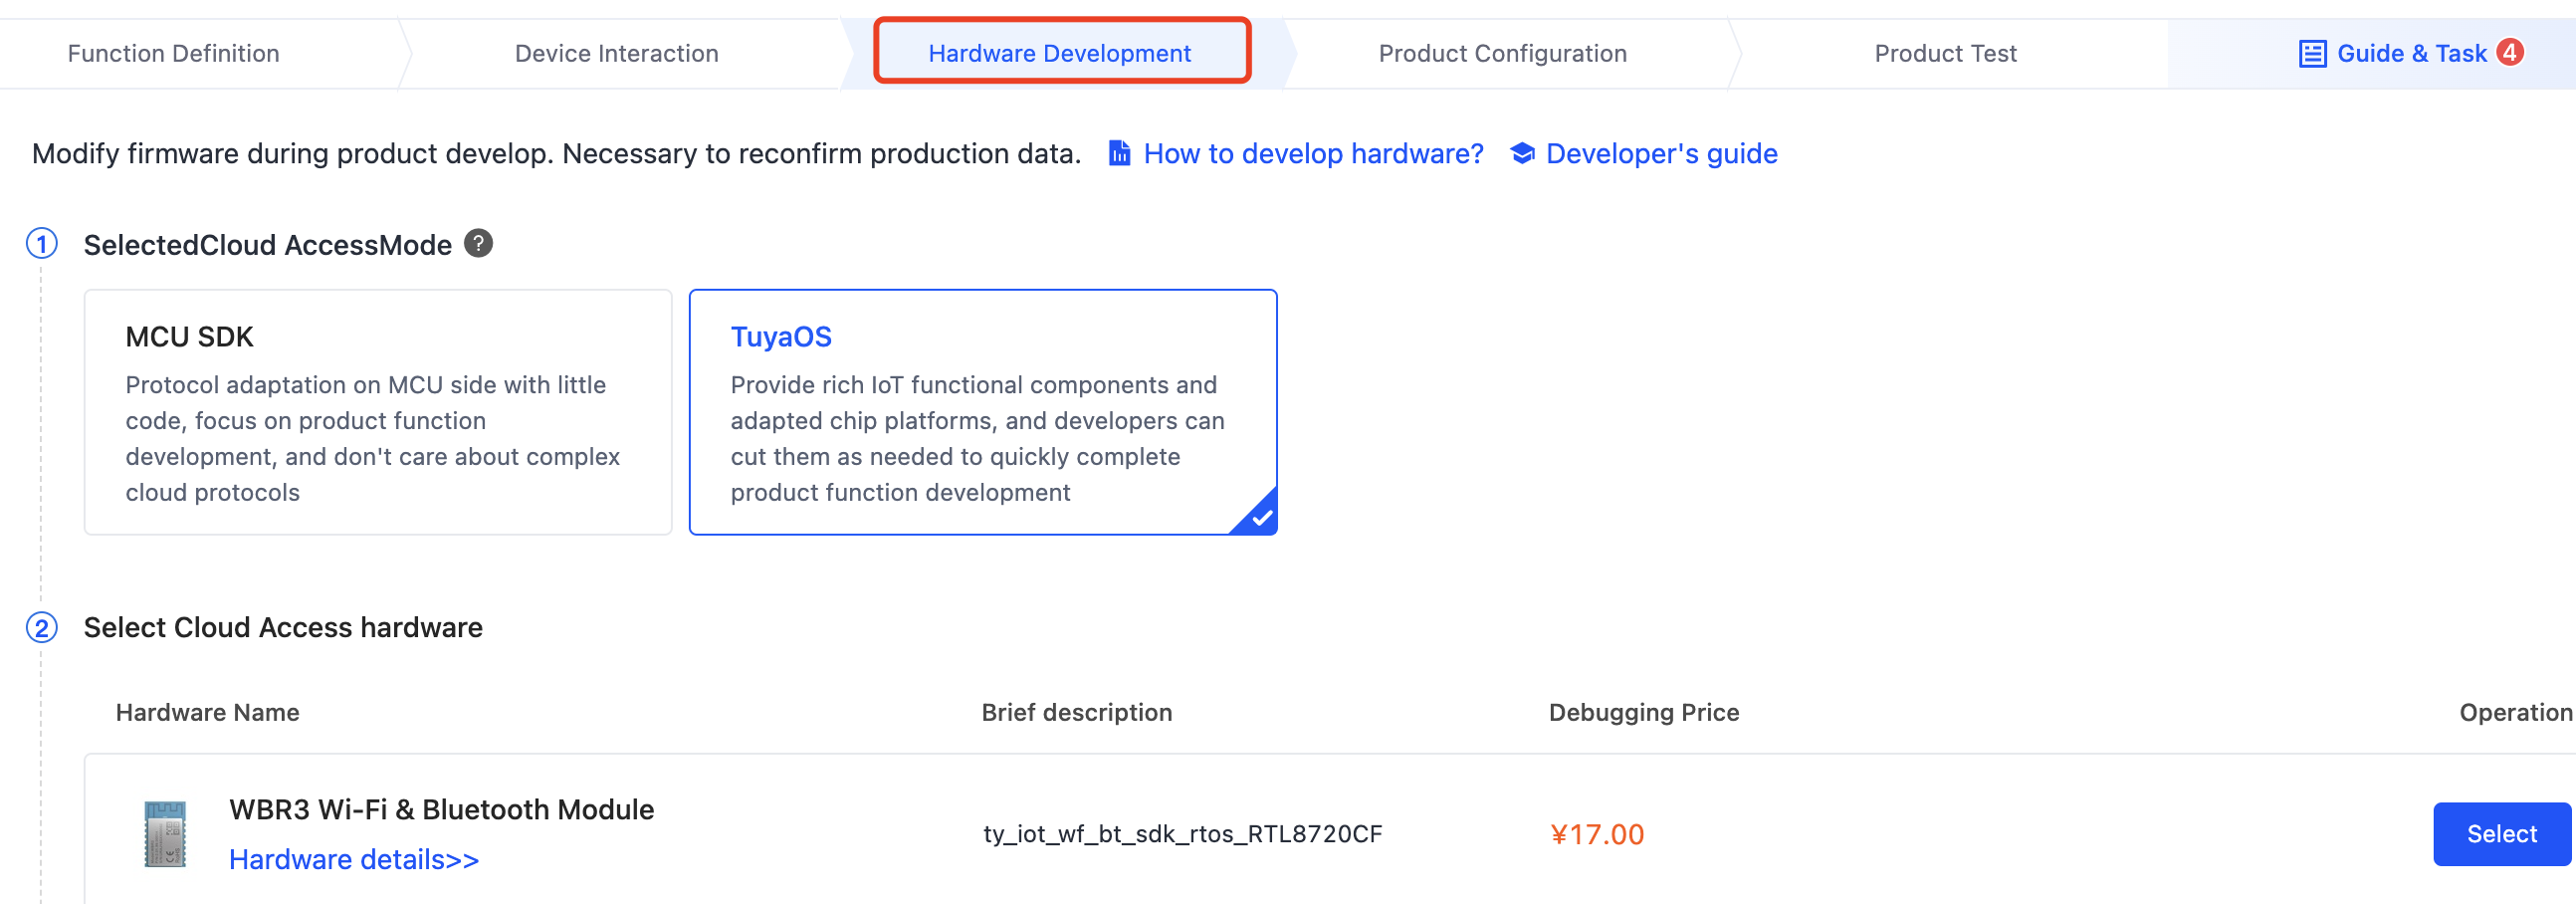
Under the Hardware Development tab, select the chip and module based on your hardware. If you do not find the desired chip, contact your project manager.
-
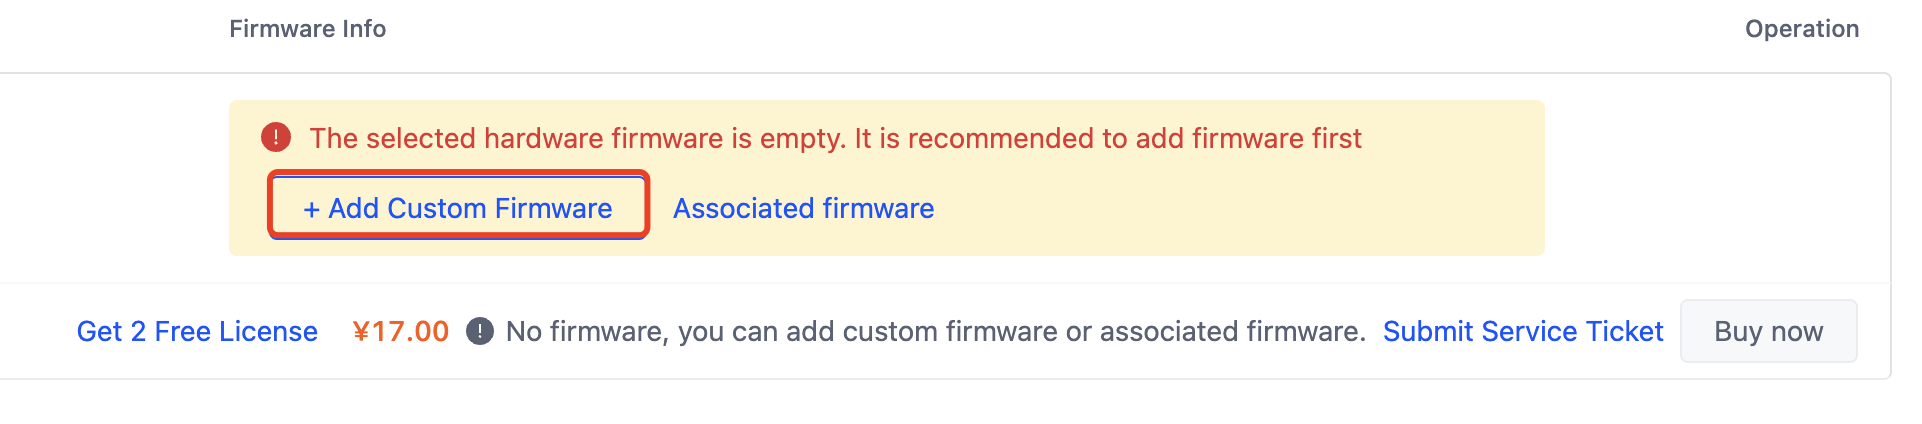
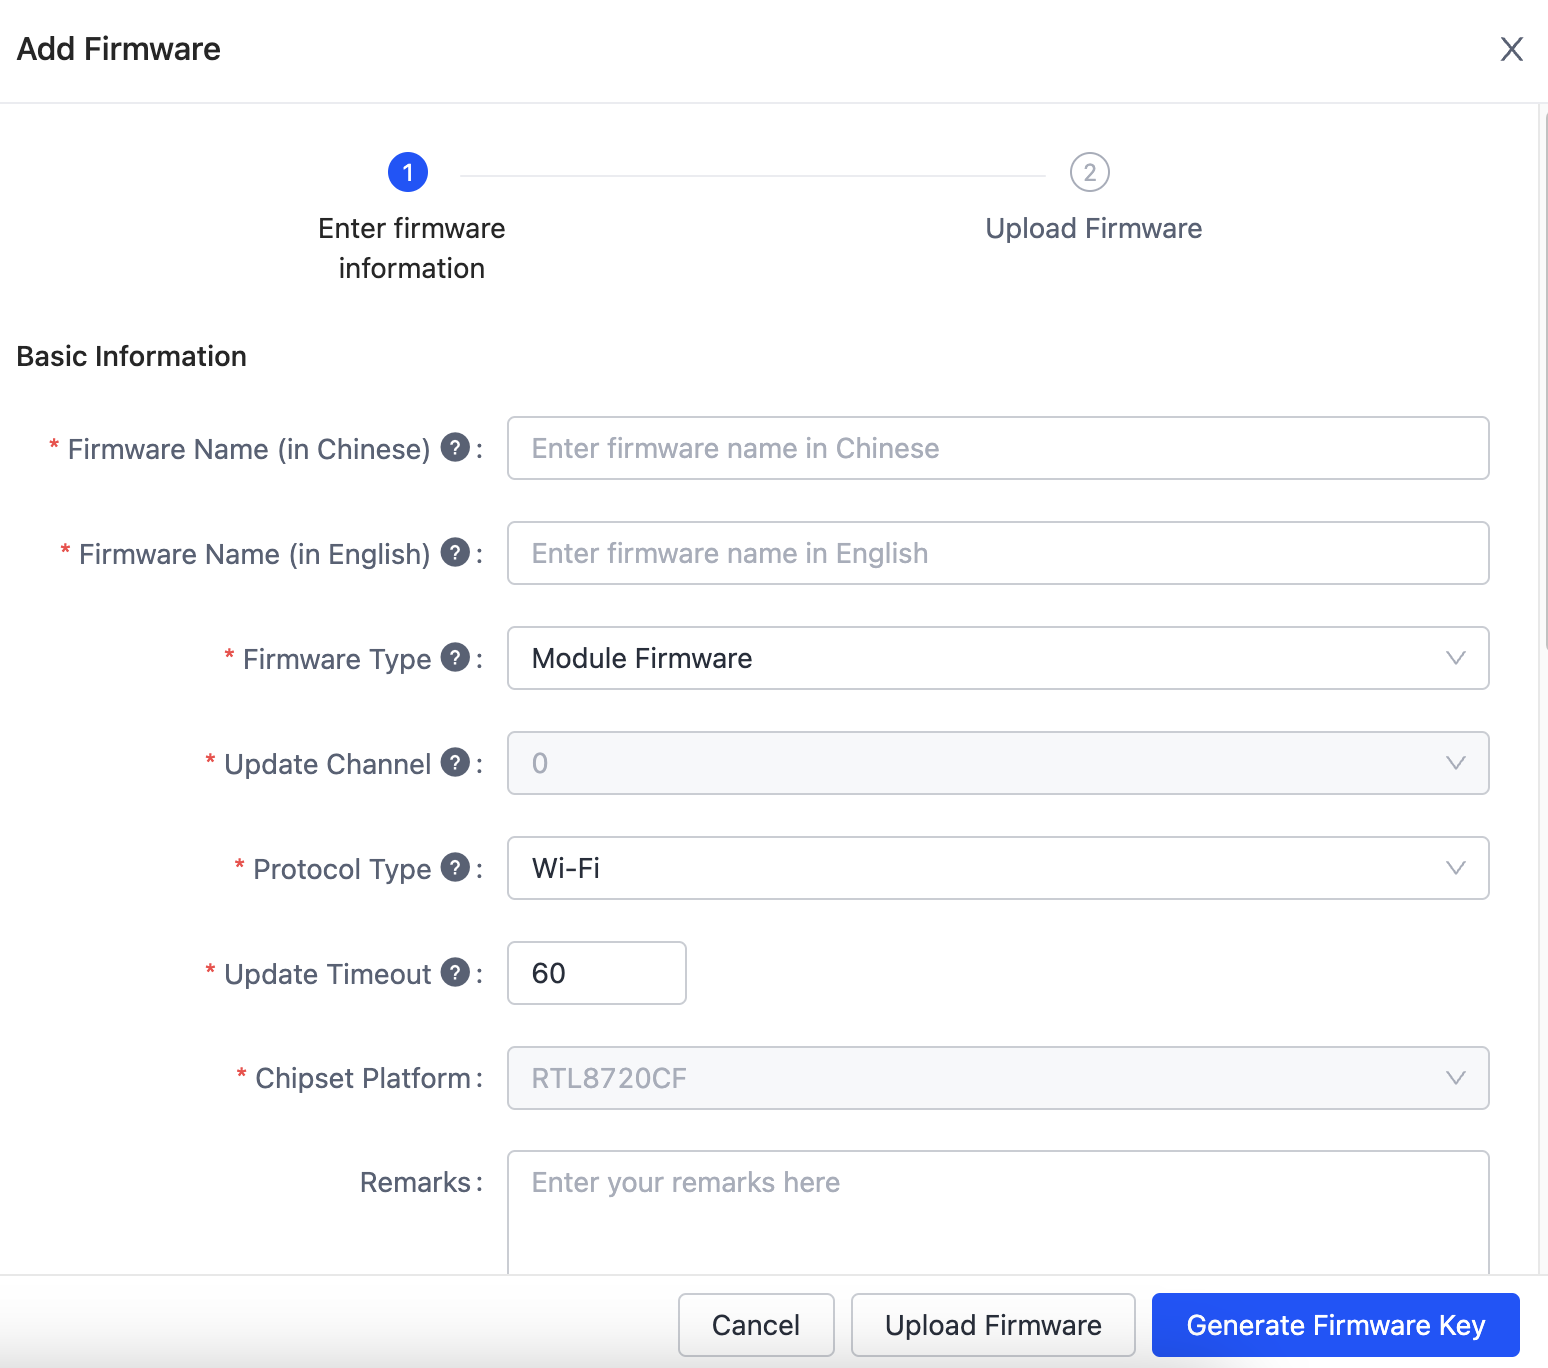
Click Add Custom Firmware. Complete the required information and click Upload Firmware.
-
Enter the firmware version information and upload the firmware file. After the firmware is uploaded, click Save. You will be asked whether to enable the firmware. You can enable it if necessary.

-
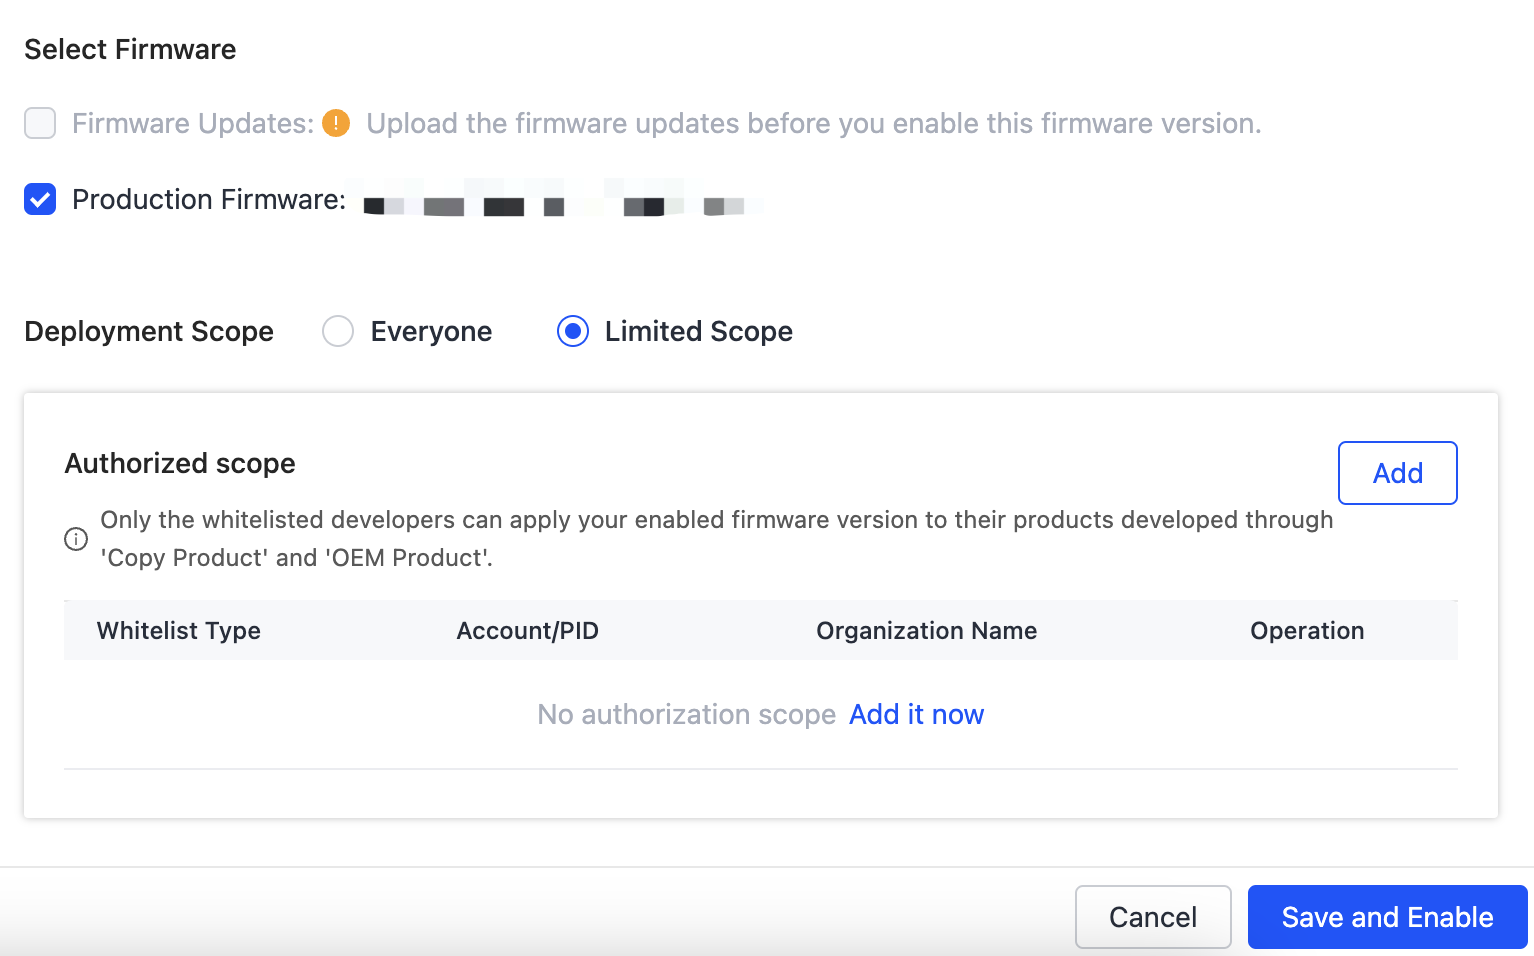
If you proceed with Enable Firmware, select firmware, set the deployment scope, and click Save and Enable.
FAQs
What is the difference between the firmware states Not Enabled and Enabled?
-
Not Enabled (default): Indicates the firmware is not available for use. You are not allowed to request or purchase the license with firmware that is not enabled.
-
Enabled: Indicates the firmware is available for use.
- If the production firmware and user area firmware are enabled, they can be selected for a product.
- If firmware updates are enabled, they can be selected for OTA updates. If you intend to deploy OTA updates, it is recommended to enable the firmware updates.
What is the purpose of the deployment scope?
It allows you to limit who can use this firmware.
Example
- Account A owns PID1 with firmware key1.
- Account B and Account C create PID2 and PID3 respectively through copy or OEM, which are identical to PID1 and contain firmware key1 v1.0.0.
- When Account A releases a new version of firmware key1, such as v1.0.1, it creates a firmware version on the platform.
- Set the deployment scope.
- If Account B and Account C are allowed to use this version, the firmware should be enabled with the development scope set as Everyone. Then, both Account B and Account C will receive firmware v1.0.1.
- If only Account B is allowed to use this version, the firmware should be enabled with the development scope set as Account B. Then, only Account B will receive firmware v1.0.1.
- If the firmware key1 is applied to multiple PIDs, the firmware publisher can restrict access to a specific firmware version by defining the development scope.
What is the purpose of the Allowlist in Development Scope?
If your product has been used for OEM or copy, you can specify who can access the firmware by product ID or account.
Where can I manage the uploaded firmware?
Go to Firmware Management > My Firmware and check the firmware associated with the current account.
Is this page helpful?
YesFeedbackIs this page helpful?
YesFeedback


