Cloud Development
Last Updated on : 2024-06-20 04:24:51download
Tuya provides a variety of fundamental services, industry services, and PaaS services, helping you develop low-code industry SaaS effortlessly.
This topic describes how to make basic API requests to control the devices. For more information about the complete operation practice, see Device Control Practice.
Development flowchart

Procedure
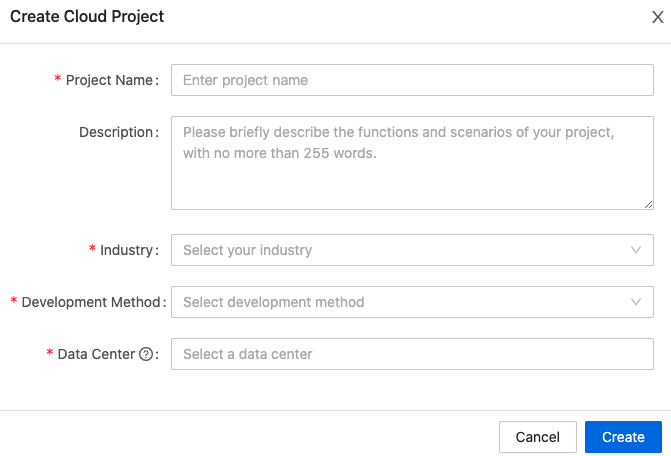
Step 1: Create cloud development project
A project is a collection of resources on the Tuya Developer Platform. Resources deployed by different cloud development projects are isolated from each other. You can create Custom and Smart Home projects on the platform.
We recommend that you adopt the Custom development method. For more information about the differences between both types of projects, see Development Method. For more information about project creation, see Manage Projects.
Step 2: Configure the project
After you configure the basic information of the project, you are navigated to the page of the configuration wizard.
-
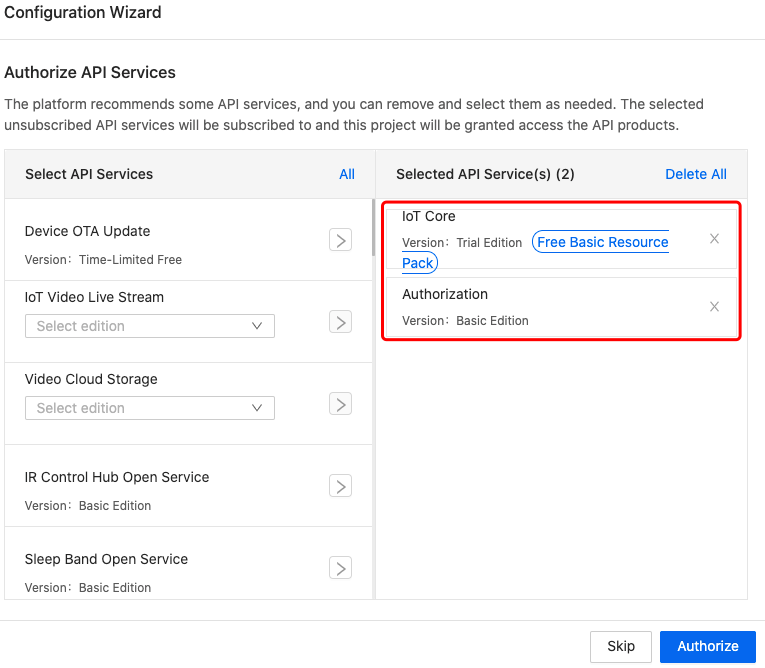
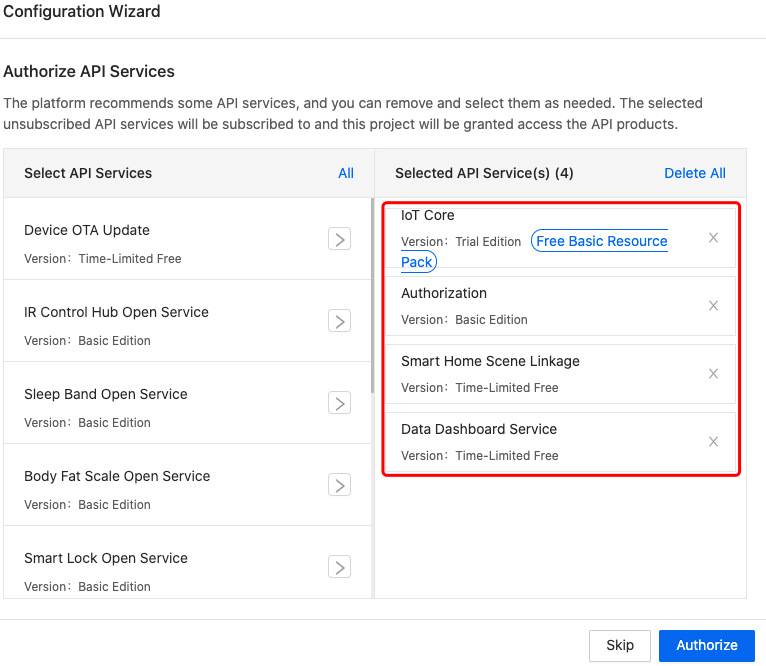
Authorize the project to access multiple API services.
By default, the API services that support the specified development method are selected for the project on the platform. You can add or delete the default API services, or select other API services. The following list shows the default APIs for each development method.If you have not subscribed to the selected API services, the platform will automatically subscribe to them and authorize this project to access them.
-
Custom development:
- IoT Core
- Authorization
-
Smart home:
-
IoT Core
-
Authorization
-
Smart Home Scene Linkage
-
Data Dashboard Service
-
-
-
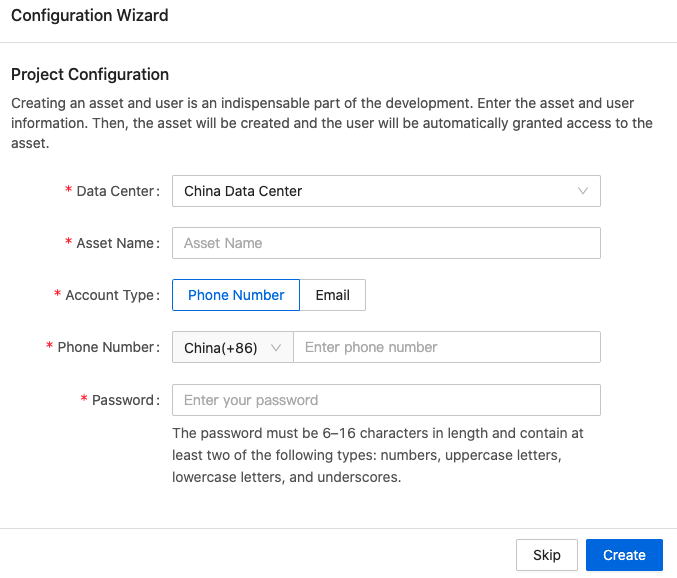
Quickly create assets and authorize specified users.
This step is only required for the Custom development method. You can skip this step if you select the Smart Home development method.
Step 3: Link devices
The process to link devices is slightly different between Custom and Smart Home projects. For more information, see Development Method.
Custom development
The following steps describe the overall process to link devices for the custom development project. For more information about specific steps, see the related documentation.
-
Manage authorization.
You can create multiple applications for a cloud development project and allocate independent resources for each application, such as assets, users, and API services. This way, you can build a multi-terminal application system.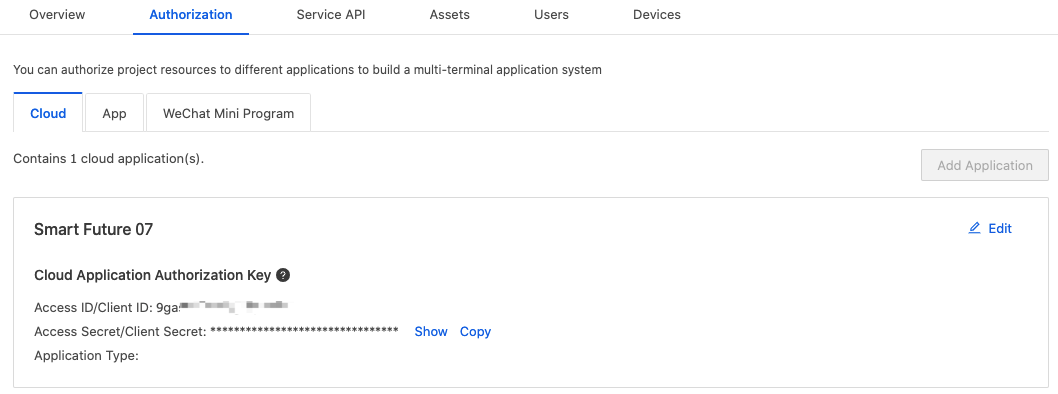
-
Create users.
After a user is added to a project, you can authorize the user to manage the specified assets.
-
Create assets.
The cloud development allows you to manage the devices and assign the device permissions by asset IDs.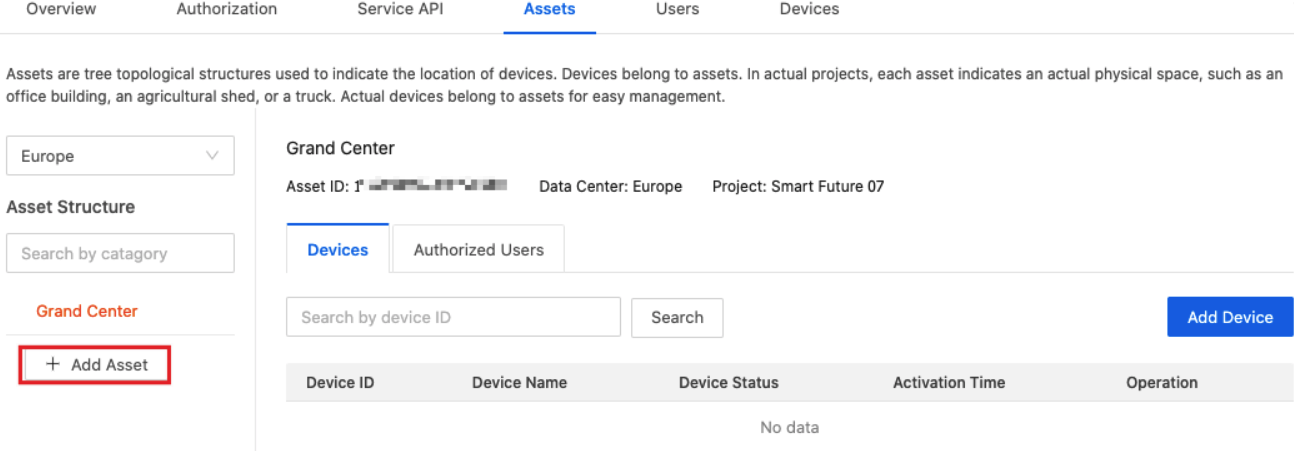
-
Authorize users.
You can authorize users to add, delete, and transfer devices under an asset. -
Add devices.
After you create an asset, you can add devices with the Smart Device Management app. You can unlink devices from a specified asset or transfer them to another asset.
Smart Home
After creating a project, you can link devices with your project.
Several linking methods are available. For more information, see Link Devices.

Step 4: Subscribe to API services
You can request permissions on APIs and enable Message Service on the platform.
-
Subscribe to API services
You can use either of the following two methods to log in to the subscription page.For more information, see Manage API Services.
-
On the My Services page, you can subscribe to API services.
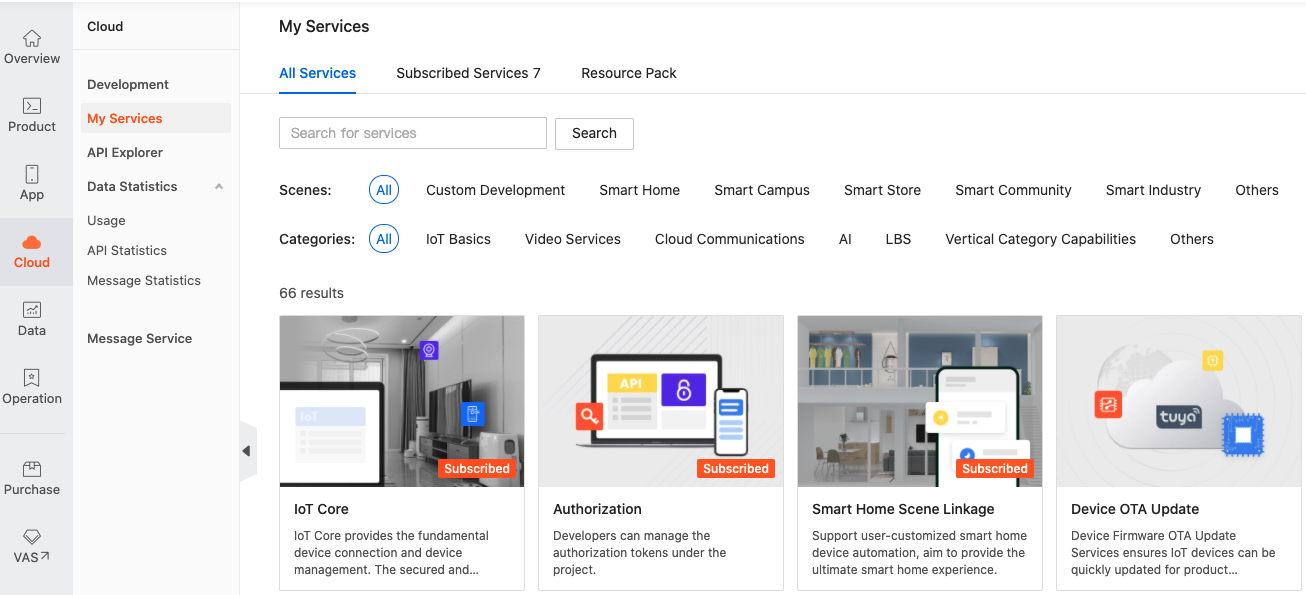
-
Choose Cloud > Development > Cloud Management, and click the created project to enter the details page. Click the Service API tab > Go to Authorize, find the required unsubscribed API products from the drop-down list, and then click Subscribe.

-
-
Authorize the project to request API services
After subscription, you must authorize the specified project to use the API service, so that the project can call this API with the authorization key.
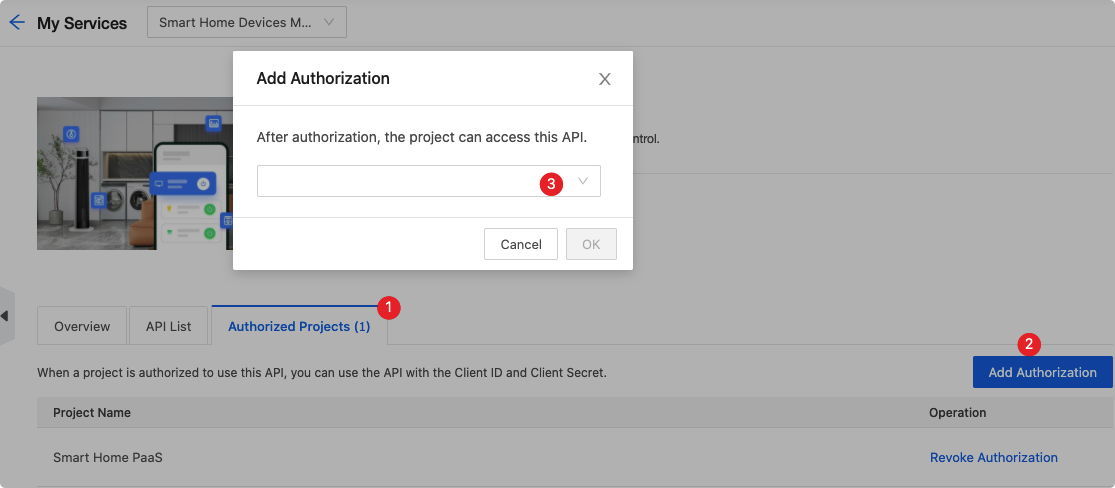
-
Authorize the subscribed API services to the project
On the Service API page of the project, you can view the subscribed API services for the project. Also, you can click Go to Authorize to add API services.

-
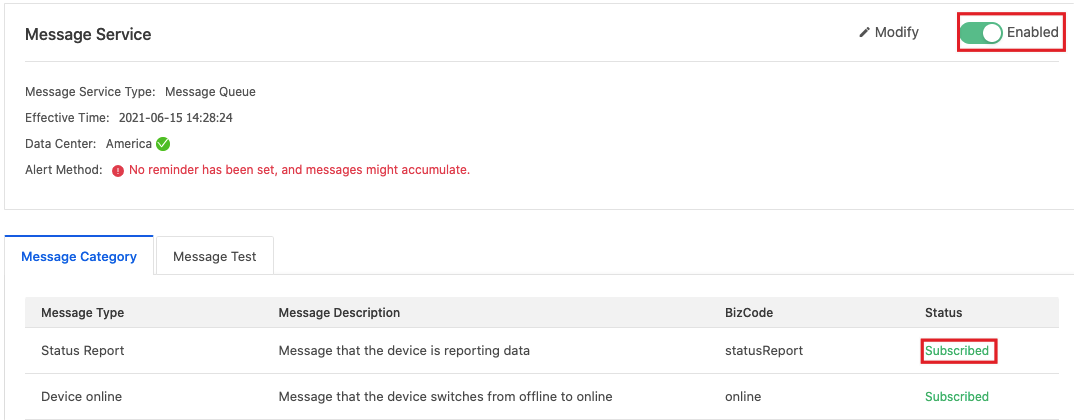
Enable Message Service
On the page of Message Service, you can enable this service and configure parameters to get alerts of excessive messages.
For more information, see Message Service.
Step 5: Develop and call APIs
After you subscribe to an API service and authorize the specified project to use it, you can debug API calls with the API Explorer on the platform. For more information, see API Explorer.
Step 6: View data statistics
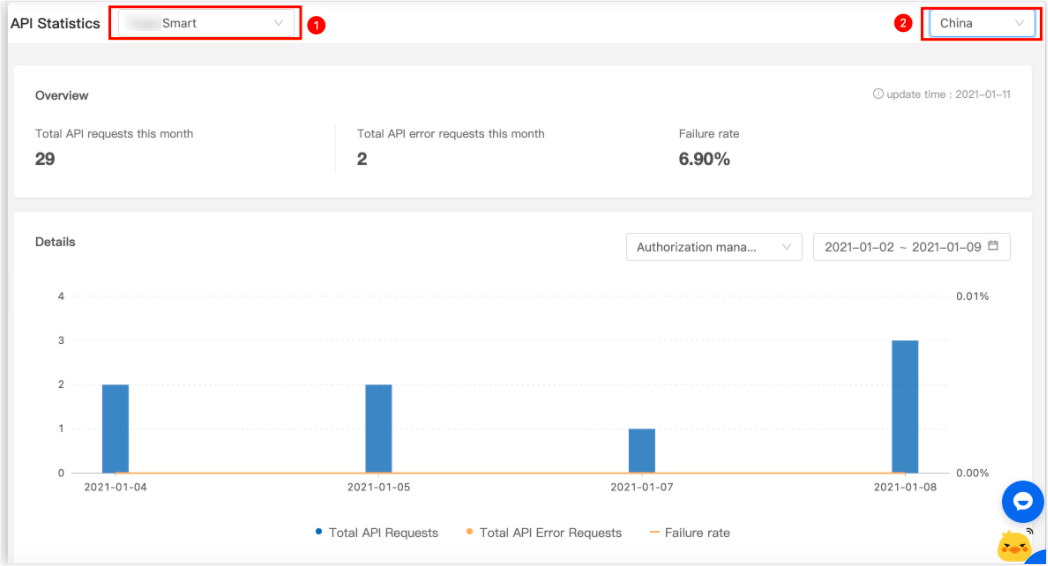
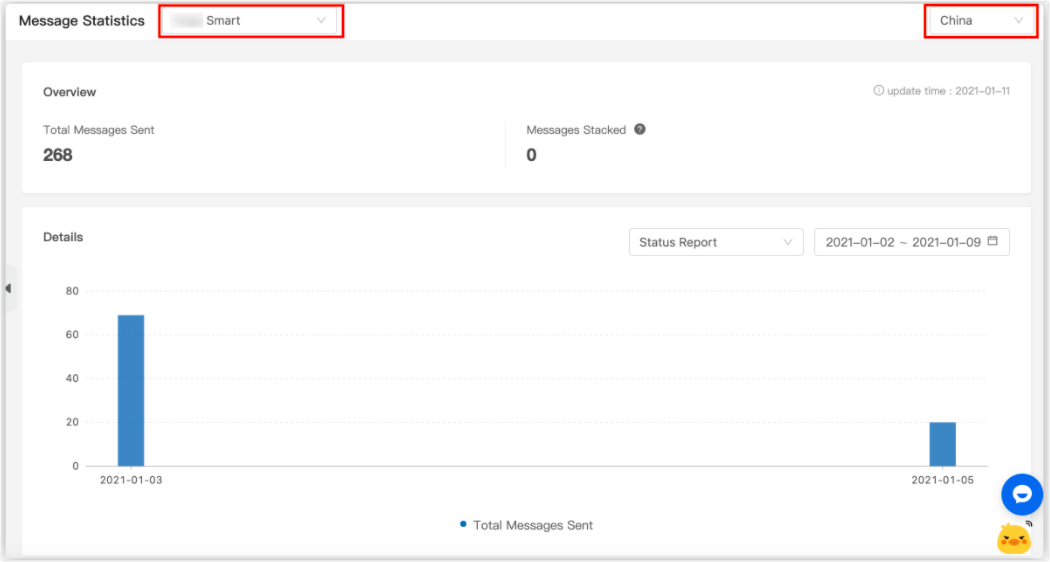
In the left-side navigation of the platform, choose Cloud > Data Statistics > API Statistics to view data statistics. For more information, see Data Statistics. Tuya provides two types of data statistics.
-
API Statistics
-
Messages Statistics
Is this page helpful?
YesFeedbackIs this page helpful?
YesFeedback


