Quick Start
This topic describes how to build a Matter project using the product development kit in Tuya Wind IDE.
Preparation
- Install Ubuntu 20.04 or later on your computer.
- Create a gateway product and sub-device product on the Tuya Developer Platform.
- Download and install Tuya Wind IDE on the Ubuntu system.
- Install a TFTP server tool, such as
tftpd64.exe.
Step 1: Download the development framework
-
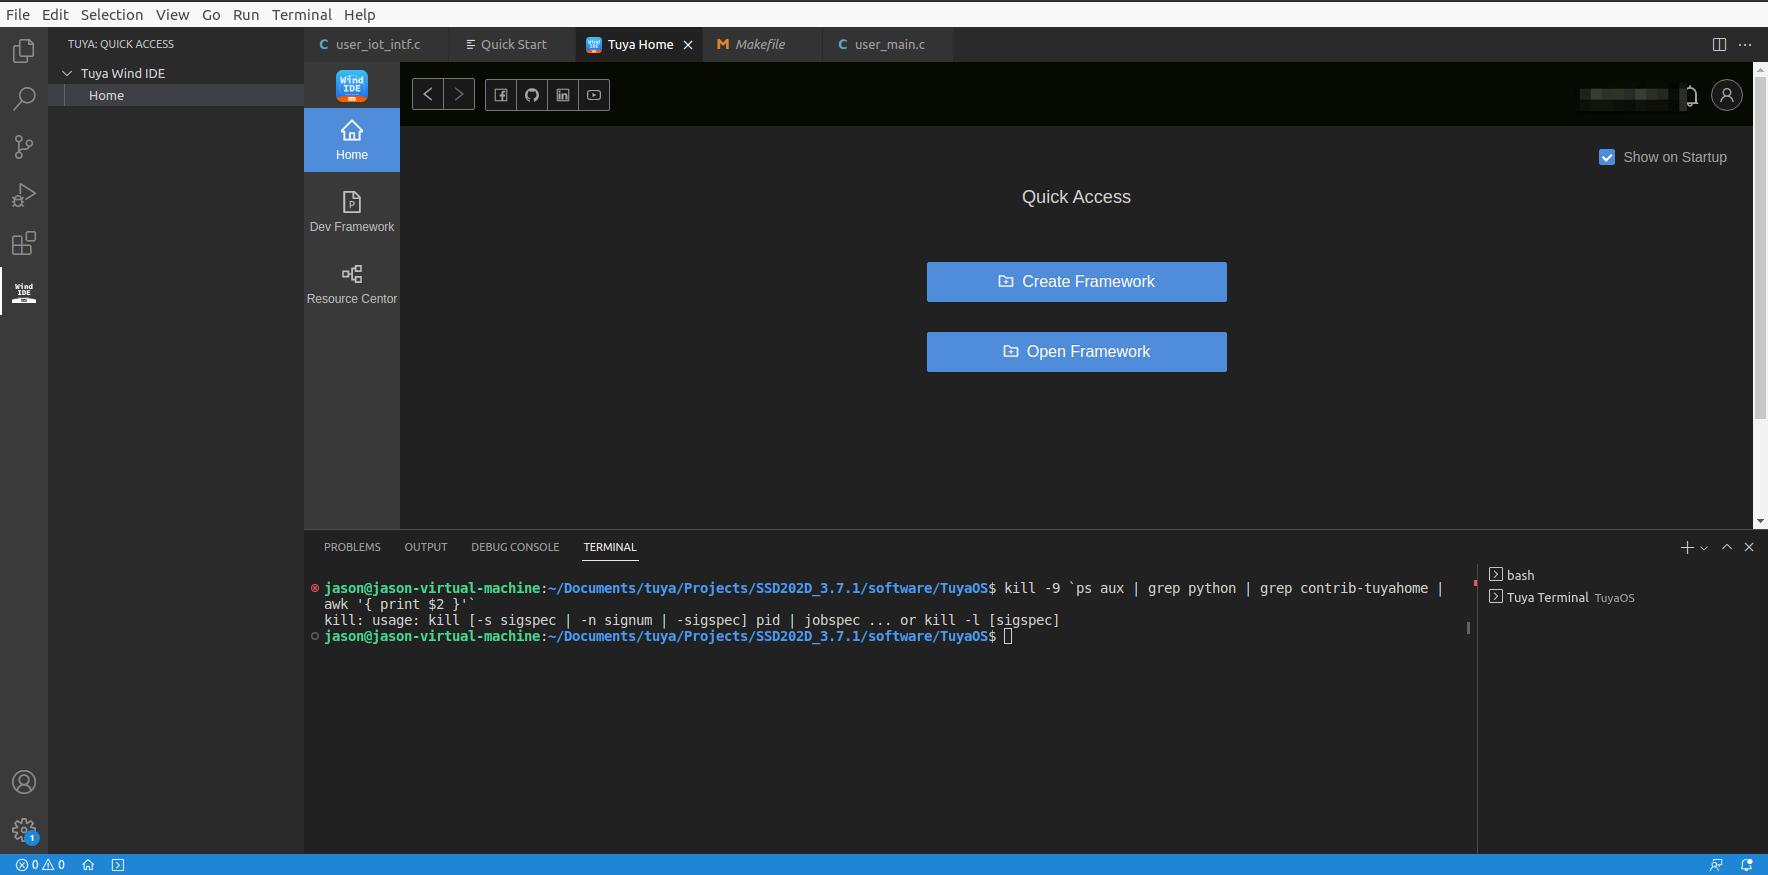
Log in to Tuya Wind IDE with your Tuya Developer Platform account.
-
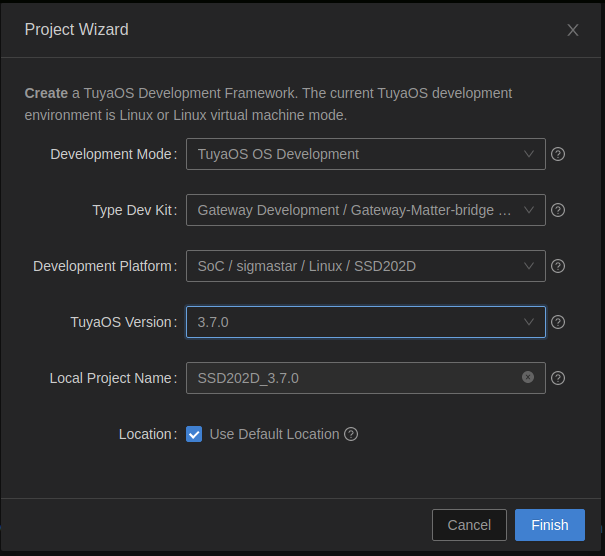
Set the project parameters as shown below and then click Finish.
Click Create Framework and complete the required parameters. If you cannot select an item, check if the currently logged-in account has been added to the allowlist.
-
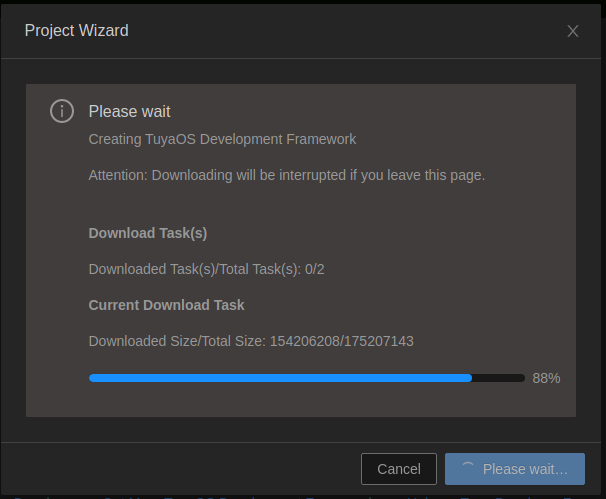
Wait for the project to finish downloading.
-
Download the product development kit.
Choose Tuya Home > Dev Framework > Product Dev Kit and then click Download. After the download is finished, refresh Visual Studio Code Explorer.
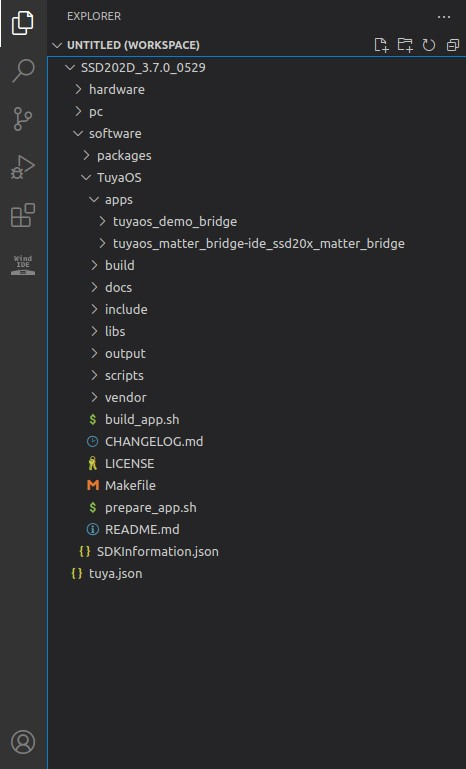
tuyaos_matter_bridge-ide_ssd20x_matter_bridgeshould appear inTuyaOS/apps.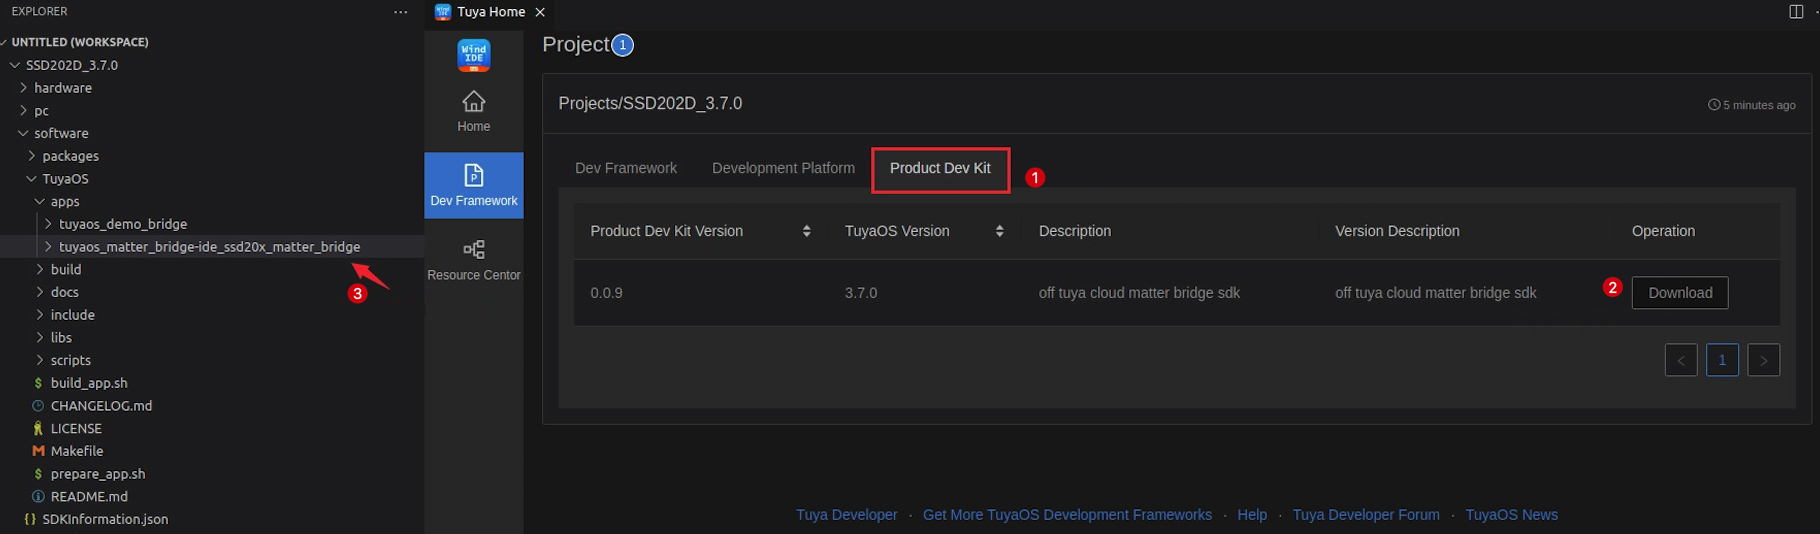
The directory of the development kit:
Step 2: Build the product development kit
-
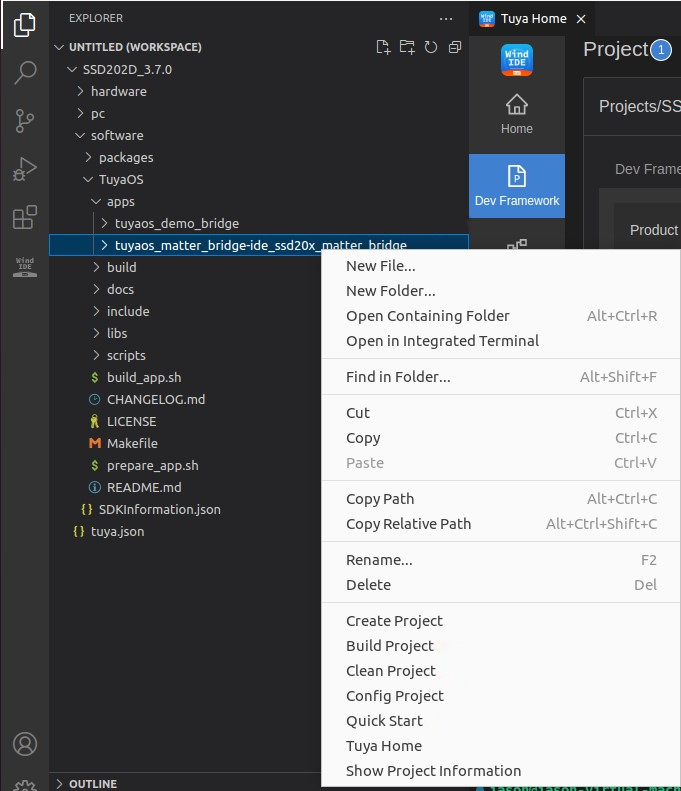
Right-click the product development kit directory and choose Build Project.
-
Enter a version number.

The initial compilation is usually slow due to toolchain download and board support package (BSP) compilation. It takes about 10 minutes to finish the build process, depending on the internet speed and the host performance.
-
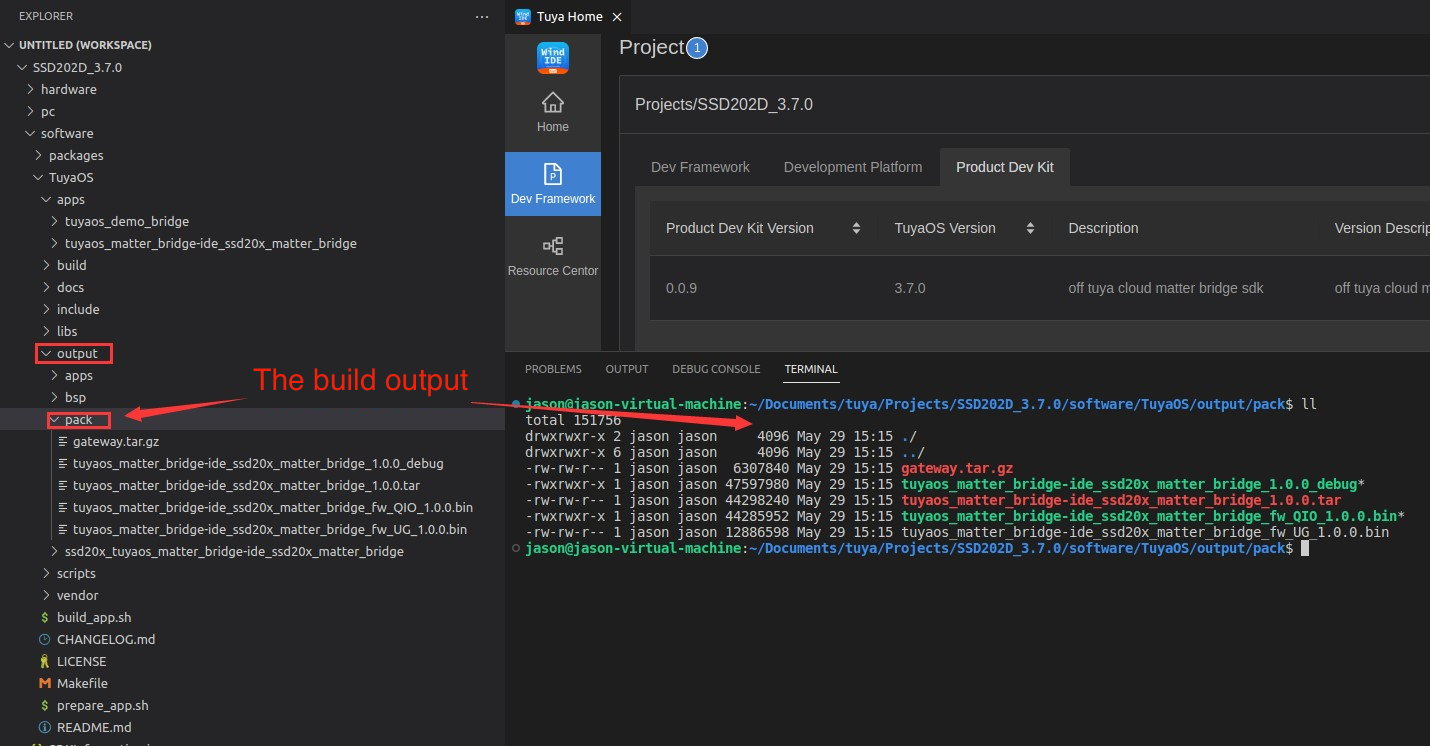
Printing will stop when the build is finished.

The build output is stored in the folder indicated below.
Step 3: Download and run the build output
-
Download the executable.
Place the tool
tftp64.exeand the executabletyZ3Gwin the same folder. Double-click to open thetftp64.exein Windows.
-
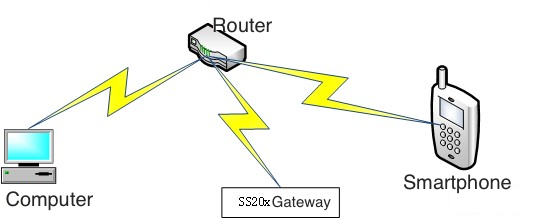
The gateway, computer, and mobile phone are all on the same LAN, as shown below.
-
Download the firmware to the gateway board. Log in to the gateway board with the username and password provided by Tuya.
Run the following command in the SSH terminal to download the executable.cd /tmp/tuya/tuya_user1/; tftp -b20480 -r tuyaos_matter_bridge-ide_ssd20x_matter_bridge_fw_UG_1.0.0.bin \ -g xxx.xxx.xxx.xxx// The IP address of tftp64Write the firmware to the gateway board.
unpack -f tuyaos_matter_bridge-ide_ssd20x_matter_bridge_fw_UG_1.0.0.bin -mReboot the gateway board.
reboot
Step 4: Add a Zigbee device
Press the button on the gateway to activate Zigbee pairing and put the Zigbee device in pairing mode. Observe the behavior of the Zigbee device to verify if it has been added to the gateway.
Step 5: Add the Matter gateway to the Apple Home or Google Home app
-
Open the Apple Home app and add the Matter gateway by scanning its QR code.
Considerations:
- Get a compatible hub ready for the target platform, such as HomePod, Apple TV, or Google Nest Hub.
- iOS 16.3.1 or later
- HomePod 16.3.2 or later
- Google Home 2.67.16.1 or later
- Google Nest Hub 1.56.324896 or later
- All devices to be operated must be on the same LAN.
- For the first-time pairing, the gateway stays in pairing mode for 15 minutes after power on.
- If the gateway has already been added by QR code scanning, it can be added to another app only through a sharing code instead of the QR code on the device body.
- When sharing, the gateway must not stay in pairing mode. Otherwise, the gateway will throw an error and the sharing code cannot be generated. This does not apply to Google Home, because Google Home will send the device a command to exit pairing mode before sharing.
- Apple Home only deletes the connected fabric. Go to Settings > General > Matter Accessories on the iPhone or iPad. Tap Edit and choose to remove Matter accessories from iCloud Keychain, individual connected services, or all connected services.
- If the app cannot find the target device to be added, restart the router.
-
After the device is added to the Apple Home app, it can be controlled with this app.
Configuration file
The operation of the SDK relies on a JSON configuration file that contains configurable parameters such as storage path, service enablement, and serial port number. The configuration file is as follows:
{
    "storage_path": "./",
    "cache_path":"/tmp/",
    "bin_path":"/tmp/",
    "backup_path":"/tmp/",
    "log_path": "./",
    "sw_ver": "1.0.0",
    "sync_systime":0,
    "log_level": 4,
    "tuya":{
        "zigbee":{
            "dev_name":"/dev/ttyZigbeeNCP",
            "cts":1,
            "thread_mode":1,
            "rcp":{
                "enable": 1,
                "dev_name": "/dev/ttyS2"
            }
        },
        "matter":{},
        "dp_engine":{
            "storage_path":"/tuya/data/user_data/",
            "file_max_count":1,
            "pidTable_max_count":1,
            "enable_zigbee_trans":1,
            "enable_matter_trans":1
        }
    }
}
Field description
| Field | Required | Description |
|---|---|---|
| log_level | No | The log level, defaulting to the debug level. |
| storage_path | Yes | The storage path that must be readable and ended with /. |
| matter | Yes | The flag for initializing Matter service. |
| dp_engine | Yes | The DP engine. This field is mandatory if you implement connectivity to Tuya-enabled devices. |
Develop new features for bridges
To add a new feature to your bridge product, simply include a JSON configuration file.
Before you start adding new features, it is recommended to:
- Have knowledge of Zigbee clusters.
- Familiarize yourself with the Matter protocol to be implemented.
For more information, see the following.
Is this page helpful?
YesFeedbackIs this page helpful?
YesFeedback


