Get Push Messages by Pulsar (Java SDK)
Tuya has customized and improved the message service based on the open source Pulsar. When a device has status changes, such as device registration, data reporting, and going offline, Tuya will send notifications of these changes. You can timely get device messages to analyze or store them. This topic describes how to use Tuya’s Pulsar SDK to receive messages.
Preparations
- Download the GitHub demo: Pulsar SDK.
- Install the development environment: IntelliJ IDEA.
- At least one cloud project is created. For more information, see Manage Projects.
- Enable the message service. For more information, see Manage Message Service.
- Download the SmartLife app to receive the test messages.
- Prepare a Tuya-enabled smart device, such as a smart light, and link the device with your cloud project. For more information, see Link Devices.
Step 1: Set up a development environment
-
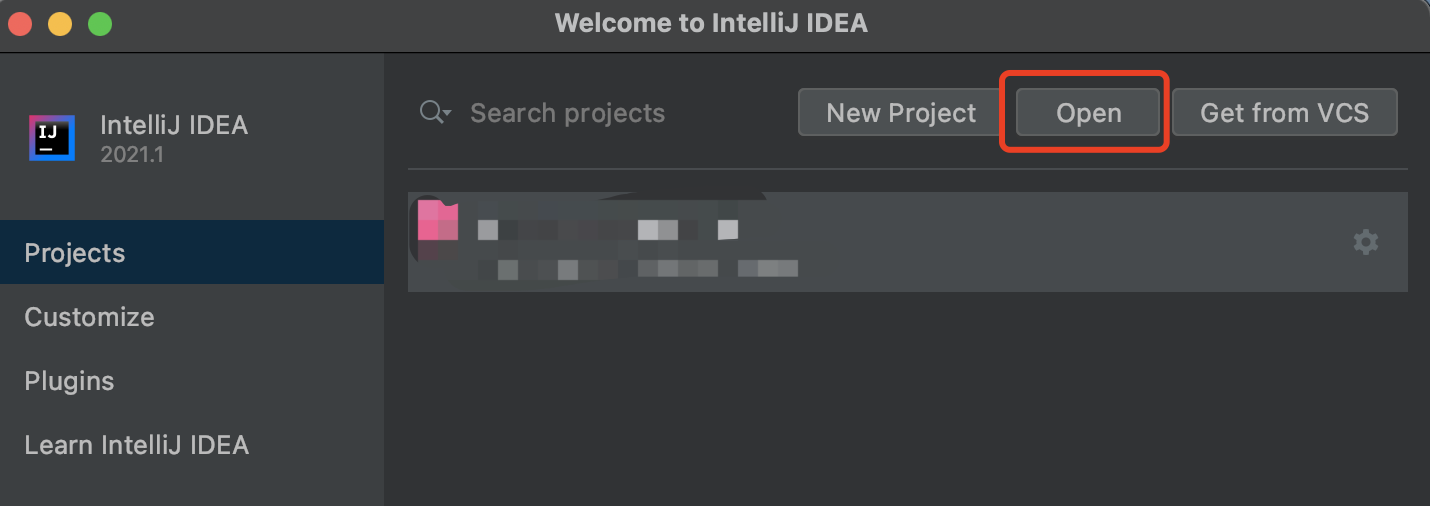
Open the source code project with IntelliJ IDEA.
Click Open to find the downloaded and decompressed file in the previous step.
-
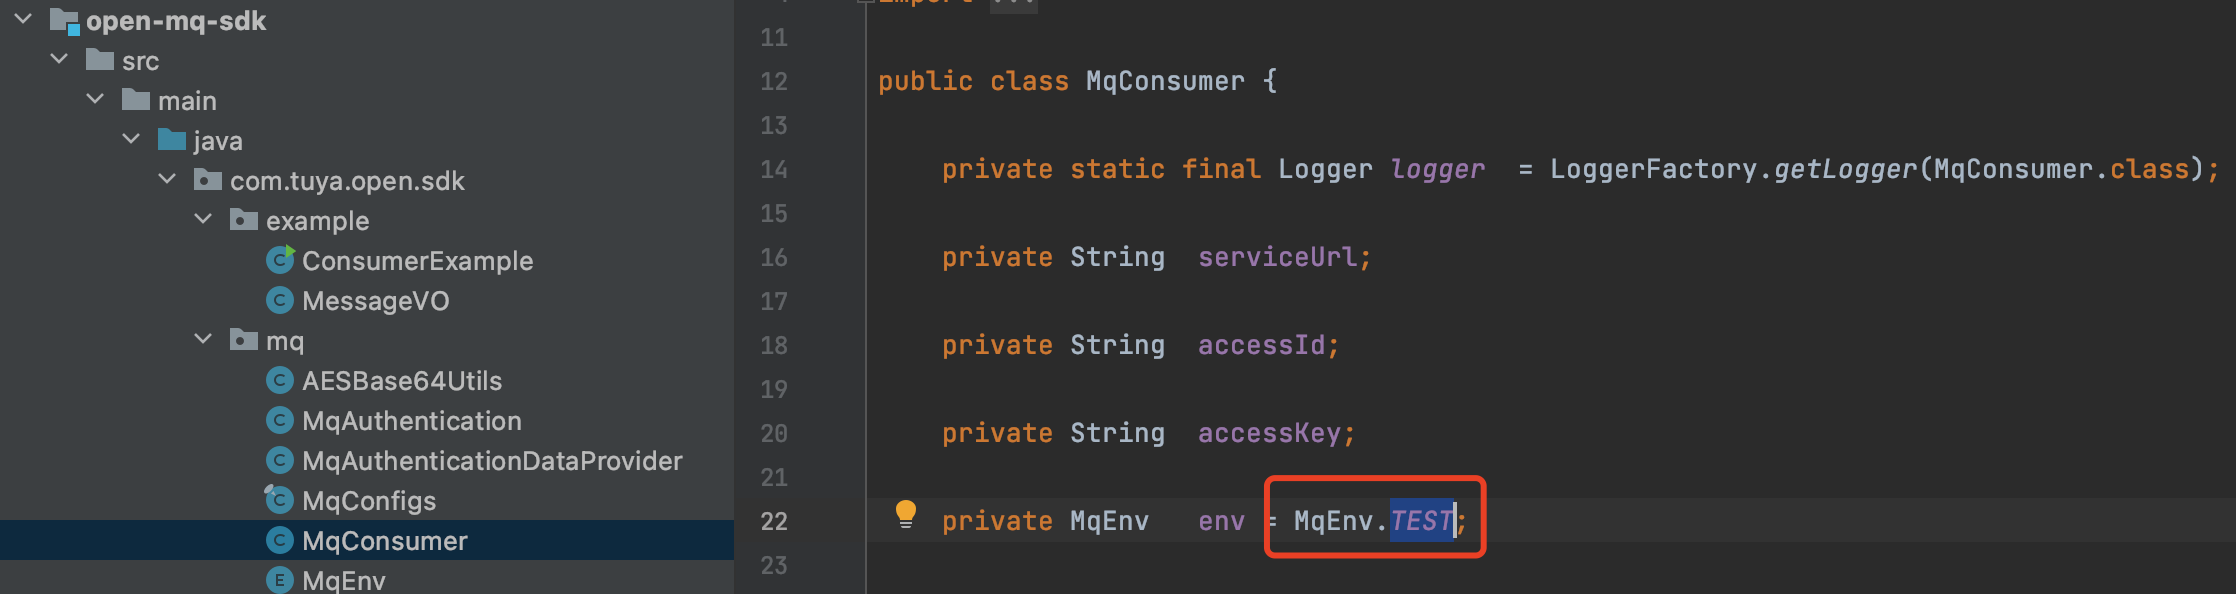
Modify parameters in
open-mq-sdk/src/main/java/com.tuya.open.sdk/mq/MqConsumer.javaand modify the Java project as a test environment. For more information about the parameters, seemq/MqEnv.java.private MqEnv env = MqEnv.TEST;MqEnv.TESTrepresents the test environment.MqEnv.PRODrepresents the production environment.
-
Modify parameters in
open-mq-sdk/src/main/java/com.tuya.open.sdk/example/ConsumerExample.java.String url = MqConfigs.CN_SERVER_URL; String accessId = "xt*****ff**n1****8ufo"; String accessKey = "479bcb7345******582d9c******4ef7";The parameters are described as follows.
Parameter Description urlThe endpoint. Choose the endpoints according to your location. -
CN_SERVER_URL: China,pulsar+ssl://mqe.tuyacn.com:7285/ -
US_SERVER_URL: America,pulsar+ssl://mqe.tuyaus.com:7285/ -
EU_SERVER_URL: Europe,pulsar+ssl://mqe.tuyaeu.com:7285/ -
IND_SERVER_URL: India,pulsar+ssl://mqe.tuyain.com:7285/ -
SG_SERVER_URL:Singapore,pulsar+ssl://mqe-sg.iotbing.com:7285/
mq/MqConfigs.java.accessIdEnter the value of Access ID in the Authorization Key section of the cloud project on the Tuya Developer Platform. accessKeyEnter the value of Access Secret in the Authorization Key section of the cloud project on the Tuya Developer Platform. 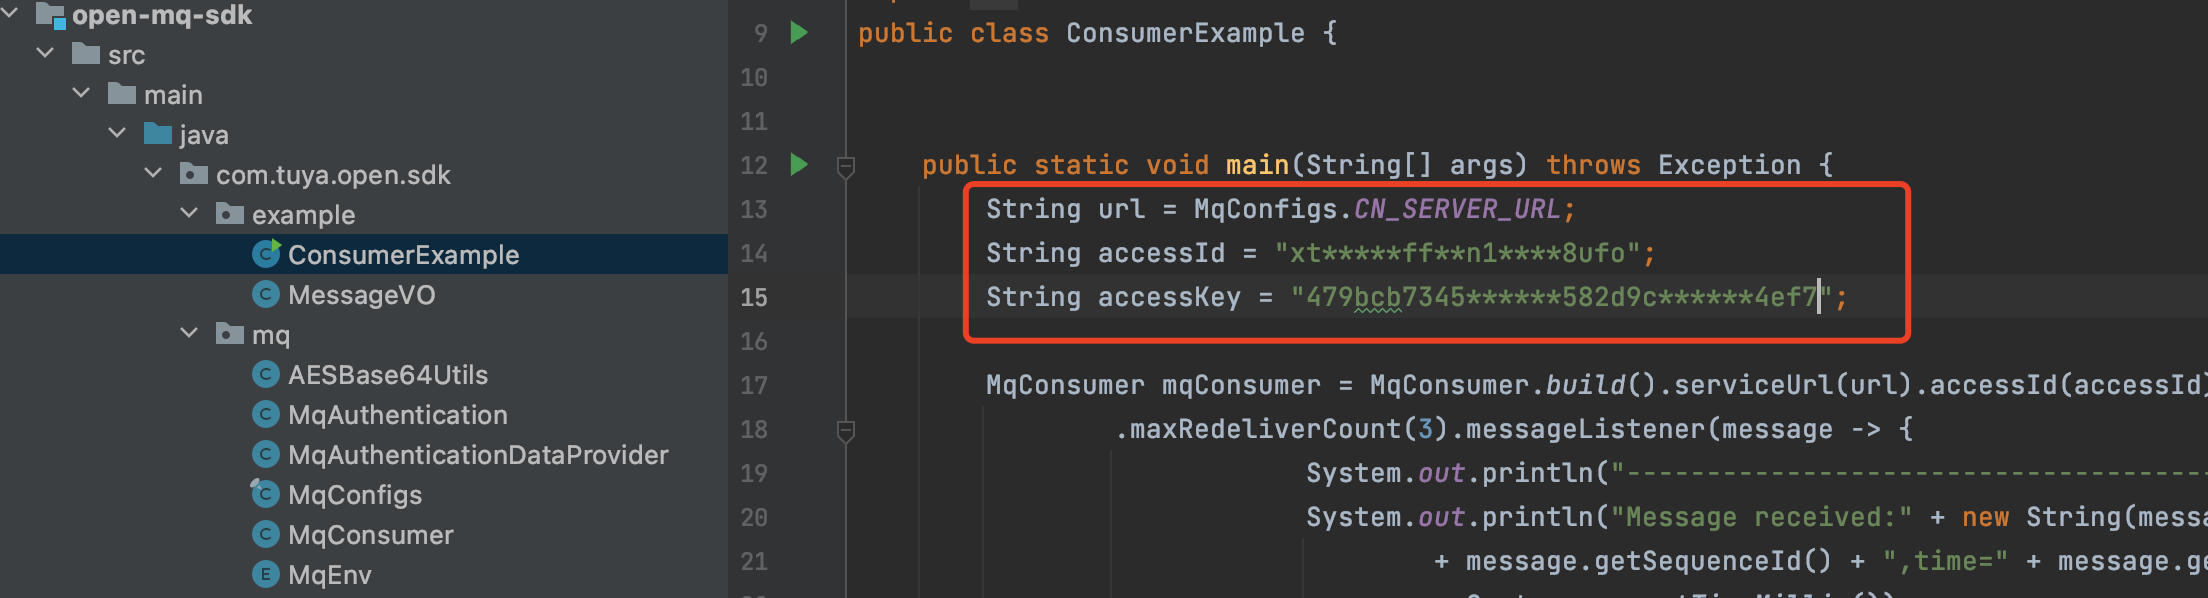
-
Step 2: Receive messages in the test environment
-
Configure a test device.
-
In the list of My Cloud Projects, click Open Project in the Operation column.
-
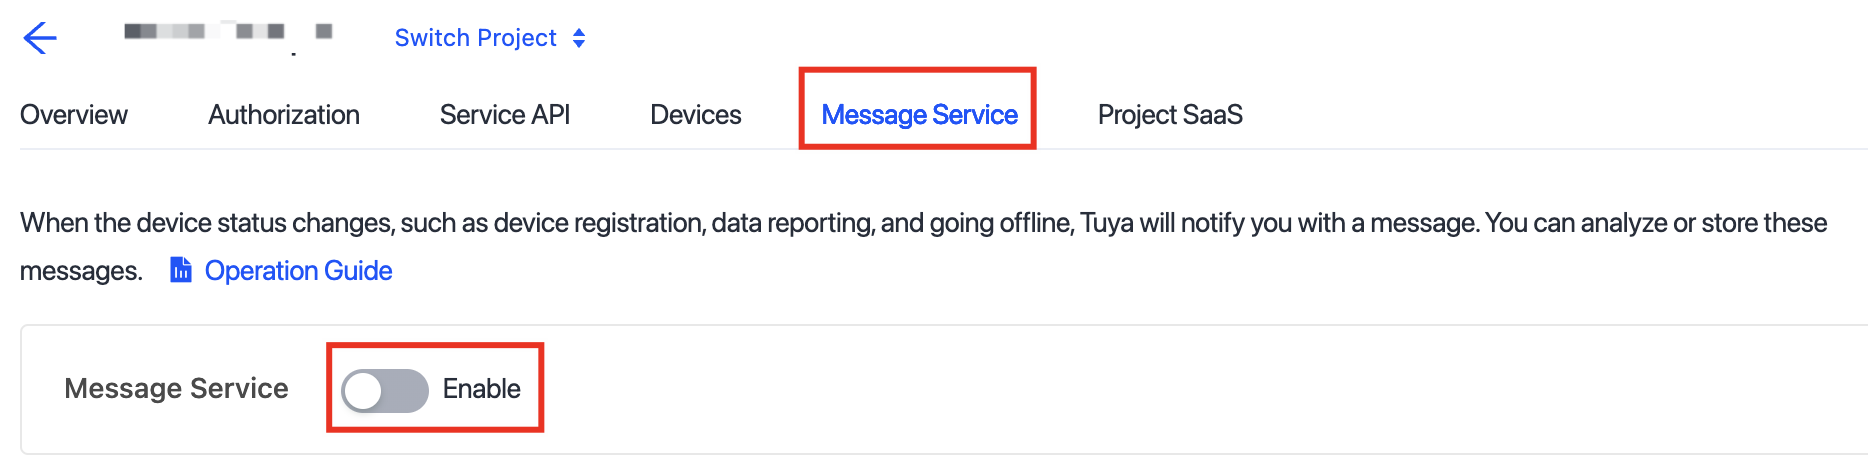
Click the Message Service tab and enable the message service.
-
After the subscription status shows Enabled, click the Test Environment tab.
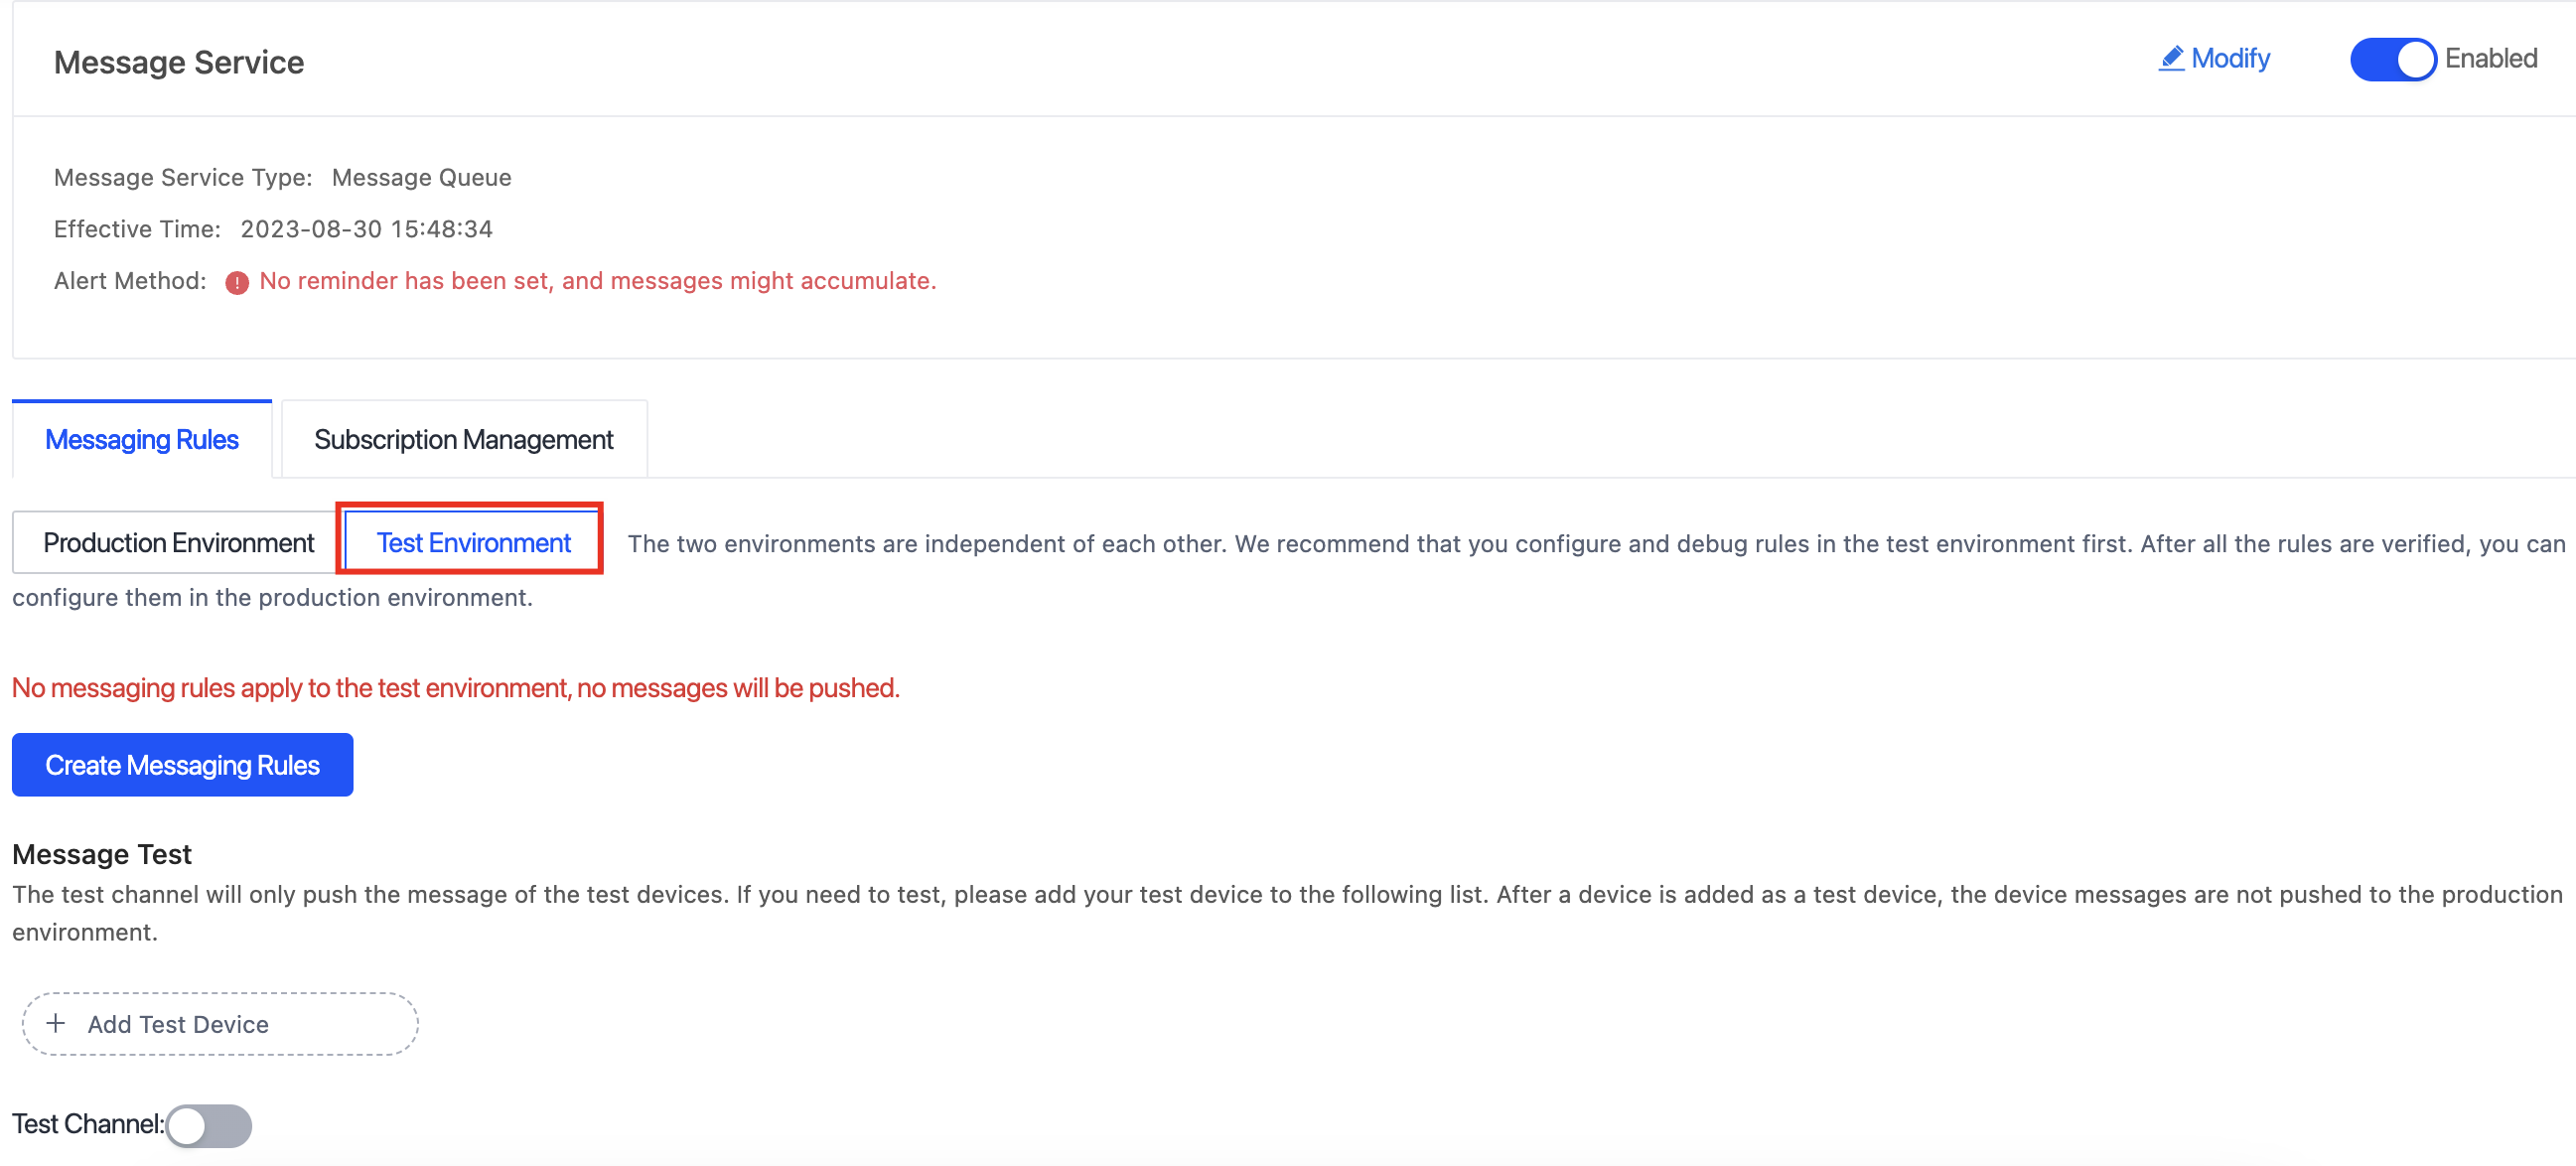
-
Enter the linked device ID in the search box, click the magnifier icon, and then double-click the selected device.

-
If a linked device is specified as a test device, the test device will report messages to the test channel for you to debug device features.
-
-
On the IntelliJ IDEA, right-click the
ConsumerExample.javafile and select Run to run the program.
-
Control the device with the SmartLife app.
- Turn on the test light.
- Adjust the brightness of the light.
-
Automatically get the push messages on IntelliJ IDEA.

Step 3: Parse the messages
Example 1: Turn on a light
-
Received message
Message received: {
    "data": "mT9eqNz5MCgibKjEC+zsikNpoukkmad6K/uS18FozRETIriMEApJBXXm5o37QmMFzQtf9wFhkSQ6IBE2P3yYPrgKoKYnbLa+mN1TUCda/JYJWG9dqUPOlAUjyey1/PKjWu8doYvgN8fCe0HIMZBTI1eVfe4RzVkEHvaaFLVF+lpfqGdvTWhlLNbh6092SG9MsR8Aq2sXHt2naIfIT36xYU9xPHy0C65K3HDuQgwi69fRWhXdA1LWvsKPavTOappD",
    "protocol": 4,
    "pv": "2.0",
    "sign": "d6be290bd0ffa196c313ecd315e6ff72",
    "t": 1622701486365
}, seq = 0, time = 1622701486373, consumed time = 1622701486652
The following parameters are concatenated:
seq: the sequence ID of this message.time: the timestamp when the client published this message.consumed time: the timestamp when the system printed this message.
-
Parse the data
the real message data: {
    "dataId": "642769b3-c434-11eb-87b5-02425b0322e7",
    "devId": "vdevo162201920765824",
    "productKey": "atxdggtv9ddjt8xx",
    "status": [{
        "code": "switch_led",
        "t": 1622701486258,
        "value": true,
        "20": "true"
    }]
}
For more information about the
dataparsing method, see Data Signature. Thedatadecryption method has been encapsulated in the SDK. For more information, seemq.AESBase64Utils.java.
Example 2: Adjust the brightness of the light
-
Received message
Message received: { "data": "UoHAZ1lTSAZRr0HFrePEw/rsMDlKAOIDeSjFQbf35K4TIriMEApJBXXm5o37QmMFzQtf9wFhkSQ6IBE2P3yYPrgKoKYnbLa+mN1TUCda/JYJWG9dqUPOlAUjyey1/PKjWu8doYvgN8fCe0HIMZBTI1eVfe4RzVkEHvaaFLVF+loWkfytt13z5nHmD9EPdmOZOxGcbyvjGOOp9iQOA3Om2XPur4DMxX0M+V+fFkyD9OXFRR9d0DA6J4LHmvDBtfO3U4HBd5MyELCdYJR7B+jCuVAcflFEGZKfv+5vINIuDZu0q1Ono+G6AcEyfmhIjrrY8EpmfMW/mWvfgGAreIOThH5WroVQpgbzIDgcGsXAsW1zzZYe27YlWKXleLLBEBcQx6Y2gSutLqfsu0MA59GNtg==", "protocol": 4, "pv": "2.0", "sign": "f055d71c2caae3549a53adddde16aaec", "t": 1622701494099 }, seq = 1, time = 1622701494099, consumed time = 1622701494059 -
Parse the data
the real message data: {
    "dataId": "68ce83d2-c434-11eb-87b5-02425b0322e7",
    "devId": "vdevo162201920765824",
    "productKey": "atxdggtv9ddjt8xx",
    "status": [{
        "code": "control_data",
        "t": 1622701494064,
        "28": "100b00193020800000000",
        "value": "{\"bright\":0,
                      \"change_mode\":\"gradient\",
                      \"h\":176,
                      \"s\":403,
                      \"temperature\":0,
                      \"v\":520
                      }"
    }]
}
FAQs
Can specific types of messages be forwarded and received?
After the message service is enabled, all types of messages can be received.
Why device messages cannot be received?
Perform the following troubleshooting steps:
- Check whether the message service is enabled.
- Check the environment configurations of the Pulsar client.
- Check whether the device is added to the test device, but Pulsar is in the production environment.
Q: How is the message service billed?
The service is billed based on the number of forwarded messages. For more information, see Pricing.
Is this page helpful?
YesFeedbackIs this page helpful?
YesFeedback


