THP23-X-D Development Board
Last Updated on : 2024-07-25 08:55:46Copy for LLMView as MarkdownDownload PDF
Development board overview
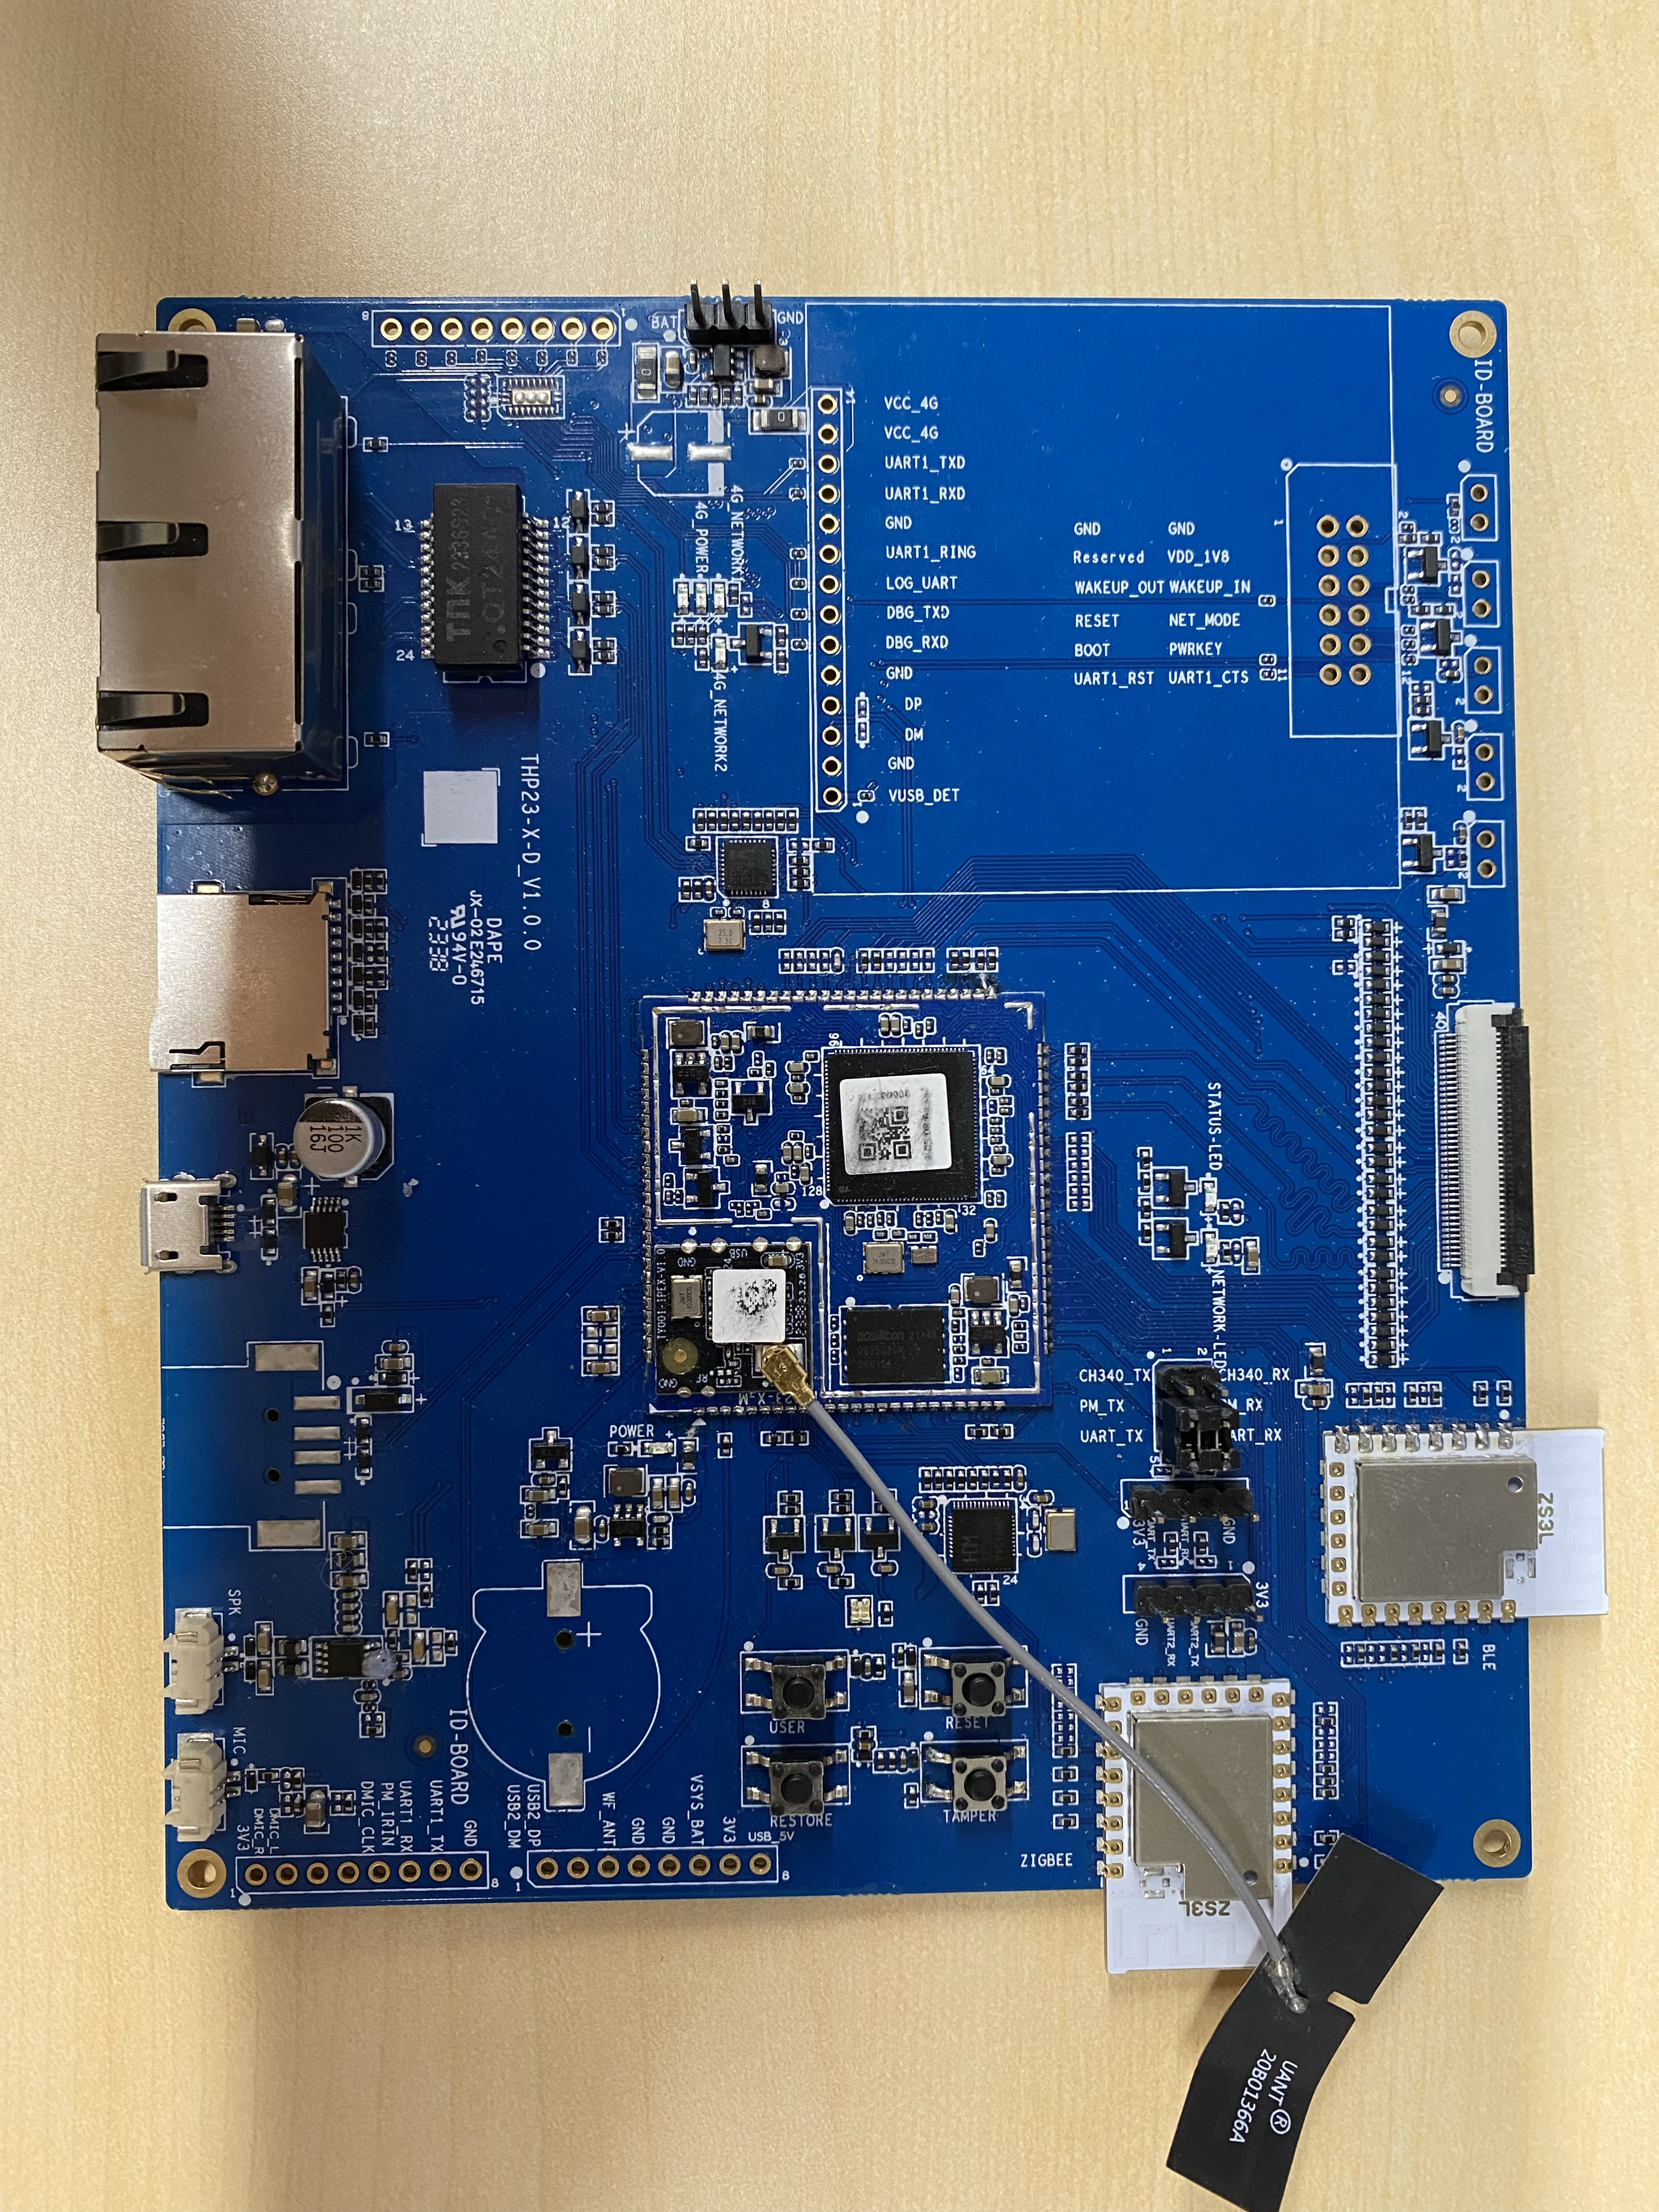
The THP23-X-D is a gateway development board developed by Tuya. It consists of a smart gateway core board, the THP23-X-M, along with peripheral circuits that provide various features for custom development.
Hardware appearance:
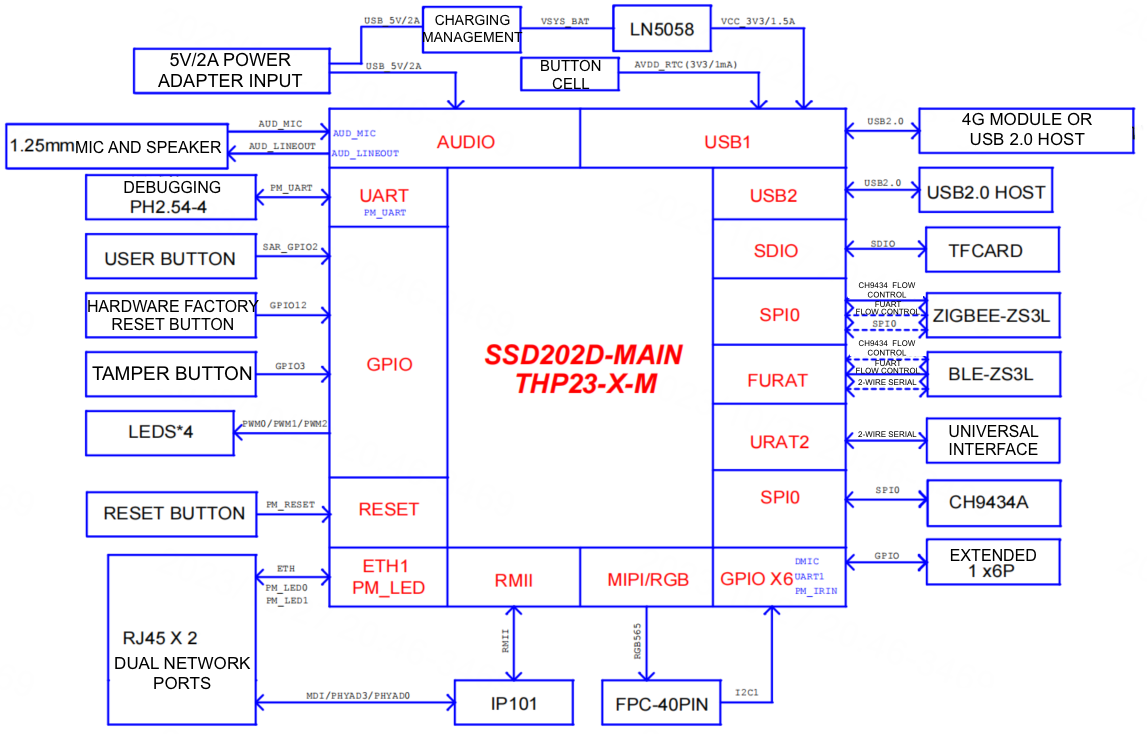
Block diagram
Development kit overview
The THP23-X-D development kit includes the open source application code for the THP23-X-D development board. The development kit, based on the TuyaOS Gateway Development Framework, can be used as-is or customized, which shortens the development cycle and lowers costs for gateway products.
Is this page helpful?
YesFeedbackIs this page helpful?
YesFeedbackMarketing Cooperation
Business Cooperation
Customer Service
Media Inquiry


