Develop with Python SDK
This topic describes how to develop a program to control 'Powered by Tuya' devices based on the open capabilities and SDK of the Tuya Developer Platform.
This documentation is no longer updated. For more information, see Best Practice.
Prerequisites
- You have created a project.
- You have downloaded the app.
- You have added a device.
- You have installed PyCharm.
Procedure
Step 1: Clone Tuya-iot-python-sdk
This step is based on Tuya-iot-python-sdk. Tuya-iot-python-sdk helps you efficiently create cloud development projects regarding the OpenAPI or message subscription capabilities. You can focus on business logic. Perform the following steps:
-
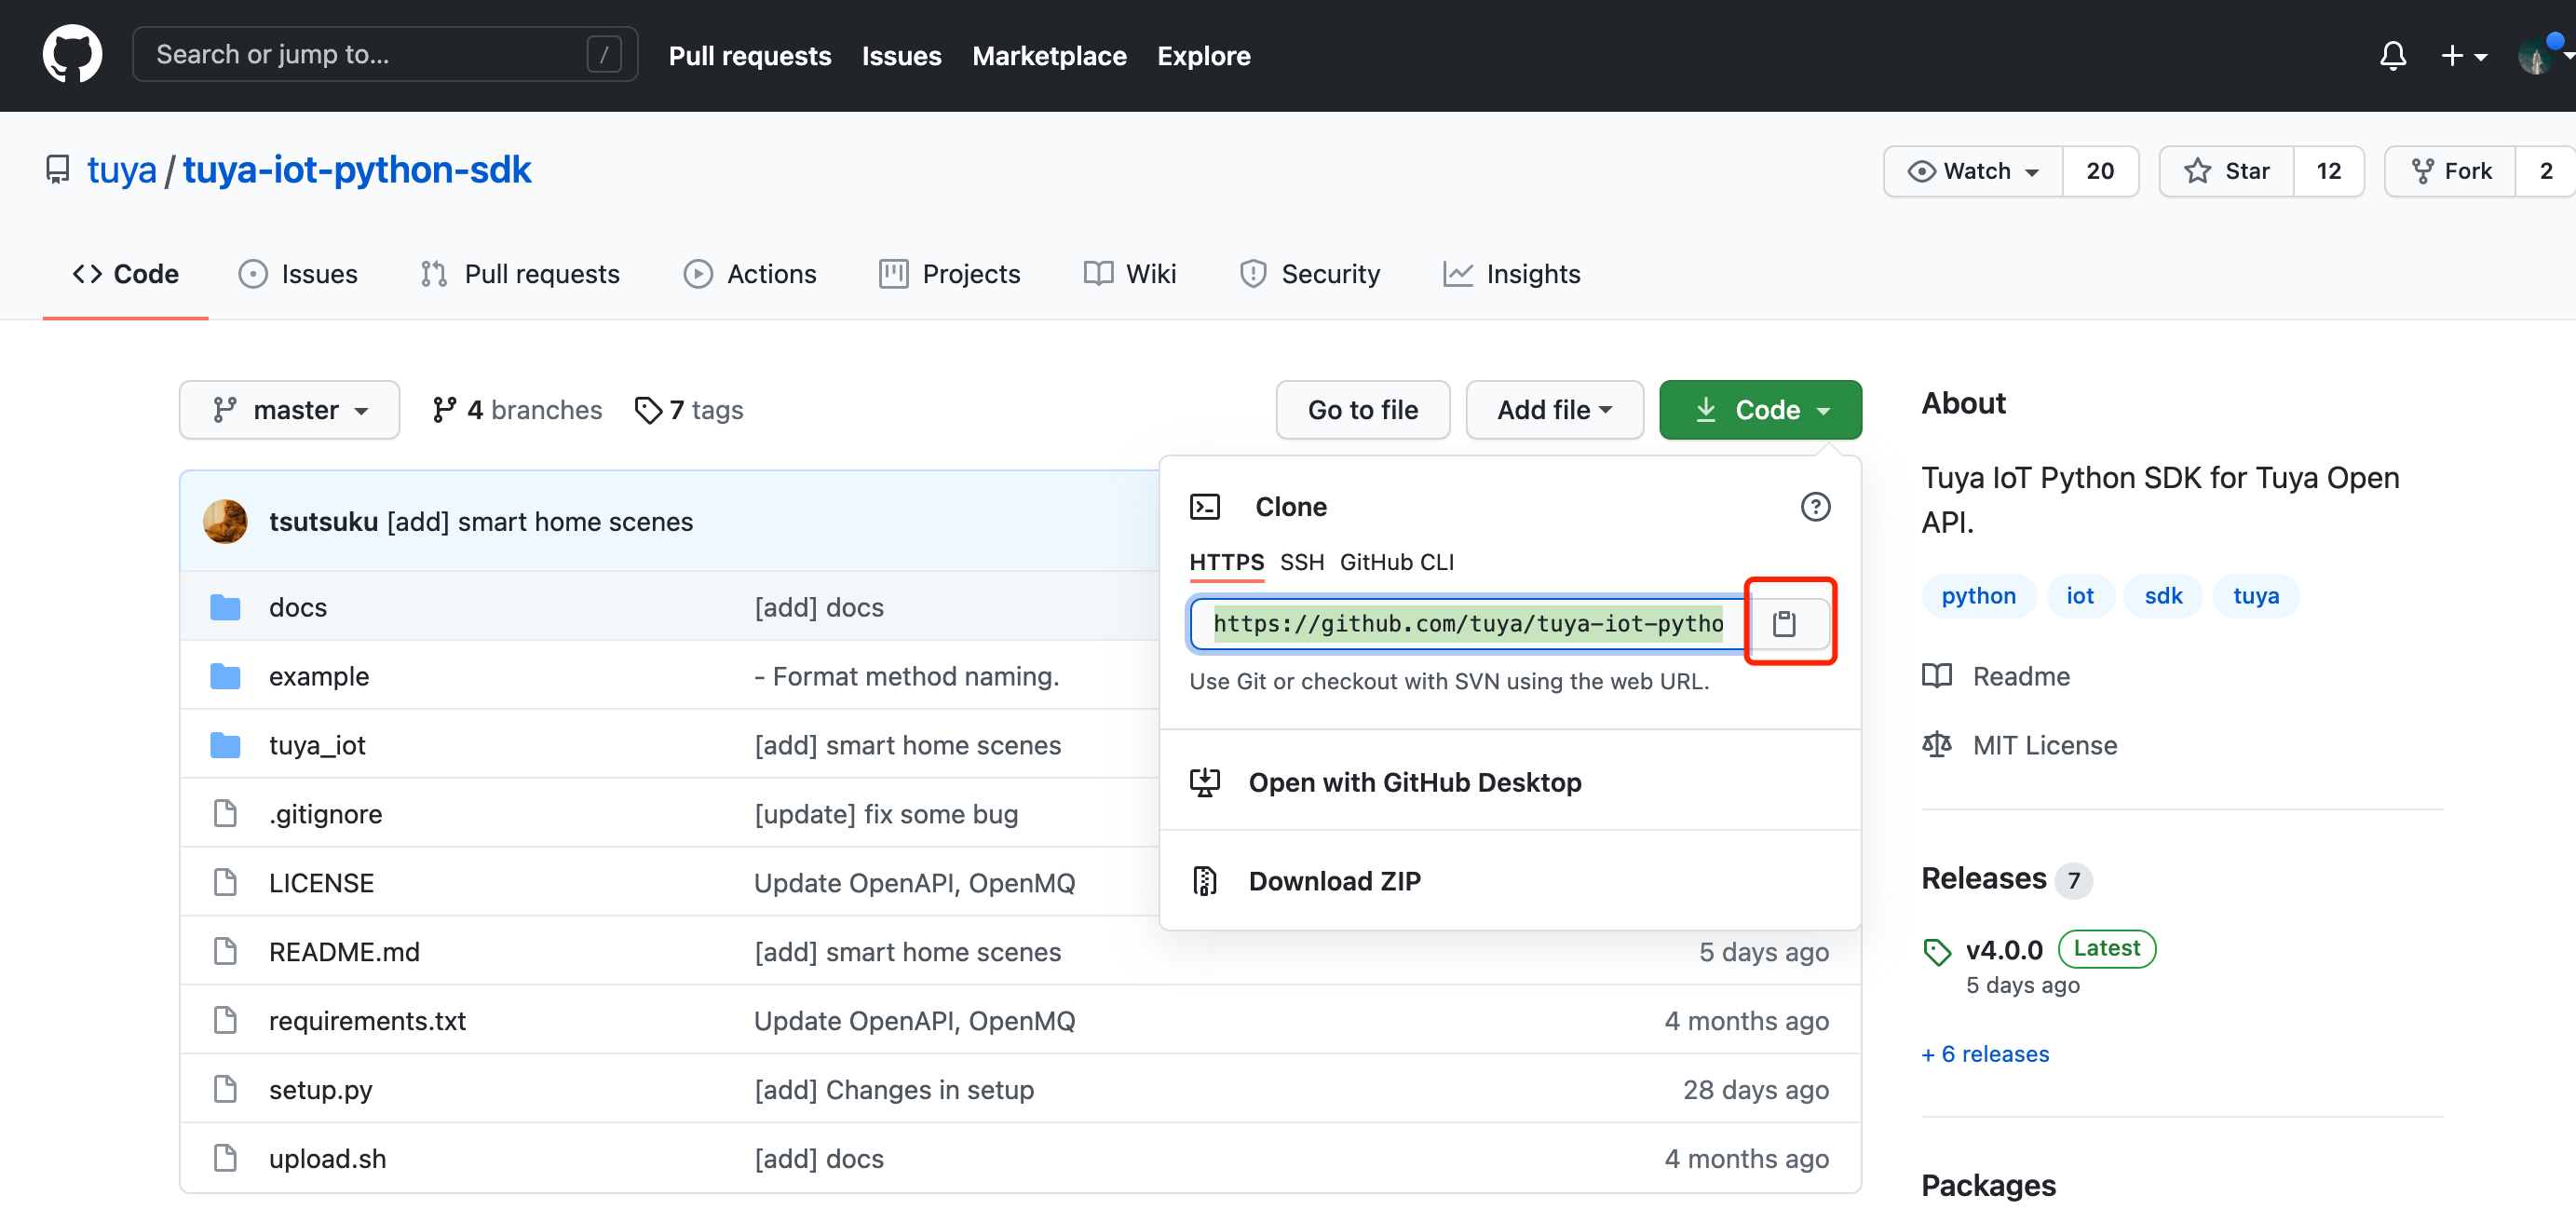
Get the SDK address at Tuya-iot-python-sdk.
-
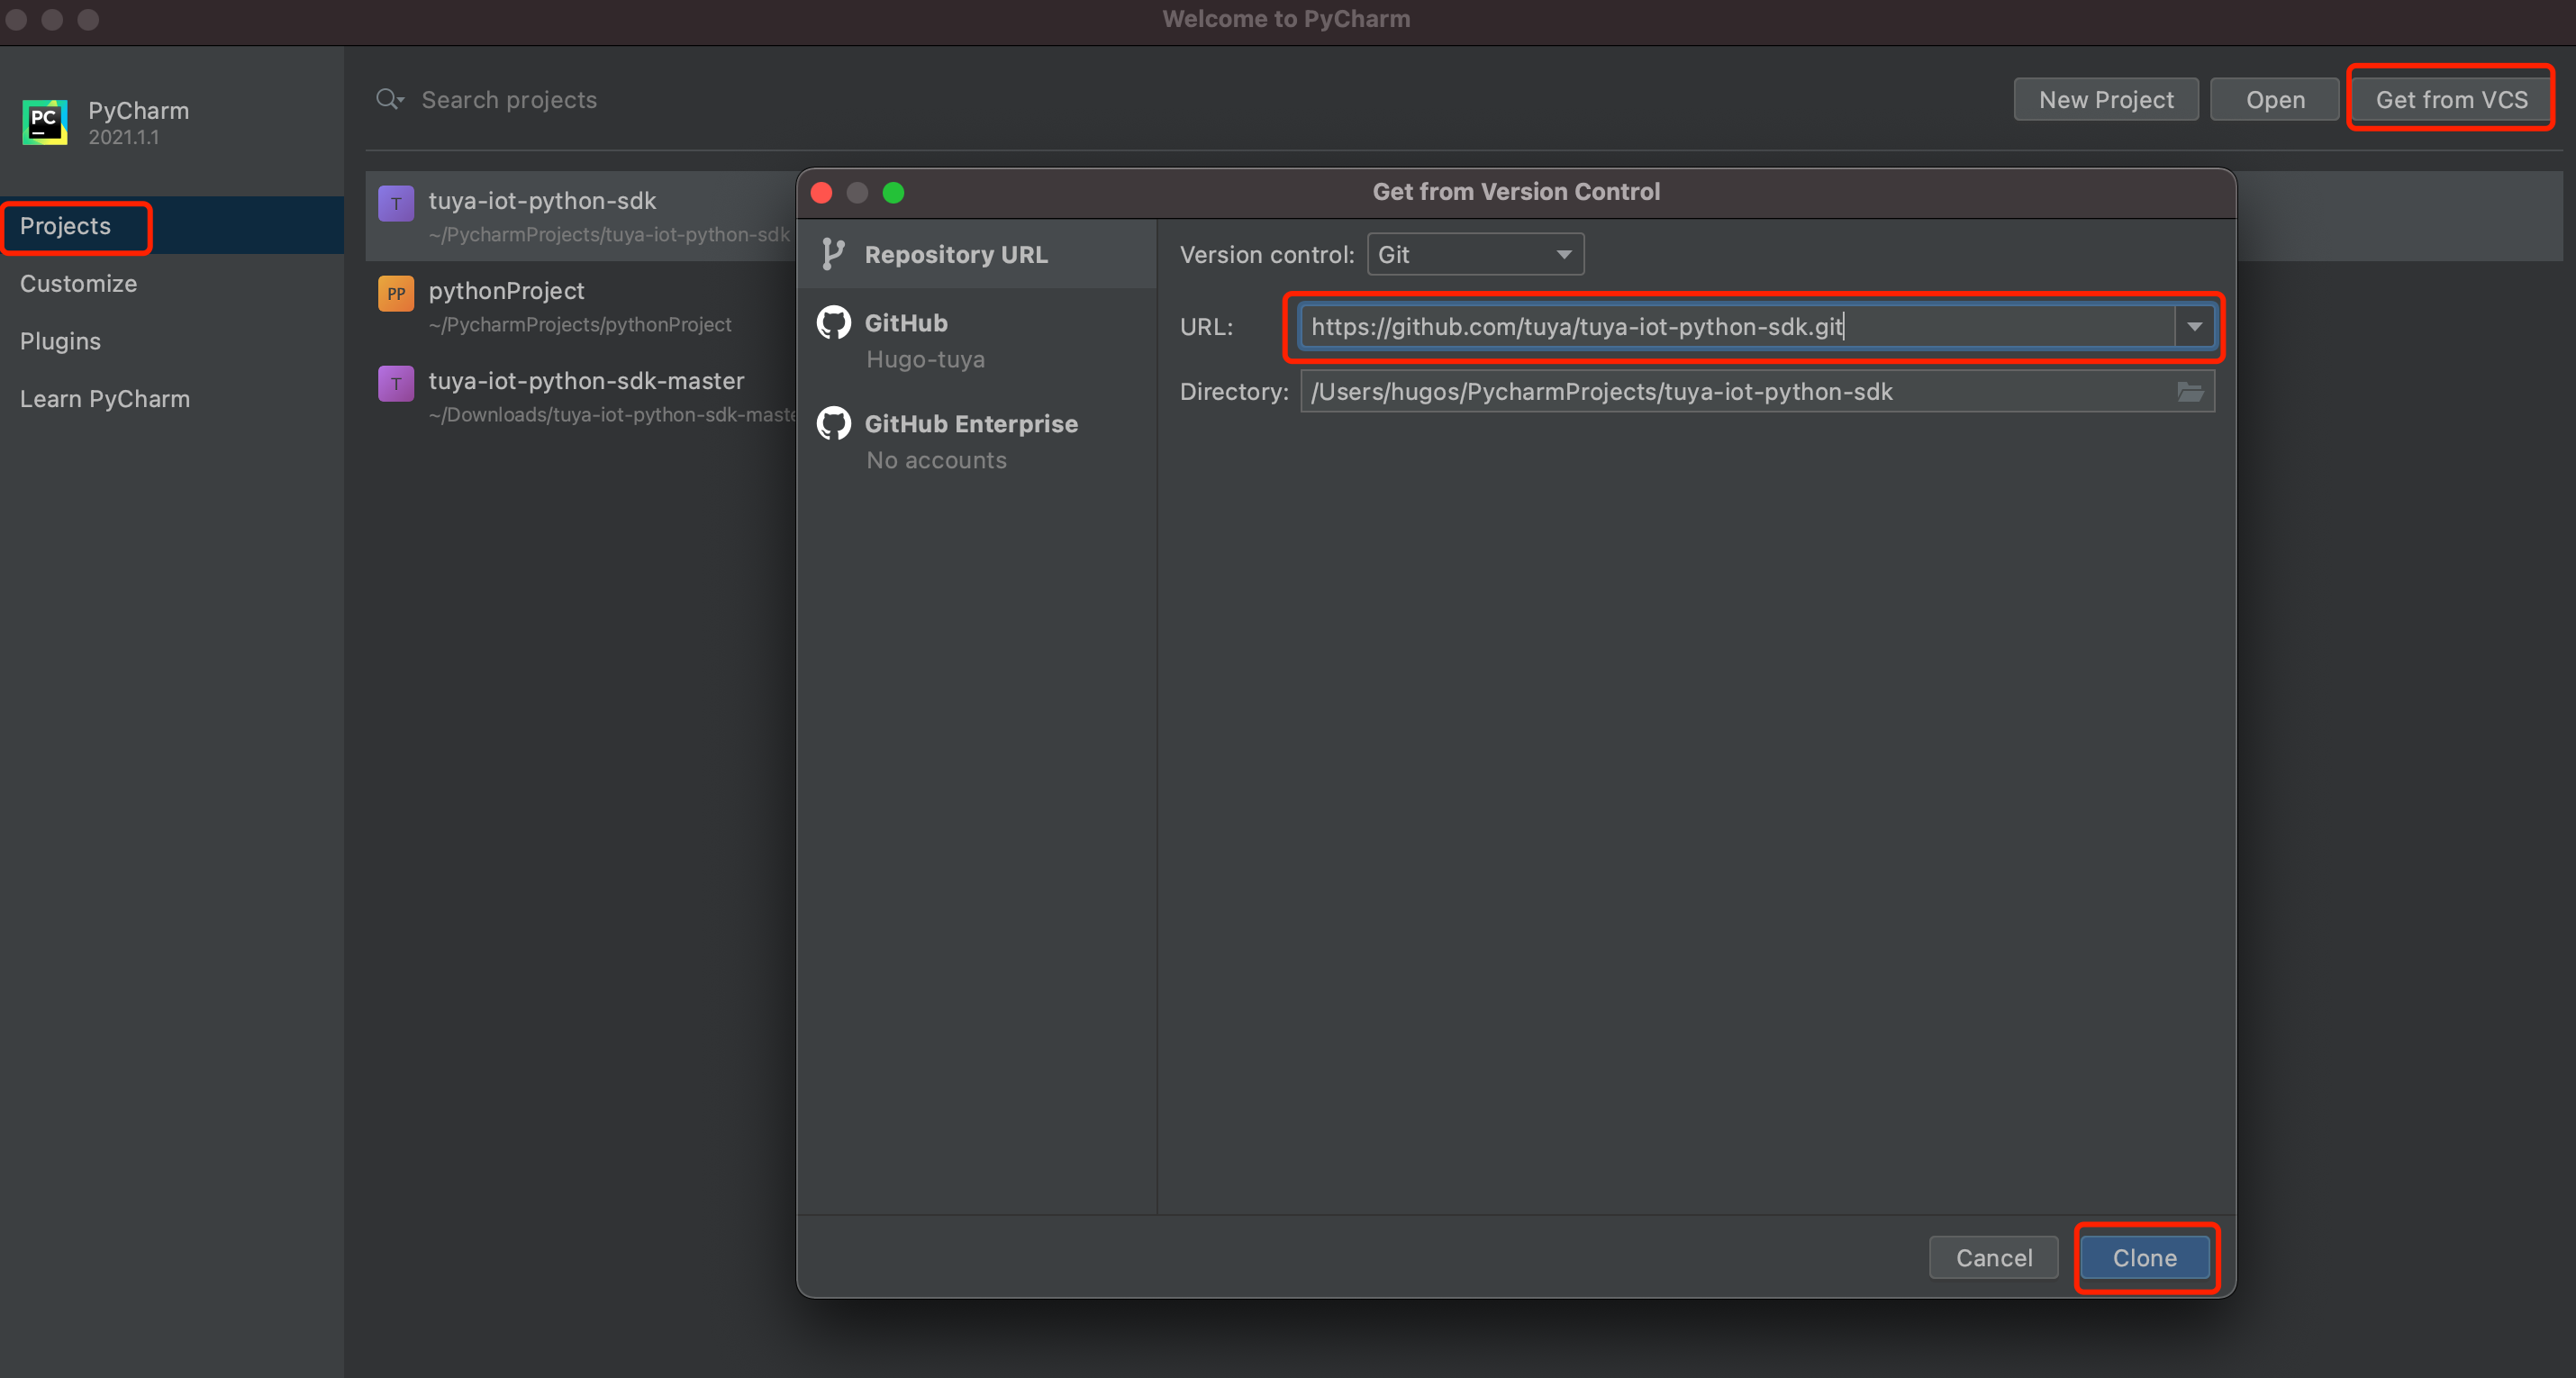
Go to Projects > Get from VCS > Repository URL, enter the SDK URL, and then click Clone. Image
Step 2: Edit the profile
Before development, you need to configure environment variables in the env.py file. The parameters are described as follows:

-
ACCESS_IDandACCESS_KEY: Enter the values of Access ID and Access Key shown in the Authorization Key section on the Cloud Development Platform. For more information, see View project details. -
USERNAMEandPASSWORD: the account and password of the app. -
ENDPOINT: the access address of the cloud development project. For more information, see Endpoints. -
DEVICE_ID: the ID of an associated device. For more information, see View Devices.ACCESS_ID = "fsxg5c9jasdrolc****" ACCESS_KEY = "d064654cd2714286a3823f16a223****" USERNAME = "*********" PASSWORD = "*********" DEVICE_ID = "vdevo16274430851****" ENDPOINT = "https://openapi.tuyacn.com"
Step 3: Control the device
After the environment is ready, you can start your coding journey. Device control is a must-have feature. The following example shows how to switch the strip lights after you press Enter on the keyboard. It is just for your reference. Create a switch.py as follows:
The strip lights are controlled in this example. The standard instruction for turning lights on or off is the switch_led. To control other devices, query the standard instruction set and modify the code.
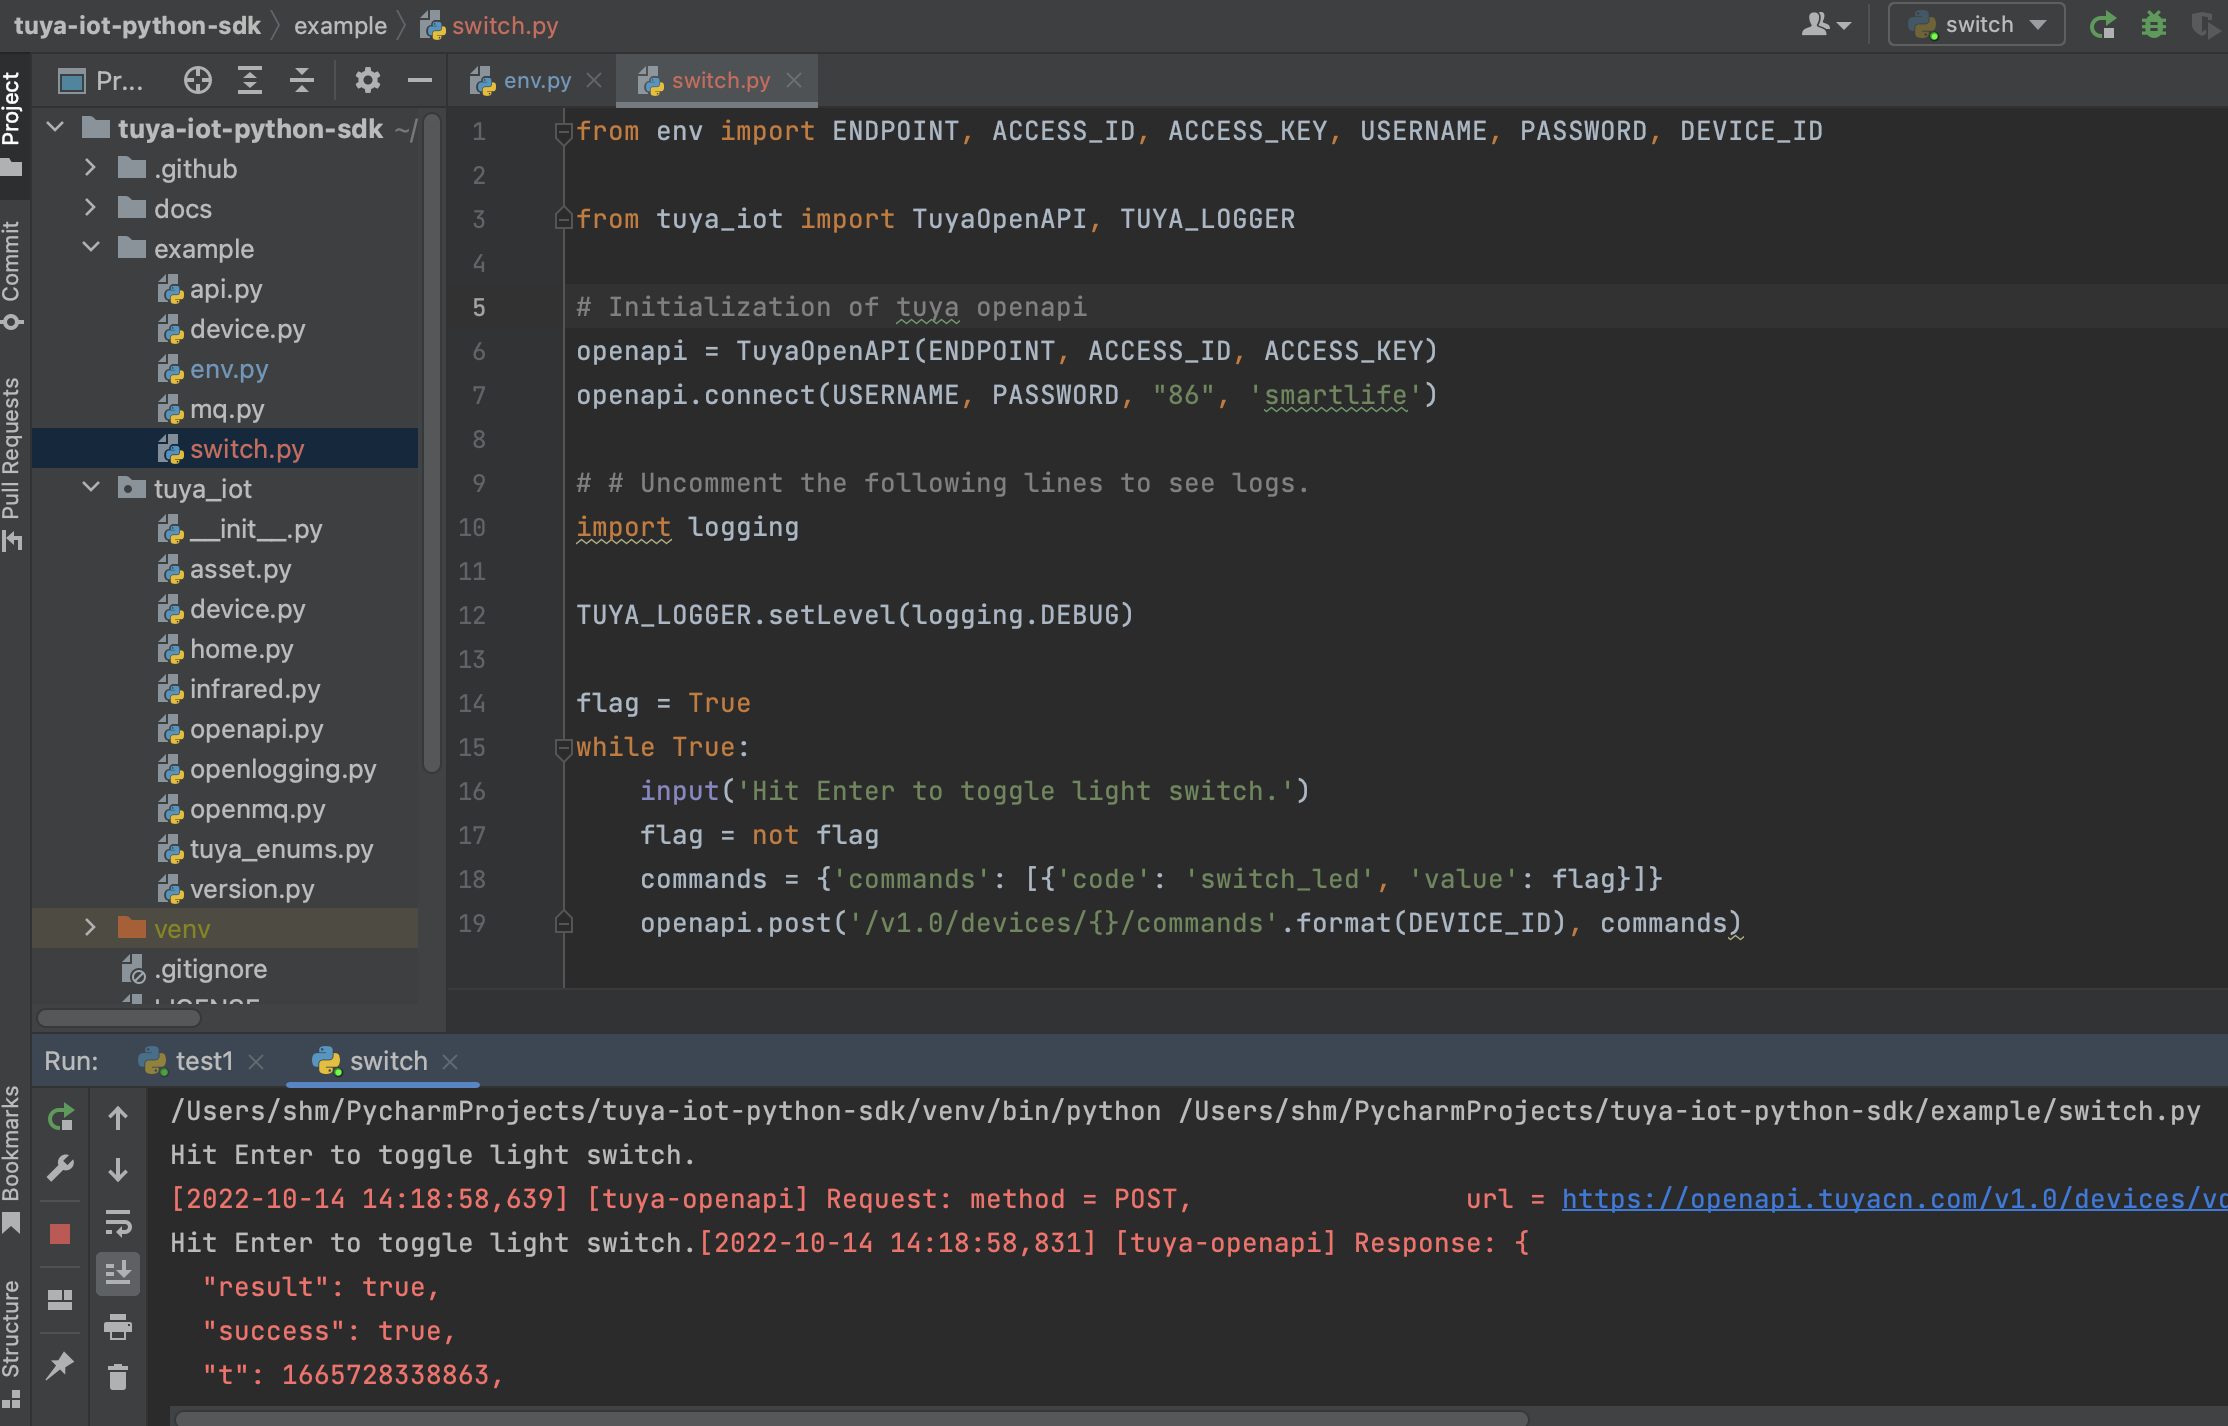
from env import ENDPOINT, ACCESS_ID, ACCESS_KEY, USERNAME, PASSWORD, DEVICE_ID

from tuya_iot import TuyaOpenAPI, TUYA_LOGGER

# Initialization of tuya openapi
openapi = TuyaOpenAPI(ENDPOINT, ACCESS_ID, ACCESS_KEY)
openapi.connect(USERNAME, PASSWORD, "86", 'smartlife')

# # Uncomment the following lines to see logs.
import logging

TUYA_LOGGER.setLevel(logging.DEBUG)

flag = True
while True:
    input('Hit Enter to toggle light switch.')
    flag = not flag
    commands = {'commands': [{'code': 'switch_led', 'value': flag}]}
    openapi.post('/v1.0/devices/{}/commands'.format(DEVICE_ID), commands)
Sample response
Hit Enter to toggle light switch.
[2022-10-14 14:30:42,047] [tuya-openapi] Request: method = POST,                 url = https://openapi.tuyacn.com/v1.0/devices/vdevo16657167*********/commands,                params = None,                body = {'commands': [{'code': 'switch_led', 'value': False}]},                t = 1665729042047
[2022-10-14 14:30:42,203] [tuya-openapi] Response: {
  "result": true,
  "success": true,
  "t": 1665729042258,
  "tid": "b9feb6ce4b8911ed97368aeef190c9e7"
}
Hit Enter to toggle light switch.
Step 4: Listen for device status
The following sample code shows how to implement listening for device events for a user. For example, devices get offline or offline, and device status is reported. Device status notifications are sent as MQTT messages to actively notify the terminal application of real-time data, such as changes in device status and device alert messages. This way, the terminal application does not need to frequently query the device status. Create a monitor.py as follows:
The Device status notification service is required to enable this feature. For more information about subscription, see Subscribe to APIs.
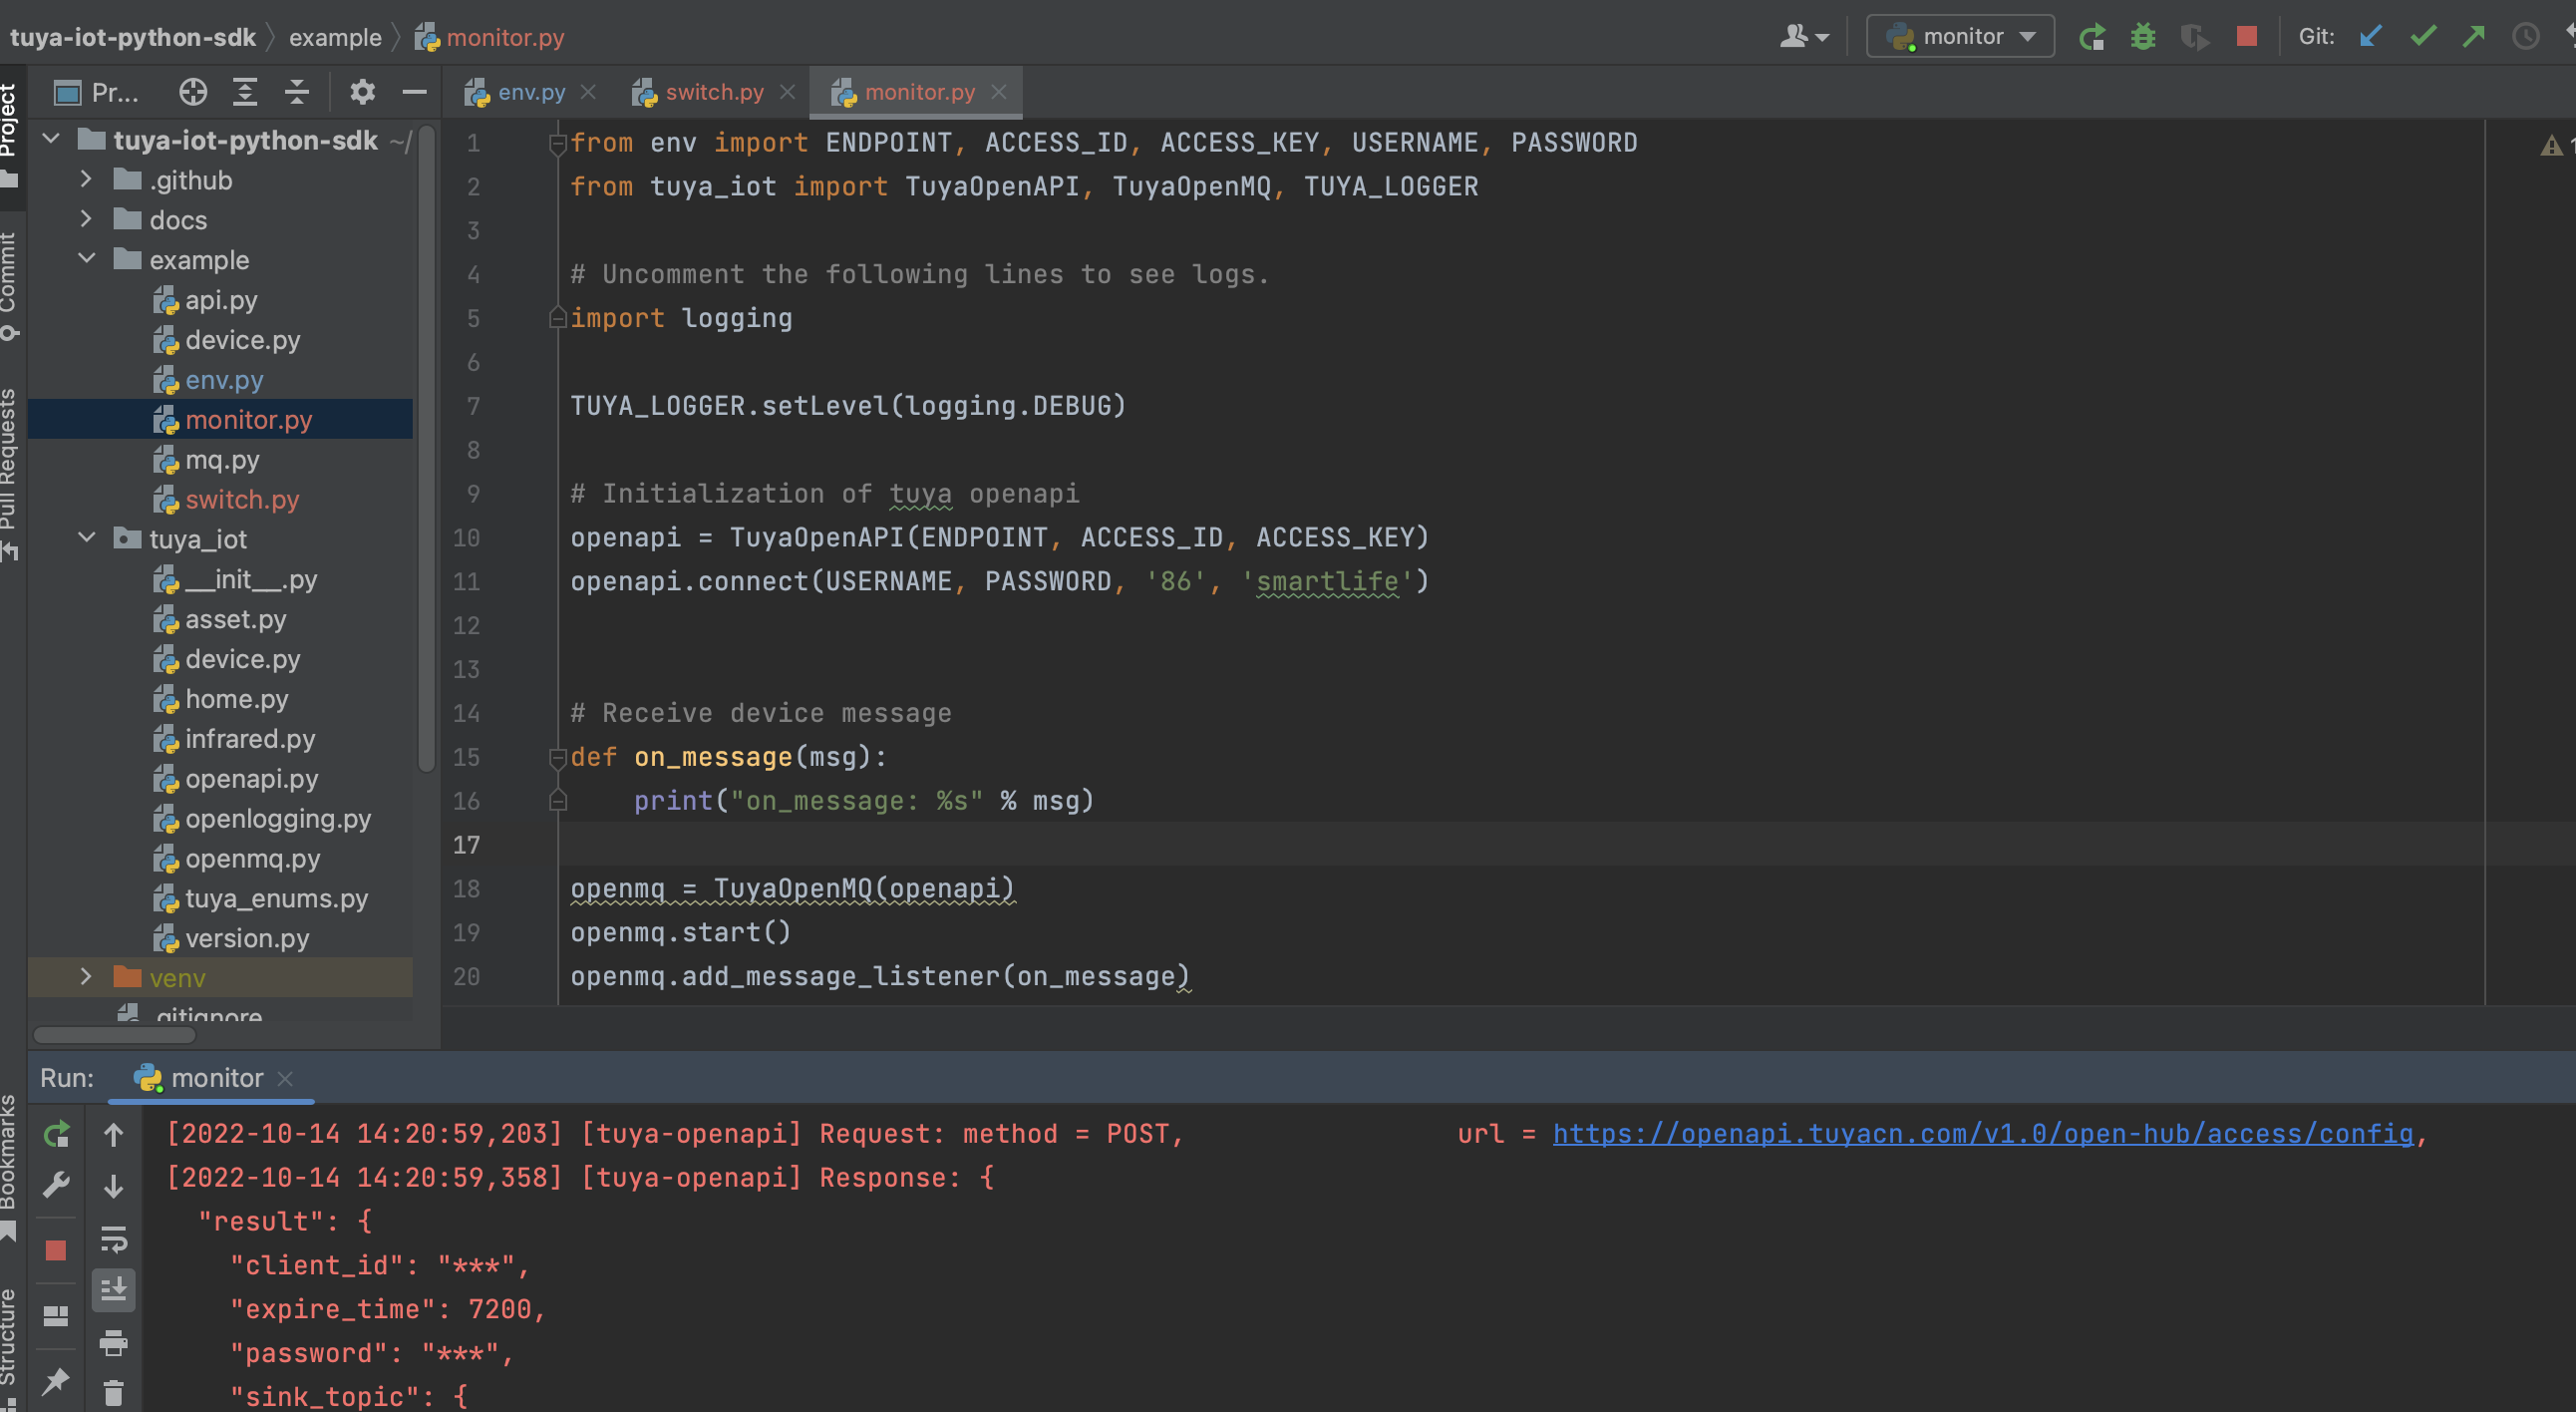
import logging
from tuya_iot import TuyaOpenAPI, TuyaOpenMQ, TUYA_LOGGER

from env import ENDPOINT, ACCESS_ID, ACCESS_KEY, USERNAME, PASSWORD

TUYA_LOGGER.setLevel(logging.DEBUG)

# Init
openapi = TuyaOpenAPI(ENDPOINT, ACCESS_ID, ACCESS_KEY)
openapi.connect(USERNAME, PASSWORD, "86", 'tuyaSmart')

# Receive device message
def on_message(msg):
    print("on_message: %s" % msg)

openapi.token_info.expire_time = 0

openmq = TuyaOpenMQ(openapi)
openmq.start()
openmq.add_message_listener(on_message)
Sample response
[2022-10-14 11:38:41,704] [tuya-openmq] payload-> b'{"data":"gIaHR01z+26gUD10tL33xxRJ/ii/cc3Egz/NXII8riWBKrFfzmMtzqX/1kSamNFkt1DwKiY6a91Ru/ChWEjhOadlz0n7A+5oFZlvV9zcWCayf5WaPGMcwpjiifAM+qDowHyHEwFmXBMFPb5449xCNKDmAraFkhaUMEOGKdAgwaCabpBzu6E/aMNc+hOSnyBrIdzAuS6ZiUEjbtVQgBDDzLcCg4+dCZHznETdWJDA3Gu0VjQhObTu4ZLd80M5x3qE","protocol":4,"pv":"2.0","sign":"fc234c7bbd6e6f11ce433676de6335f1","t":1665718721658}'
[2022-10-14 11:38:41,705] [tuya-openmq] on_message: {'data': {'dataId': 'e0d1ca4f-7fd0-4c83-a64a-c8c7113a7153', 'devId': 'vdevo166571674150717', 'productKey': '0v90y5gxz1ae8pcl', 'status': [{'code': 'switch_led', 't': '1665718721658', 'value': True, '20': True}]}, 'protocol': 4, 'pv': '2.0', 'sign': 'fc234c7bbd6e6f11ce433676de6335f1', 't': 1665718721658}
Conclusion
In this topic, you have learned how to use the Python SDK based on the Tuya Cloud Development Platform. You can call device APIs to control smart devices and listen for device status. Thanks to the standard ecosystem of 'Powered by Tuya' devices, you can extend this control method to all devices of Tuya’s ecosystem. This helps you focus on and accelerate SaaS development based on smart devices, without regard to device differences.
Is this page helpful?
YesFeedbackIs this page helpful?
YesFeedback


