MCU Development Environment Building
Last Updated on : 2022-10-26 06:59:15download
This topic takes the ST Nucleo development board as an example to describe how to build an environment for ST Nucleo development board in Windows. The following solution also applies to macOS and Linux, but the specific operation interface will be slightly different.
Background information
The master control board in the Tuya Sandwich Evaluation Kit supports the following two boards:
-
ST Nucleo
ST Nucleo uses STM32Nucleo-G071RB as the master control, and its development method is compatible with Arduino. Therefore, when using the ST Nucleo development board, you need to install Arduino IDE and ST-Link driver.
-
Arduino UNO
Arduino is the world’s most popular open-source hardware and also an excellent hardware development platform. Easy-to-use development by Arduino gives developers more time to focus on creative ideas and quick implementation. It helps to reduce learning costs and shorten development cycles. For more information about Arduino UNO development environment building, see Arduino official tutorial.
Procedure
Step 1: Install ST-Link driver
-
Go to Arduino to download Arduino IDE.
Arduino IDE is a software for writing Arduino programs. The program can be uploaded to the Tuya Sandwich Development Board through this software.
-
Go to STMicroelectronics to download ST-Link driver for Windows.
-
Install and run ST-Link driver as an administrator.
-
Connect the development board to the computer with a Micro-USB cable, open Device Manager. If the port in the following image appears, it indicates the driver is successfully installed.
Note: The Micro-USB cable must have the data transfer capability.

Step 2: Configure Arduino IDE
The master control of Tuya Sandwich ST Nucleo development board is STM32Nucleo-G071RB that is not supported by default in Arduino IDE. To enable Arduino IDE to support the development board, you need to operate as follows.
-
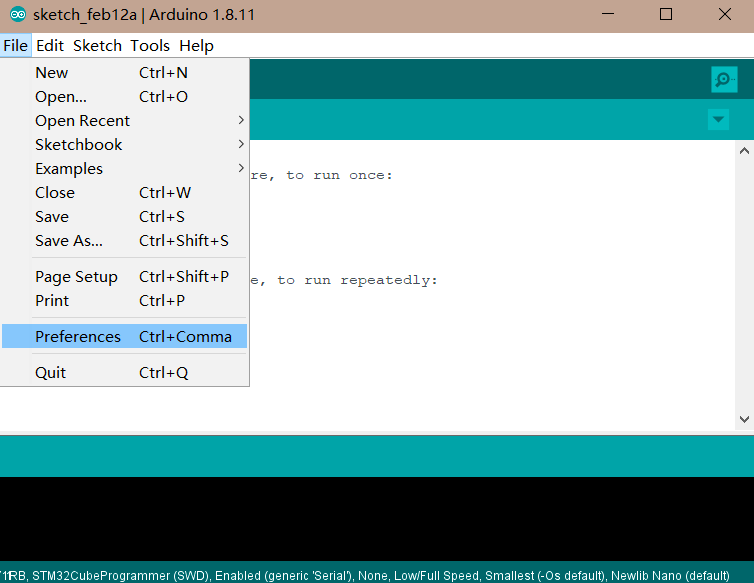
Enter Arduino IDE, choose File > Preferences in the menu bar.
-
Fill in
https://github.com/stm32duino/BoardManagerFiles/raw/master/STM32/package_stm_index.jsonin the red box and click OK.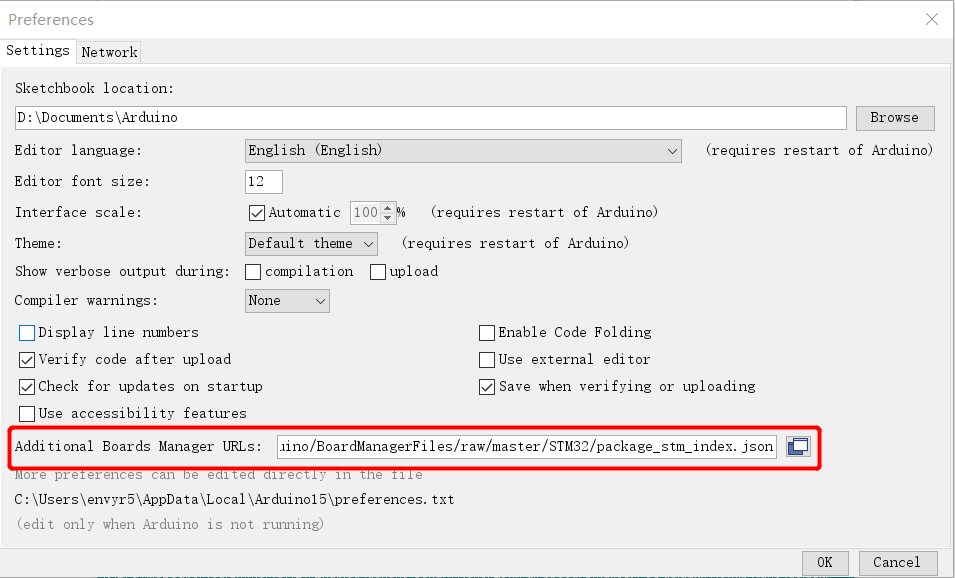
-
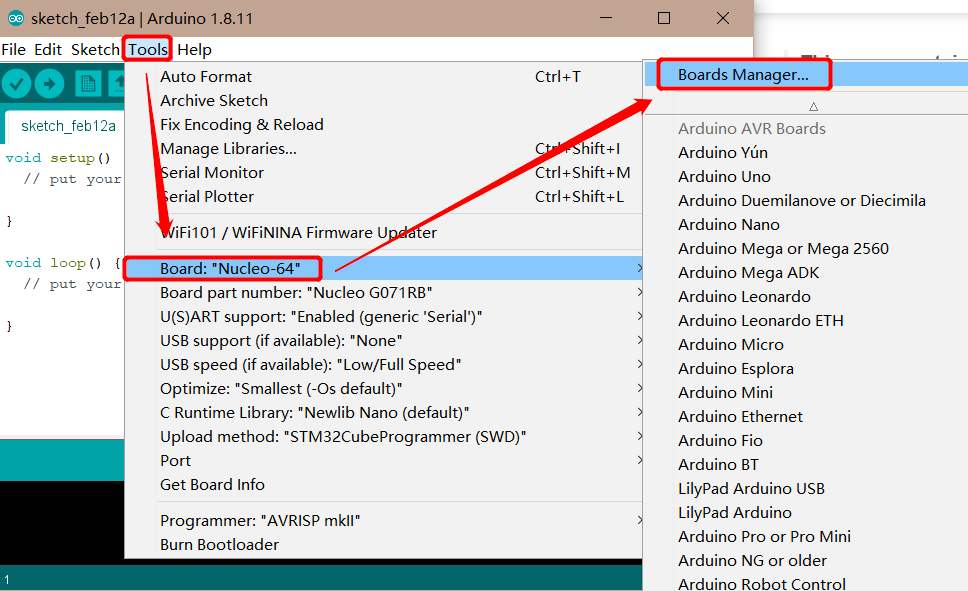
In the menu bar, choose Tools > Board > Boards Manager.
-
Enter
STM32in the search box and clickInstallto start relevant onboard package installation.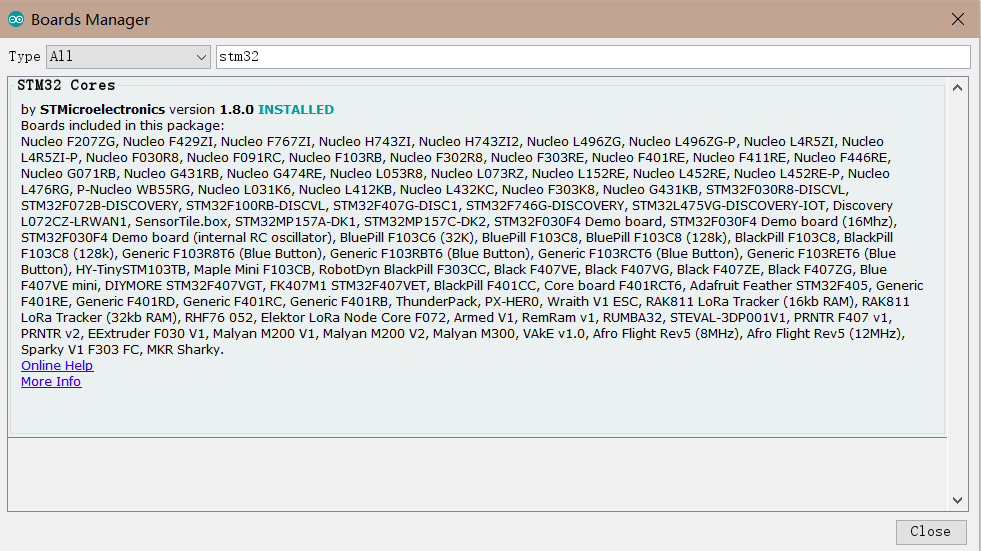
Step 3: Configure development board
After the development board is installed, you choose the model of your development board. Tuya Sandwich Development Board is displayed as Nucleo-64 in Arduino IDE, and the model is displayed as Nucleo G071RB. Configure as follows. For other options in the toolbar, it is recommended to keep the default configuration, or you can change it as needed.
-
Enter Arduino IDE, choose Tools > Board in the menu bar.
-
Choose board:
Nucleo-64.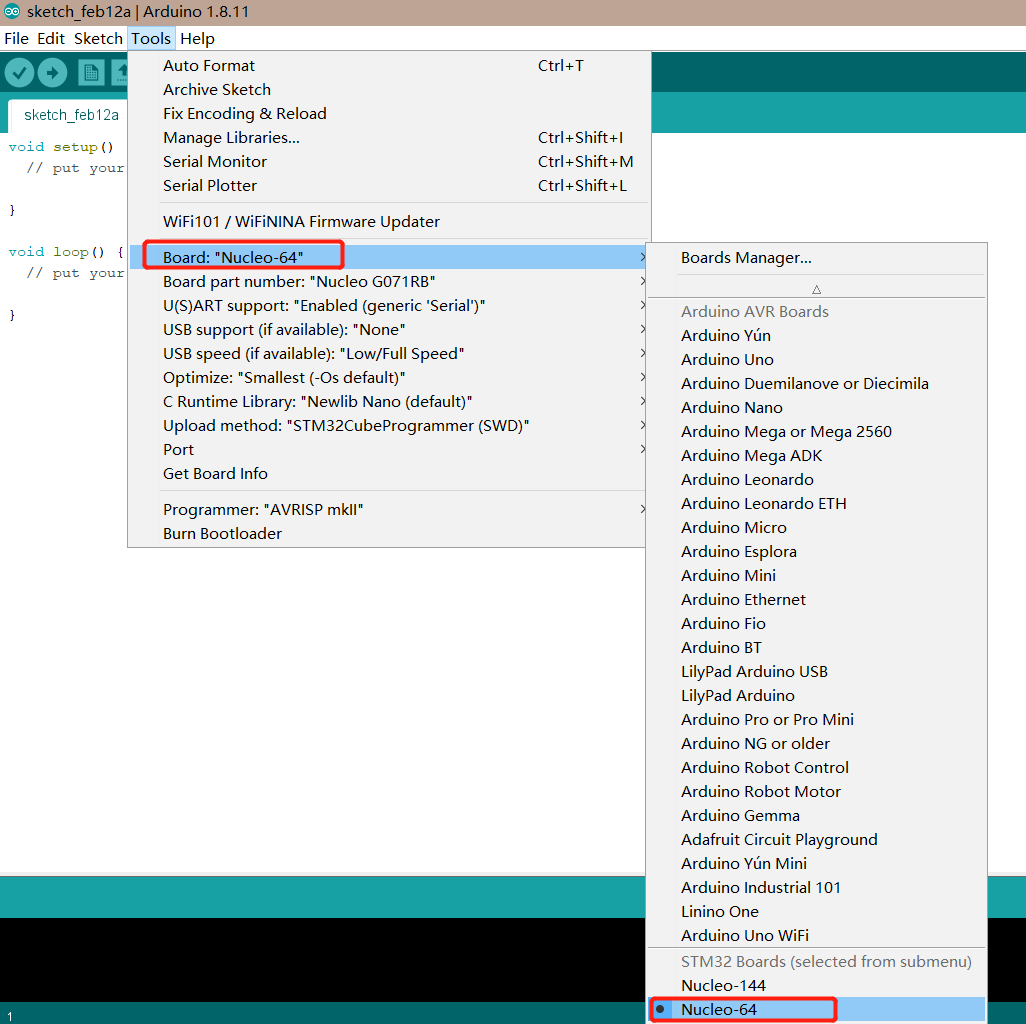
-
In the menu bar, choose Tools > Board part number, and then choose
Nucleo G071RB.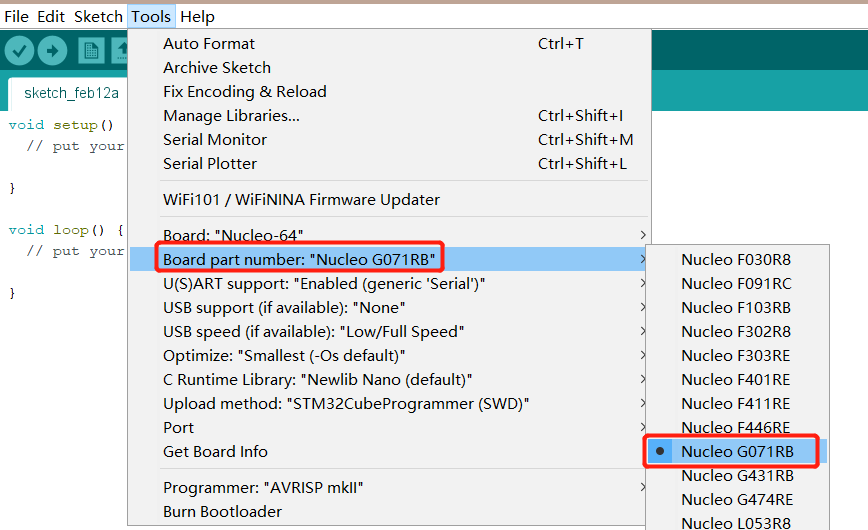
-
In the menu bar, choose Tools > Upload method, and then choose
STM32CubeProgrammer (SWD).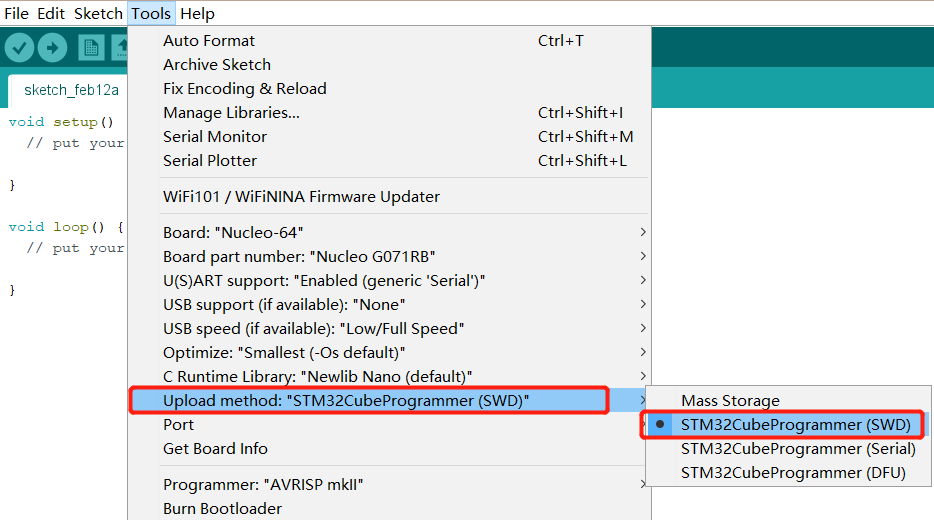
-
In the menu bar, choose Tools > Port, and choose the program download port. Choose the applicable port according to the connection between the development board and your computer.

Step 4: Download STM32CubeProgrammer
Tuya Sandwich Evaluation Kit adopts STM32Nucleo-G071RB as the master control, so if you use Arduino IDE to write STM32 code, you need to download STM32CubeProgrammer software to download the code to the development board.
-
Go to STMicroelectronics to download STM32CubeProgrammer for Windows.
Note: For macOS and Linux, you need to download the applicable STM32CubeProgrammer software respectively to install the driver.
-
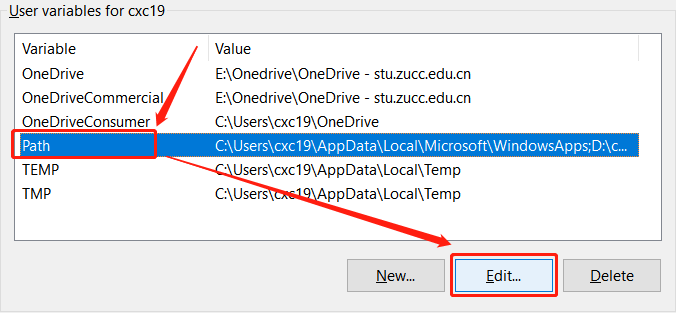
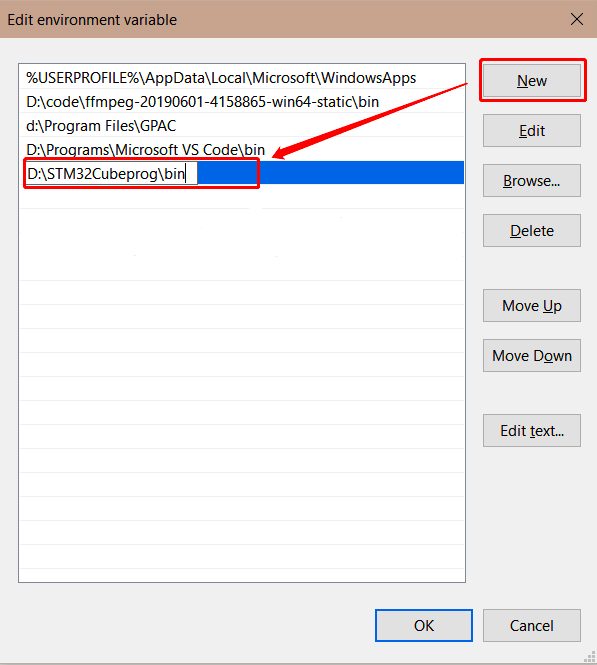
After installation completed, add the
binfile path under the software installation path to the system environment variables.-
Open the Control Panel, select System and Security > Security, and click Advanced system settings in the left navigation bar.
-
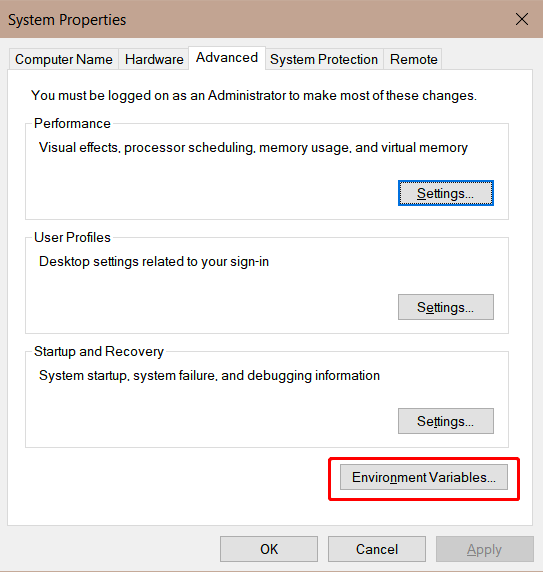
In the pop-up System Properties window, switch to Advanced tab and select Environment Variables.
-
According to the prompt, add an environment variable.
-
Execution result
So far, an environment for Tuya Sandwich Development Board has been built, and you can write application codes in Arduino IDE and download it to the development board.
Is this page helpful?
YesFeedbackIs this page helpful?
YesFeedback


