Manage Brand Page
Last Updated on : 2025-02-26 05:48:22download
Prerequisites
Before adding a brand page, you need to apply for a brand first.
Add a brand page
Procedure
-
Log in to the Tuya Developer Platform, and choose Operation > Tuya’s Apps > My Brands.
If your brand application is approved, click Manage Brand Page in the Operation column to access the brand page.
-
On the Add Brand Page that appears, select your brand and its primary market. The app will determine the effective regions of your brand page based on the country or region where the user registers. And then, click Confirm.

-
Go to the Brand Page. The Contacts component is selected by default. Fill in the brand’s contact information and after-sales agreement.
Click a component in the preview on the left to uncheck or recheck it.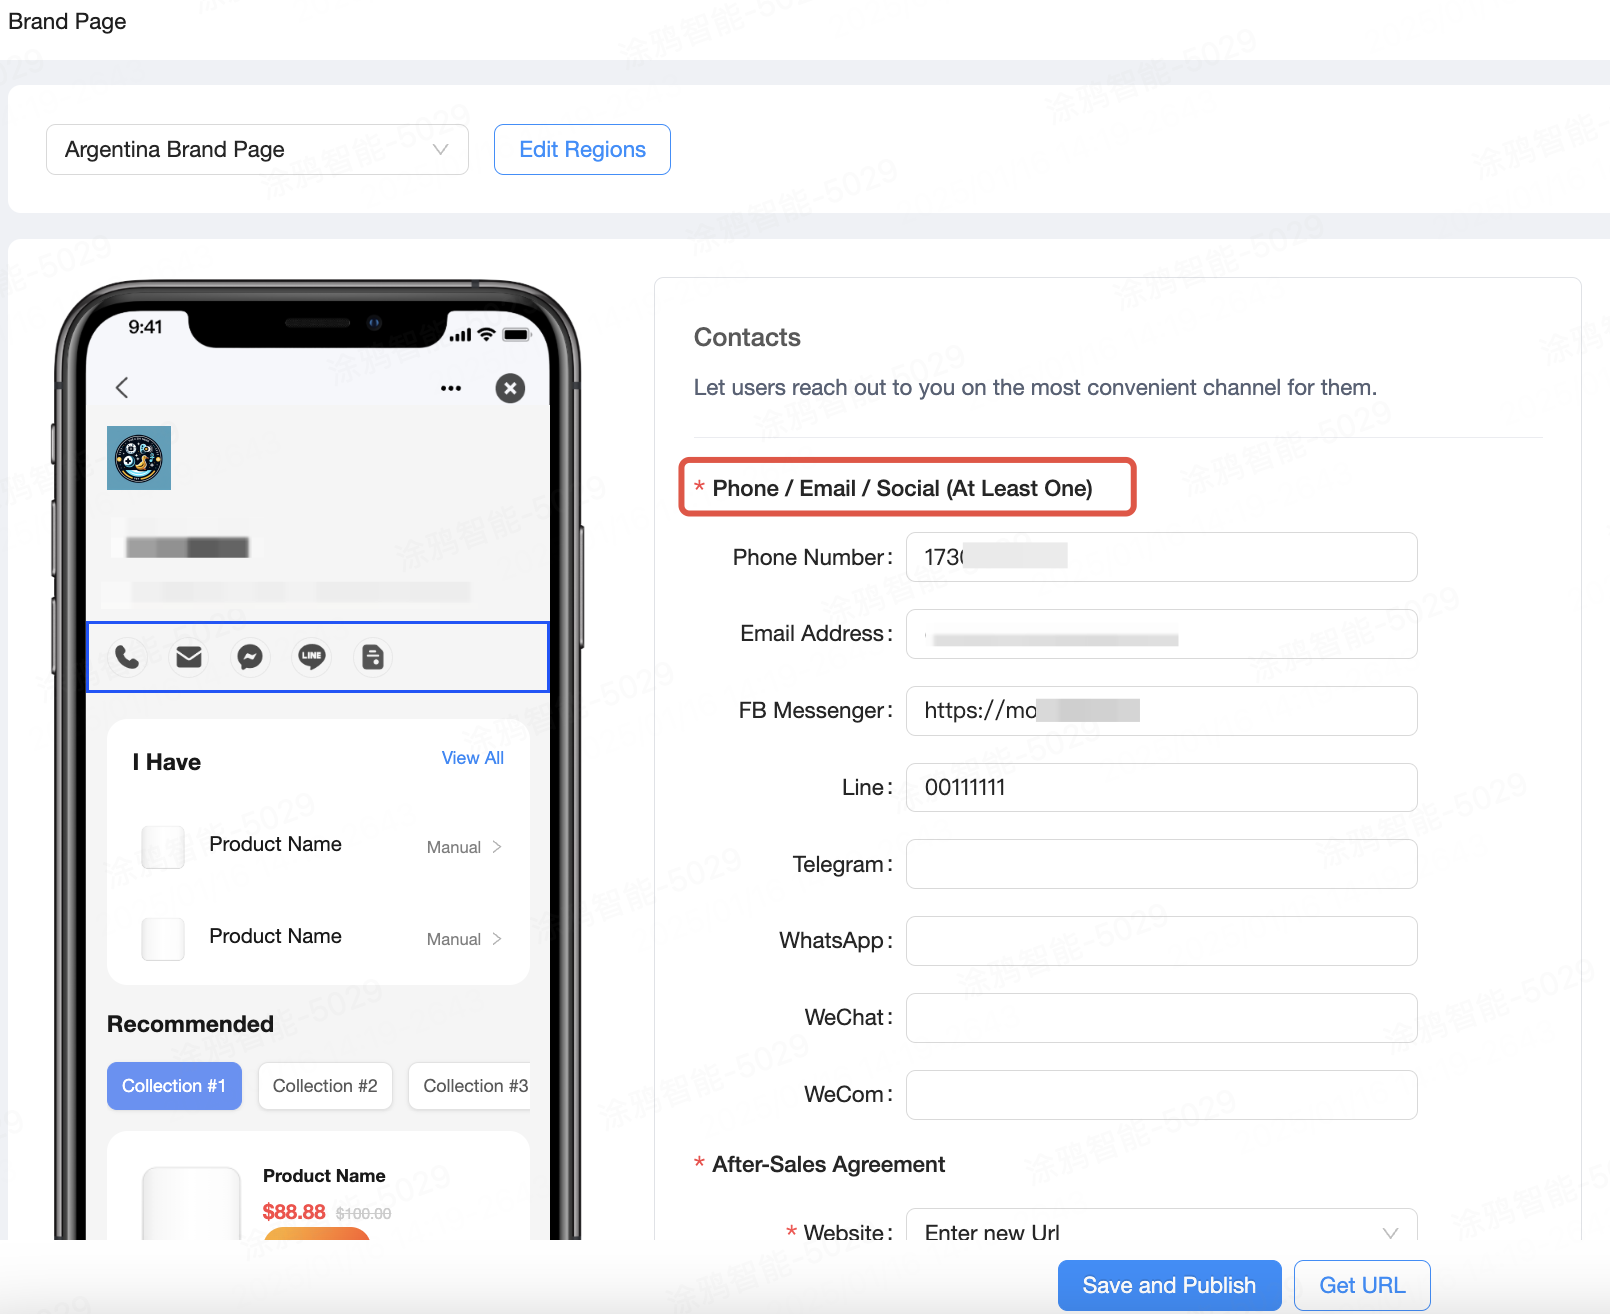
-
Click Save and Publish to submit the brand page.
Your brand page will be reviewed by the Tuya team before publishing. This review typically takes one to three workdays.
Edit brand page name and region
Procedure
-
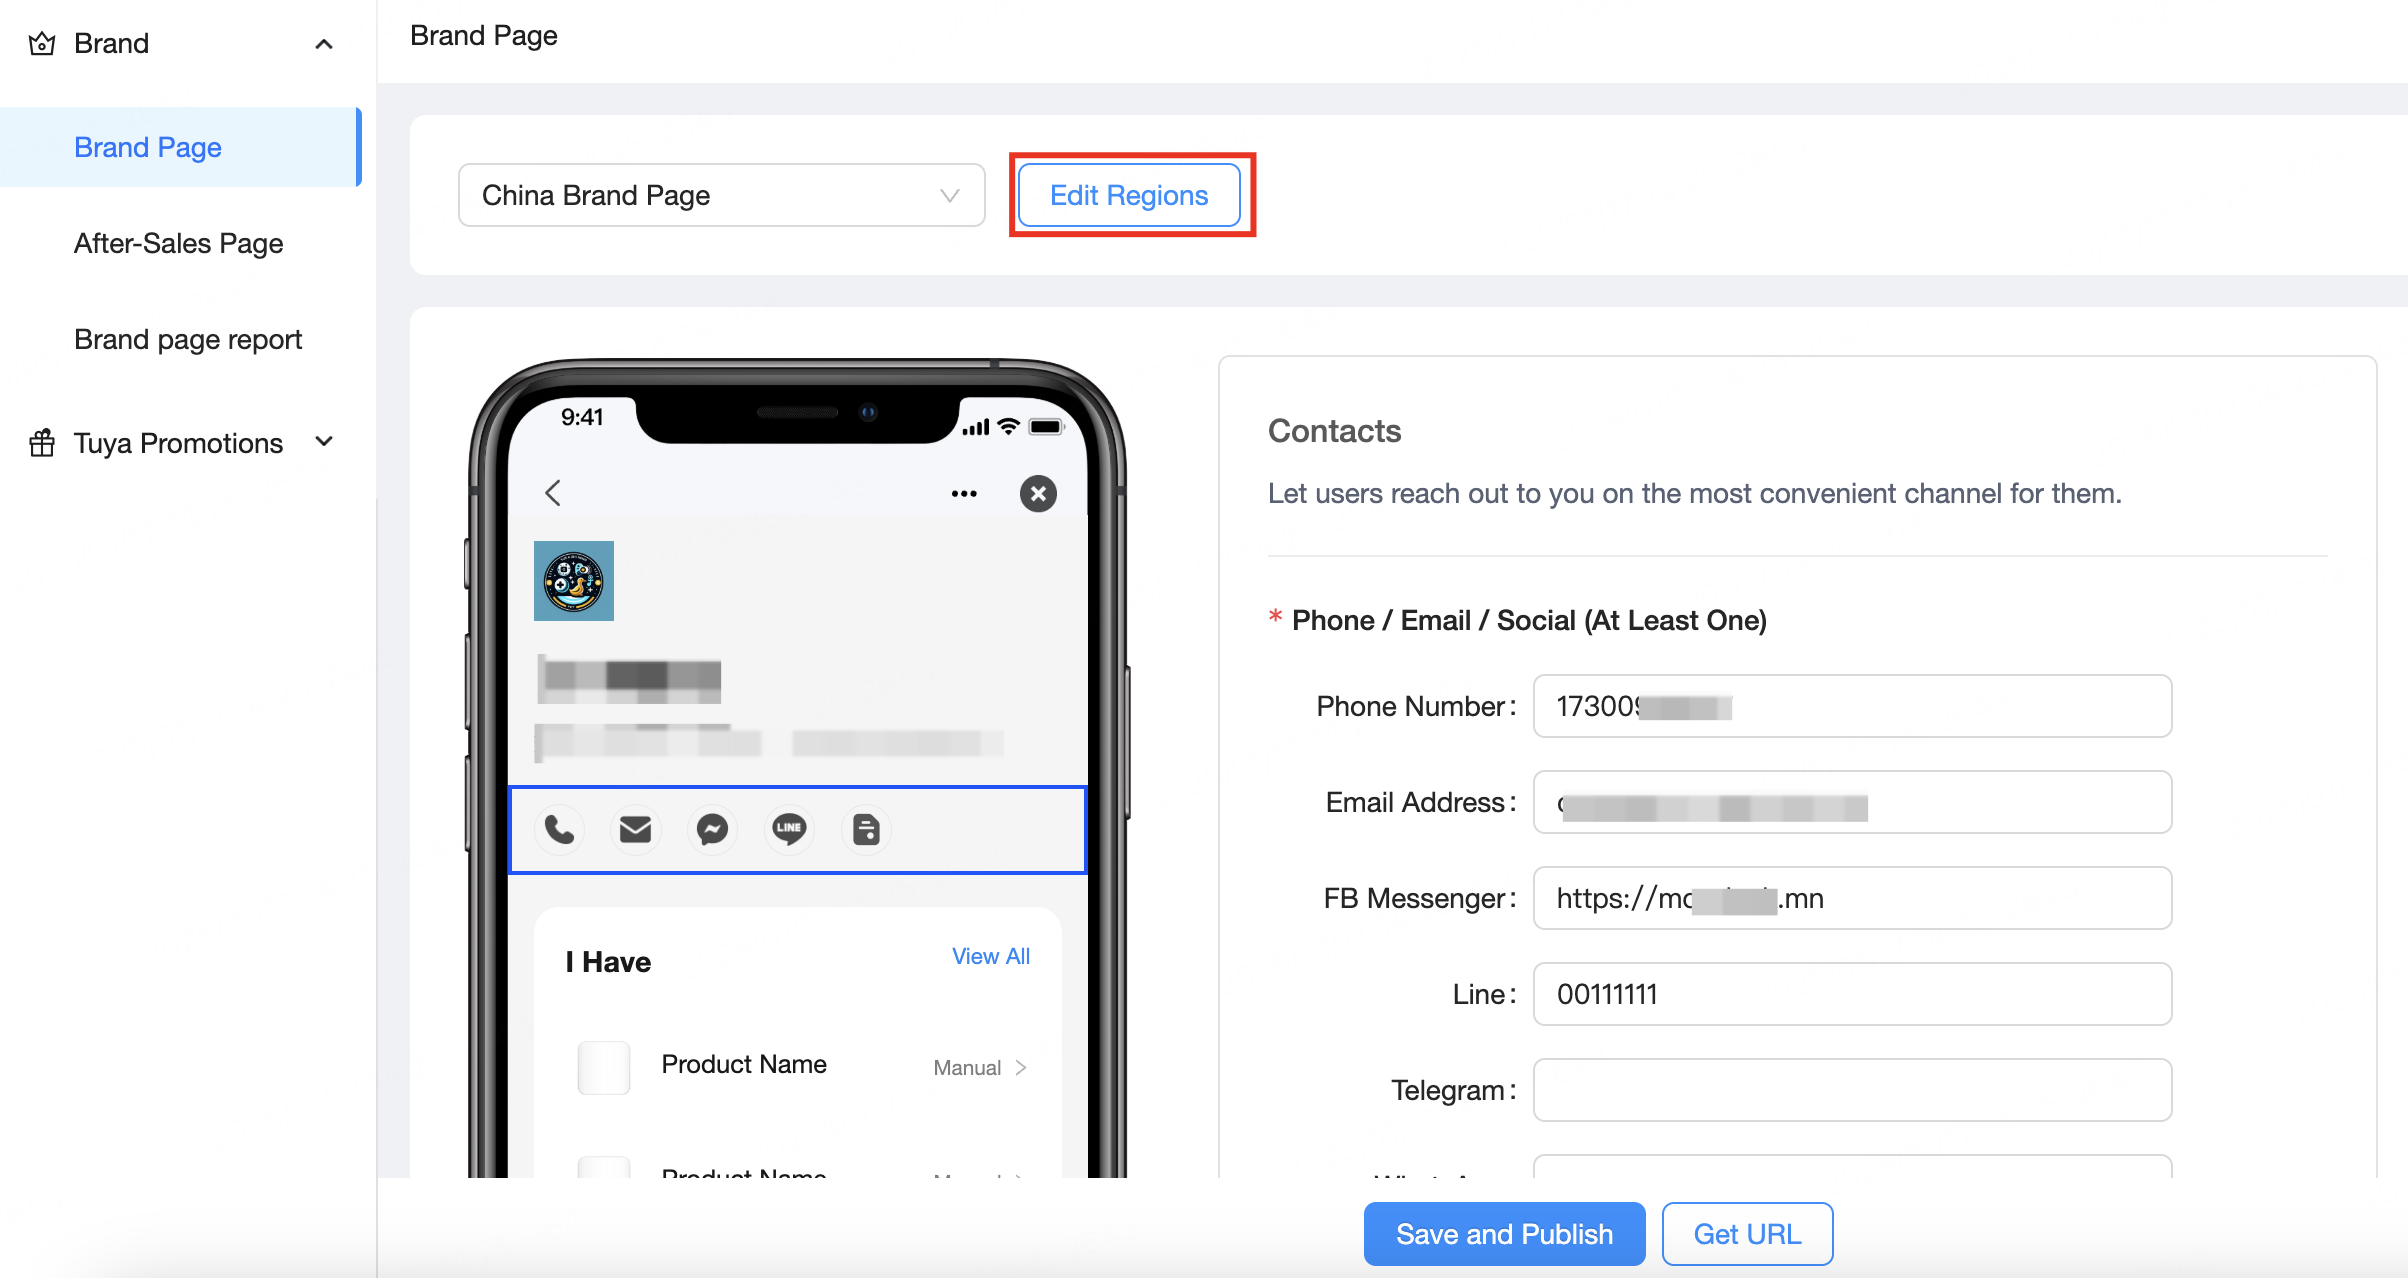
On the Brand Page, click Edit Regions to modify the regions this brand page applies to.
-
Due to national regulations and data security requirements, regions are isolated and managed according to data centers.
If the countries/regions managed by a specific brand page go beyond the range supported by the current data center, you must create a new brand page.
-
Click Edit Name to modify the name of the brand page in the pop-up window.
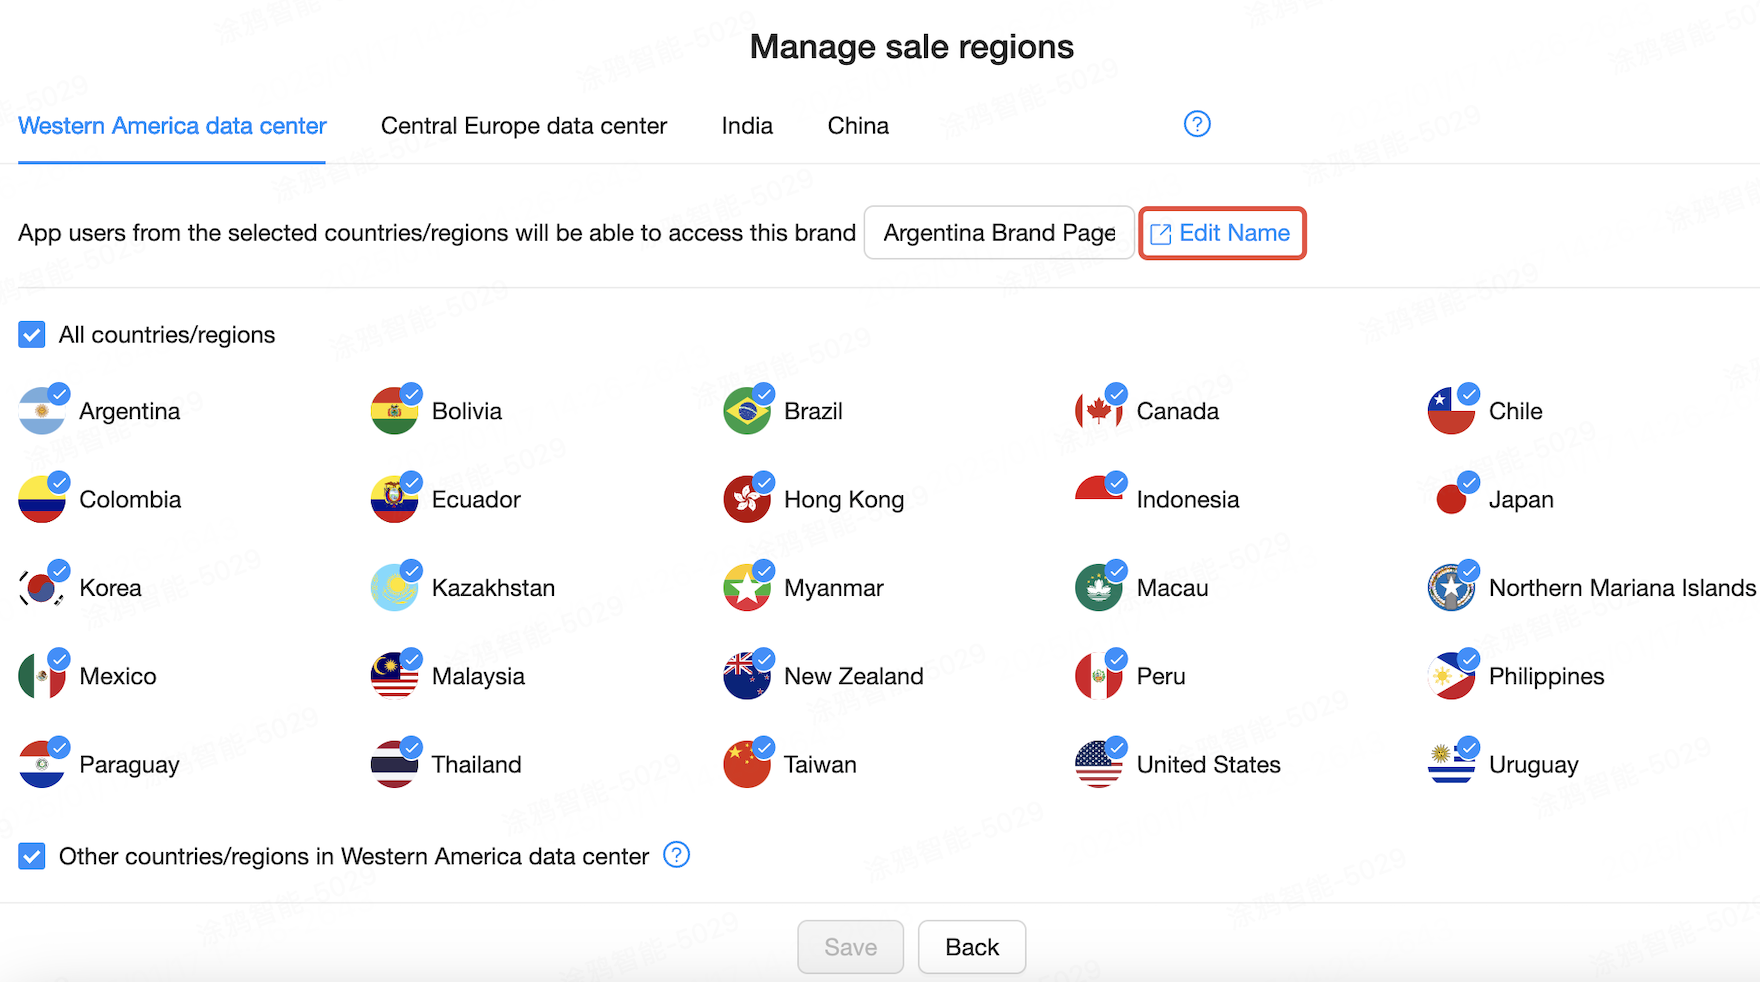
Only app users registered in these countries or regions can access the brand page.
Add brand page
Procedure
-
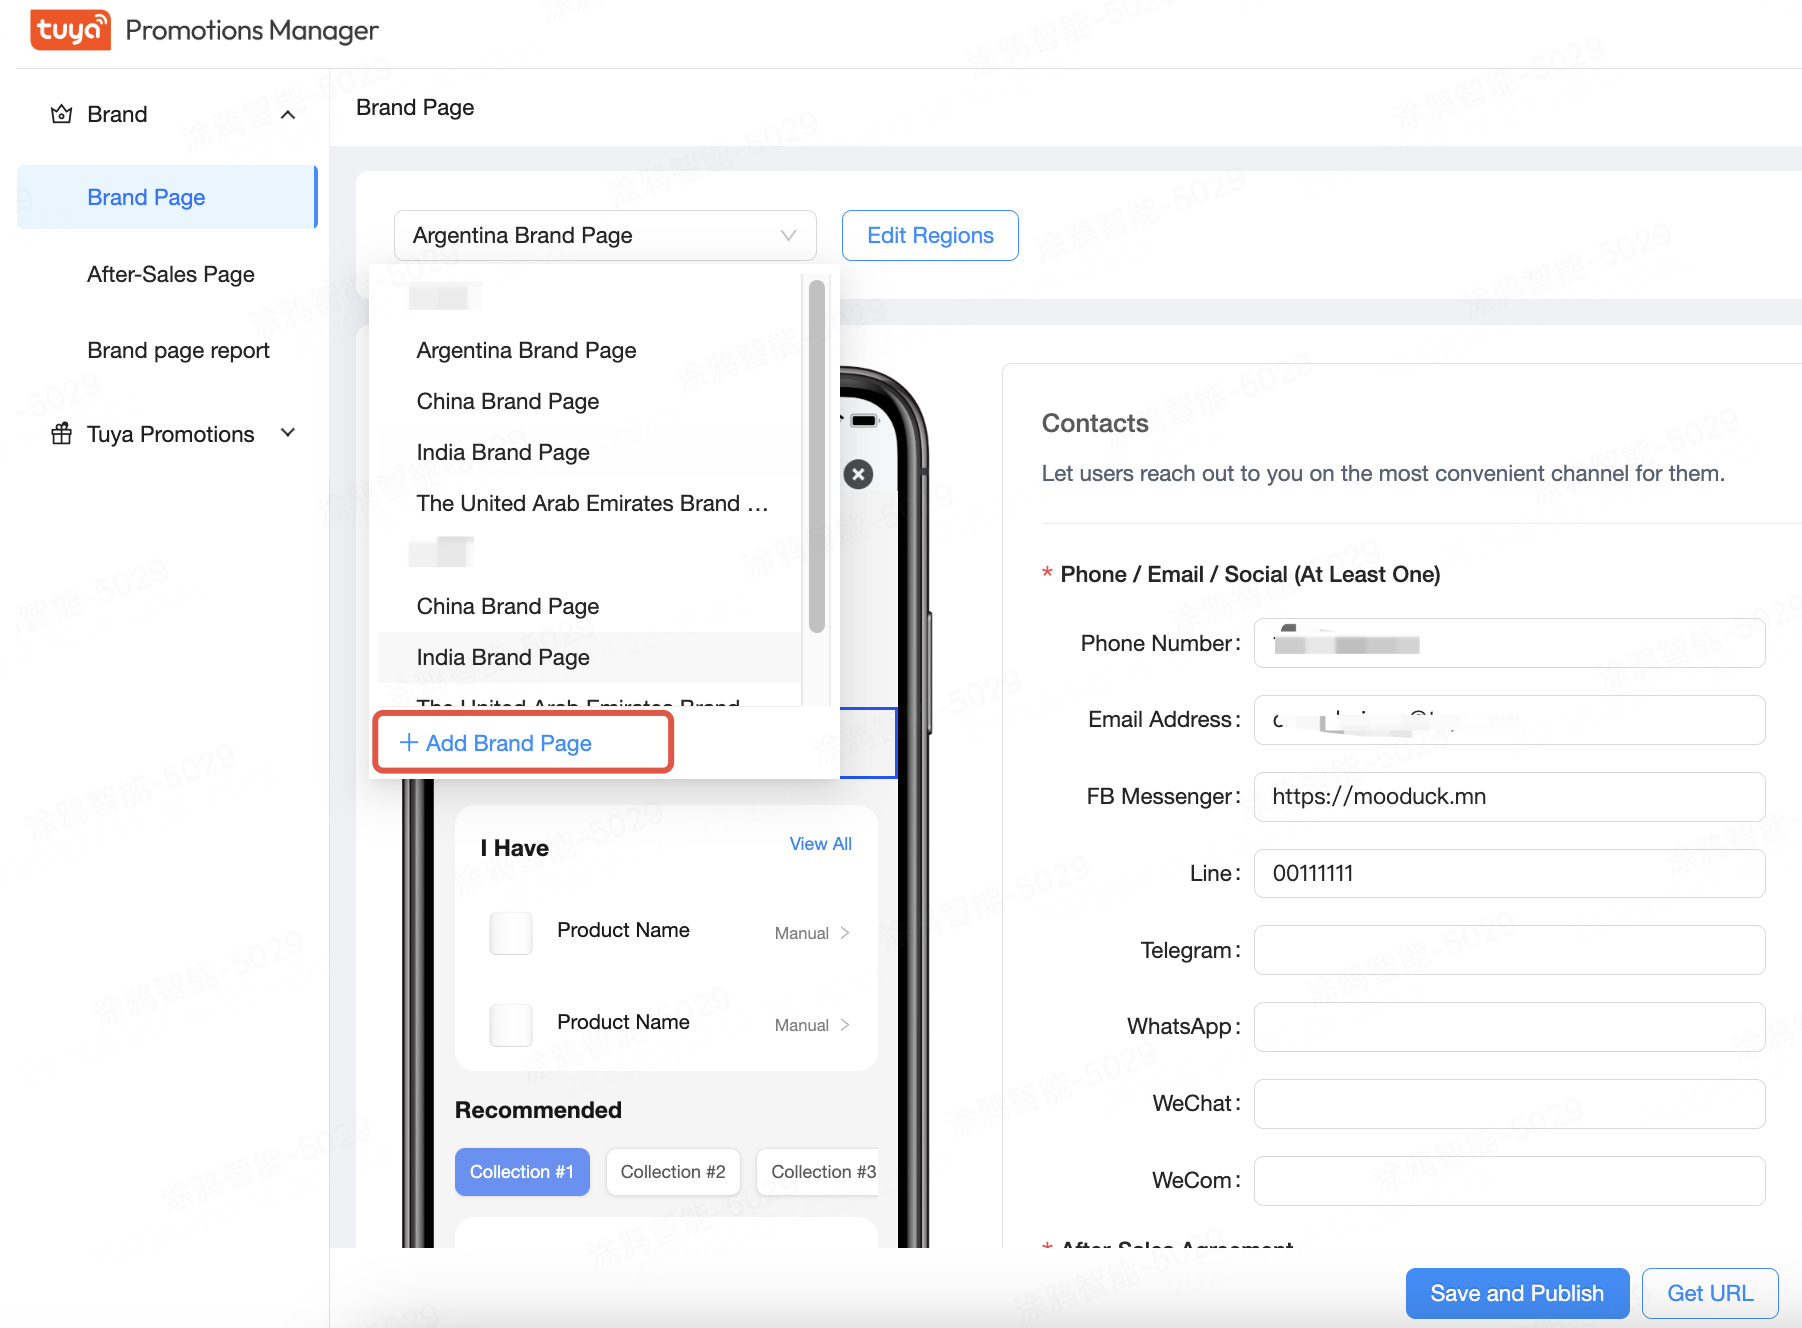
On the Brand Page, from the drop-down list of regions, click + Add Brand Page to add a brand page for the specified brand.
-
On the Add Brand Page that appears, select your brand and its primary market, and click Confirm.

Add products to the brand page
Before adding products, you need to subscribe to the App Mall service to sell products on Tuya-enabled apps. Subscription to the App Mall is free of charge if the products in the app store are only for sale on the brand page.
Procedure
-
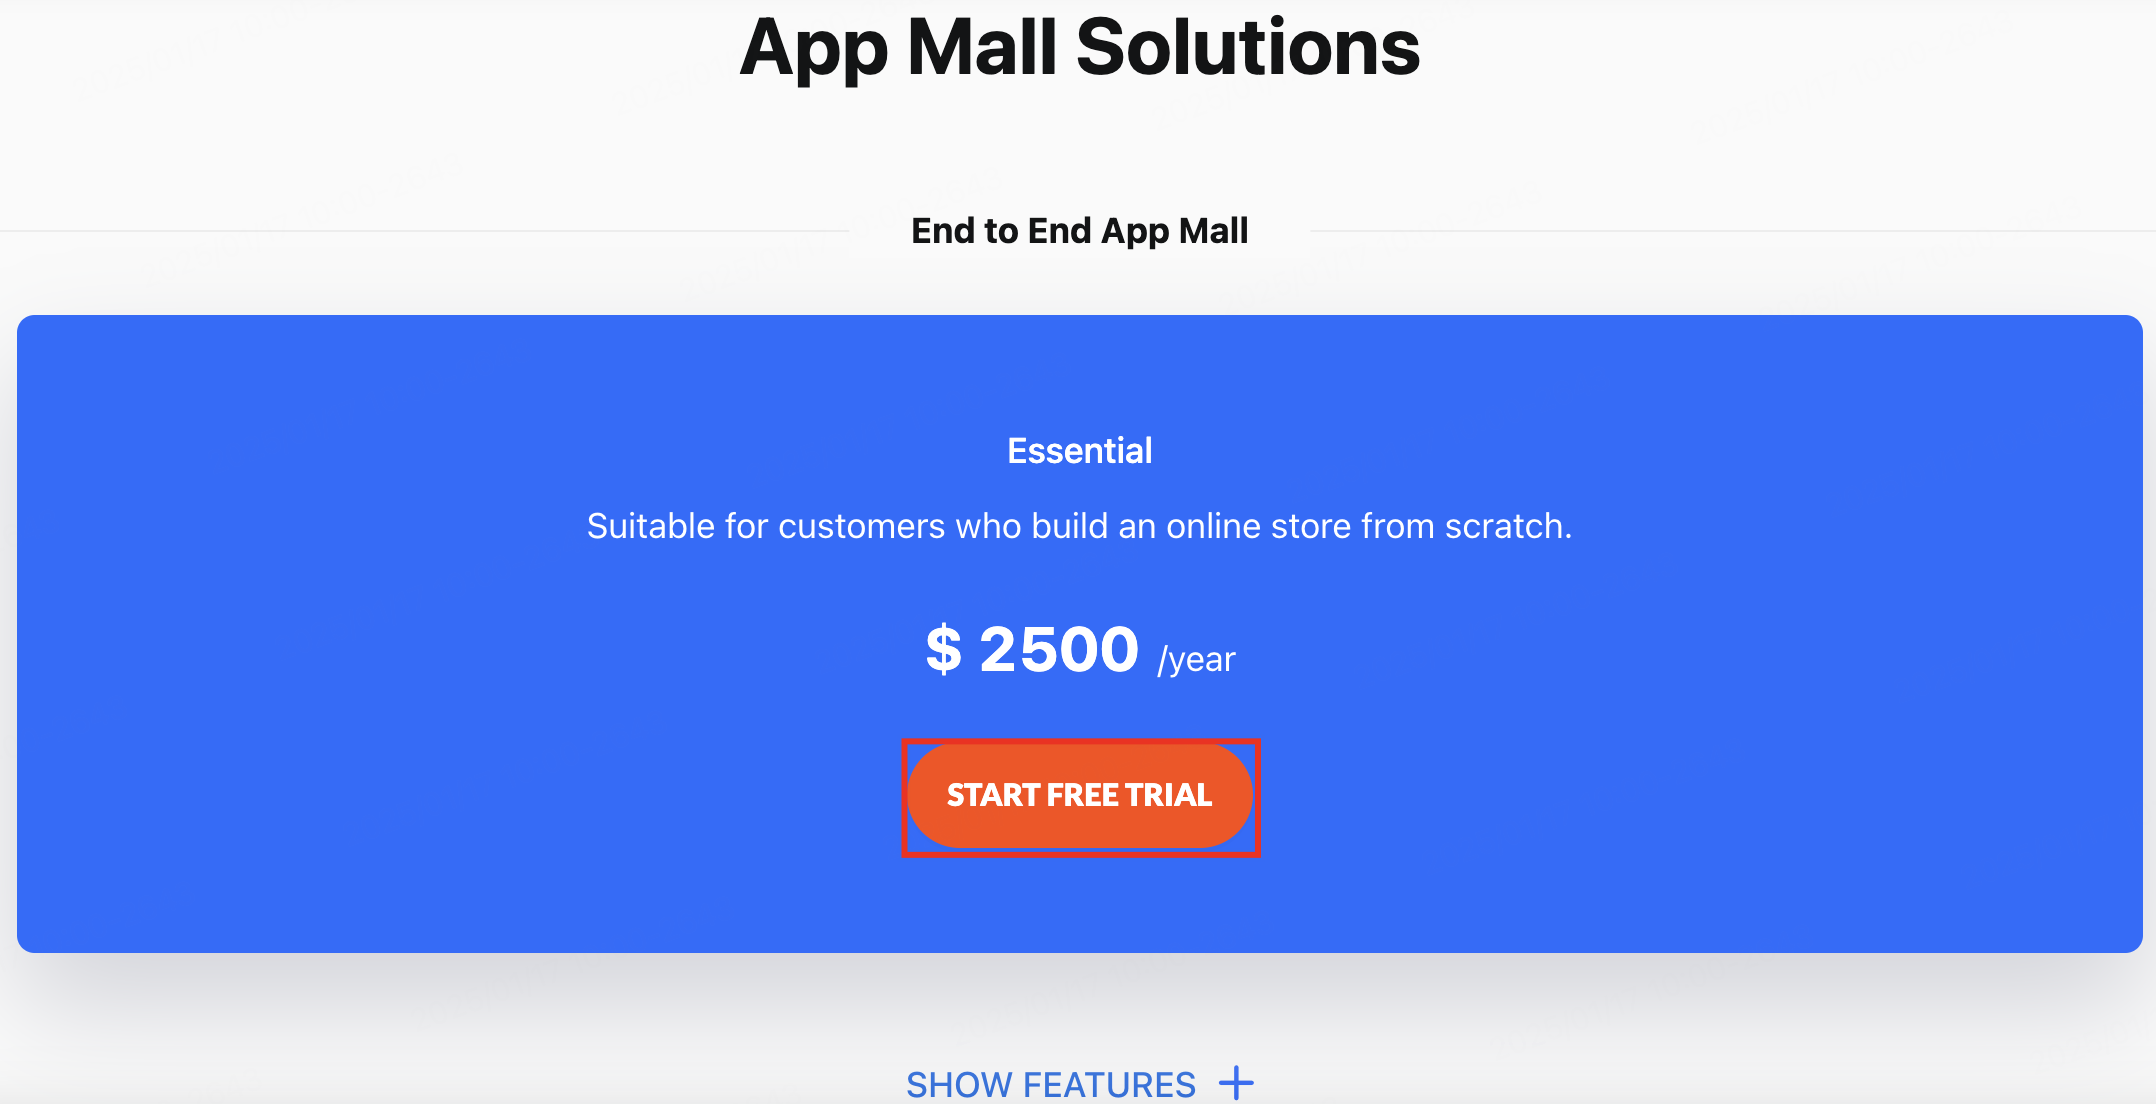
Go to the App Mall, scroll down until you see the picture below, and click Start Free Trial to enter the subscription page. If you have subscribed to the app mall, skip this section. The App Mall can extend for free, please contact the relevant personnel at Tuya.
-
Complete the following configuration on the subscription page:
- (Optional) Enter a store name.
- Select your main sales countries and regions. App Mall sets the default main currency and the main language of your store accordingly.
- (Optional) Select the app where you want to sell your products. You can skip this step if you only sell products on the Tuya-enabled apps. You do not need to bind an OEM app.
-
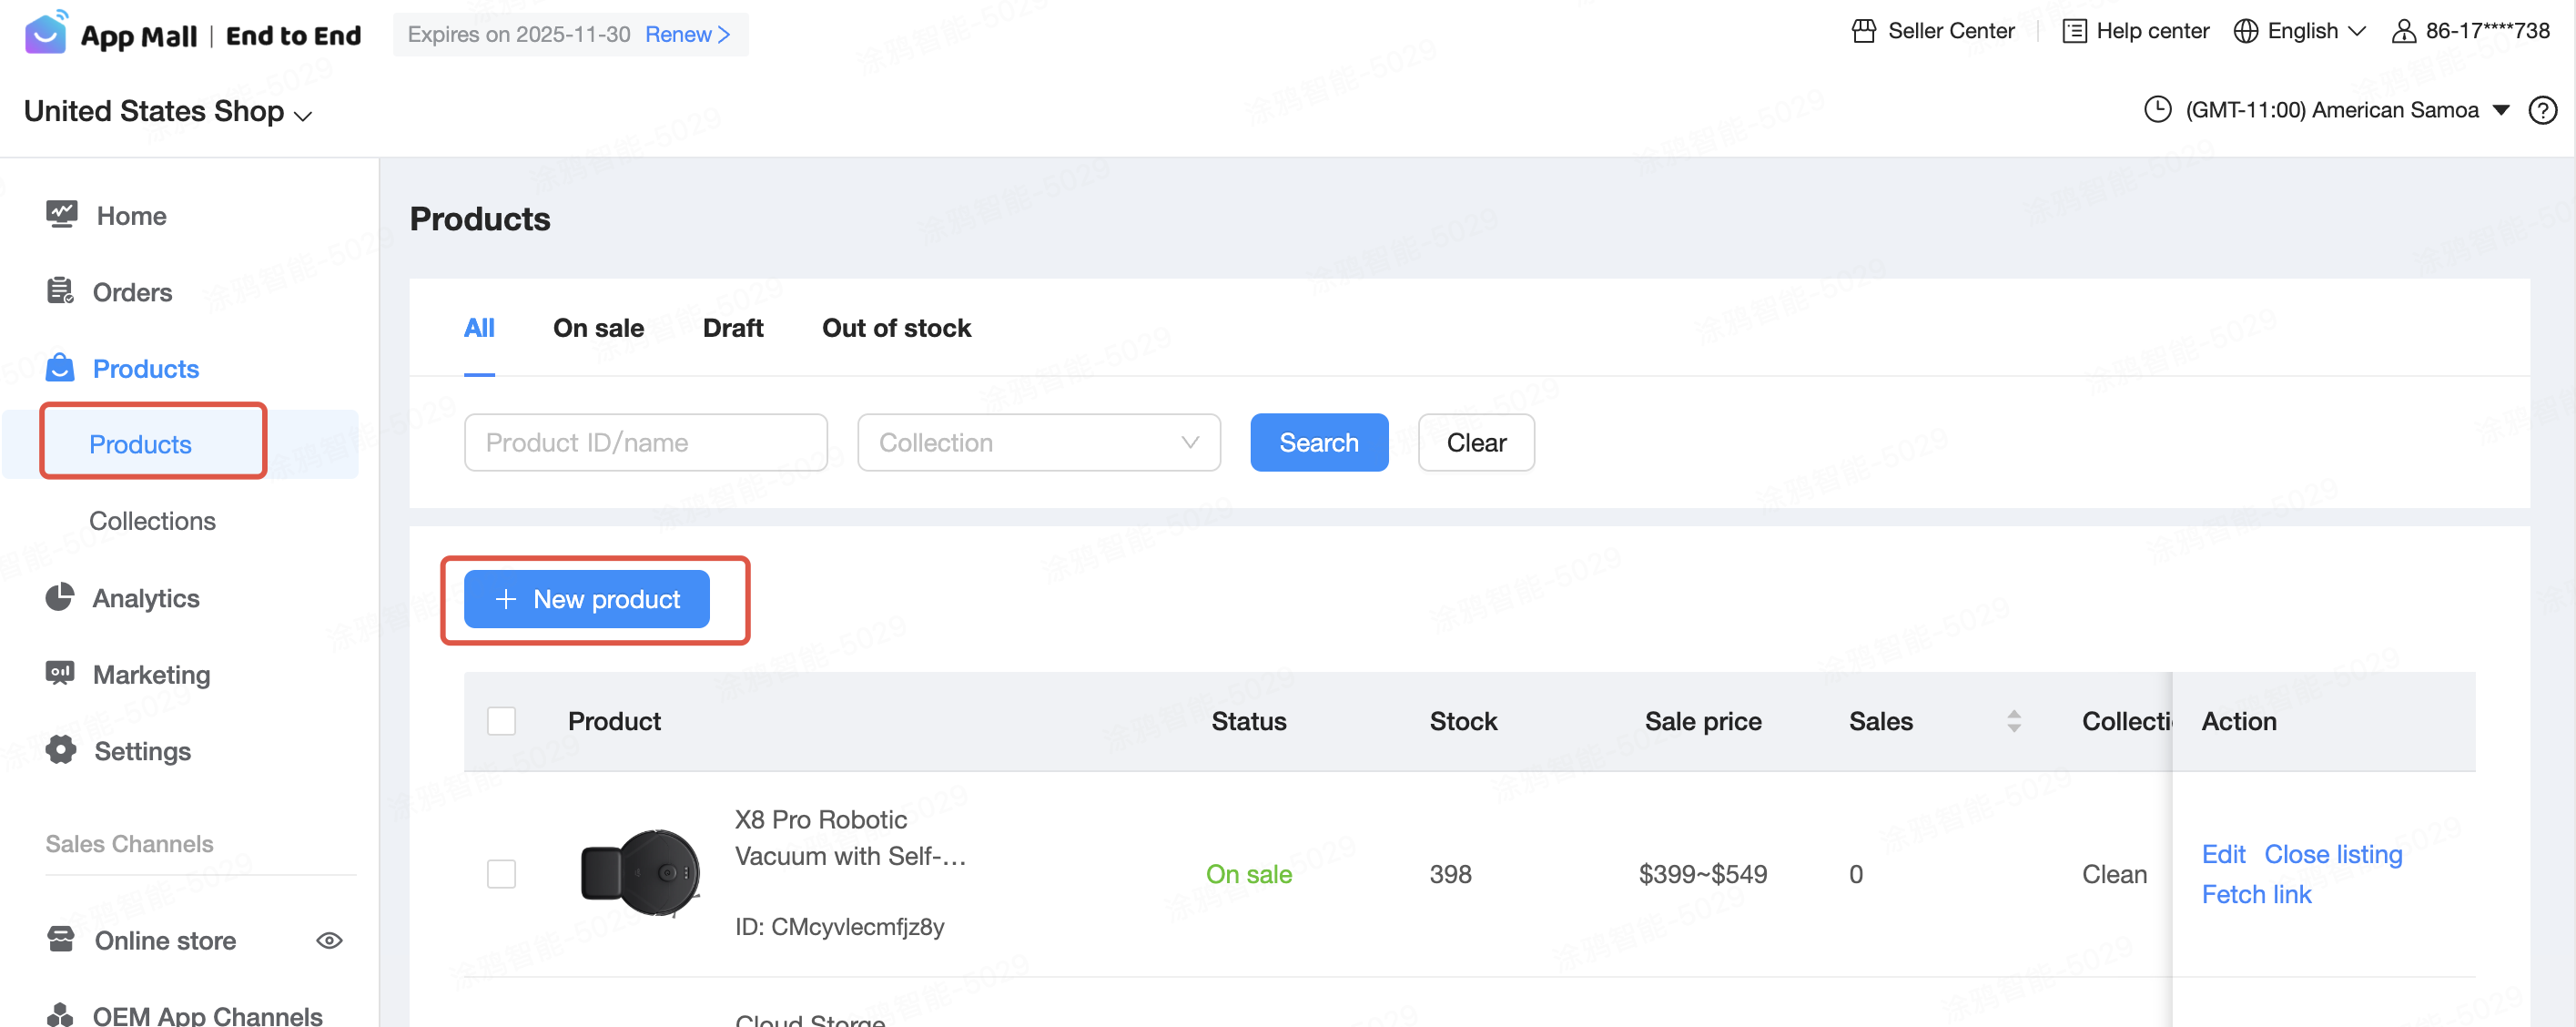
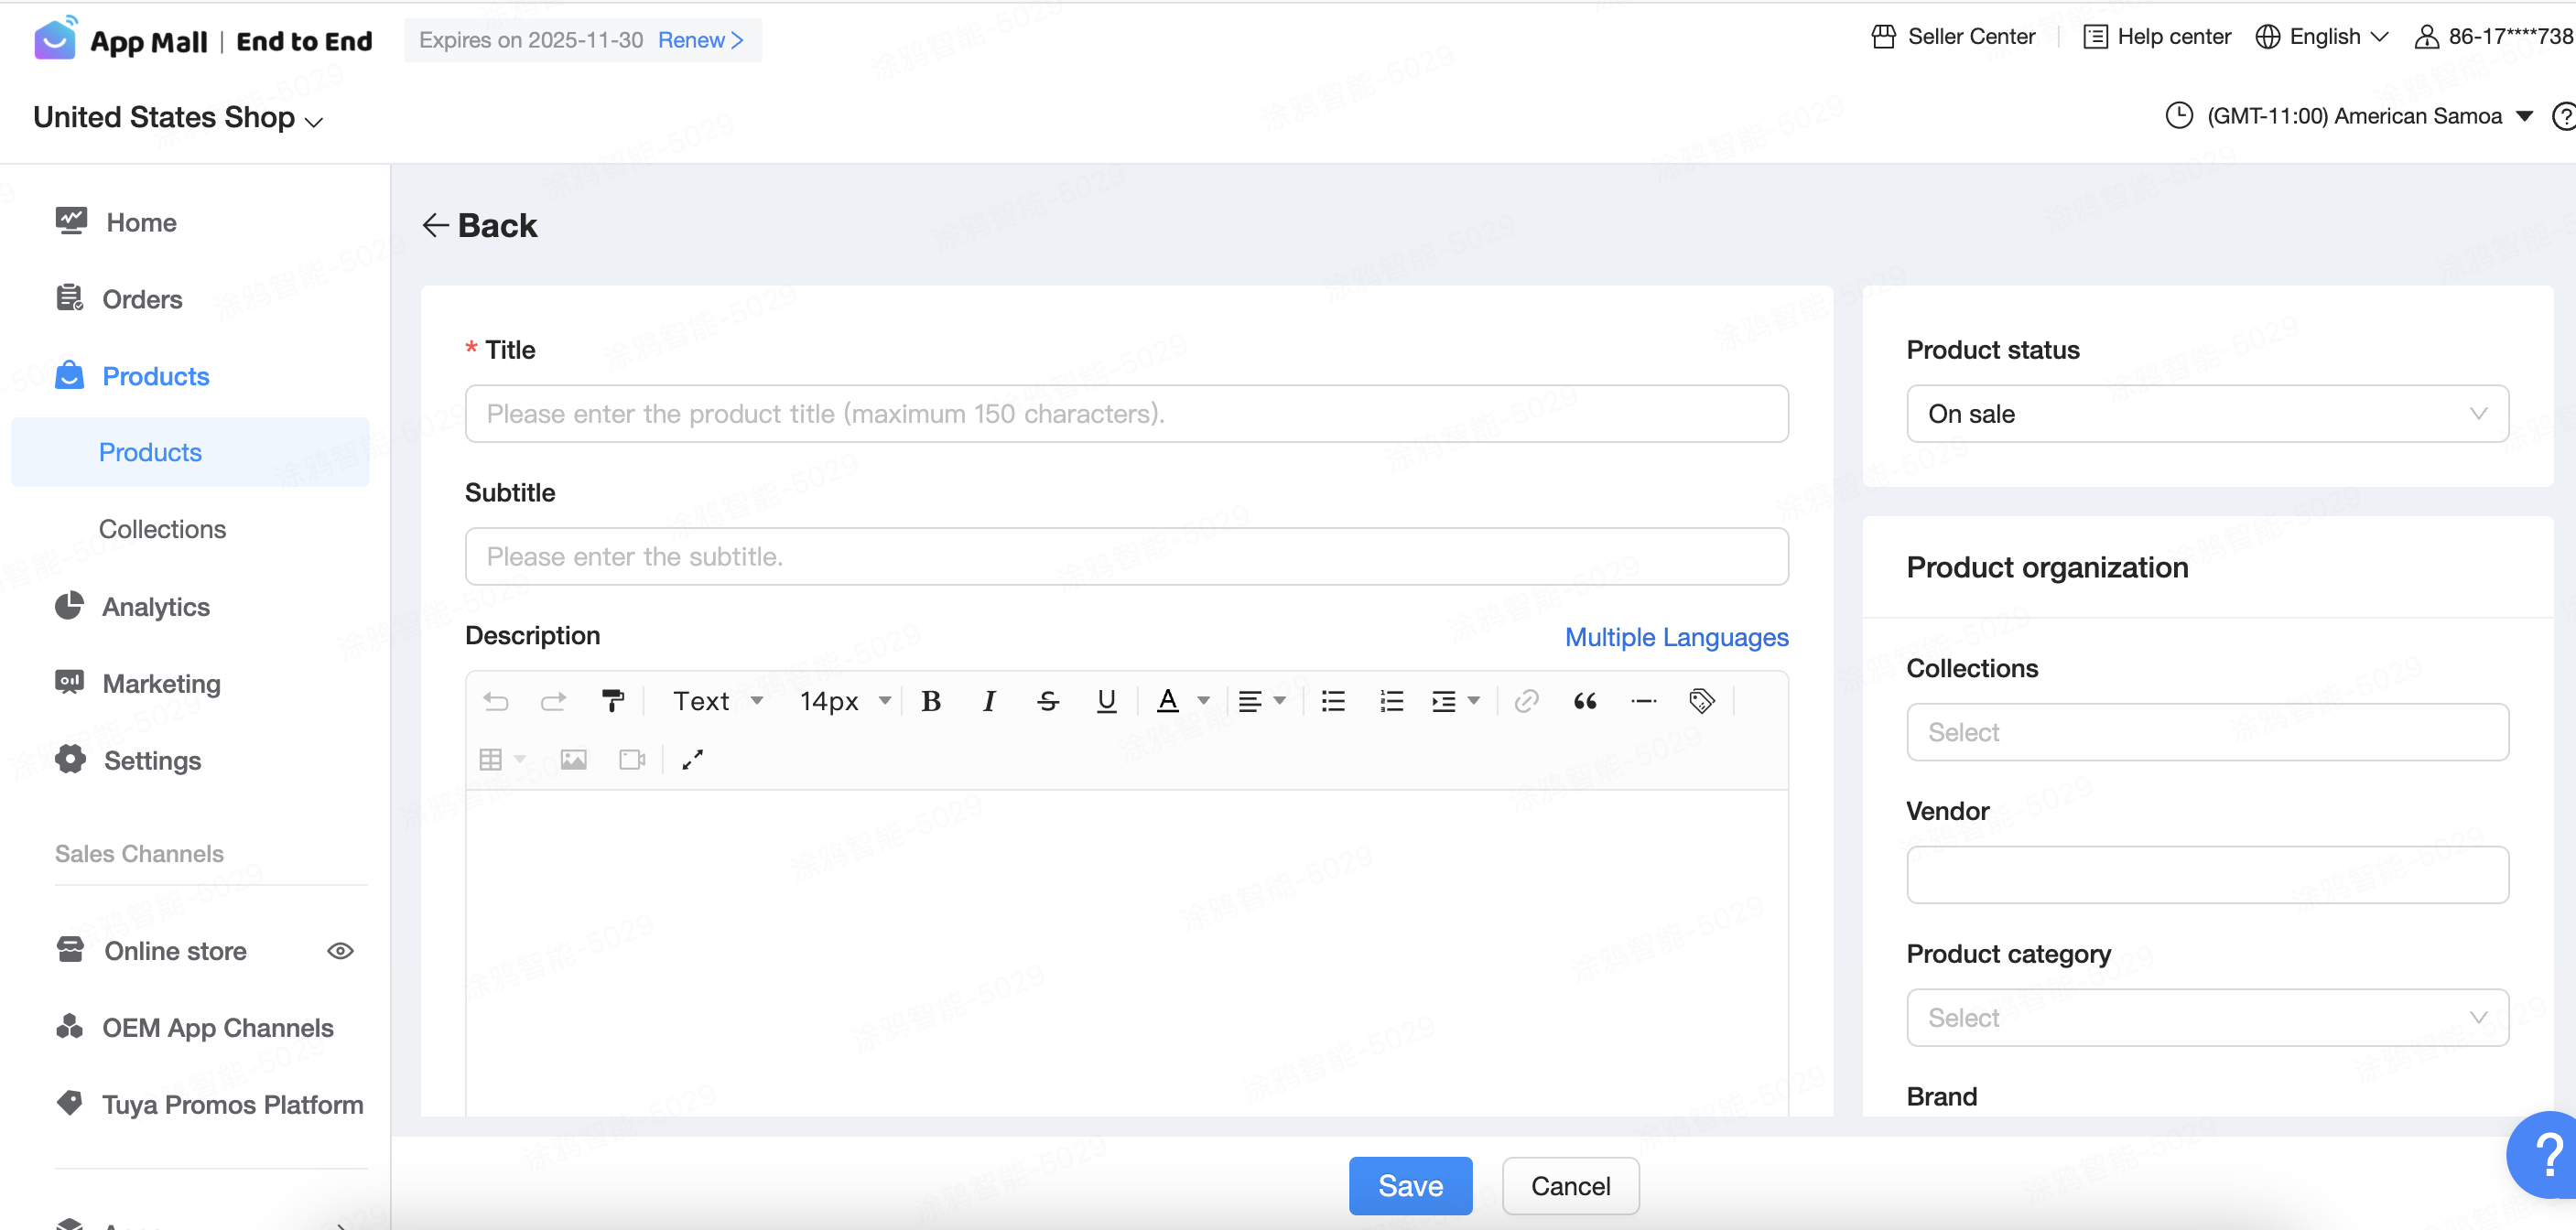
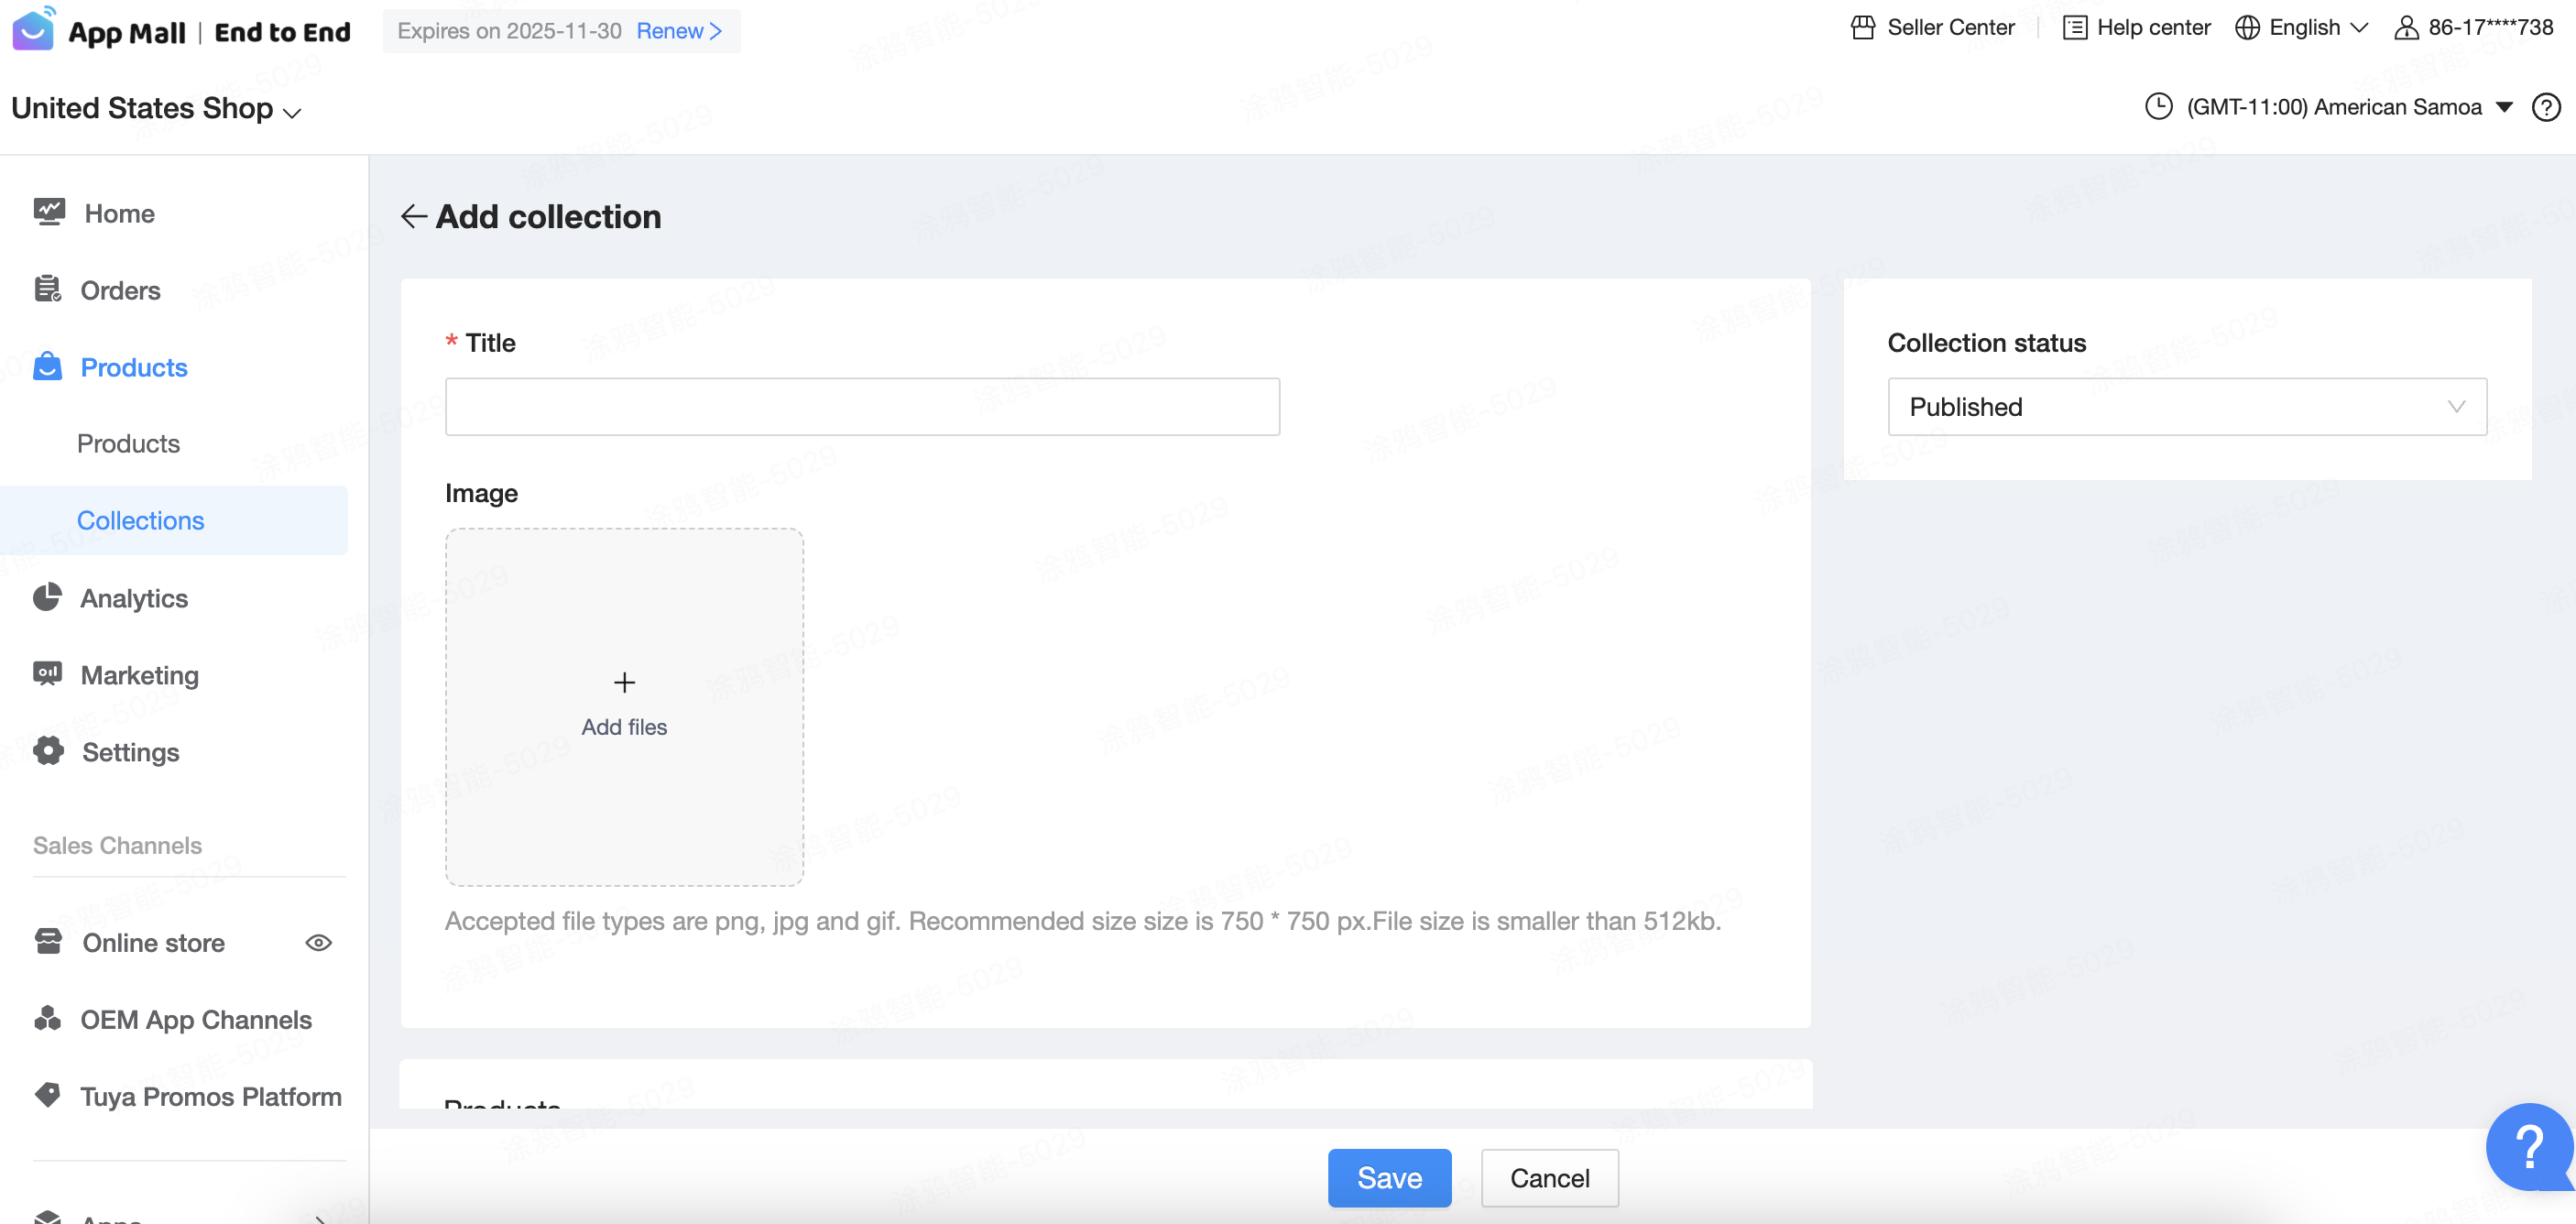
In the left-side navigation bar, choose Products > Products. On the page of Products, click + New product.
-
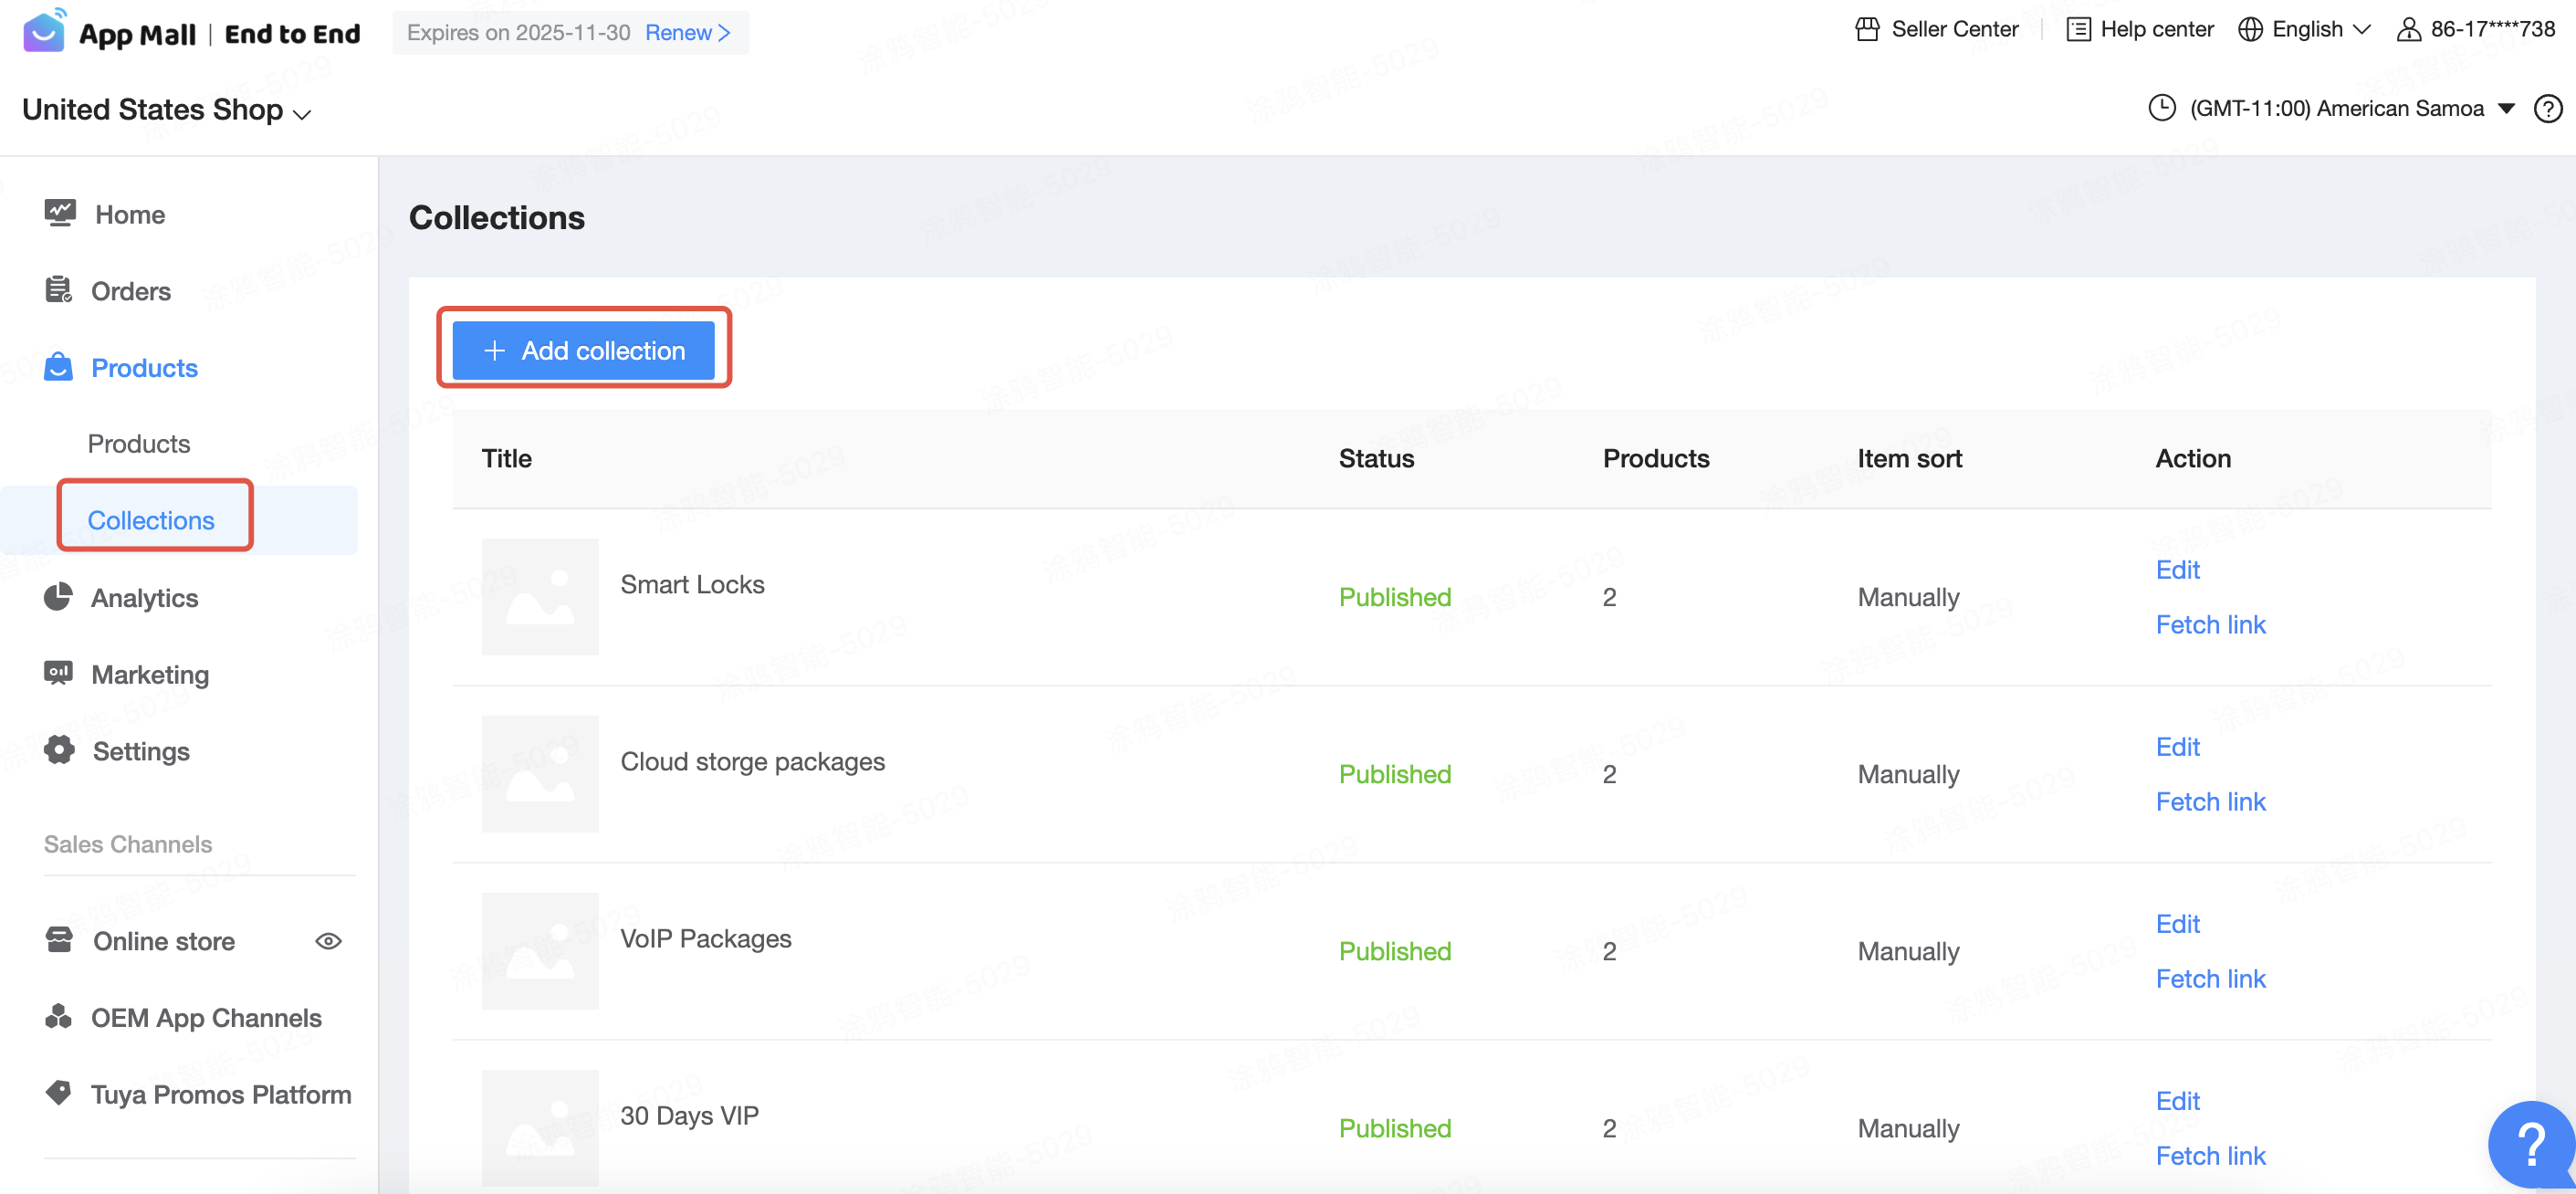
Alternatively, you can add a collection by going to Products > Collections in the left-side navigation bar and clicking + Add collection.
-
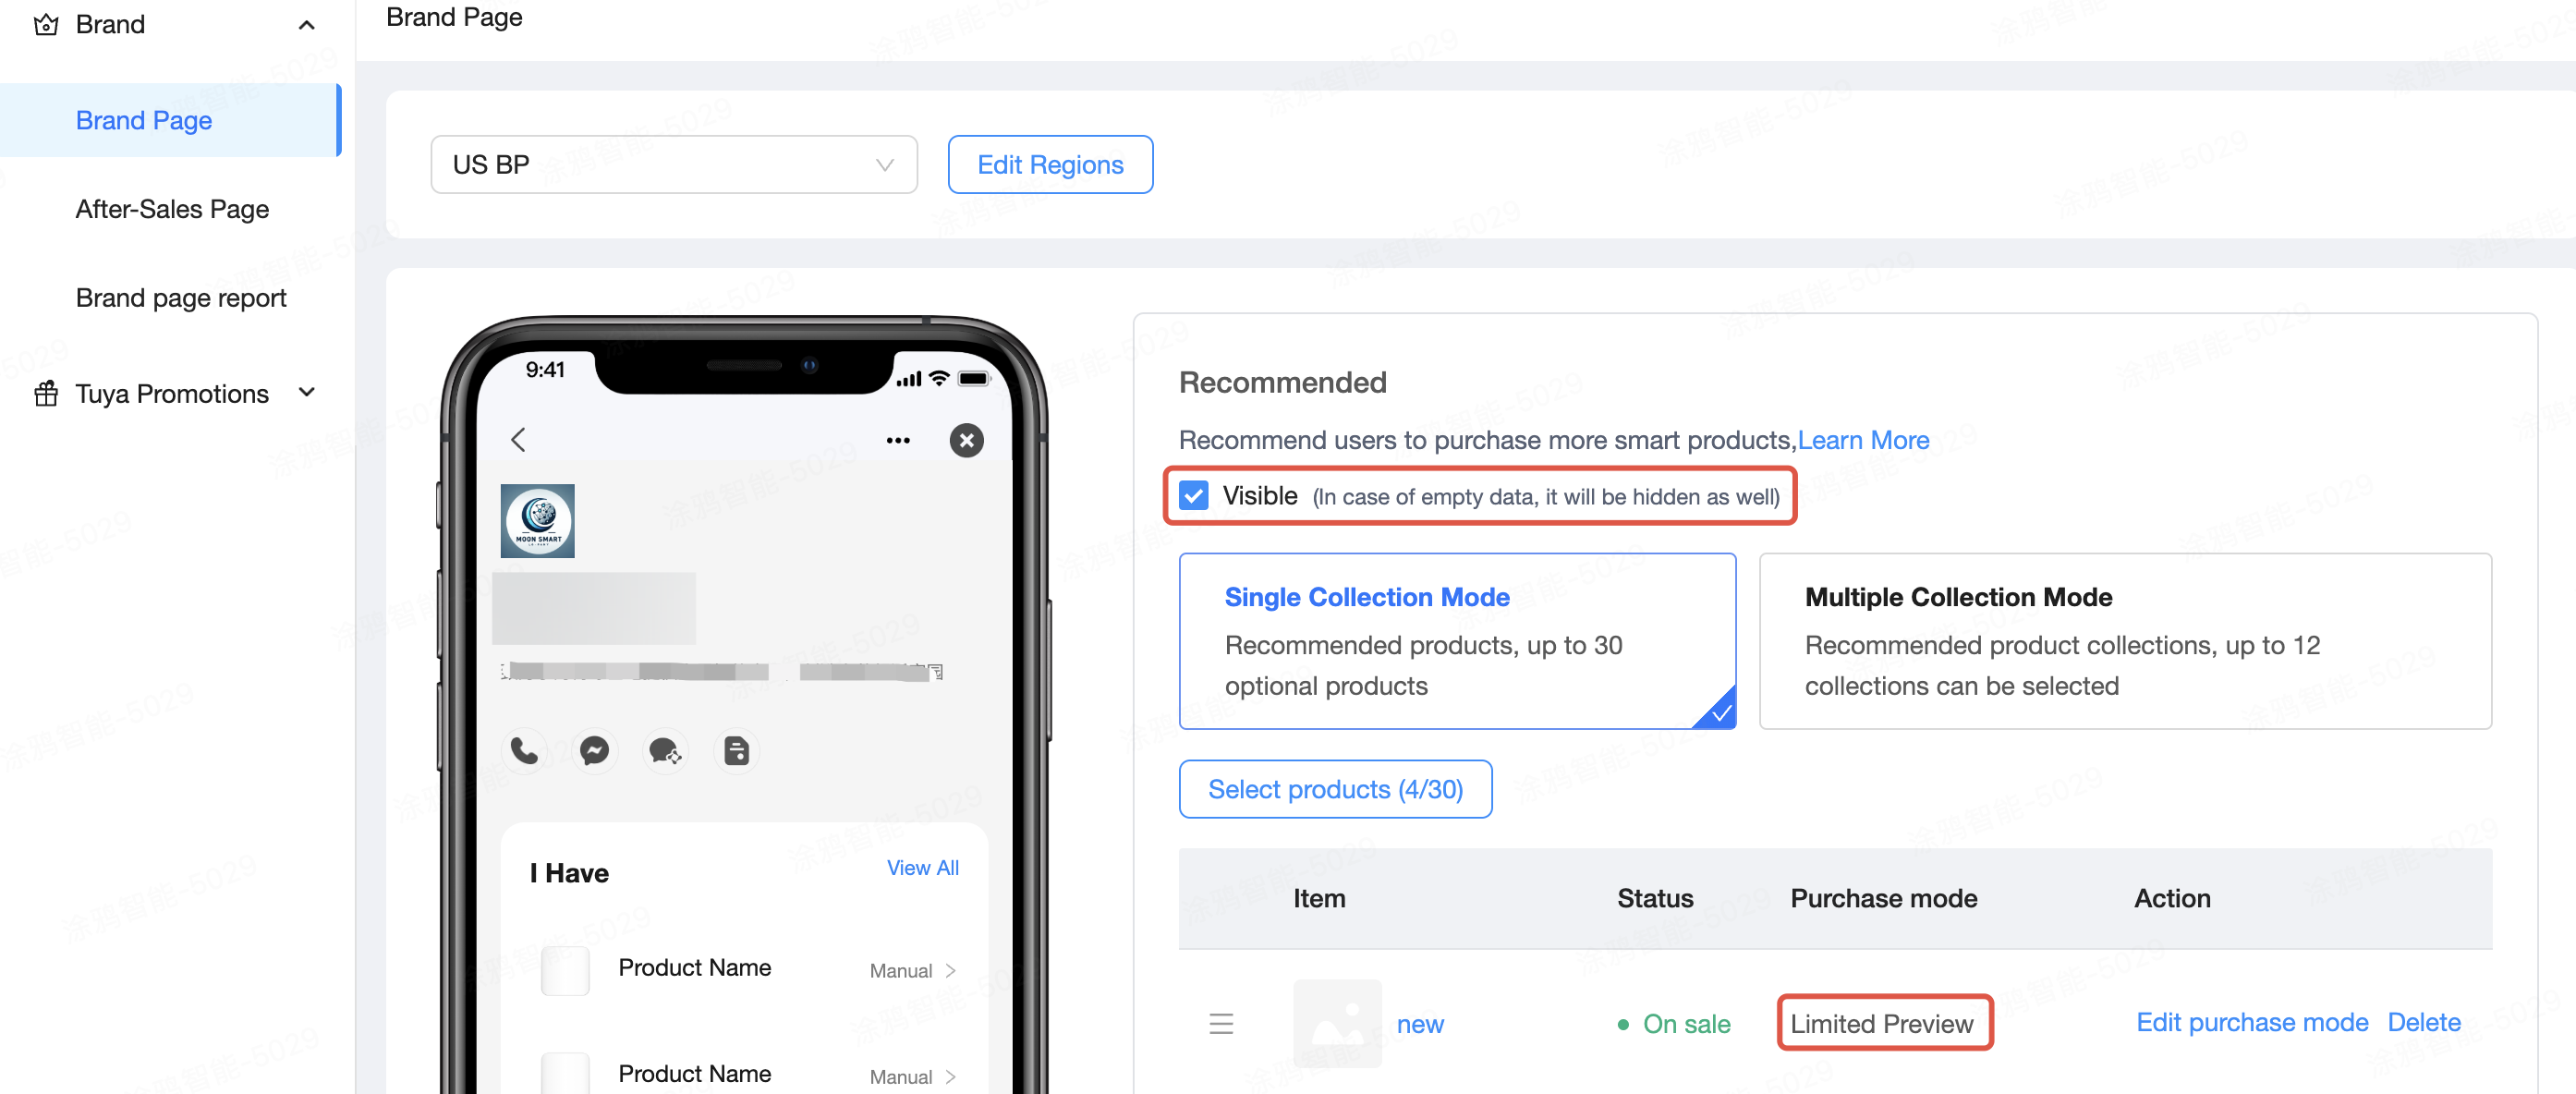
Go back to the Tuya Promotions Manager, click the Recommended component, add products or collections, and specify whether to show the component.
Select the transaction mode
- By default, products added to the brand page are for display purposes only and cannot be transacted or linked.
- Brands can adjust the transaction mode of the products to either in-app transactions or navigation to third-party platforms. For in-app transactions, commissions are charged based on the transaction amount. For navigation to third-party platforms, fees are charged based on the number of clicks. If you want to explore more, please feel free to contact the Tuya team.
In-app transactions
In the in-app transaction mode, brand merchants collect payments, ship goods, and perform after-sales management on their own.
Procedure
-
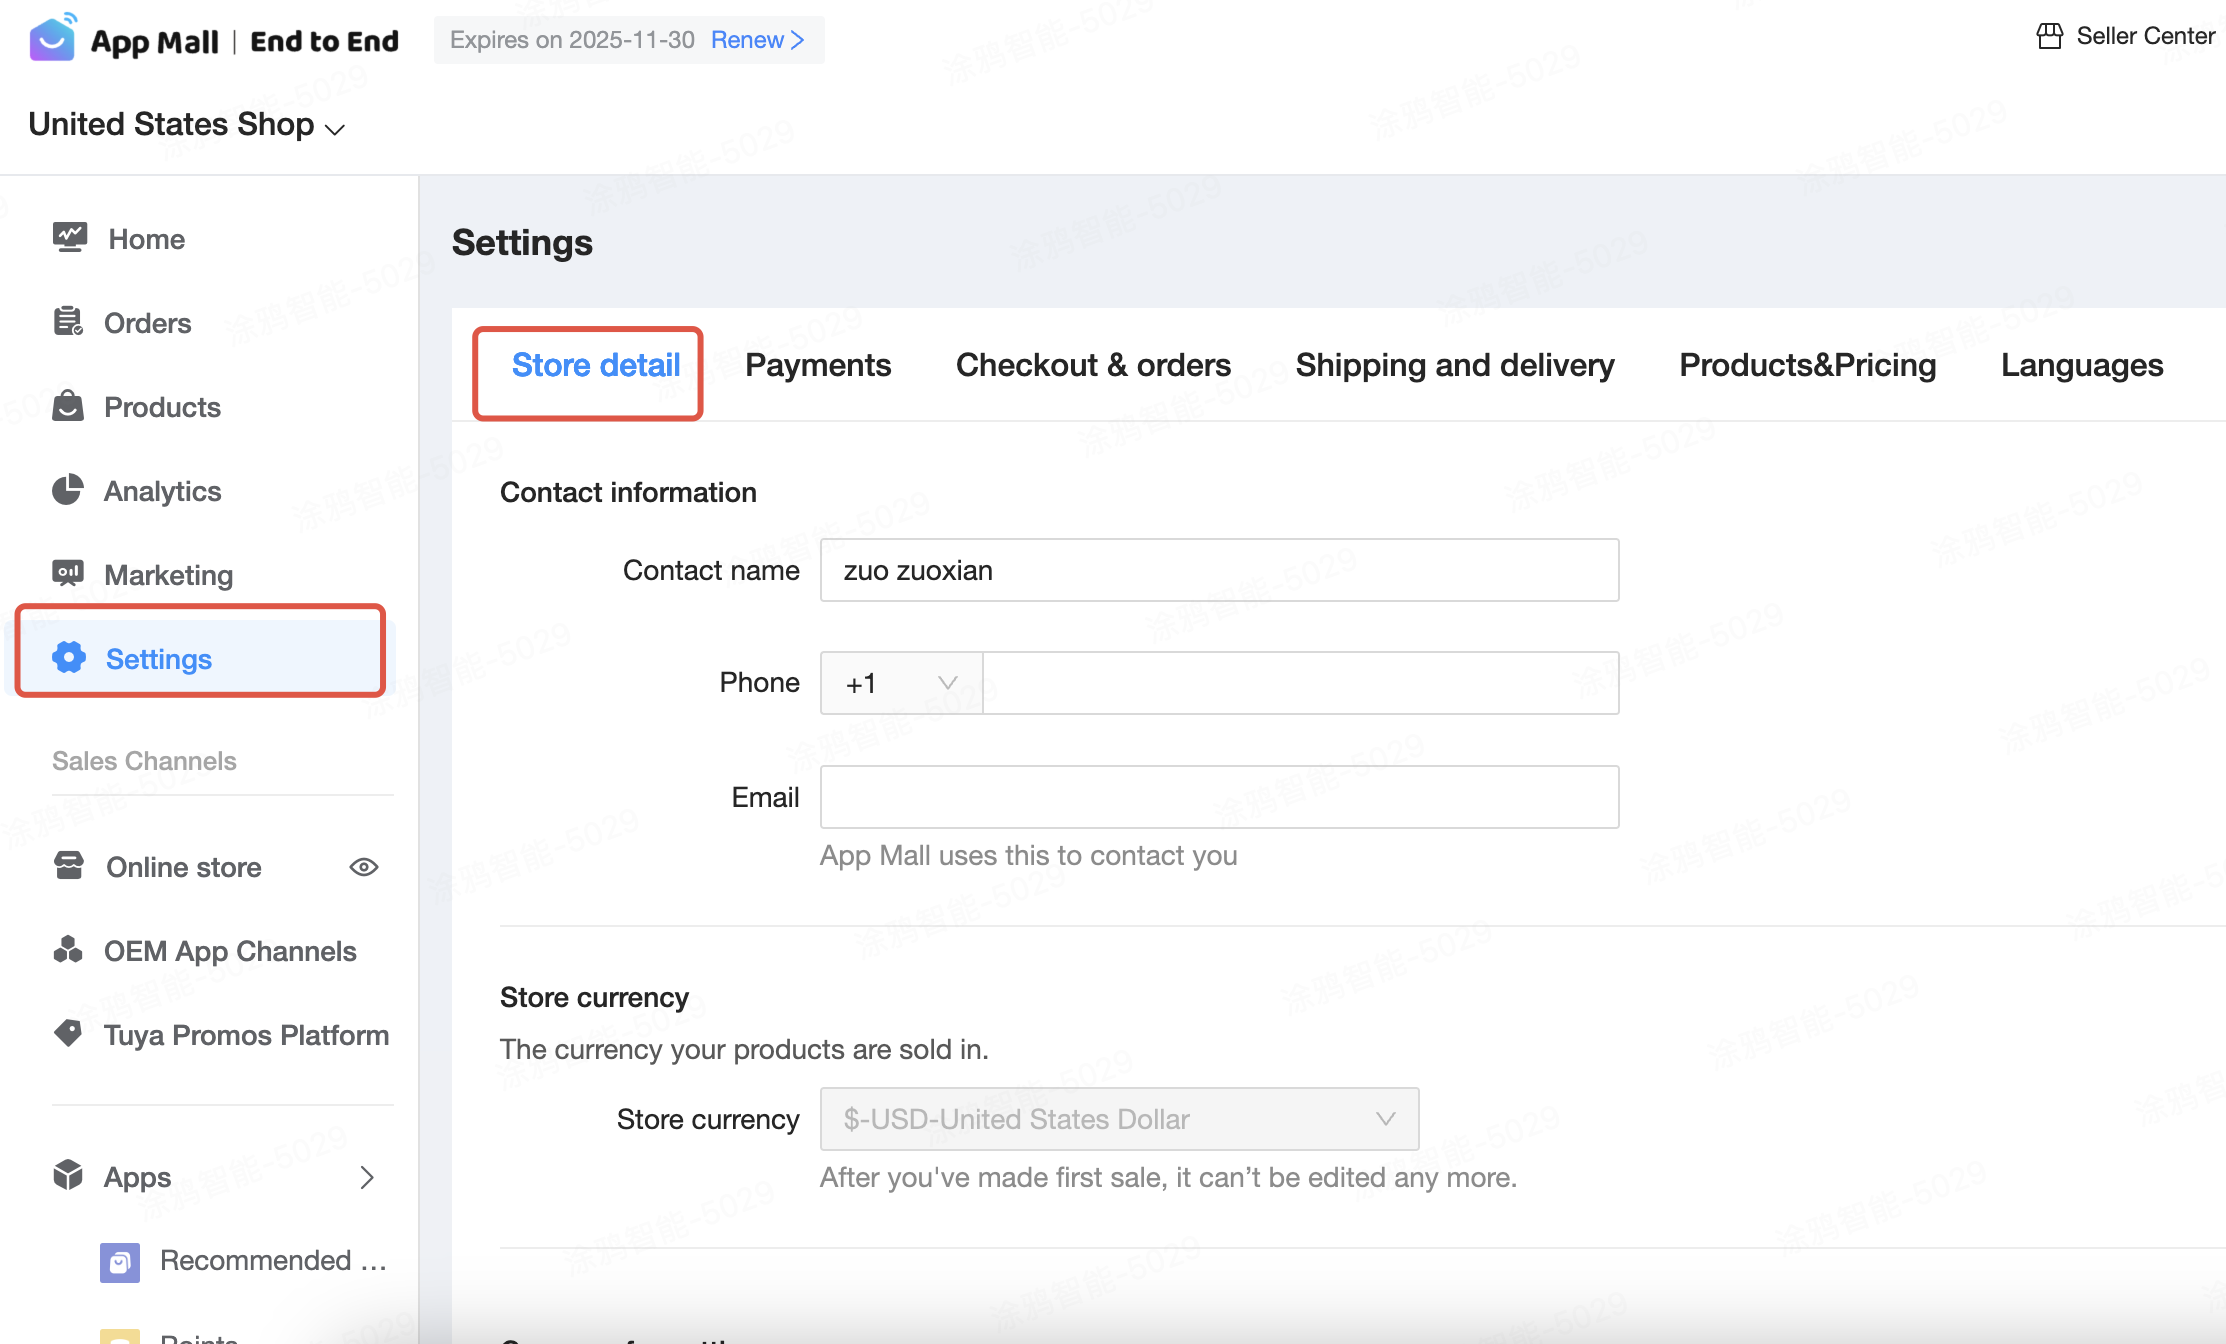
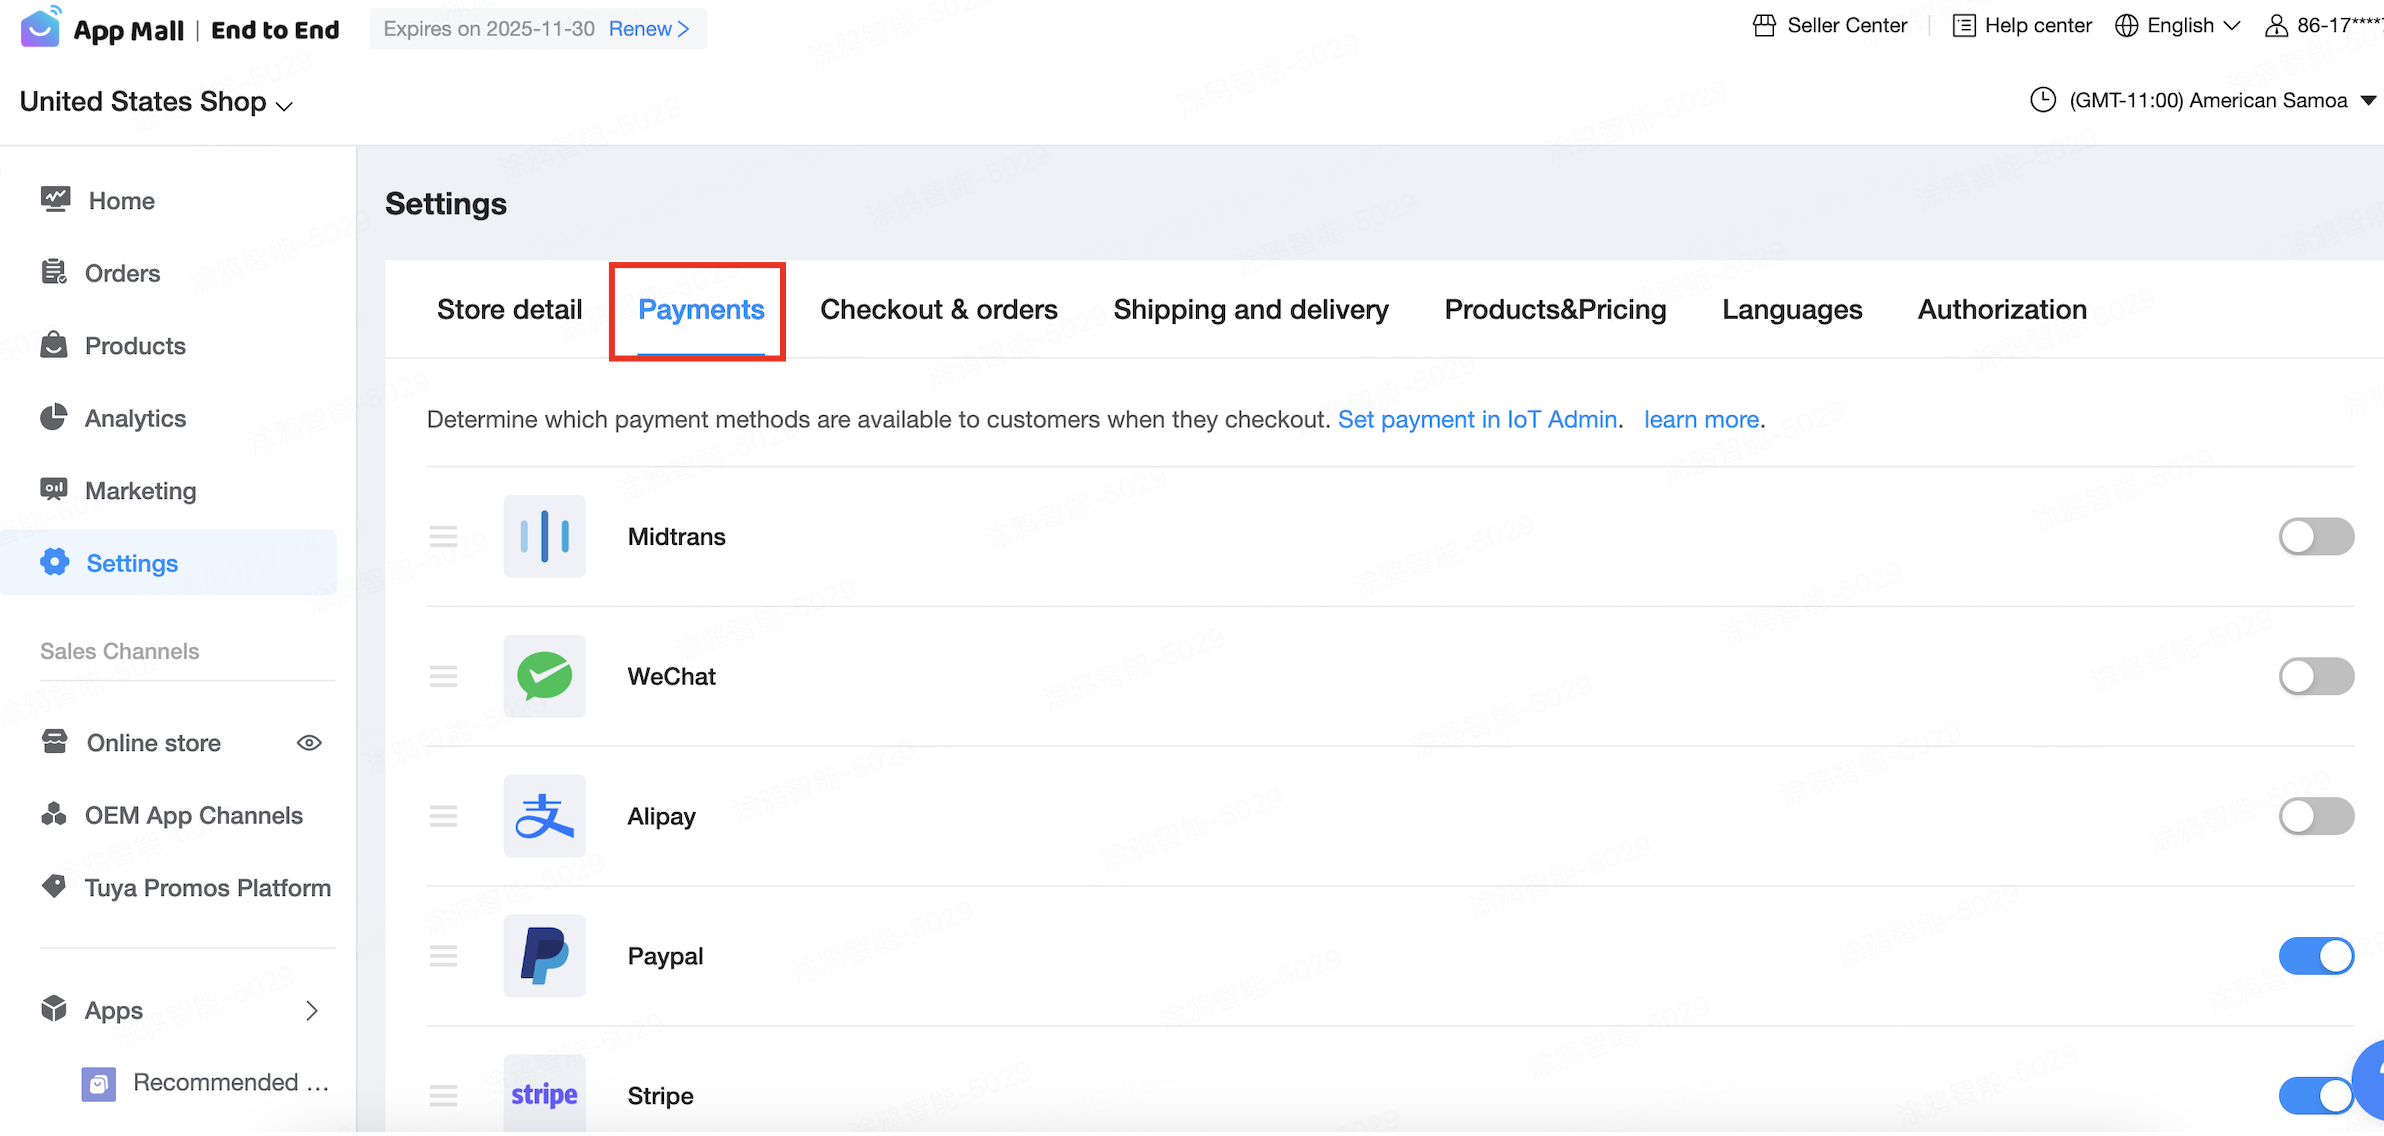
In the App Mall management backend, click Settings in the left-side navigation bar. Then, confirm the store contact information and add payment methods on the Store detail and Payments pages respectively.
-
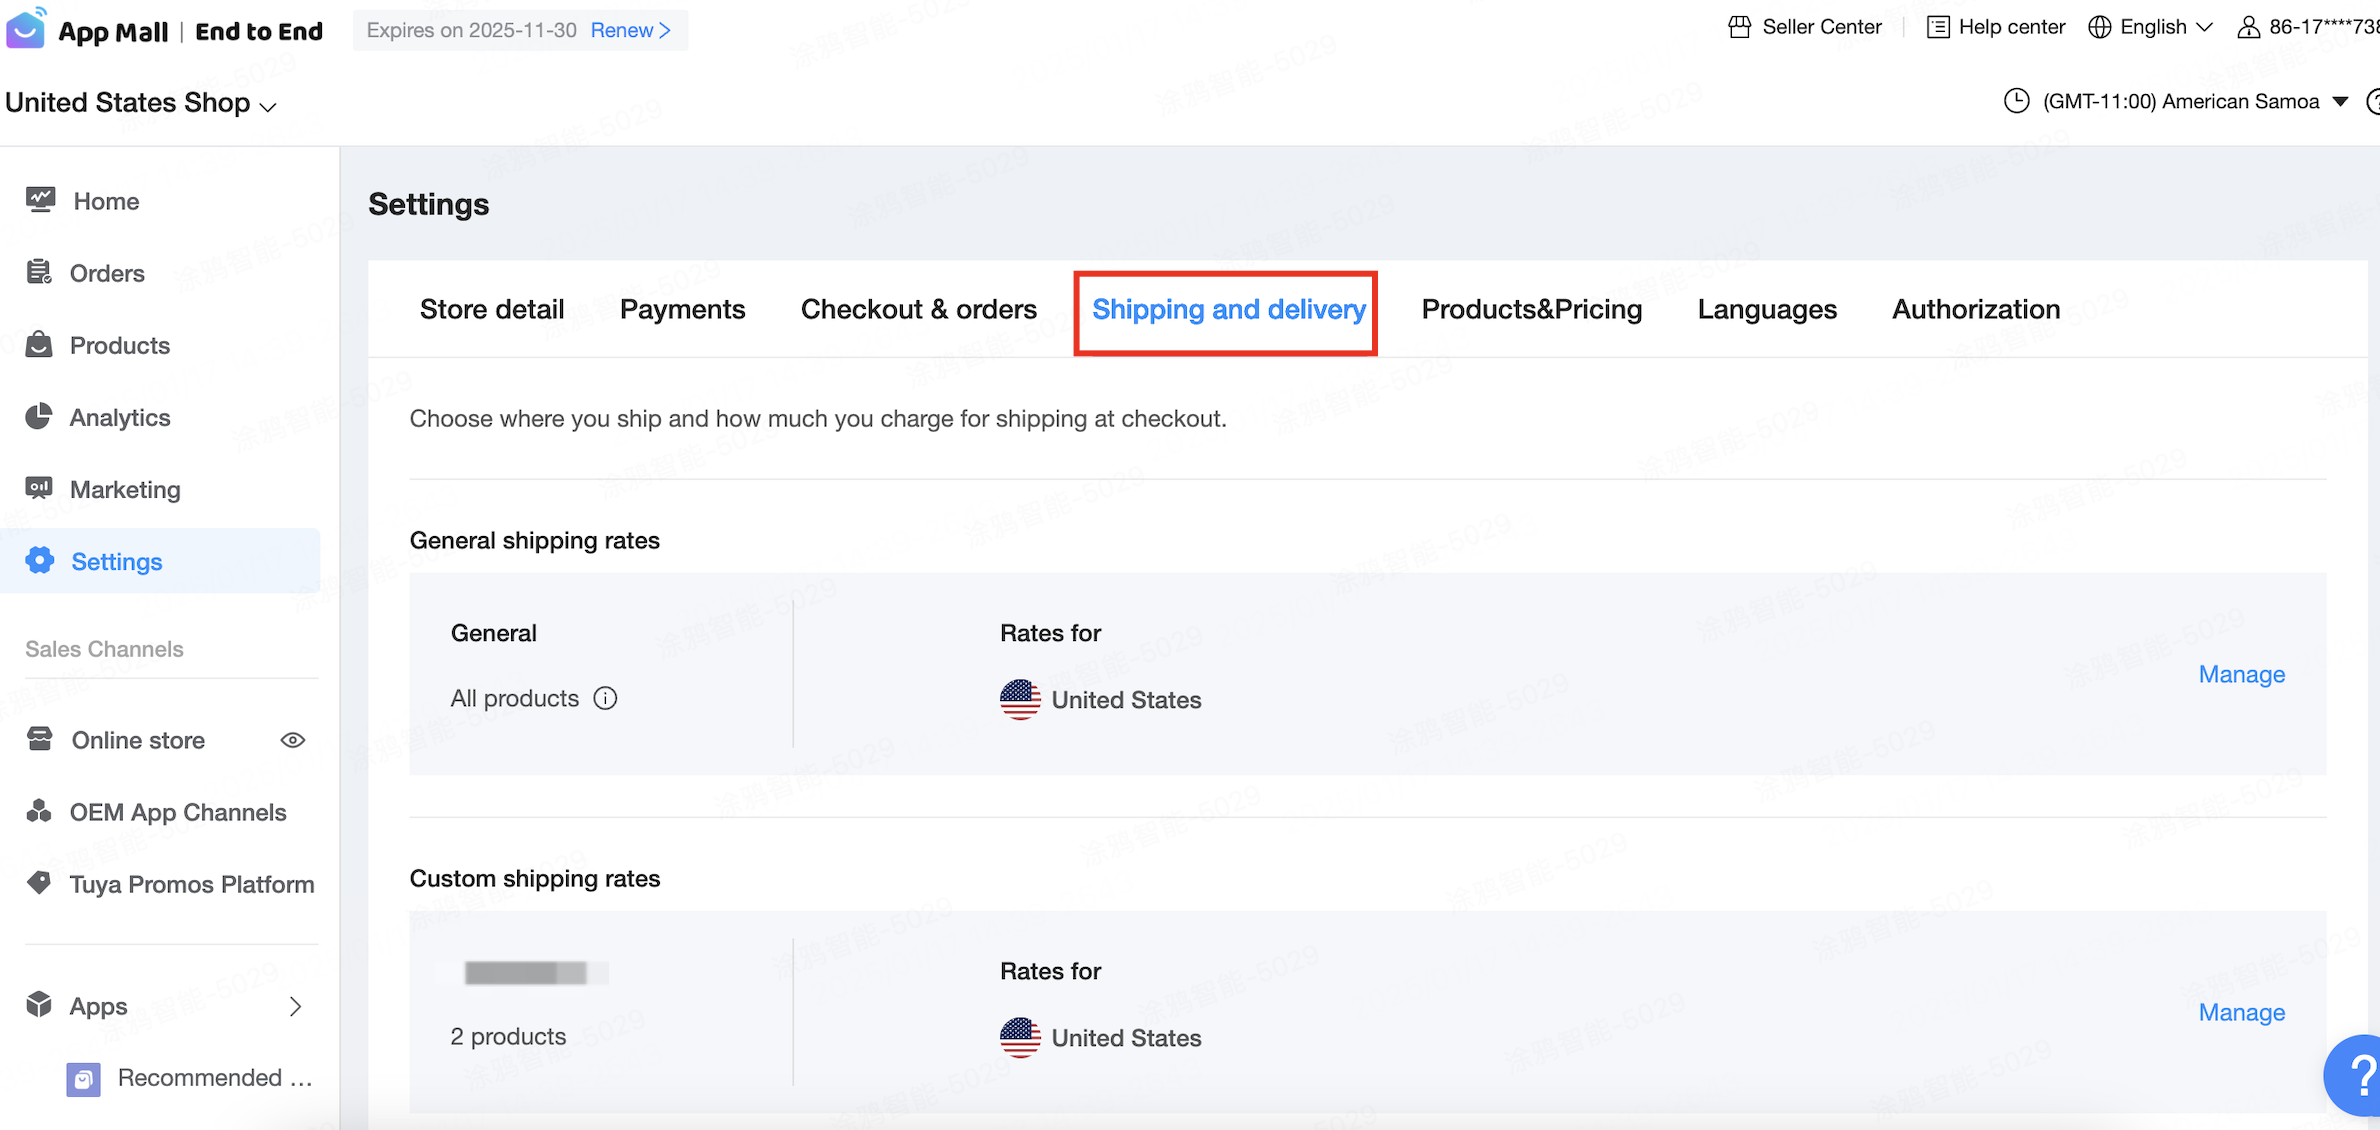
On the page of Shipping and delivery, configure your store’s delivery areas and charging templates.
-
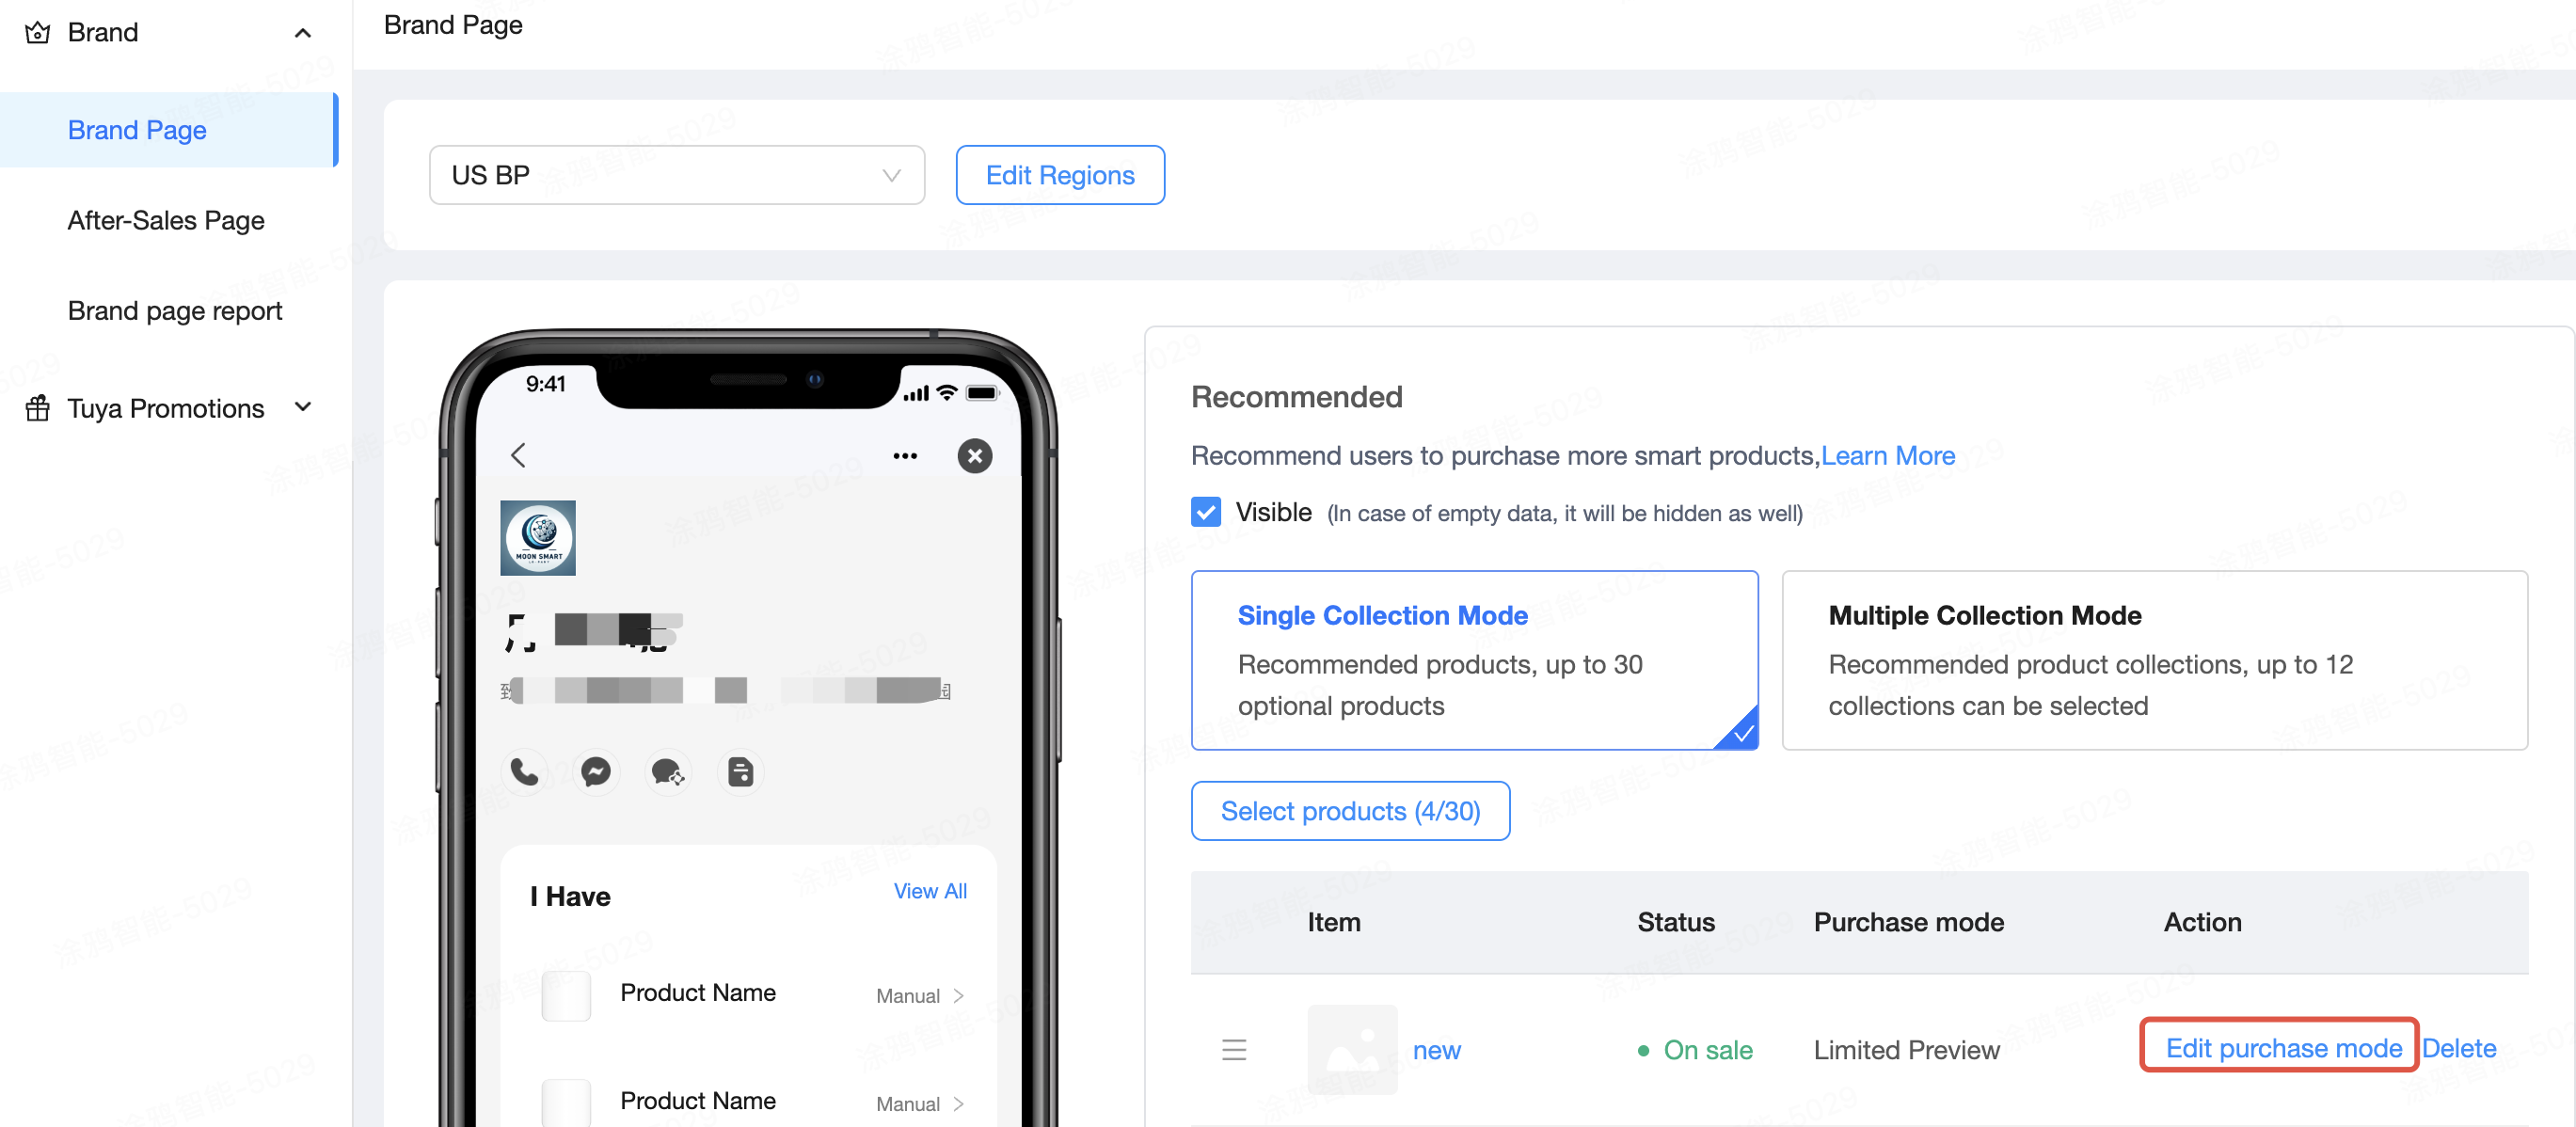
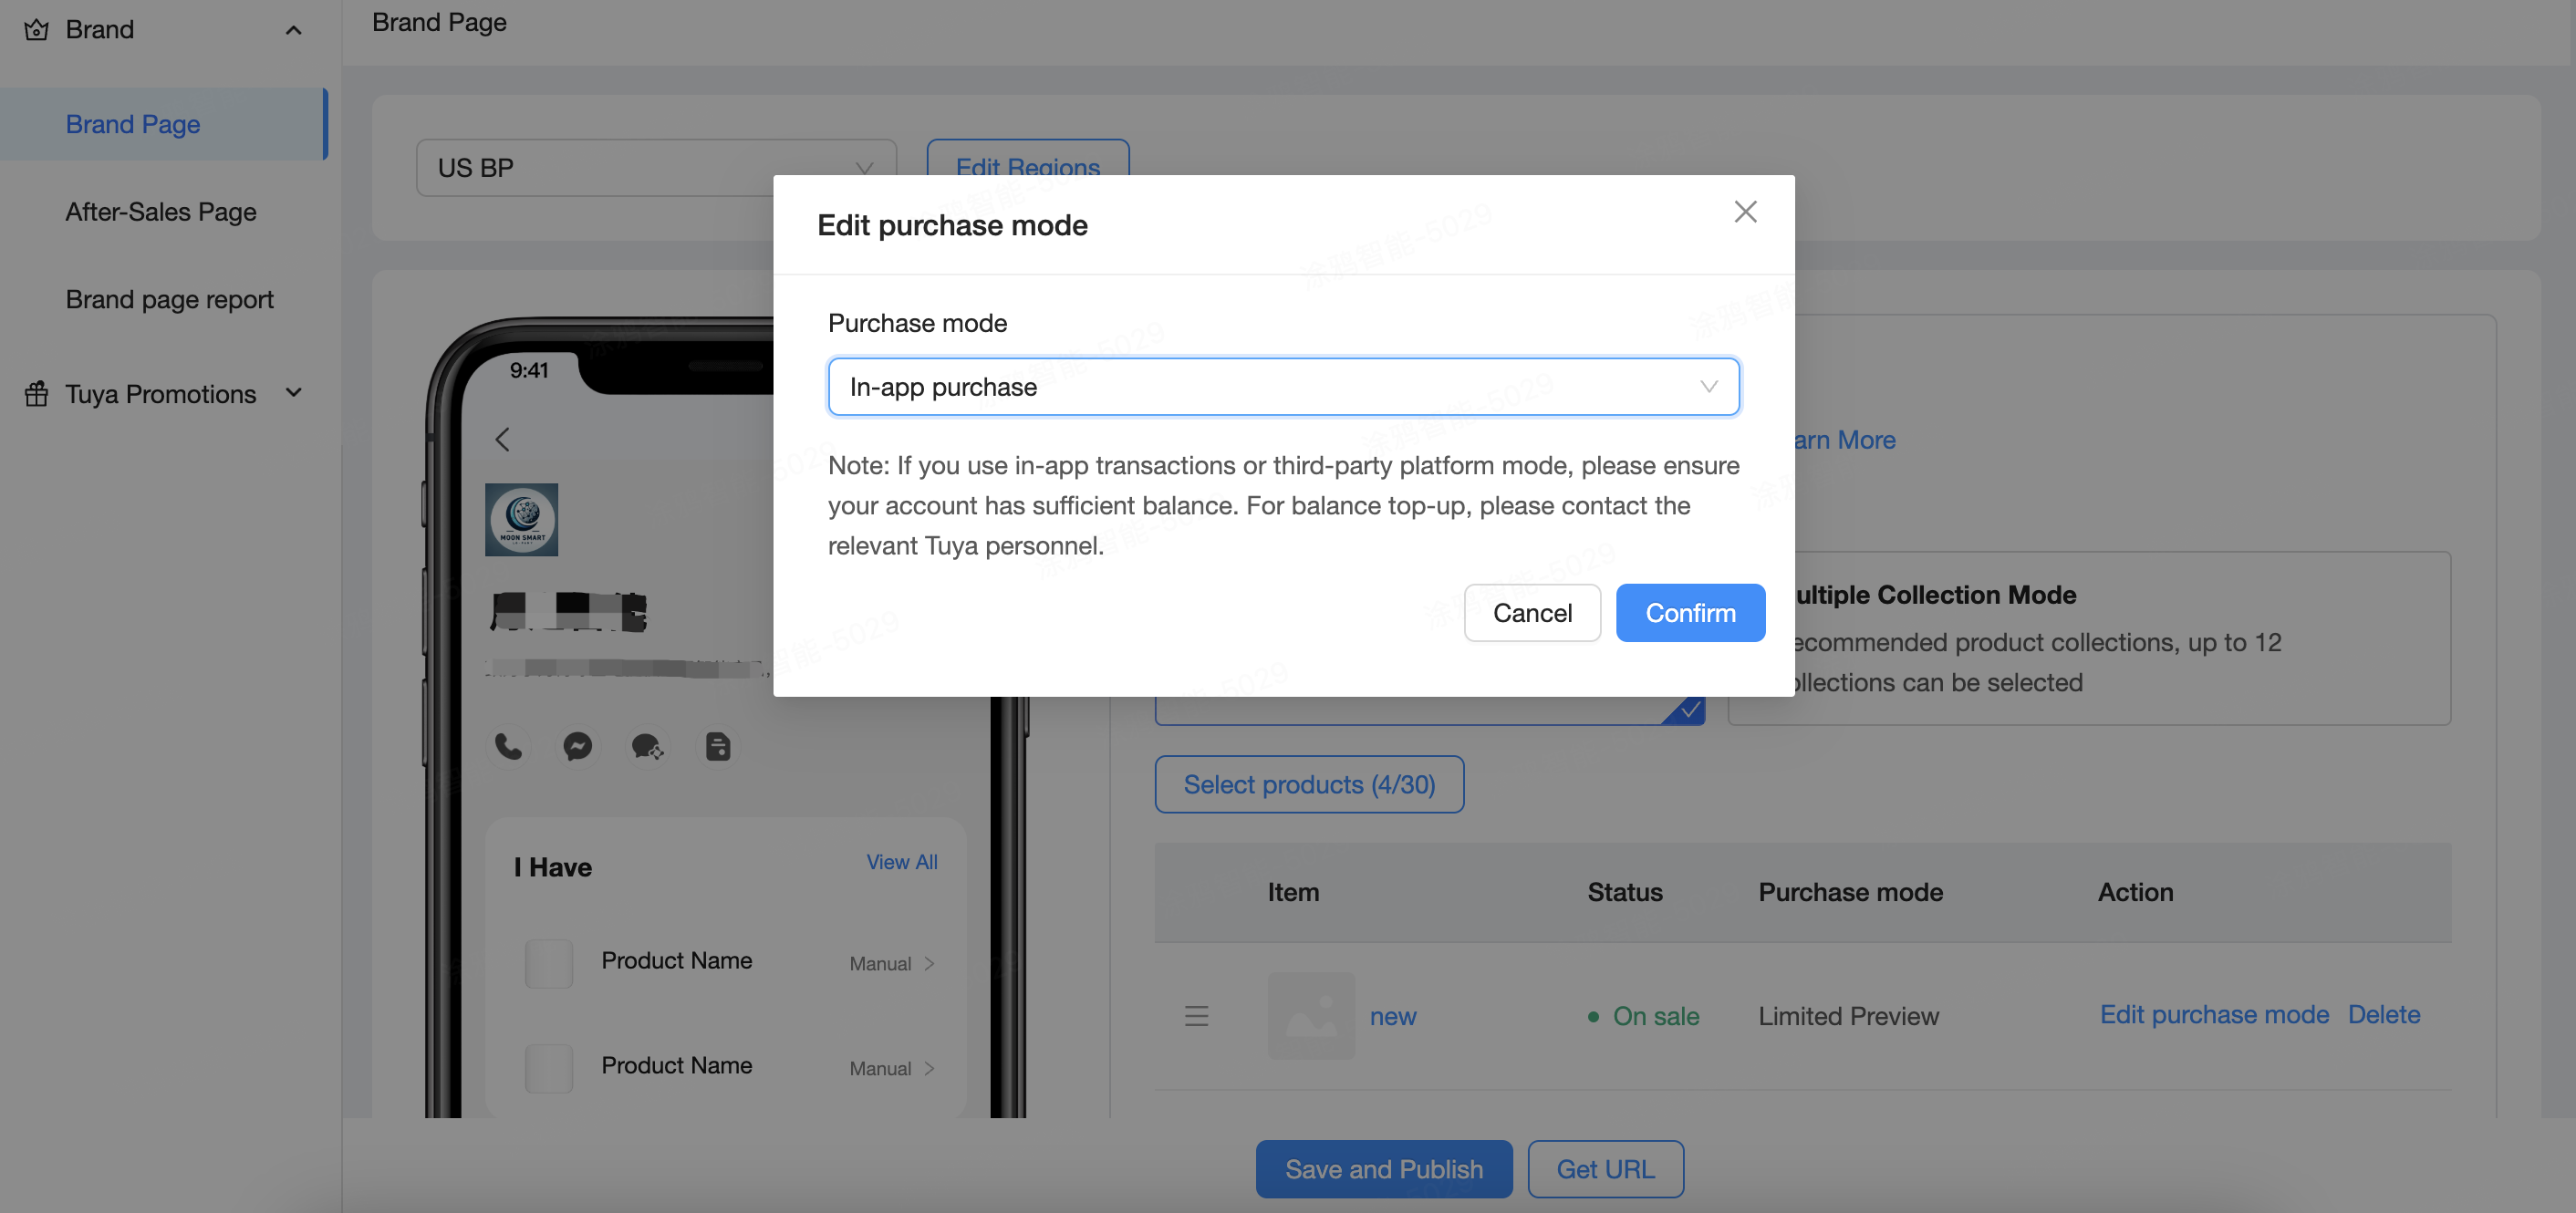
Go back to the Tuya Promotions Manager, click the Recommended component, select the target product, click Edit purchase mode, and then select In-app purchase.
Navigation to third-party platforms
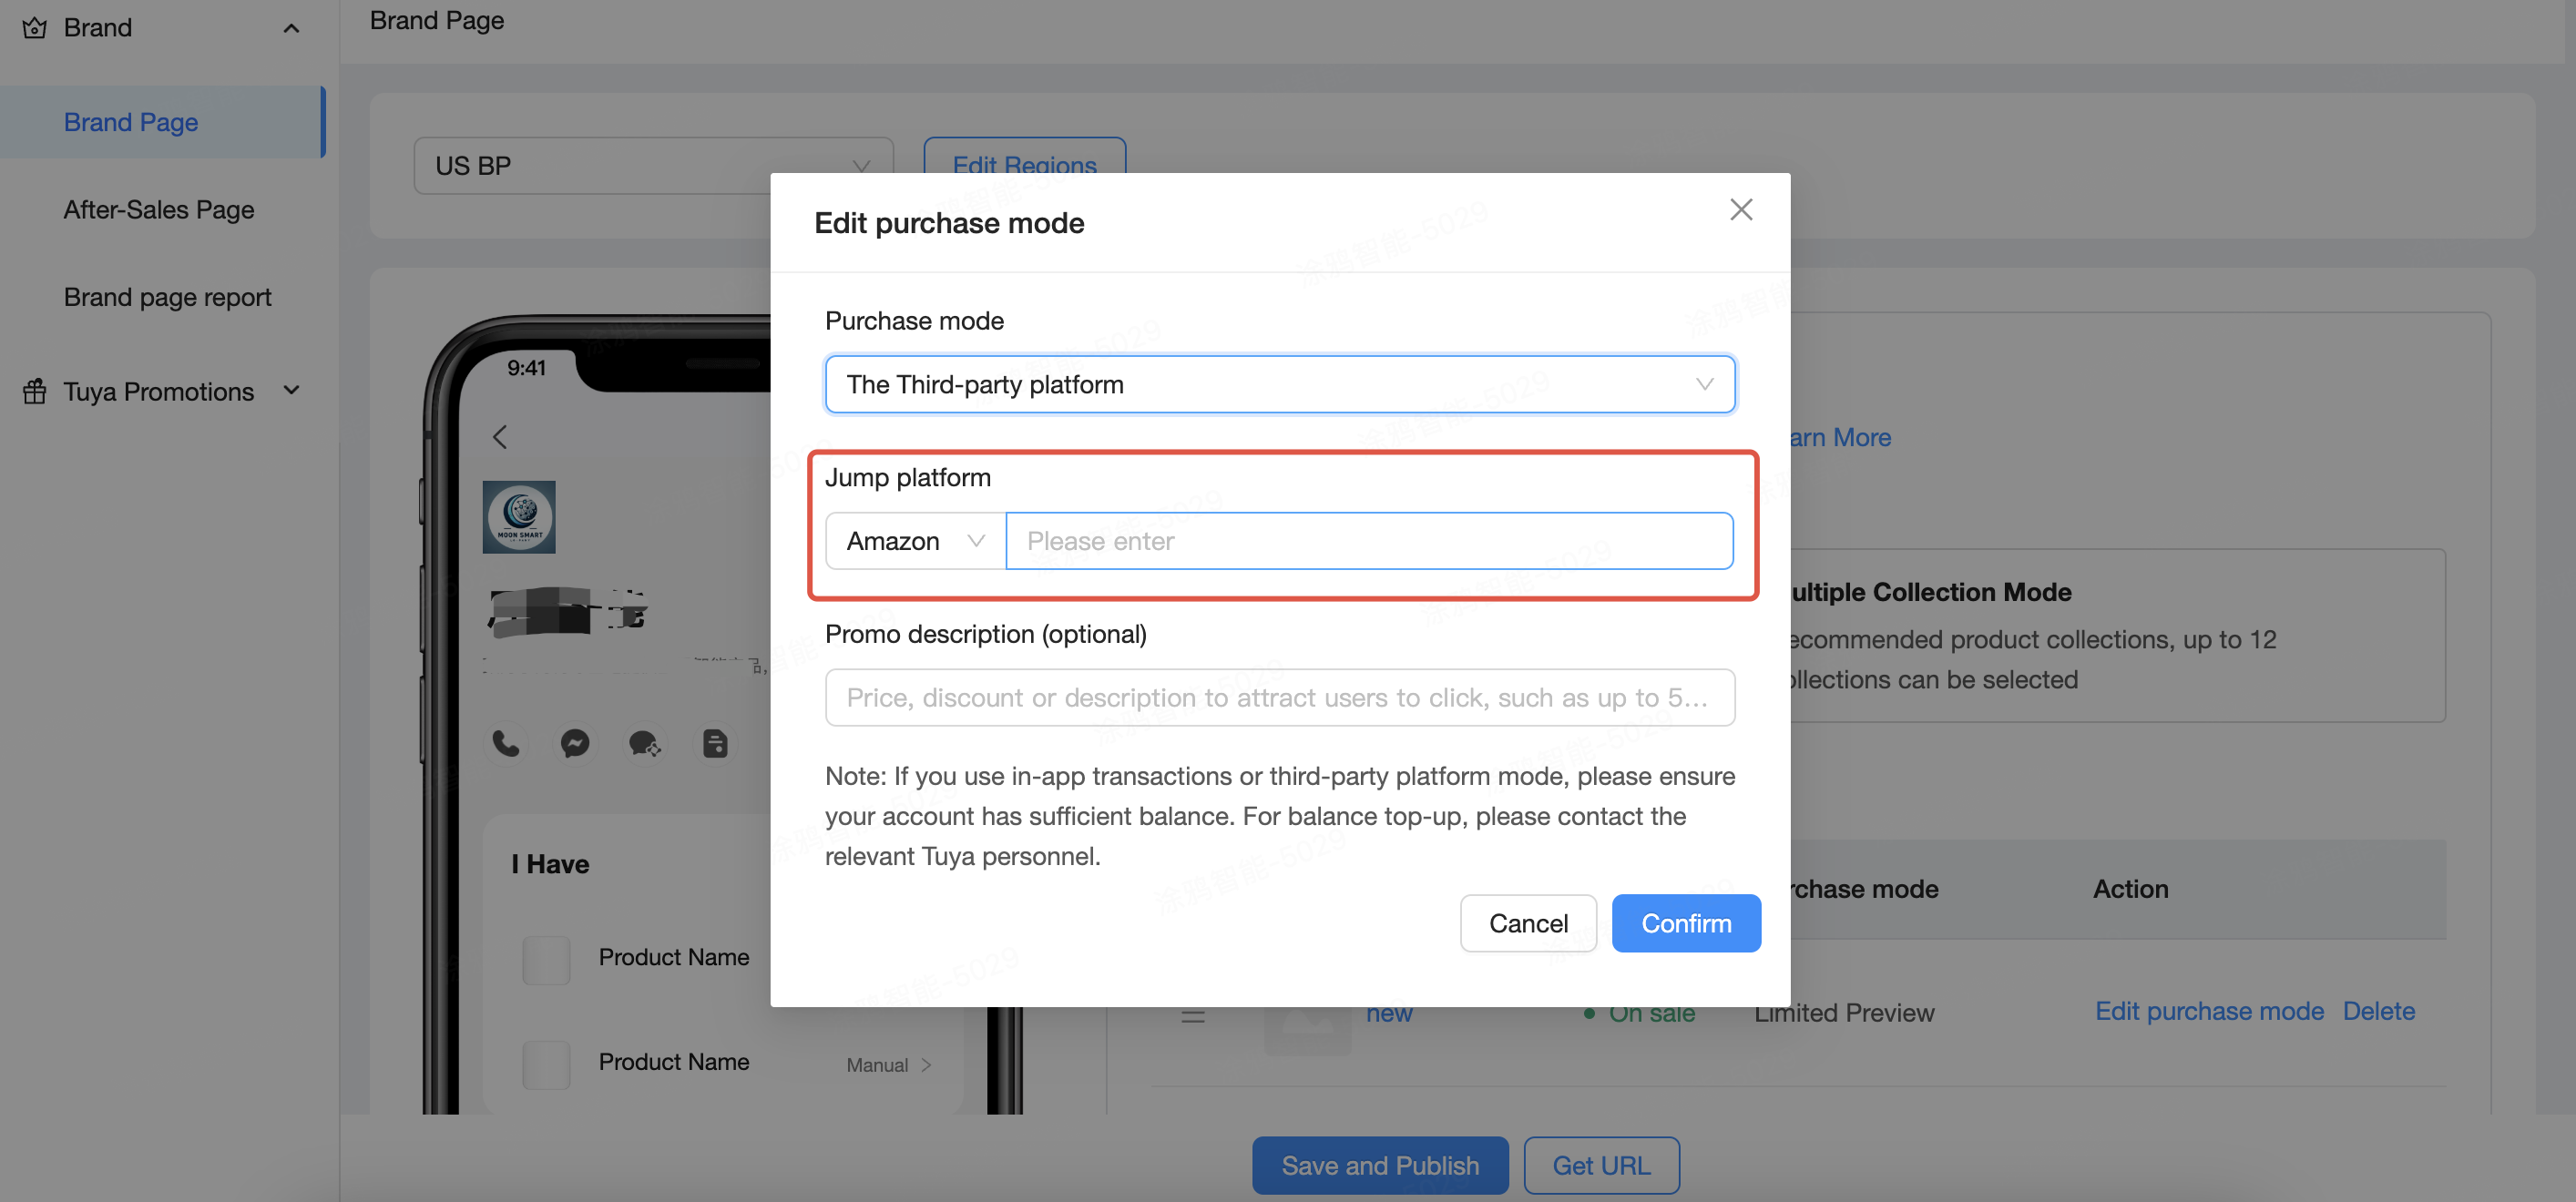
After you add a product, click Edit purchase mode, select The Third-party platform, such as Amazon.
Share and discover brand pages
After your brand page is approved, you can share its QR code or configure the discovery mechanism within the app to allow your users to quickly find your brand page.
Procedure
-
Go to Operation > Tuya’s Apps > My Brands.
-
If your brand application is approved, click Manage Brand Page in the Operation column.

-
After your brand page is approved, click Get URL at the bottom of the Brand Page to get the QR code and URL for your brand page.
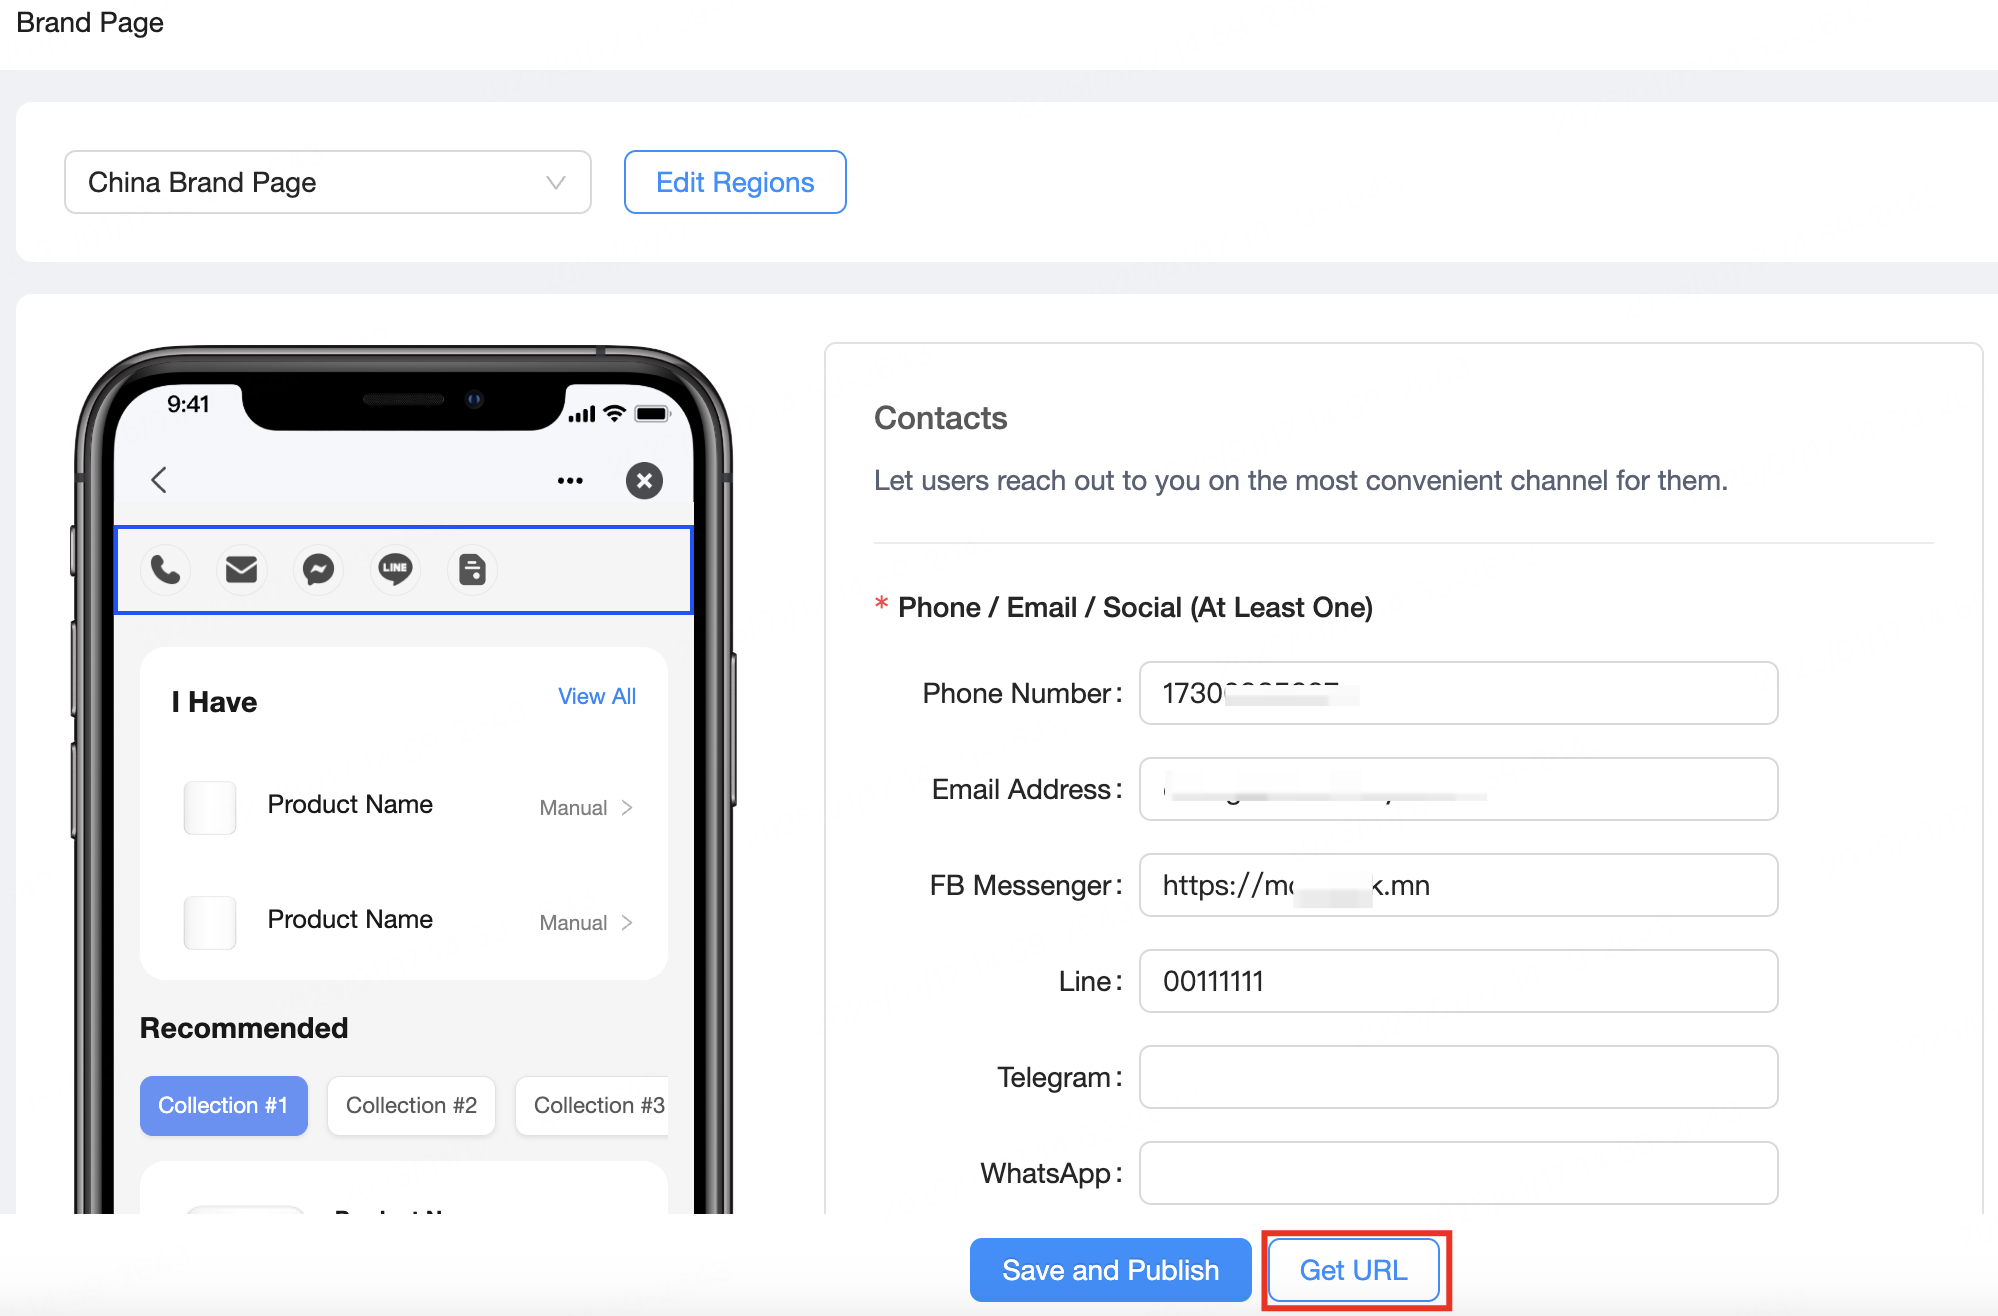
Scan the QR code
After you get the QR code and URL for your brand page, you can place the QR code on the product packaging. Then, users can open the Smart Life or Tuya app, and tap + > Scan in the top right corner of the homepage to access your brand page.
Discover the brand page on the Smart tab
Associate devices with your brand. When app users activate their devices, they can discover your brand page in the app.
Users can access your brand page through the Smart tab > Product Profile.
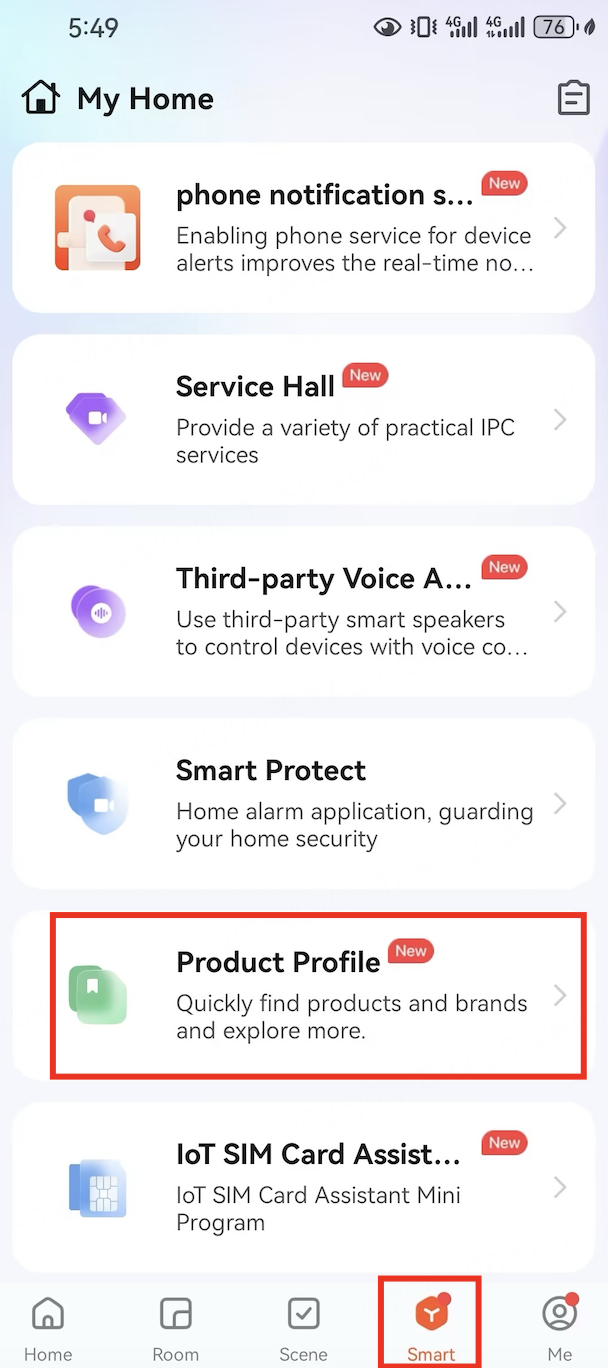
Procedure
-
Go to Operation > Tuya’s Apps > Product Profile. You can find all your products except for the authorized ones.
-
In the Operation column, click Edit Product Profile.

-
In the Edit Product Profile window that appears, complete the required information.
-
Brand: Select a brand. You can only select an approved brand.
-
Status: Choose Online to activate the product profile.
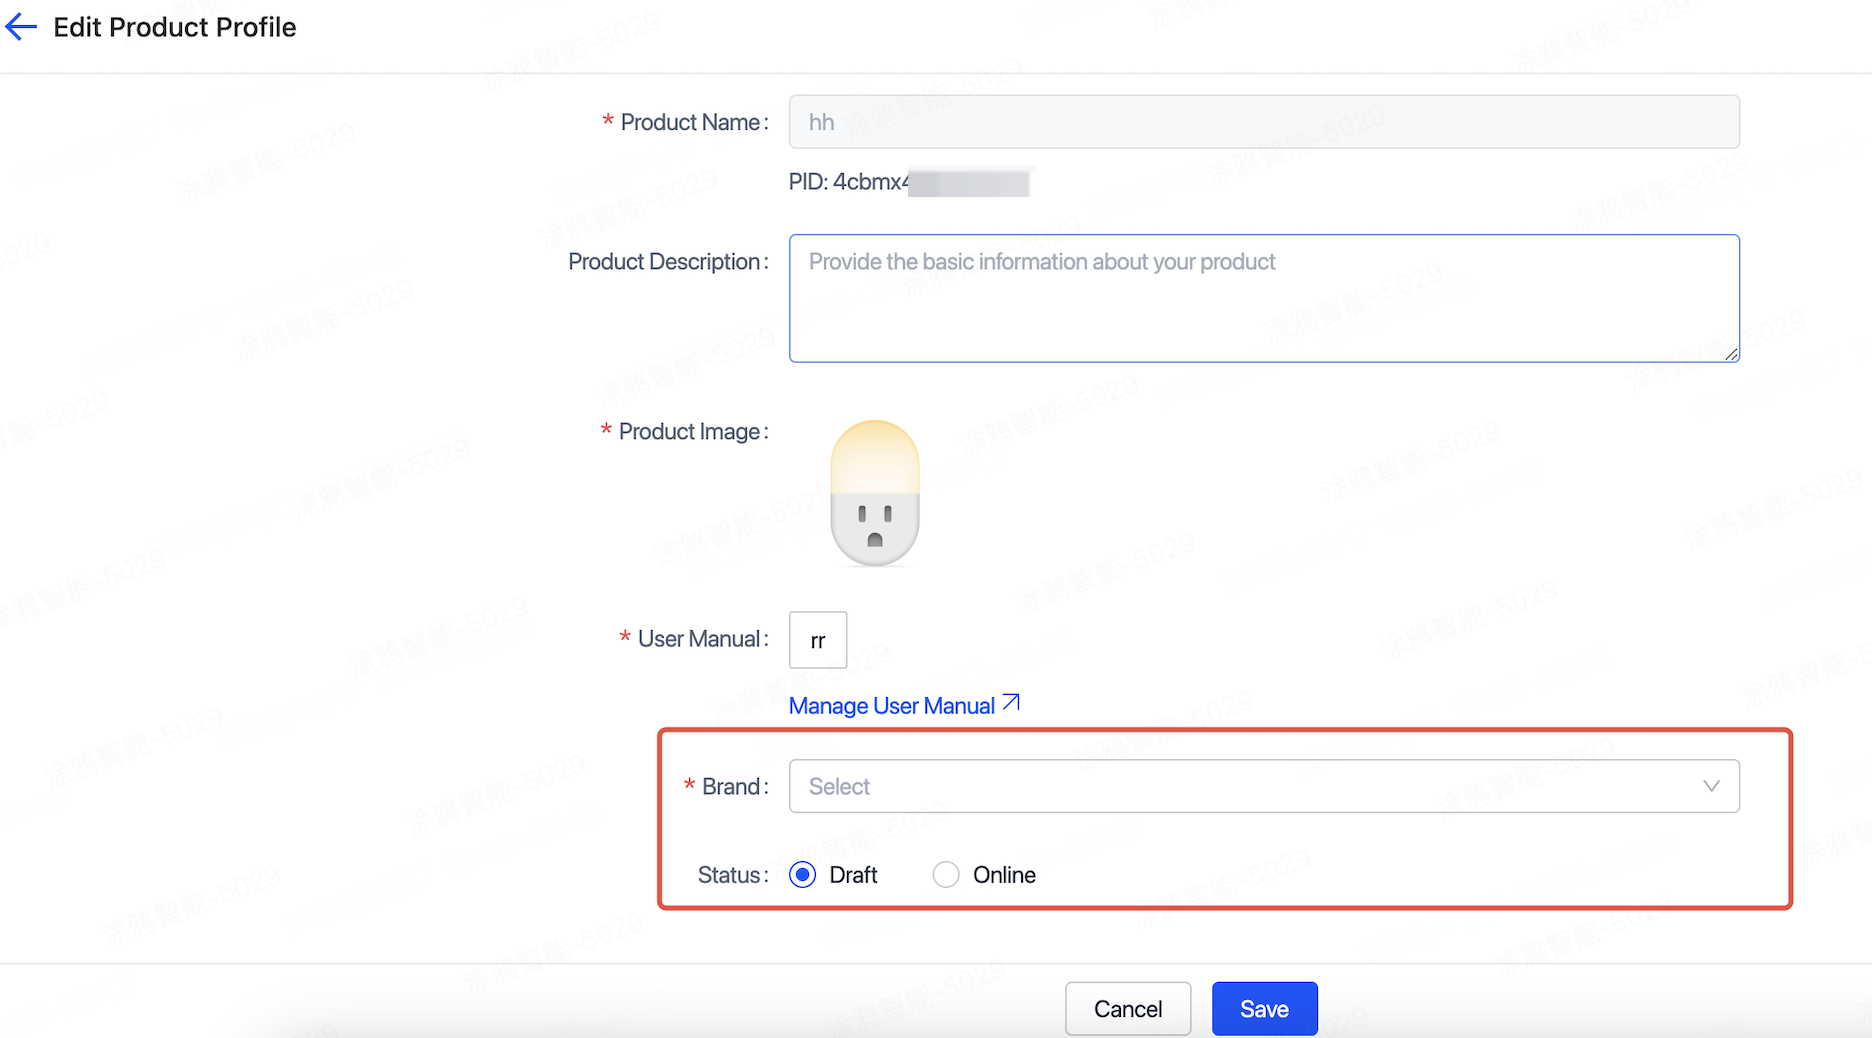
After a PID is associated with the brand, the brand information will not be displayed until 24 to 48 hours after the app user activates the new device.
-
Discover the brand page on the device details page
Procedure
-
Log in to the Tuya Developer Platform and choose Product > Development.
-
Choose the target product and click Develop in the Operation column.
-
Find the Product Configuration tab, and click Settings in the Device Details Page Configuration.
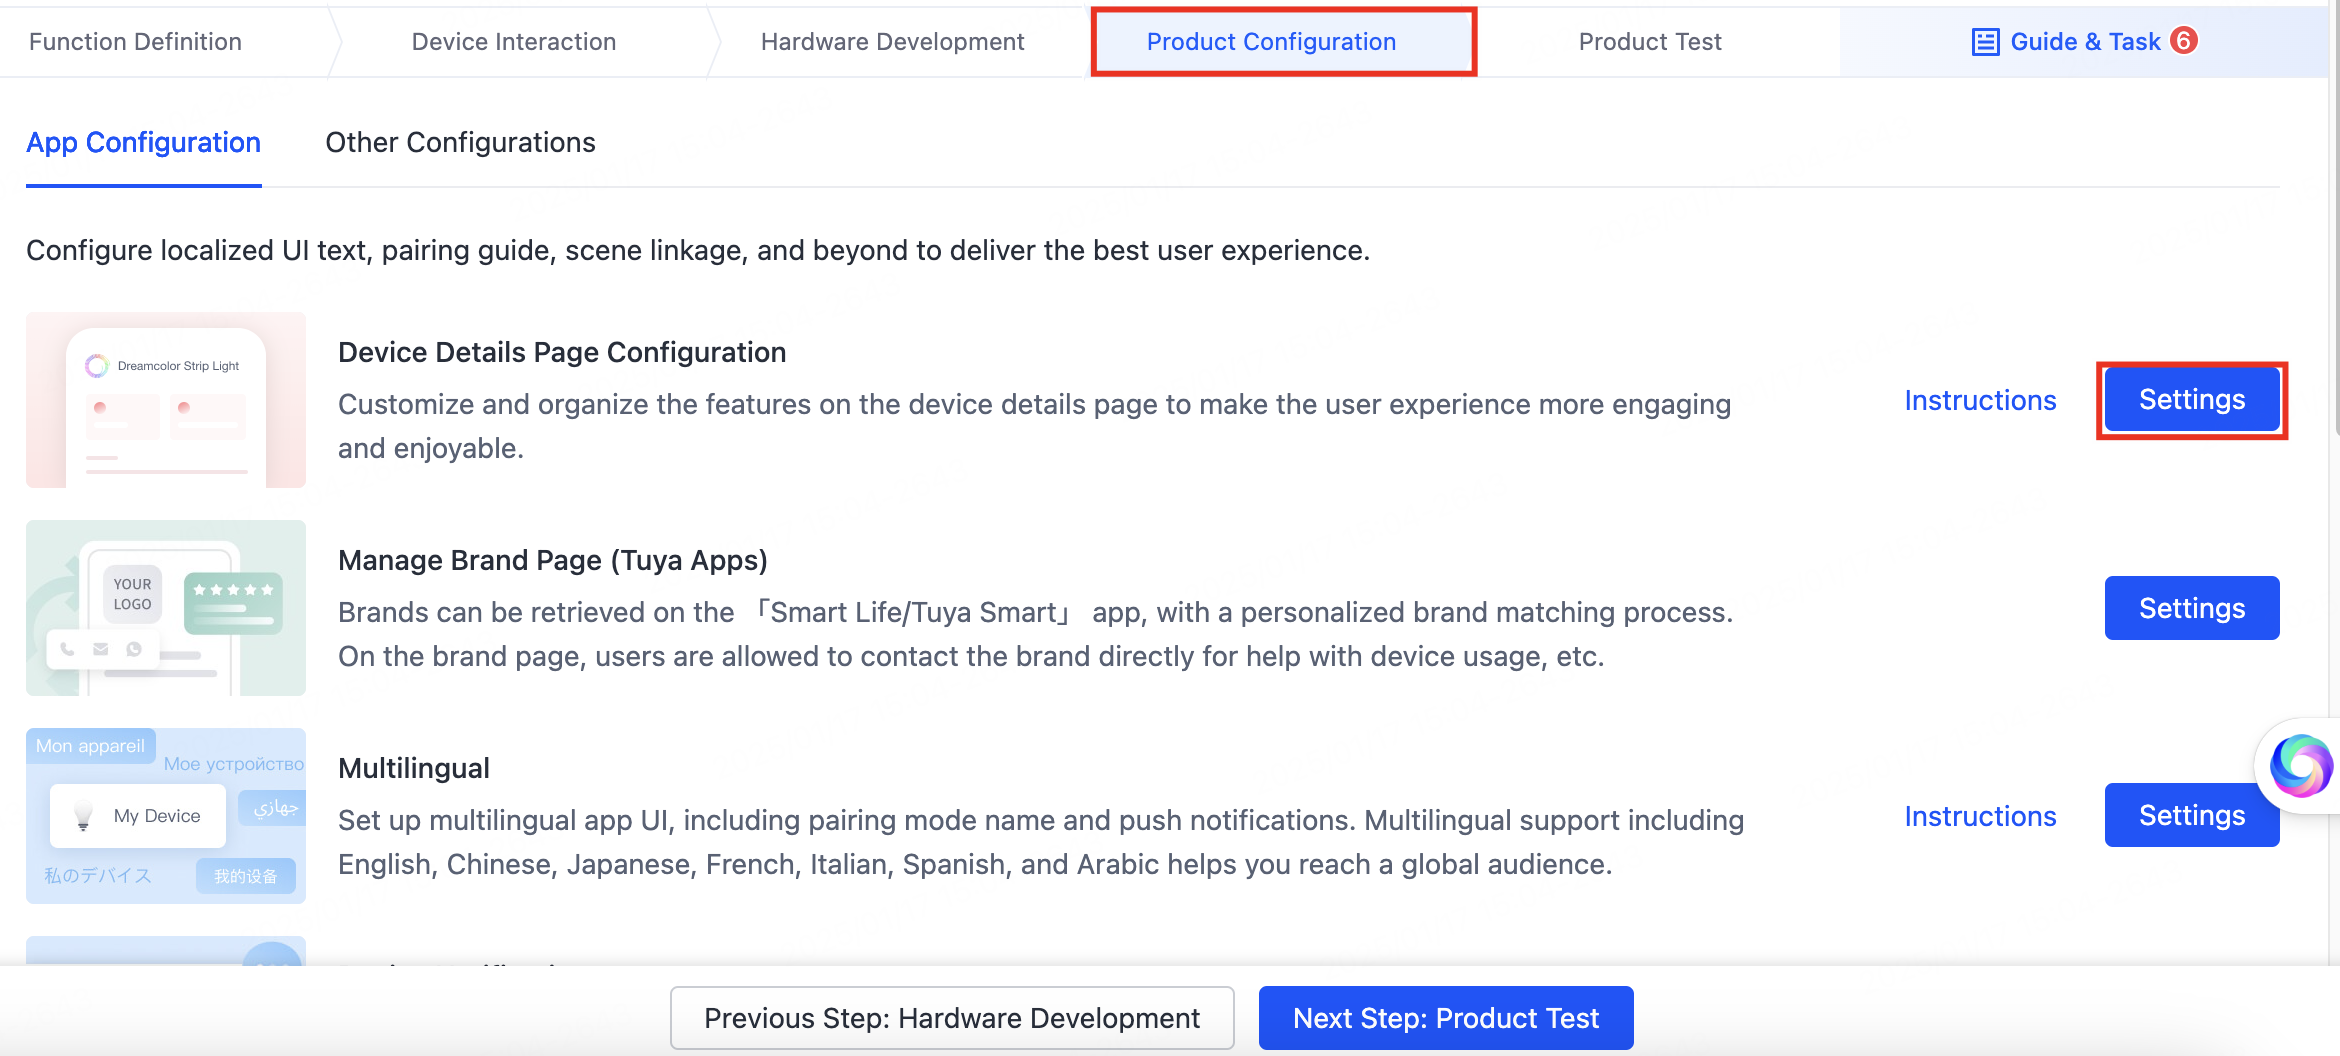
-
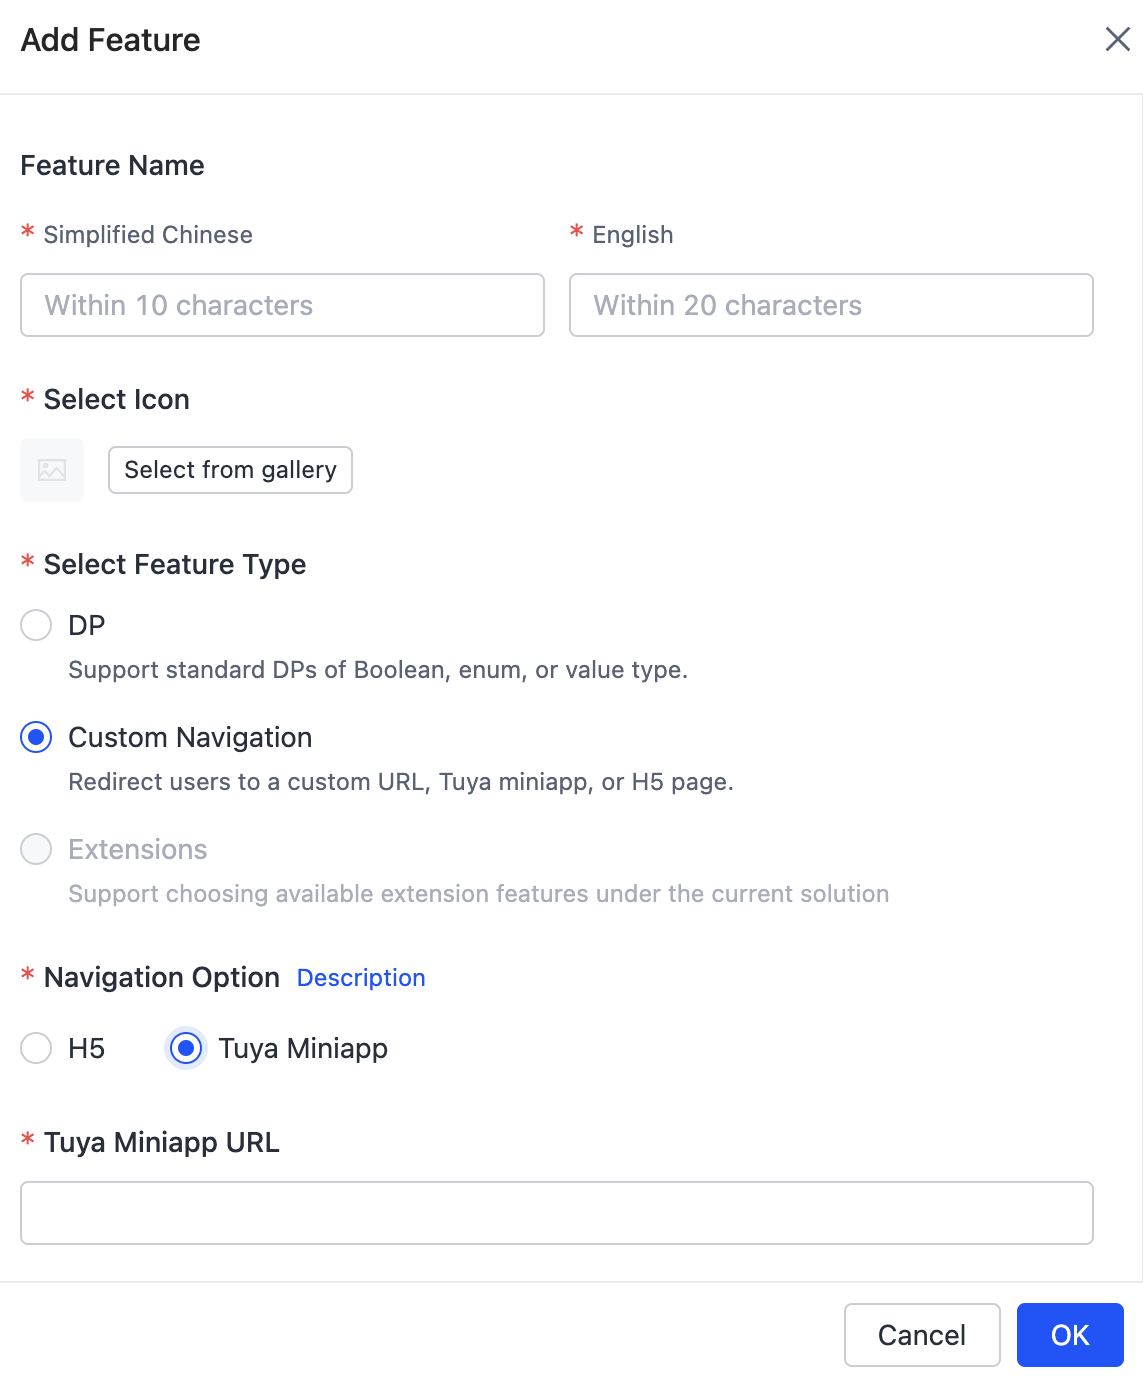
On the Device Details Page Configuration page, click Add Feature. In the dialog that appears, configure the Feature Name, select an icon, select Custom Navigation for the feature type, copy the URL of your brand page, and paste it into the Tuya Miniapp URL.
-
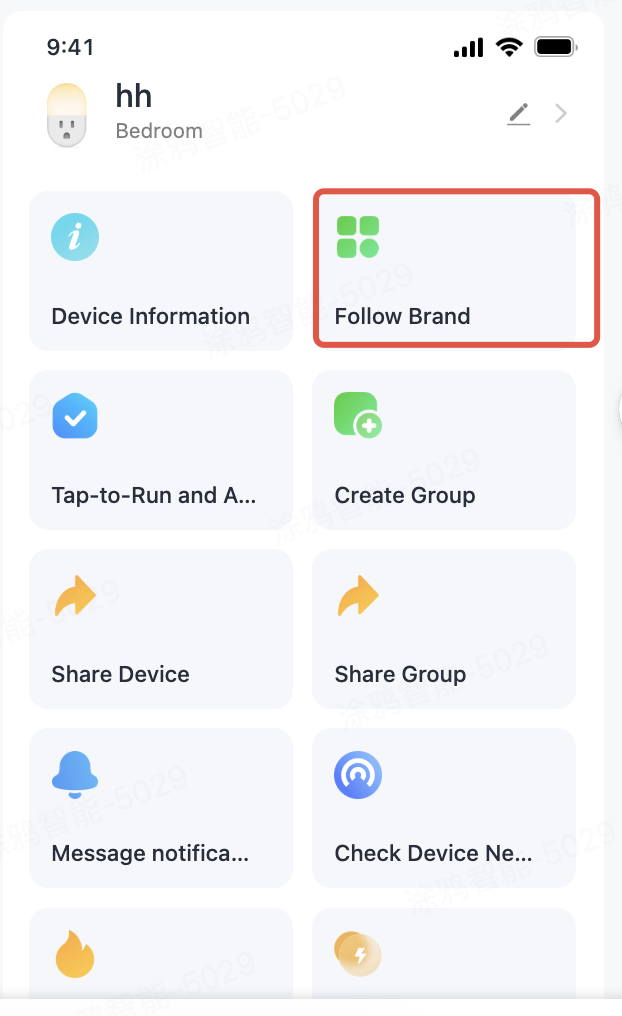
After configurations are completed, the device details page in the app is displayed as follows.
Discover the brand page after a successful pairing
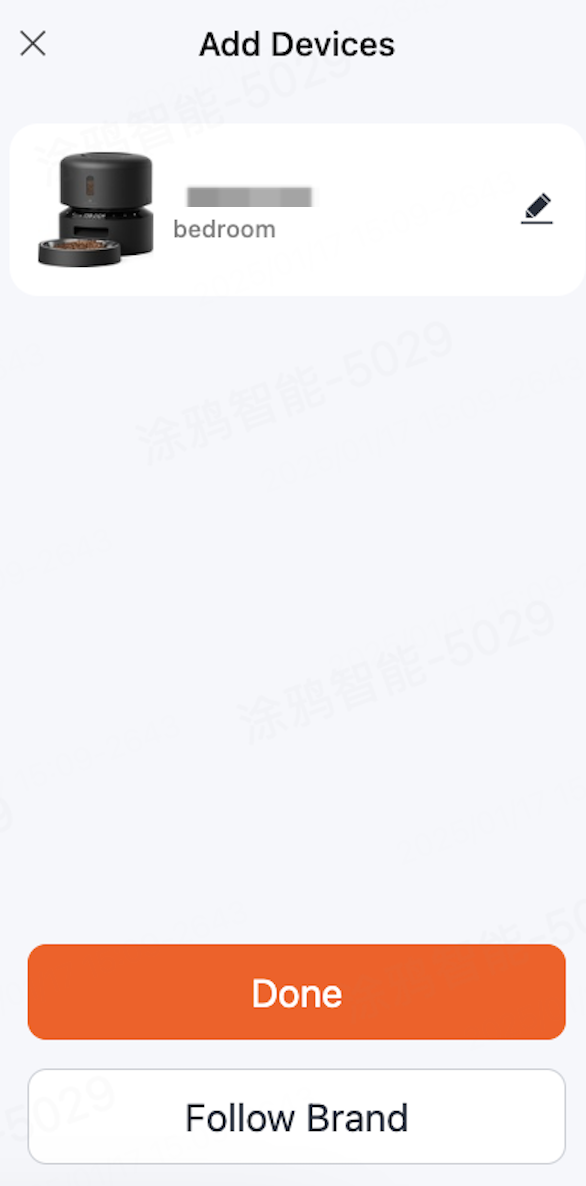
You can add an entry to your brand page on the device pairing success page. If you want to configure this entry, contact the Tuya team.
Is this page helpful?
YesFeedbackIs this page helpful?
YesFeedback


