Smart Home Quick Start
This topic describes how to create and set up a cloud project in the smart home system, and how to integrate with cloud development.
Overview
Authorize an OEM app and link it with a new cloud project. Then, query user information and control devices by using APIs and message queues.
The following figure shows the interaction logic during development and debugging.
If you have also integrated the SmartLife App SDK, you only need to select this SDK in your linked app to develop the smart home system.
The whole process is detailed step by step.
Step 1: Create and configure a cloud project
A cloud project is a carrier or collection of resources on the Tuya Developer Platform, including devices and users. Resources deployed for each project are isolated from those for other projects. For more information about cloud projects, see Manage Projects.
-
Log in to the Tuya Developer Platform. If you do not have an account yet, register with the platform as prompted.
-
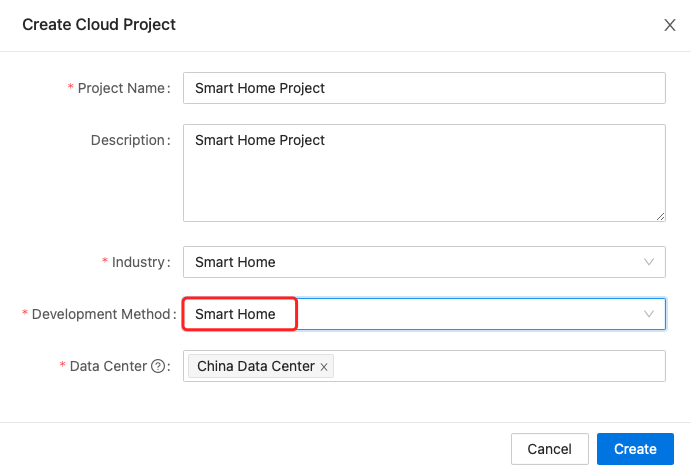
In the left-side navigation bar, choose Cloud > Create Cloud Project.
-
Enter the required information as prompted and click Create.
To create a smart home project, you must select Smart Home in the Development Method field.
-
On the Configuration Wizard page, click Authorize to subscribe to the cloud services and authorize the cloud project.
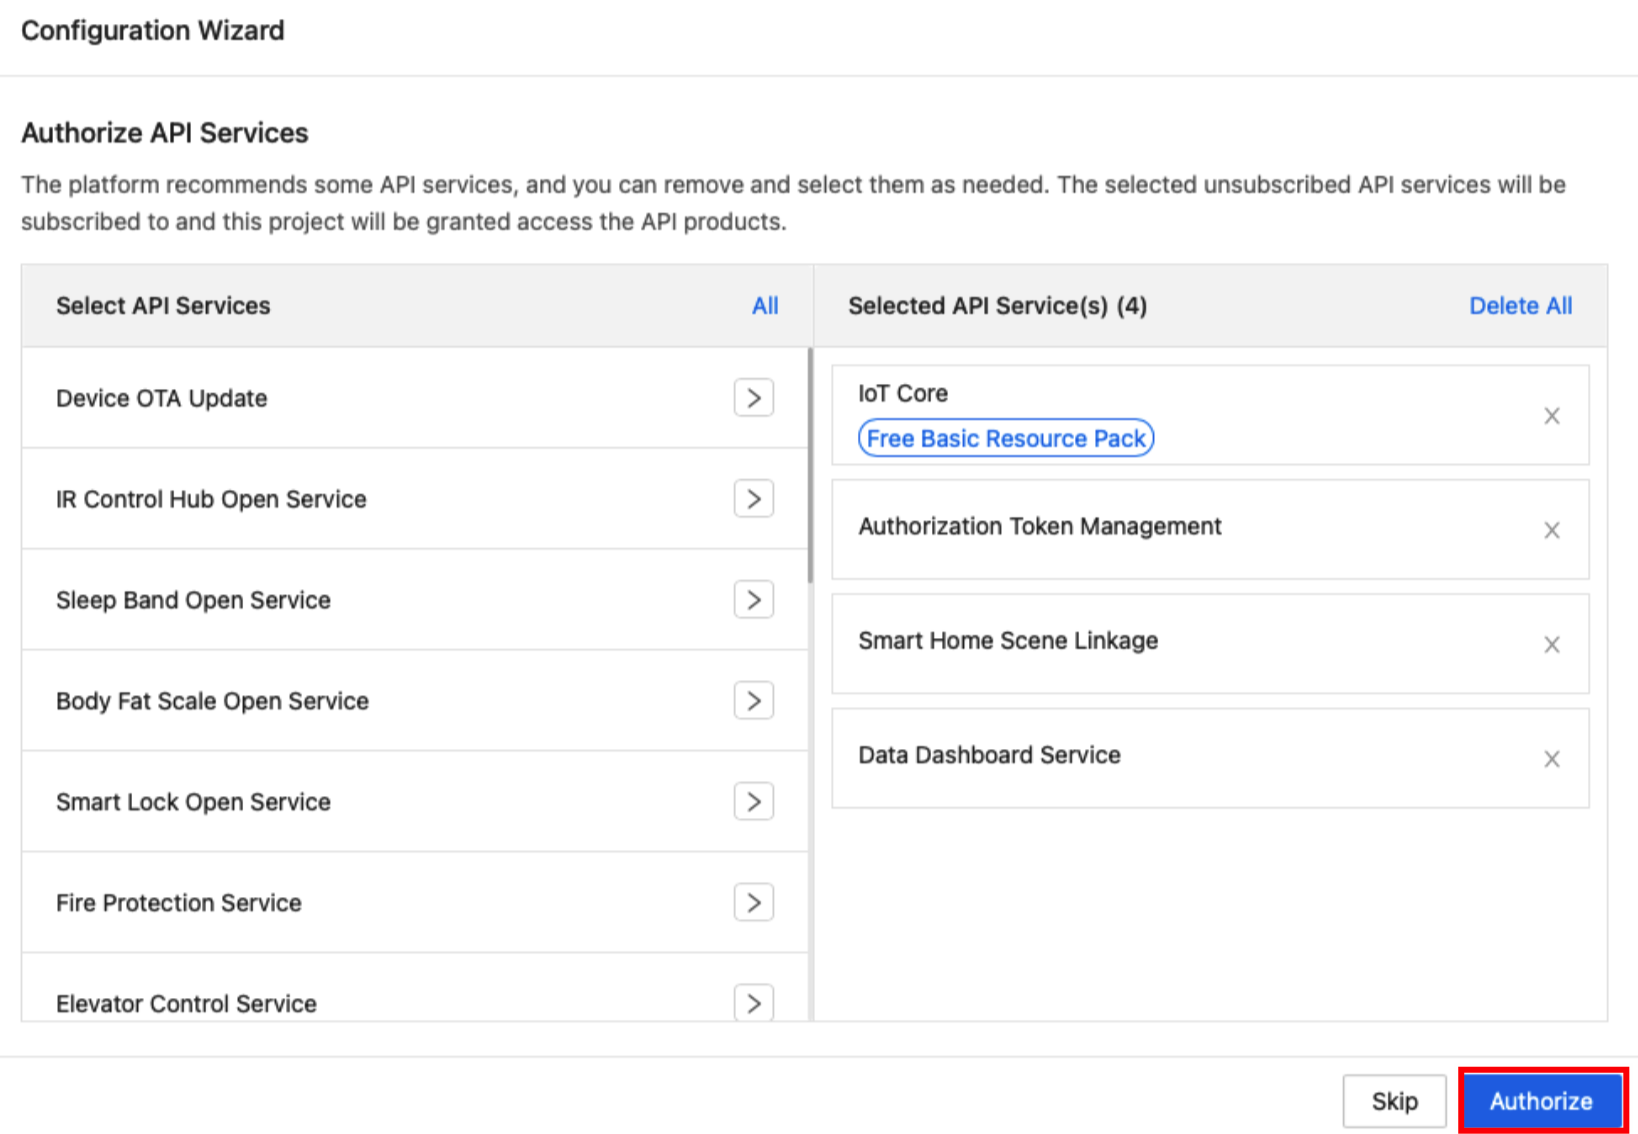
By default, the APIs that support the specified development method are selected for the project on the platform. You can add or delete the default API services, or select other desired API services. For more information about API services, see Manage API Services.
Step 2: Link business data
After creating a cloud project, you need to link your OEM app with the cloud project.
If you have not created an OEM app, you can link a Tuya-enabled app account with the project.
-
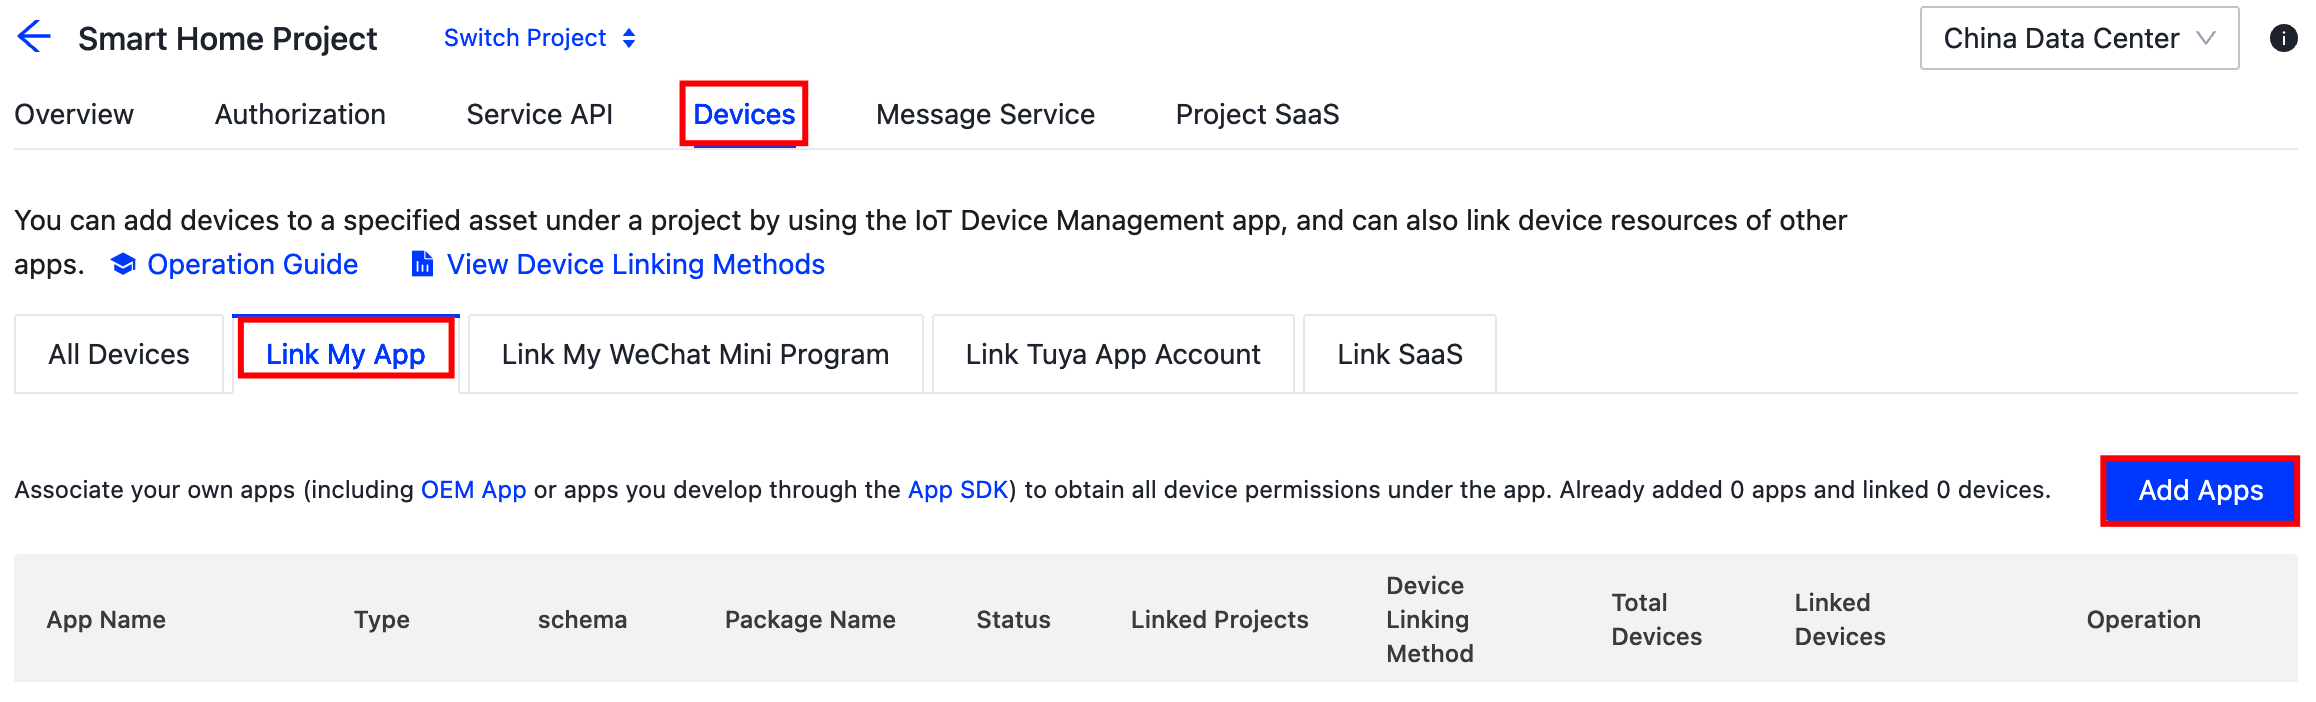
Enter the details page of your cloud project.
-
Choose Devices > Link My App > Add Apps.
-
Select the desired OEM app and link it with the cloud project.
During the process to link an OEM app or a Tuya-enabled app account with the project, a window appears for you to select the device linking method and device permission. To get started quickly, select Automatic Link as the device linking method and Read, Write, and Manage as the device permission. For more information about device linking, see Link Devices.
Step 3: Enable message service
-
On the page of Cloud > Message Service, you can enable this service for the cloud project and set parameters to get alerts of excessive messages. For more information about the message service, see Message Service.

-
After you enable the message service, you can also customize message filtering rules to keep and push only the desired messages to the server.
This feature is only available for projects created after June 20, 2023. If the message service is enabled for a historical project, the default message
bizcodeis automatically enabled. If you want historical projects to support custom message rule configurations, submit a service ticket to contact Tuya.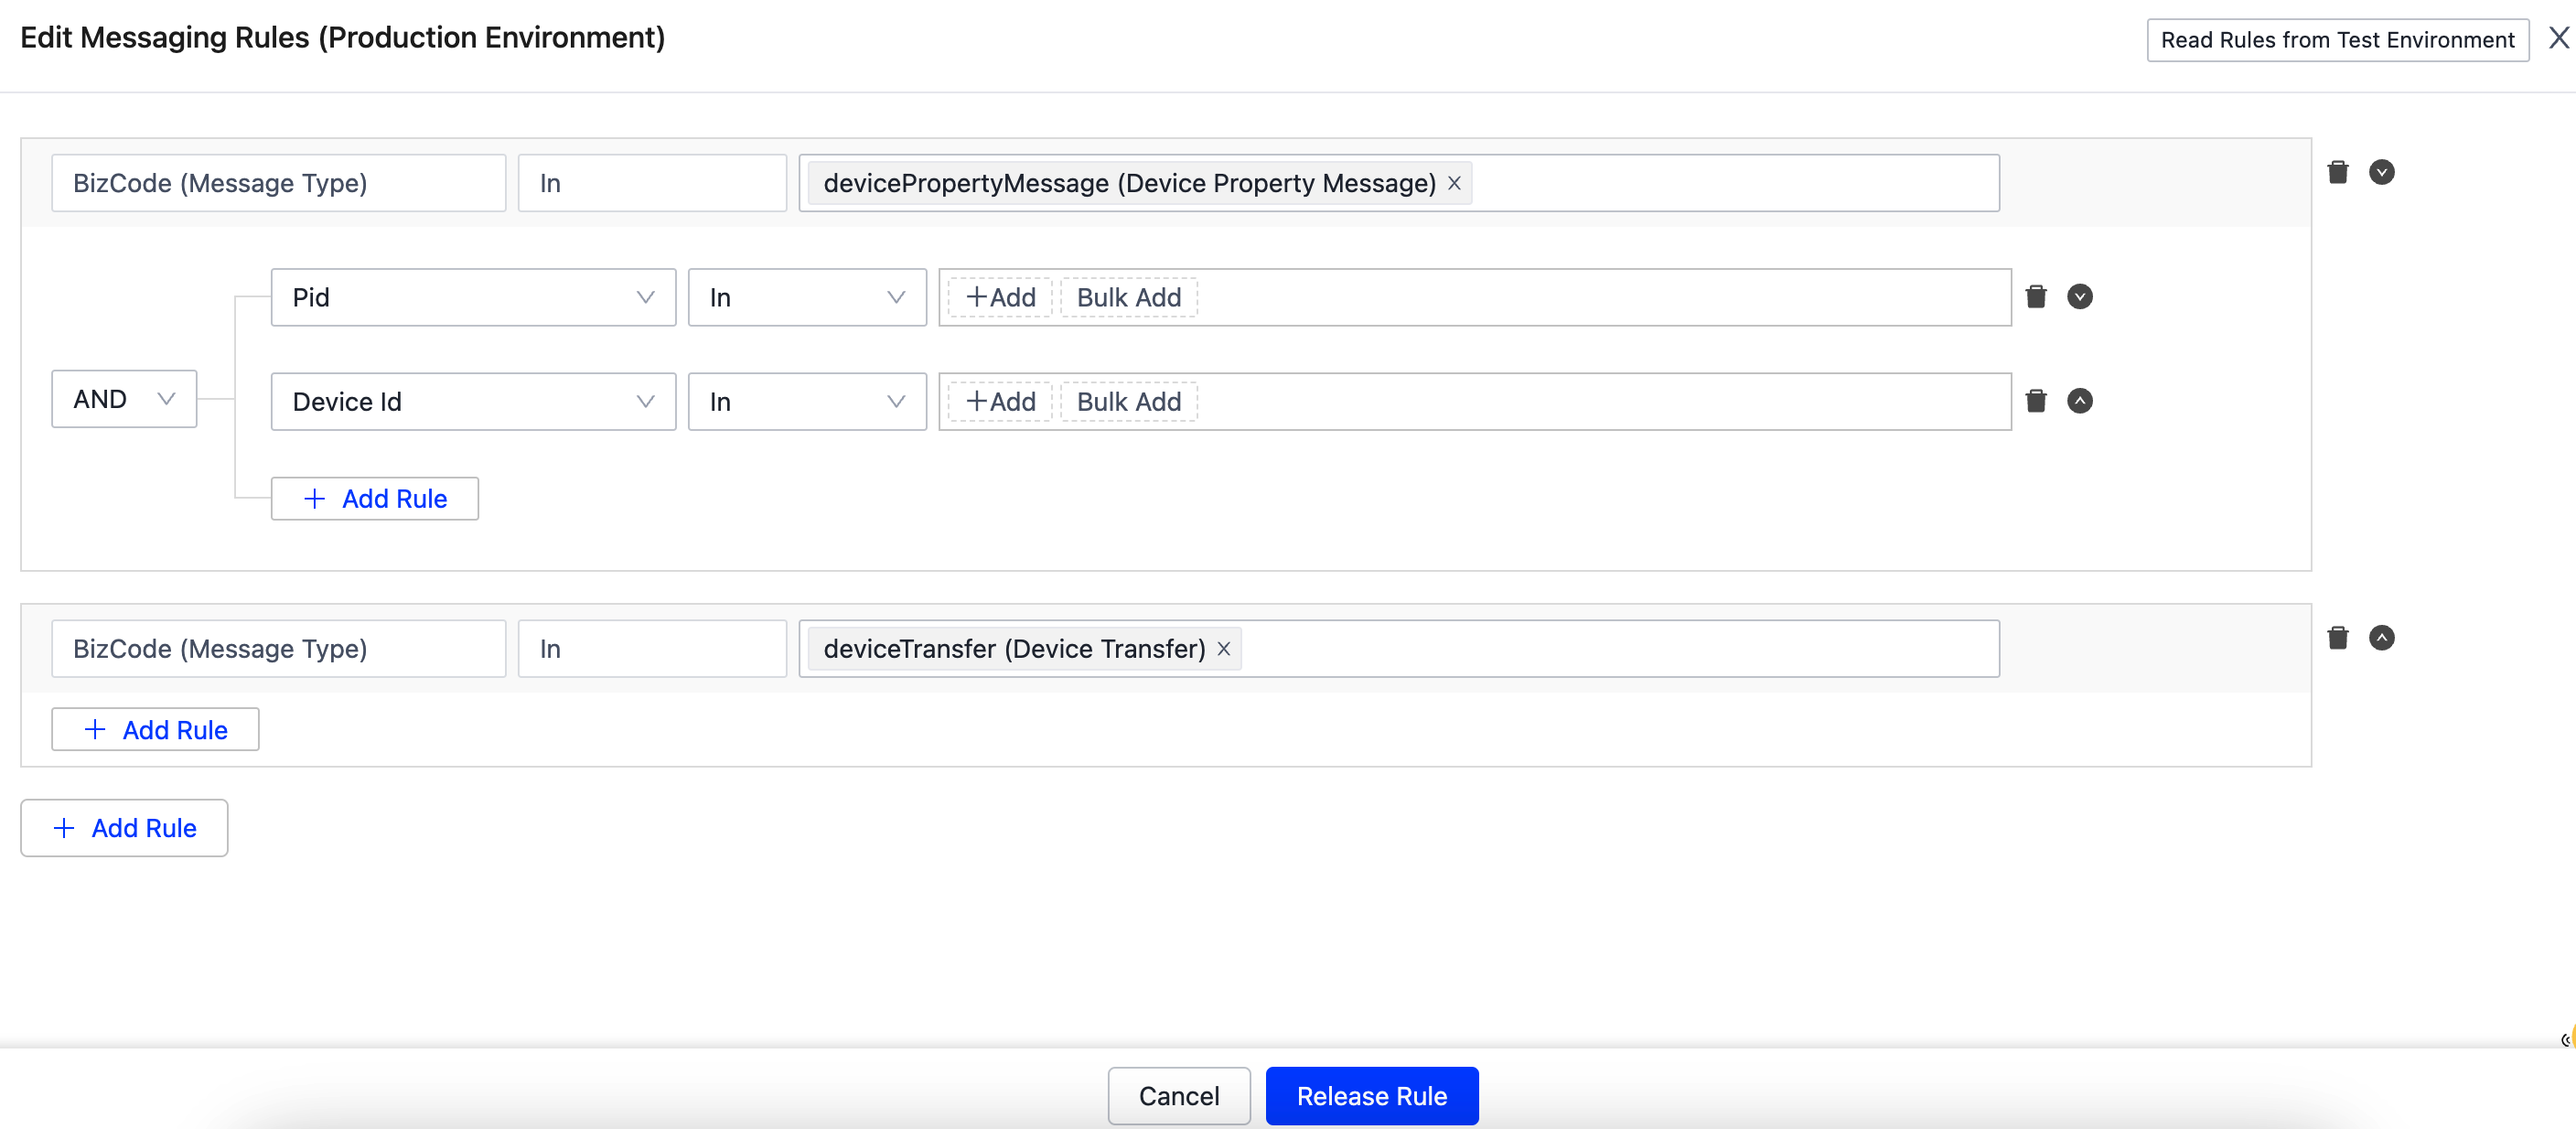
Step 4: Develop and debug
Call APIs
This section uses API Explorer to debug the API calls.
-
Call the API Get User List to get a list of app users.
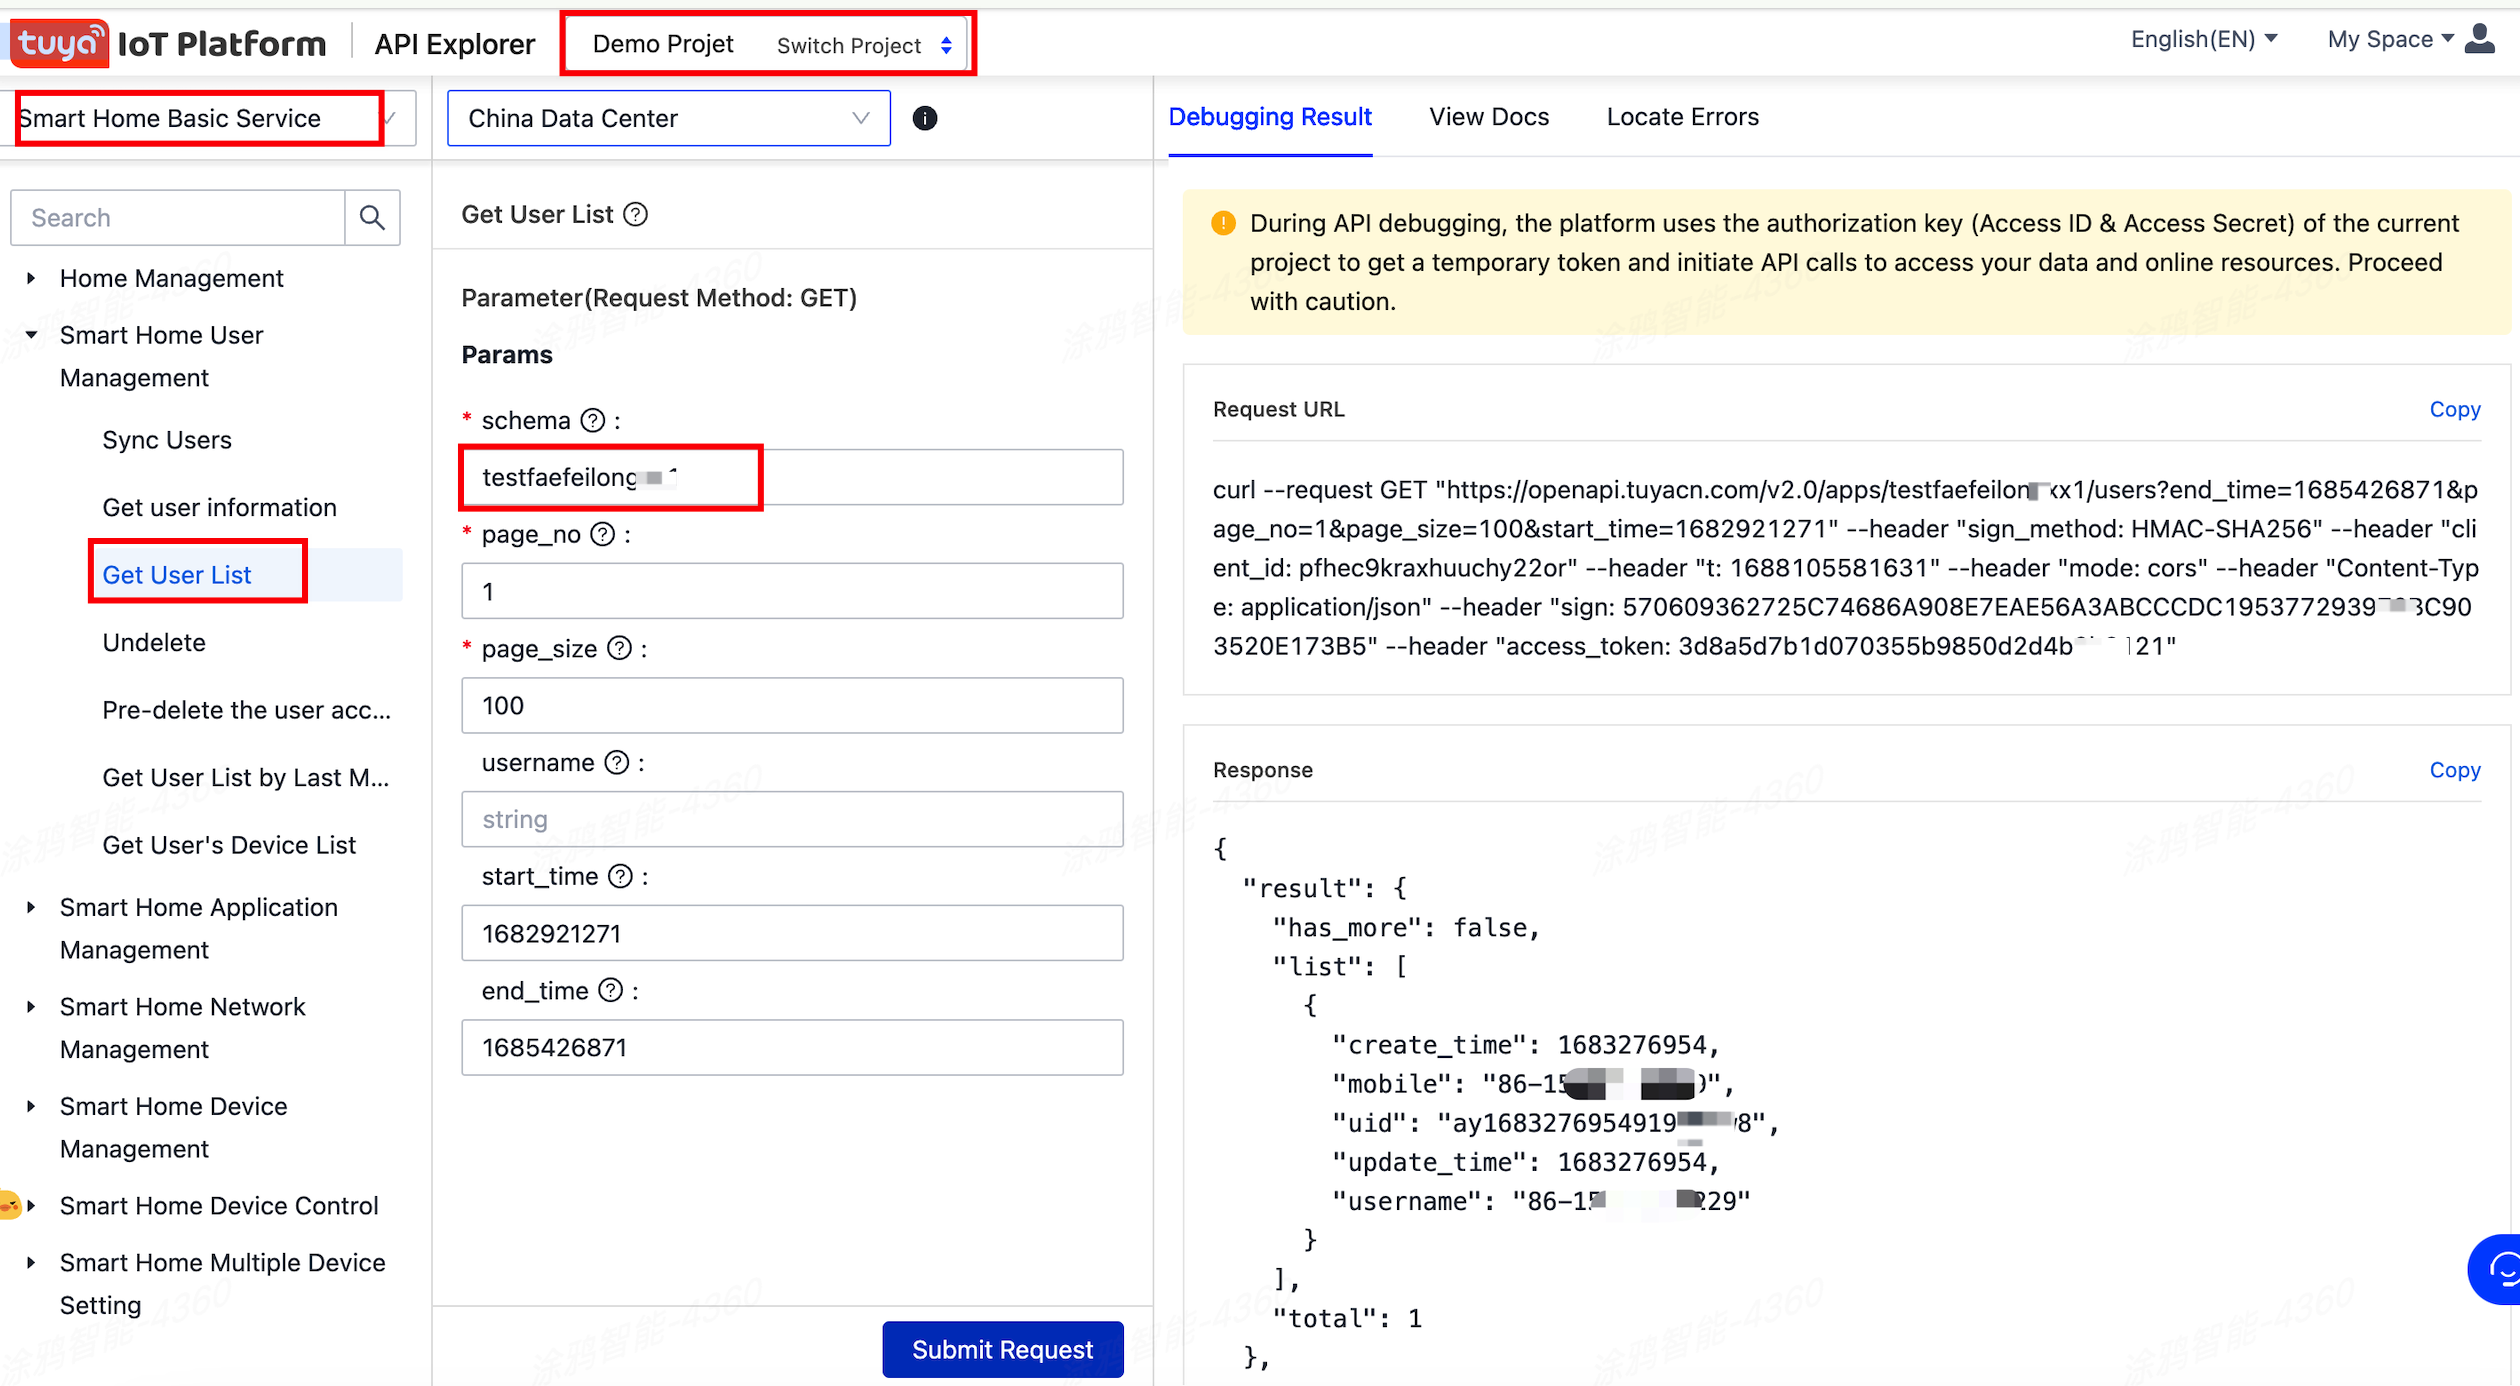
As shown above, the current OEM app has a user with user ID (UID)
ay16600***ONz7. -
Call the API Get User’s Device List to get a list of devices that belong to the user.
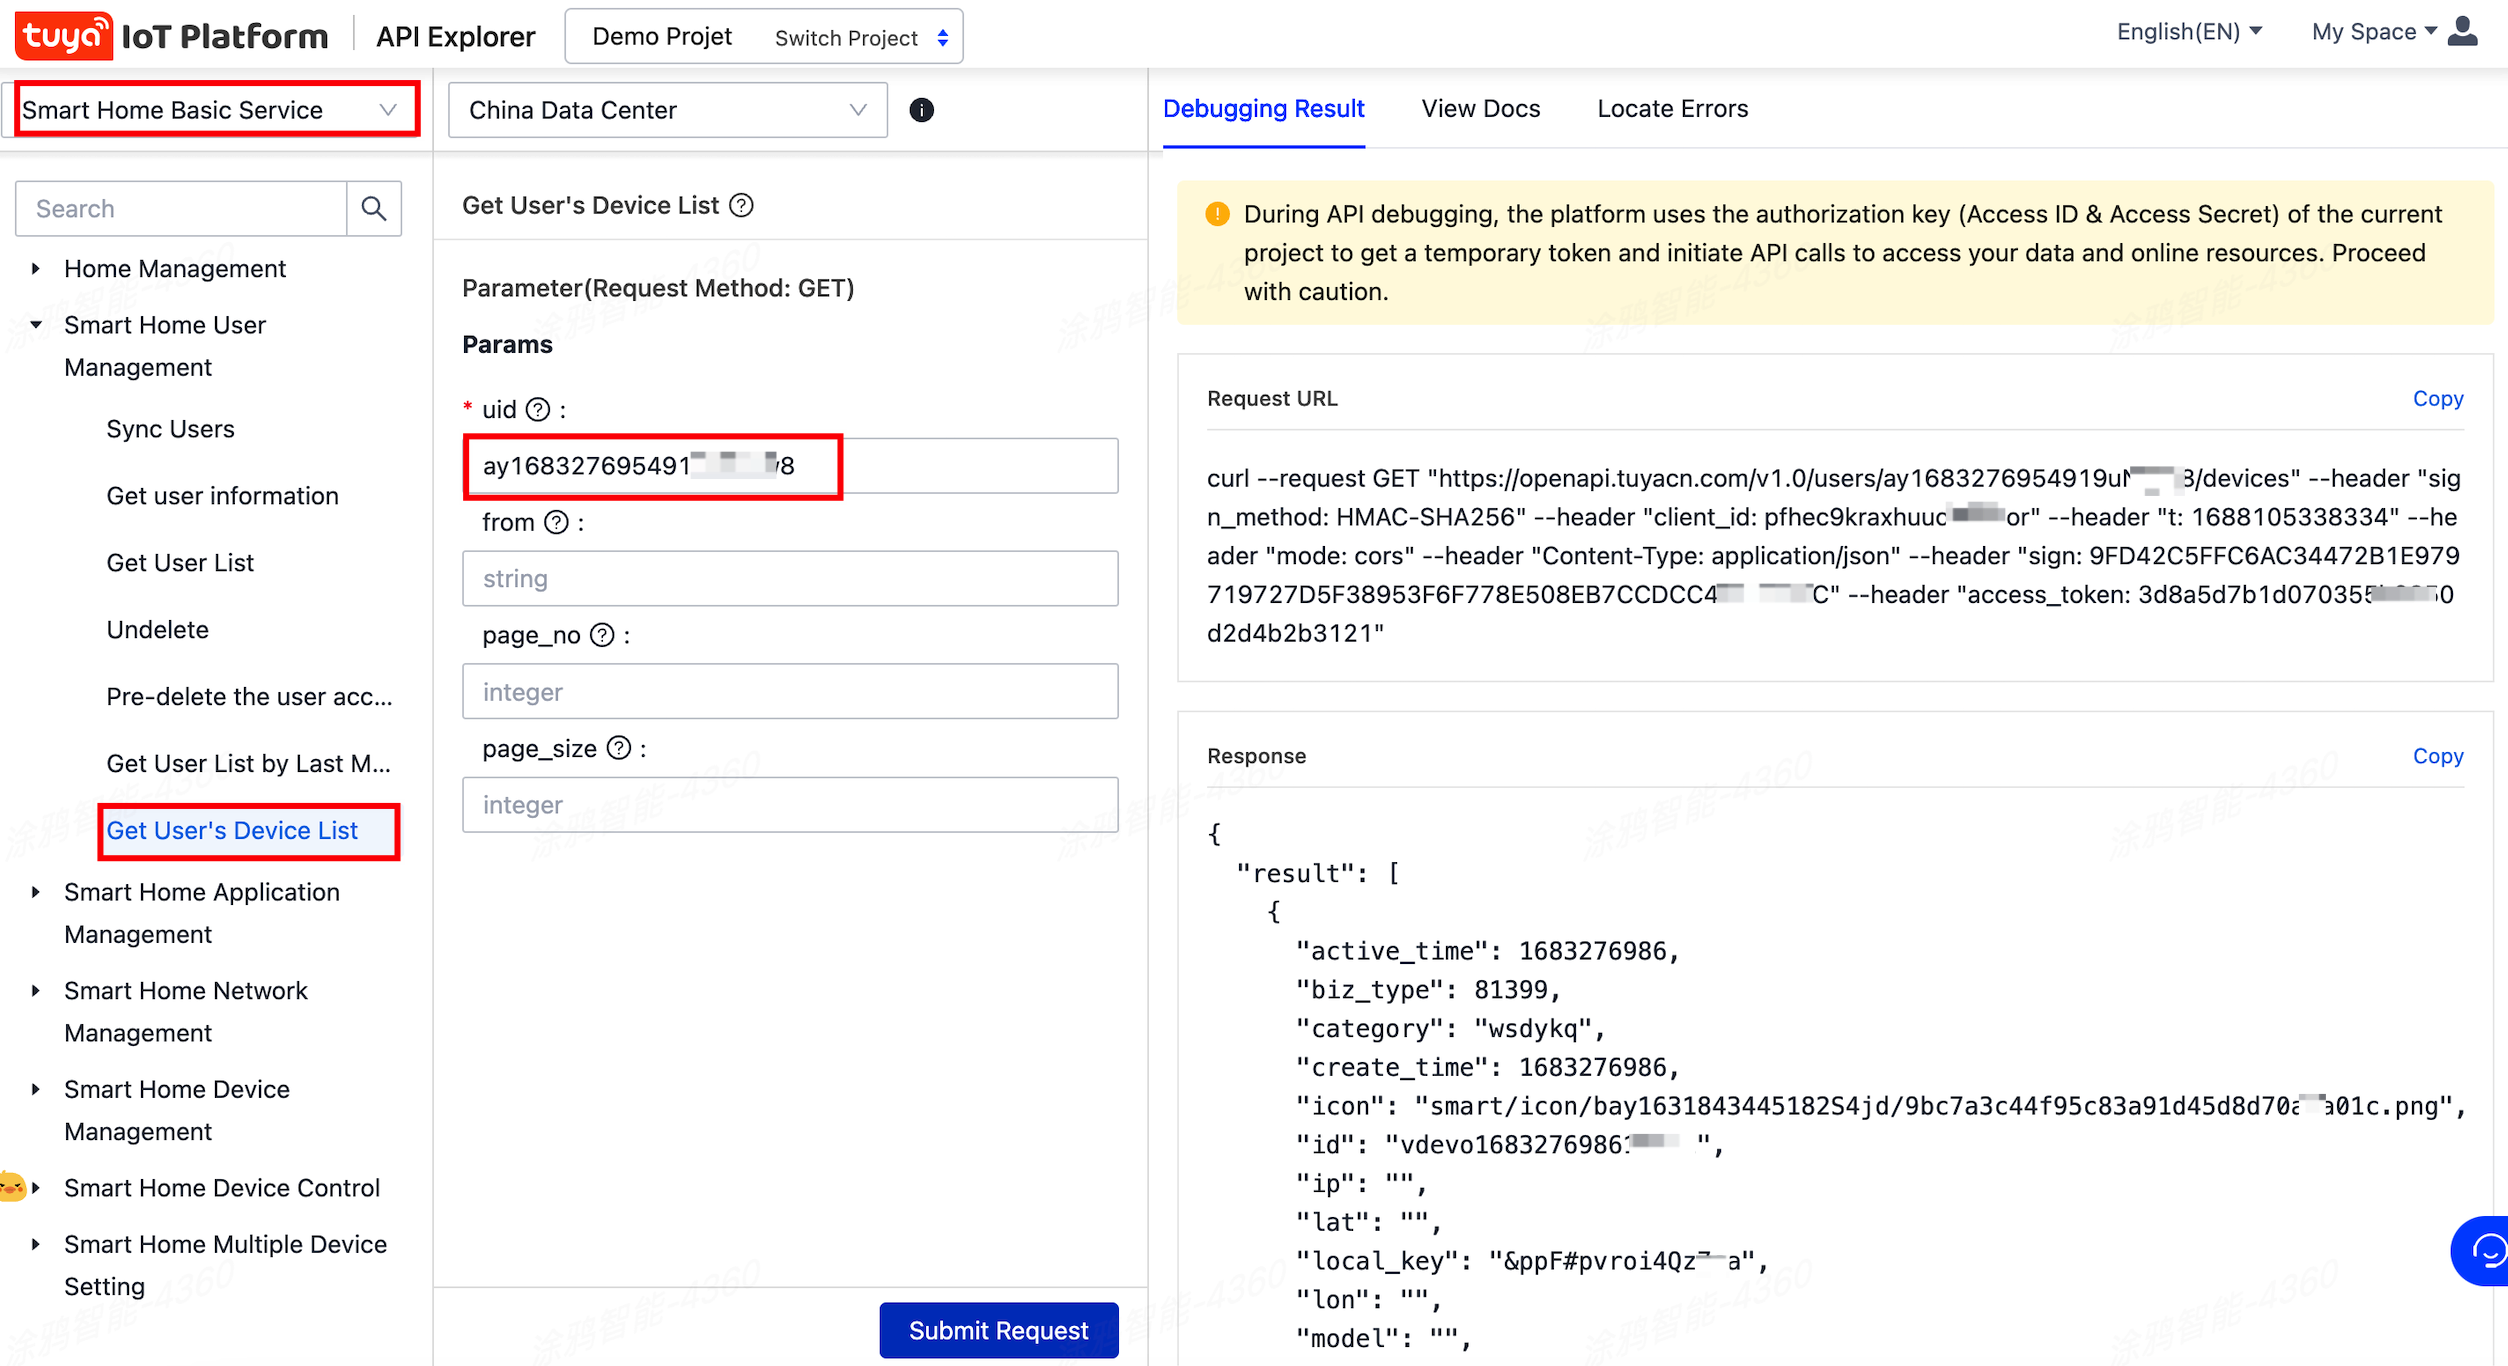
As shown above, the user has a socket with ID
87707085bcddc****fa3.If you have linked a Tuya-enabled app account with the project, you can find the UID in the list of linked accounts.
-
Choose IoT Core > Device Control (Standard Instruction Set).
Call the API Get the instruction set of the device to get the available instruction set.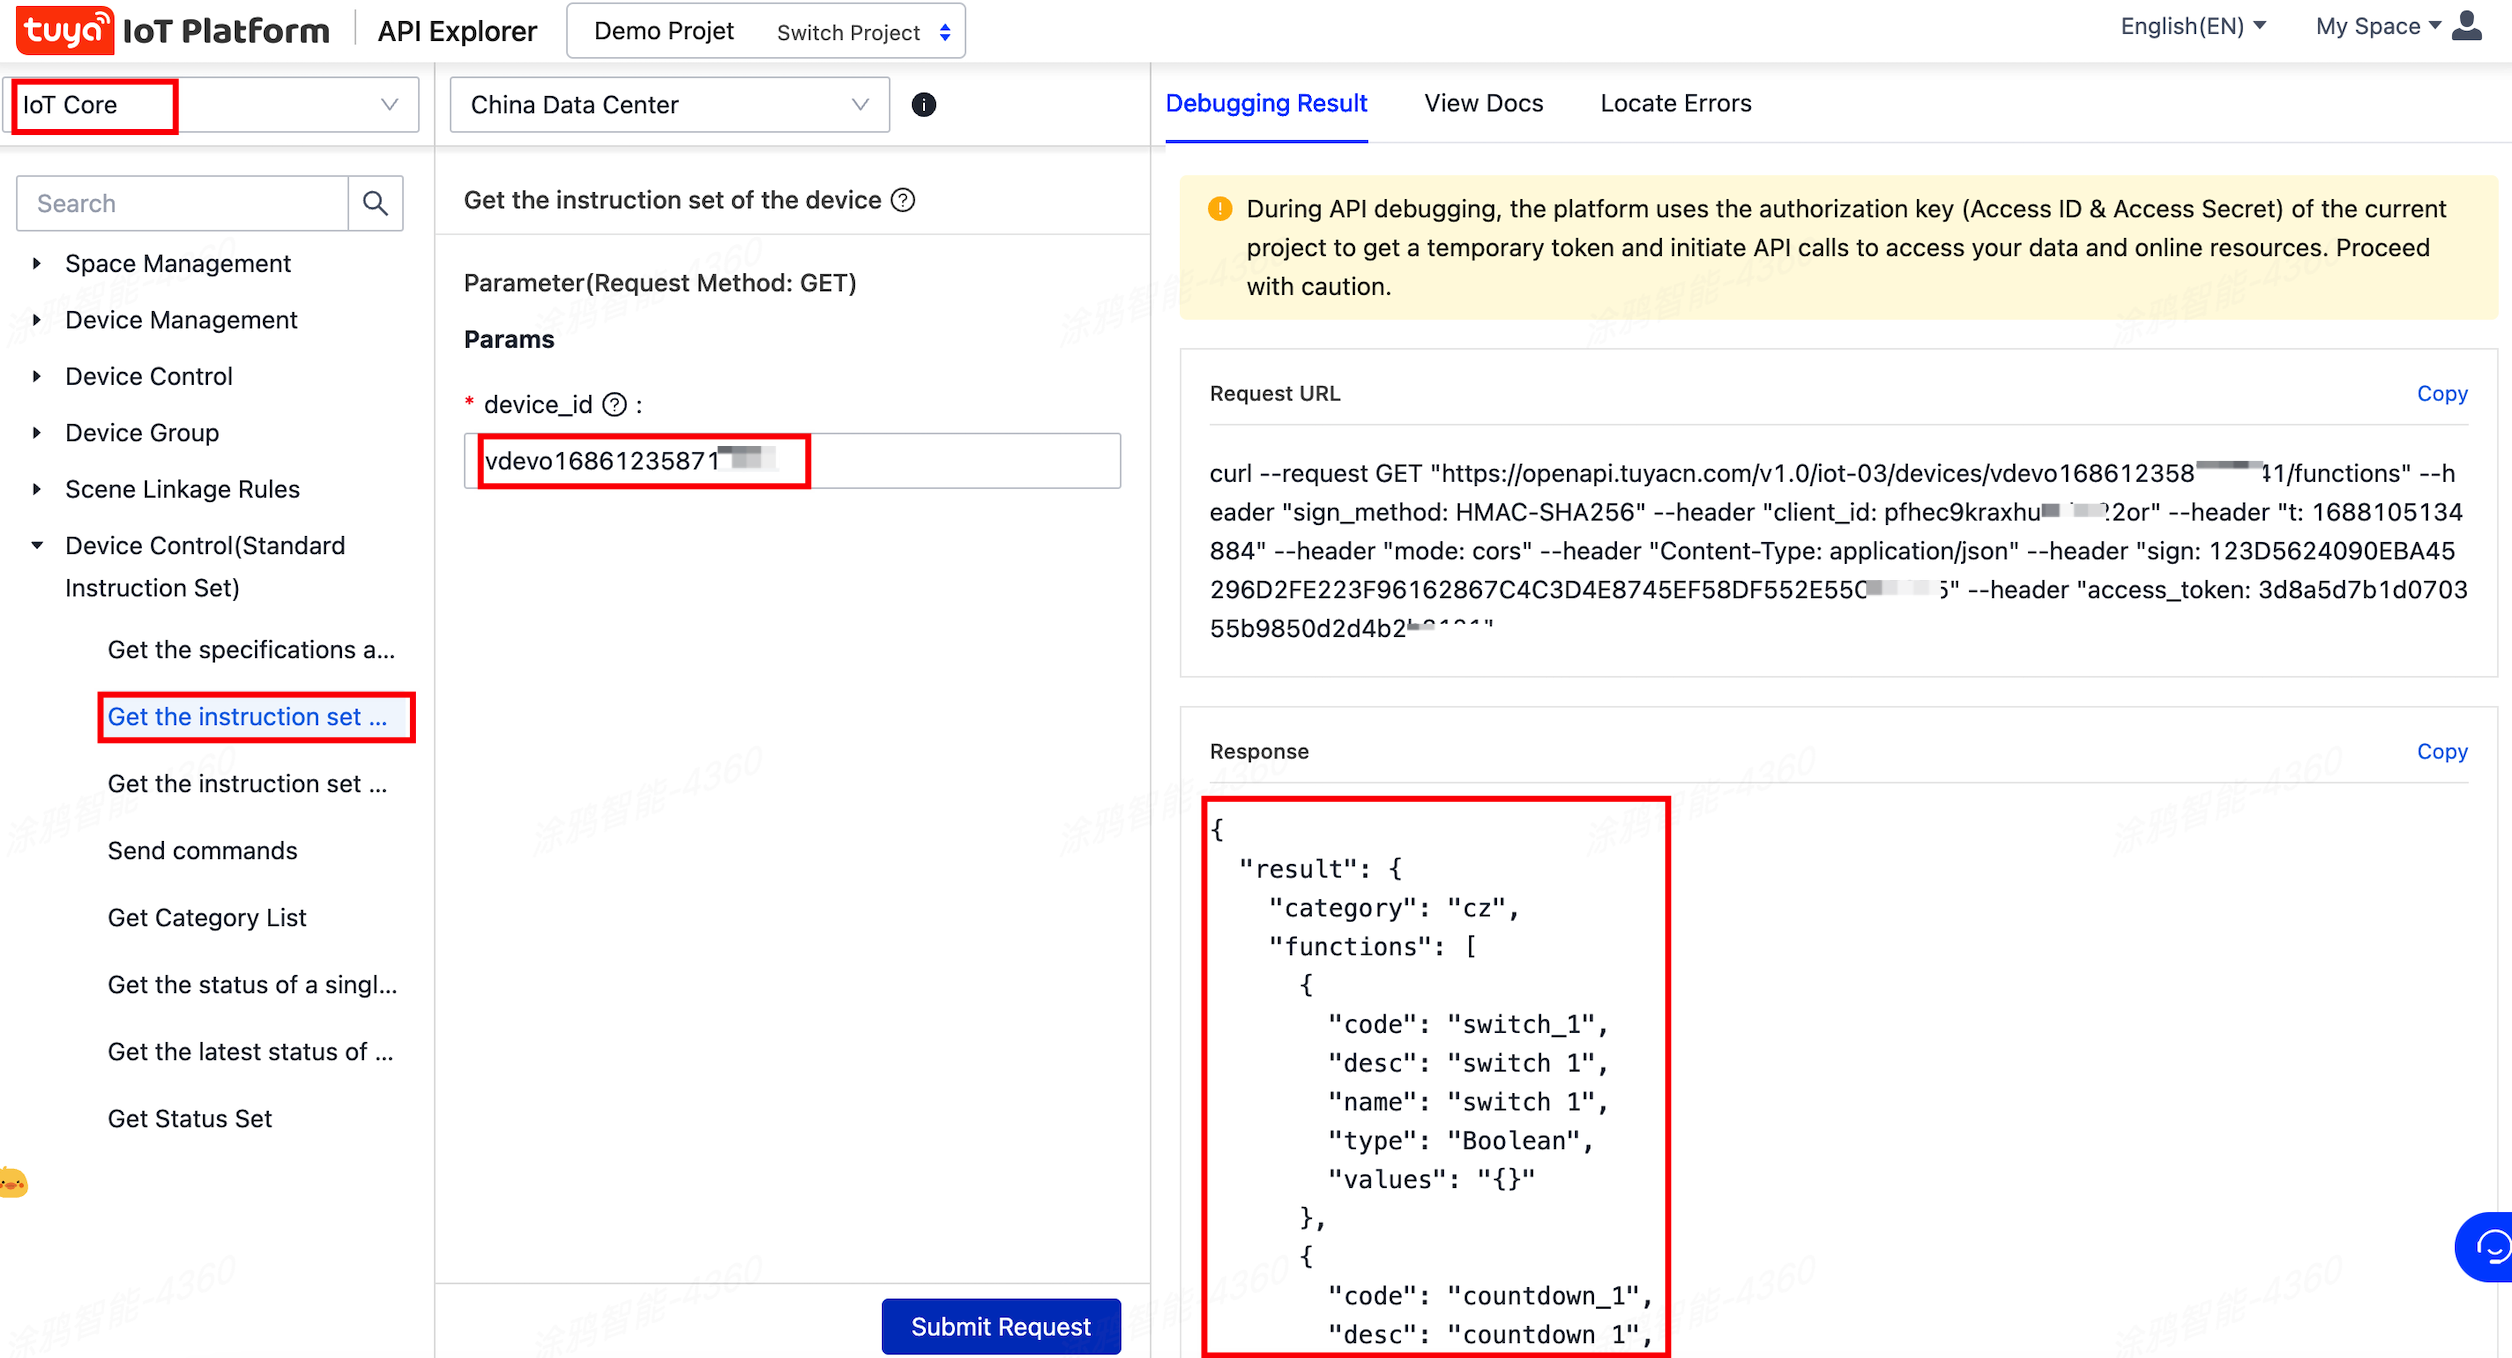
The socket supports two functional instructions:
-
Switch
-
Countdown
The code of the switch instruction is
switch_1, and the value is of Boolean type.truemeans to turn on the socket, andfalsemeans to turn off the socket. For more information about functional instructions, see Standard Instruction Set.
-
-
Call the API Send commands again and enable the socket.

The output window shows that the instruction has been sent to the device successfully. The content of the instruction is as follows:
[
    {
        "code":"switch_1",
        "value":true
    }
]
Subscribe to messages
-
In the Message Test section, add the device to the message test channel and enable the Test Channel.
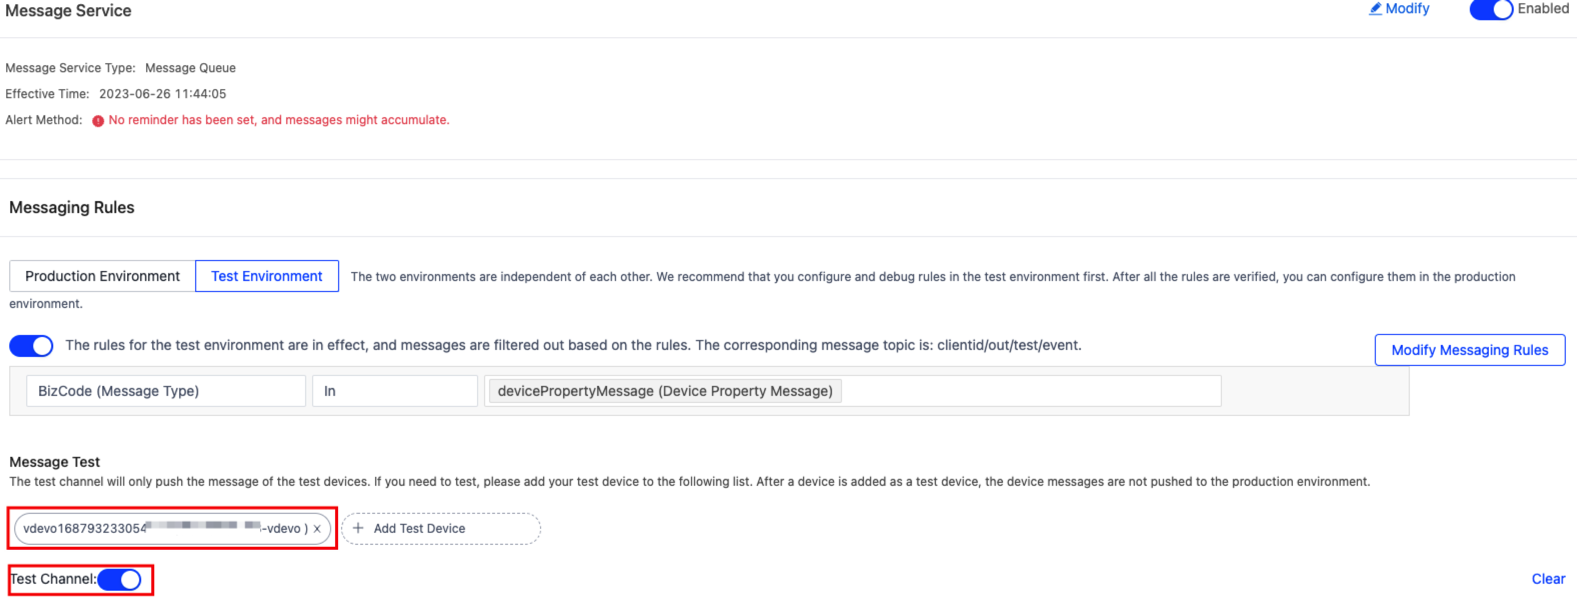
-
Call the Send commands API again and observe the test channel.
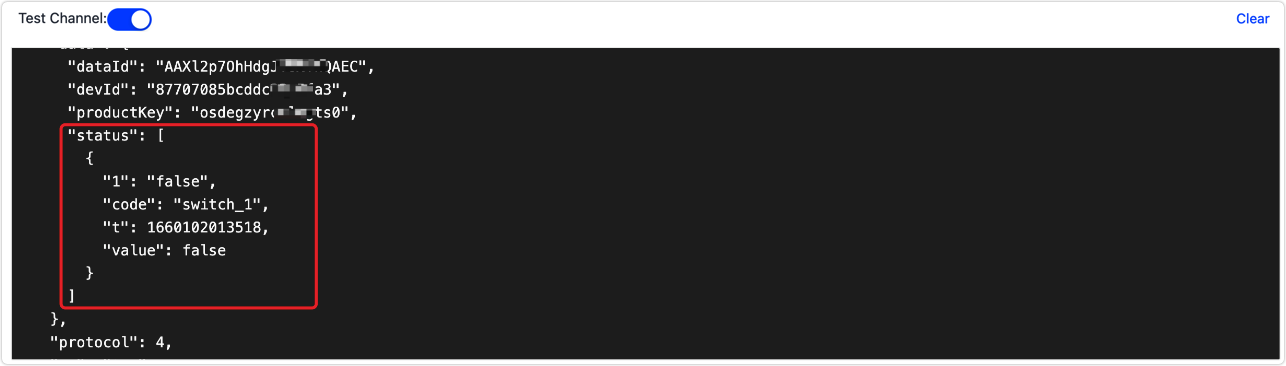
As you can see, the listener has returned the message that the socket was turned off.
The message test channel is for trial and debugging only. If you add your device to the test channel, you will not receive messages in the production environment.
Now, you have walked through the quick start guide and can dive deep into the smart home system.
Is this page helpful?
YesFeedbackIs this page helpful?
YesFeedback


