Flash Firmware
This topic describes how to flash firmware to the CR3L module.
Flash firmware and authorize module with Tuya’s tool
-
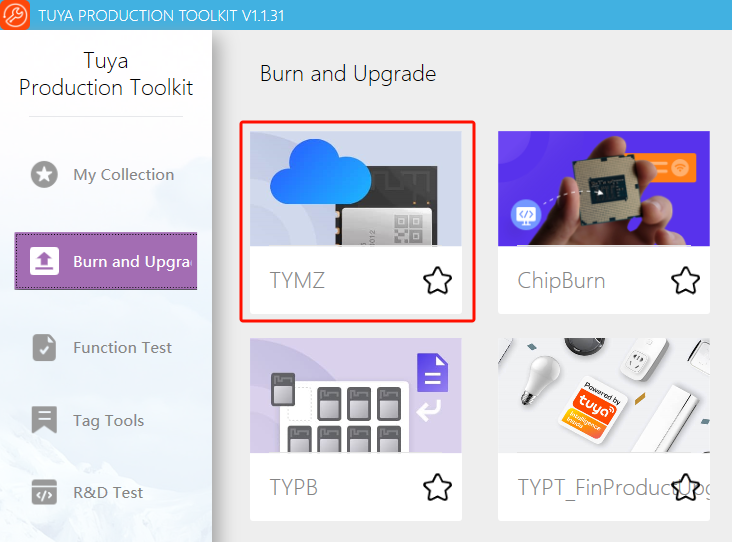
Open Tuya Production Toolkit and choose Burn and Upgrade > TYMZ.
-
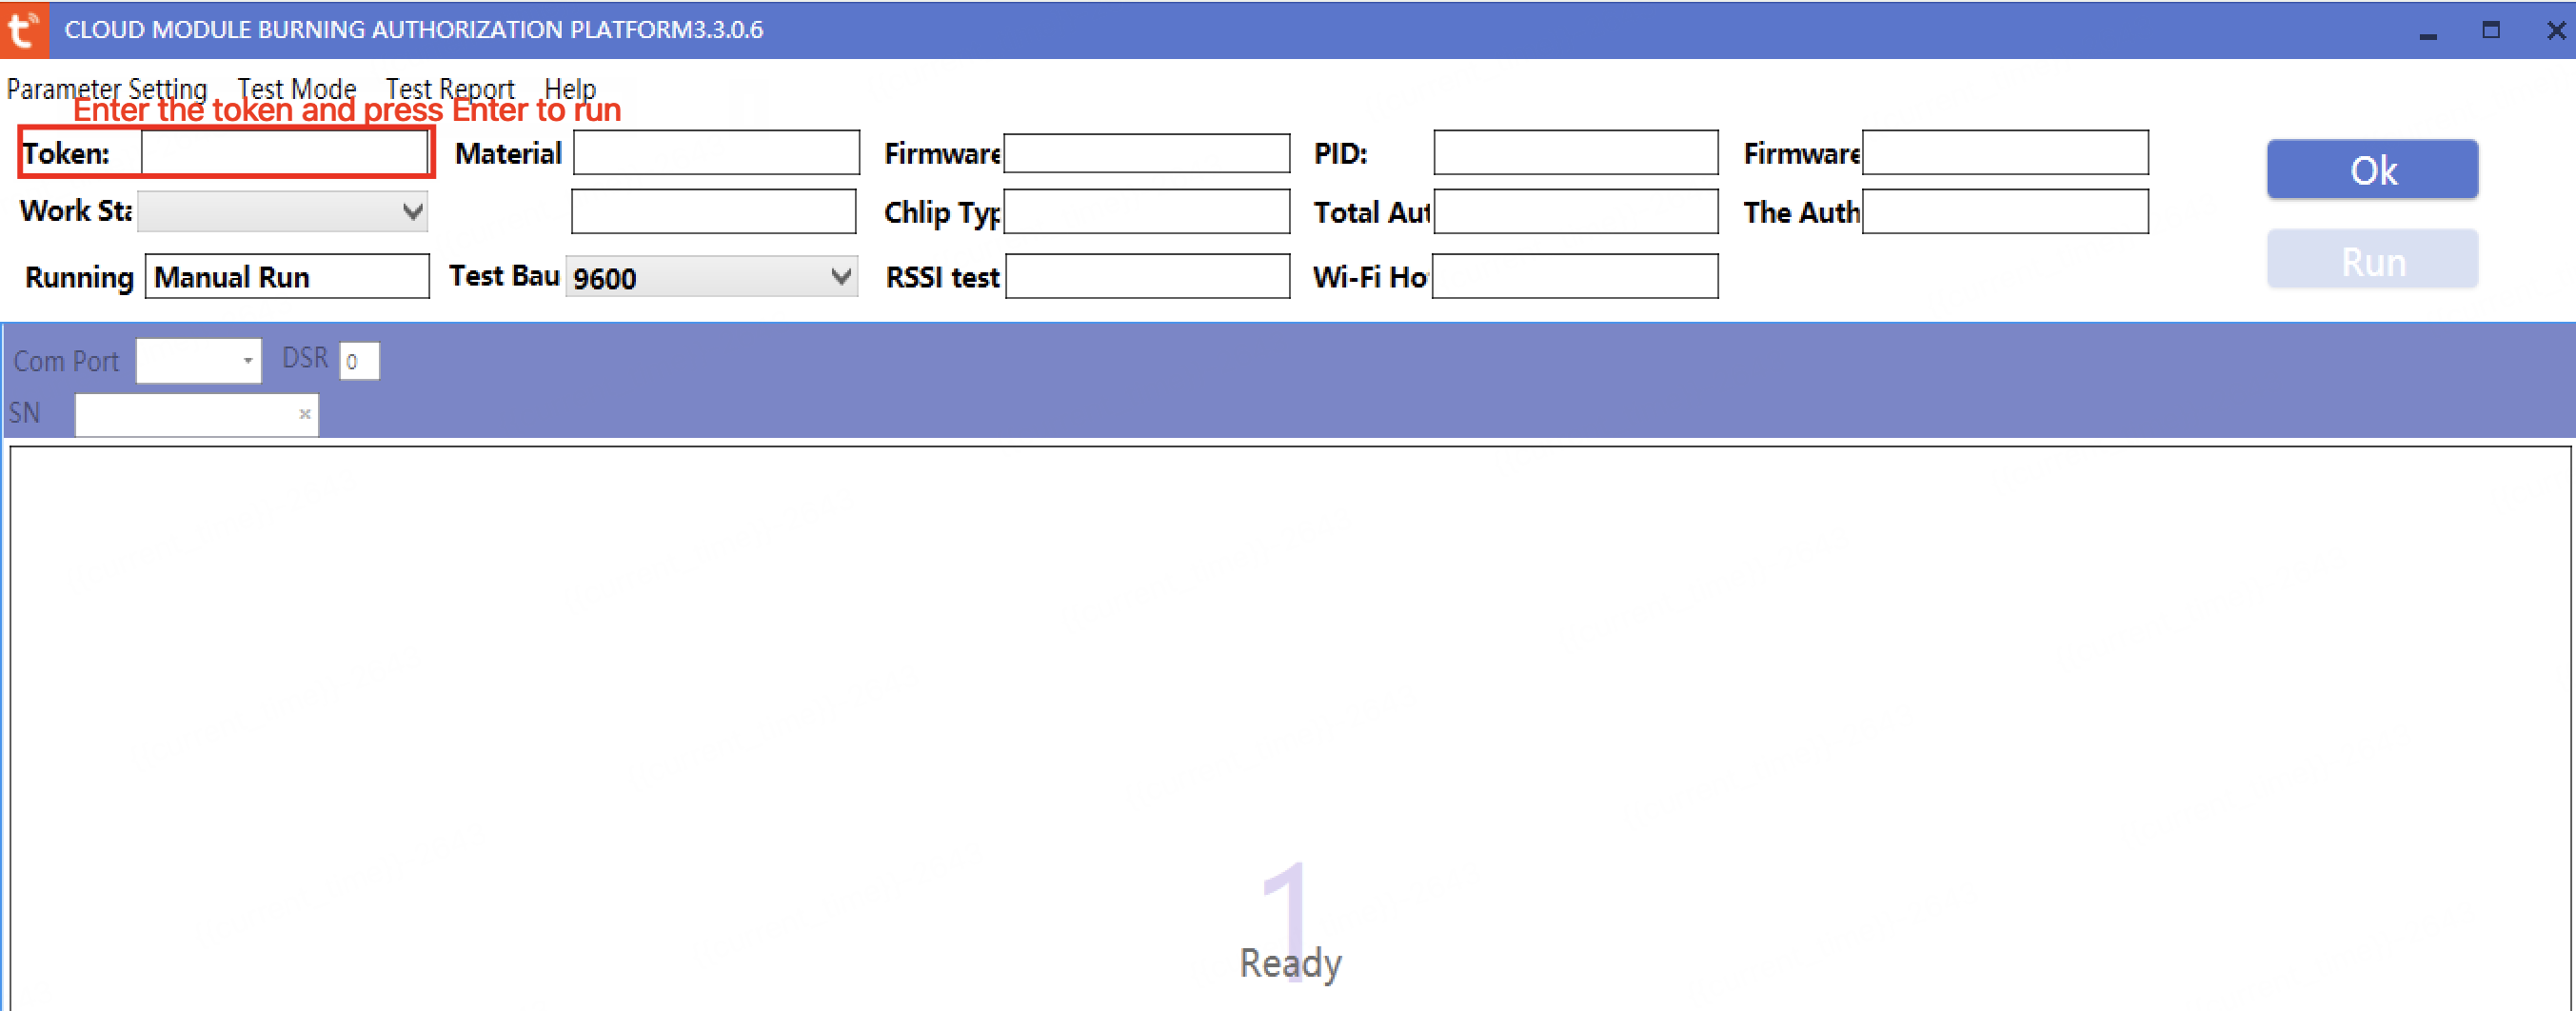
Enter the token and press the Enter key to run.
Flash firmware with chip vendor’s tool
Pins on flashing tool
| Pin | Description |
|---|---|
| Tx/Rx | User serial port, used to flash firmware and authorize the module with Tuya’s tool. |
| A15/A16 | The pin used to flash firmware with the chip vendor’s tool. |
| A15 | Rx pin to receive the chip vendor’s command (ATSC). |
| A16 | Tx pin to transmit the chip vendor’s command. |
| A_0 | Connect this pin to high level, and connect Rx to high level simultaneously to force it into flashing mode. |
| A_1 | When this pin is connected to a high level, the MAC address will be read from the flash memory. When this pin is connected to a low level or floating, the MAC address will be read from the eFuse area. The MAC address is stored in the eFuse area, so this pin must not be set to a high level. |
Wiring
- A0: Connect to a button or manually connect to the high level during flashing.
- A1: Connect to GND.
L_TX: Connect to the high-speed serial port (blue) Rx.L_RX: Connect to the high-speed serial port Tx. If a flashing tool from the chip vendor is used, the blue high-speed serial port must be used.
Output files

- Files with
DEBUGsuffix are debug files. Theaxffile can be used to locate the path before a crash. - Firmware with
flash_issuffix contains bootloader andota1(tuya). For daily debugging, you can flash this firmware using the chip vendor’s tool. - QIO firmware includes bootloader, mp (RF calibration), and
ota2(tuya). This firmware can also be flashed using the chip vendor’s tool. - UA firmware: The user area firmware for backend upload. This firmware does not include a bootloader and cannot be flashed using the chip vendor’s tool. However, when flashed with Tuya’s host software, this firmware will be pulled by the host software.
- UG firmware: The update area firmware for backend upload. This firmware does not include a bootloader and cannot be flashed using the chip vendor’s tool. However, during a remote OTA update, this firmware will be pulled by the module.
Currently, UA/UG firmware is the same for this module.
Download procedure
-
After wiring is completed as described above, open the chip vendor’s flashing port.
-
The module enters download mode.
A_0and Rx are connected to high level. -
If the log port prints the following, the module has entered download mode. At this point, close the logging port because it shares the same interface as the chip vendor’s flashing port.

-
Open the chip vendor’s flashing tool and download as shown in the image. You can obtain the tool at
vendor/rtl8720cf_ameba/rtl8720cf-os/tools/AmebaZII_PGTool_v1.2.39.exe.- Select the firmware. Choose either the firmware with
flash_issuffix or QIO firmware in theoutputfolder. You must select the firmware again after each compilation. Otherwise, the SHA-256 hash value will not be recalculated. - Deselect Keep System Data to ensure booting from the OTA1 area every time.
- Select the serial port number. It is the port occupied by the high-speed serial debugging assistant.
- Select A7_A12 for Flash Pin.
- Click Download.
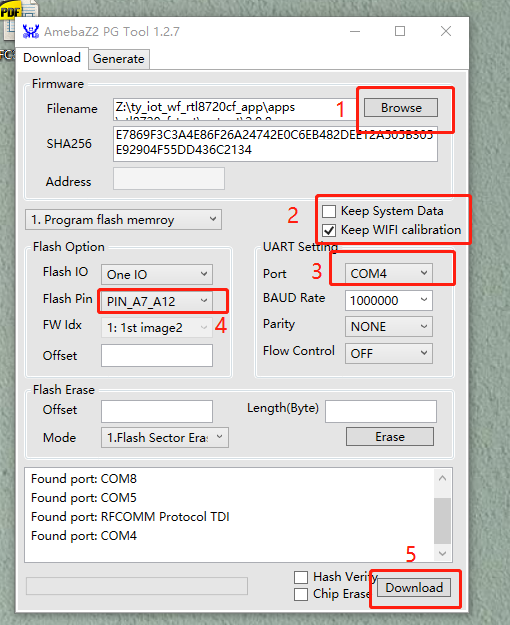
- Select the firmware. Choose either the firmware with
OTA update on the platform
How it works:
- Upload the firmware to the Tuya Developer Platform. For more information, see Manage Firmware.
- Configure the firmware version. For more information, see Update Firmware.
- Trigger the update using the mobile app.
Is this page helpful?
YesFeedbackIs this page helpful?
YesFeedback


