Account Authorization
The Tuya Developer Platform enables you to access Authorize to Collaborate Within Organization. With this feature, you can grant specific role permissions to another account. This way, the authorized account can be used as a sub-account to view and operate your menu, product ID (PID), or app, and manage the data of your account.
Scenarios
Tuya presets several common roles, such as developer, administrator, data operation, and customer service. For example, brand owner A wants to create a product and has the following requirements. In this case, brand owner A can authorize sub-accounts to collaborate within the organization.
| Requirement | Authorization within the organization |
|---|---|
| A solution provider assists in creating product solutions. | Grant the developer permission to the solution provider. |
| The buyer for brand owner A purchases modules from Tuya. | Grant the buyer permission to the buyer. |
| The marketing operations personnel and customer service personnel of brand owner A check the products that have been launched on the market. |
|
A space is a place to handle the authorization data. One space corresponds to one account of the authorizer. Authorized accounts consist of organization accounts and individual developer accounts. When you authorize other accounts, a space will be generated under the authorized account, and the authorized data and operation permissions can be seen in the space. For example:
-
Account A authorizes account B and account C, and then both account B and account C get a space authorized by account A.
-
Both account A and account B grant permissions to account C, then account C gets a space authorized by account A and account B respectively.
Permissions
Tuya provides 11 preset roles. If the preset roles cannot meet your permission assignment requirements, you can create a custom role. The permission you set needs to include the following three dimensions:
| Permissions | Description |
|---|---|
| Role type | You can assign different role types to accounts based on the scope of functions, together with the specified permissions of menus and data. |
| Menu permissions | The menu items that an authorized account can view, enter, and use. |
| Data permissions | The data that an authorized account can view, process, edit, and delete after the account accesses the specific menu. Data can be generated by products, applications, and agents. Data permissions include management permission and view permission.
|
You can edit the menu permissions of custom roles, but preset roles cannot be edited.
Prerequisites
The authorizer’s account and authorized account must be registered on the platform. Register an account in advance or get a Tuya developer account from the authorized party.
Add an authorized account
This feature allows you to grant another account the permissions to view and operate the data that belongs to your account.
-
Log in to the platform.
-
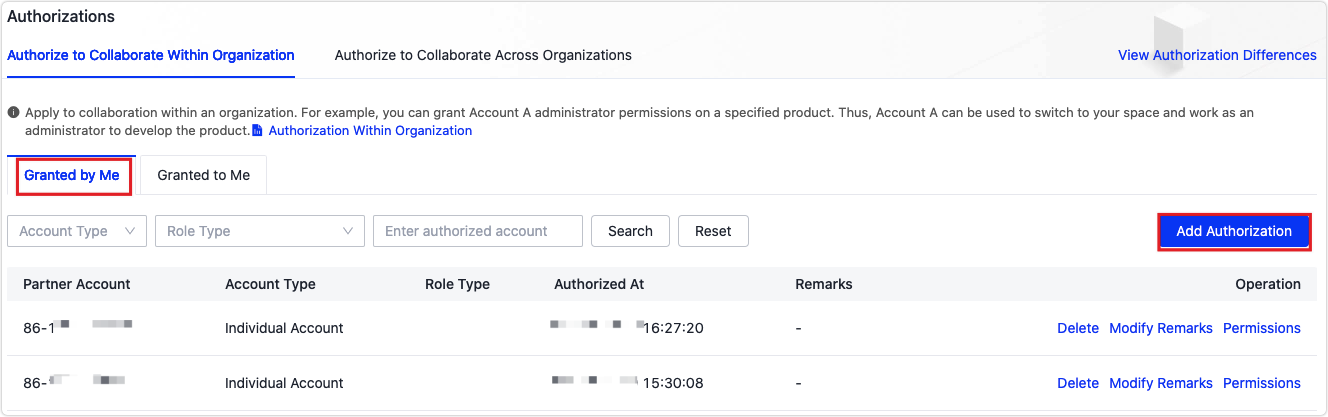
In the top right corner of the platform, choose My Space > Authorization> Authorize to Collaborate Within Organization.
-
In the Granted by Me tab, click Add Authorization.
-
In the Grant Space Permissions dialog box, enter the authorized account and click OK.
-
You are navigated to the page of Set Permissions. All products and apps available under the account space can be authorized to third parties. However, the data in the authorized space cannot be further authorized.
Method 1: Grant permissions of a preset role
- In the Role type section of the Set Permissions page, select a preset role like Data operation.
- For a preset role, menu permissions cannot be edited. Move on to select data management or view permissions in the Data Permissions section.
- Select the data permissions regarding the specified products, applications, and technical support tickets.
- Click OK.
Method 2: Grant permissions of a custom role
-
In the Role type section of the Set Permissions page, click + Custom Role.
-
On the Custom Role page, enter the custom role name, and select the menu permissions and subsidiary permissions at all levels as needed.
- Subsidiary permissions refer to permissions for other features that can be separately controlled under the specified menu. Other features other than subsidiary permissions cannot be controlled separately, but follow the parent menu to be enabled or disabled.
- To handle a certain PID or app, an authorized account shall have both the menu permissions and data management permissions of the specified PID or app.
-
Click Save at the bottom of the page and go back to the Set Permissions page.
-
(Optional) In the Menu Permissions table, click Edit to edit the menu permissions for the role.
-
Select data management or view permissions in the Data Permissions section.
-
Select the data permissions regarding the specified products, applications, and technical support tickets.
If you select All Products, All Apps, or All technical support tickets, the data permissions include those of existing and future new products, applications, and tickets.
-
Click OK.
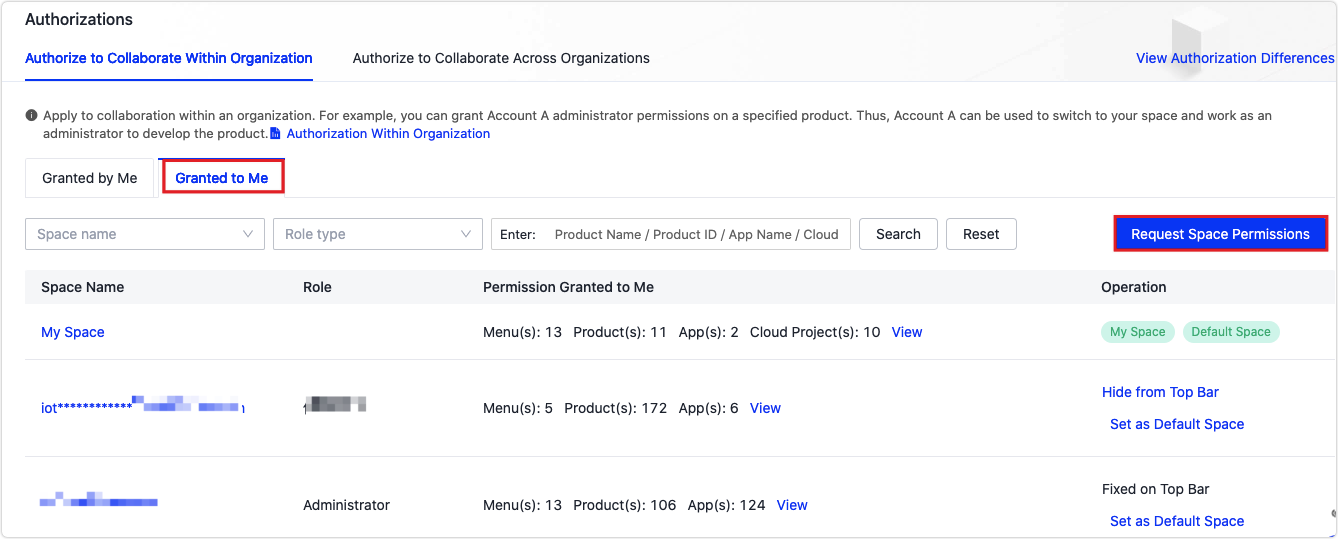
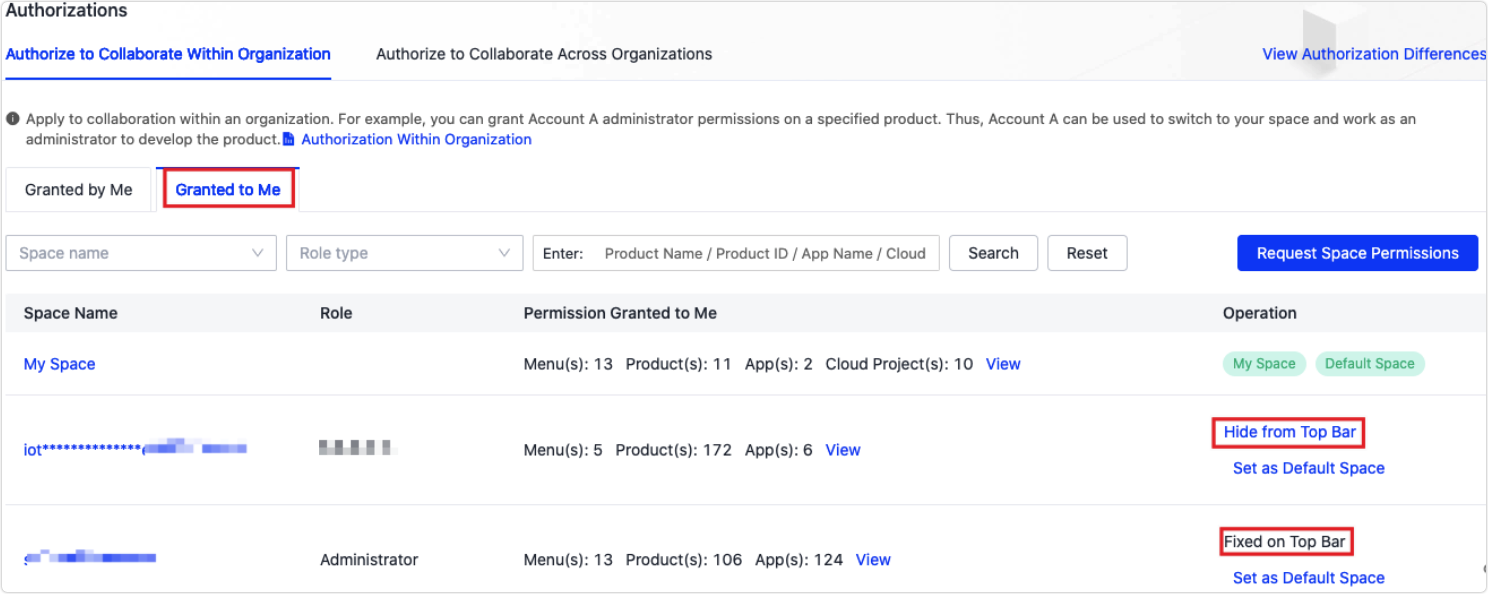
The authorized party can go to My Space > Authorization > Authorize to Collaborate Within Organization > Granted to Me to view the authorized Space. This space is displayed under the organization name of the authorizer.
Request role permissions
You can request specific role permissions in a space of another account. Specified roles are limited to Tuya’s 11 preset roles.
-
Log in to the platform.
-
In the top right corner of the platform, choose My Space > Authorization> Authorize to Collaborate Within Organization.
-
In the Granted to Me tab, click Request Space Permissions.
-
In the Request Space Permissions dialog box, enter the space owner’s IoT account.
The space owner’s IoT account can be an email address or phone number. But currently, the platform only supports a phone number in mainland China that begins with the country code
+86. -
Click Submit. After the other party agrees, you will join the other party’s space with the default role requested from Tuya. In the other party’s space, you can only view the data of the products or apps you created.
Delete an authorized account
-
Log in to the platform.
-
In the top right corner of the platform, choose My Space > Authorization> Authorize to Collaborate Within Organization.
-
In the Granted by Me tab, click Delete.
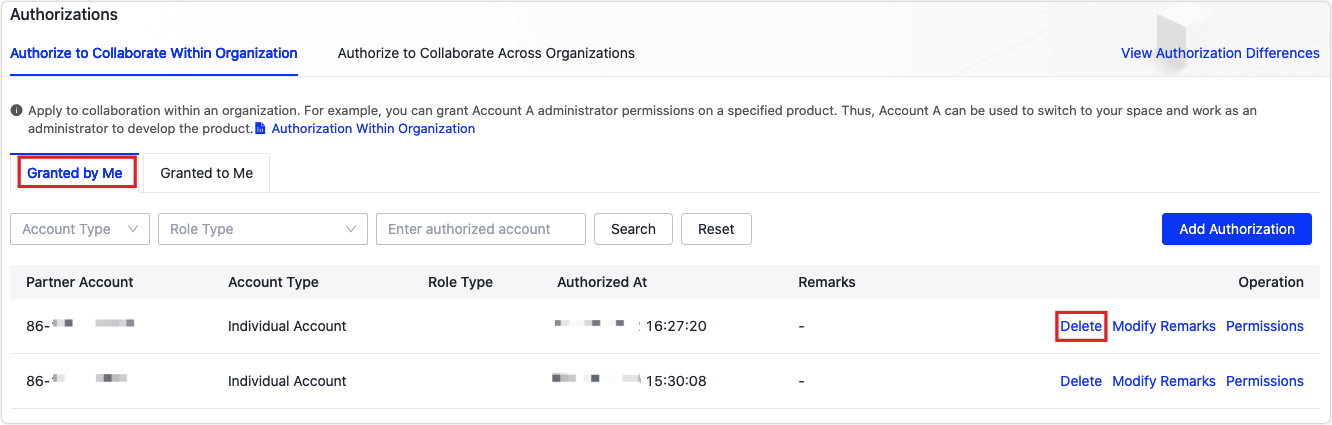
After deletion, the authorized data disappears from the authorized account.
How to use the authorized space
View and switch authorized spaces
-
Method 1:
-
Log in to the platform.
-
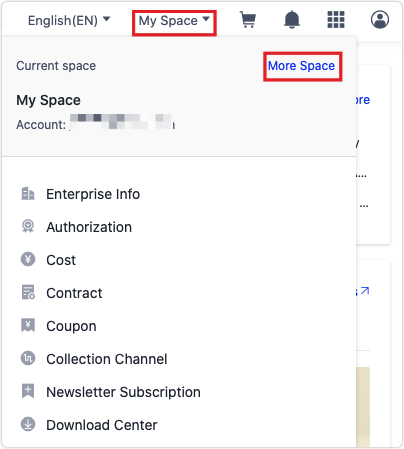
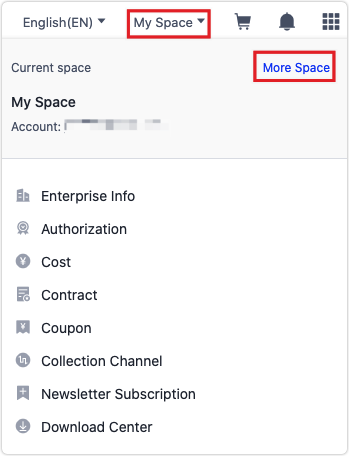
In the top right corner of the platform, choose My Space > More Space to view and switch to another space. The default space and authorized spaces are shown. Click More Space at the bottom of the space list, and you will find more details of the spaces.
-
-
Method 2:
- Log in to the platform.
- Choose My Space > Authorization > Authorize to Collaborate Within Organization > Granted to Me to view and switch between the authorized spaces.
Fix a space on the top bar
This feature allows you to show the specified spaces in the space list.
- If the total number of spaces is less than 10, the newly added spaces will be automatically displayed at the top.
- If the total number of spaces is greater than 10, you need to click More Space to see all the spaces.
Follow the steps below to fix a space on the top bar.
-
Log in to the platform.
-
Choose My Space > Authorization > Authorize to Collaborate Within Organization > Granted to Me.
-
Click Fixed on Top Bar or Hide from Top Bar in the Operation column to designate the display status of a space.
-
Go back to the platform.
-
In the top right corner of the platform, choose My Space > More Space to view the list of spaces on the top bar.
Is this page helpful?
YesFeedbackIs this page helpful?
YesFeedback


