Flash Full Firmware
This topic describes how to flash the THP10-Z-X board with the full firmware. Log in to the THP10-Z-X backend using a serial port and then proceed with the flashing process. For more information, see Log in via Serial Port.
Back up data
To flash the firmware to the board, the flash memory is completely erased and written with the 128 MB QIO binary. Therefore, you need to back up the authorization information on the board and restore it after the firmware is flashed.
Back up authorization information
-
Run
nvram showand copy the output to your computer.Back up the following information:
country
AUTHKEY
bsn
master_mac
UUID
Back up information about the Matter protocol.
matterDacCrt-x # Device Attestation Certificate (DAC) packet fragmentation. matterDacCrt # The total number of DAC fragments. matterPaiCrt-x # Product Attestation Intermediate Certificate (PAI) packet fragmentation. matterPaiCrt # The total number of PAI fragments. matterResource-x # Resource (including discriminator and passcode) packet fragmentation. matterResource # The total number of resource fragments. matterPrivateKey-x # PrivateKey packet fragmentation. matterPrivateKey # The total number of PrivateKey fragments. matterPubKey-x # PublicKey packet fragmentation. matterPubKey # The total number of PublicKey fragments. -
After the firmware is flashed, run
nvram set <key> <value>to write the authorization information to the NVRAM. -
Then, run
nvram committo write to the flash memory.
Enter U-Boot mode
U-Boot is disabled by default. Log in to the development board backend and enable U-Boot.
Run nvram set persist.uboot.enter on && nvram commit and restart the device. During restart, press and hold the Enter key to go into the U-Boot mode.

Flash firmware
-
In the terminal, set the
serverip(the IP address of your computer) andipaddr(the IP address of your device, defaulting to192.168.1.55). Runprito view IP addresses. -
After you set
setenv serverip xxxxandsetenv ipaddr xxxxand connect an Ethernet cable to the device, enter ping. Ifping xxxxx(yourserverip) is alive, it means the network works fine. -
Place
demo_fw_QIO_<version number>.binto the TFTP Server directory. Be sure you have enabled the Server service for TFTP and configure the IP address of your computer in the TFTP Setting.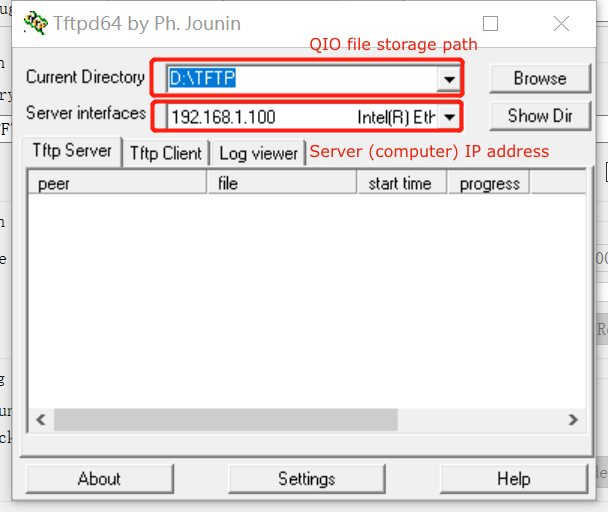
-
In the terminal, enter
tftp 0x21000000 demo_fw_QIO_<version number>.binto upload the file. Be sure the file is successfully uploaded.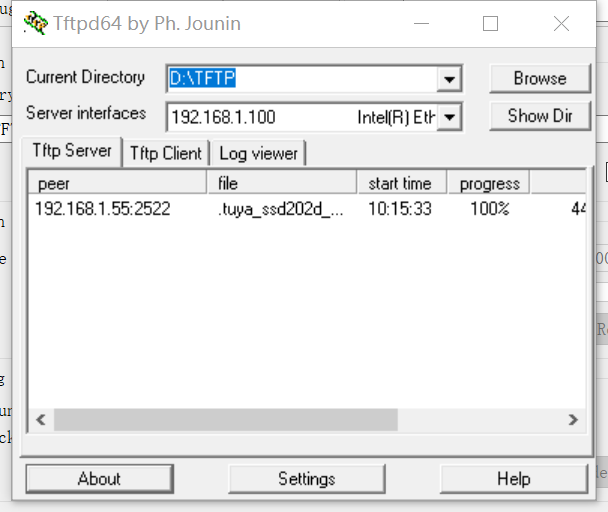
-
In the terminal, enter
nand erase.chip. -
In the terminal, enter
nand write 0x21000000 0x0 ${filesize}. -
Power off and on the gateway, or enter
resin the terminal to restart the gateway.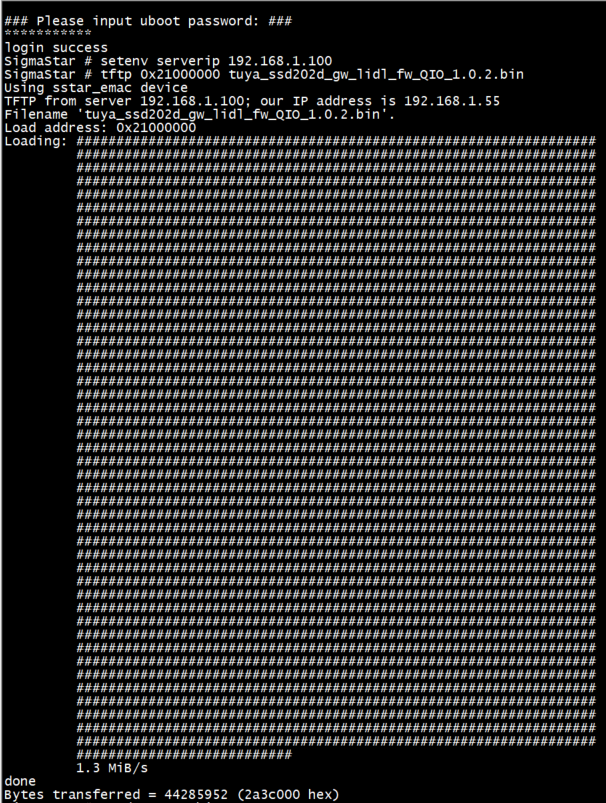
The flashing process might take a while. After firmware is flashed, restart the device.
Restore data
After you restart the device on successful flashing, you can restore data by writing the backup data to the flash memory.
Example:
# nvram set country CN
# nvram set AUTHKEY h8eHMxNGVCUxzsKLCd2cmgAgFwI6OUaY
# nvram set slave_mac1 105a17f3cc2b
# nvram set bsn JDCJ30UTU00009
# nvram set master_mac 105a17f3cbf2
# nvram set UUID 1420ee8d85e3a146
# nvram commit
Is this page helpful?
YesFeedbackIs this page helpful?
YesFeedback


