Integrate with Devices Using V2.0
This topic describes how to install and use the Tuya Edge Gateway (TEdge) V2.0.
Install TEdge
Currently, TEdge can be installed on Docker. The following code block shows how to install TEdge.
The current version can only run on Linux systems.
# To persist the data generated during the use of TEdge, a host directory needs to be mounted when TEdge gets started.
# Otherwise, if the container is deleted, all data generated in the use of TEdge will also be deleted.
# Example: the host directory `/var/tedge` is mounted.
sudo mkdir /var/tedge
# Install and deploy TEdge.
docker run -d --name tedge \
  -p 58090:58090 \
  -p 21883:21883 \
  -p 3000:3000 \
  -v /etc/localtime:/etc/localtime:ro \
  -v /var/run/docker.sock:/var/run/docker.sock \
  -v /var/tedge:/var/tedge \
  tuyaedge/tedge-community
Use TEdge
Initialize TEdge
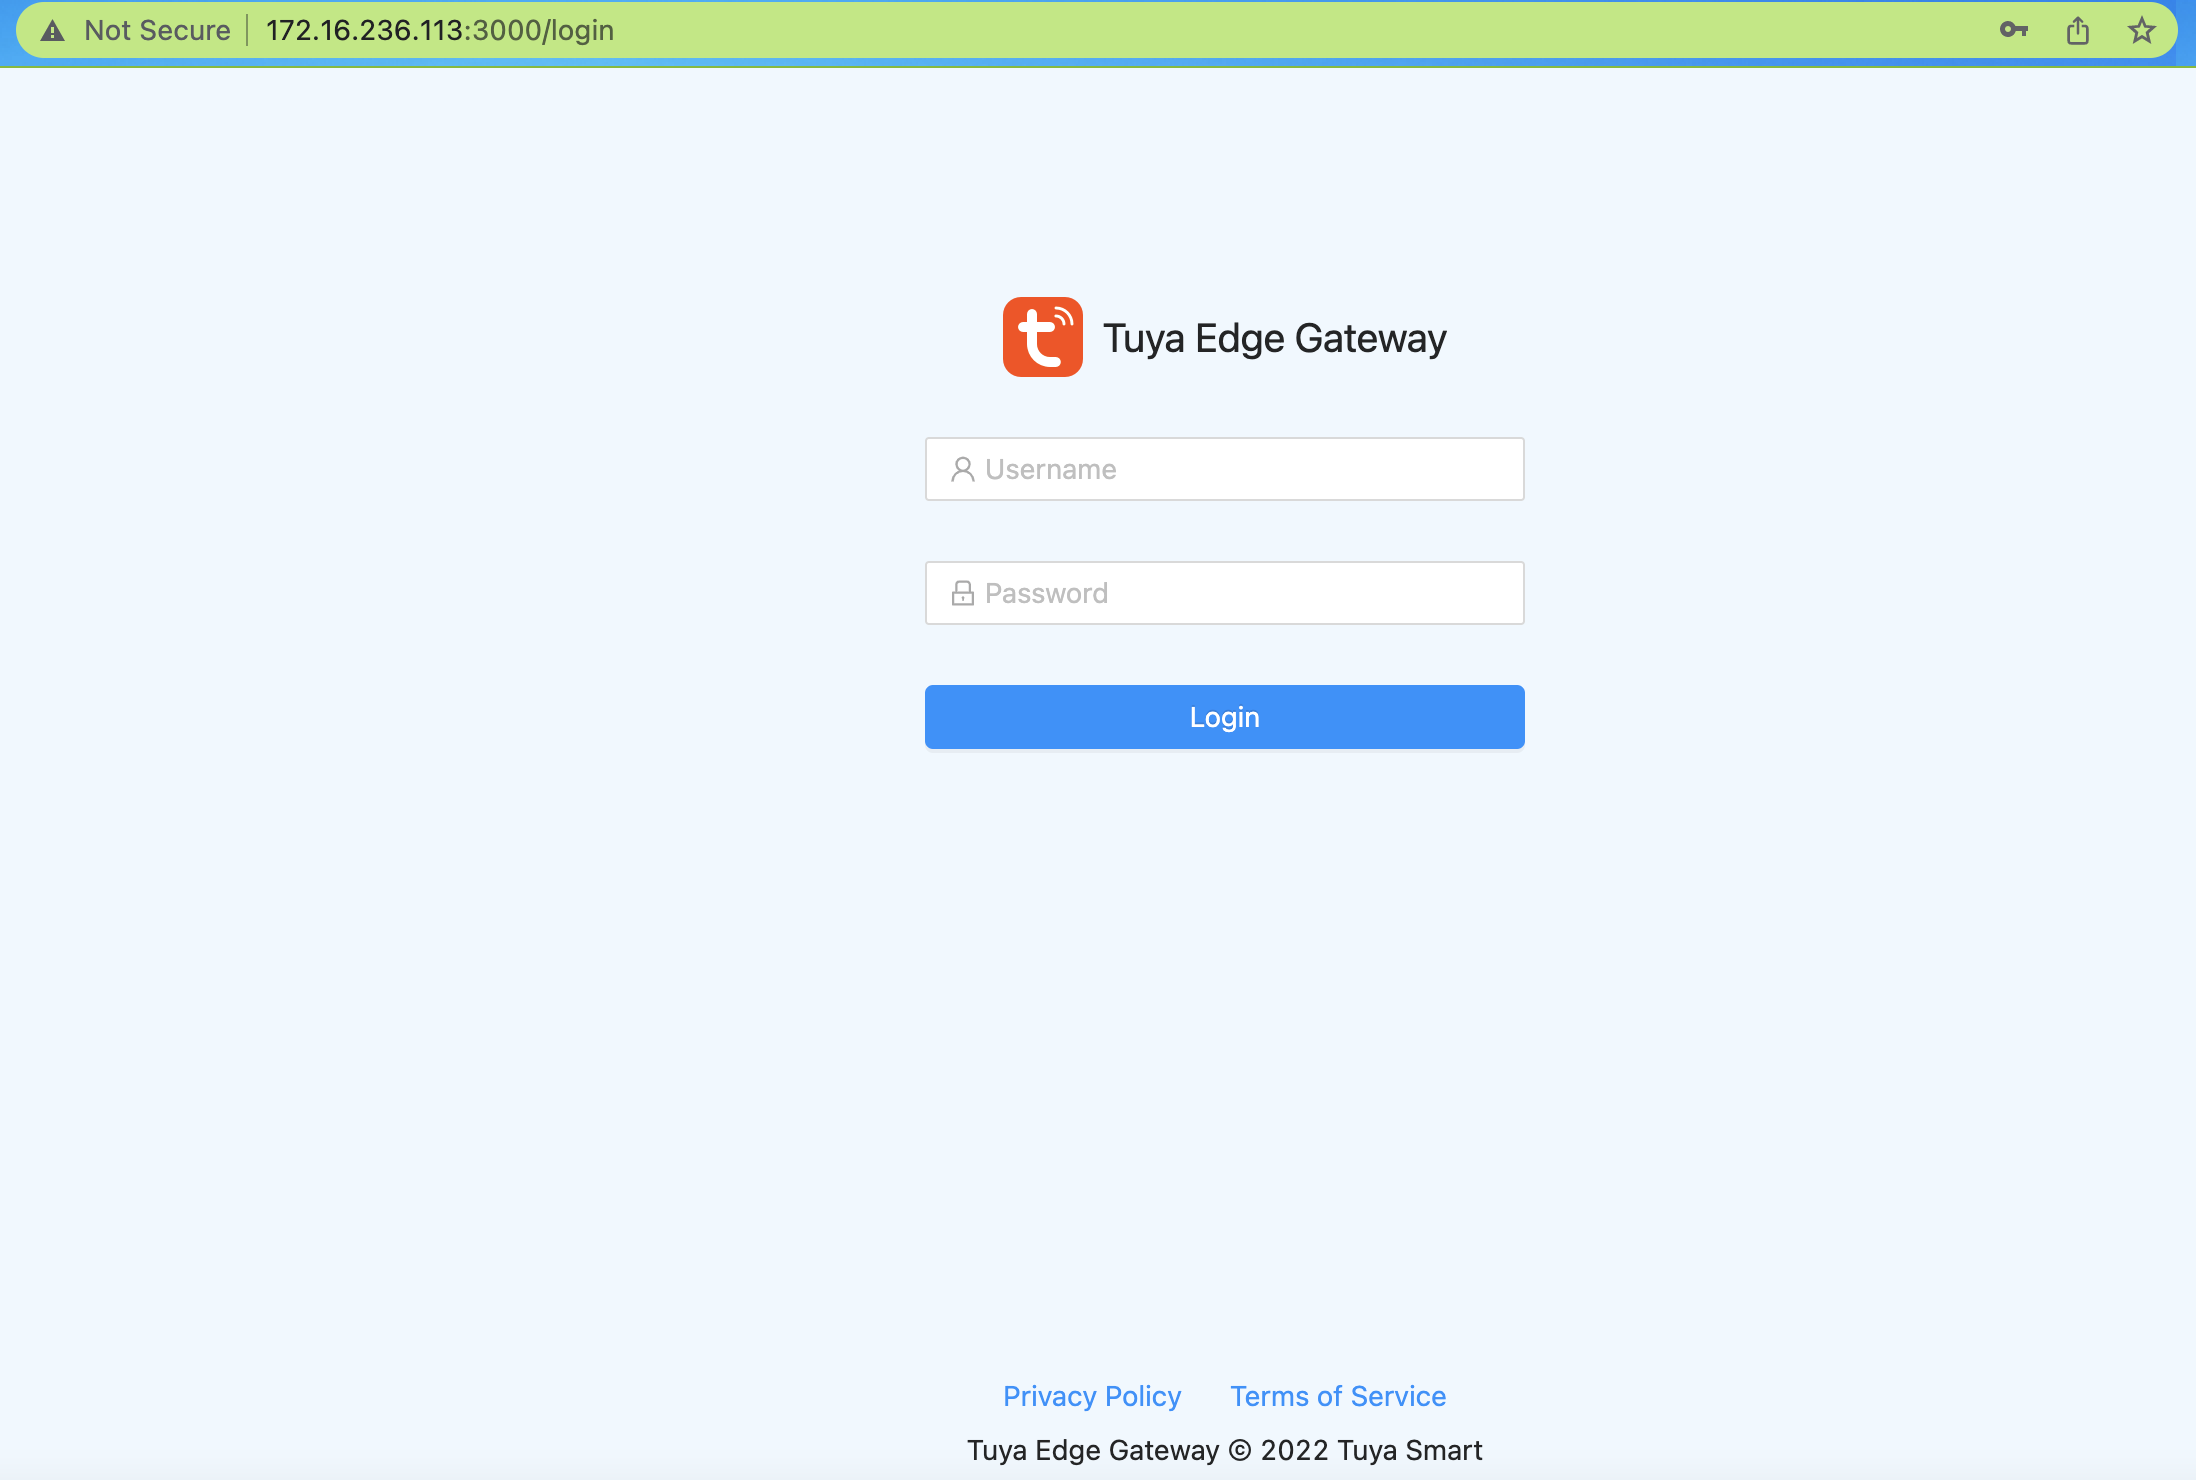
After TEdge is started, visit the URL http://TEdge host IP:3000. The default port is 3000. In the following example, the host IP address is 172.16.236.113 and the port is 3000. Therefore, visit http://172.16.236.113:3000 on the browser.
-
Set up a login password.
-
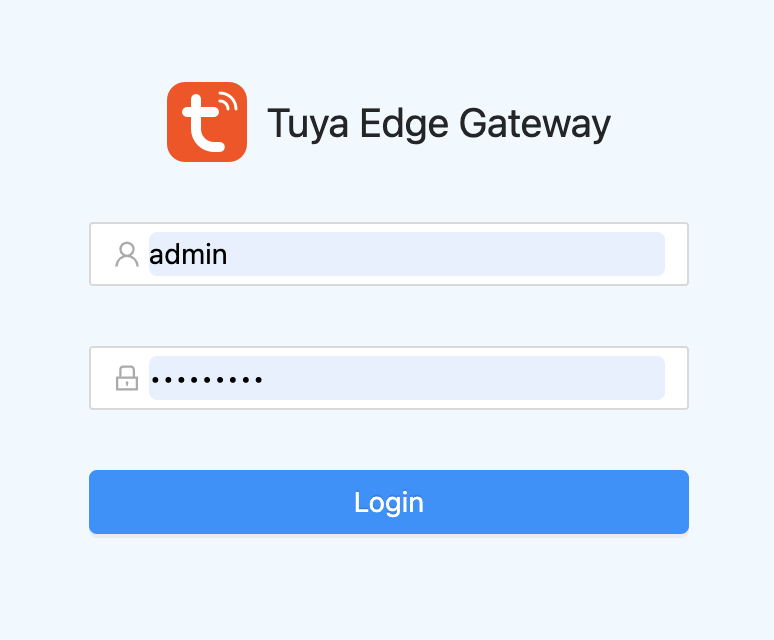
Open the login page, and enter the user name admin and the password specified in the previous step.
Activate TEdge
After the initial login, you will be navigated to the gateway activation page.
-
Before the activation process, create an edge gateway and its sub-device on the Tuya Developer Platform. The following figure shows the creation result.
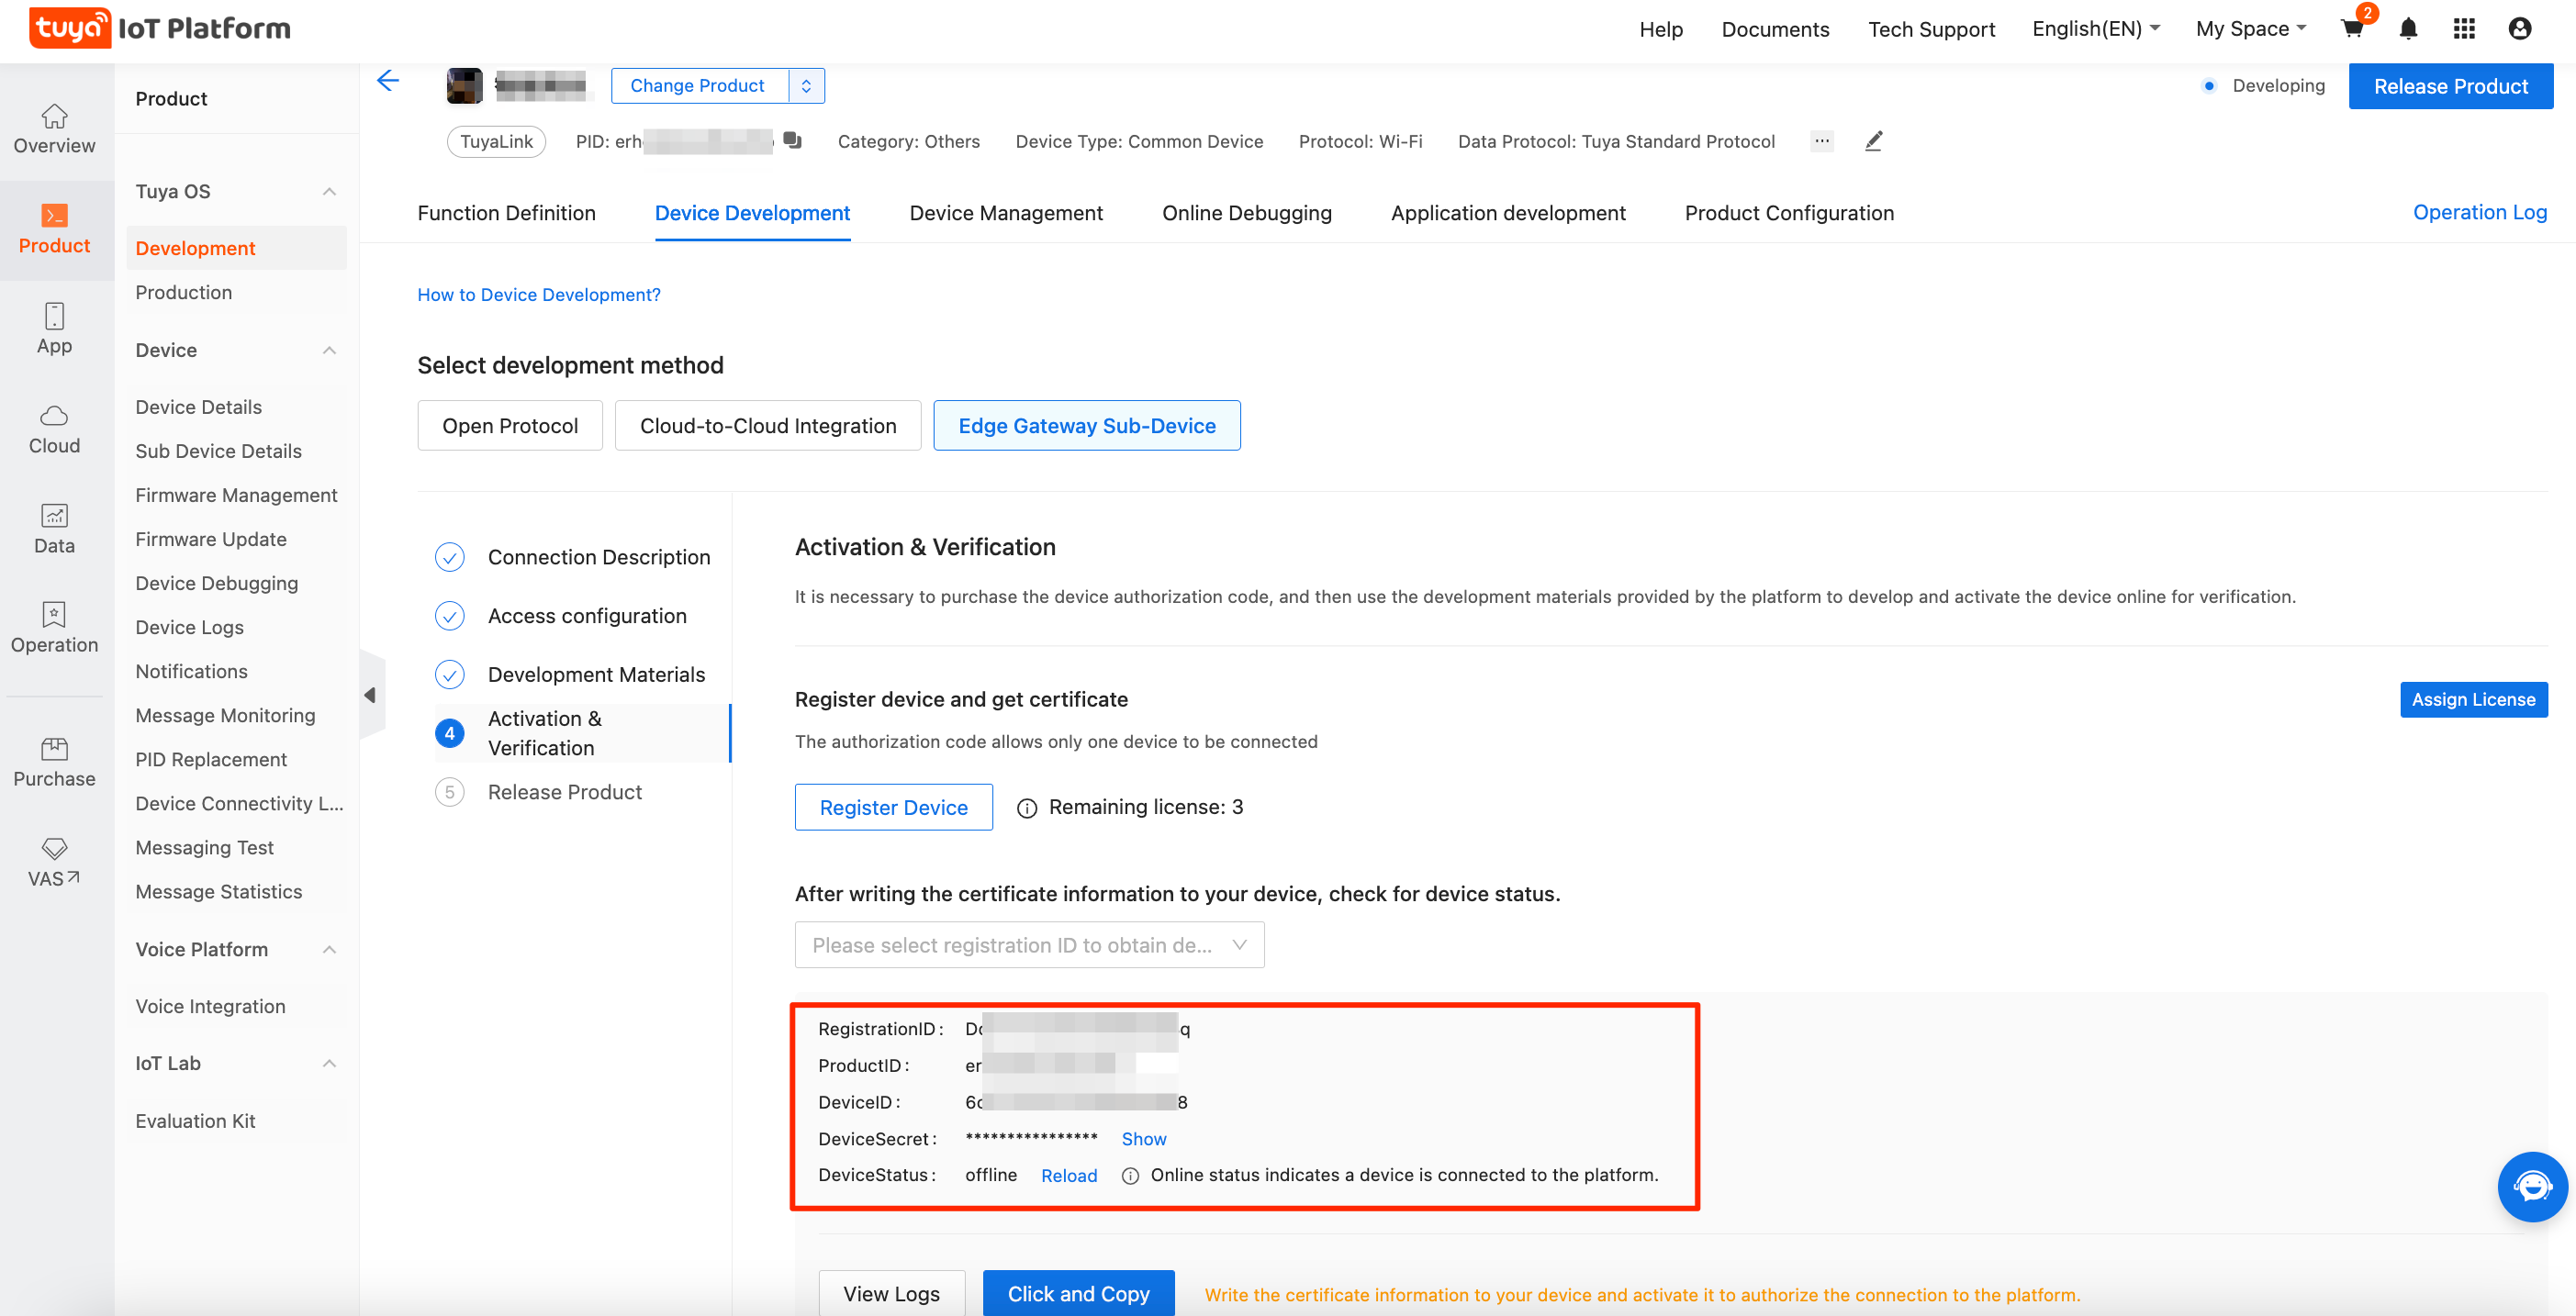
-
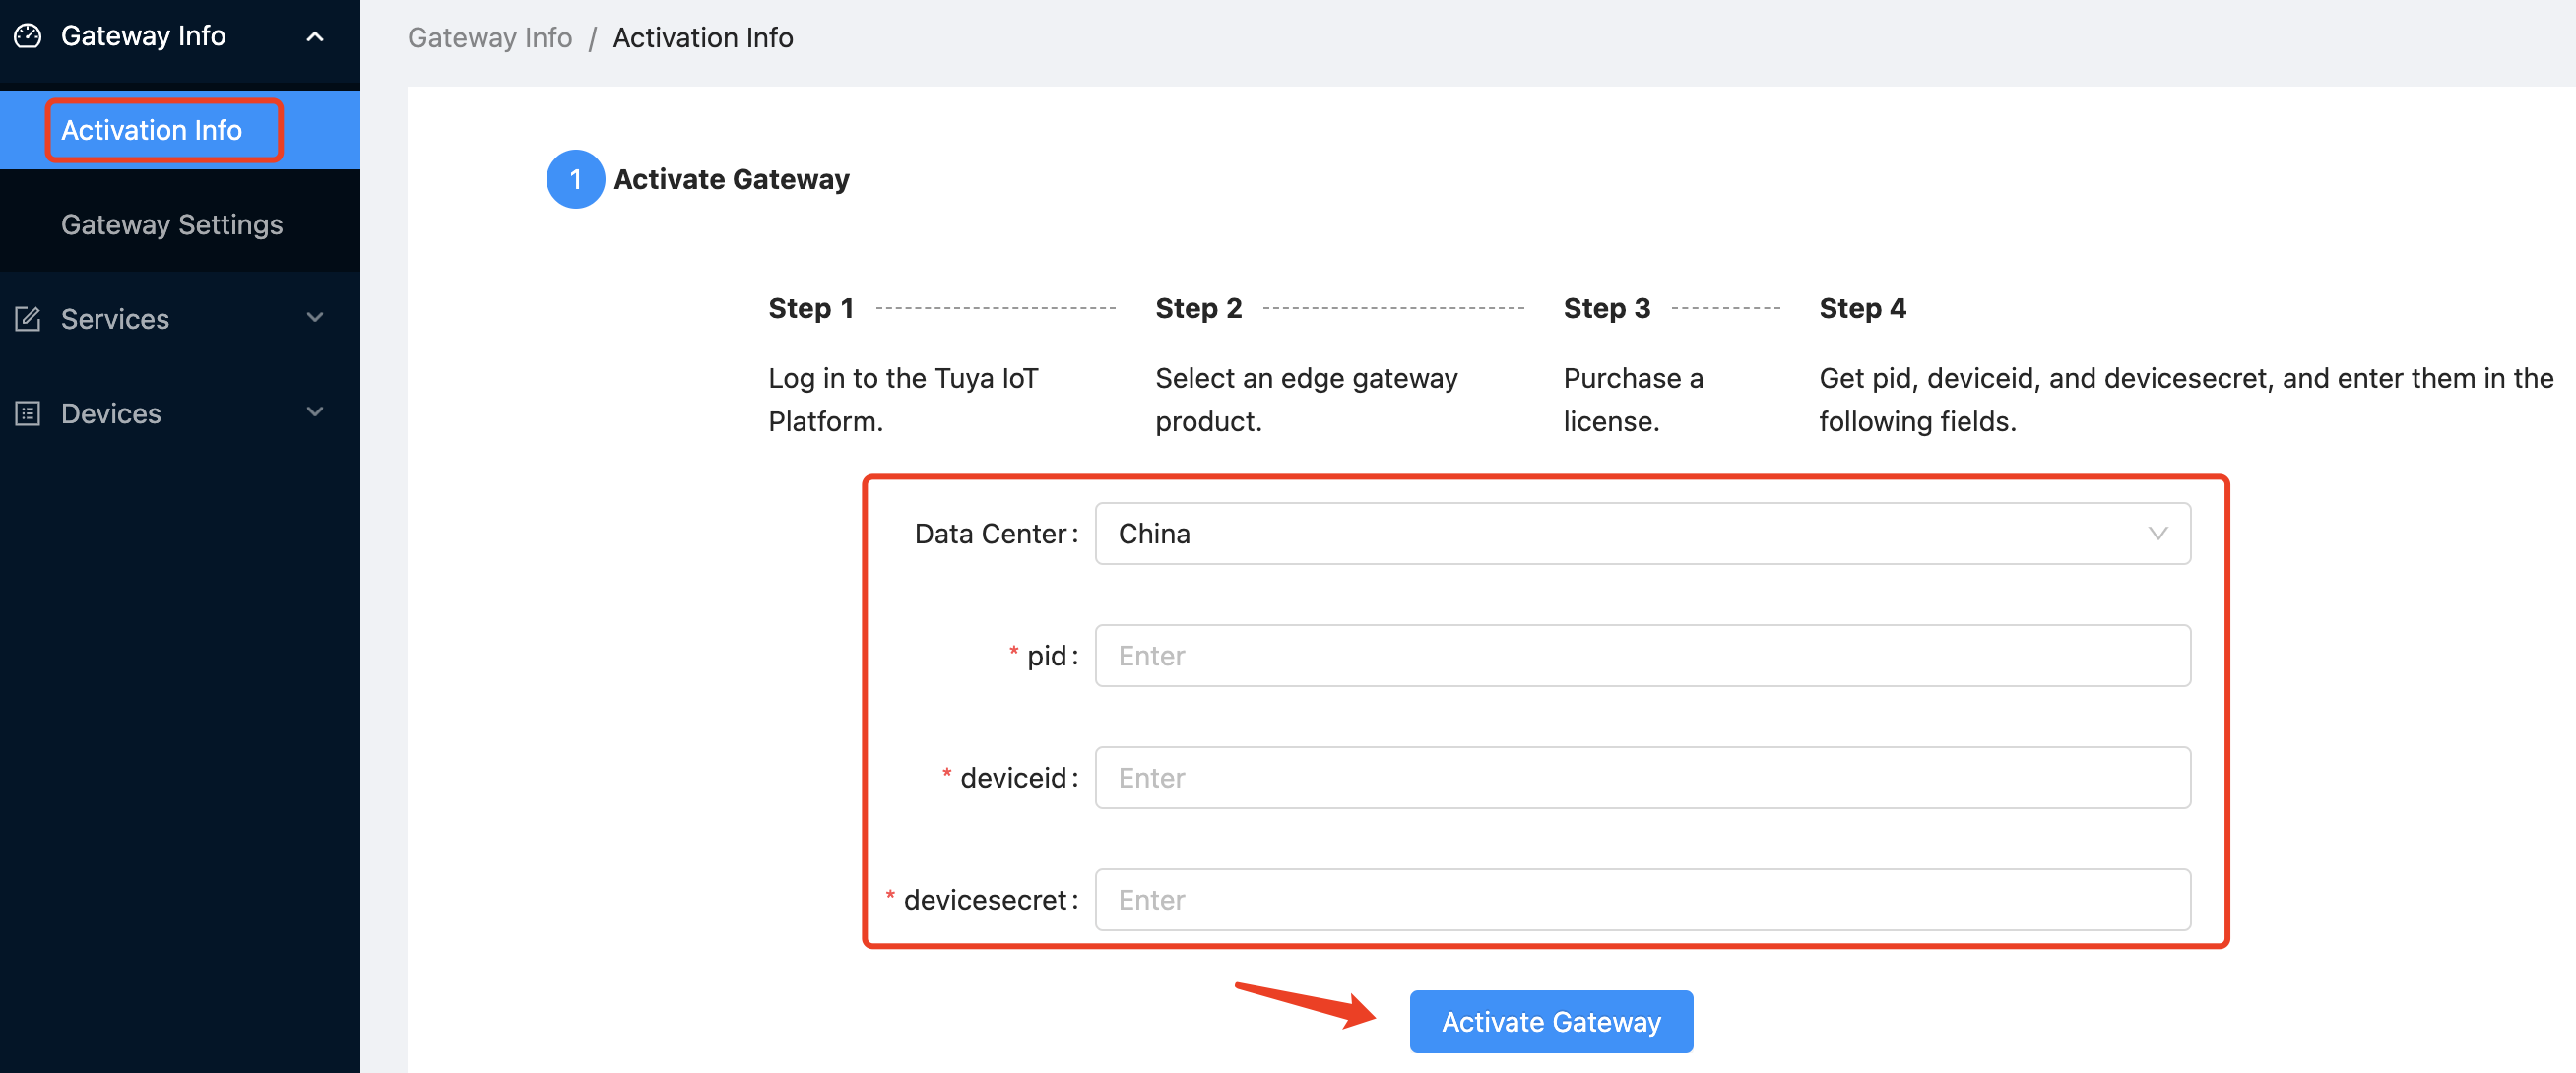
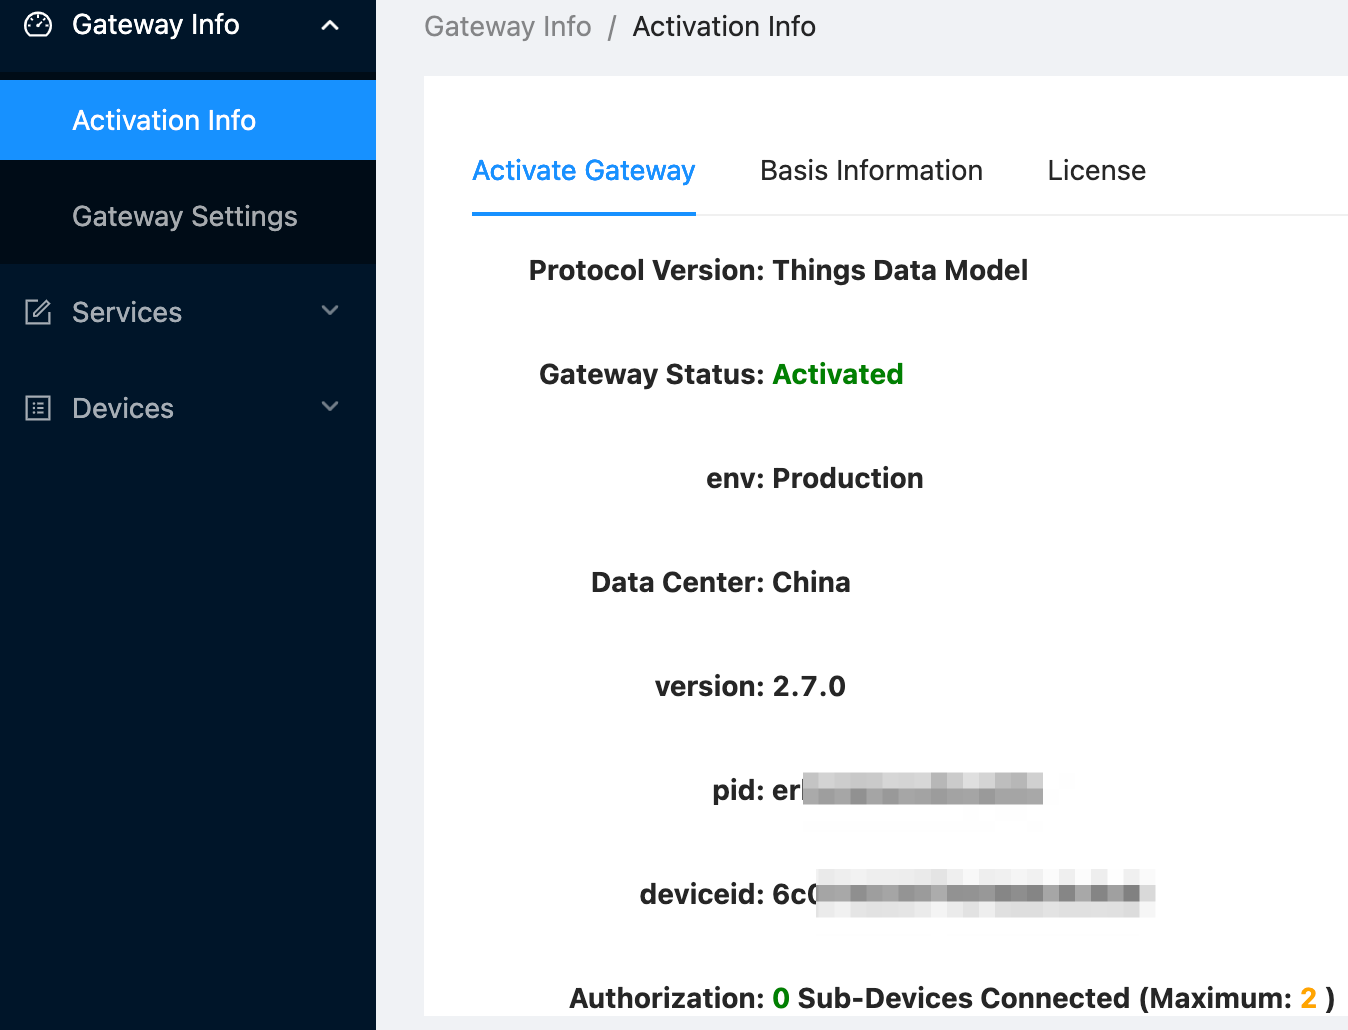
Go to Tuya Edge Gateway > Gateway Info > Activation Info, enter the details of the registered edge gateway, and then click Activate Gateway.
The activated gateway is shown in the following figure.
-
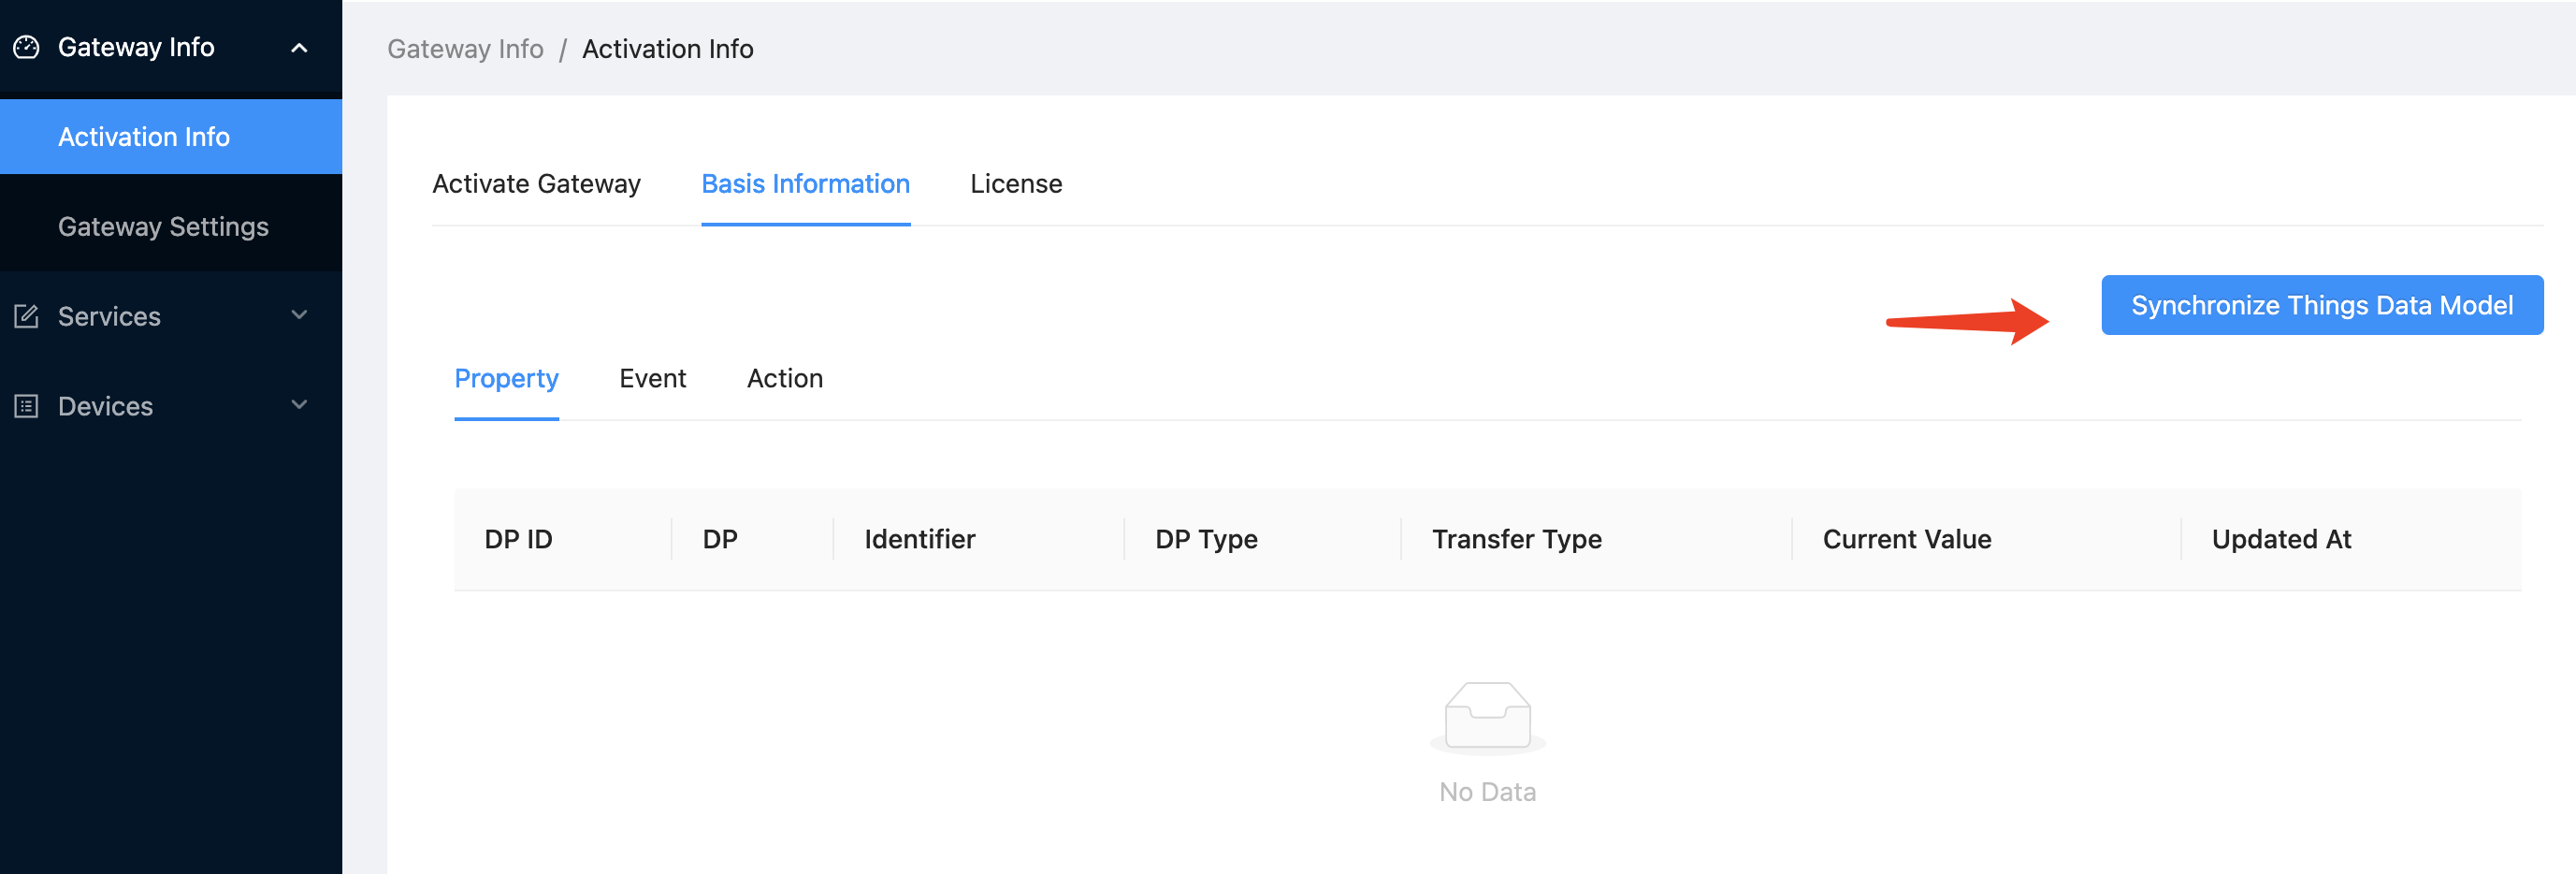
Click the Basic Info tab to synchronize the things data model. The following figure shows the edge gateway product created on the Tuya Developer Platform.

Click Synchronize Things Data Model to synchronize product information.
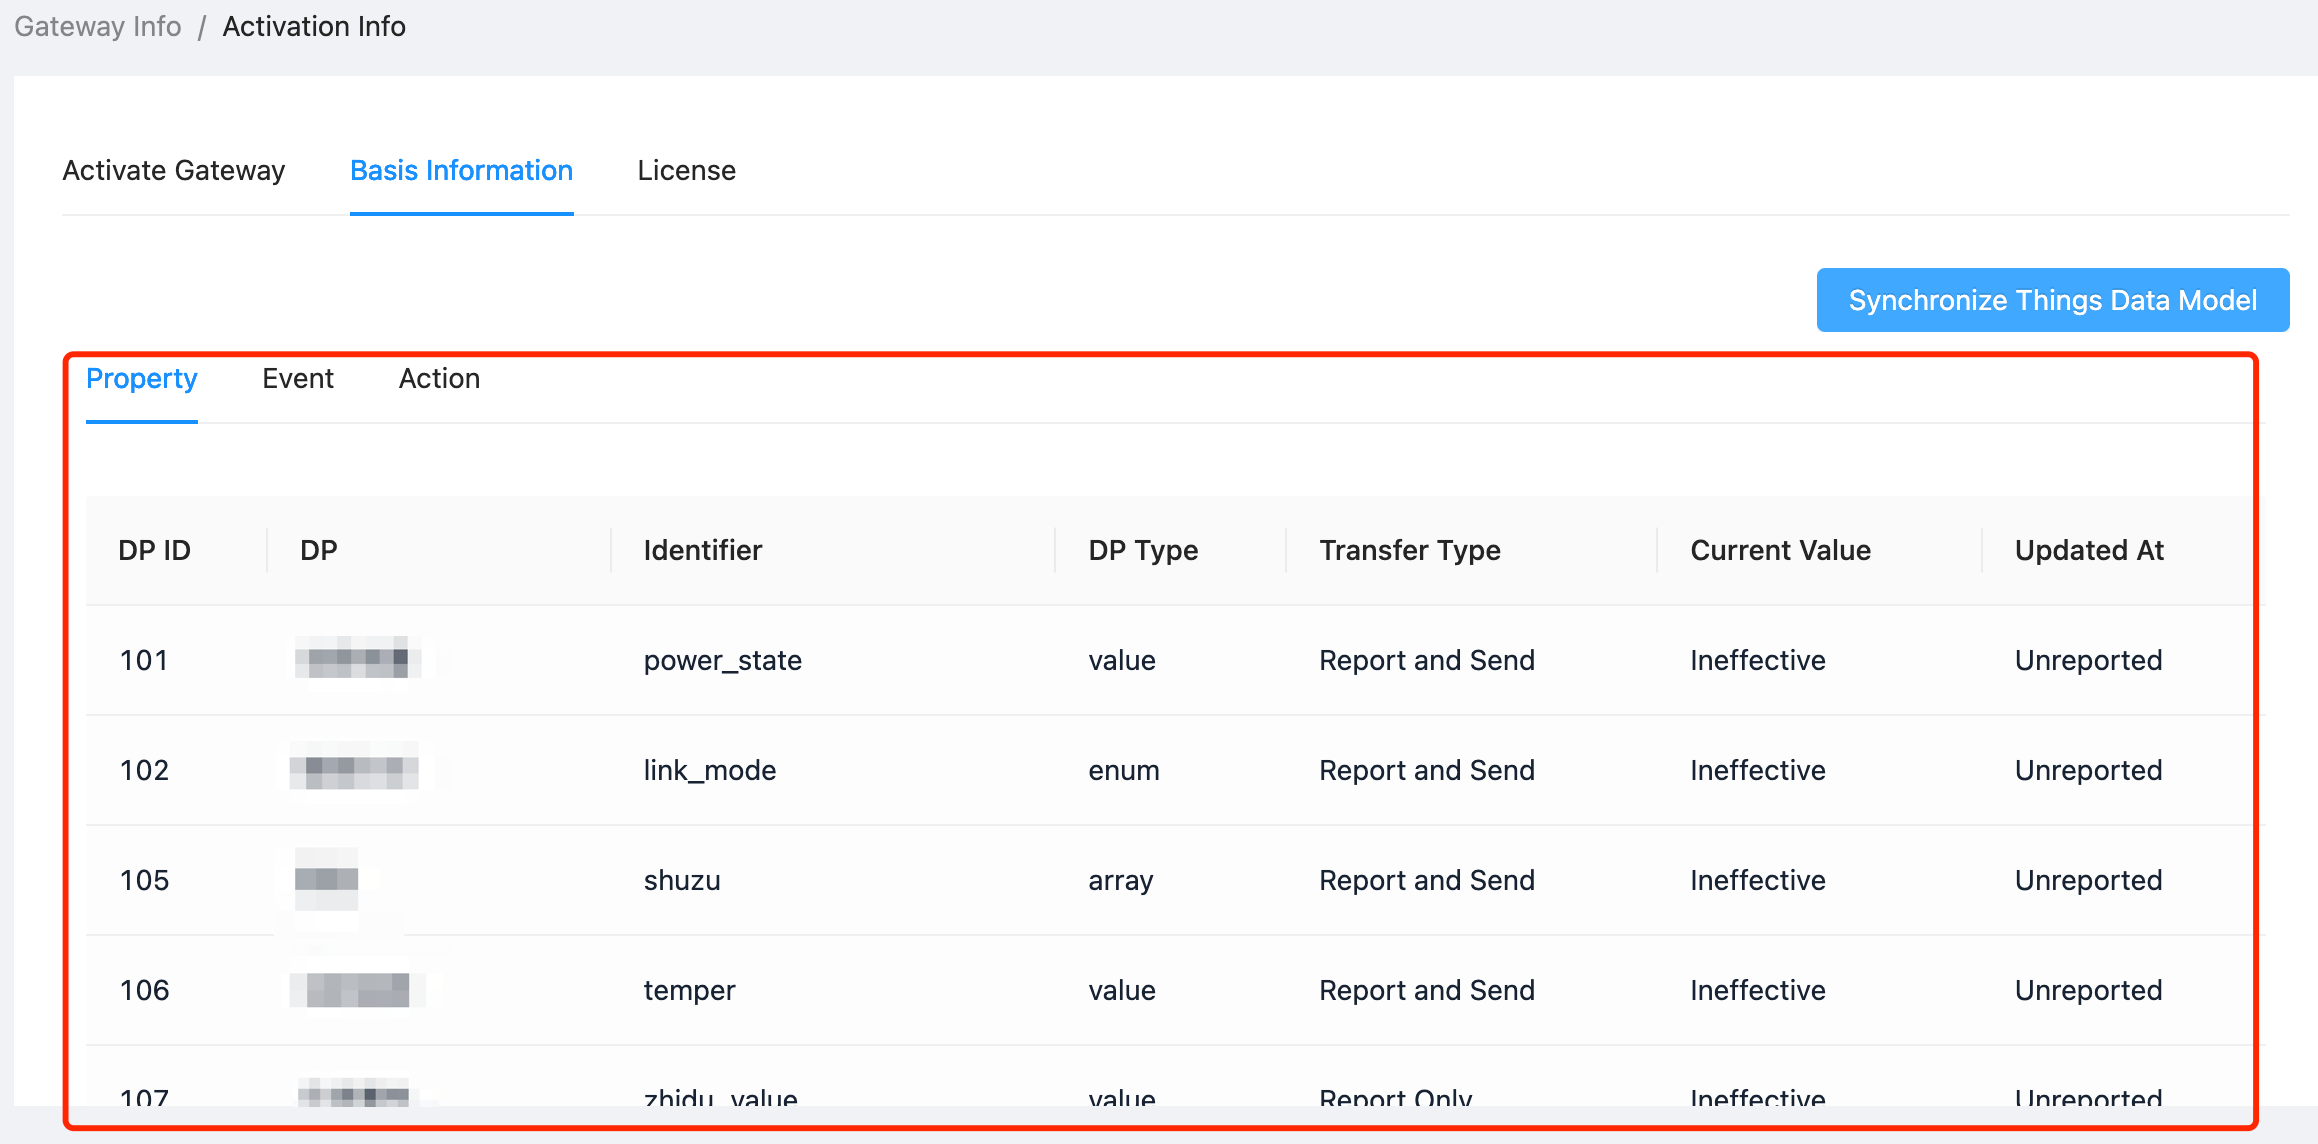
The following figure shows the synchronization result.
Purchase and manage license
-
The license for the free version of TEdge is valid for 60 days. To purchase a license, click Activation Info > License > Buy Now to contact Tuya for more help.
-
After the license is purchased, click Import License to bind the gateway with the license.

Add driver and product
-
In the left-side navigation pane of the Tuya Edge Gateway, click Services > Service Images > Custom > + Create to add a service image.
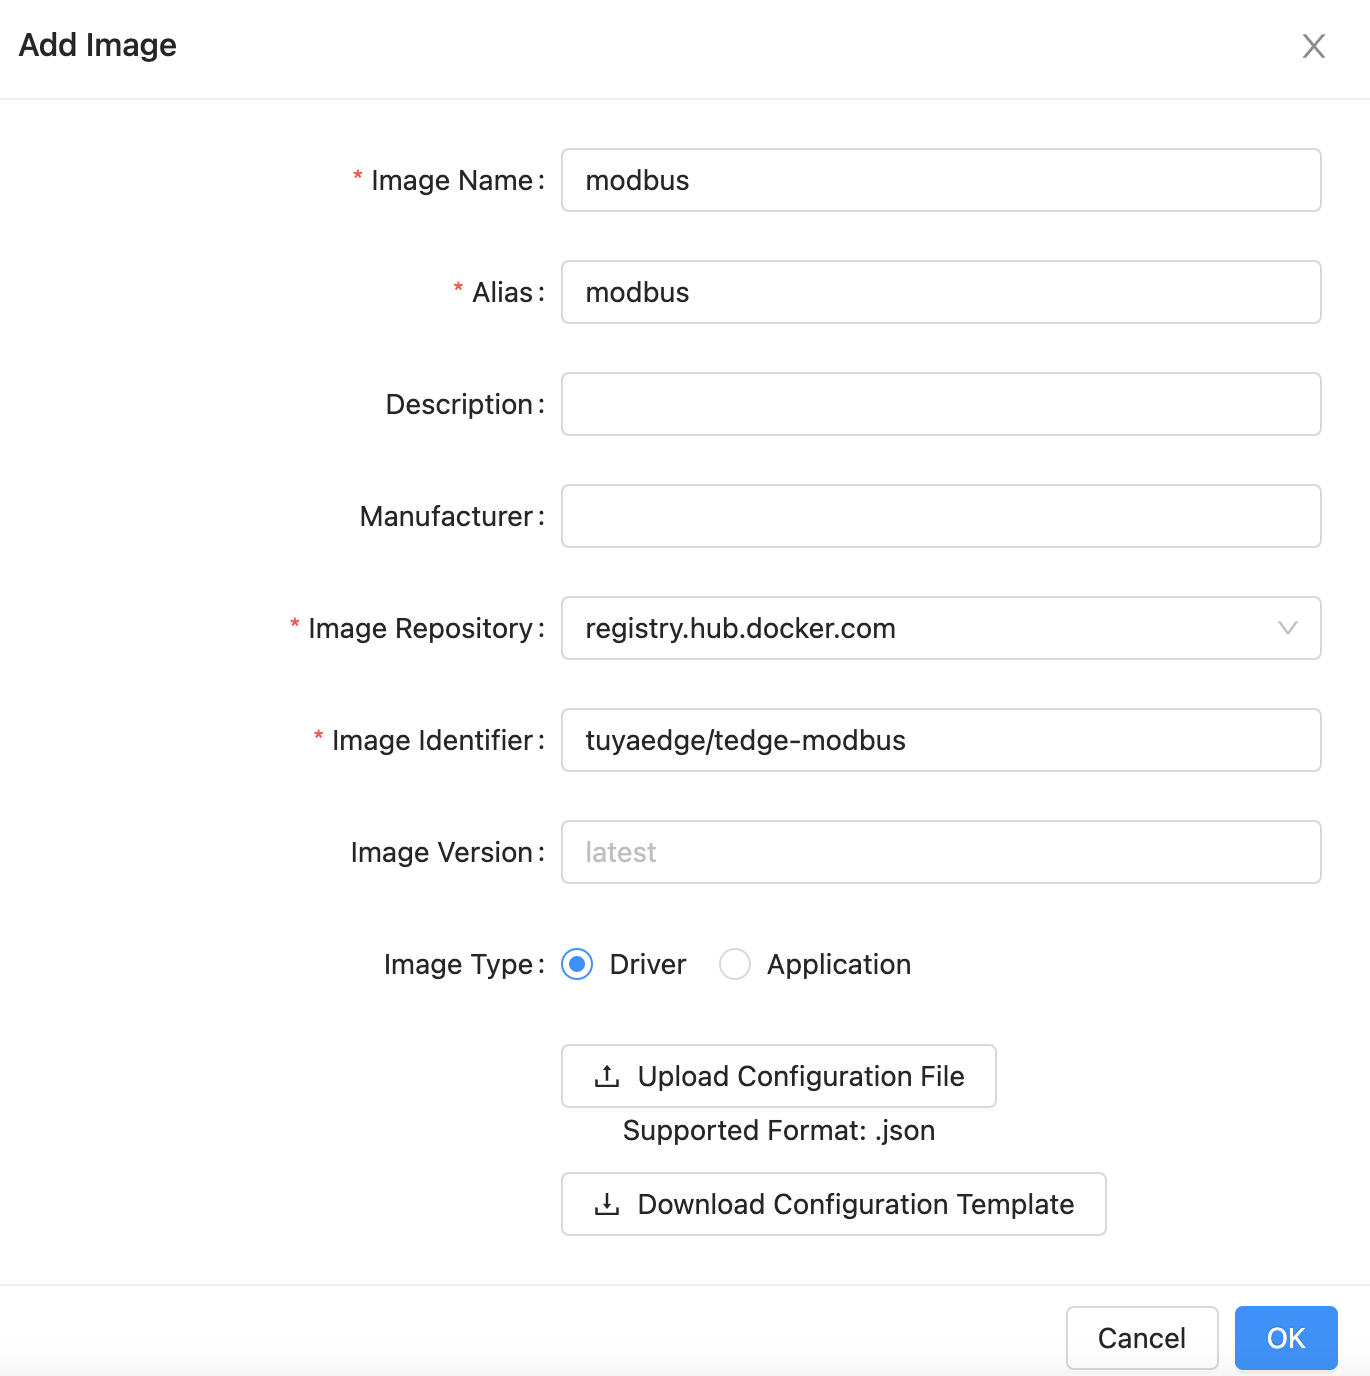
This section describes how to add a Modbus driver.
- Image Name: modbus
- Alias: modbus
- Image Repository:
registry.hub.docker.com(Docker Hub repository) - Image Version: latest
- Upload Configuration File: Upload the Modbus driver image. The Modbus driver requires additional configurations of data points. You need to upload a configuration file.
{ "deviceServer": {}, "deviceProtocols": { "modbus-rtu": [ { "name": "Address", "display": "Serial Port", "type": "string", "defaultValue": "" }, { "name": "BaudRate", "display": "Baud Rate", "type": "string", "defaultValue": "" }, { "name": "DataBits", "display": "Data Bits", "type": "string", "defaultValue": "" }, { "name": "StopBits", "display": "Stop Bits", "type": "string", "defaultValue": "" }, { "name": "Parity", "display": "Parity", "type": "string", "defaultValue": "" }, { "name": "UnitID", "display": "Unit ID", "type": "string", "defaultValue": "" }, { "name": "ReportDpsInterval", "display": "DP Reporting Interval (s)", "type": "string", "defaultValue": "120" }, { "name": "DevCmdInterval", "display": "Device Command Interval (ms)", "type": "string", "defaultValue": "10" }, { "name": "IsSwapCrc", "display": "CRC Swap", "type": "select", "defaultValue": "false", "options": [ "true", "false" ] }, { "name": "EnableDevice", "display": "Enable", "type": "select", "defaultValue": "true", "options": [ "true", "false" ] } ], "modbus-tcp": [ { "name": "Address", "display": "IP Address", "type": "string", "defaultValue": "" }, { "name": "Port", "display": "Port", "type": "string", "defaultValue": "" }, { "name": "UnitID", "display": "Unit ID", "type": "string", "defaultValue": "" }, { "name": "ReportDpsInterval", "display": "DP Reporting Interval (s)", "type": "string", "defaultValue": "120" }, { "name": "DevCmdInterval", "display": "Device Command Interval (ms)", "type": "string", "defaultValue": "10" }, { "name": "EnableDevice", "display": "Enable", "type": "select", "defaultValue": "true", "options": [ "true", "false" ] } ] }, "deviceDpAttrs": [ { "name": "readFunctionCode", "display": "Read Function Code", "type": "string", "defaultValue": "" }, { "name": "writeFunctionCode", "display": "Write Function Code", "type": "string", "defaultValue": "" }, { "name": "startingAddress", "display": "Address", "type": "string", "defaultValue": "" }, { "name": "isByteSwap", "display": "Byte Swap", "type": "select", "defaultValue": "false", "options": [ "false", "true" ] }, { "name": "expandMultiple", "display": "Multiplied By", "type": "string", "defaultValue": "0" }, { "name": "endian", "display": "Endianness", "type": "select", "defaultValue": "big", "options": [ "big", "little" ] }, { "name": "length", "display": "Length", "type": "string", "defaultValue": "" } ] } -
Download the image previously added.
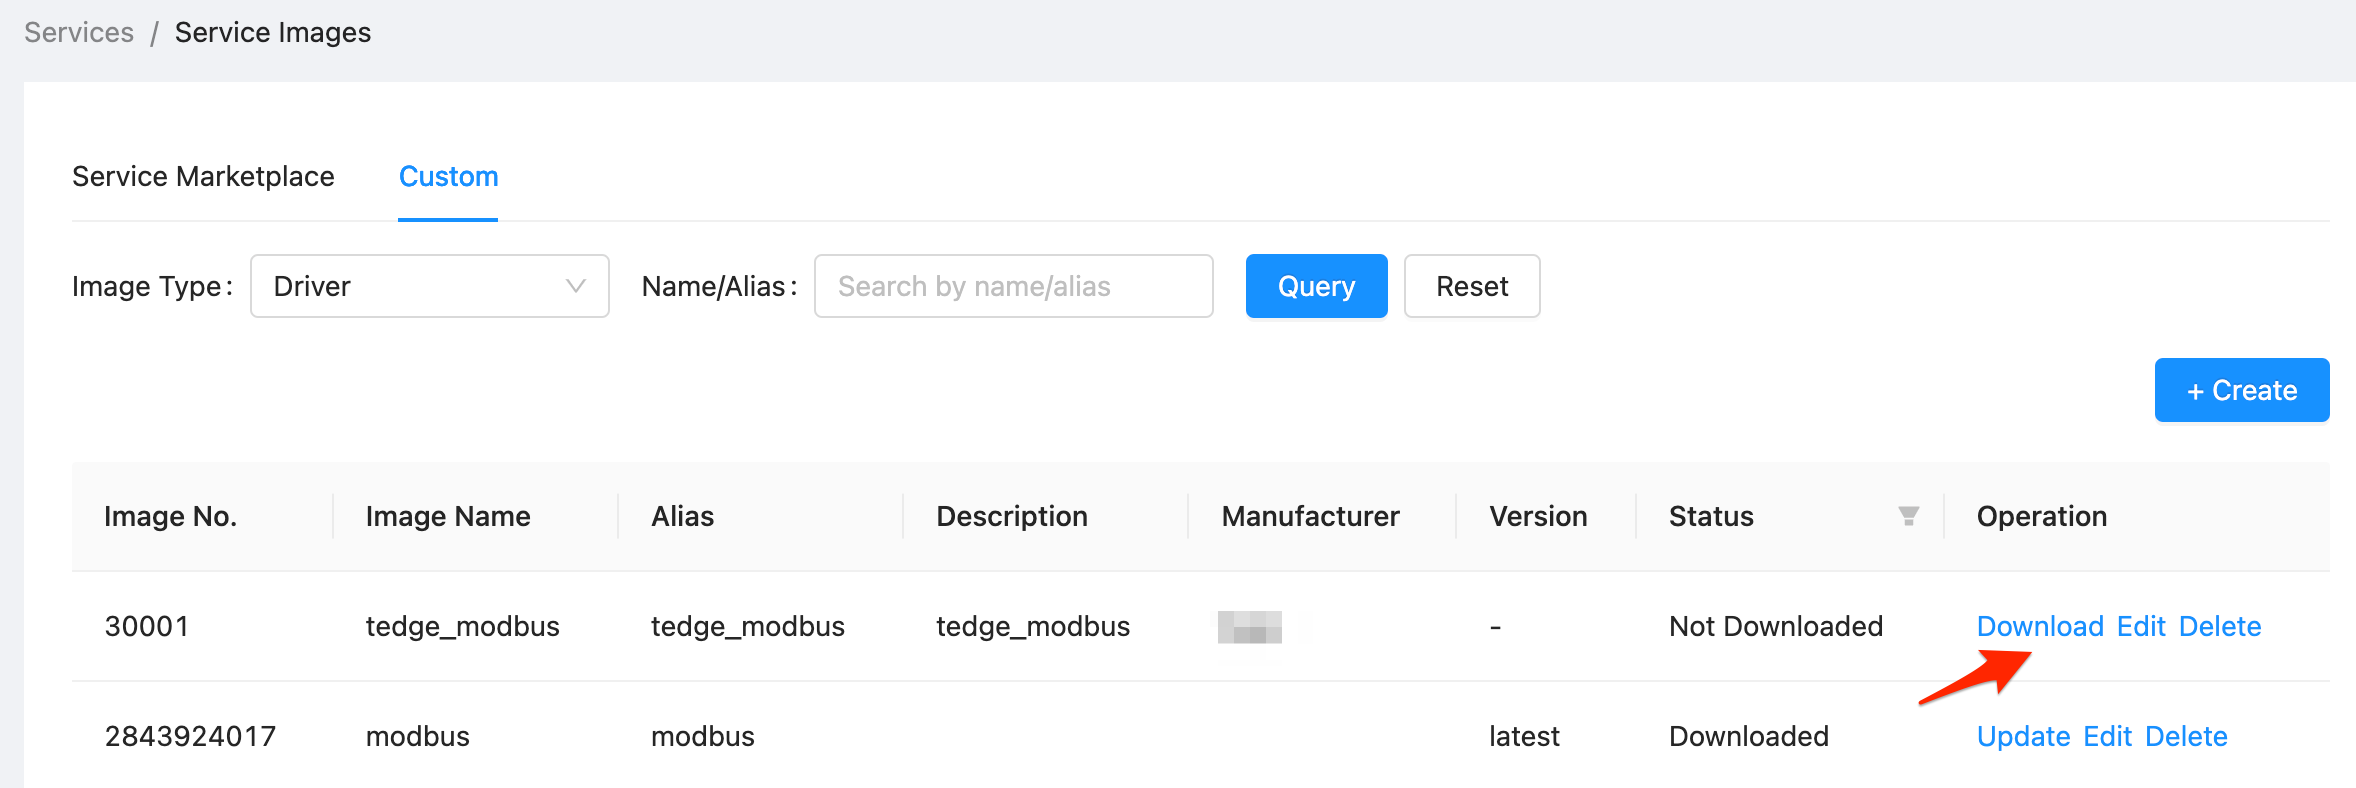
-
Go to the Tuya Developer Platform and create a sub-device product.

-
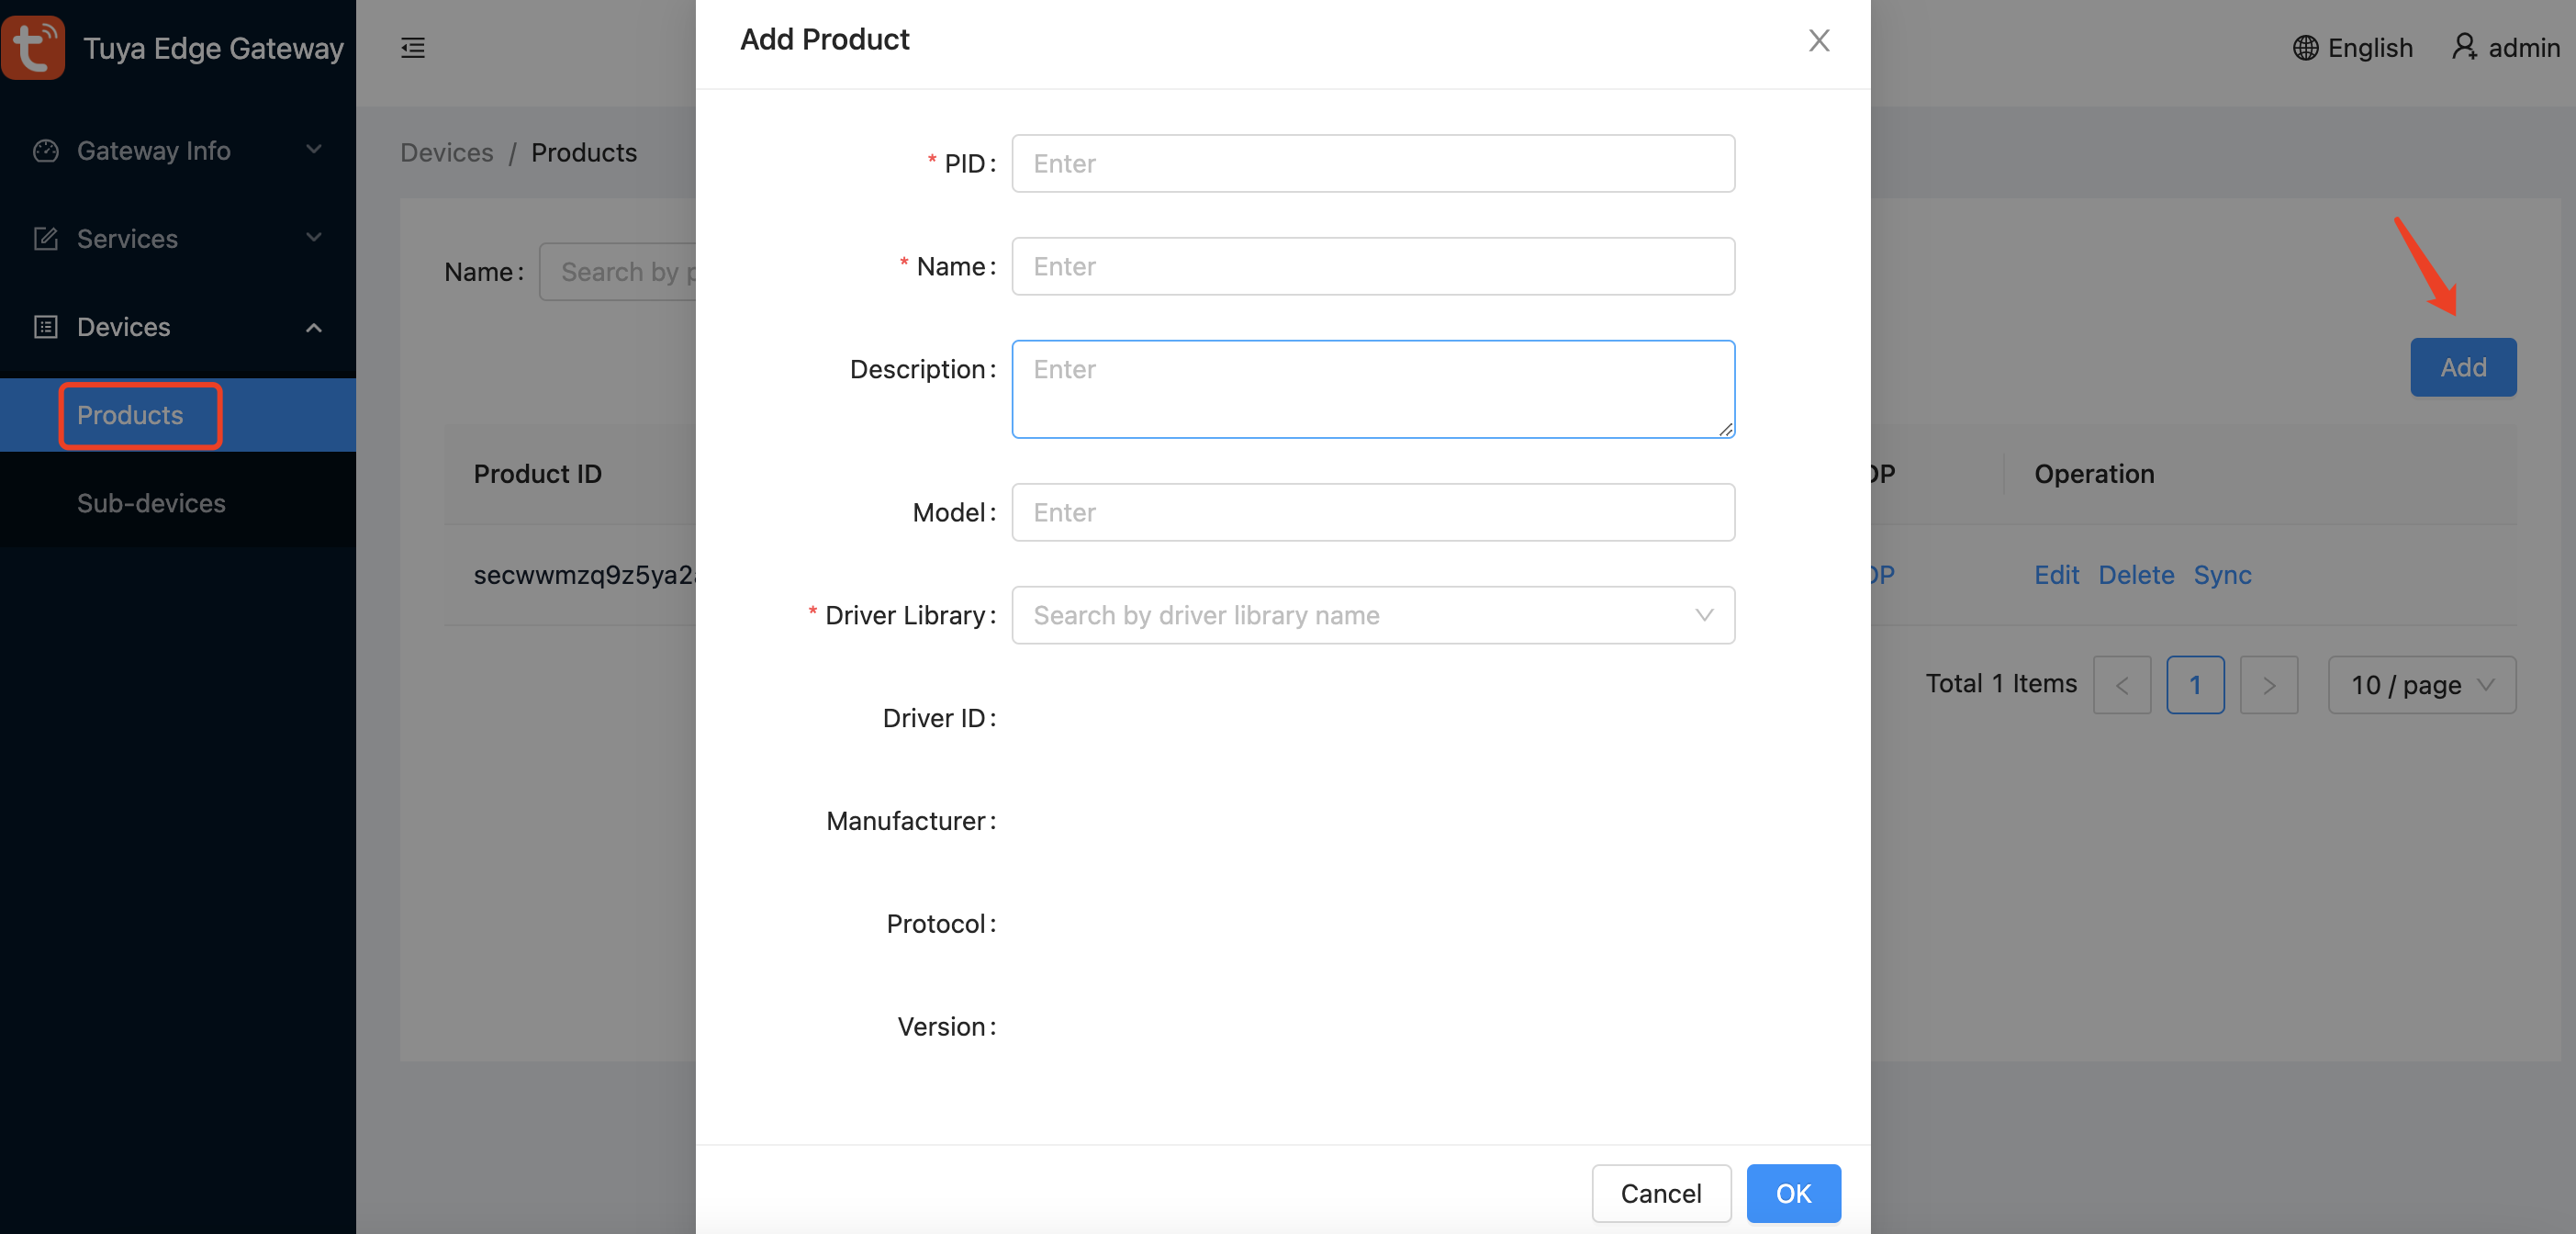
In the left-side navigation pane of the Tuya Edge Gateway, click Devices > Products > Add to add a Modbus product. Select a Modbus driver from the Driver Library drop-down list.
Add and activate device
-
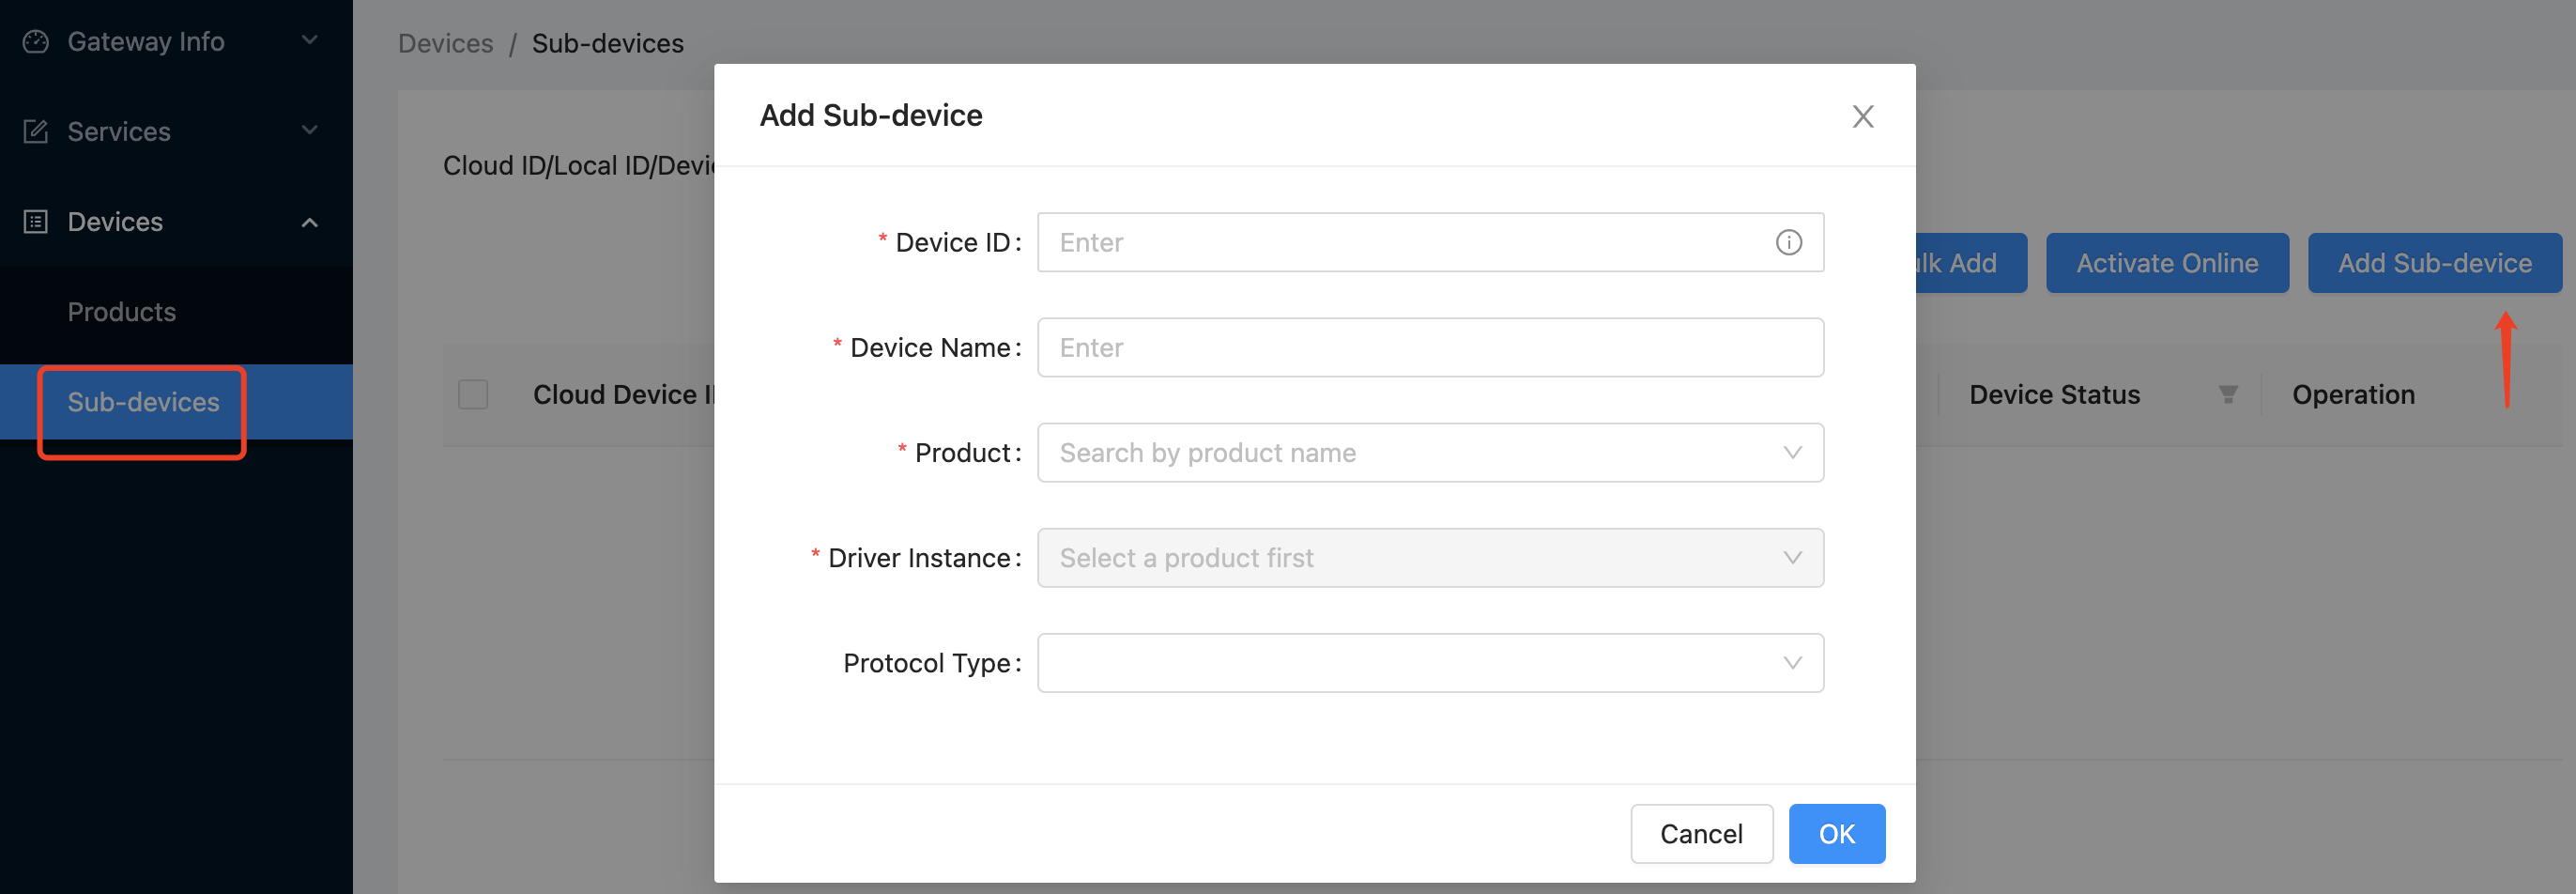
In the left-side navigation pane of the Tuya Edge Gateway, click Devices > Sub-devices > Add Sub-device.
This section describes how to add a Modbus sub-device.
-
Product: Select the product for the Modbus device.
-
Driver Instance: Select a Modbus driver.
-
Set the Protocol Type field and other device information as defined in the configuration file that is uploaded when the Modbus driver image is added. In this example, a Modbus simulated device of TCP type is added. This page might vary, depending on different protocol types of devices.
-
-
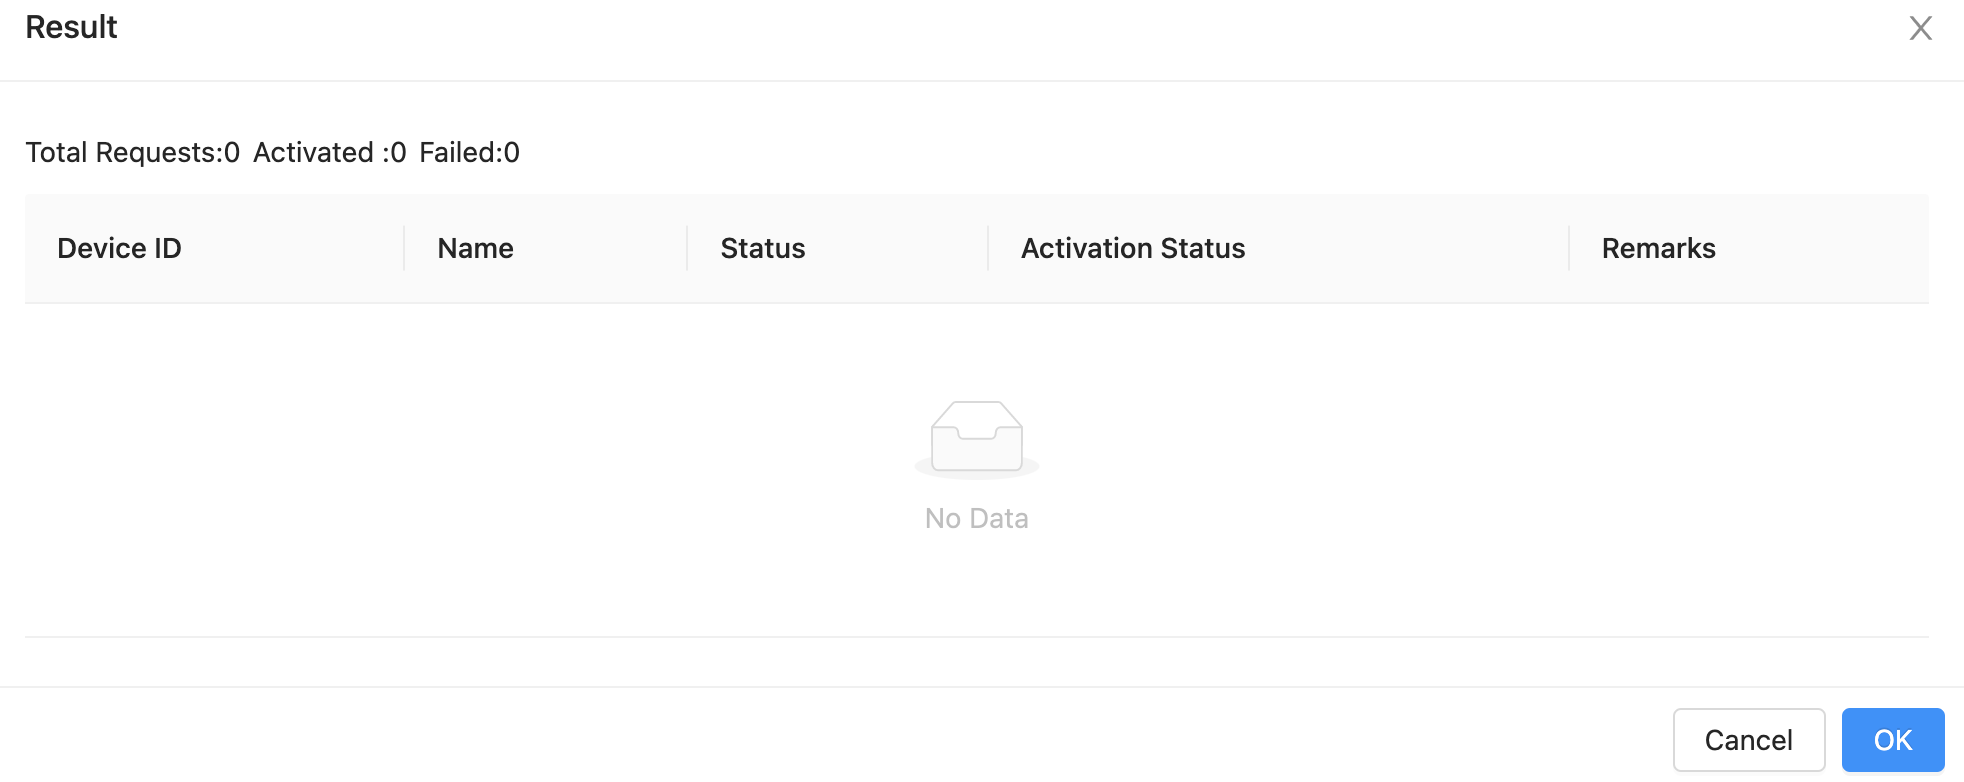
Click Activate Online to activate the added sub-device.

The following dialog box shows the online activation result.
-
After the sub-device is added, go back to the Products page and click Sync to synchronize product metadata.
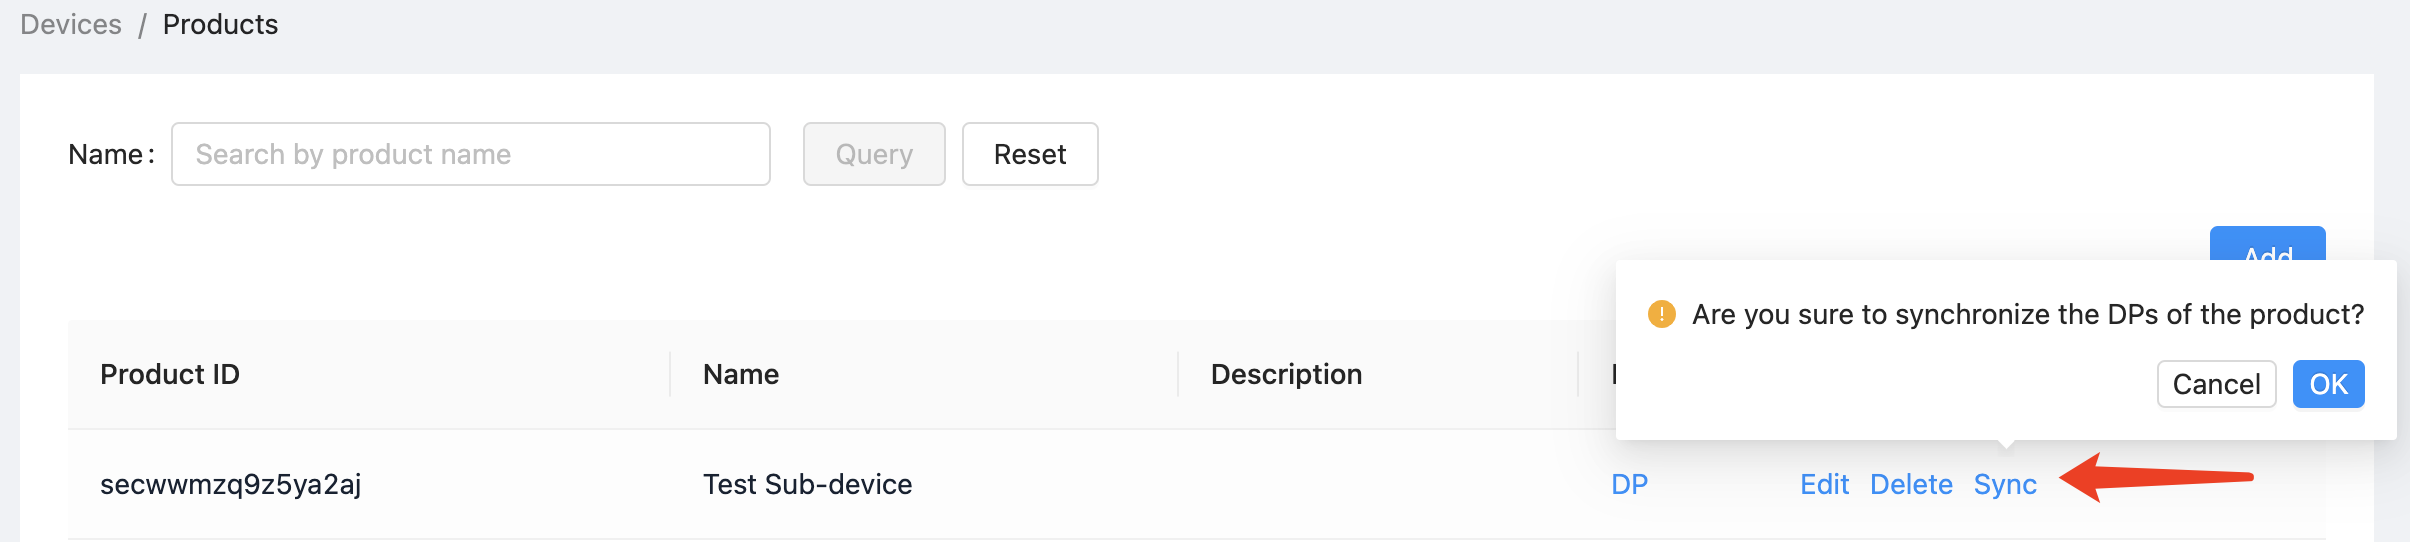
The following figure shows the synchronized product details.
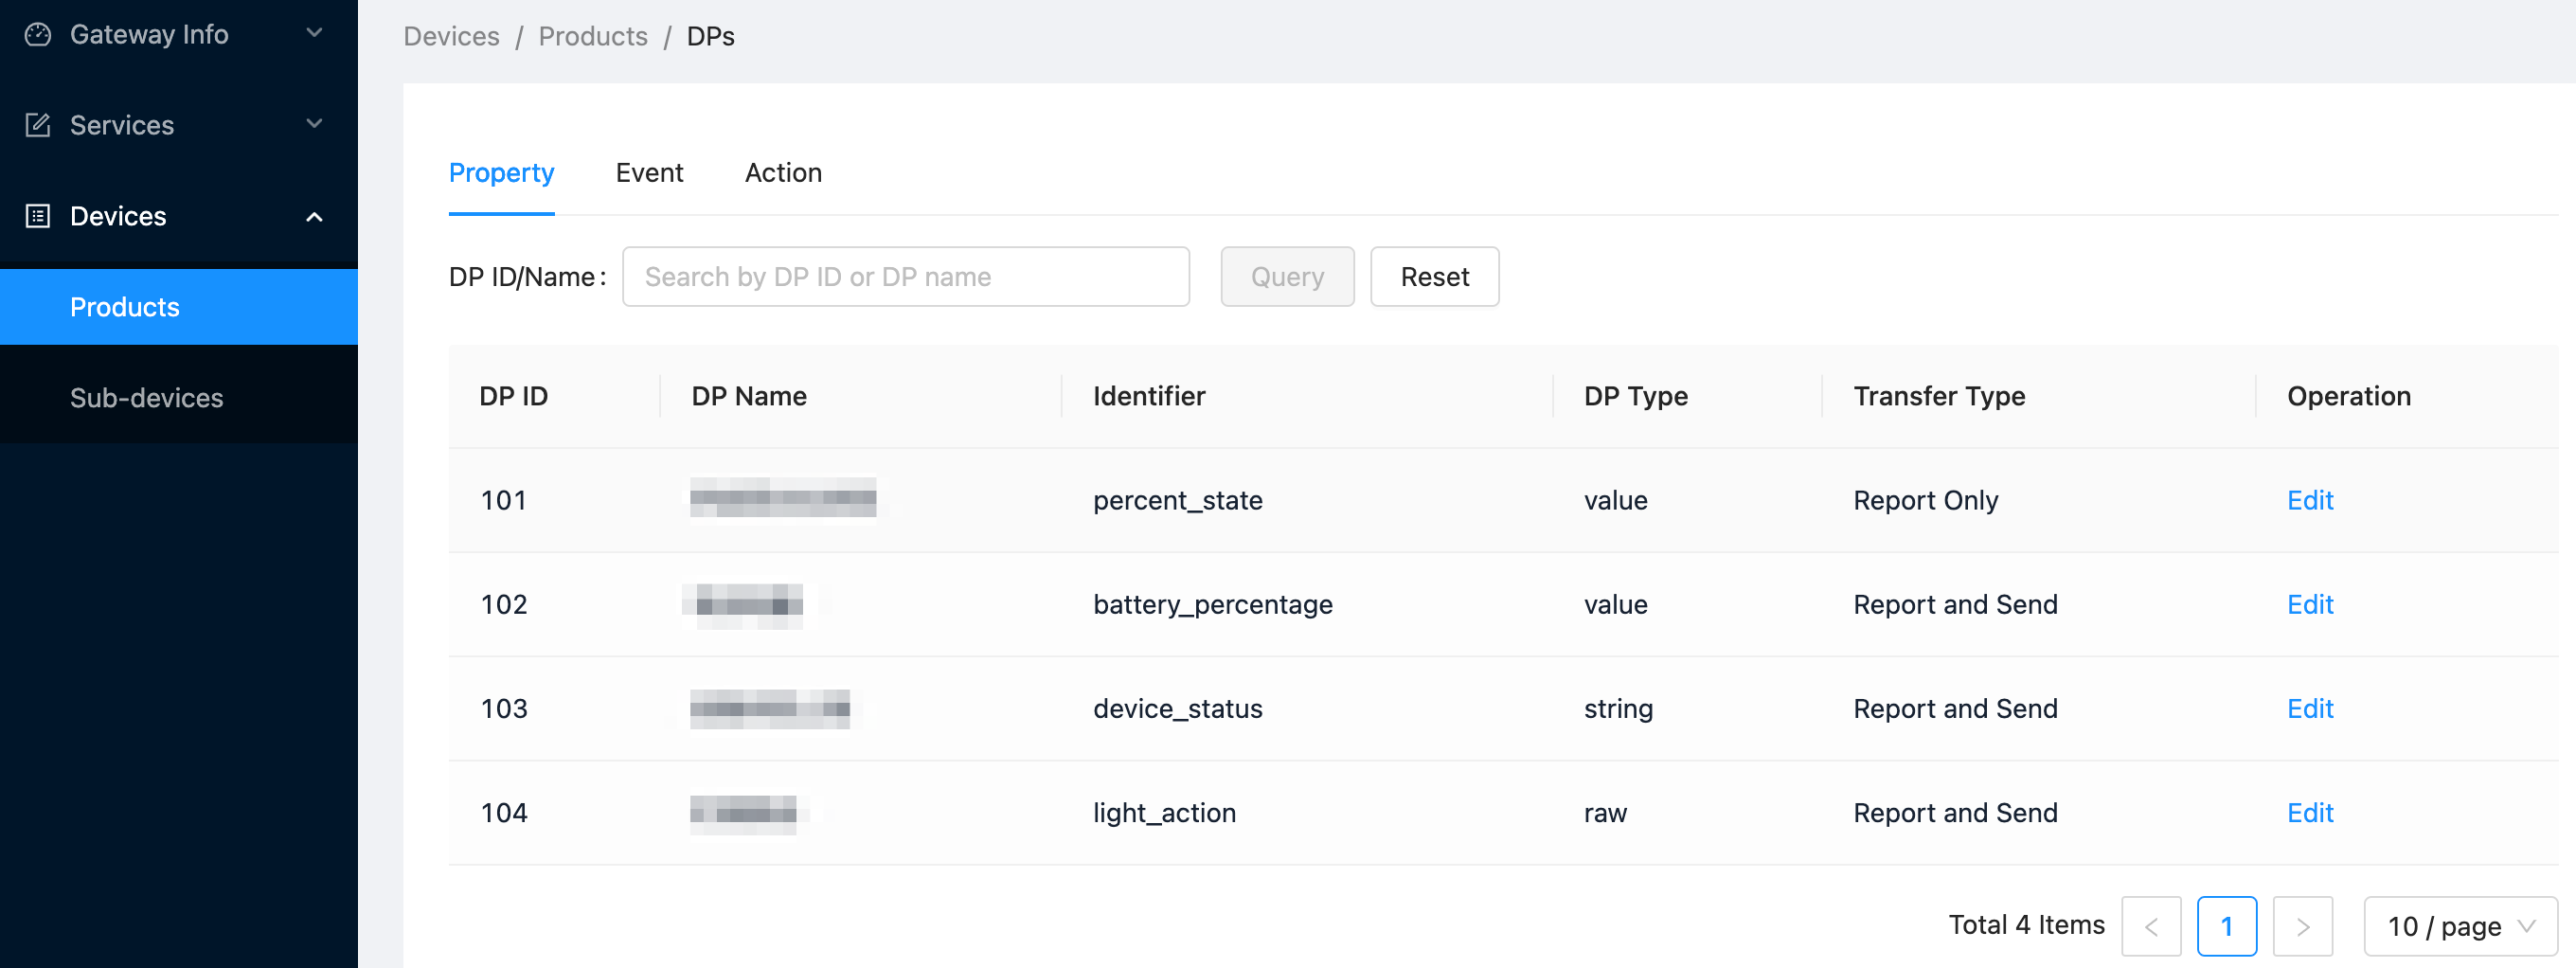
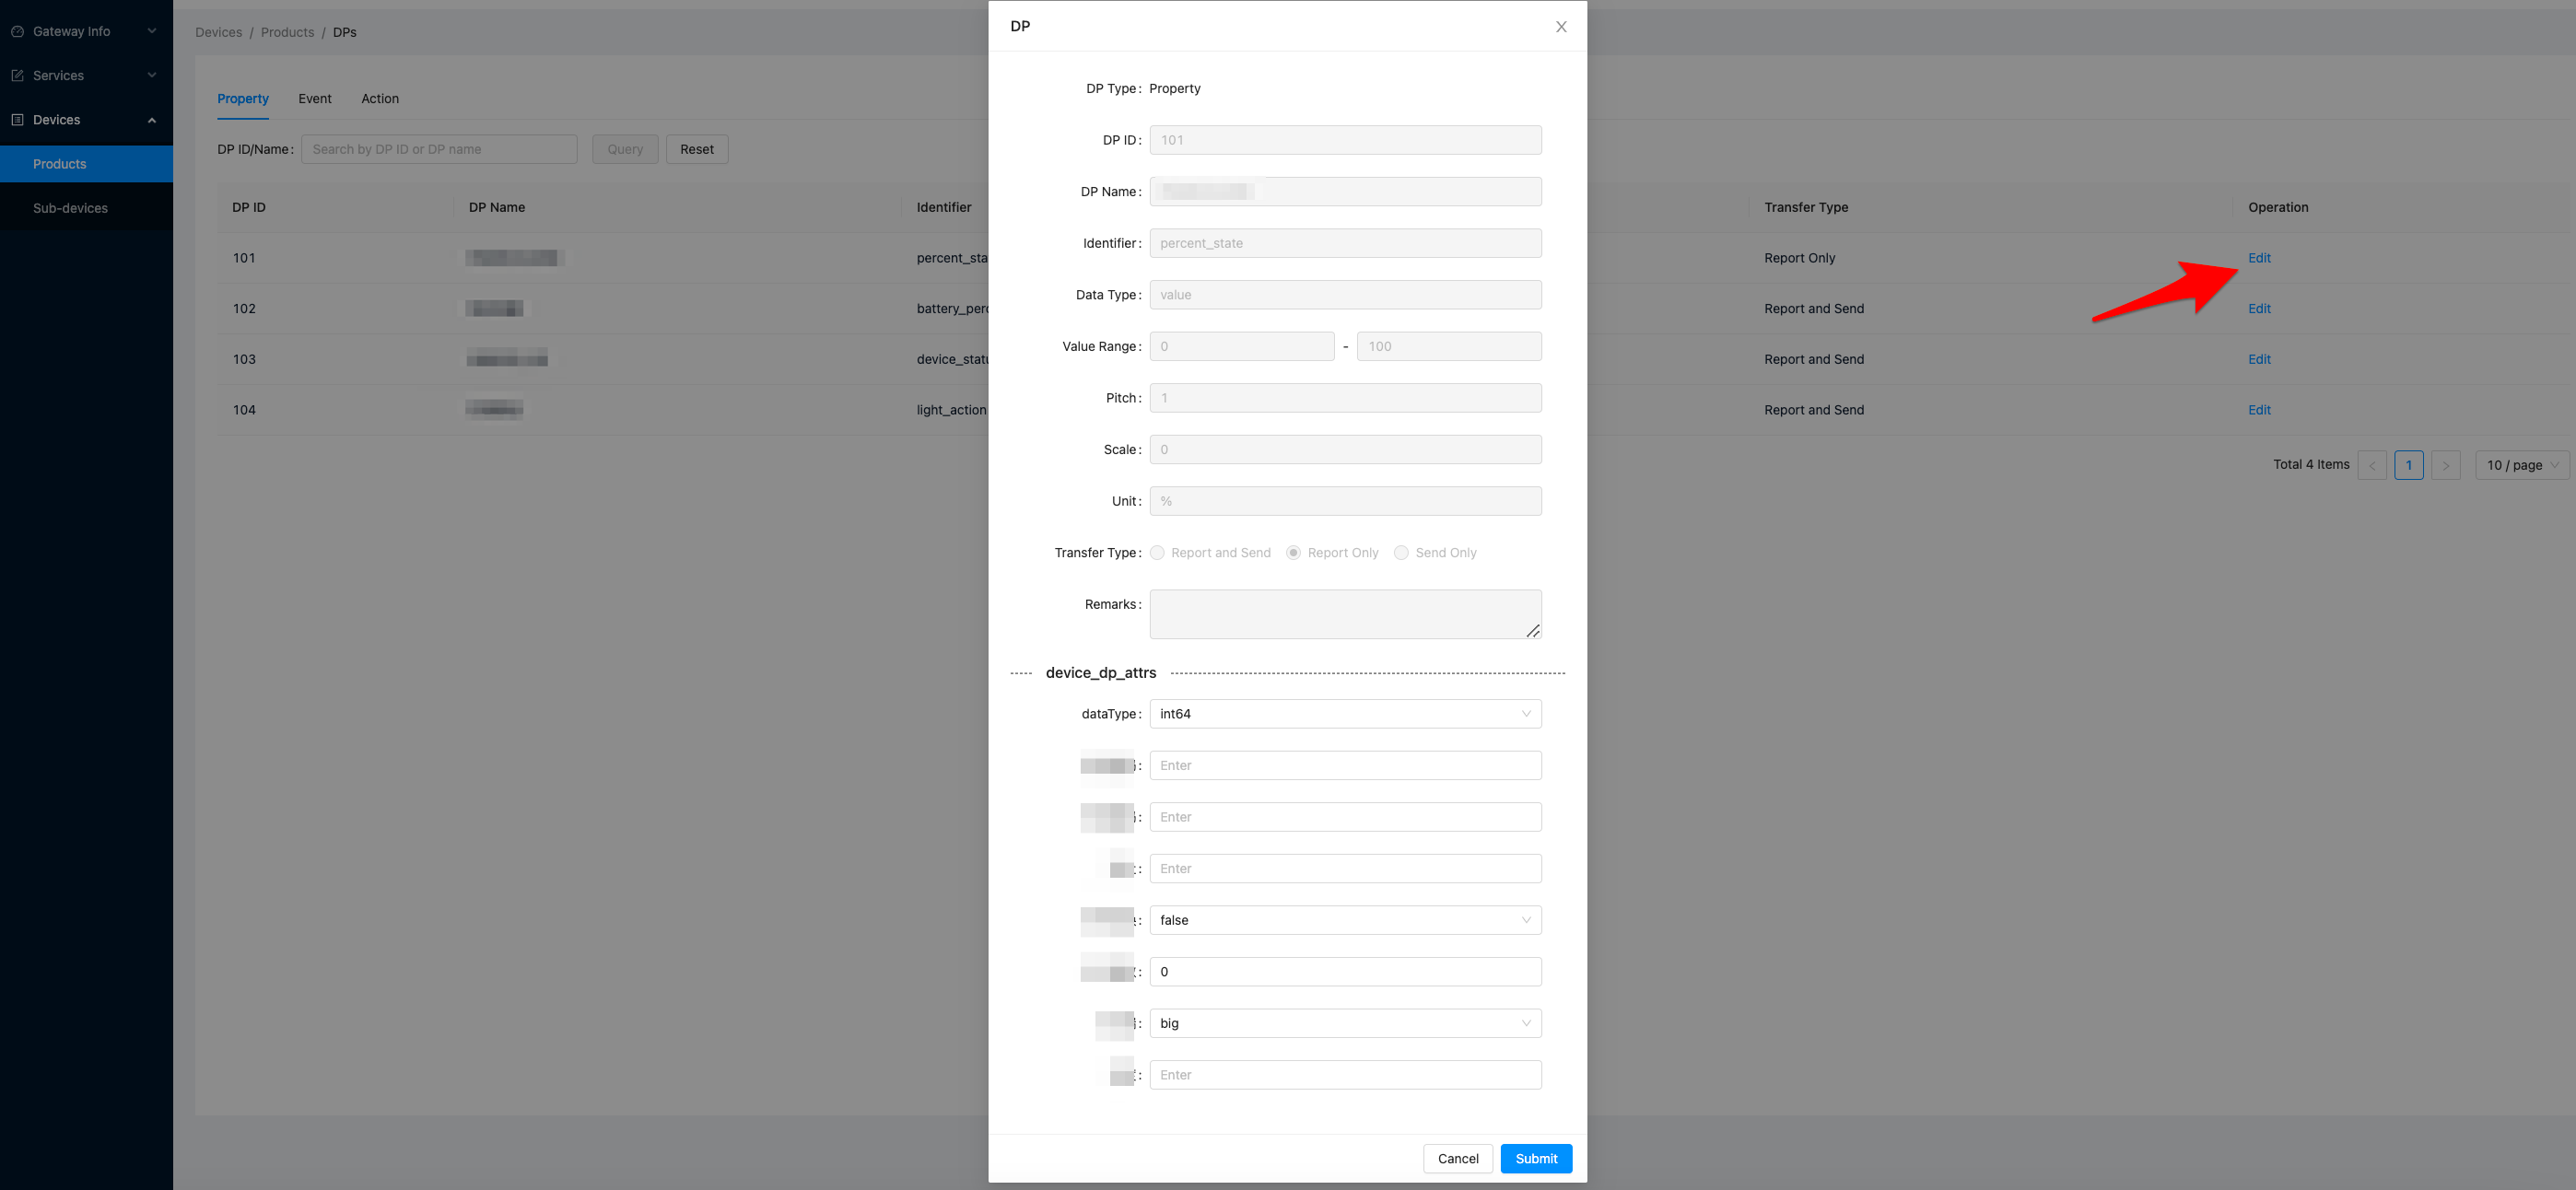
The data that the Modbus driver reads from the Modbus device needs to be converted into the data structure of the things data model. This conversion depends on certain additional configurations. Therefore, you must add the configurations to the target product of the Modbus driver. These configurations are defined in the configuration file uploaded when you add the Modbus driver image, as shown in the following figure.
Run driver, report data, and send command
Report data
-
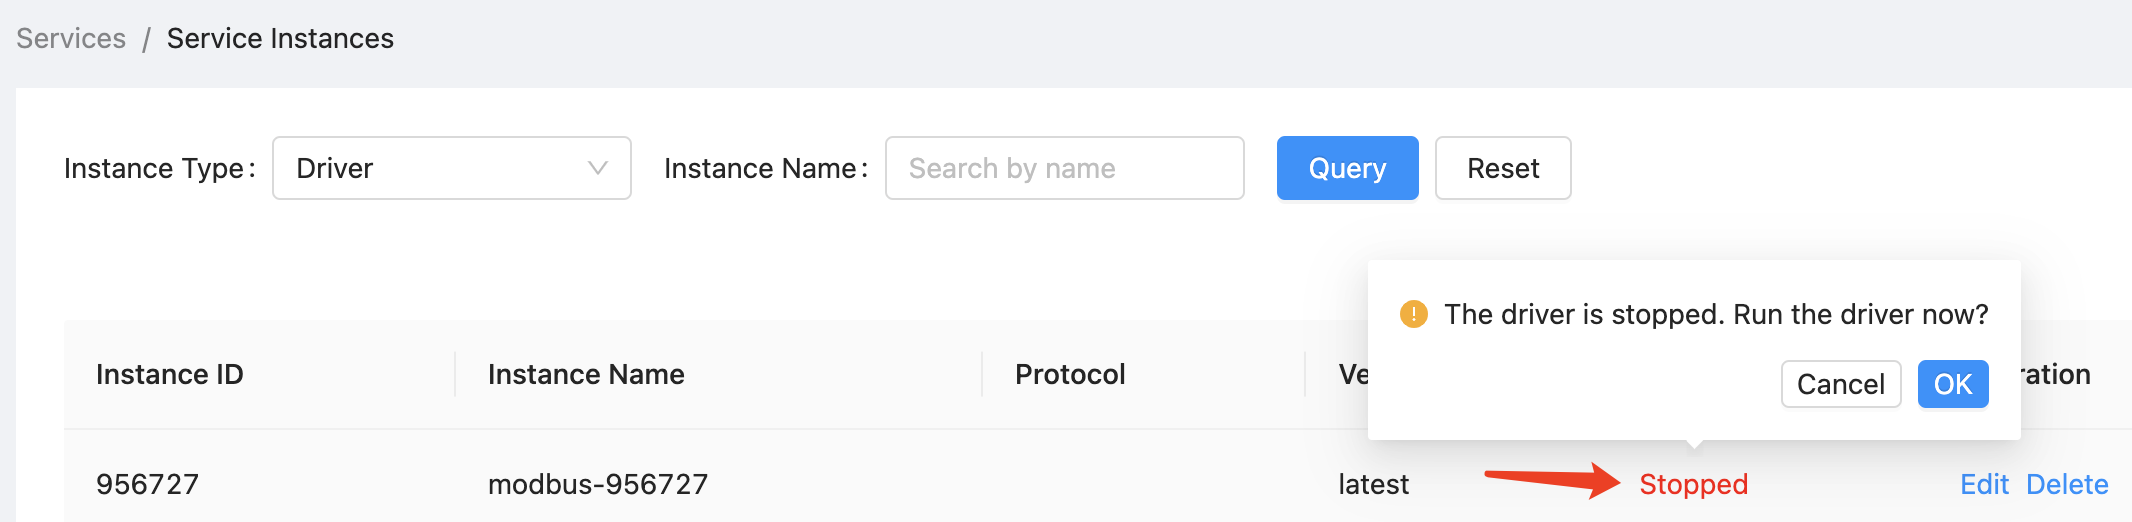
Go to Services > Service Instances to start the Modbus driver instance.
-
After the Modbus driver instance is started, click Devices > Sub-devices to check the Modbus sub-device data regularly reported by the driver.

Send command
To send a control command from the edge gateway to a sub-device, perform the following steps:
-
In the left-side navigation page of TEdge, click Devices > Sub-devices, select a sub-device, click DPs to go to the DPs page, and then click Send for the target DP in the Operation column.
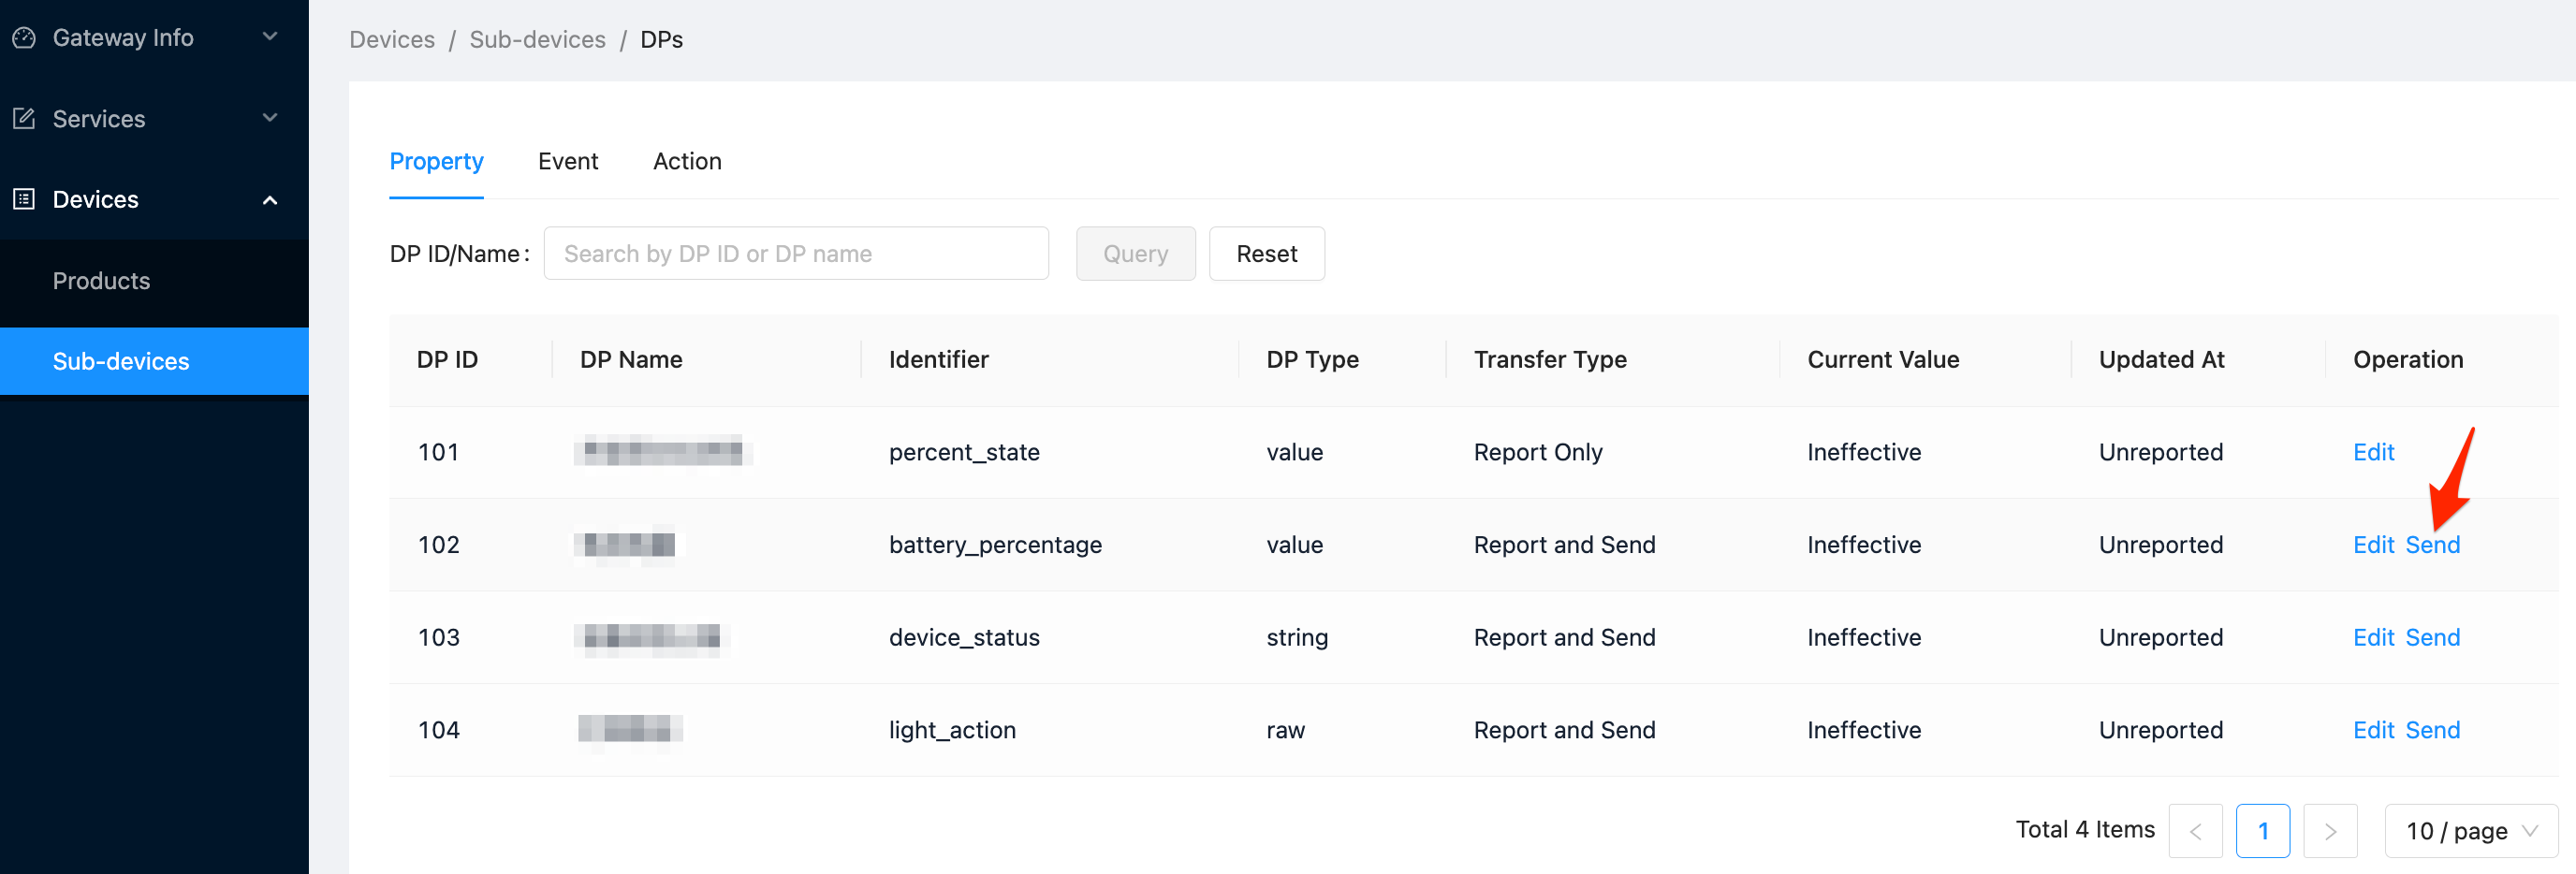
-
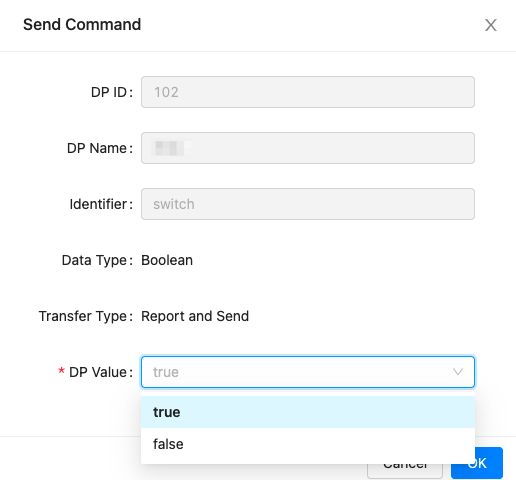
Enter the details of the DP value and click OK.
-
After the DP is sent, refresh the page to see the result. The DP value is false before it is sent, as shown in the previous figure. The figure below shows that the DP is sent and the DP value becomes true.

Is this page helpful?
YesFeedbackIs this page helpful?
YesFeedback


