Robot Vacuum
Last Updated on : 2024-11-20 08:51:50download
This topic describes the full cycle of connecting a robot vacuum to the Tuya Developer Platform in terms of software and hardware solution, development, production, and after-sales support.
Product solution
A complete robot vacuum solution is made up of an embedded system, mobile app, and cloud service, which can be tailored to your needs. This topic describes embedded development. For more information, see the Introduction to robot vacuum solution.
MCU integration solution
Tuya provides the network module, mobile app, and cloud services. The MCU on your hardware talks to Tuya’s module via serial communication to enable network connection. You need to build robot vacuum applications based on Tuya’s serial protocol.
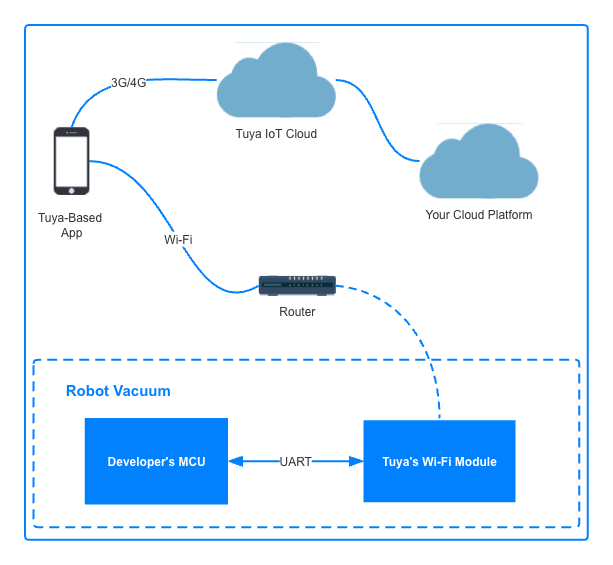
Features
- Support two pairing modes: Wi-Fi Easy Connect (EZ) or access point (AP). You can implement them as needed.
- OTA firmware update.
- Lightweight map data transfer.
- Cloud storage of cleaning history.
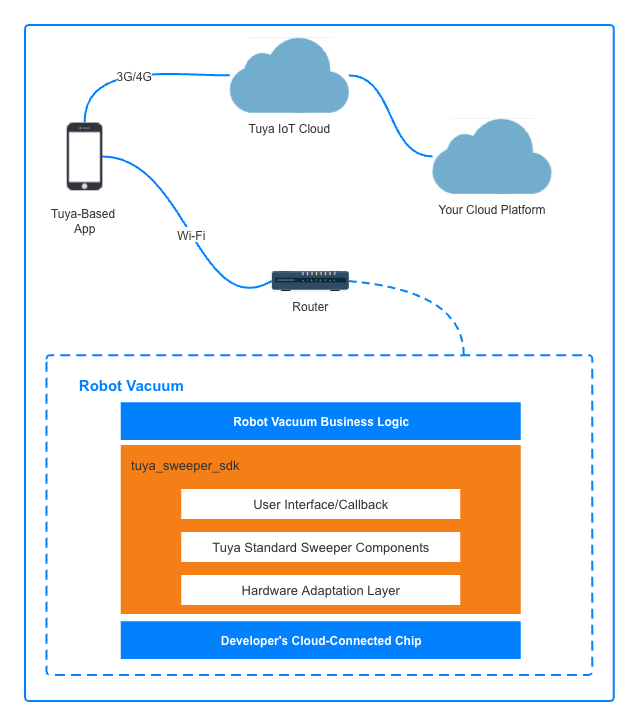
Linux SDK integration solution
-
Tuya offers a standard Linux SDK for robot vacuum, which can be integrated into your device software to implement application development.
-
The SDK runs on the cloud-connected wireless chip.
Development process
Create a developer account
-
Register with the Tuya Developer Platform if you don’t have an account yet.
-
There are two account types, individual and organization, each suited to different purposes. Your developer account can be upgraded to an organization account after your organization’s identity is verified.
-
For more information about the developer account, see Account Types.
-
For more information about the organization’s identity verification, see Organization Verification.
-
Define a product
Create a robot vacuum product and define functions on the Tuya Developer Platform with the following steps.
-
Log in to the Tuya Developer Platform.
-
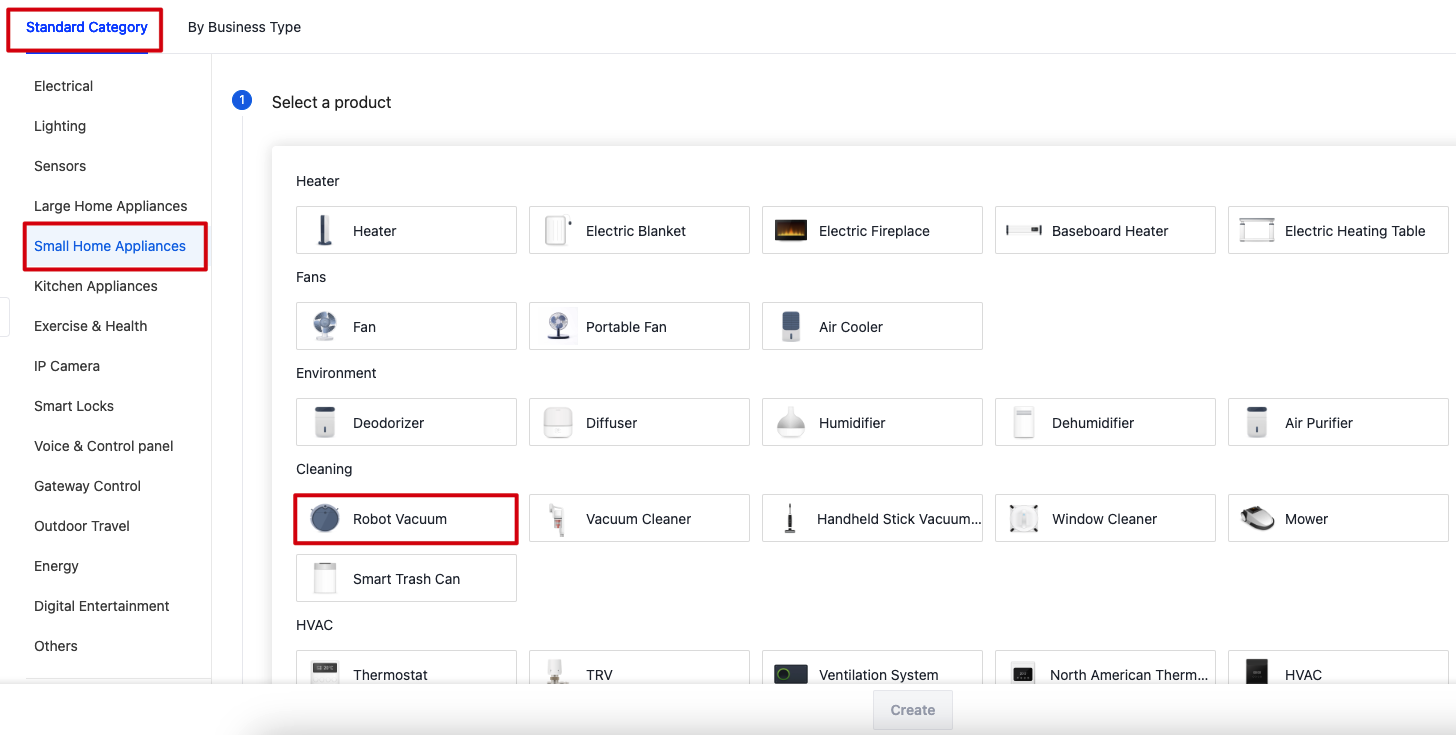
Choose Small Home Appliances > Robot Vacuum.
-
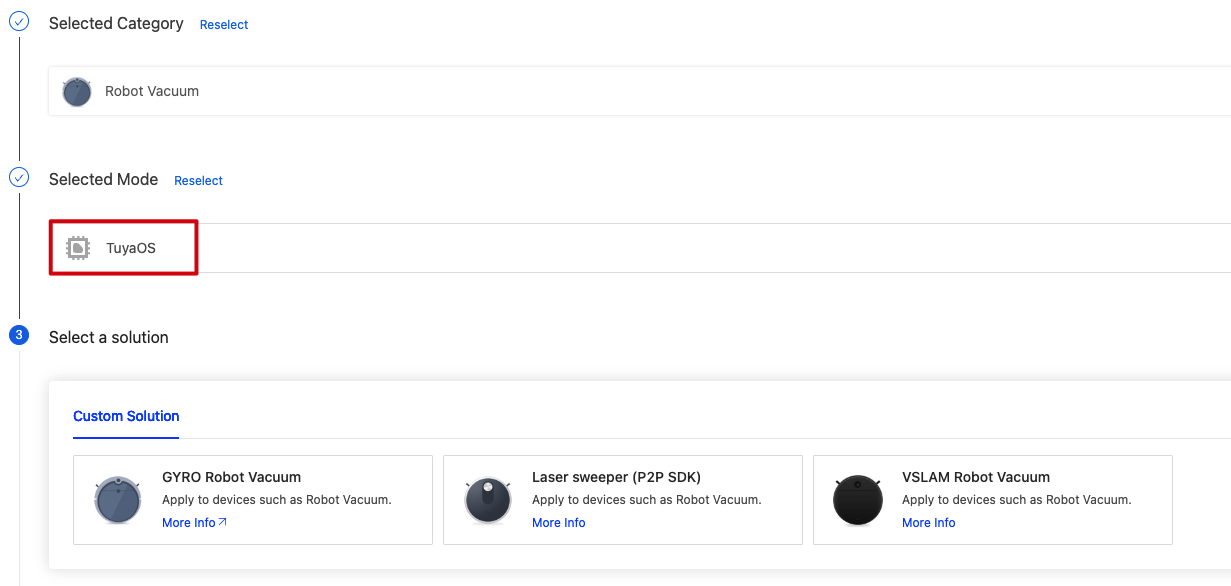
Choose TuyaOS and select the desired type of robot vacuum.
-
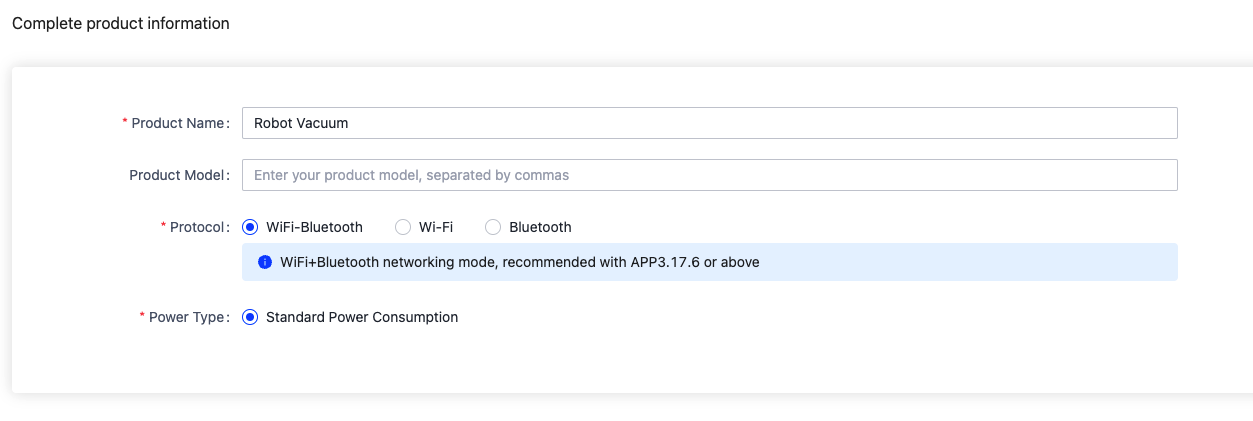
Give the product a name and model name, and select a protocol.
- Wi-Fi-Bluetooth: supports both Wi-Fi and Bluetooth connectivity, applying to Wi-Fi and Bluetooth combo modules.
- Wi-Fi: supports Wi-Fi connectivity only, applying to Wi-Fi modules.
- Bluetooth: supports Bluetooth connectivity only, applying to Bluetooth modules.
-
The Tuya Developer Platform assigns a unique product ID (PID) to each created product, which is linked to all defined functions. Devices produced from the same product share the same PID.
The account that creates a product has exclusive management rights over the PID and its associated devices. The product owner can authorize another account to manage the PID. For more information about authorization, see Account Authorization and Authorize Product to Partners.
Terms
| Term | Explanation |
|---|---|
| Data point (DP) | A data point is an abstract representation of a function defined for a physical product. |
| DP ID | The ID of a DP. The data exchange between the device and the cloud is based on the DP ID. |
| DP name | The name of a DP. |
| Identifier | The key of a DP. Identifiers are used to manage the display names of DPs in multiple languages on the mobile app. An identifier must start with a letter and can contain letters, numbers, and underscores. |
| Data type | standby, smart_clean, and wall_clean. |
| Data transfer type |
For more information, see Glossary.
Function definition
Functions can be divided into two types: standard and custom. Standard functions are common, while custom functions allow you to create a function as needed when the standard function cannot meet your needs. The following uses inertial navigation and laser navigation robot vacuums to describe function definition.
-
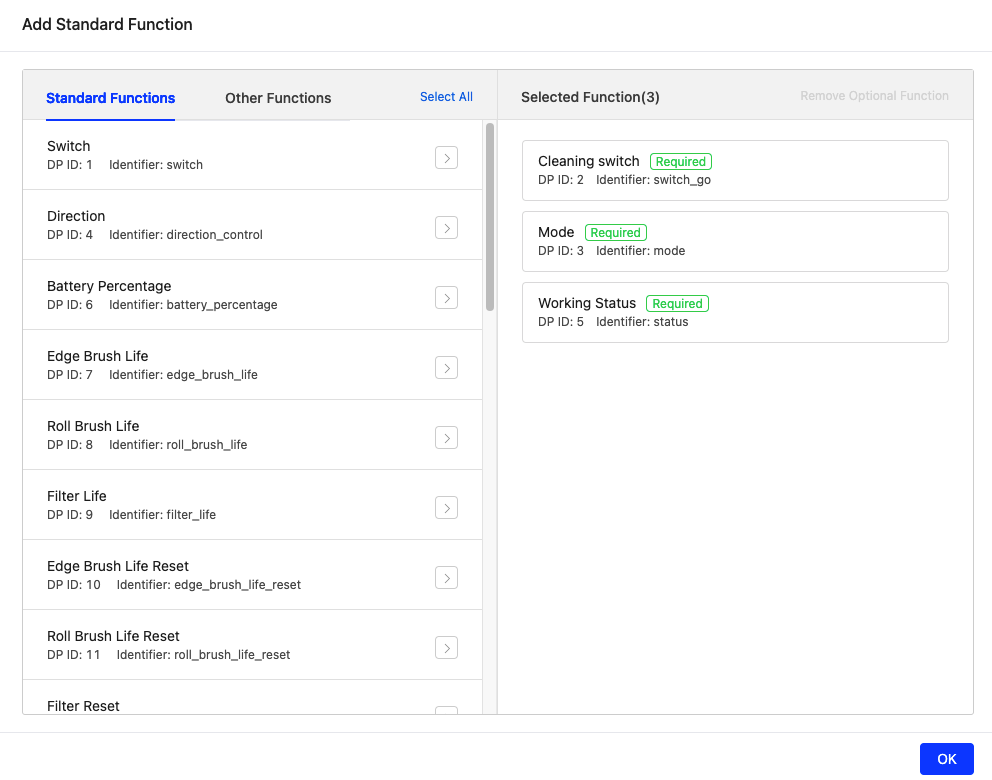
Inertial navigation robot vacuum
After creating a product, you will see the Add Standard Function page. Three functions are required, while others are optional.
-
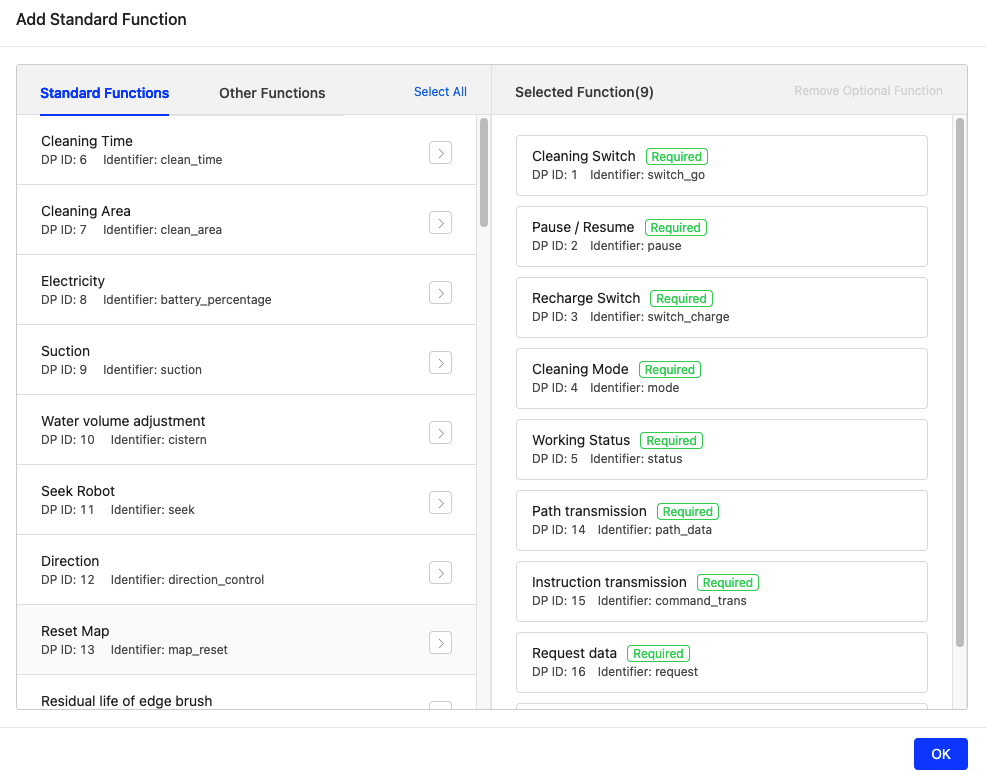
Laser navigation robot vacuum
Eight functions are required, while others are optional.
FAQs
Panel configuration
Three types of panels are available: all-in-one panel, SDK-developed panel, and customized panel.
All-in-one panel
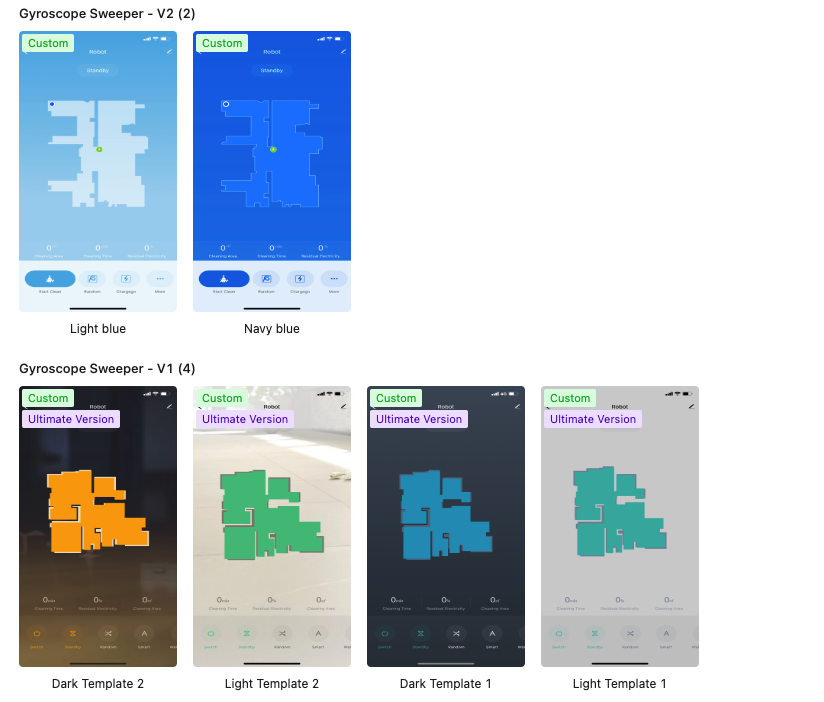
There are four versions of all-in-one panels for inertial navigation robot vacuum.
-
V1 and V2 feature a grid map that can display the current position, obstacles, cleaned areas, and charging dock.
-
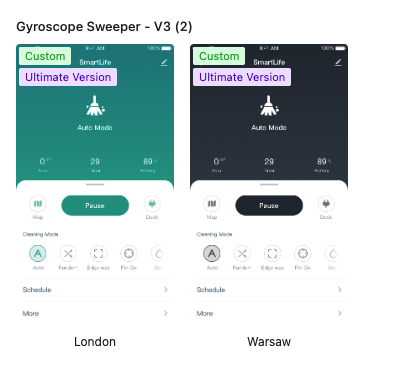
V3 features a smudged map that can display the current position and cleaned areas.
-
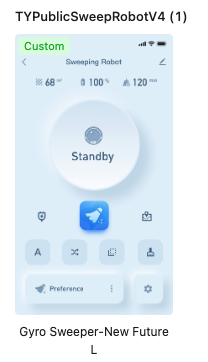
V4 features three types of map representation with a brand-new UI: grid map, smudged map, and block map.
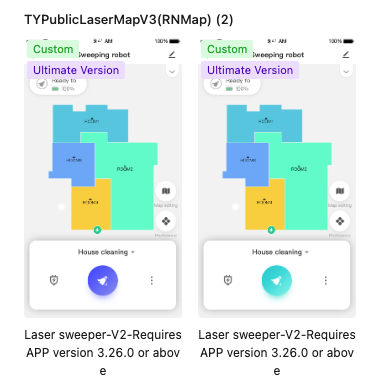
There are two versions of all-in-one panels for laser navigation robot vacuum. You can replace or edit the panel as needed.
Configure all-in-one panel
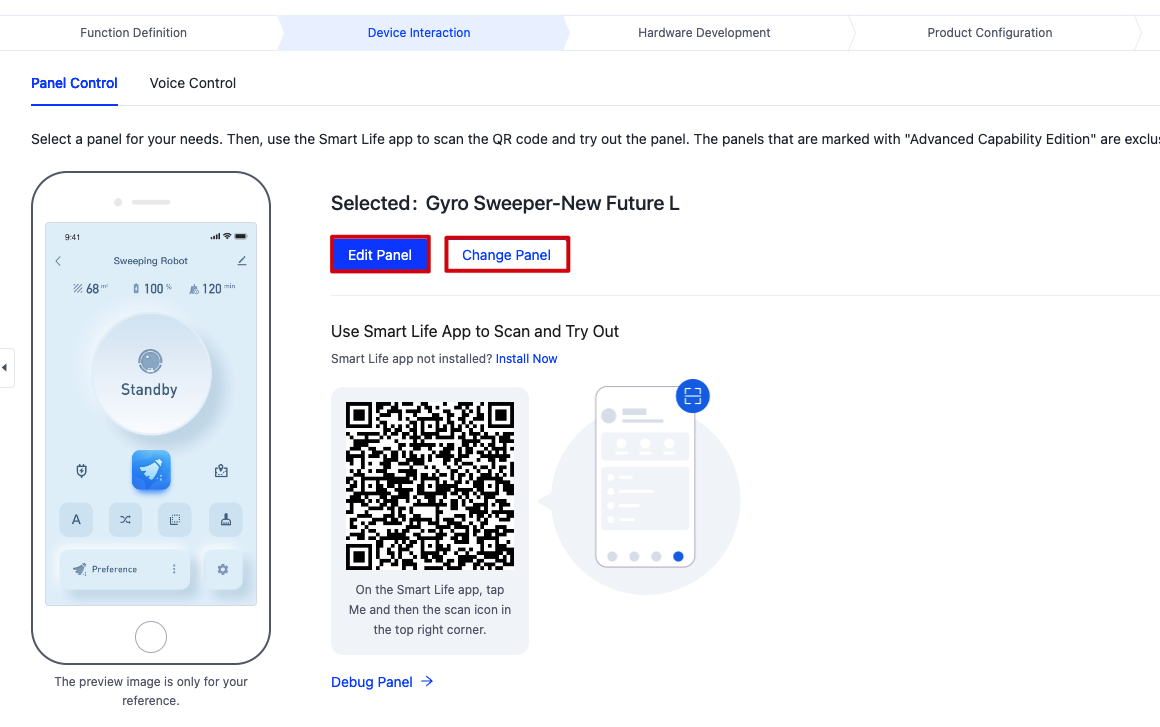
Each all-in-one panel has its default settings. You can click Edit Panel to personalize the panel settings, including UI background and icons, to your preference.
SDK-developed panel
Develop a panel using the SDK. For more information, see Quick Start.
Customized panel
Tuya offers a professional customization service to develop a panel that is tailored specifically to your product and requirements.
Customization service can help you with:
-
Building a fully customized panel with a layout and UI style tailored to your requirements.
-
Adding additional features to the panel.
Customization process
Submit your customization requirements to the project manager. Tuya will evaluate them and send you a quote. Following the payment, the team will begin developing your customized panel and binds it with your product.
FAQs
Software and hardware development
Module selection
Three module models are commonly used on the inertial navigation robot vacuum: WR3 (2.4 GHz Wi-Fi network), WBR3 (2.4 GHz Wi-Fi network and Bluetooth), and WBR3D (2.4/5 GHz Wi-Fi network and Bluetooth). You can consult your account manager for more suitable models.
MCU development
Module Debugging Assistant
Tuya Module Debugging Assistant is an all-in-one serial debugger with Tuya’s serial protocols built-in. It can simulate both the network modules and microcontrollers to help you verify your program. For more information, see Module Debugging Assistant.
MCU SDK porting
The MCU SDK is automatically generated code based on the functions defined for your product. It allows you to easily implement the code running on the MCU. For more information, see MCU SDK Porting.
Serial protocol
In the MCU integration solution, Tuya’s module talks to the MCU using the serial protocol. For more information, see Serial Protocol.
Laser navigation robot vacuum
Laser Robot Vacuum SDK Quick Start
SDK download
You need to provide information about the cross-compiler toolchain for your platform so that Tuya can send you the appropriate SDK.
SDK development
For more information, see Laser Navigation Robot Vacuum SDK Development.
Click the Hardware Development tab. In the Download Documents section, you can download the General Serial Protocol.

The laser navigation robot vacuum protocol describes the standard features and implementation logic for the laser navigation robot vacuum. If this protocol cannot have your needs covered, you can discuss your requirements with your project manager.
Get free licenses
To access the cloud, a device must be activated using a license. Tuya offers two free licenses for debugging purposes, but licenses must be purchased for each product used in production. For more information, see Get Free Licenses.
FAQs
Product configuration
Firmware update
You can deploy an OTA update to devices. For more information, see Update Firmware.
Things to note:
-
To update the module firmware, choose General Firmware Scheme from the dropdown list when you created an update deployment.

-
When you create custom firmware:
-
For the MCU integration solution, choose MCU Firmware for Firmware Type.
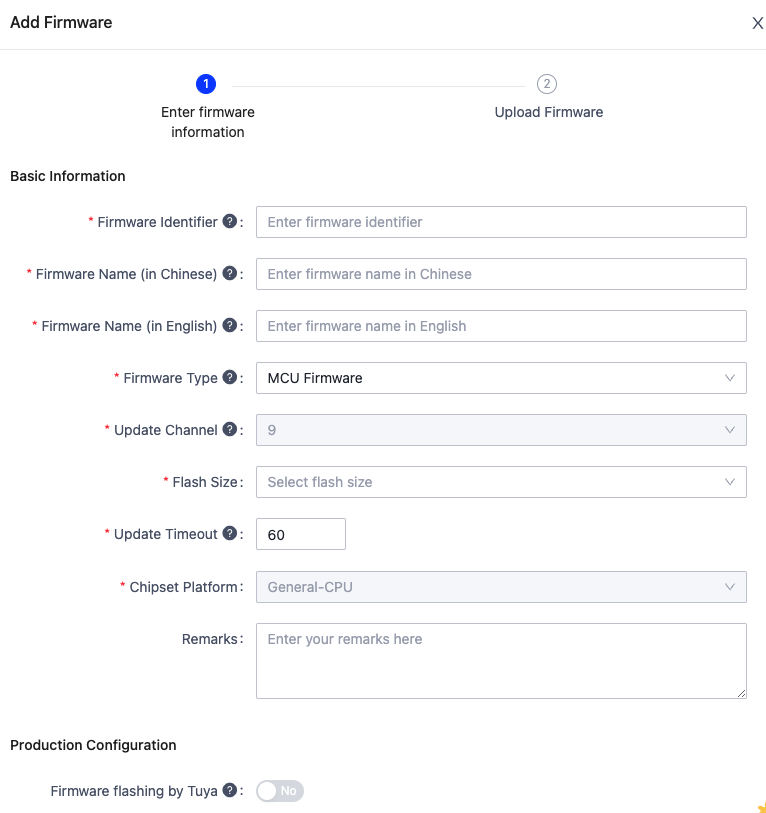
-
For the Linux SDK integration solution, choose Module Firmware for Firmware Type.
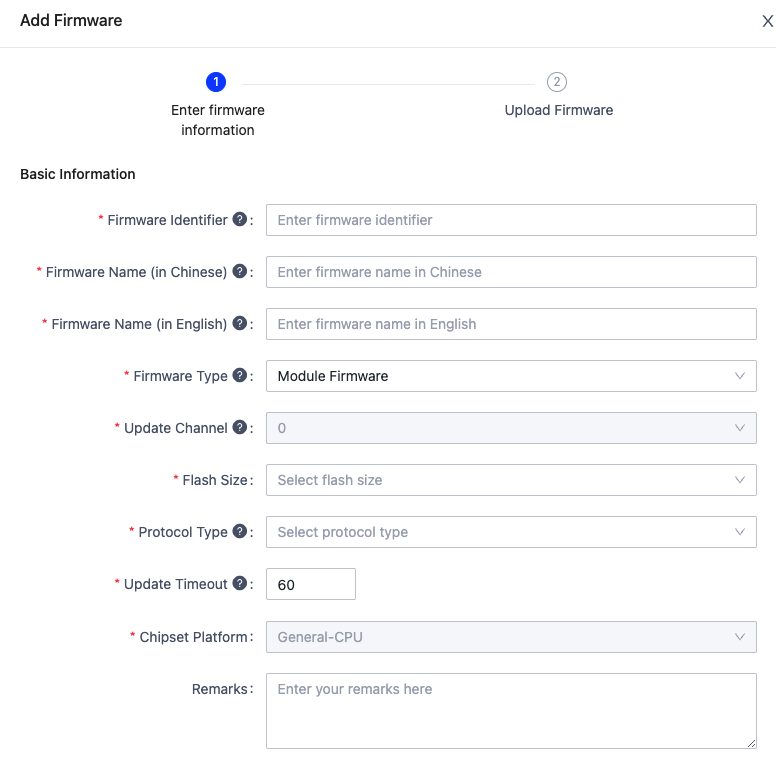
-
An update timeout is the time between initiating an update and restarting the device after installation.
-
Review the naming convention tip and customize the firmware identifier and firmware name to your preference.
-
Flash size and chip platform are intended for application development for Tuya modules. You can leave them as is.
-
Multilingual
Manage the multilingual UI text displayed on the mobile app. To reach a global audience, you can localize the UI text that appeals to a target market, respecting product names, data points, device panels, pairing guides, device push notifications, and firmware updates.

For more information, see Configure Multilingual UI.
The following uses the inertial navigation robot vacuum to describe the multilingual configuration.
Product name
You can set the product name in the target language, and it will be displayed as the default device name on the app after initial pairing.

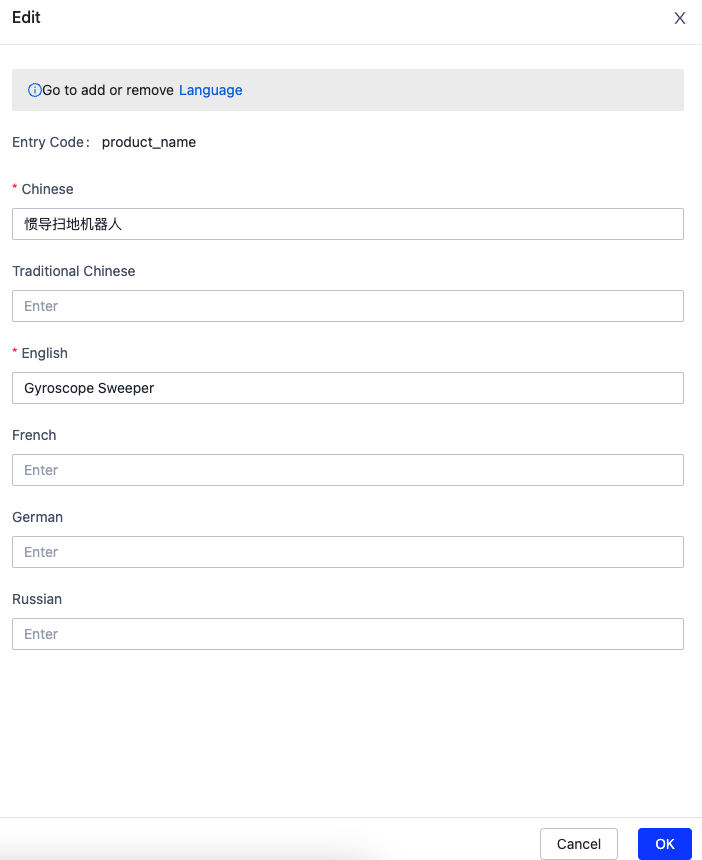
For example, change from Inertial Navigation Sweeper to Gyroscope Sweeper. The updated name will be applied once the device is paired again.
Data point
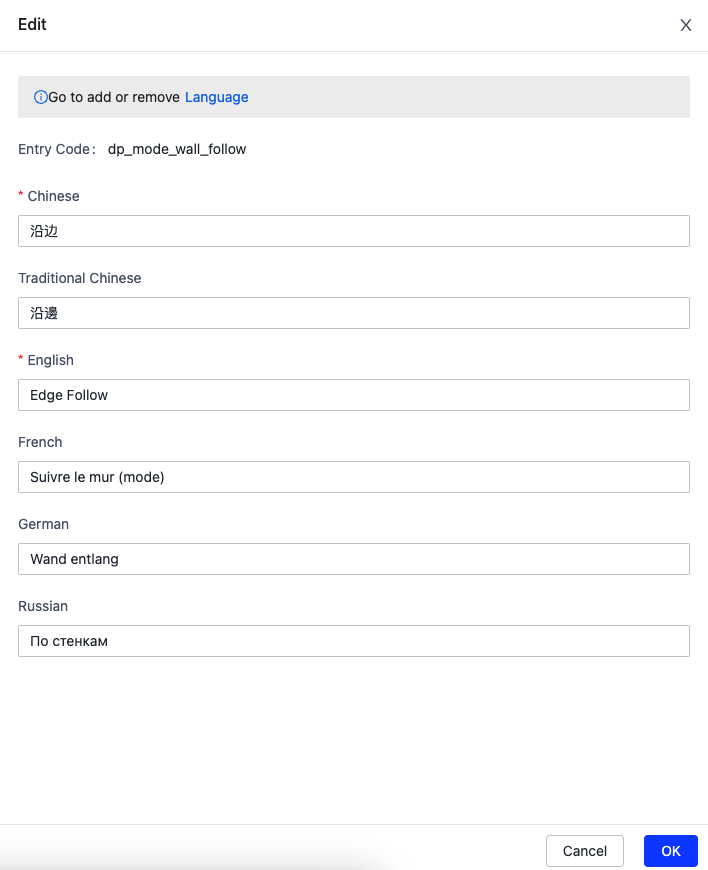
Set the display name for a data point. For example, change Wall Follow to Edge Follow.
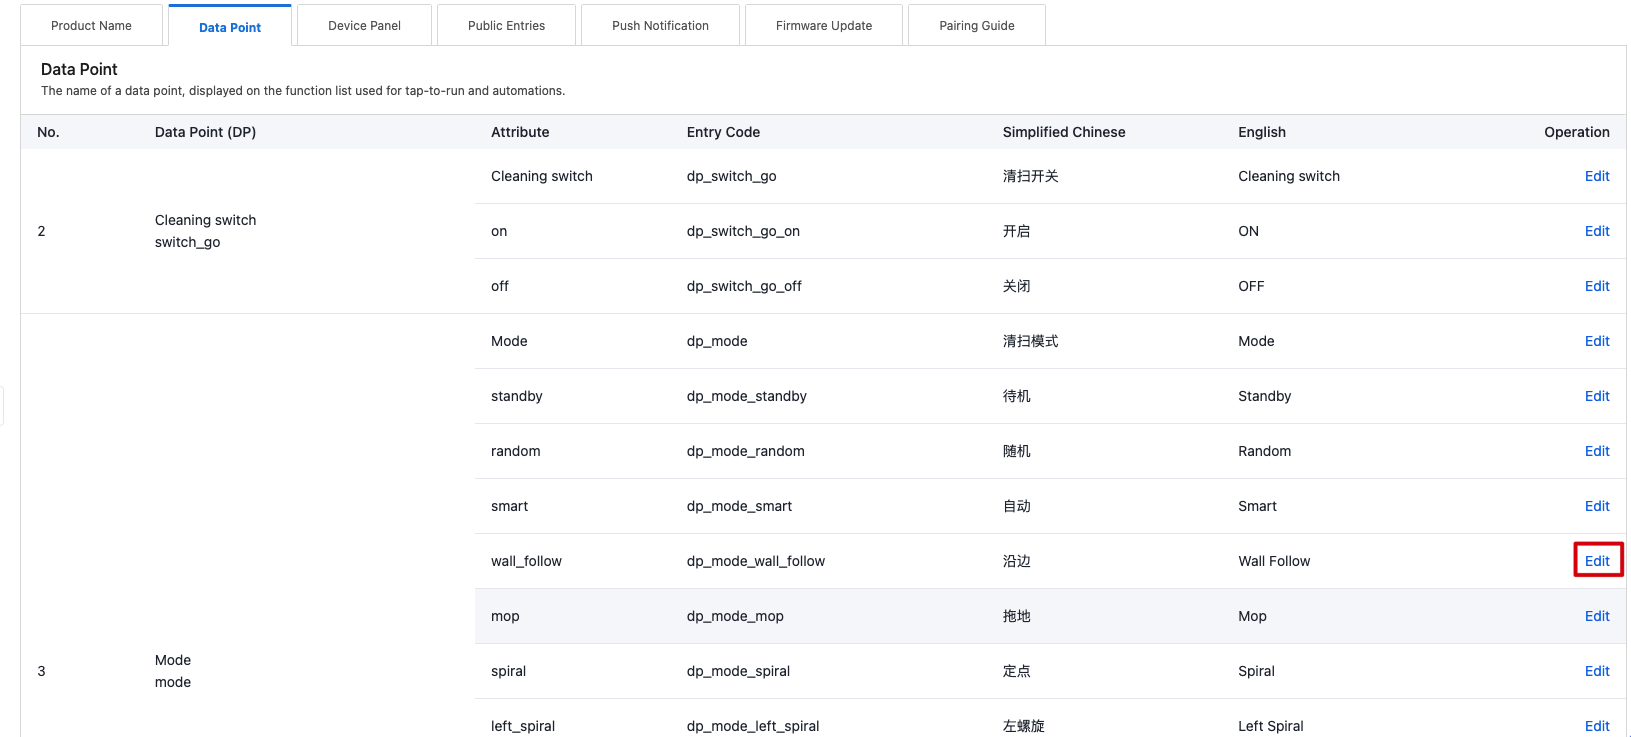
Device panel
Device Panel allows you to edit more text fields than you could edit in Data Point. You can preview the edited text on the app. If the changes do not take effect, you can tap Clear Cache in settings on the app or exit the app and try again. If you still cannot preview, you can submit a service ticket for troubleshooting.

Push notification
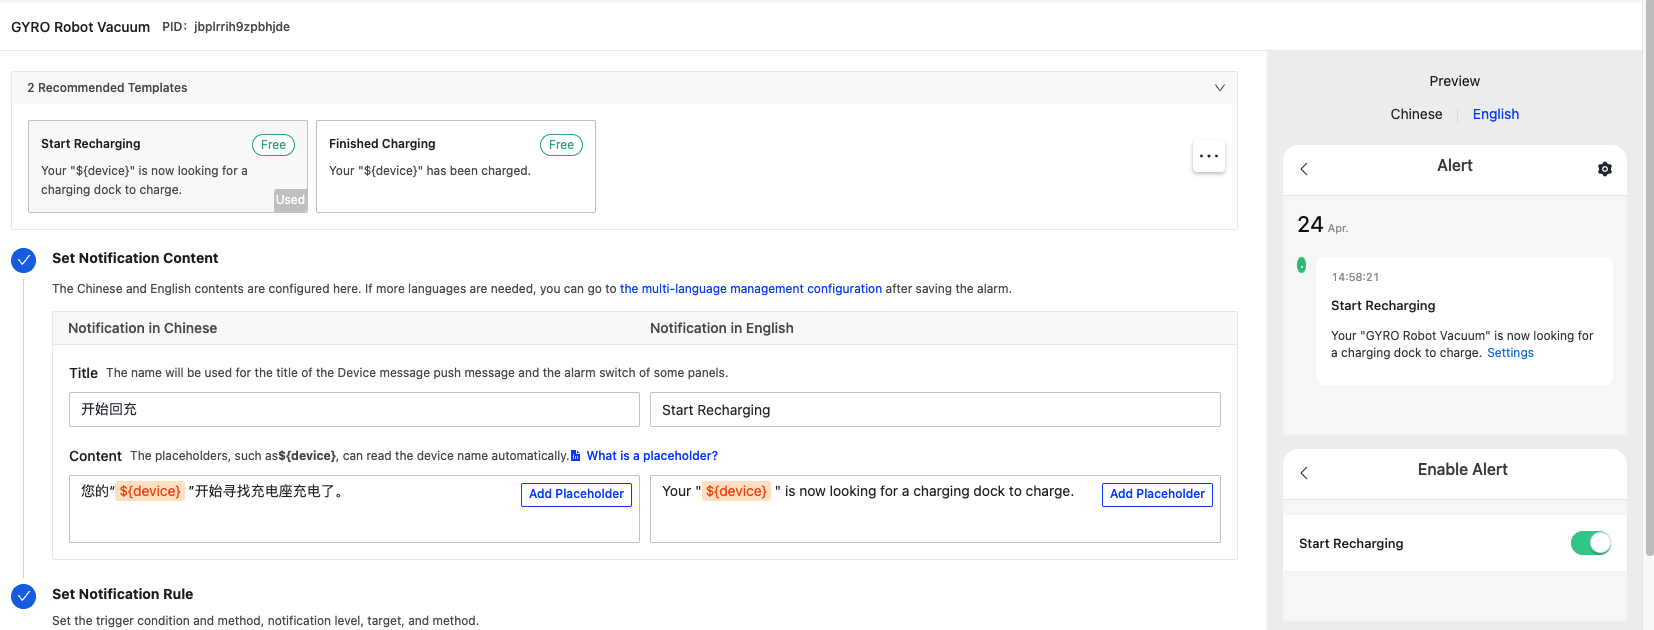
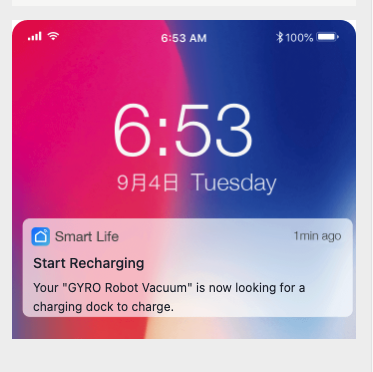
You can set rules to trigger an automated push notification. For example, set a threshold for a function. If the preset value is reached, the user will receive an alert from the mobile phone.
For more information, see Configure Push Notification.
For example, add a condition mode = goto_charge. When the device reports goto_charge status, the user will get notified of the device returning to the charging dock.
Pairing guide
You can set the pairing guide in Product Configuration. A QR code will be generated accordingly, which can be put on your user manual. You can update the guide anytime without changing the QR code.
For more information, see Configure Pairing Information.
Voice assistant integration
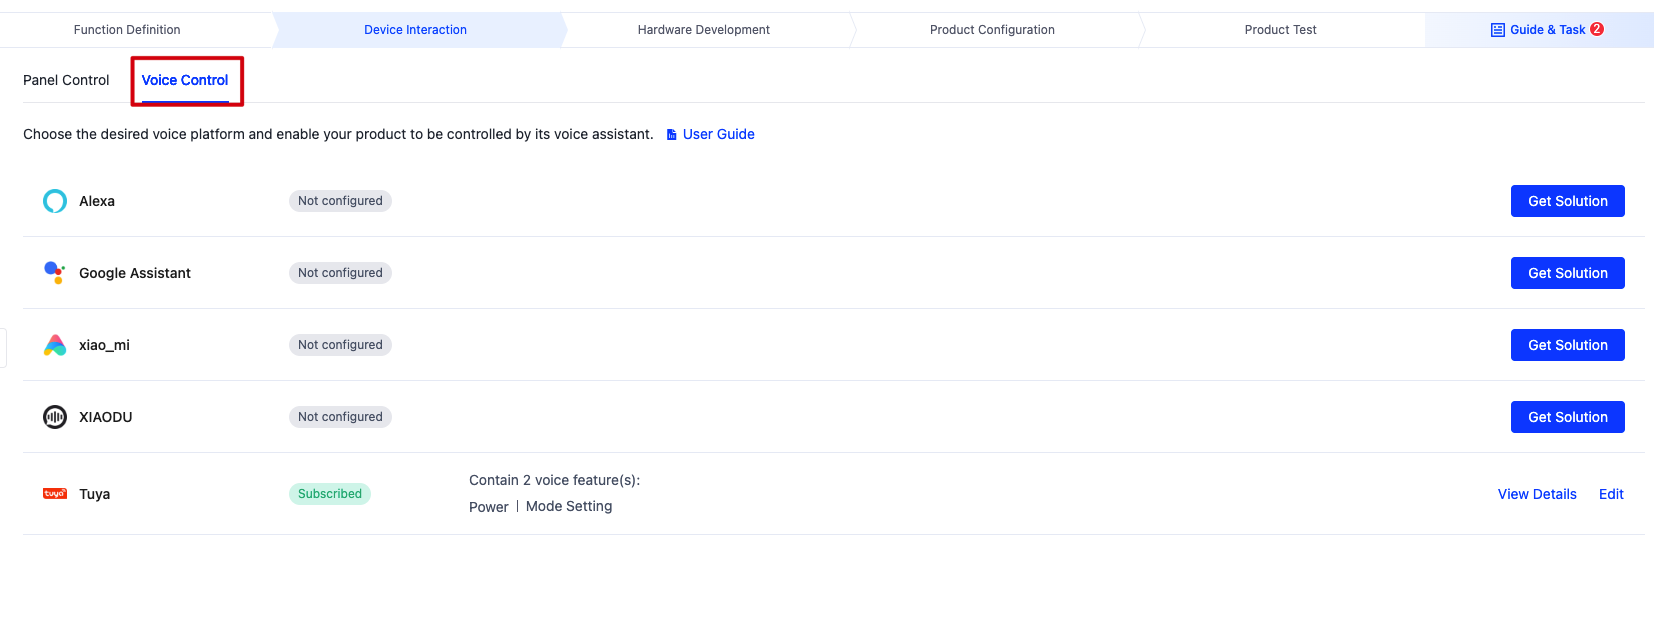
You can enable a voice control feature in Device Interaction and edit the voice solution to your needs.
For more information, see Use Voice Platform.
Device debugging
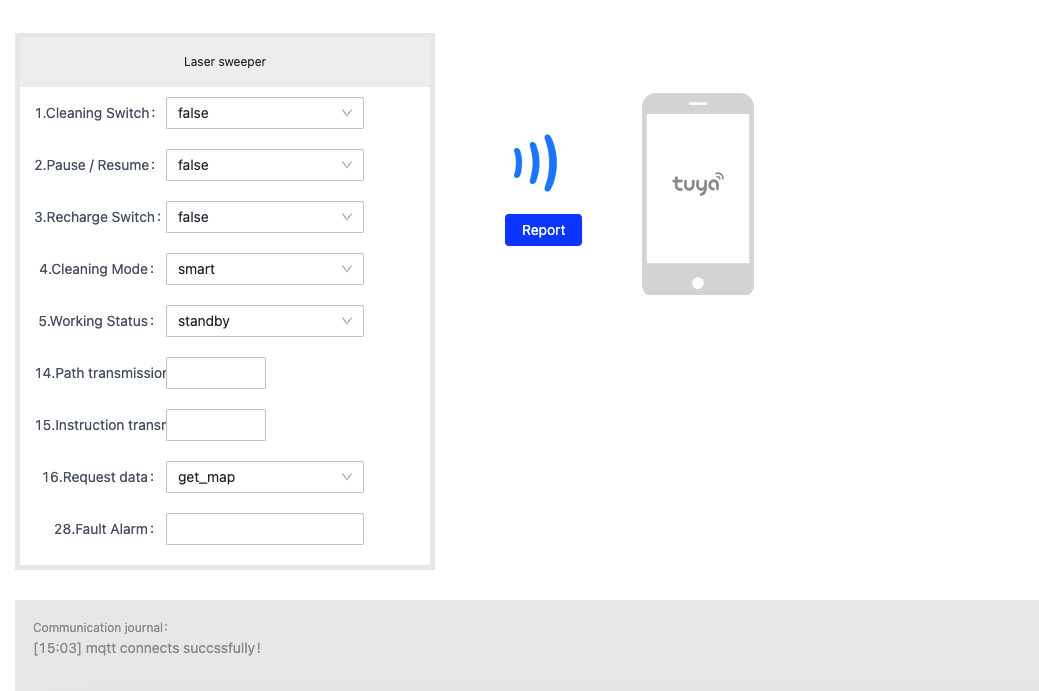
Device debugging can be performed on a virtual or a real device. Real device debugging tests the functionality of an actual device using the debugging panel, while virtual device debugging verifies the control panel’s functionality through a cloud-based virtual device.
Debug with real device
On the Device Debugging page, click Add Real Device Debug and add a device by device ID or app account.

Debug with virtual device
-
Click Add Virtual Device and open the Smart Life app and scan the QR code to add a virtual device.

-
Click Debug to test the virtual device.
-
You can test command sending and status reporting.
Test and release
To ensure your final product meets the necessary requirements, you need to conduct testing. Only qualified products can proceed with mass production.
Self-testing
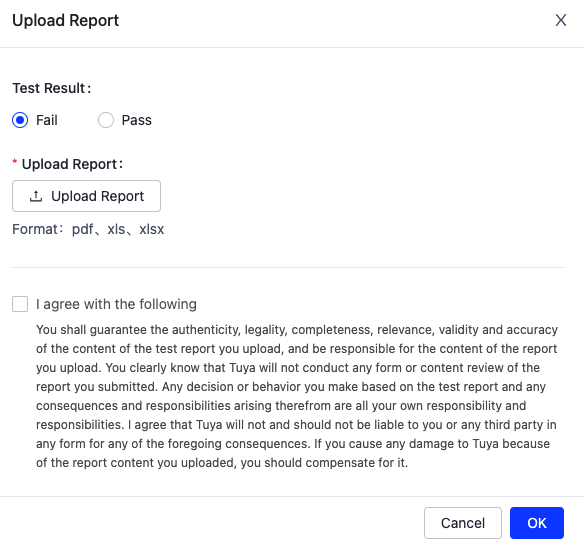
Download the test cases from the Tuya Developer Platform, test your product, and upload the test report.

Be sure the test report is authentic and legal. Tuya will not review the content of the test report, as declared in the following figure.
After-sales services
If you have any problems with development, you can request technical support through the following ways.
Service ticket
If you have any problems, please submit a service ticket.
App feedback
The user can request help from Me > FAQ & Feedback.
Is this page helpful?
YesFeedbackIs this page helpful?
YesFeedback


