Create an OEM App for iBuilding+
This topic describes how to create a trial app on the Tuya Developer Platform, create an official OEM app, publish the app, and configure general parameters.
Prerequisite
The smart iBuilding+ app needs to be used with web end( SaaS). Please contact Tuya by sending an email to building@tuya.com after completing the OEM app configuration on the Developer Platform. You can register for the app account for use after purchasing the license and completing the configuration.
Build an OEM app
Create an app
-
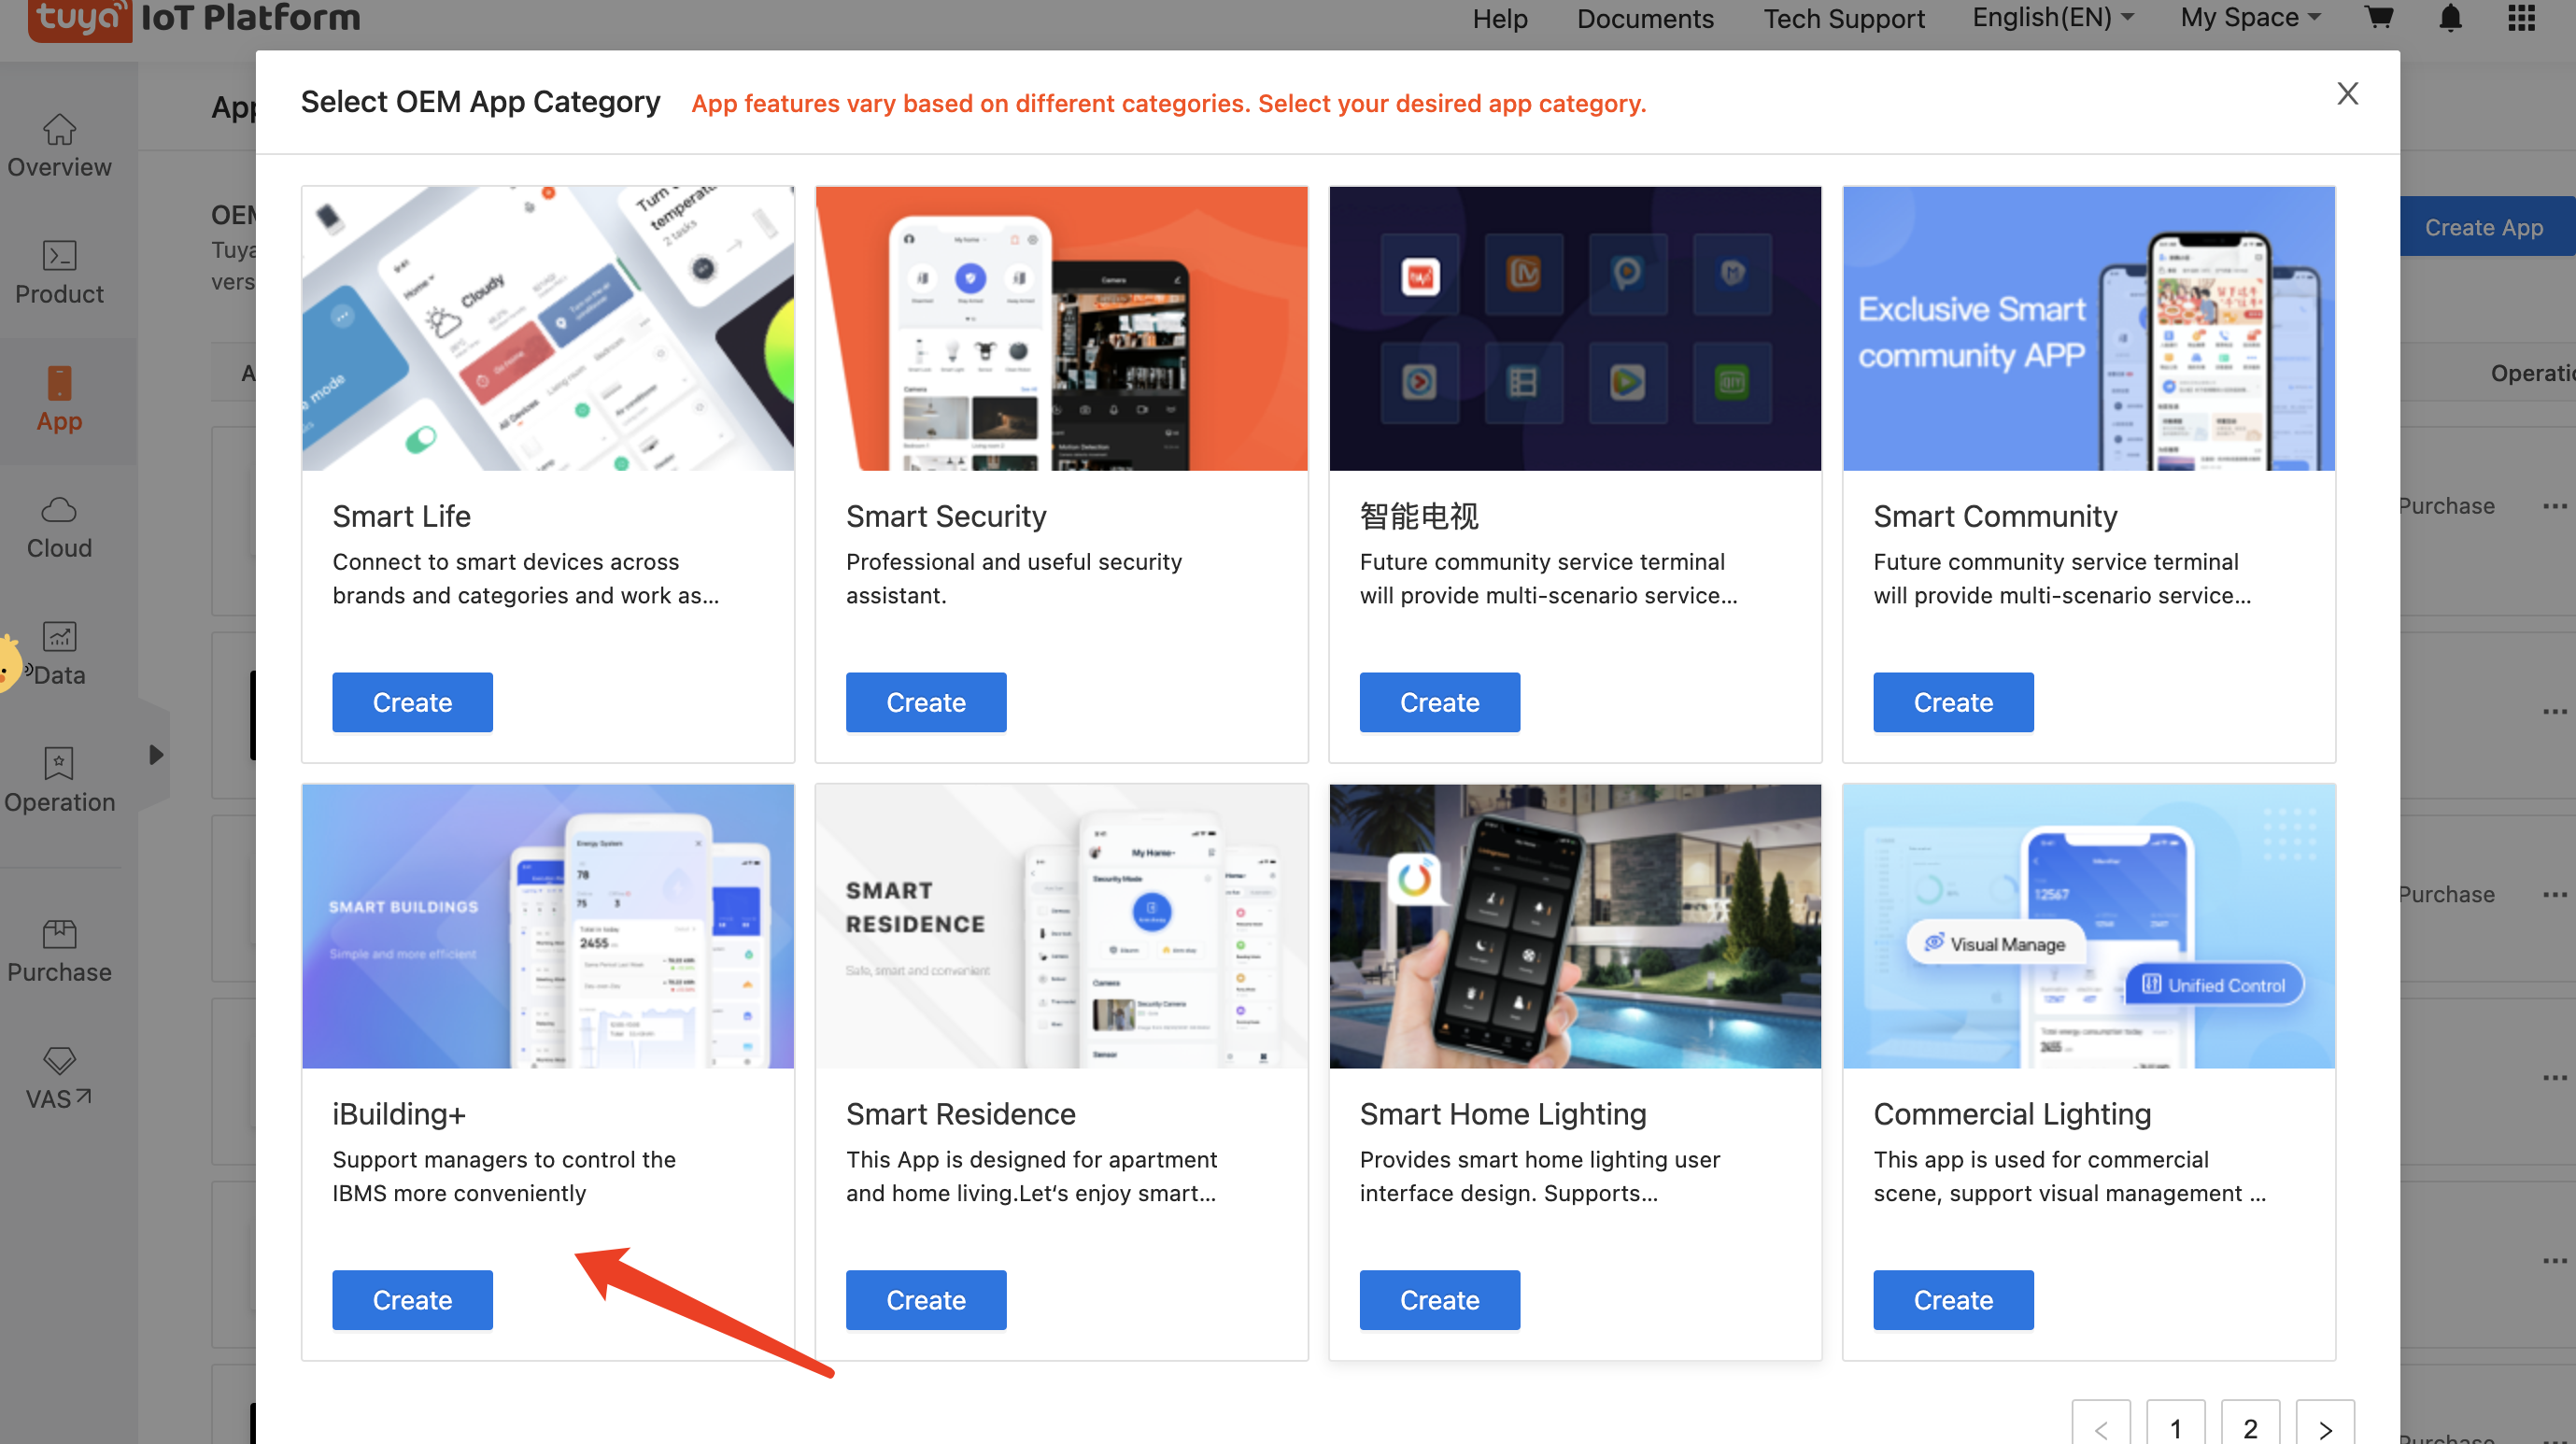
Log in to the Tuya Developer Platform and go to the app page.
-
Click Create, select iBuilding+ APP.
-
In the dialog box, complete the app information, carefully read and accept terms in OEM APP Service and Software License Agreement.
Option Description Example App Name The app name will be displayed on the user’s mobile phone desktop. We recommend that you enter a name within six characters in Chinese or 12 characters in English. If the specified maximum length is exceeded, app users cannot view the full name. A branded smart product app App Package for Android/iOS The unique identifier used for publishing on app stores. Try to include the company domain name to ensure a unique app package name. If the app package name already exists in an app store, the app cannot be published on the app store. Recommend letters and numbers. Three sections are recommended and they can be separated from each other with periods (.). Each section starts with a letter. The characters such as "tuya" cannot be used. For example, if the Tuya domain name is tuya.com, the package name can be set tocom.tuya.smart.com.testapp.smartiot Channel ID Optional. If not specified, the channel ID is automatically generated based on the package name. The channel ID cannot be modified after it is confirmed. It is mainly used to evoke this app on the mobile phone and is also related to the link of the QR code to print. – 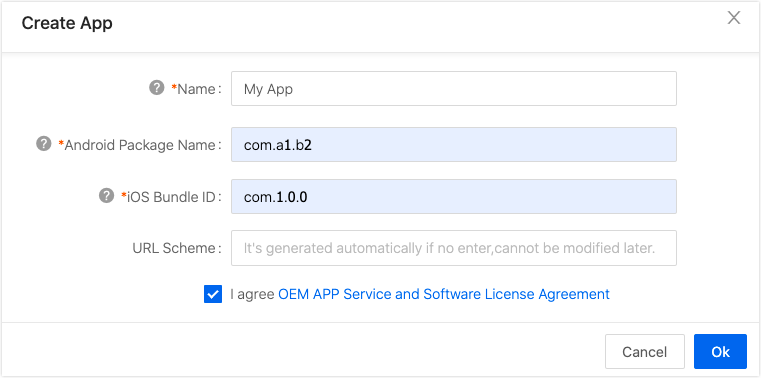
-
Click OK.
Customize the user interface (UI) style
The UI configuration determines your app appearance and the application icons of the app.
-
Set App Icon.
- Only square images in the .png format are supported. Do not upload images with transparent images. Otherwise, a display error might occur.
- The dimensions must be 1024 × 1024 pixels.
-
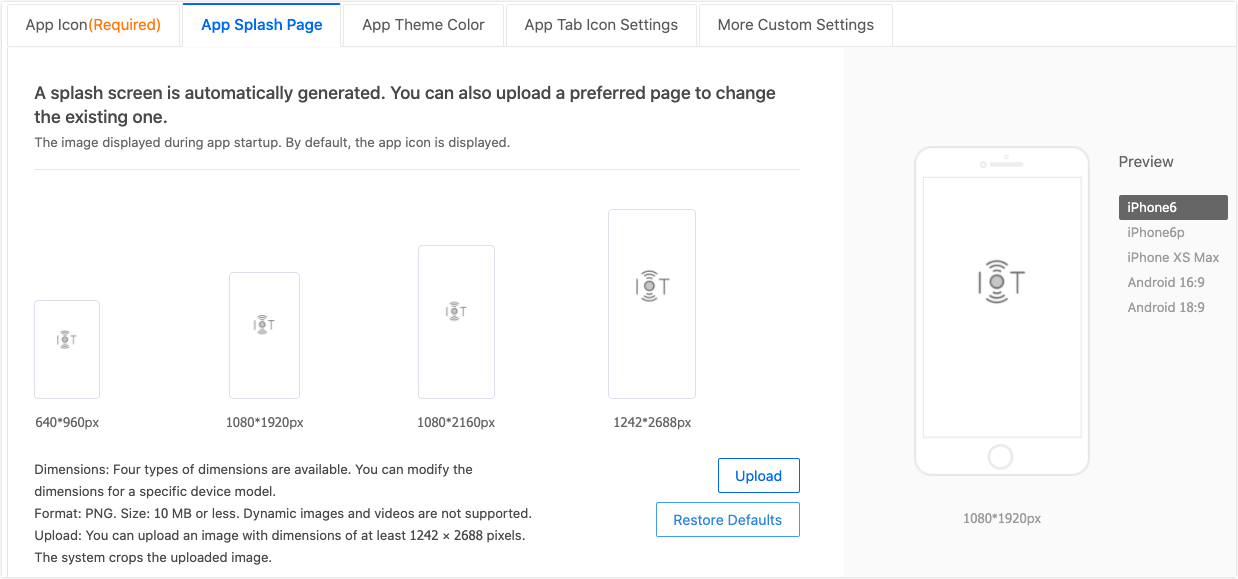
Set App Splash Page.
A splash screen is automatically generated after you upload the logo. You can also upload a preferred page to change the existing one.
-
Only .png files are supported.
-
Upload: You can upload an image with dimensions equal to or higher than 1242 × 2688 pixels. Images of different dimensions can be separately uploaded.
-
-
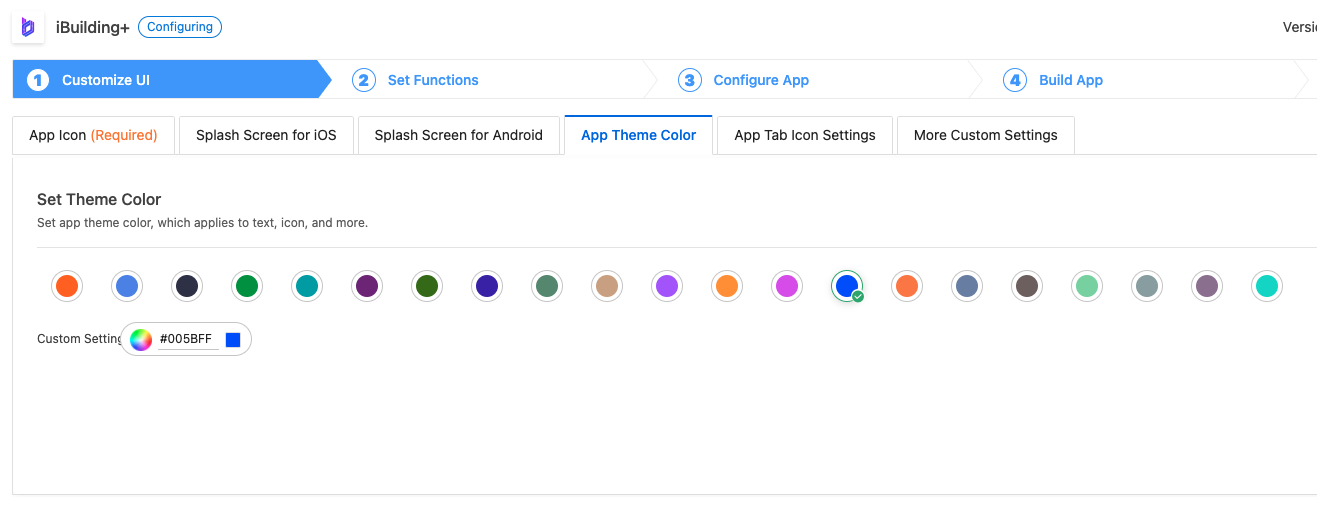
Set App Theme Color.
-
When the template version used by your app is earlier than v3.23.5, you can set the theme color of the app. You can choose from 21 preset color schemes, or customize a color scheme.
-
-
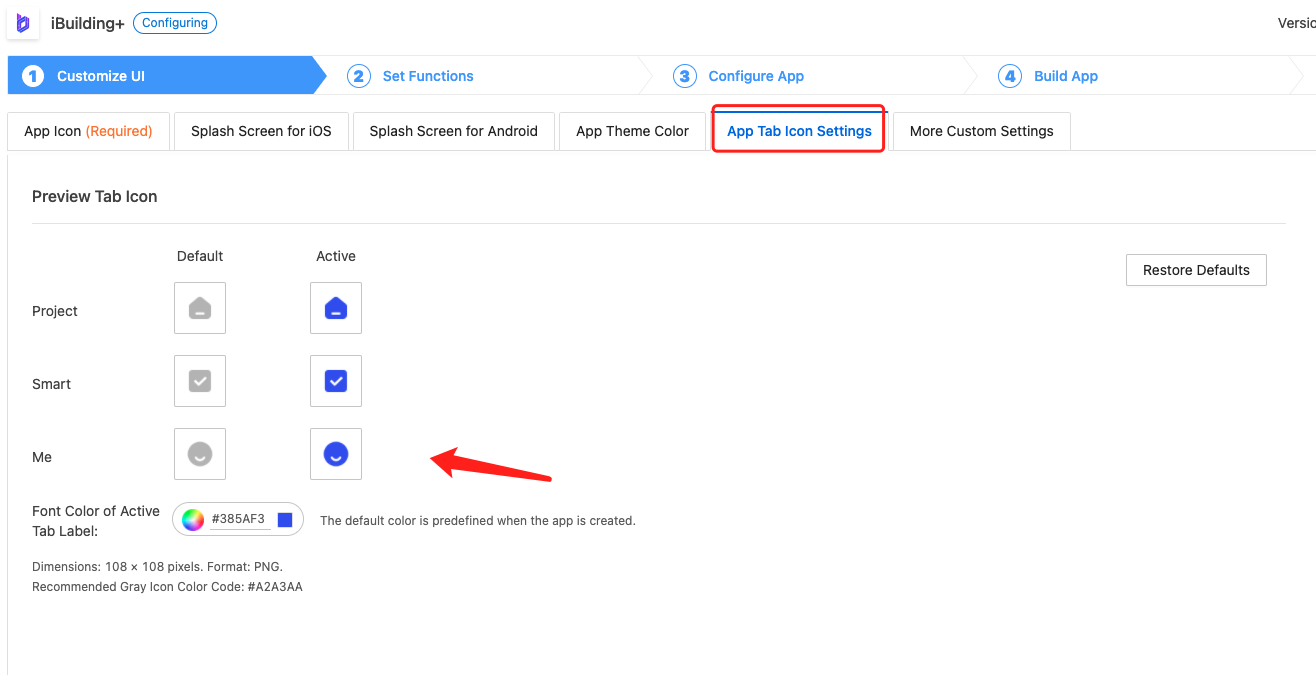
Set App Tab Icon Settings.
Tuya provides default icons. Also, you can upload the desired icon.
Note: You can upload your own six icons in the .png format. The dimensions must be 108 × 108 pixels.
The following figure shows the configuration.
- Default: preview an active icon.
- Active: preview an inactive icon. You can customize the font color of an active tab label.
-
More Custom Settings: Tuya provides default icons. Also, you can upload the desired icon.
-
Sign In/Sign Up Logo: The logo must be in the .png format, with the dimensions of 400 × 400 pixels.
-
Default avatar: the default avatar on the Me tab of the app. The file must be in the .png format, with the dimensions of 144 × 144 pixels.
-
Sign In/Sign Up Background: The file must be in the .png format, with the dimensions of 1080 × 1920 pixels. Currently, the button font color on this page is fixed. You must upload the image and confirm the preview effect. We recommend that you change the background.

Note:
- To try an OEM app with a few simple clicks, click Next: Function after the preceding configurations.
- You can use the default configuration of the basic function or modify the configuration. Choose Next: Build > Build Now, wait until the app is built, and then test the app. Each version can be built up to 10 times a day and up to 30 times a month.
-
Configure the functions
You can choose whether to enable or set the Extended Functions.

-
About Us: You can enter your official website link in the format of https://. If the link does not start with
https://, this page cannot be opened in the app. Currently, only the pages in Chinese and English are supported. To navigate to a page in another language, enter the link in the field for the English language. -
Copyright Information: To add the copyright information to the app, tap Me at the bottom of the page, tap the setting icon in the top right corner of the page, and then tap About. Currently, only Chinese and English are supported.
-
User Agreement: Due to the rules of the major app stores, it is enabled by default. After it is enabled, the logged-in user can also view the latest version of the user agreement.
-
Scan: You can choose whether to enable the function.
-
Privacy Policy: Due to the rules of the major app stores, it is enabled by default. After it is enabled, the logged-in user can also view the latest version of the user agreement.
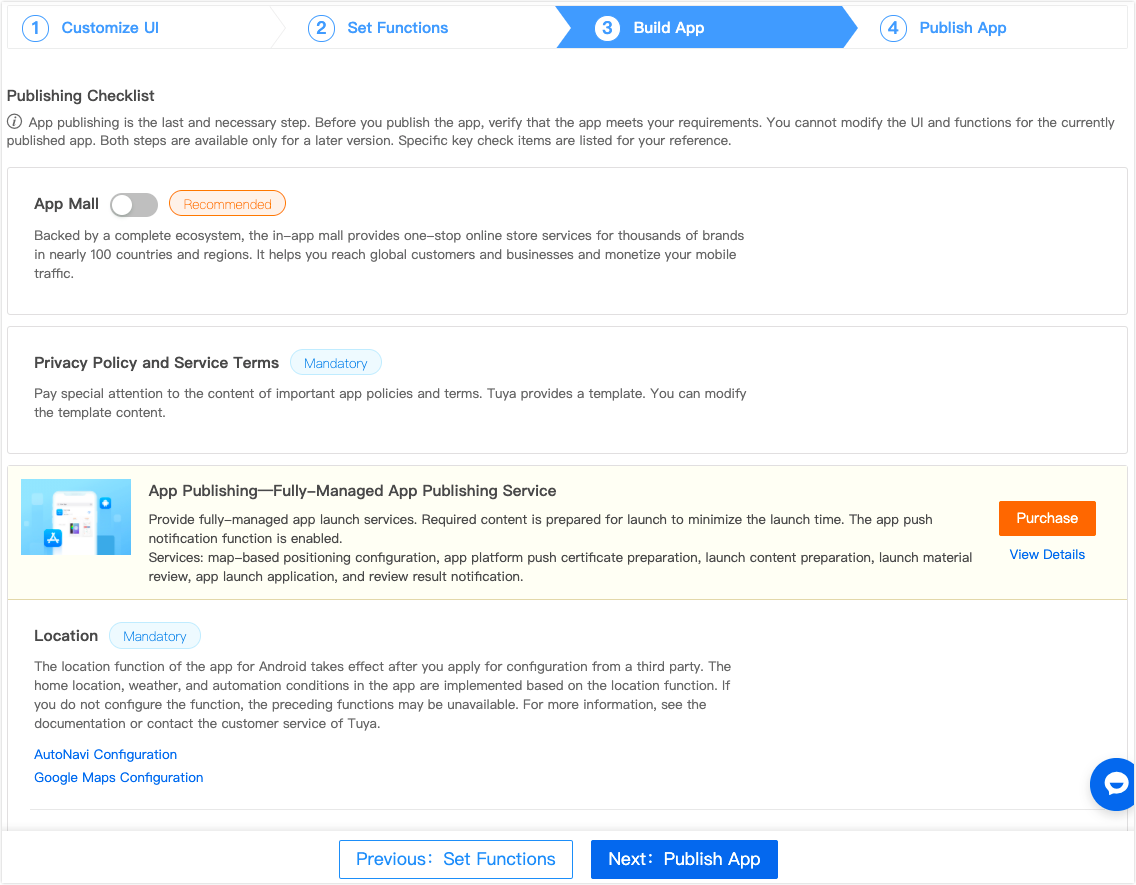
Build an app
After the app configuration is completed, choose Next: Build App > Build. Then, the system builds each app package in the sequence of application time, and the page will prompt the estimated build time. After the app is built, the system pushes the build result to your account of Tuya Developer Platform by email or SMS.
-
Launch Checklist: When you visit this page for the first time, this page displays the required configuration items for your app to be published on the app store. However, to optimize your tests and experience, you can click Build to build the app for tests in advance.
-
If the app is built, you can use your mobile phone to scan the QR code to download and install the app for tests. The QR code automatically identifies the mobile phone system and supports both Android and iOS.
-
In the very rare case that the build fails, an error message is returned to help you troubleshoot the error. You can also submit a ticket to request technical support.

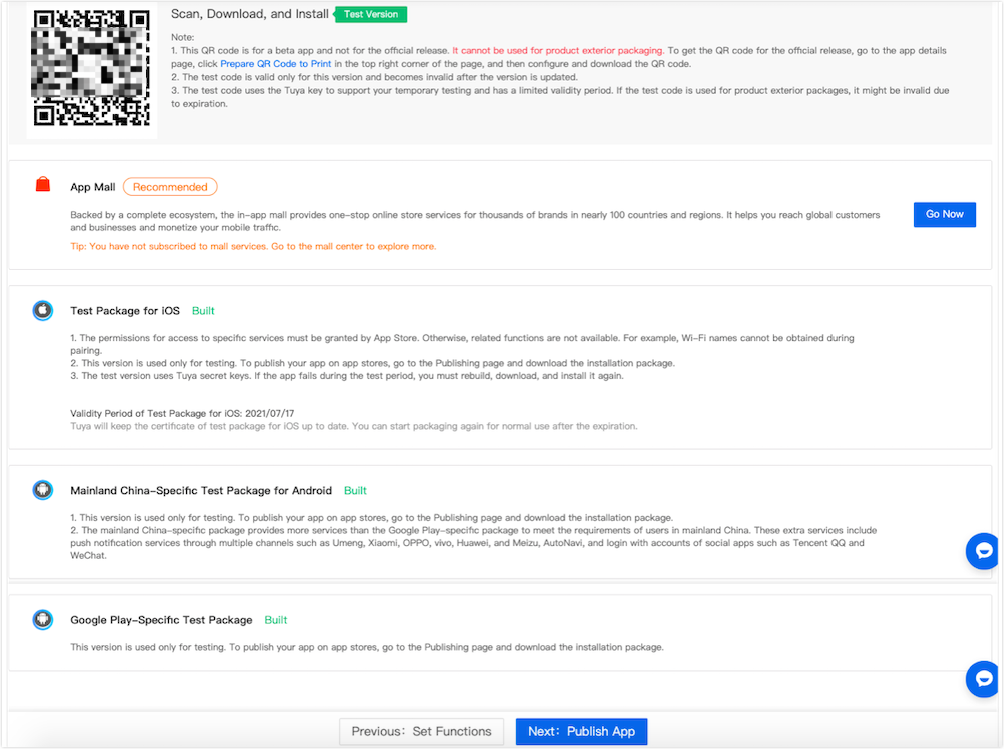
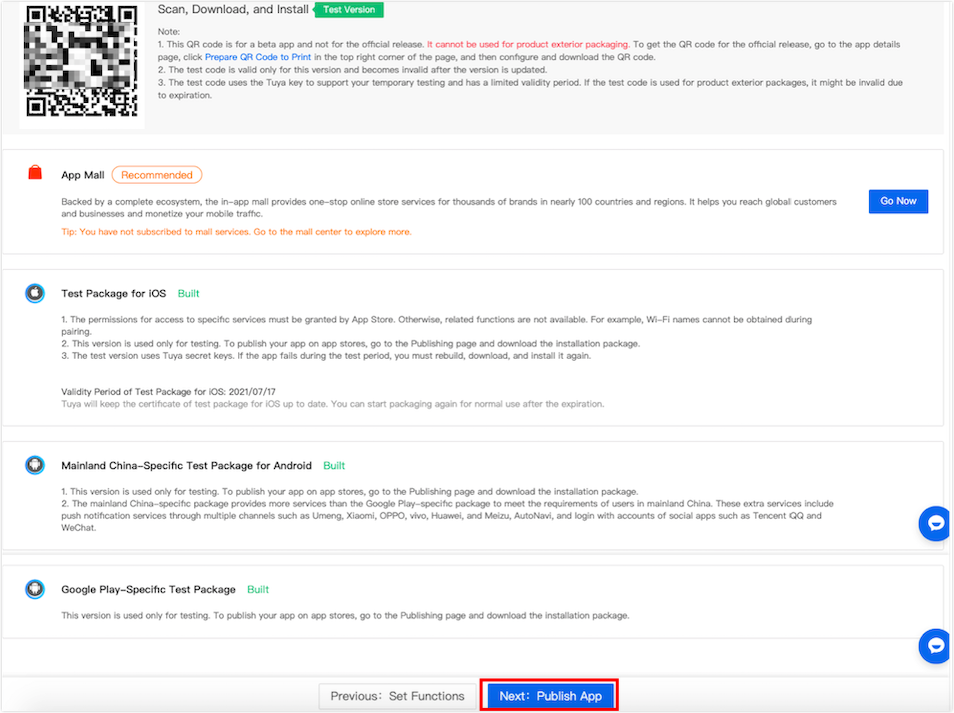
Trial version of the app
The trial version is created and configured on the Tuya Developer Platform through the above process. After the app is built, you can scan the QR code for the trial version to download and install the app on your mobile phone.
- The trial version is valid for 30 days from the date of creation. The trial version cannot be edited or built after expiration, and the installed app on the mobile phone cannot be used as expected.
- The installation package of the trial version cannot be used to publish the app on the app store. You must purchase the OEM App service and complete the required configuration items before the app can be published on the app store.
Official version of the app
If you have already purchased the OEM App service, ignore this step and publish the app on the app stores.
Get the SaaS account
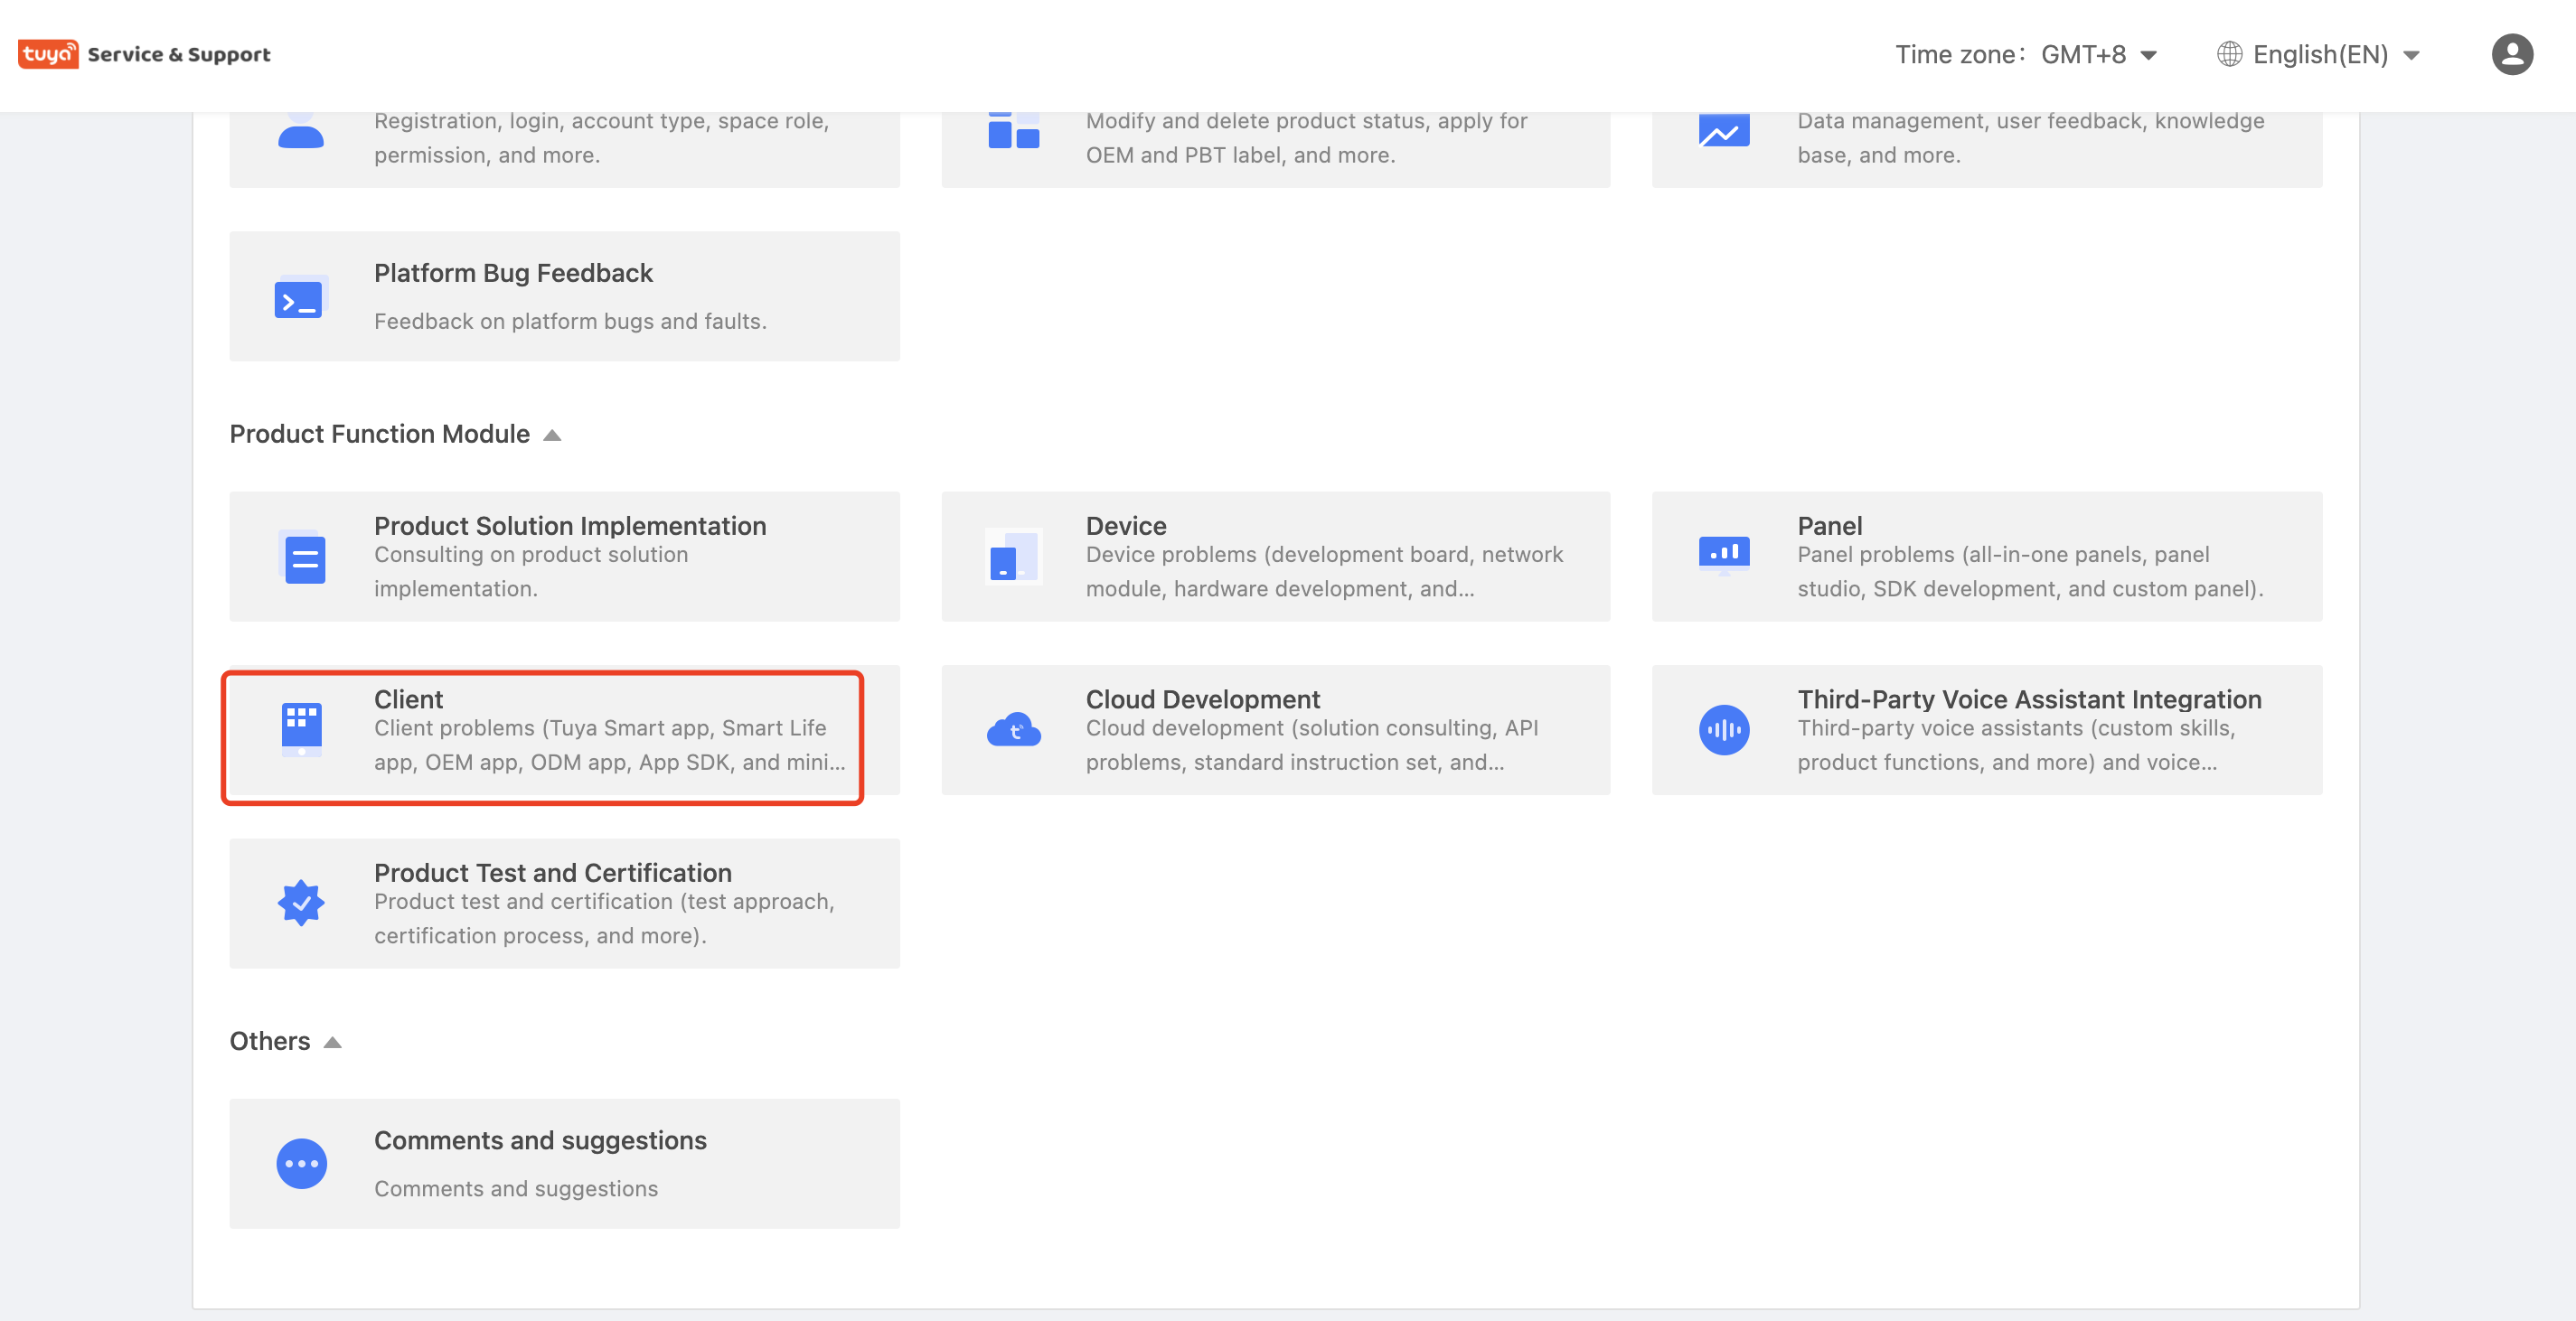
The smart iBuilding+ app needs to be used with web end( SaaS). Please contact Tuya by sending an email to building@tuya.com after completing the OEM app configuration on the Developer Platform. You can register for the app account for use after purchasing the license and completing the configuration. Or you can use "Tech Support" --"Client"–"OEM App" to contact us.
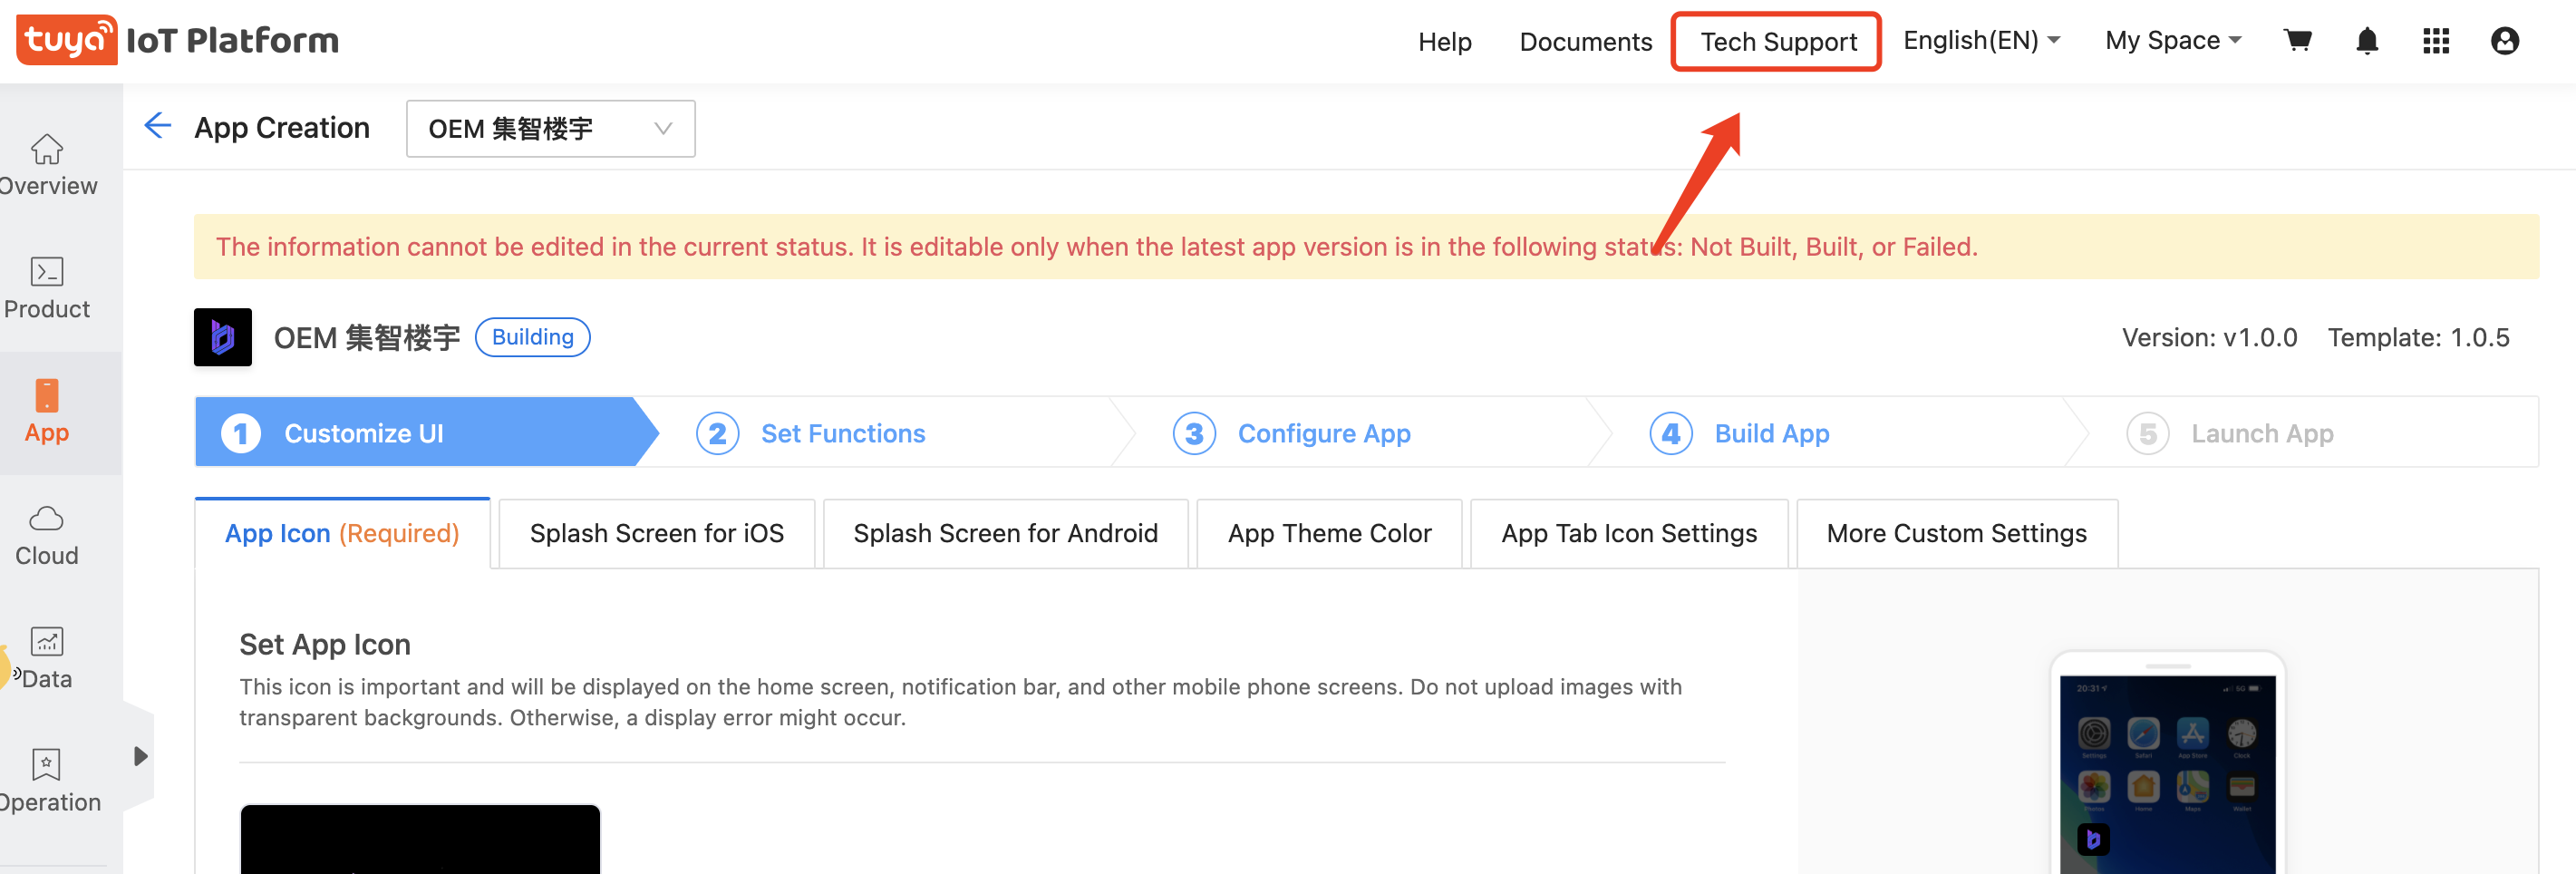
Select "Client "- "OEM app"
Purchase OEM app service
If your app passes the test, you can publish the app on the app stores. If the OEM App service is not purchased, you cannot get the installation package for publishing. After the trial version expires, you cannot continue to use the app.
-
Click Purchase OEM App and follow the instructions on the page to place an order and complete the payment.

-
Select App: Select the app to be purchased.
-
Company Developer Account: Prepare a developer account for the app stores in advance. We recommend that you register an overseas developer account in App Store.
-
Tel: Enter the phone number of the contact person.
-
Email: Enter the email address of the contact person.
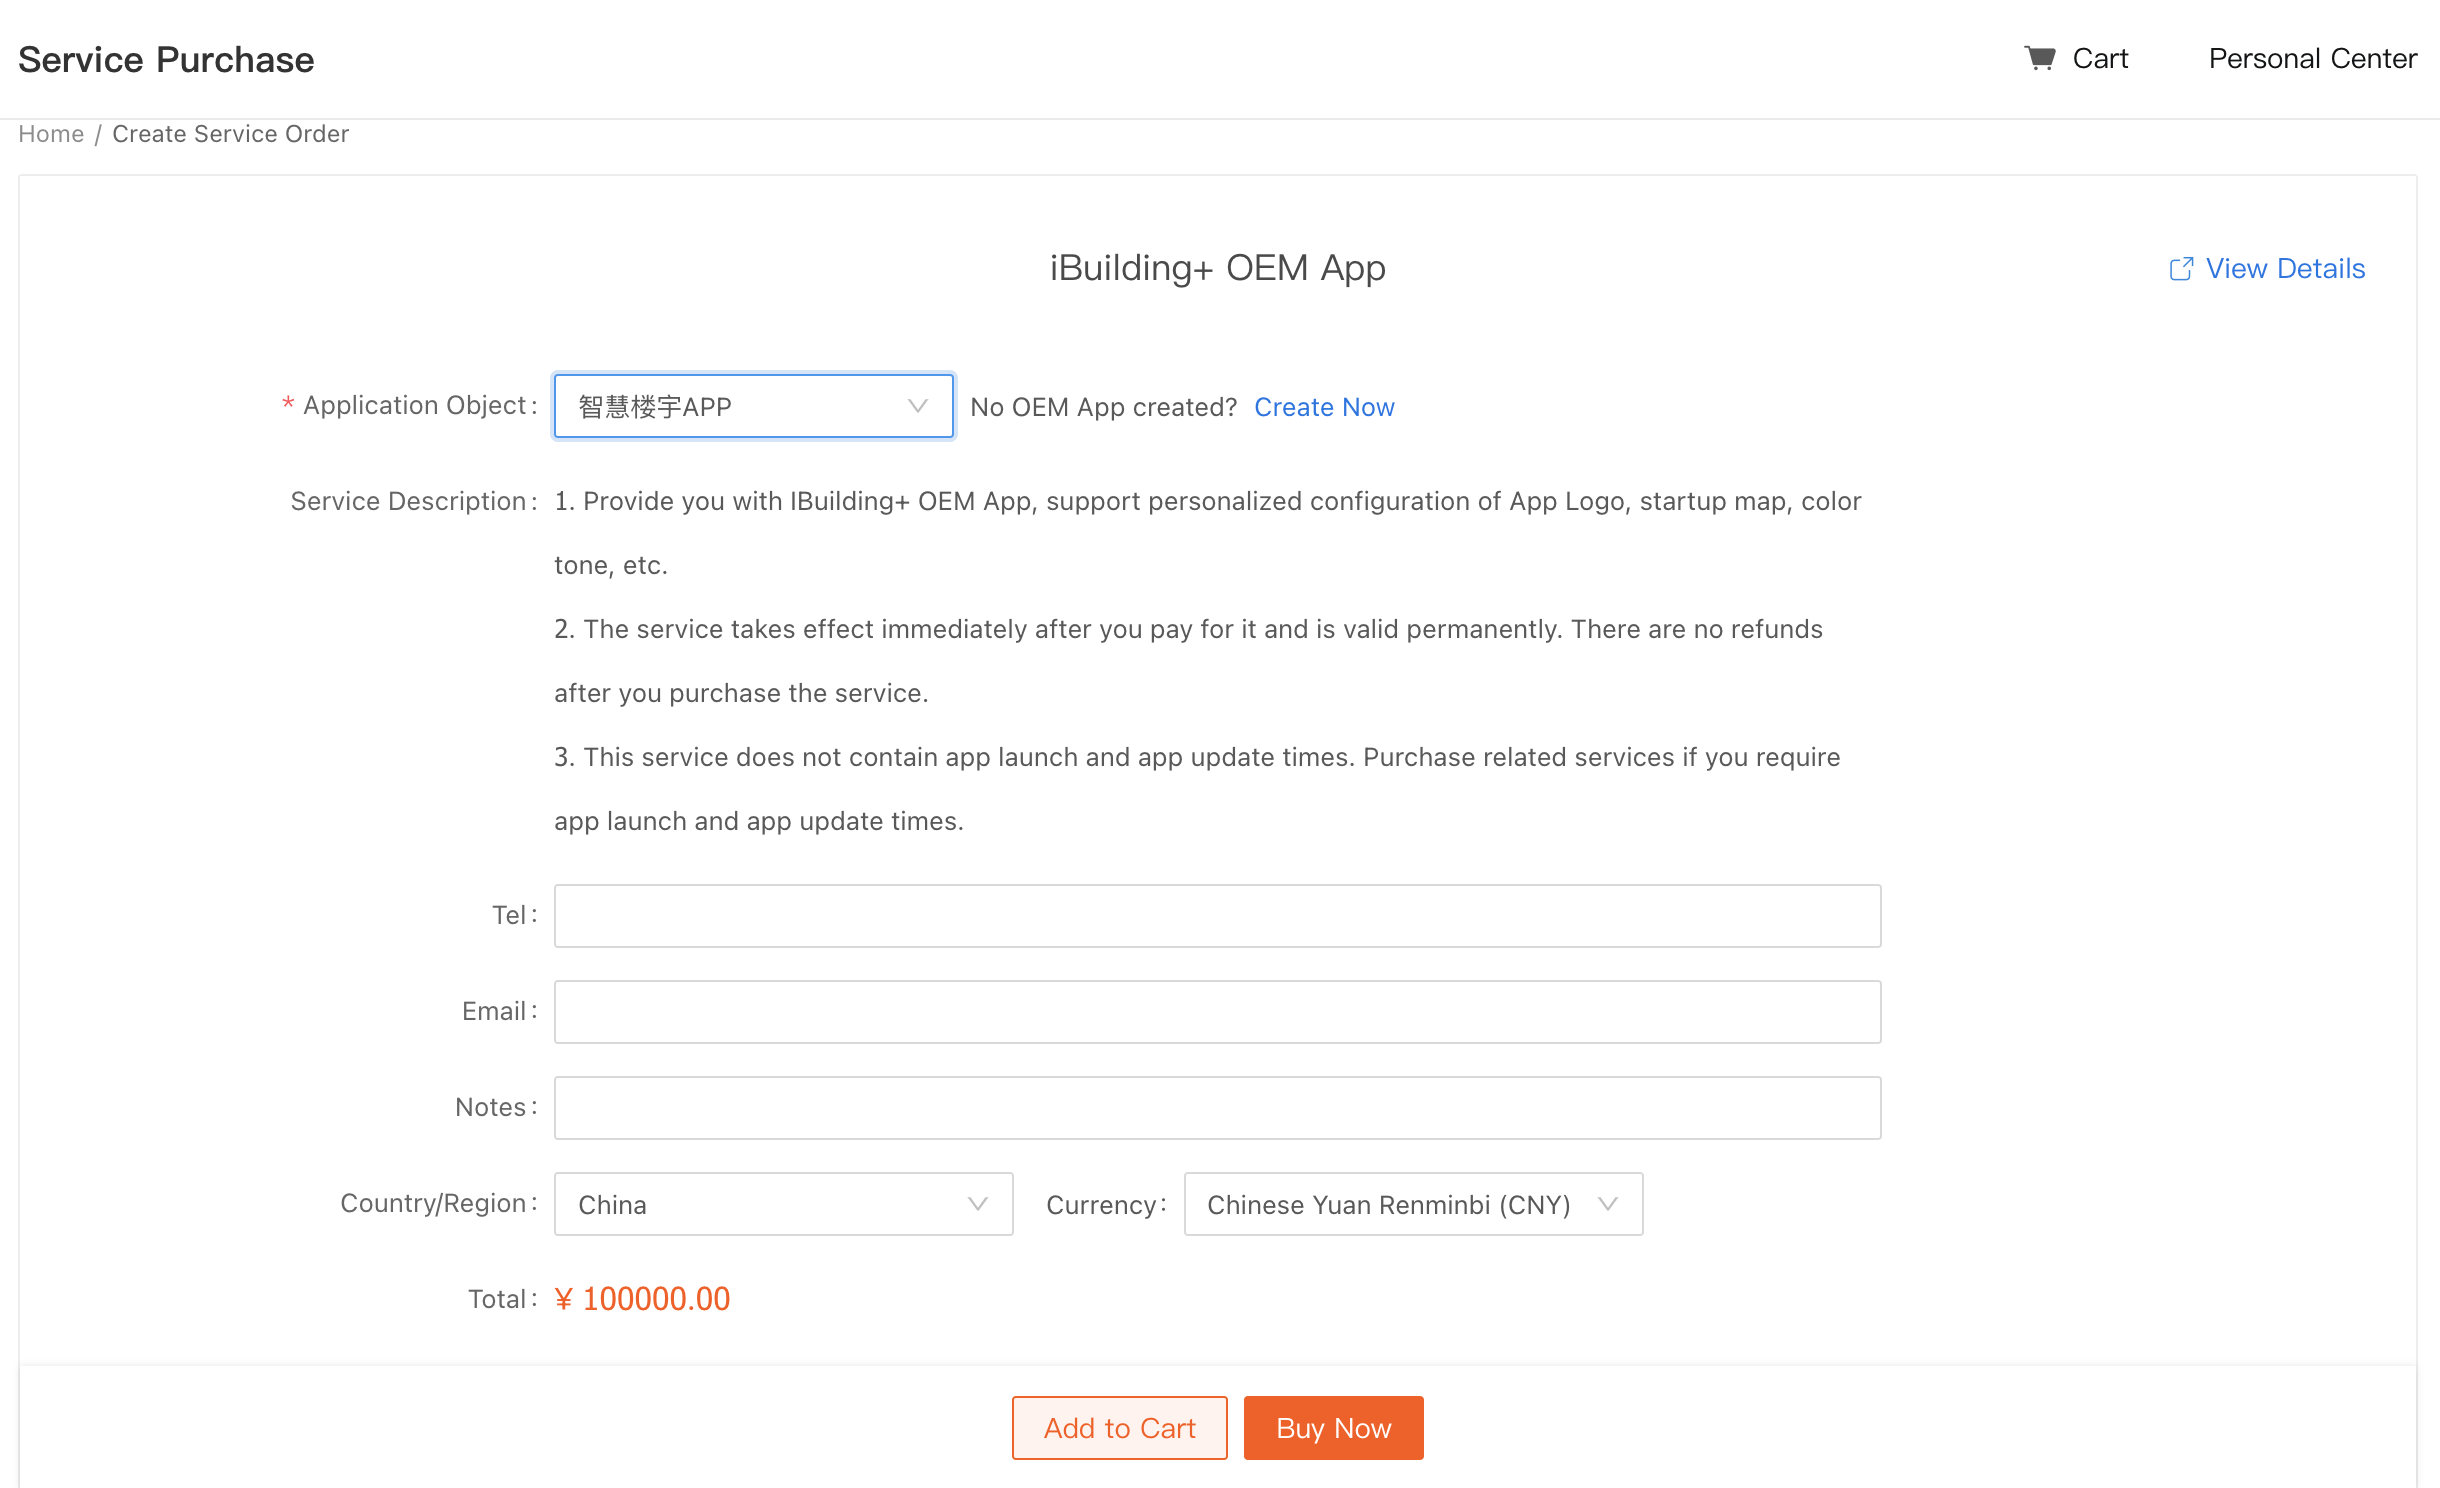
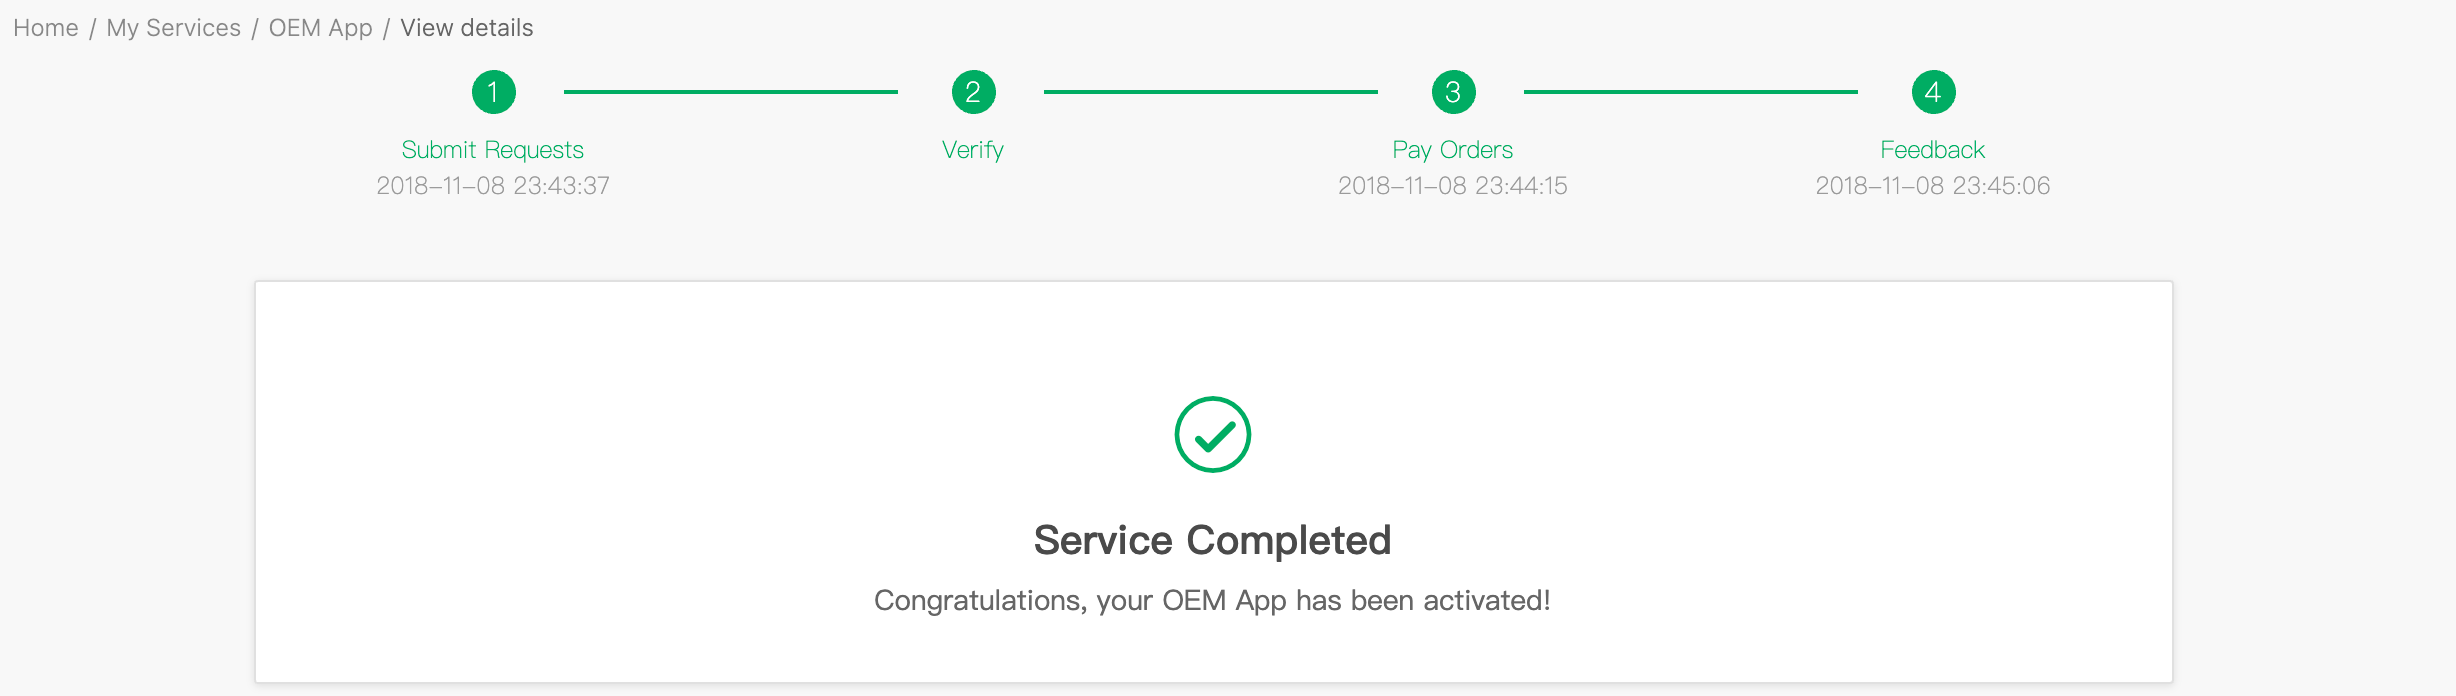
After the information is confirmed, click Submit Requests. Tuya will review the request and reply with a quotation. After the review is passed, your account of Tuya Developer Platform will receive a notification.
-
Payment Information: If your OEM app has been paid offline, provide your order number and contact the Tuya staff to bind the payment.
-
Invoice: You can choose whether to request an invoice. If you want an invoice, provide the invoice information after the service is completed and contact the Tuya staff to get an invoice.
After you select the payment method and complete the payment, you can return to the studio and continue to configure your app.
App overview
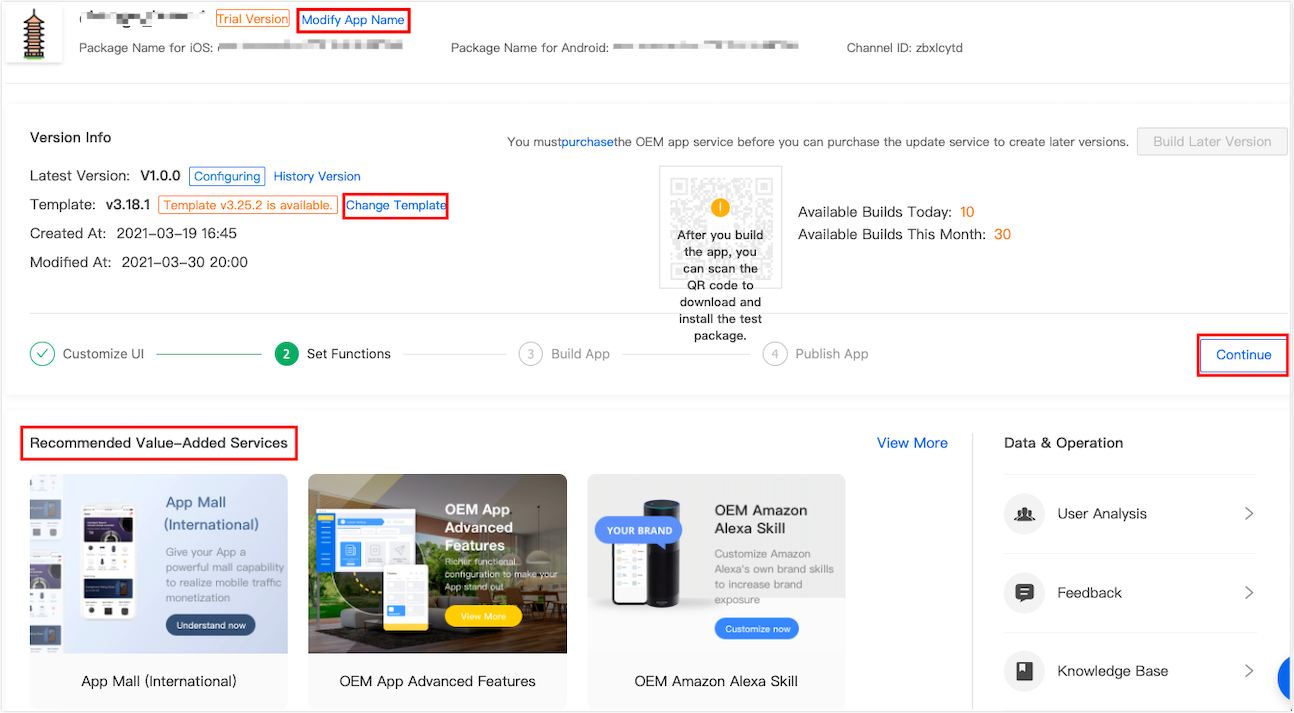
After you subscribe to the OEM app service, enter the App Overview from the OEM app list and update the following information.
-
Modify App Name: Currently, the name can be set only in Chinese and English. If the name in Simplified Chinese is not specified, the name in English is displayed.
-
History Version: If you have created two or more versions of your app, the History Version entry will be displayed. Click it to view the configuration information of the historical versions.
-
Change Template: If the template version currently used by your app is earlier than the latest template on the Tuya Developer Platform, you can click Change Template, and click Update in the pop-up box to select and use the latest template. The updates take effect only after you rebuild the app. Click View Release Notes to view the functions of the latest template.
-
Continue: Click here to enter the last configuration page of the latest version.
Publish the app
Method 1: Purchase the app publishing service
-
When the app test is finished, click Next: Publish App.
Note: After you modify the content in the development step, such as UI and extended functions, you need to rebuild the app.
-
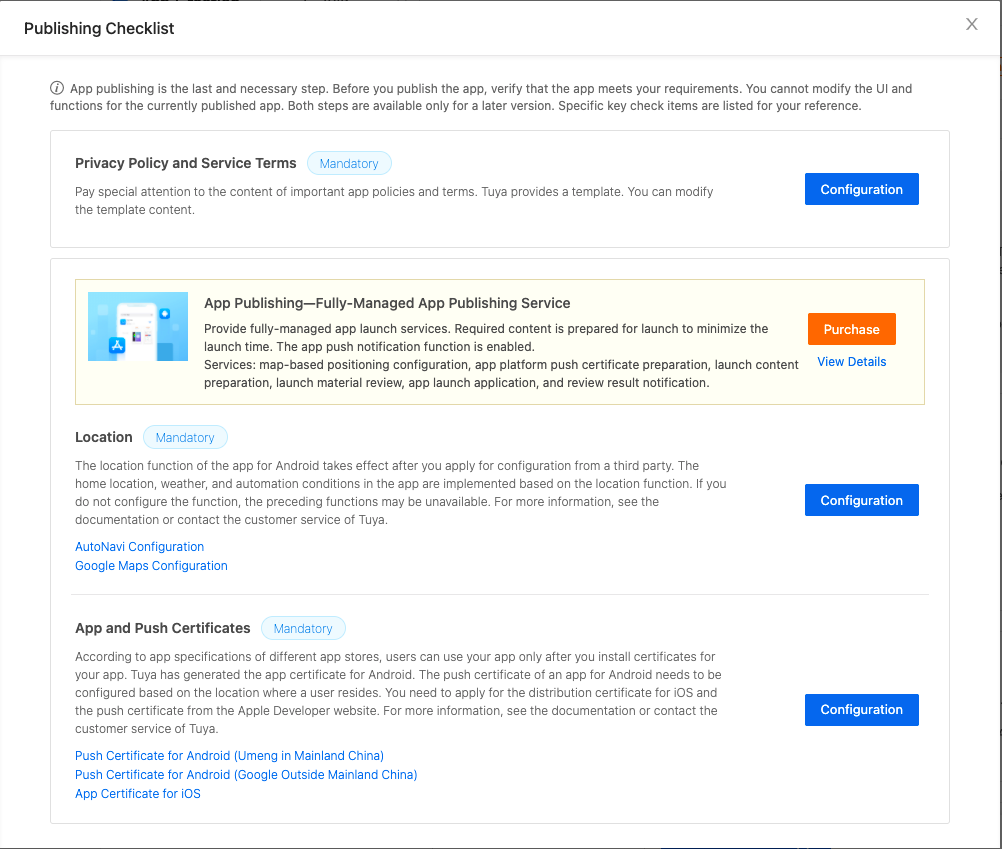
If you have not purchased the publishing service, we recommend that you purchase the app publishing service in advance. Because certain required functions of the app depend on third-party platforms, we provide related configuration services for Location, App Certificate, and Push Certificate.
-
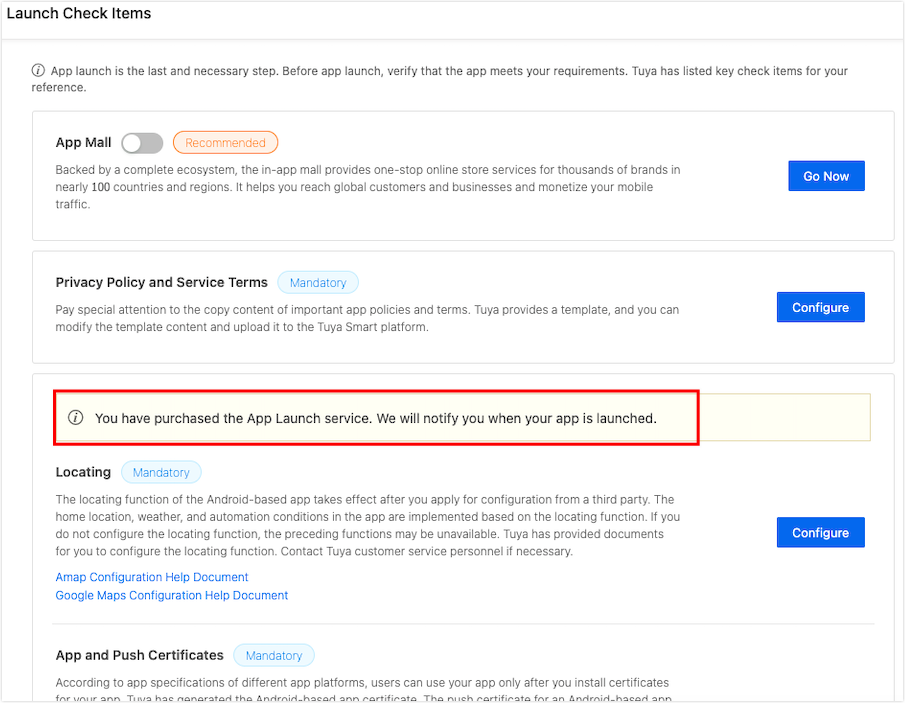
If you have already purchased the publishing service, the system will display a prompt, and the Tuya staff will contact you. You can ignore the steps for the publishing and the Tuya staff will complete the follow-up operations.
Method 2: Publish by yourself
-
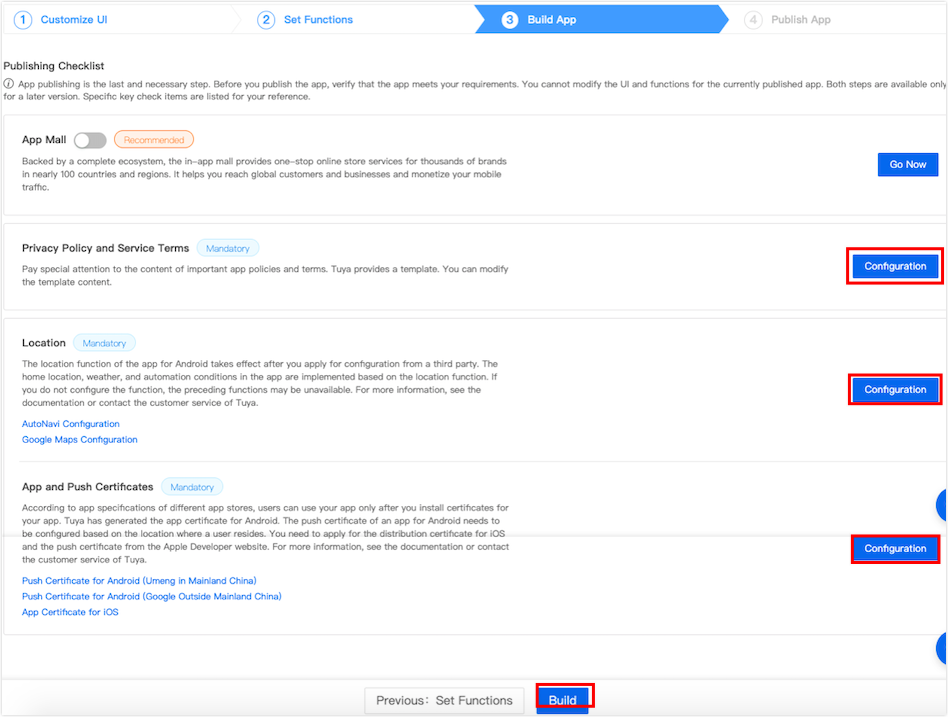
After the app test is finished, click Next: Publish App. The system automatically checks the required items. When the app is not fully configured, the page will prompt you to configure it. You can click Configuration to configure one by one.
Note: As long as any configuration item is modified, the app must be rebuilt to take effect. After the configuration is completed, you can rebuild the app. To accelerate the build process, we recommend that you complete all the configurations at once before building.
-
After the app is built, uninstall the previous app version and download and test the app of the later version. Check whether to enable or disable the Android push function and map function and continue to publish the app. The iOS push service can only be tested after the app is published.
-
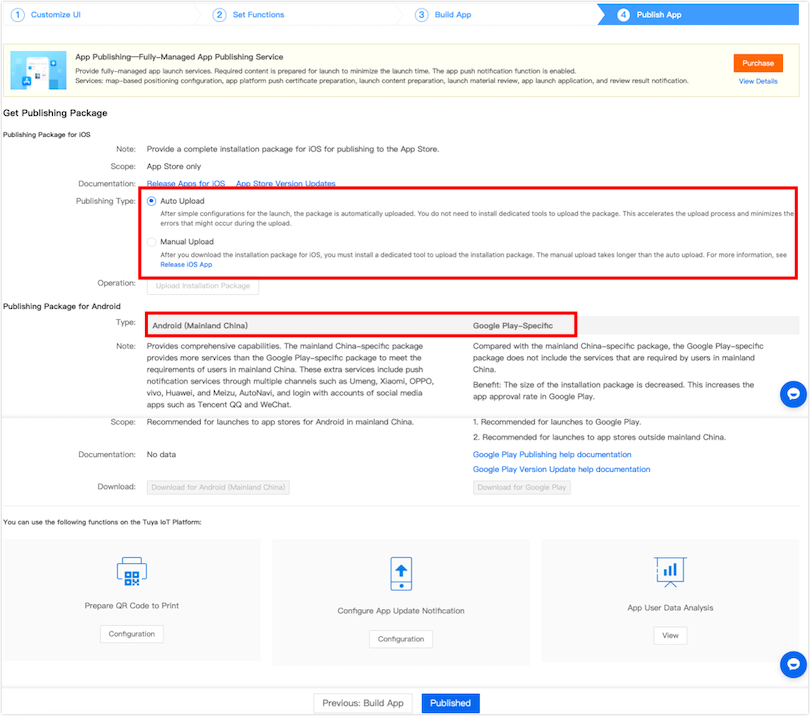
You can upload and download the installation package for iOS on the platform. To pass the strict review of apps for iOS, carefully read the operation manual and publish your app according to the specifications.
The installation package for iOS supports Android (Mainland China) and Google Play-specific packages. New installers to Google Play since August 2021 must use the app bundle file.
-
By default, the Android (Mainland China) package includes AutoNavi map service. It allows login with WeChat and Tencent QQ accounts and supports push notification services for multiple mobile phone brands.
-
The Google Play-specific package includes Google Maps and the push notification services.
-
-
(Optional) You can submit a ticket to consult and solve the problems when you publish the app.
-
After your app has passed the review, click Published at the bottom of the page to confirm that the app has been published on the app stores.
Required setting
To publish your app, the following functions are required.
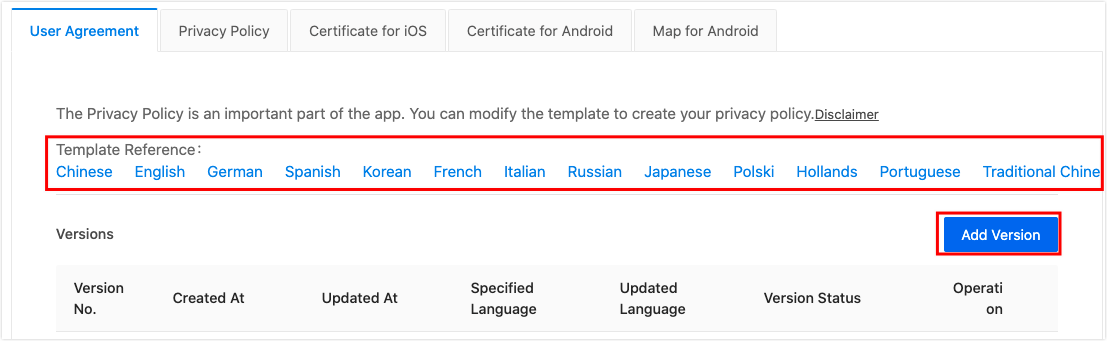
User agreement or privacy policy
Click Add Version. You need to provide the custom content of the privacy policy and service terms.
Tuya provides Template Reference in multiple languages including Chinese, English, German, French, and Japanese. You can download and customize your content. To publish your app, versions in English are required.
Note: Tuya’s privacy policy and user agreement templates are for reference only. Upload your versions of the privacy policy and user agreement with accurate and legal content. If you follow the entire content of the template, Tuya shall not make any representations or warranties as to the applicability and application results of the specified template. To meet the mandatory regulatory requirements and improve privacy protection, Tuya will modify and publish the template content from time to time. You must check and update your privacy policy and user agreement if you follow the template content.
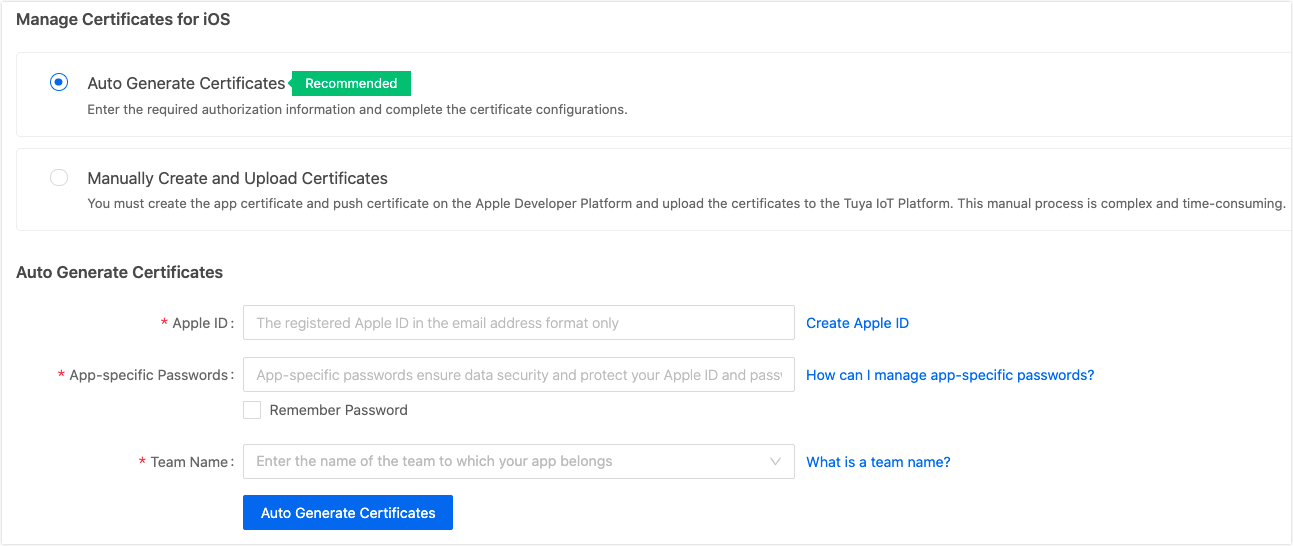
Certificate for iOS
If you want to publish your app on the App Store, you need to upload the relevant certificate here. To create a certificate, you need to register a developer account first. For more information, see the corresponding documents. If the certificate is not uploaded, the system will not be able to build an installation package, and the app cannot be published.
-
Auto Generate Certificates (recommended): This function is an auxiliary function. The certificate preparation process of the iOS certificate platform is complex. You can enable the automatic generation and upload of all certificates. You only need to enter the authorization information to quickly complete the certificate configuration.
-
Manually Create and Upload Certificates: For more information, see Making an iOS Certificate.
Certificate for Android
To publish your app on the Android app stores, upload the relevant certificate here. To create a certificate, you need to register an Android developer account first and configure the app as required by the app stores. For more information, see the corresponding documents. If the certificate is not uploaded, the system will not be able to build an installation package, and the app cannot be published.
-
App certificate
-
Re-signing for Android: App security can be improved after setting. For more information, see Resignature Configuration.
-
App Signing Certificate: You can apply the certificate to specific services. For example, you must provide the certificate to get the token that enables Login with Amazon (LWA).
-
-
Set the Push certificate according to the location of the app user:
-
Google FCM: the certificate information that must be set when you use the Google Push service. For more information, see Register the Firebase Cloud Messaging (FCM).
-
If you are pushing to users in mainland China, you can use the Tuya push channel or Umeng push channel.
In addition, if you want users to receive pushes without the need to open the app, you need to set up the branded system-level channel to push certificate information.
-
Optional setting
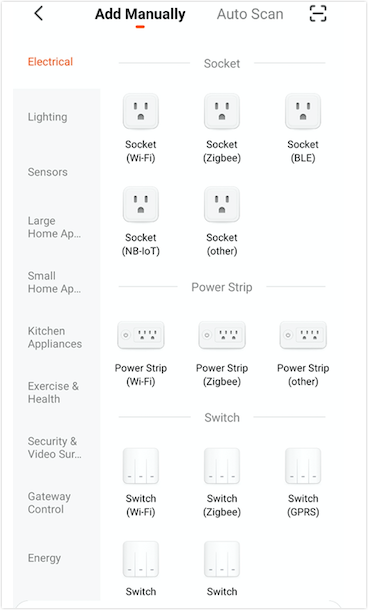
Devices
Currently, you can choose the category of the devices to be paired. It is set to Standard View by default. For this category, the same pairing list and guide content as the Tuya app are used. In the standard view, you cannot modify the pairing list and guide content.

After the app is built, take template A v3.24.6 as an example (click to add a device). An example of the app page is as follows in the standard view.
-
If you have less than 10 categories, you can choose Tile View. Users do not need to switch categories. All available product categories are easily visualized.
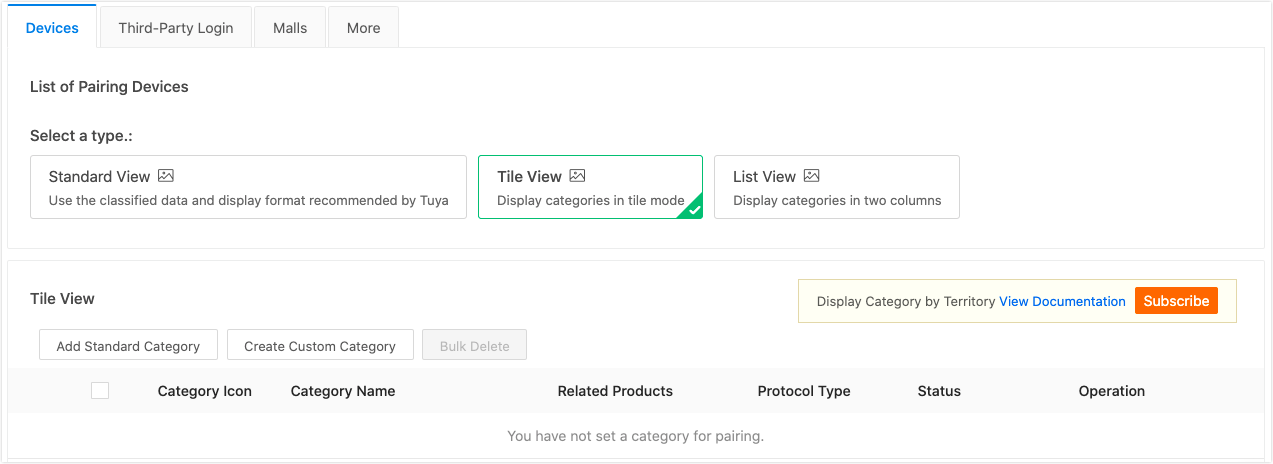
-
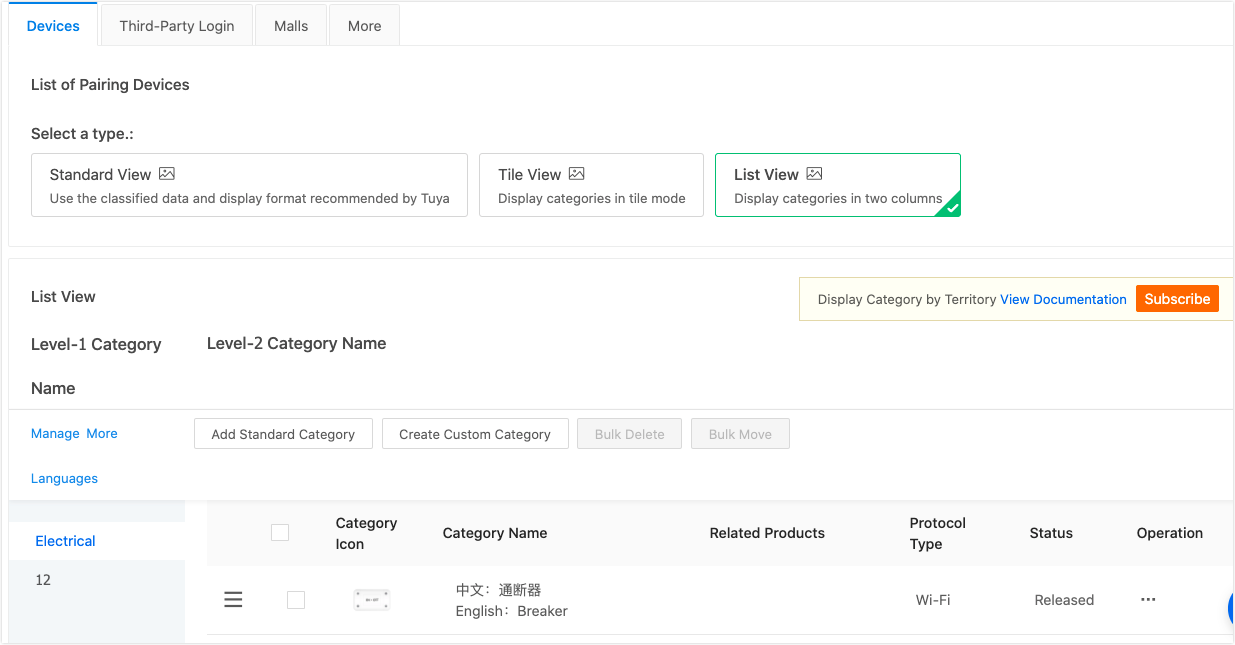
If you have more product categories or cross multiple categories, you can choose List View. Users can quickly find the pairing entry of the target product category through classification, and complete the pairing according to the guidance.
Customize specific steps
-
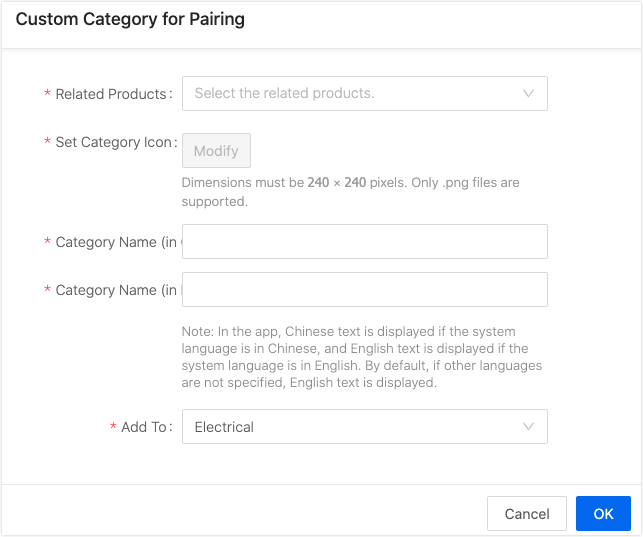
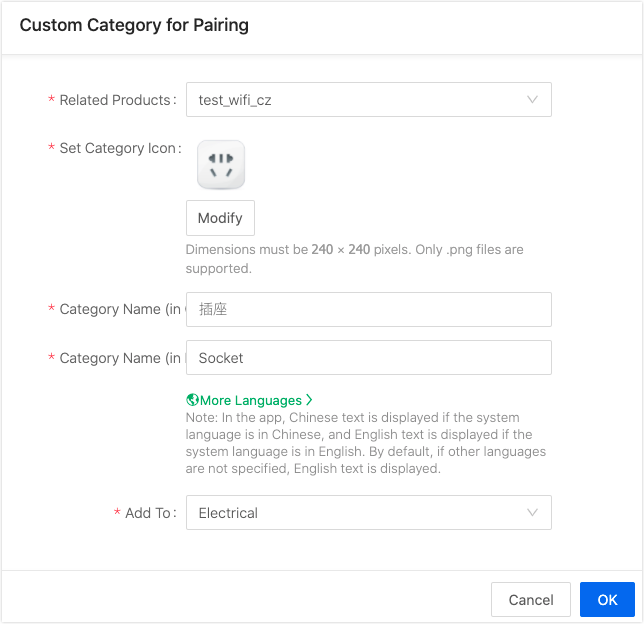
Click Create Custom Category. In the Custom Category for Pairing dialog box, select the product to be associated with the category.
-
If no product has been created for the current space account, the product cannot be associated. You need to create a product first or choose Add Standard Category. For more information about how to create a product, see Create Products.
After the association, during pairing through the specified pairing category, the app user can see pairing guide content. Accurate pairing guide content can improve the success rate of pairing.
-
After the product is associated, the category icon will default to the icon of the associated product. Also, you can upload other icons.
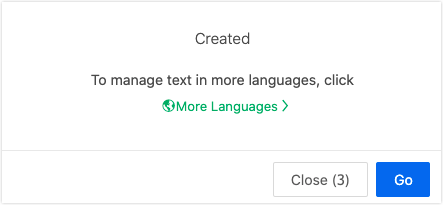
The category name can be customized. The default Chinese and English are required. After the creation is successful, you can set the category name in other languages in the dialog box that appears.
-
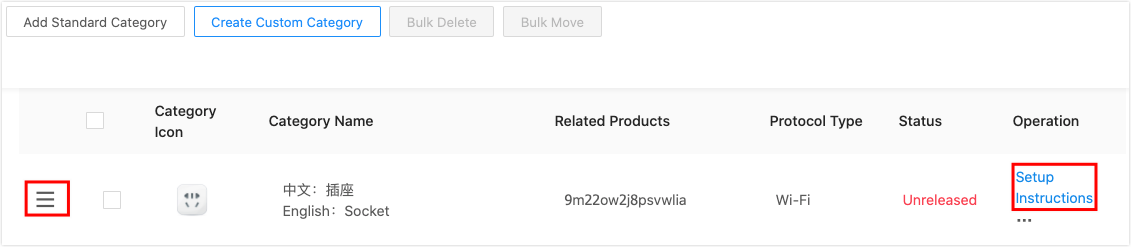
Click a category to see an icon with three lines on the left side of the category. Click and hold the icon to move the specified category.
-
Click Setup Instructions in the Operation column to navigate to the pairing guide setting page of the product. You can complete the pairing guide content according to the actual operation steps and points for attention.
-
Click the icon with three dots in the Operation column to view more operation items.
-
Click Multilingual, you will be redirected to the multi-language configuration page of this app’s pairing list.
-
Click Modify to see the specified information in the dialog box. You can modify the information.
-
-
Click Delete. In the message that appears, click OK to delete the category. The deletion operation immediately takes effect. Proceed with caution.
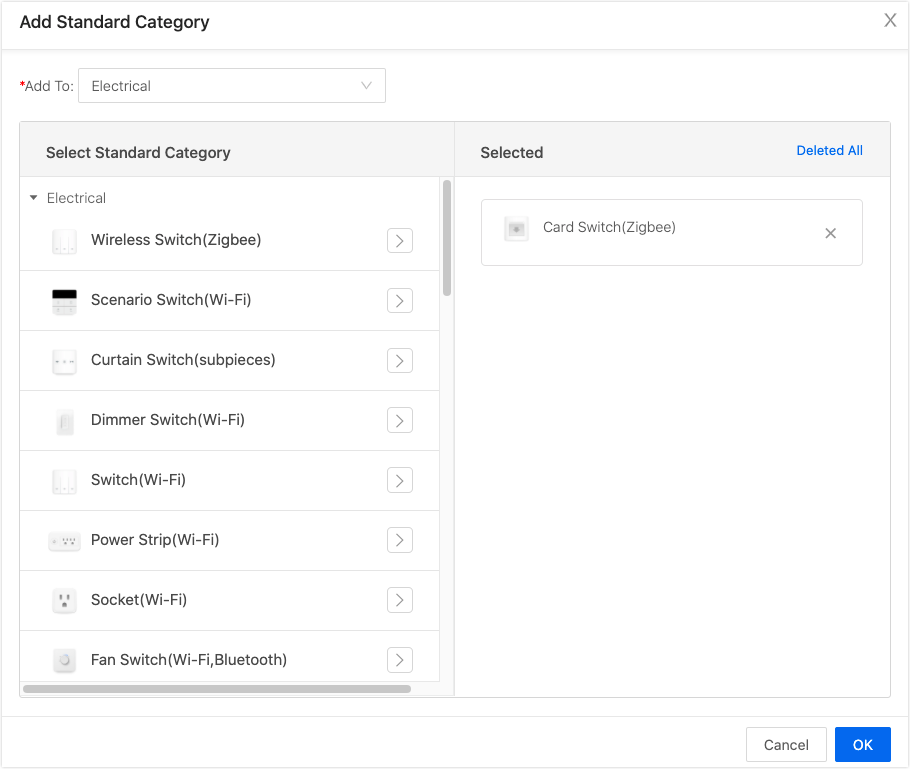
Add a standard category
-
Click Add Standard Category. In the dialog box, add the required standard categories to the Selected category column.
-
You cannot modify the icon, name, and pairing guide content of a standard category. You can only adjust the sorting in the list of paired devices or delete the category.
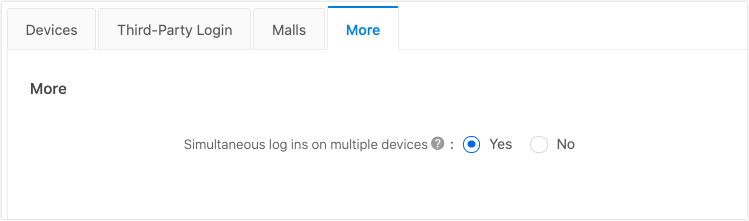
Simultaneous logins on multiple devices
You can choose whether to enable simultaneous login to multiple mobile phones with the same account.
Common tools
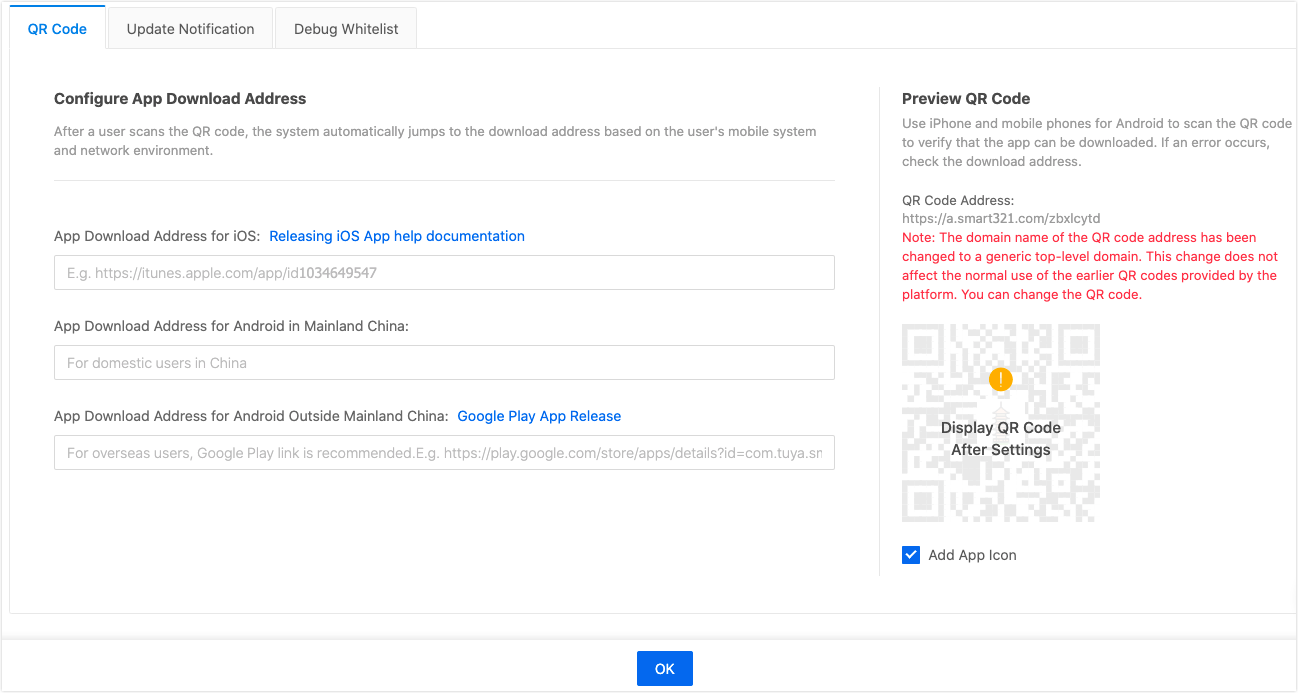
QR code
The QR code can be printed on the outer packaging of the product and can be used properly even if the app is updated later. Make sure that the download address entered is available. The app details page of each app store is preferred.
Note: The QR code of one download address must be configured before the QR code can be displayed. You can get download links in the app stores. Only after the download link of each operating system is set, the mobile phones of the corresponding operating system can scan the QR code, and visit the download link to download the app.
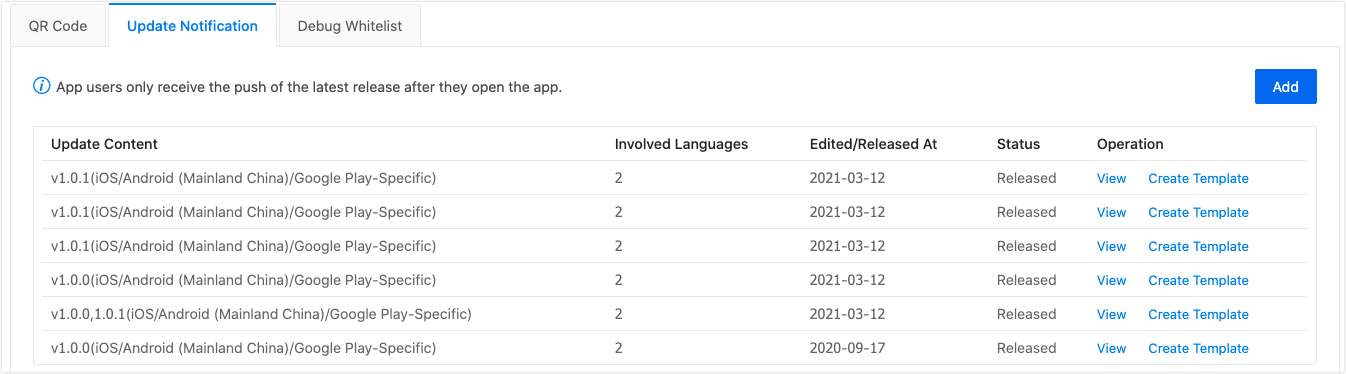
Update notification
When a version update of your app has been released, you can configure a push notification here and push the update to the user’s app. The user chooses whether to update or not. For more information, see Configure Upgrade Notification Push.
Multilingual settings
Currently, you can modify all entries in batch and modify specified entries online.
-
Method 1 (batch modification): You can export the language content table of the app, modify the content in the table, and post the modification.
-
Method 2 (individual modification): You can search for the specified entry through the app content and modify it.
For more information, see App Multilingual Introduction.
Is this page helpful?
YesFeedbackIs this page helpful?
YesFeedback


