Flash Firmware
This topic describes how to flash firmware to the WR11-G-IPEX module.
Flash with Tuya tools
-
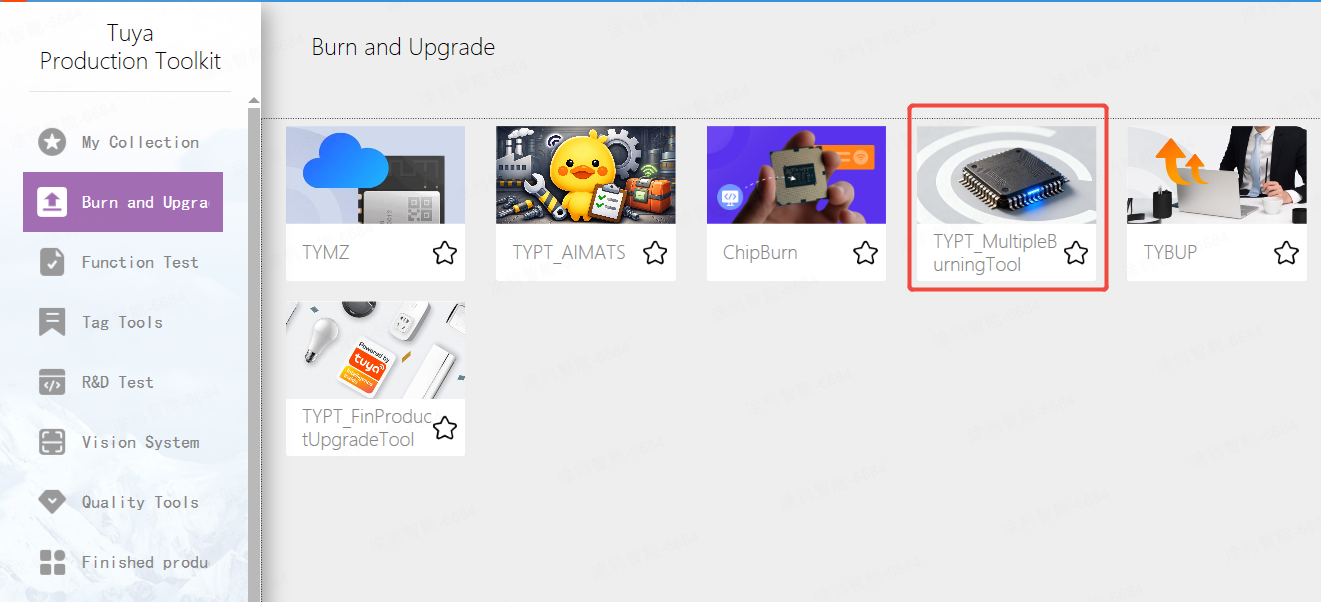
Open Tuya Production Toolkit and choose Burn and Upgrade > TYPT_MultipleBurningTool.
-
Connect the pins for flashing.
- Serial port TX > LOG_RX
- Serial port RX > LOG_TX
-
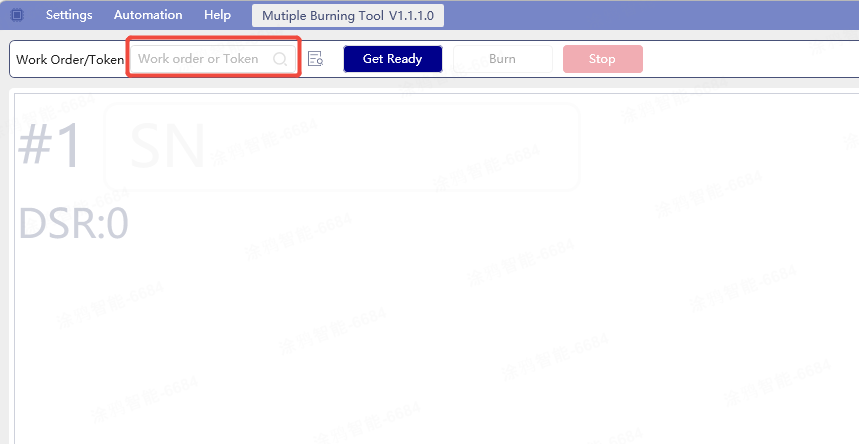
Enter the token and press Enter.
-
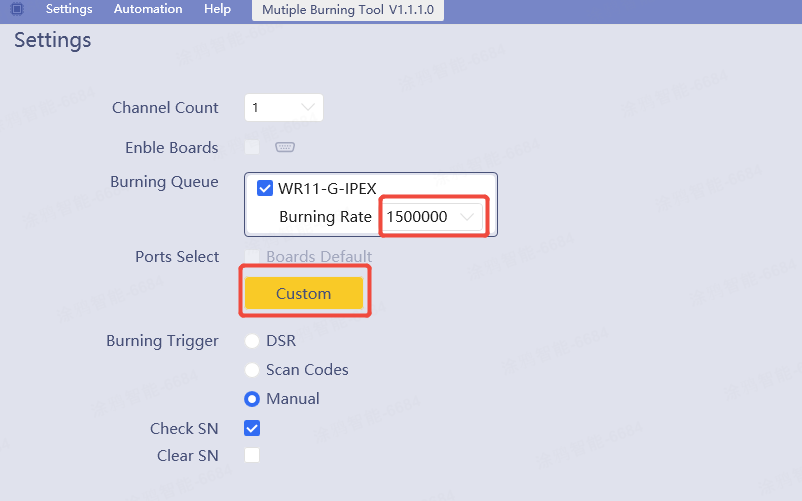
Configure the flashing serial port and baud rate (1,500,000).
-
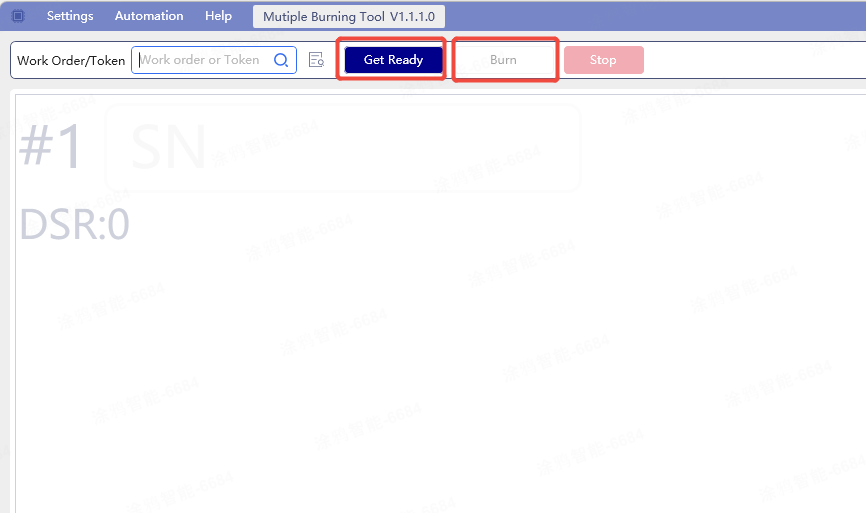
Click Prepare, click Flash, and then power on the device.
Switch firmware after flashing
Switch from the MP firmware to the application firmware after flashing.
-
Open SecureCRT or other serial software. Configure the correct serial port and baud rate (the same as the flashing baud rate).
-
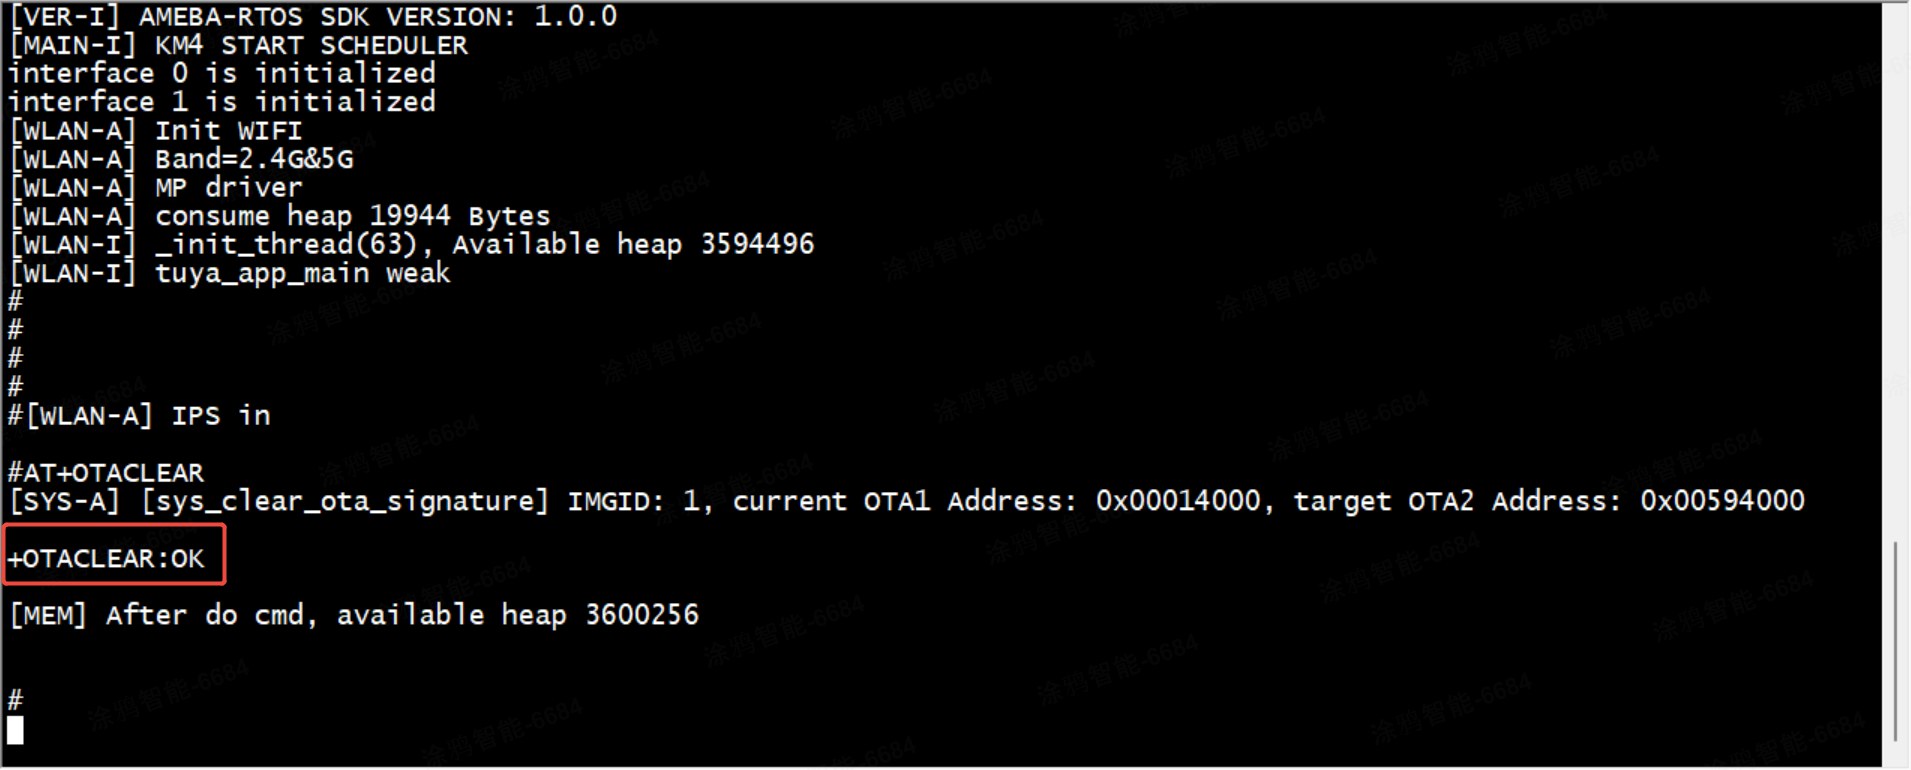
Power on the device. When logs appear, enter AT+OTACLEAR and press Enter. A prompt in the red box indicates success.
-
Power on the device again.
Flash firmware with chip vendor’s tool
Pins on flashing tool
| Pin | Description |
|---|---|
| TX/RX | User serial port (Tuya tool authorization and production tests) |
| LOG_TX/LOG_RX | Chip vendor’s tool or batch flashing |
Wiring
Connect the pins as described in the Flash with Tuya tools.
Output files
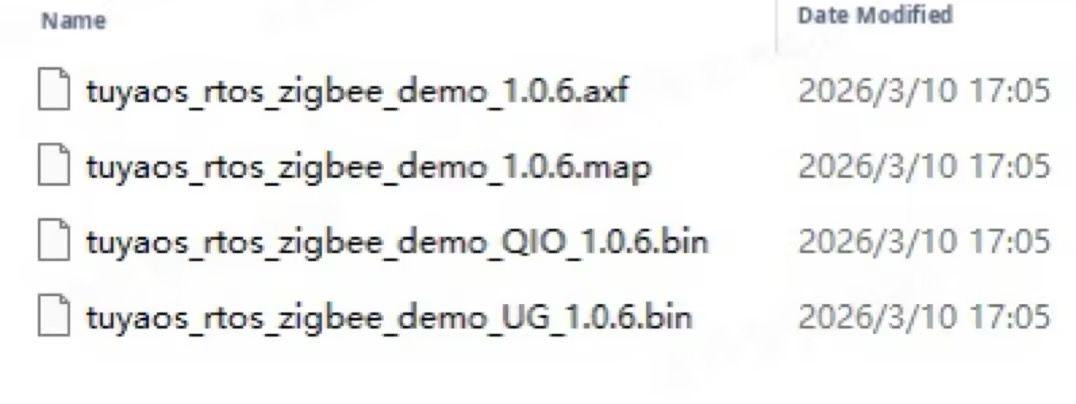
axffile: A debug file used for locating paths before a crash.- QIO firmware: includes
bootloader, mp (RF calibration), and ota2 (tuya). This firmware can also be flashed using the chip vendor’s tool. - UG firmware: The update area firmware for backend upload. This firmware does not include a bootloader and cannot be flashed using the chip vendor’s tool. However, during a remote OTA update, this firmware will be pulled by the module.
Download procedure
Download full firmware
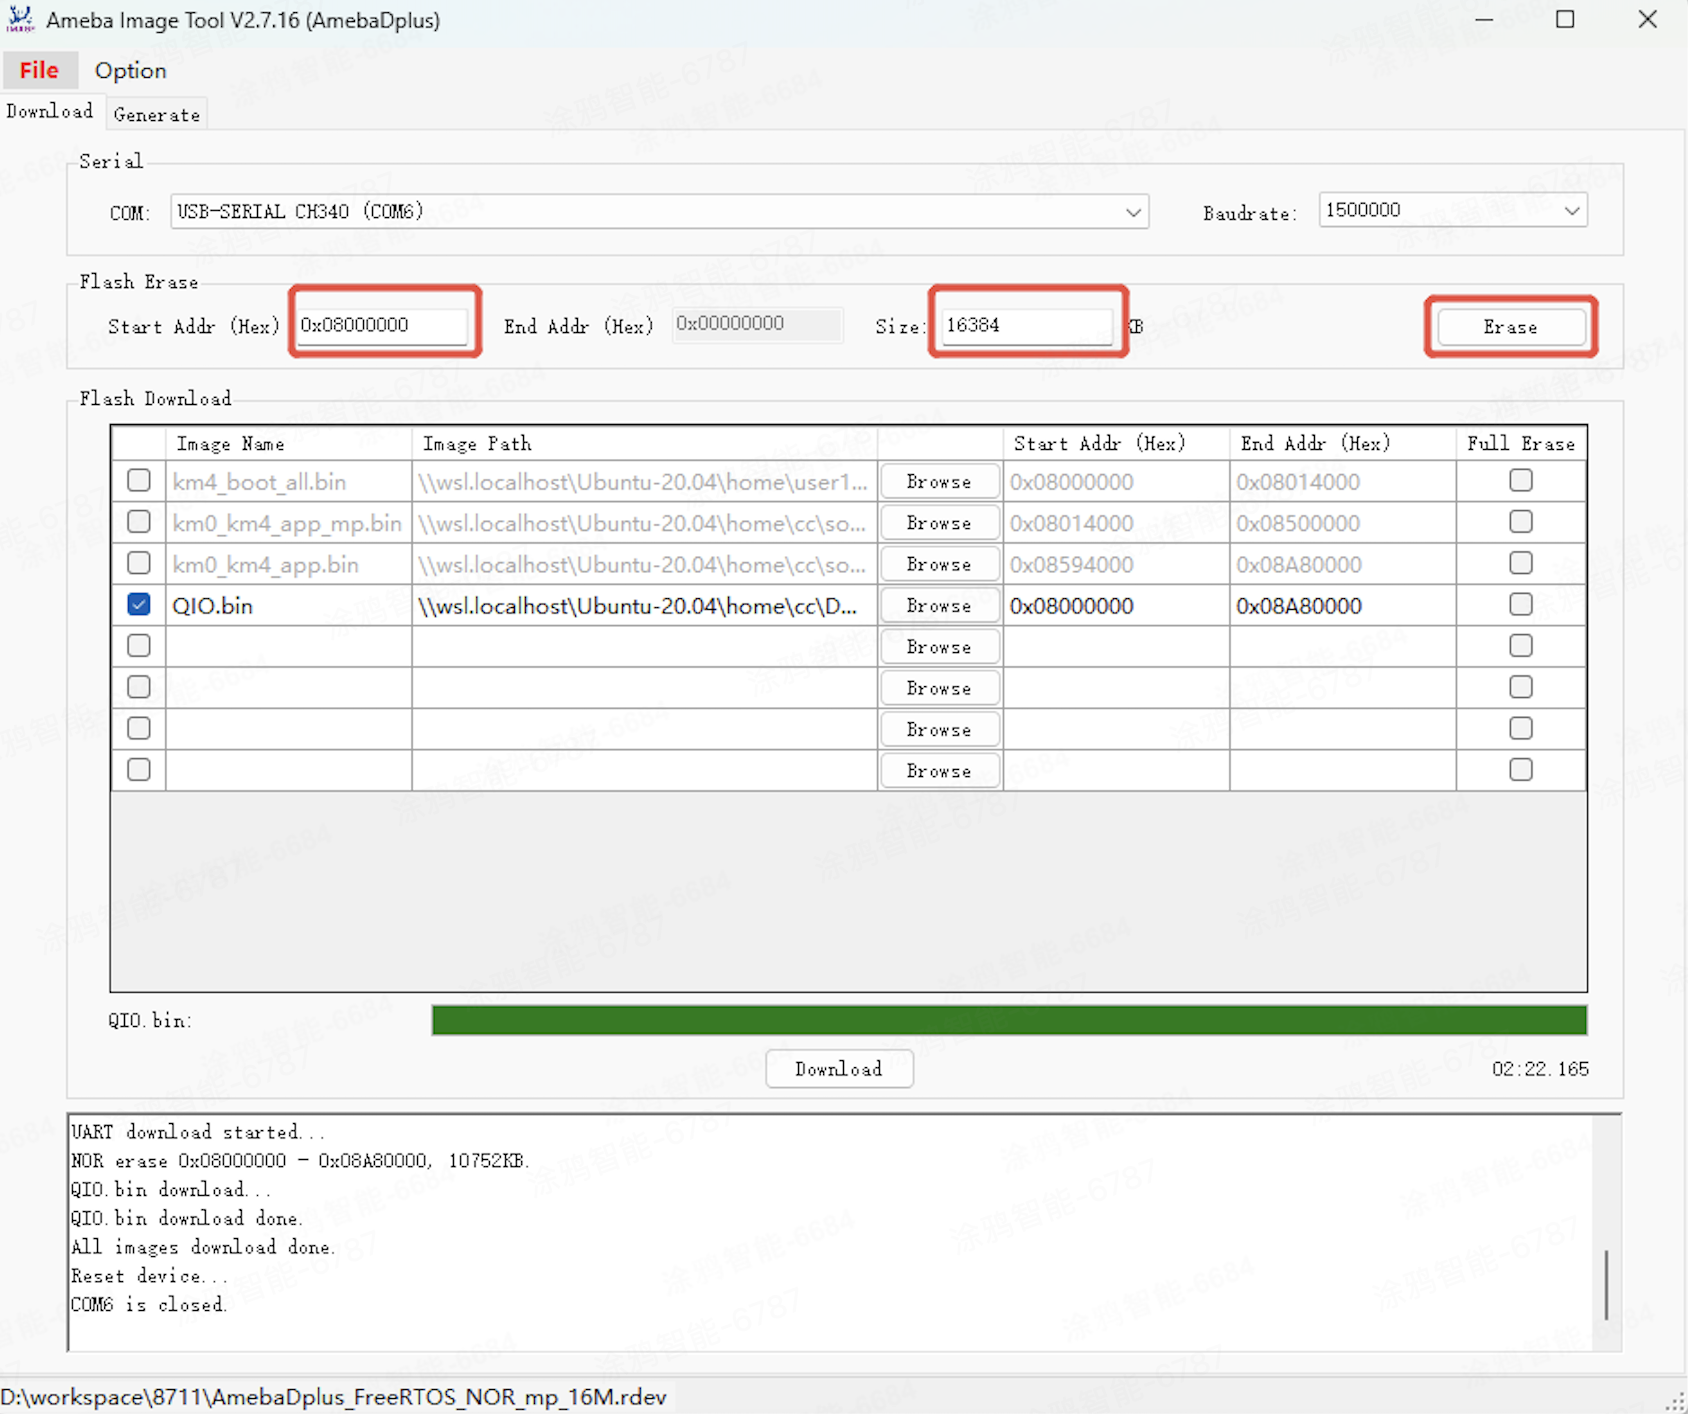
Chip vendor’s tool path: /vendor/rtl8711daf/rtl8711daf_os/tools/ameba/ImageTool/AmebaImageTool.exe
- After wiring is completed as described above, open the chip vendor’s flashing port.
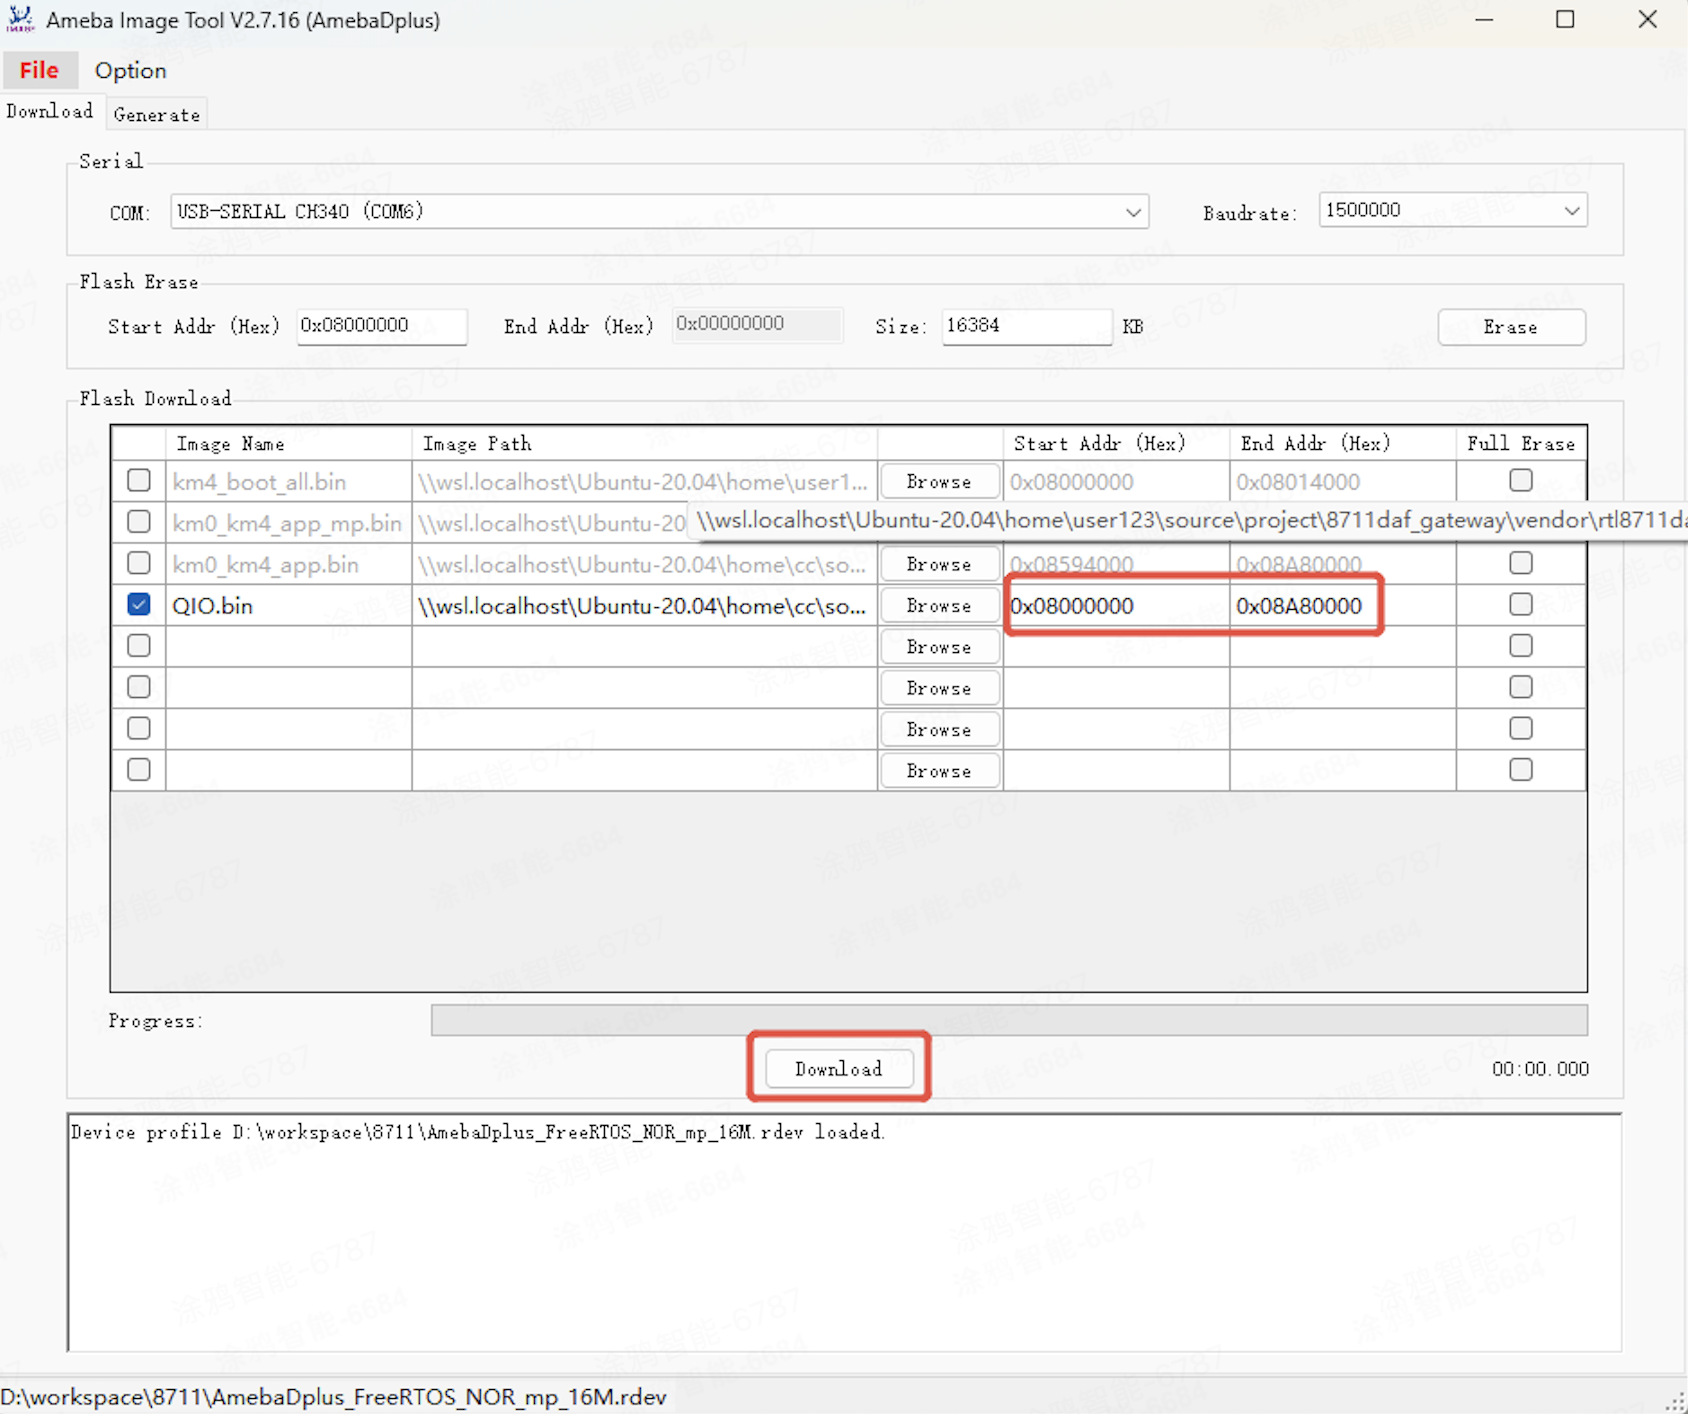
- Open the chip vendor’s flashing tool and configure settings as shown in the image.
- Select the firmware. Choose QIO firmware in the
outputfolder. Select the firmware again after each compilation. Otherwise, the SHA-256 hash value will not be recalculated. - Configure the correct serial port and baud rate for flashing.
- Enter the start and end addresses for flashing.
- Click Download.
- Switch the firmware after downloading (see above).
Download debug firmware
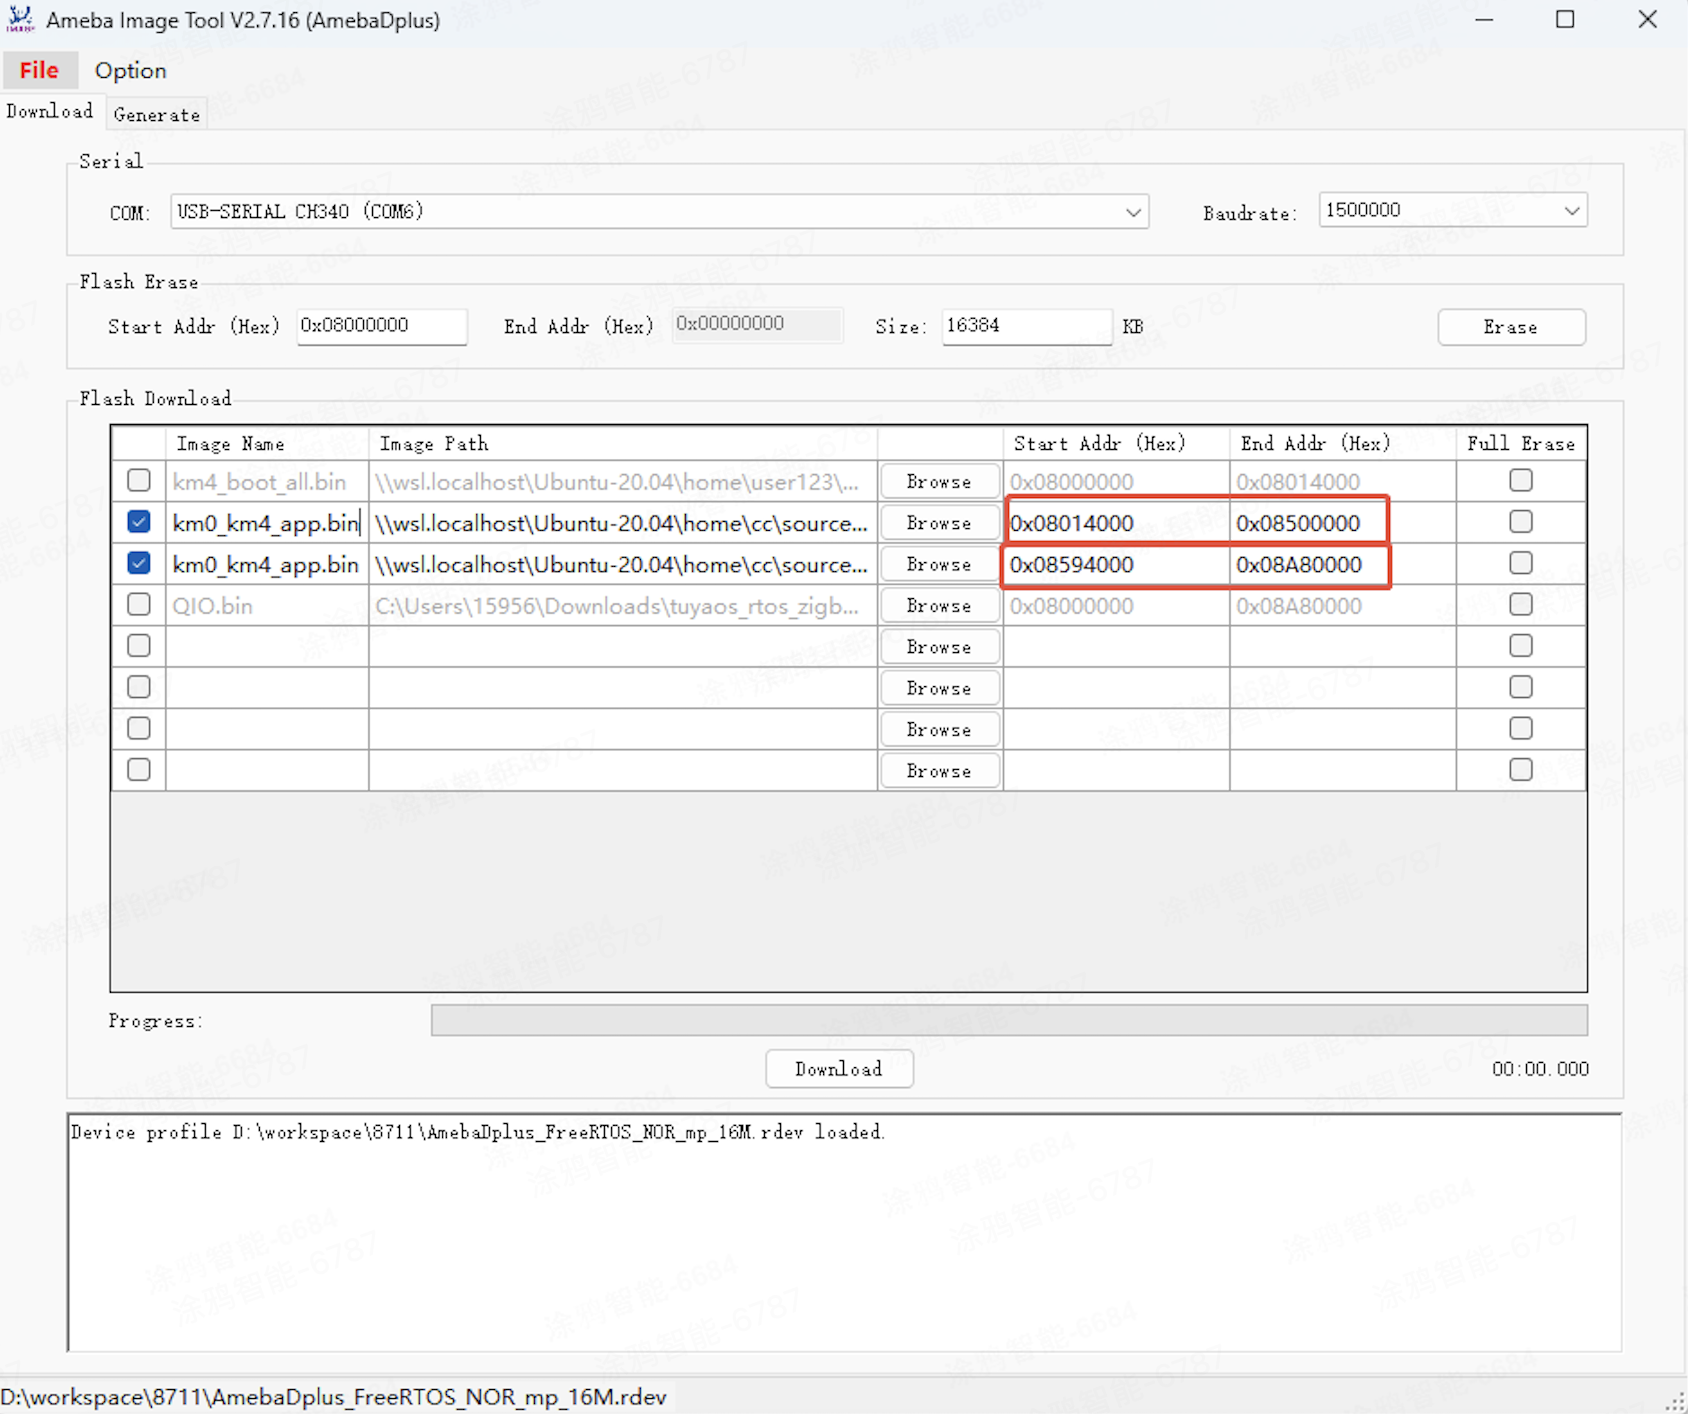
You can flash only the application firmware during local debugging instead of flashing the full firmware every time.
- Debug firmware path:
vendor/rtl8711daf/rtl8711daf_os/amebadplus_gcc_project - Select the debug firmware km0_km4_app.bin. Select the firmware again after each compilation.
- Configure the correct serial port and baud rate for flashing.
- Enter the start and end addresses for flashing.
- Click Download.
Erase full chip
- Configure the correct serial port and baud rate for flashing.
- Configure the start address and size for erasing.
- Click Erase.
OTA update on the platform
How it works:
- Upload the firmware to the Tuya Developer Platform. For more information, see Manage Firmware.
- Configure the firmware version. For more information, see Update Firmware.
- Trigger the update using the mobile app.
Is this page helpful?
YesFeedbackIs this page helpful?
YesFeedback


