Quick Start
This topic describes the directory structure of the development kit, with an explanation of folders and their content.
Directory
The directory of the development kit:
├── hardware                  # Hardware documentation.
├── pc
│    └── tools                # Development tools.
├── software
│    ├── packages             # SDK package.
│    ├── SDKInformation.json  # SDK information file.
│    └── TuyaOS               # SDK directory.
│        ├── apps             # The sample applications, which can be modified as needed.
│        ├── build
│        ├── build_app.sh     # The build script.
│        ├── CHANGELOG.md
│        ├── include          # SDK header files.
│        ├── libs             # SDK libraries. You can link them as needed.
│        ├── LICENSE          # Tuya MIT License
│        ├── Makefile
│        ├── output           # The build output.
│        ├── README.md
│        ├── scripts
│        └── vendor           # The toolchain. When you build a project, the toolchain is automatically downloaded to this directory.
└── tuya.json
Directory structure of TuyaOS > apps > 8711daf_gateway-tuyaos_rtos_zigbee_demo:
├── application_components       # The gateway components.
├── application_drivers
|—— build                         # Files for firmware packaging.
|—— include                       # Application header files.
|—— libs                          # Application library files.
|—— src                           # Application source files.
|—— output                        # Output directory.
|—— README.md
└── build.conf                    # Build configuration.
Configurations
The RTOS gateway needs to generate a JSON configuration during initialization, as shown below:
{
    "pid": <xxx>,
    "uuid": <...>,
    "authkey_key": <...>,
    "ap_ssid": <... optional>,
    "ap_password": <... optional>,
    "log_level": <level>,
    "storage_path": <...>,
    "start_mode": <xxxx>,
    "tuya": {
        "zigbee": {
                "dev_name": <xxx, string>,
                "cts": <xxx, bool>,
                "thread_mode": <xxx, bool>,
                "dev_txt_sta": <xxx, bool>,
        },
    },
    "user": {
        [ { "tp": <DEV_ATTACH_MOD_X, number>, "sw_ver": <version, string> }, ... ]
    },
}
Common configurations
| Field | Required | Description |
|---|---|---|
| PID | Yes | The SDK runs in non-OEM mode. pid specifies the product ID (PID) of the current device. |
| uuid | No | The universally unique identifier. The system reads UUID from the flash memory first. If no UUID is found, the UUID specified here is used. |
| authkey_key | No | The authorization key. The system reads the authorization key from the flash memory first. If no authorization key is found, the authorization key specified here is used. |
| ap_ssid | No | The SSID of the access point (AP) used for pairing in Wi-Fi AP mode. If not specified, the default value is SmartLife-<the last four characters of the WLAN MAC>. |
| ap_password | No | The password of the AP, defaulting to empty. |
| log_level | No | The log level, defaulting to debug level (level 4). |
| start_mode | No | The supported Wi-Fi pairing modes:
|
Zigbee configuration
| Field | Description |
|---|---|
| dev_name | Zigbee device name |
| cts | Specifies whether to support hardware flow control. |
| thread_mode | Specifies whether to start the service using user-mode threads (pthread) or processes (fork). TRUE: thread. FALSE: process. |
| dev_txt_sta | Specifies whether devices.txt needs to be updated. TRUE: update required. FALSE: no update required. |
Build the project
The toolchain decompression depends on the unzip tool. Run the following command before compiling:
sudo apt install unzip
Follow the steps below to build SDK-WR11-G firmware on Visual Studio Code:
-
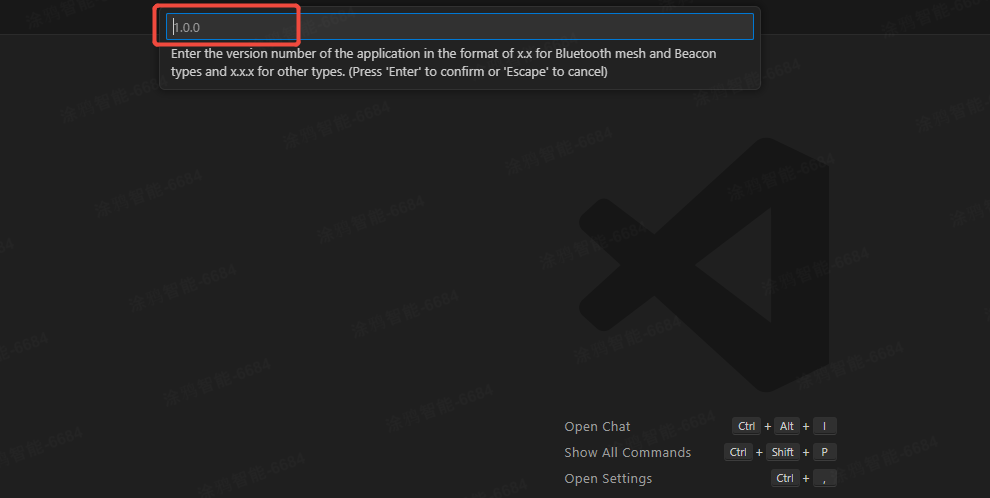
Expand TuyaOS > apps. Right-click and choose Build Project. Enter a version number and press the
Enterkey.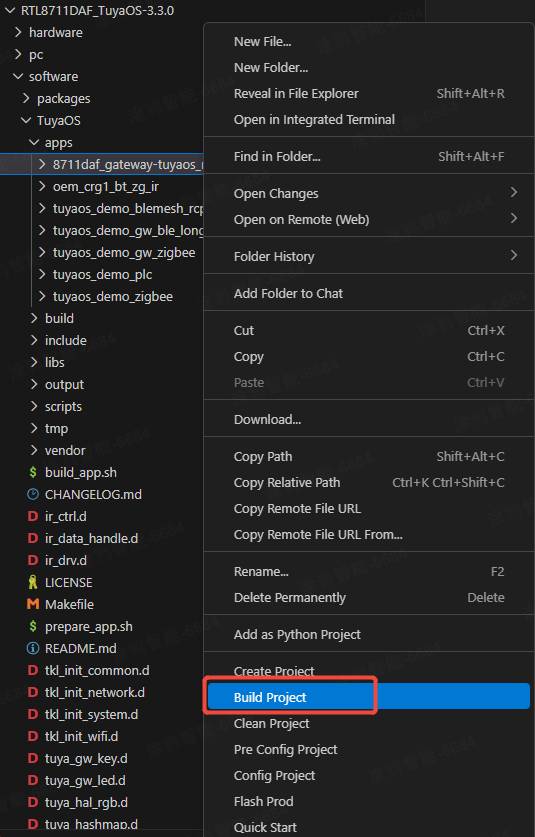
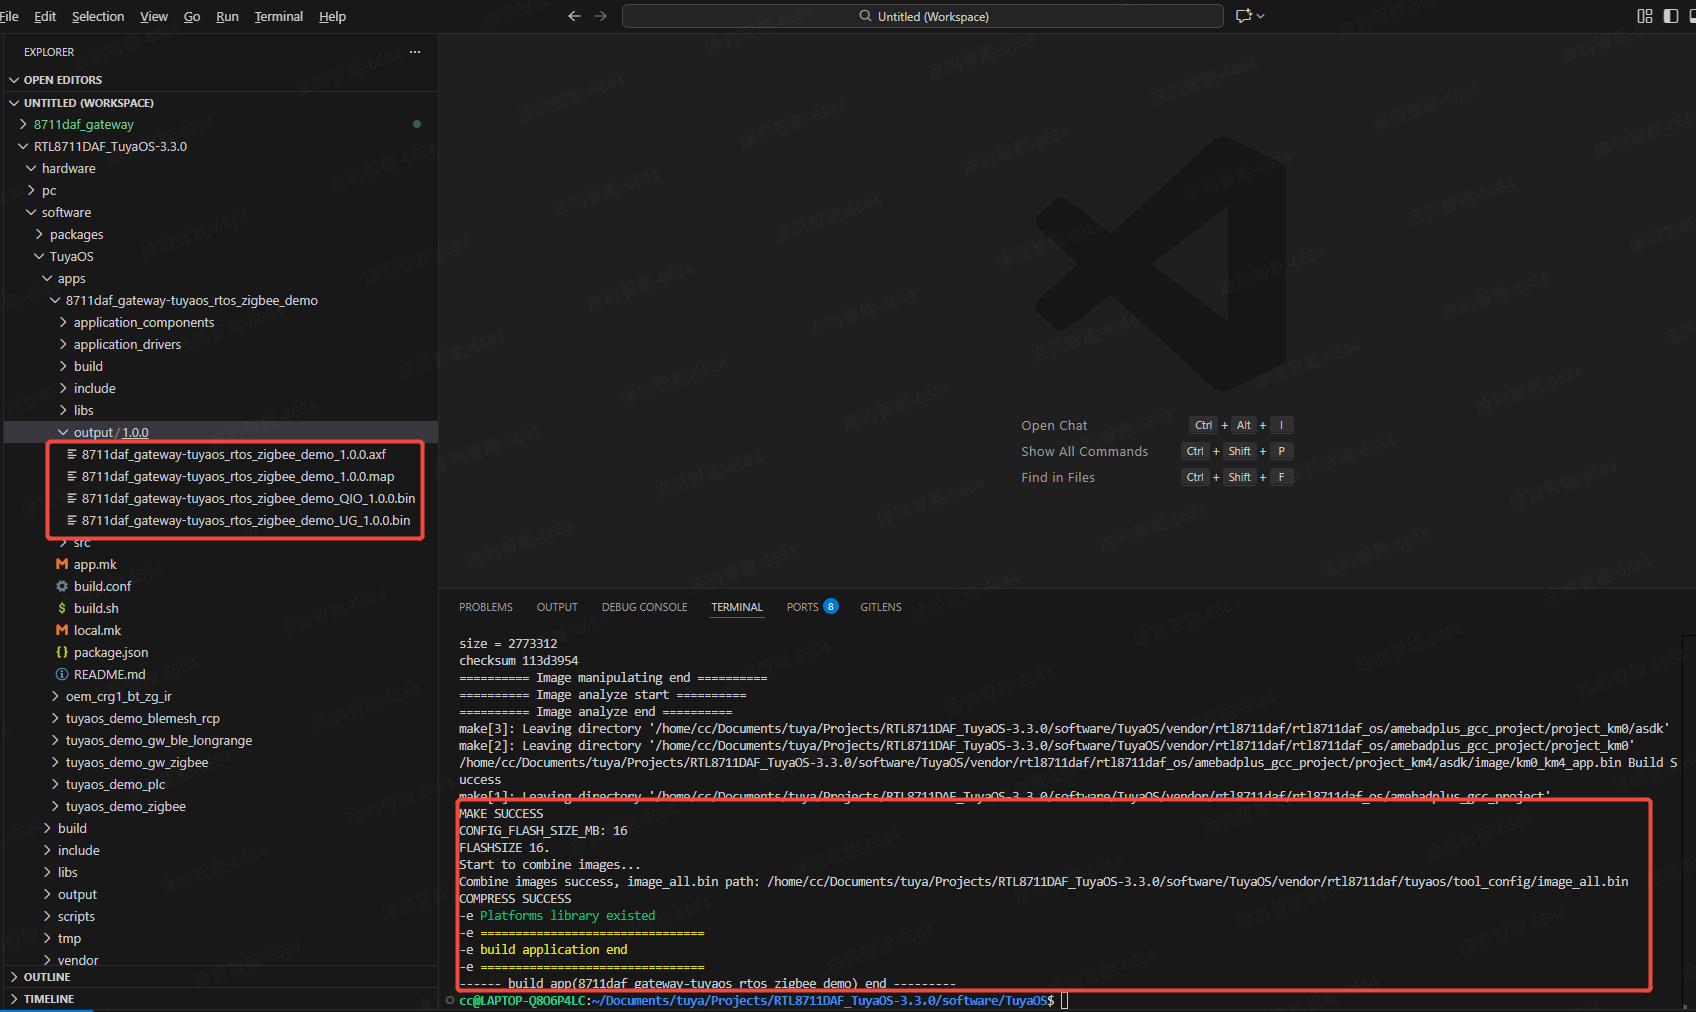
-
You can see the output in the TERMINAL window. When the TERMINAL displays a message as shown below, it means the build is successful. The build output is stored in the output directory.
Flash firmware
For firmware details and flashing methods, refer to Flash Firmware.
Run
Run the sample application to see how it behaves.
After flashing, restart the device.
WR11-G supports Bluetooth pairing and AP pairing. You can use the Tuya app to activate the gateway. For more information about the app, see User Guide.
Upload firmware
For more information, see Update Firmware.
Is this page helpful?
YesFeedbackIs this page helpful?
YesFeedback


