Manage Product Tag
Last Updated on : 2024-06-24 10:04:24download
When you have too many smart products for an accurate search, or need to add more notes to a given product, you can achieve by setting up tags for the product.
Step 1: Create new tags
-
Under My Products or Customer Products tab, select Tag button, in the drop-down menu, click Manage Tag.
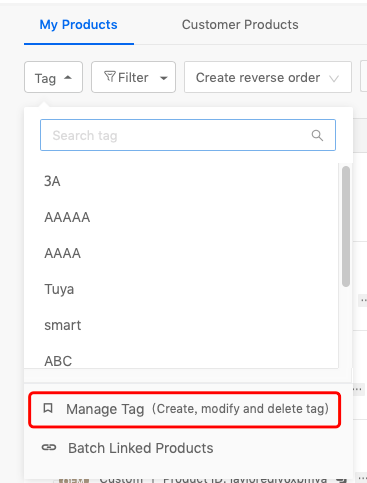
You can search all the set tags in the search bar. When the corresponding tags are selected, the products containing such tag will be displayed in the product list automatically.
If more than one tags are selected, all products containing any of the tags in that list will be displayed.
-
In the pop-up box, click Create Tag.
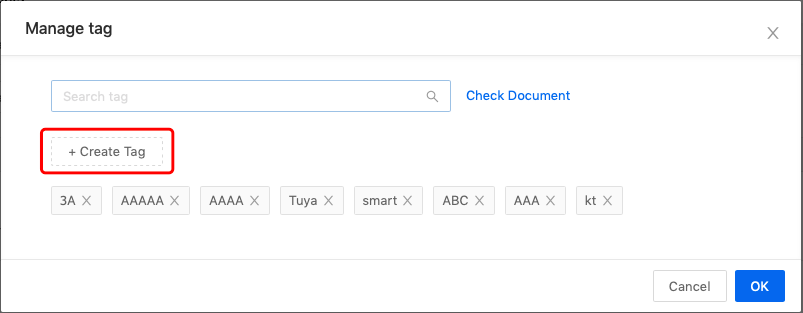
-
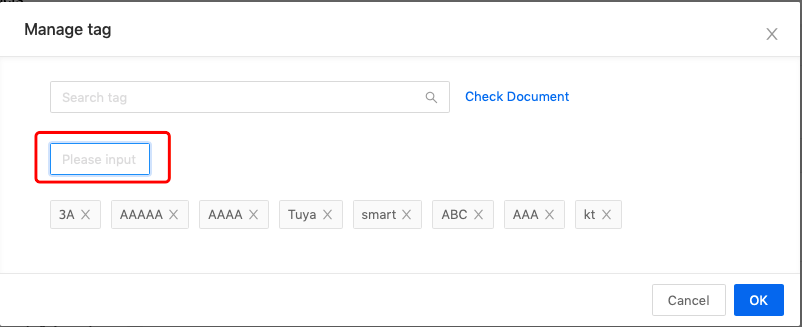
Enter the tag name in the input box. After setting the name, the system automatically checks whether the tag name has following conditions:
- There is no duplication
- No more than 30 characters
- The tag name can’t contain a comma (,)
Step 2: Associate products
Batch linked products with a tag
-
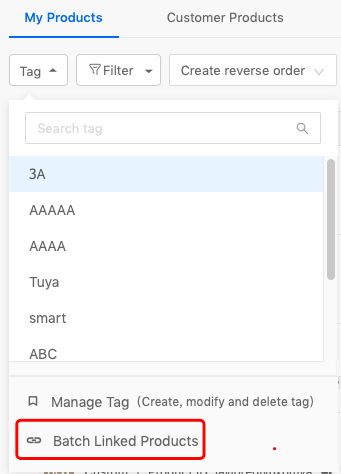
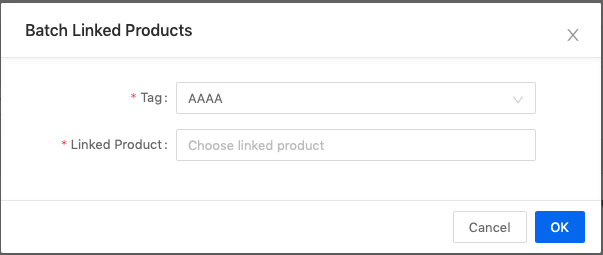
In the appeared pop-up box after clicking the Tag button, select Batch Linked Products.
-
In the pop-up box of tag column, click or enter a keyword to search and select a tag, then in the Linked Products column, select multiple products, click Confirm.
Associate multiple tags for a product
-
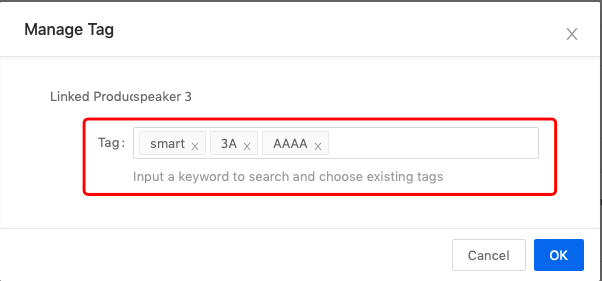
In the product list, click the tag column icon, and click Manage Tag in the balloon tooltips.

-
In the Tag column of pop-up box, select the tag you want to add or delete, click Confirm.
Step 3: Manage tags
Search tags
By default, platform displays all tags in the current space. You can enter keywords in the search box, click Confirm or search icon to display the search matching result.

Modify tag name
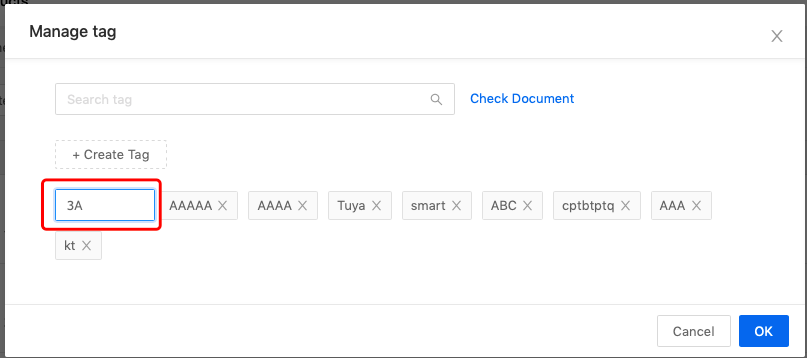
Click Tag Name, the corresponding tag switches to edit state, you can modify the tag name. After modification, all linked products with this tag will be updated.
Delete tags
When a tag is no longer used and not linked with any product, you can click the delete icon behind each tag to delete the corresponding tag.
Note: After deleting the tag, you need click Confirm to officially delete the tag.

Is this page helpful?
YesFeedbackIs this page helpful?
YesFeedback


