Tuya Testing Machine Installation
This topic describes how to install a Tuya testing machine.
Preparations
Hardware
-
A Raspberry Pi 4 Model B
Buy a Raspberry Pi 4 Model B (4G RAM) and necessary add-ons such as an official Raspberry Pi power supply and case. For more information, visit official website.
-
A Micro SD card
Prepare a Micro SD card with available space no less than 64 GB. We recommend the SanDisk 64GB Extreme Pro Micro SD card (U3, C10, A2, V30, and 4K).
-
A computer with a Micro SD card reader for image flashing
-
A wired router
Software
-
balenaEtcher
Download balenaEtcher from the official website and install it. balenaEtcher will be used to flash the image file to the Micro SD card later.
-
Tuya testing machine image file
Download the image file from image download link.
-
Activation code
Send an activation code application email to testing_machine@tuya.com. The email must contain your company’s name, the purpose of the application, and the name of the business or project manager.
Hardware assembly
-
Attach the heat sink to the Raspberry Pi.
-
Insert the Raspberry Pi motherboard into the case.
-
Insert the cooling fan into the case.
-
Connect the power supply of the cooling fan to the power supply pins on the Raspberry Pi motherboard. For more information, see the following figure.
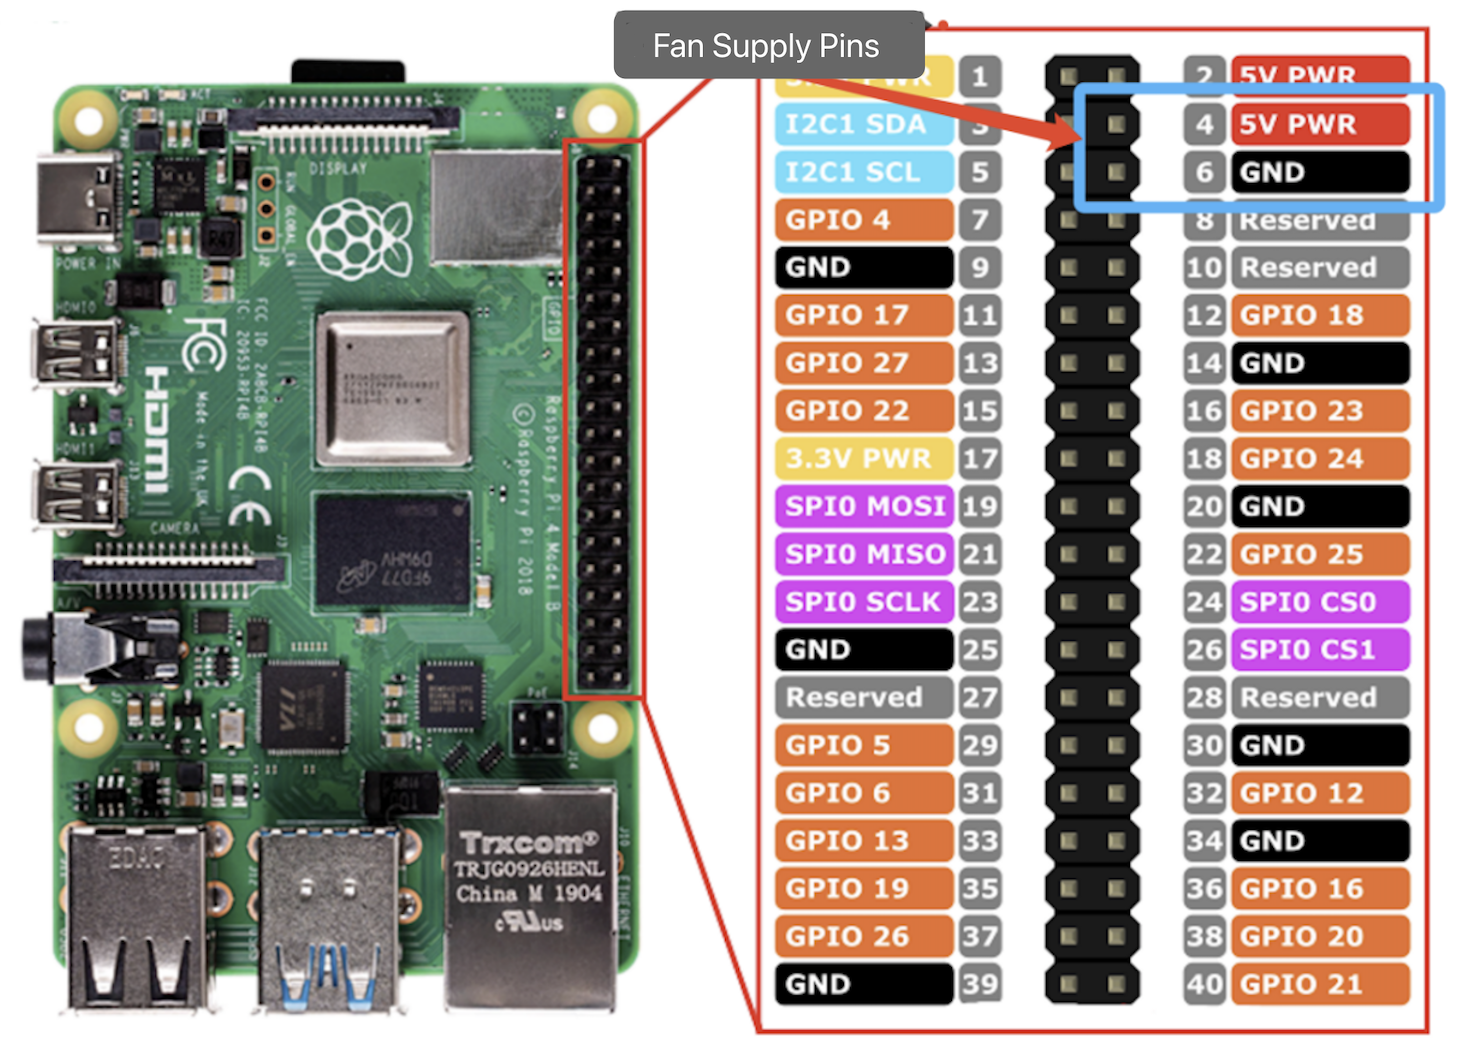
For now, do not insert the Micro SD card into the Raspberry Pi and do not supply power to the Raspberry Pi.
Software installation
Flash the image file
-
Insert the Micro SD card into your computer.
-
Use balenaEtcher to flash the image file to the Micro SD card.
-
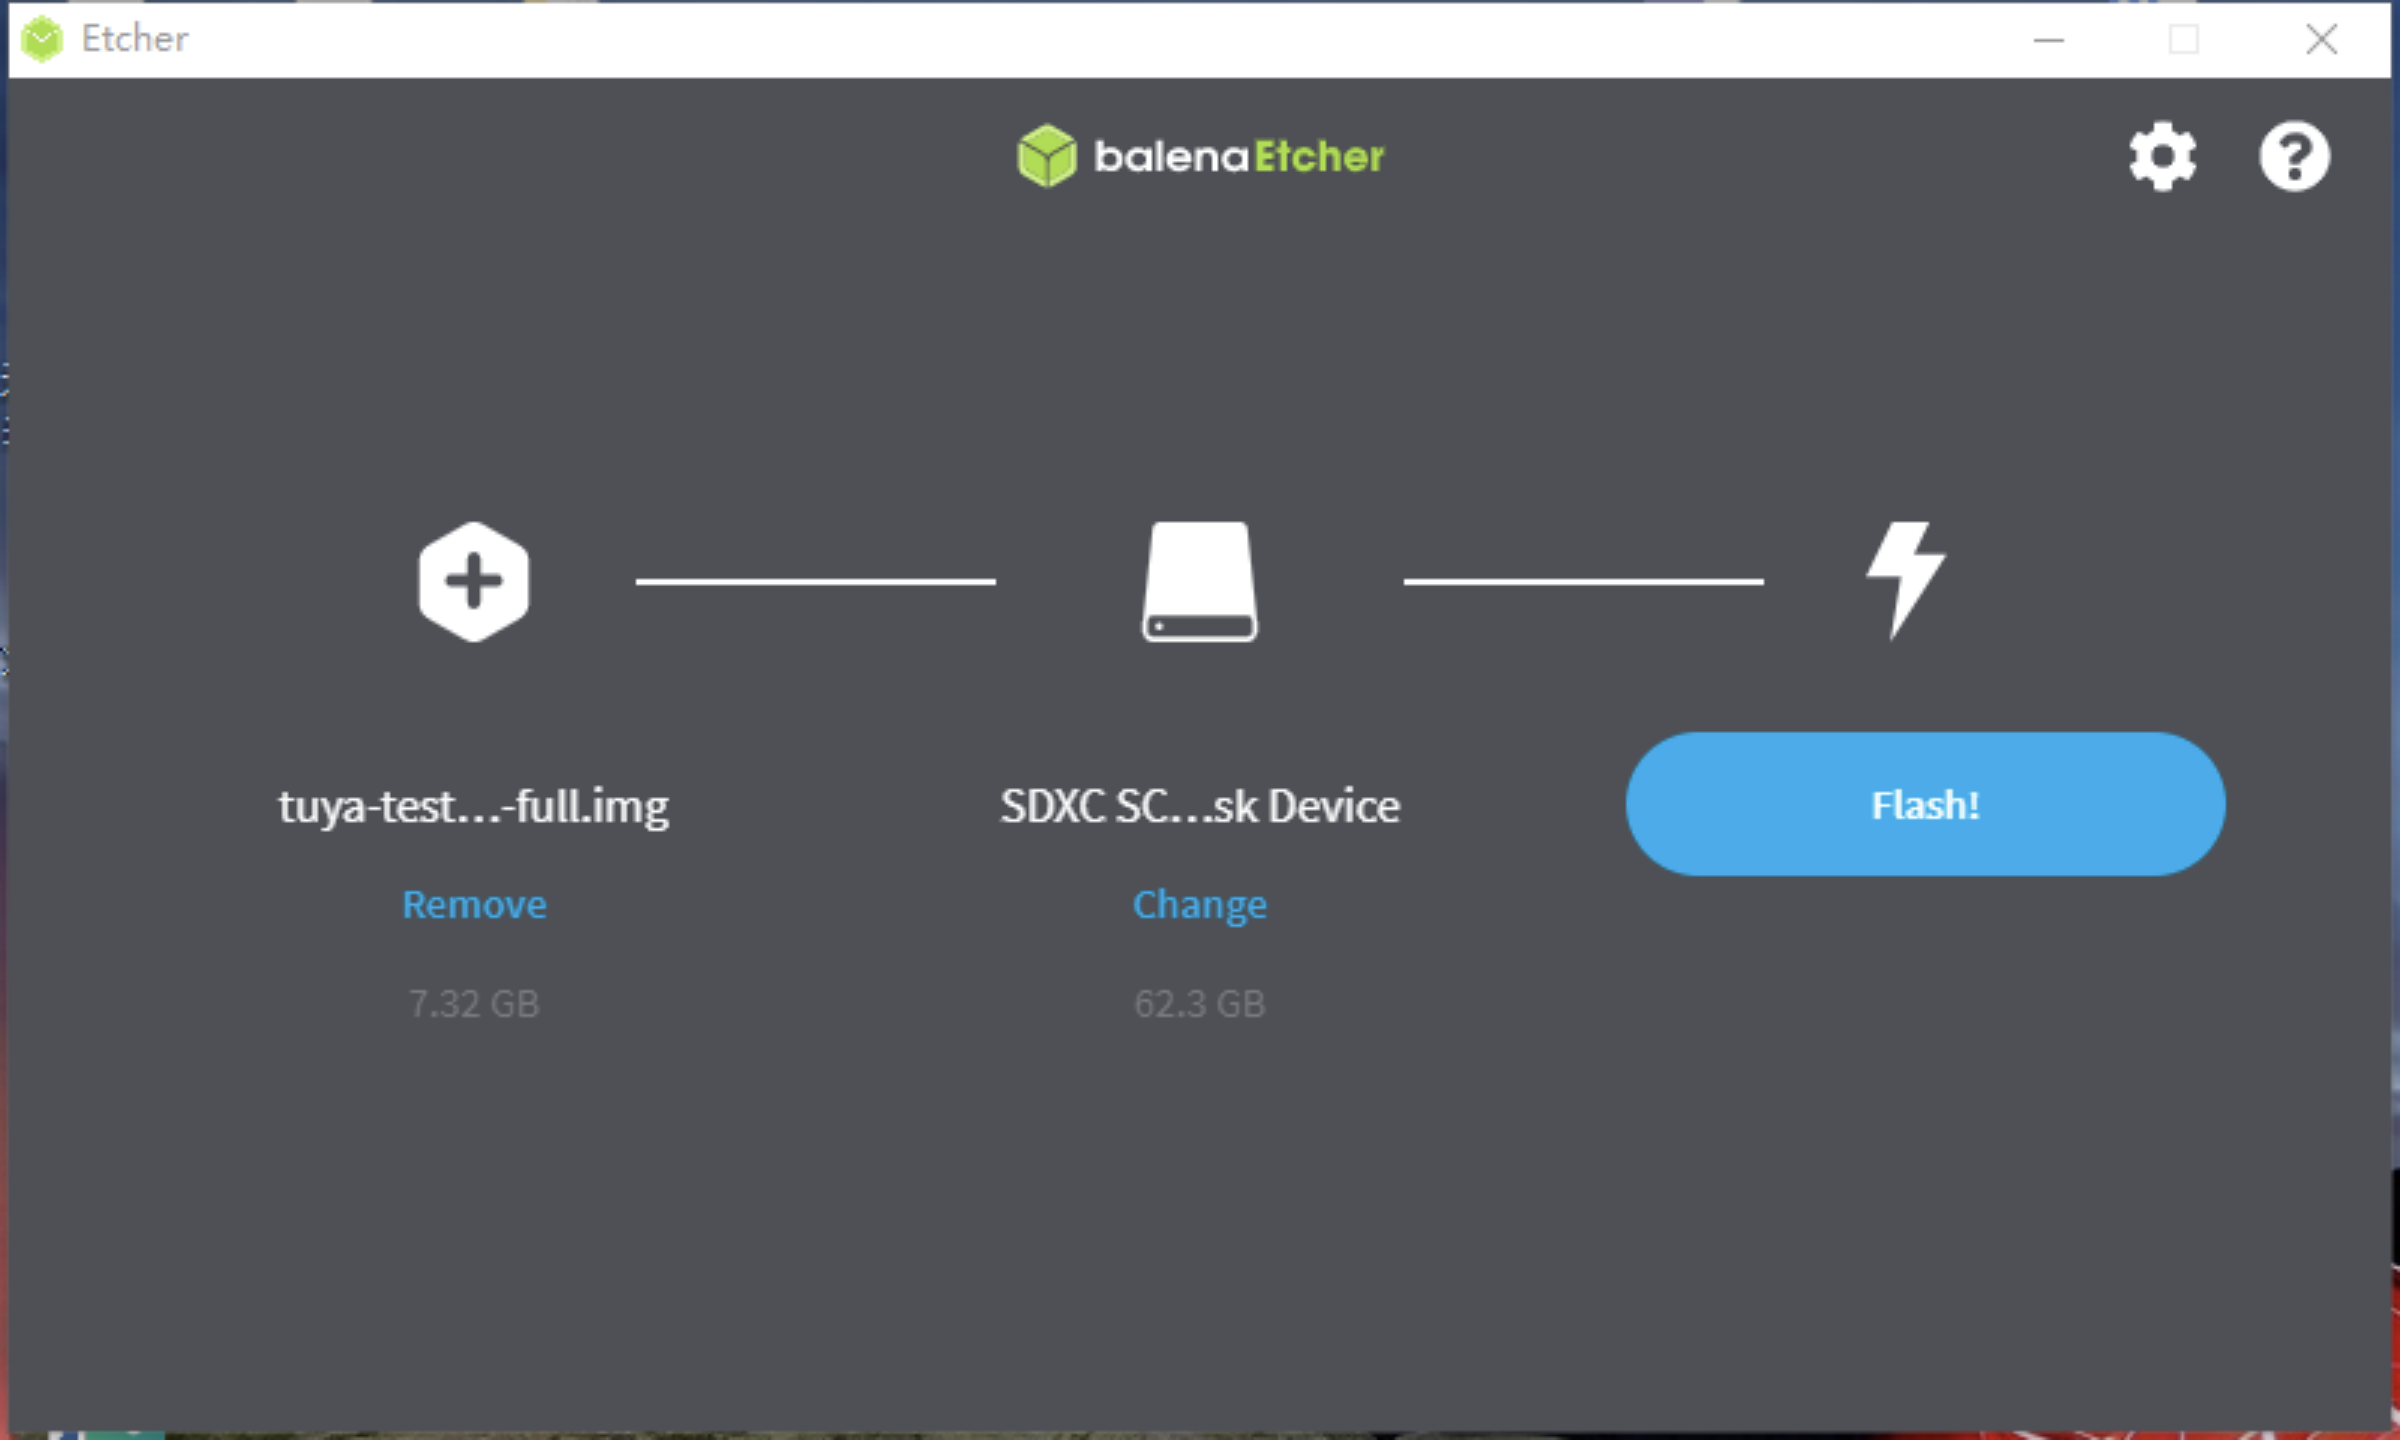
Run balenaEtcher on your computer.
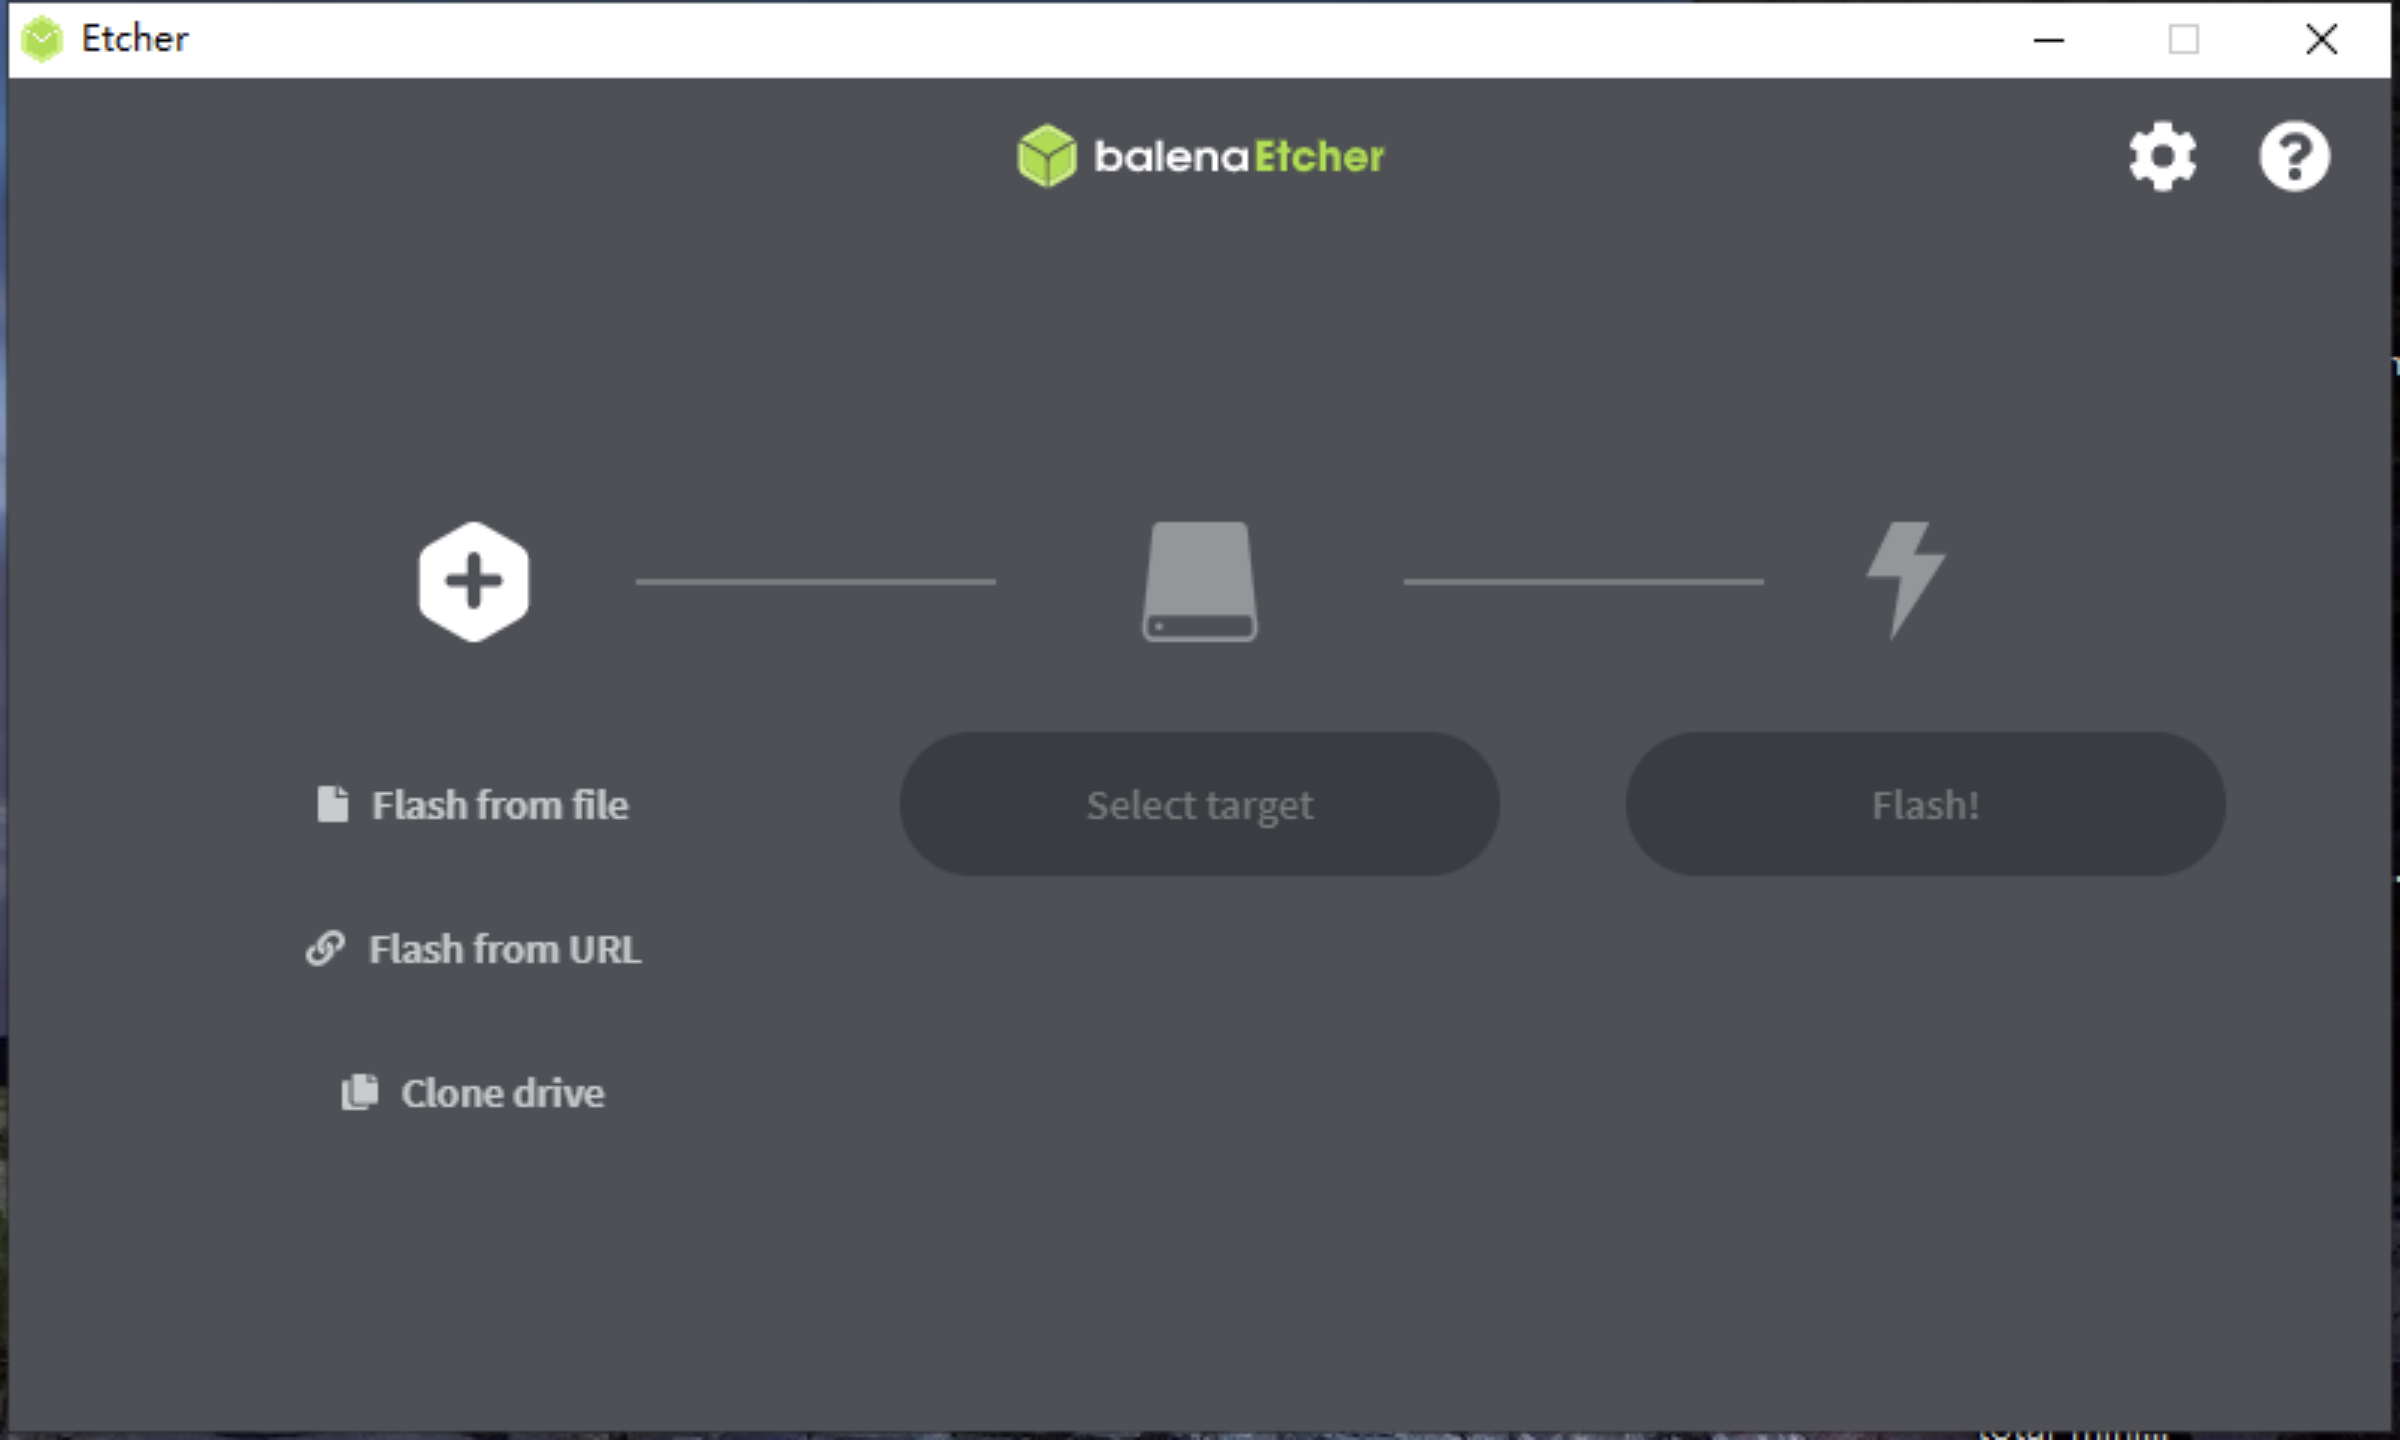
-
Click Flash from file. Select the image file that you downloaded.
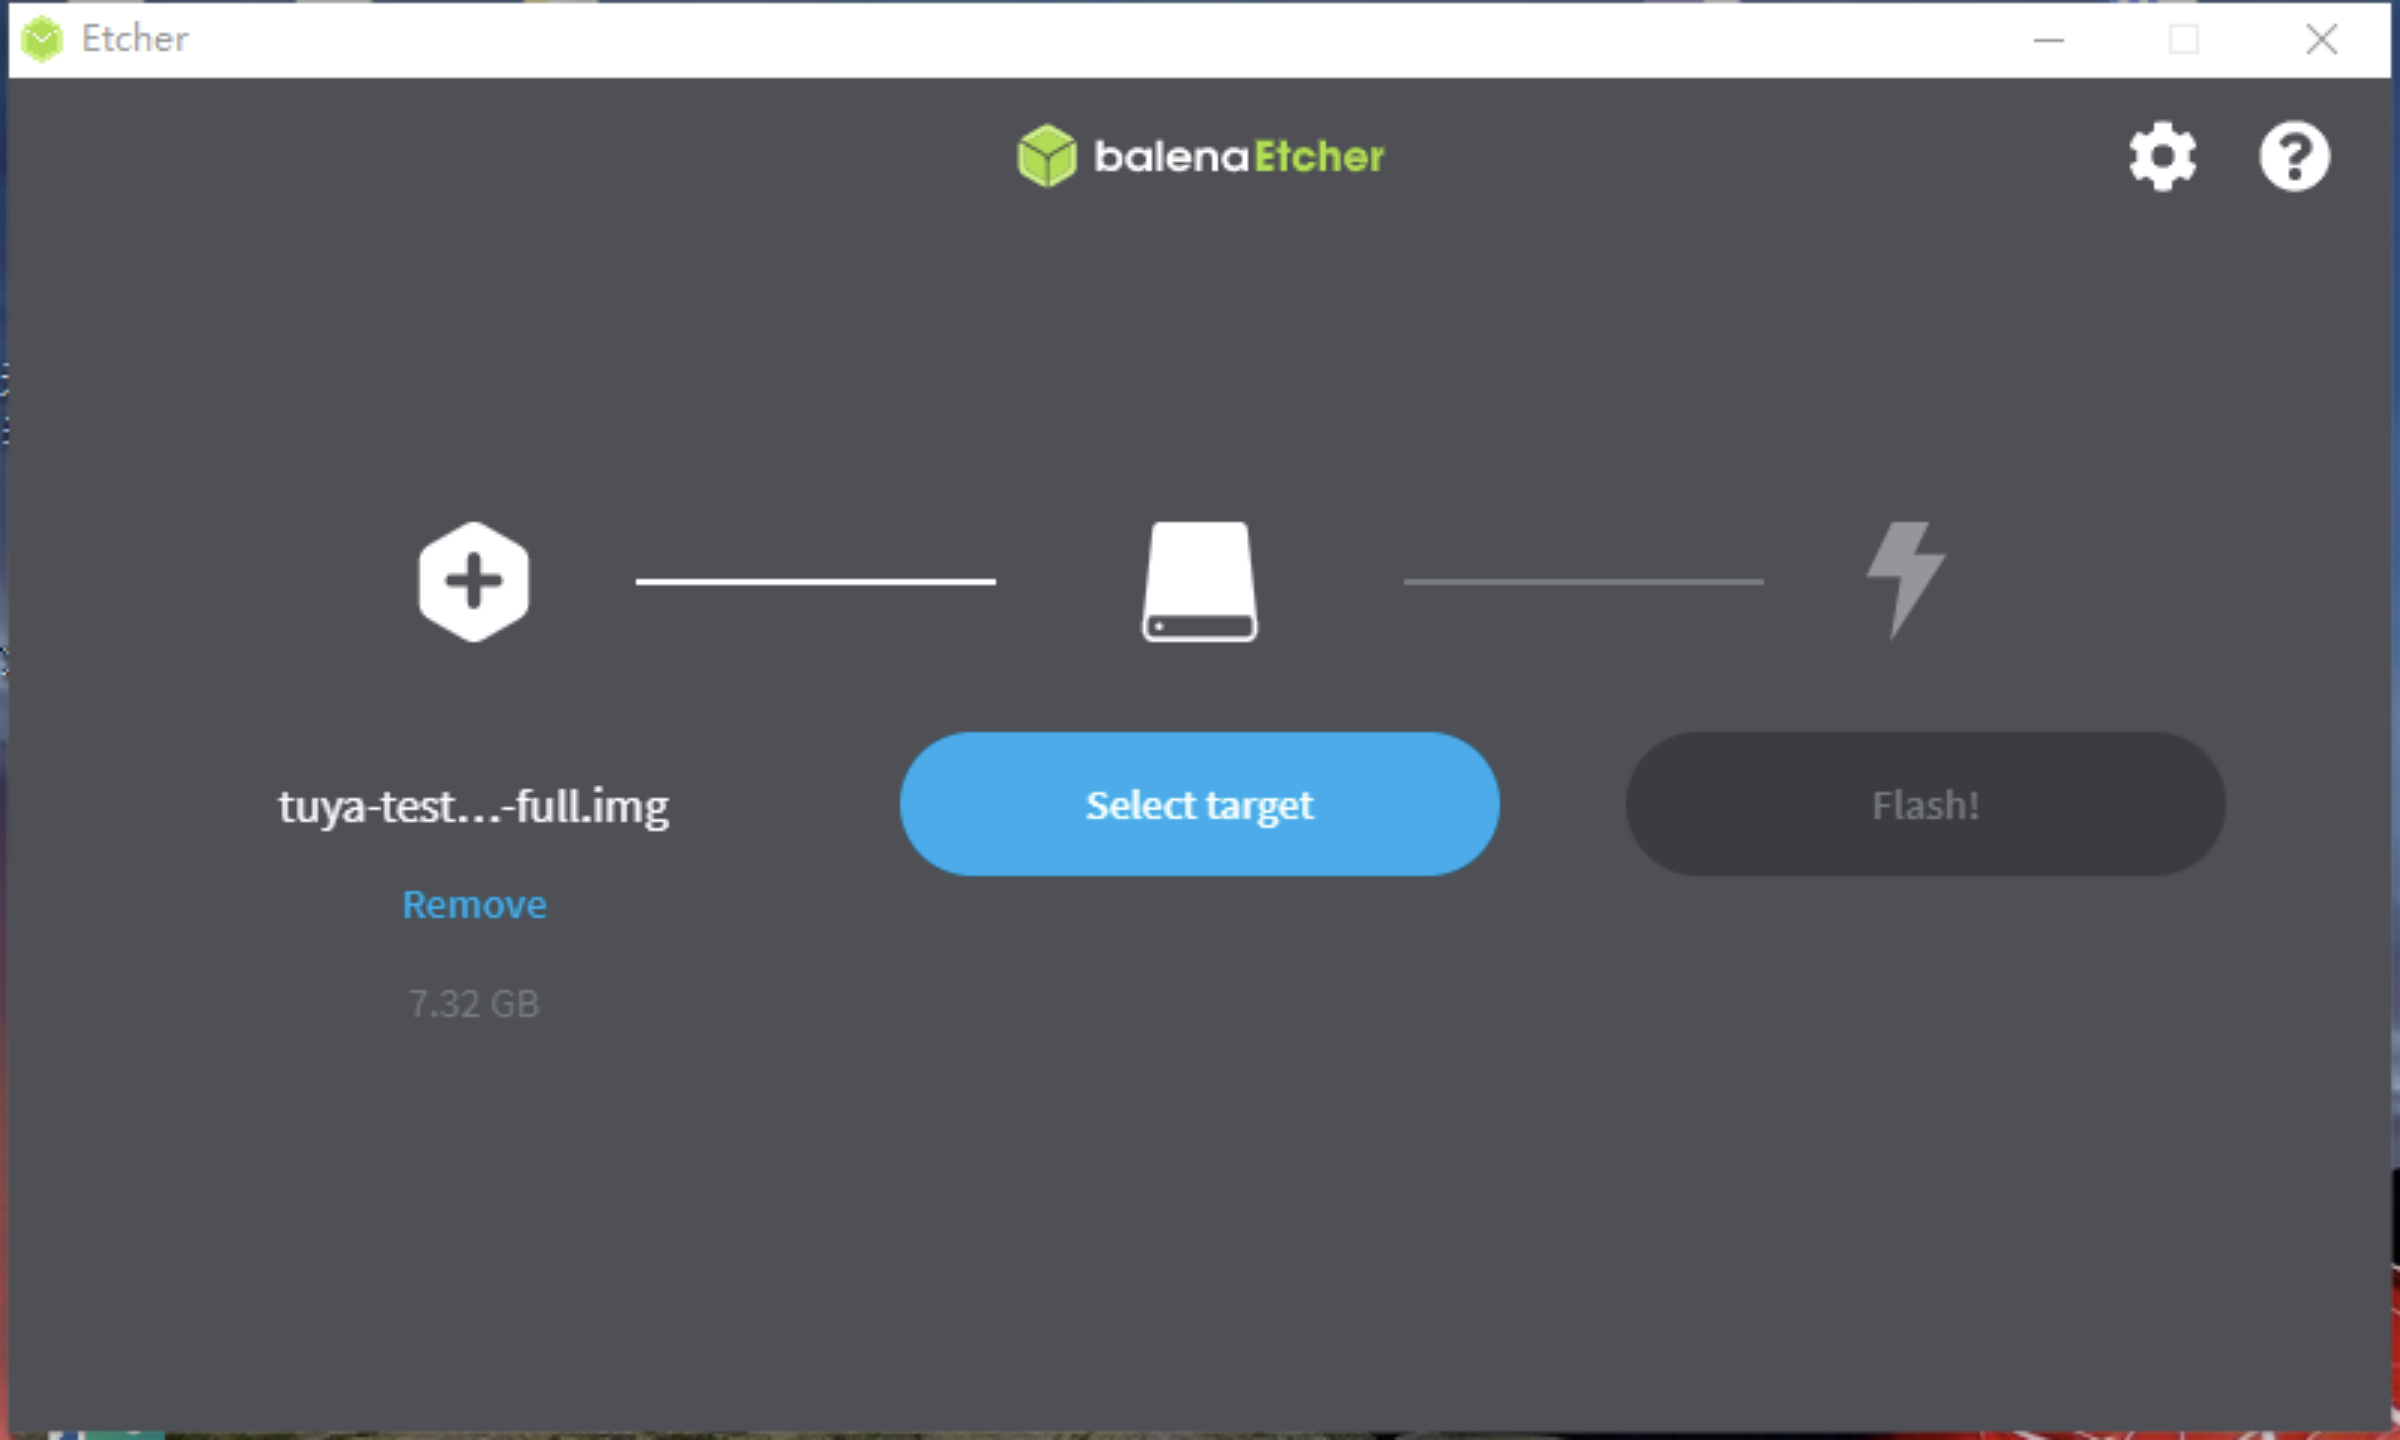
-
Click Select target. In the pop-up window, select the Micro SD card that you inserted into the computer.
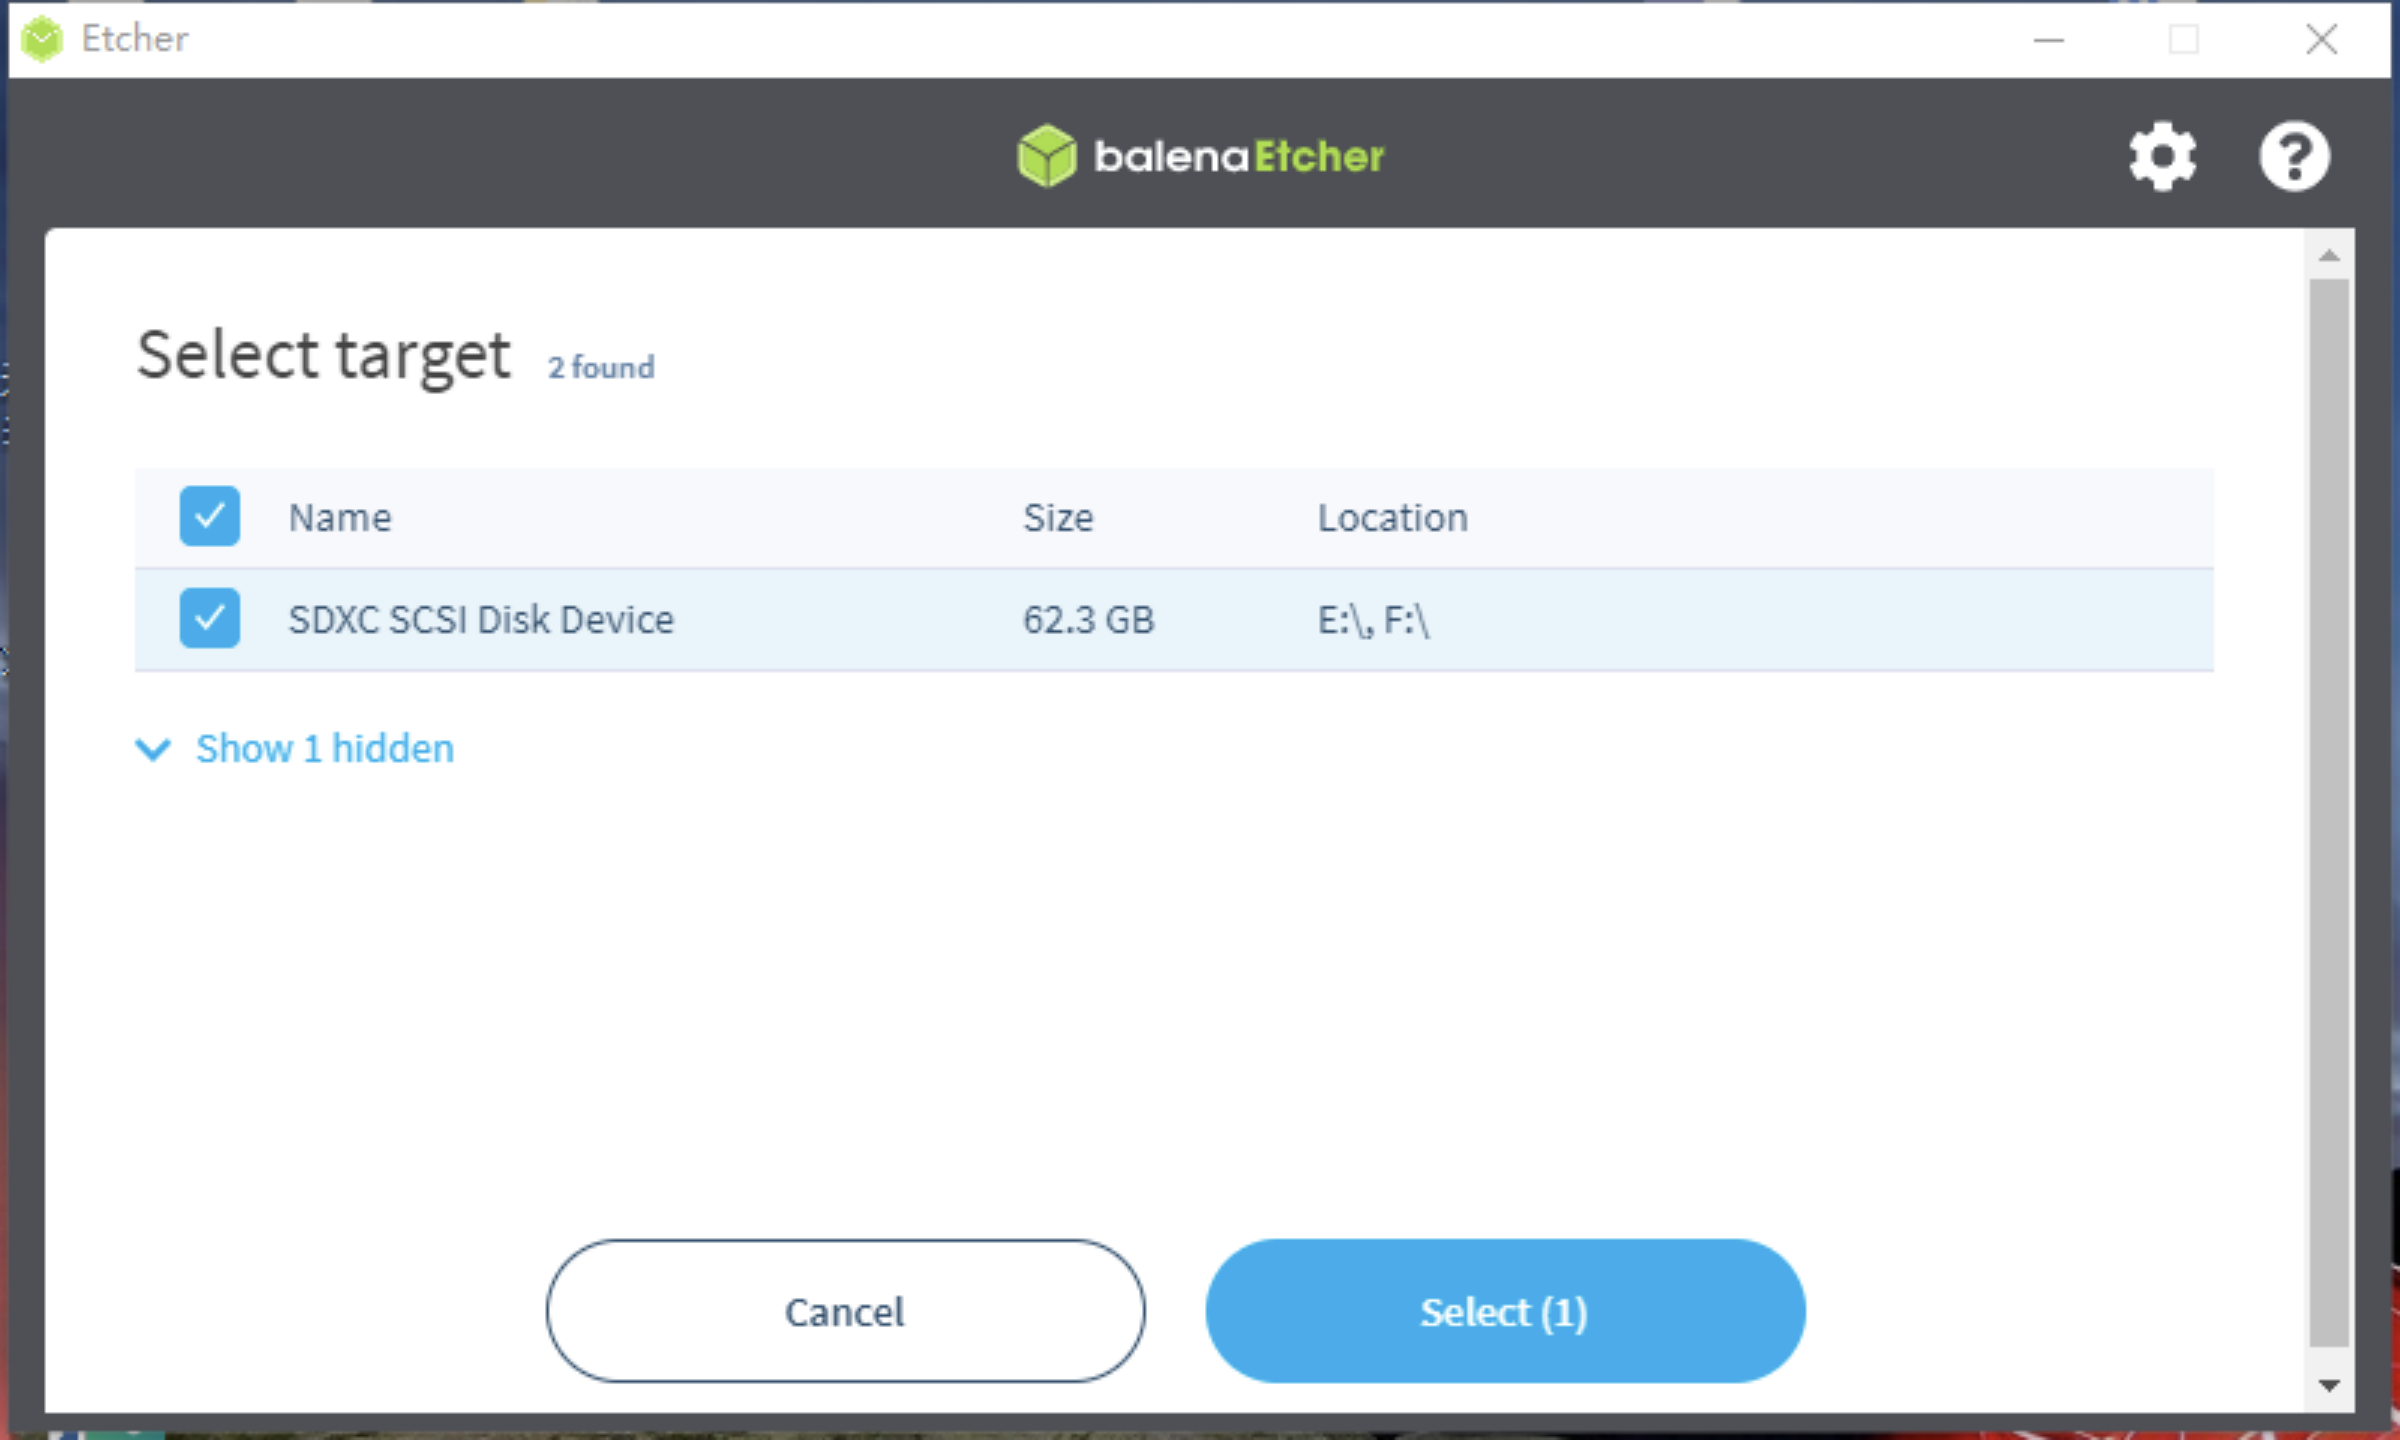
Before you flash the image file, remove any other USB drives or external hard drives from the computer to avoid data loss caused by misoperations.
-
Click Flash.
If you use a computer that runs Windows, you may be prompted to format the Micro SD card during the flashing process because Windows cannot recognize the Linux file system. Ignore this prompt and never format the Micro SD card throughout the flashing process.
-
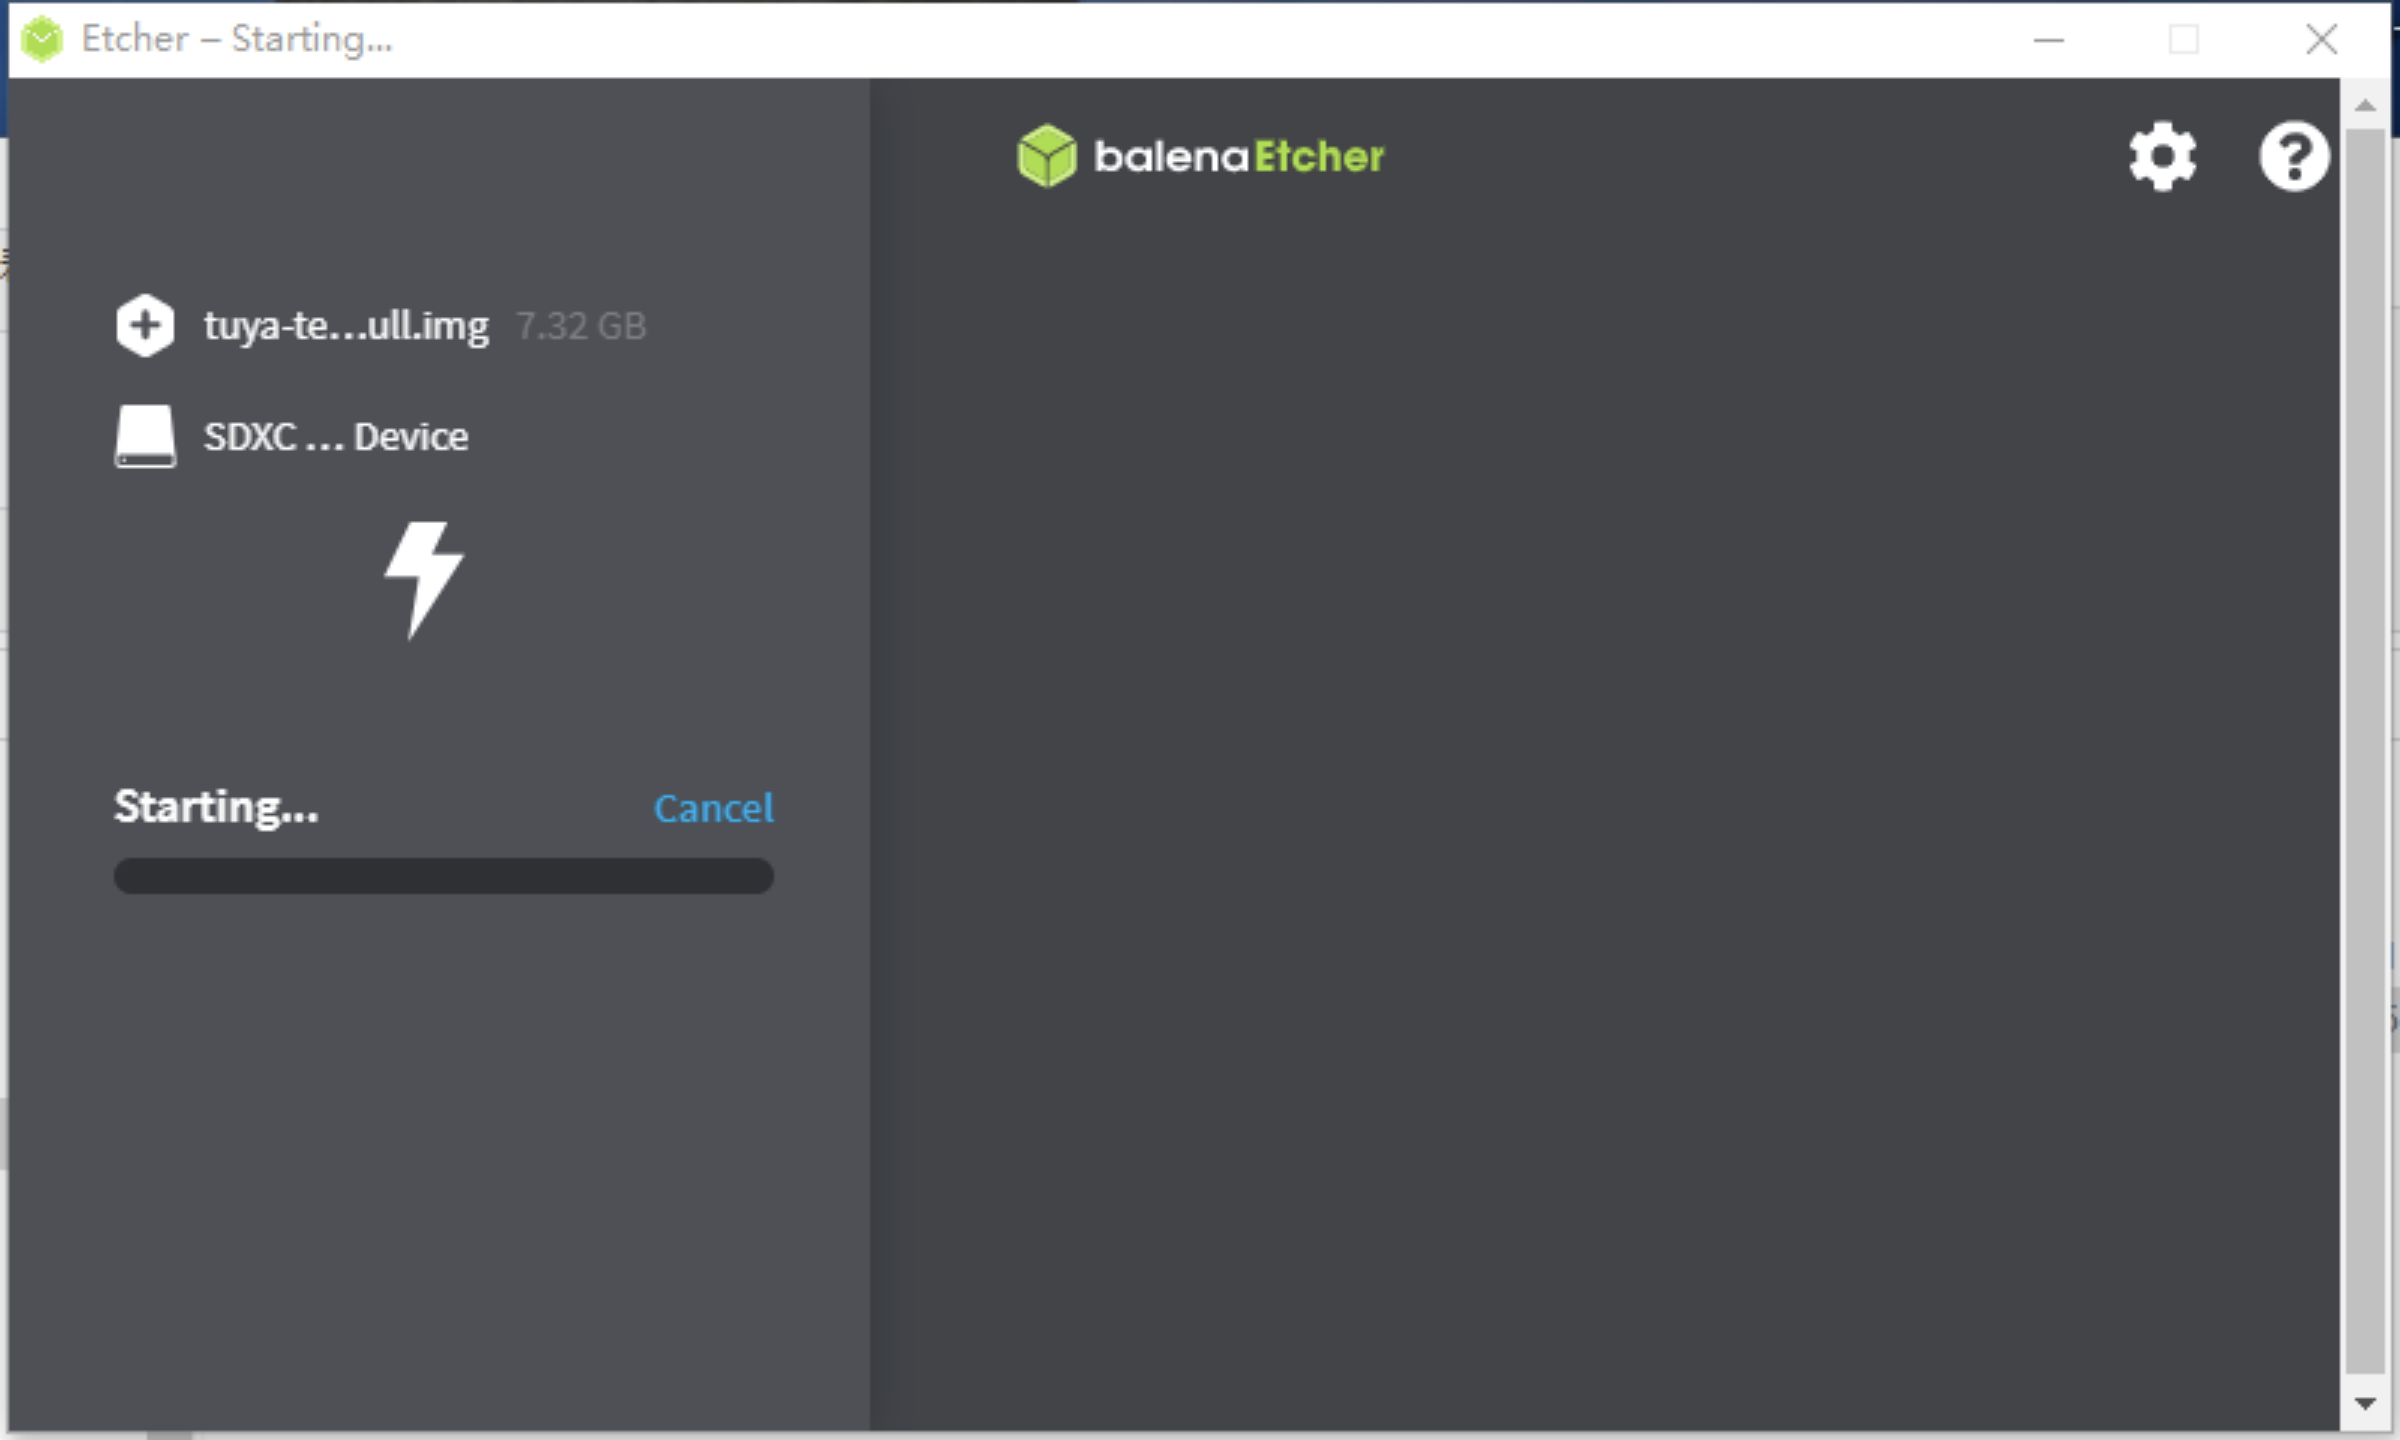
Wait for the flashing to complete. The flashing process generally takes two to three minutes.
-
-
If you see the following page, the flashing is successful. If the flashing fails, repeat the aforementioned steps.

Write device configuration information
Things to note
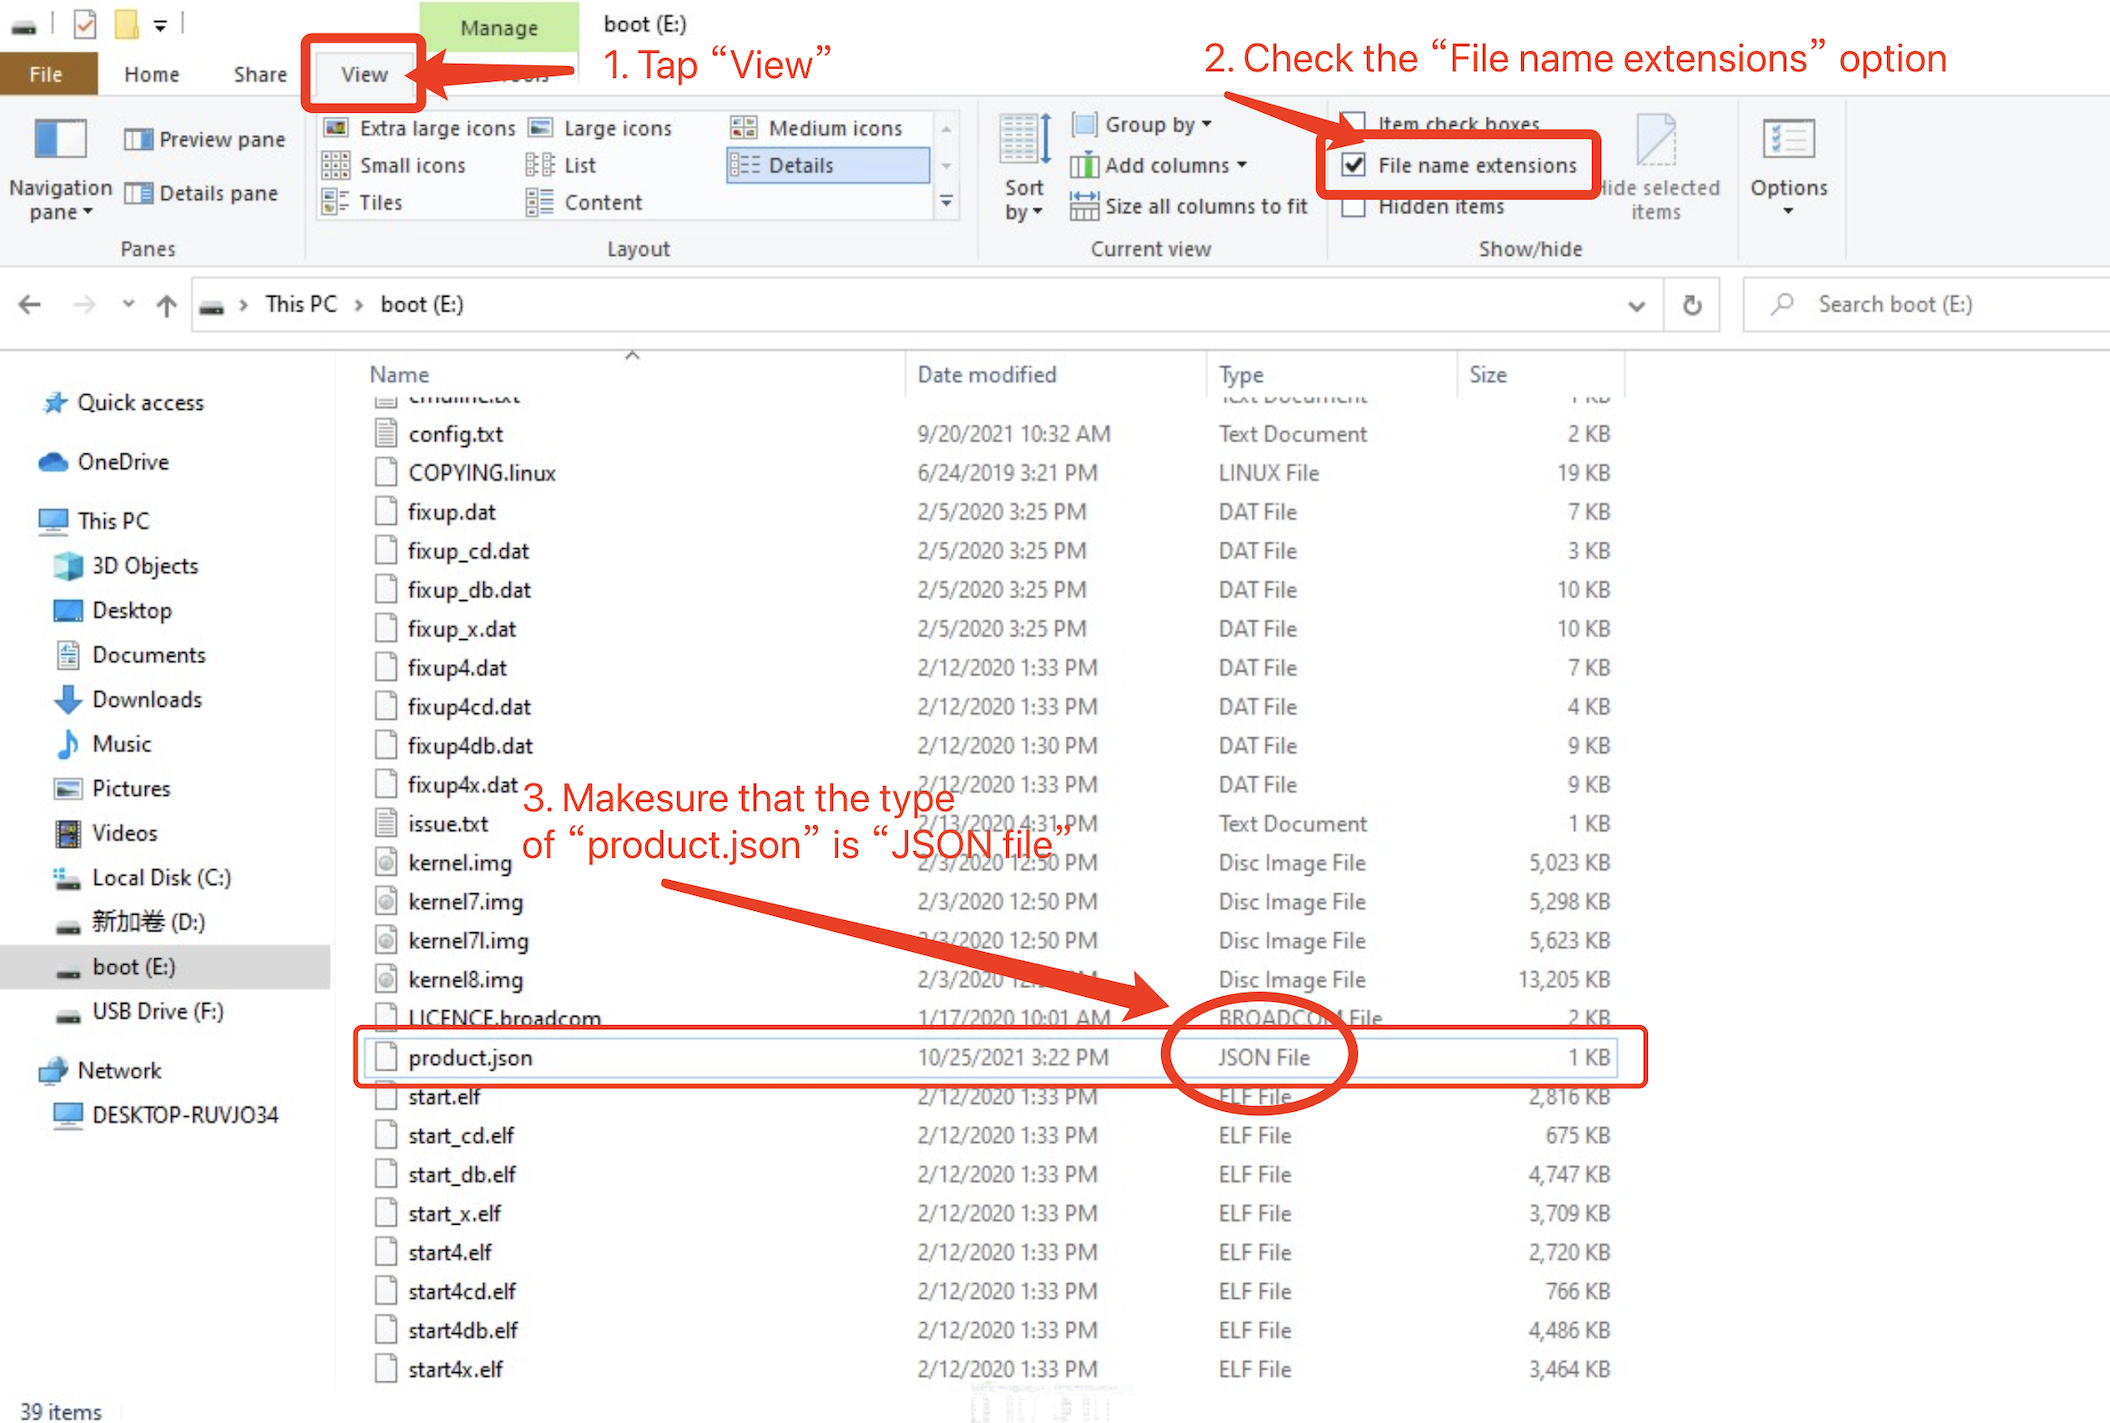
Make sure that the extension of the device configuration file is .json. An extension other than .json causes your device to be unrecognizable. To check the file extension on Windows, follow the steps in the following figure.
-
After the flashing is completed, remove the Micro SD card and insert it into your computer again.
-
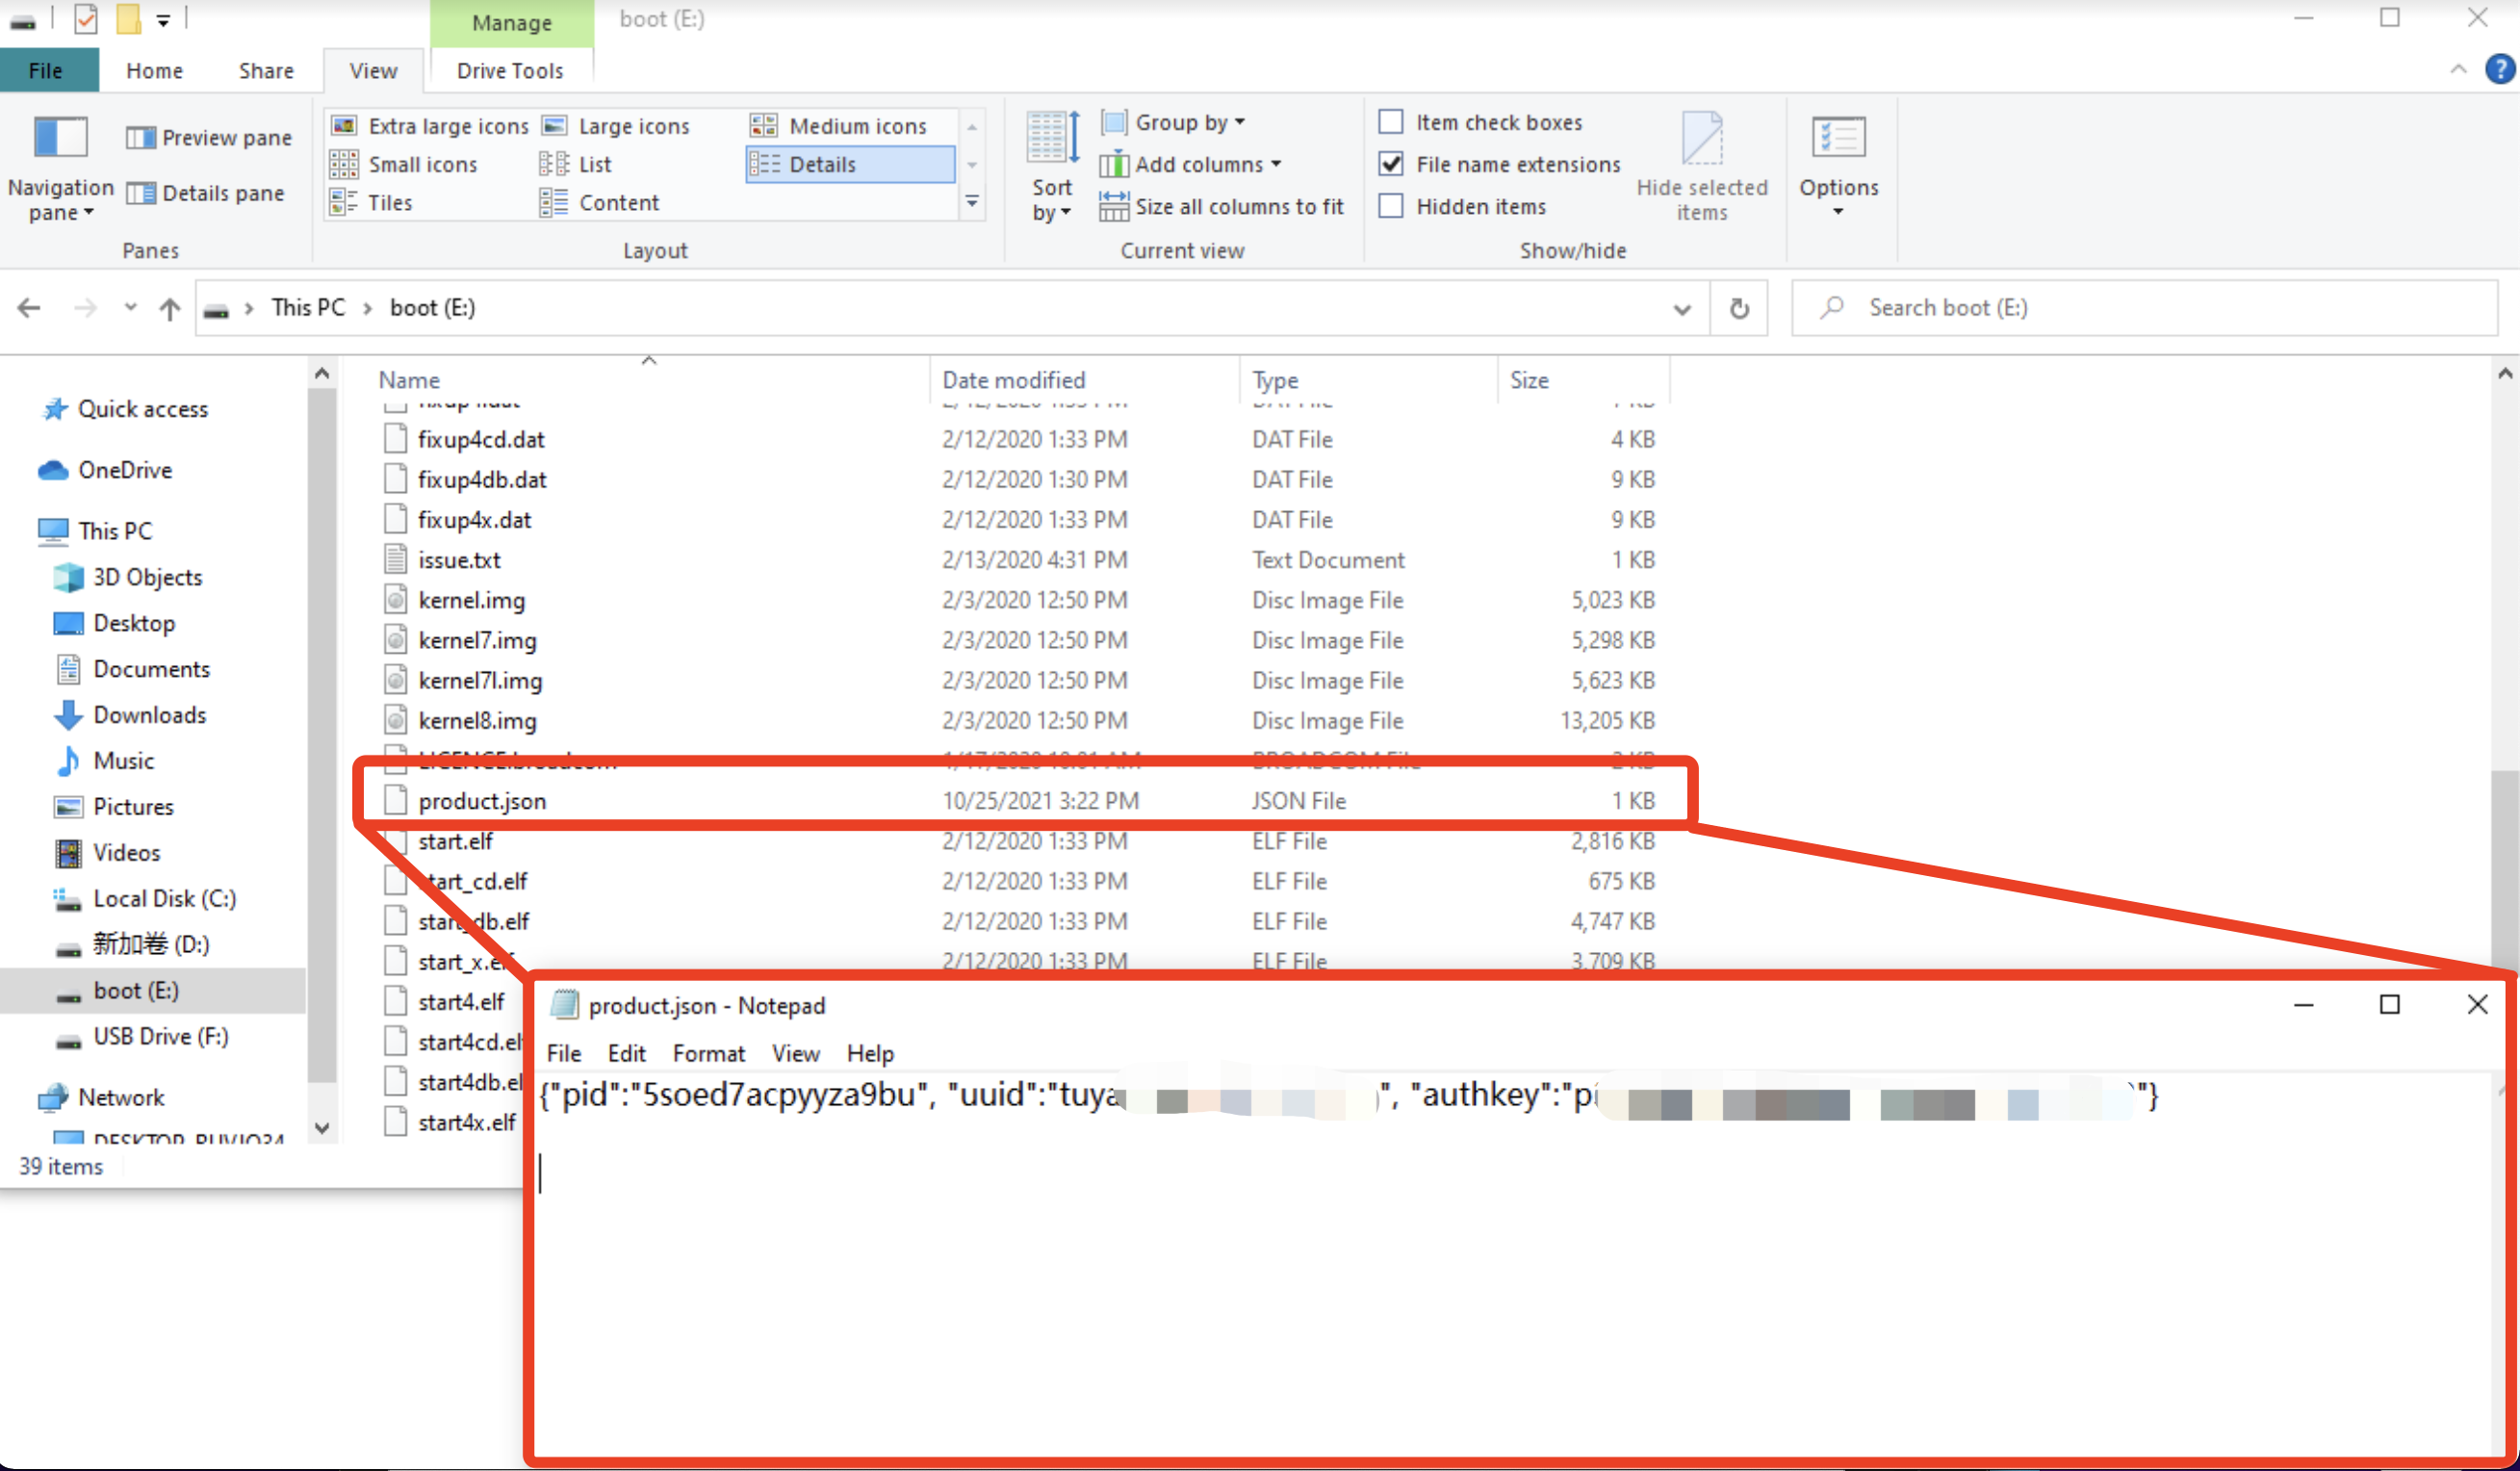
Under the boot partition, create a device configuration file named
product.json. -
Write the following device configuration information into the
product.jsonfile:{"pid":" 5soed7acpyyza9bu", "uuid":" tuya\*\*\*\*\*\*a6f6f", "authkey":" Tex\*\*\*\*\*\*\*\*\*vhF"}pid is a fixed value and uuid and authkey are obtained from the activation code.
Start the device
-
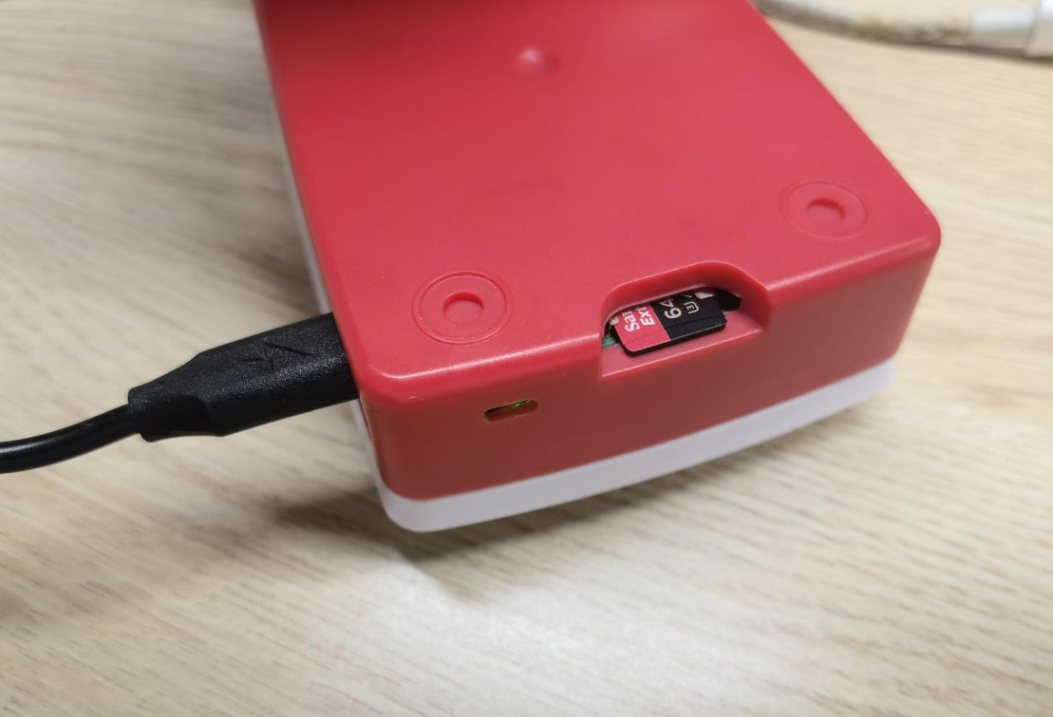
Insert the Micro SD card into the card slot on the Raspberry Pi.
-
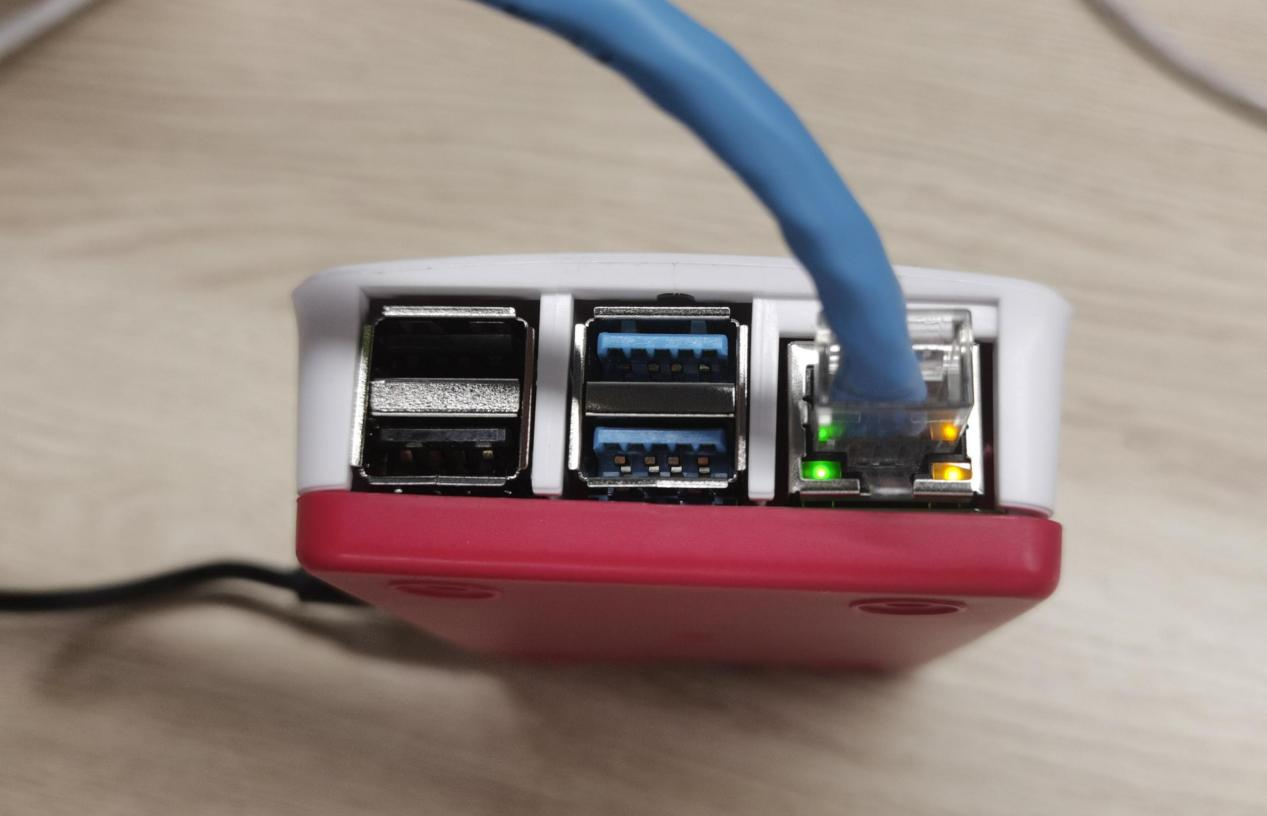
Connect the Raspberry Pi to the router by using a network cable and power on the Raspberry Pi.
When the Raspberry Pi is powered on for the first time, it takes some time to initialize.
-
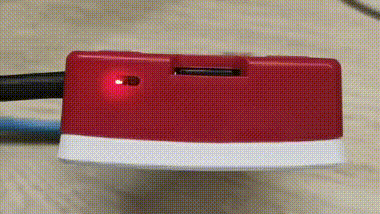
After the Raspberry Pi starts, the red indicator flickers quickly. This indicates that the Raspberry Pi needs to be paired.
-
The Raspberry Pi is installed. You can use the SmartLife app or Tuya Cloud Test app to pair the Raspberry Pi.
Indicator status description
-
Two indicators are near the Micro SD card slot on the testing machine: a red one and a green one.

-
The following table describes the indicator statuses.
Working mode Device status Red indicator Green indicator Power-on Steady on Flickers irregularly Normal device operations Removed from the app or waiting to be paired Flickers quickly (at an interval of 250 ms) Off Connecting to the cloud Off Flickers slowly (at an interval of 1,500 ms) Paired Off Steady on OTA updates in progress Flicker synchronously (at an interval of 1,500 ms) Failure Disconnected from the router Flicker alternatively (at an interval of 500 ms) product.json missing Flicker alternatively (at an interval of 100 ms)
Is this page helpful?
YesFeedbackIs this page helpful?
YesFeedback


