TuyaLink Quick Start
This tutorial walks you through using TuyaLink to connect smart devices to the Tuya Developer Platform. A demo project in Java is available on GitHub. You can run the demo in IntelliJ IDEA and try out sending commands to and receiving data from a smart switch.
Prerequisite
Create an account of the Tuya Developer Platform to create and manage your connected devices.
Step 1: Enable TuyaLink connectivity
Create product
A product describes an abstract representation of a collection of physical devices, which is used to manage devices with the same capabilities. For example, if you want to have your Bluetooth treadmill connected to the Tuya Developer Platform for device monitoring, you can define it as a smart treadmill. This section describes how to create a product with TuyaLink.
-
Log in to the Tuya Developer Platform.
-
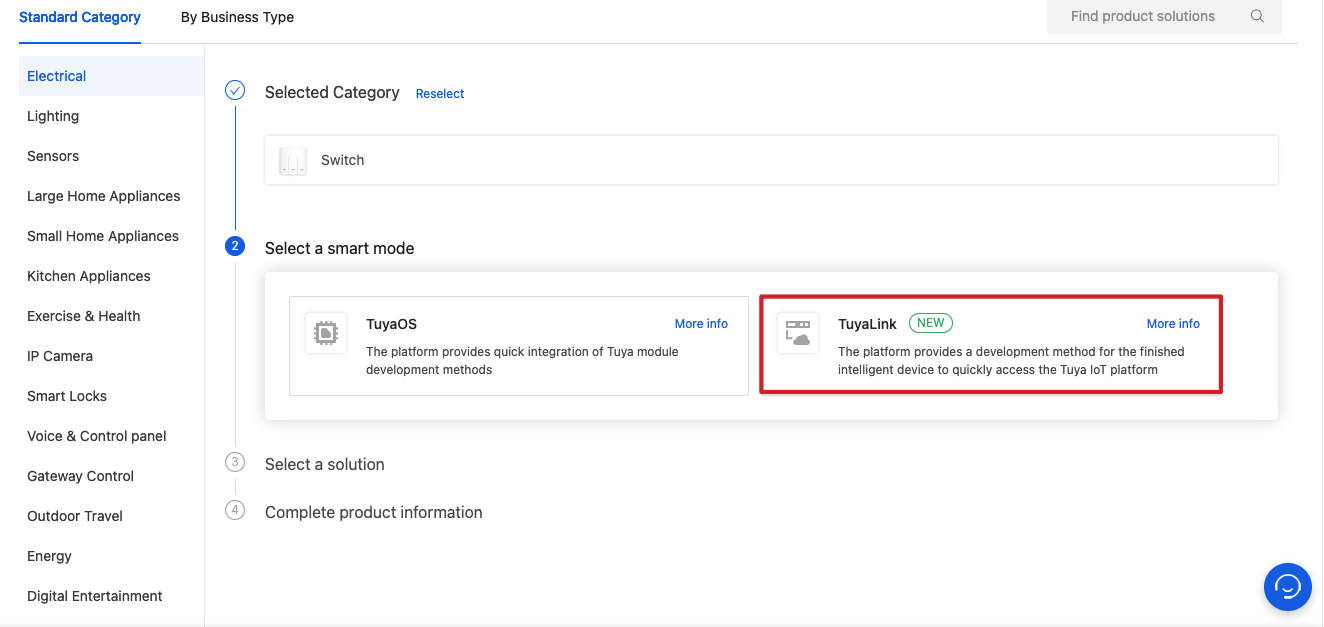
Determine the product category for your devices. For example, Electrical > Switch.
-
Choose TuyaLink for smart mode.
-
TuyaLink Solution is selected by default.
-
Complete the basic information about the product.
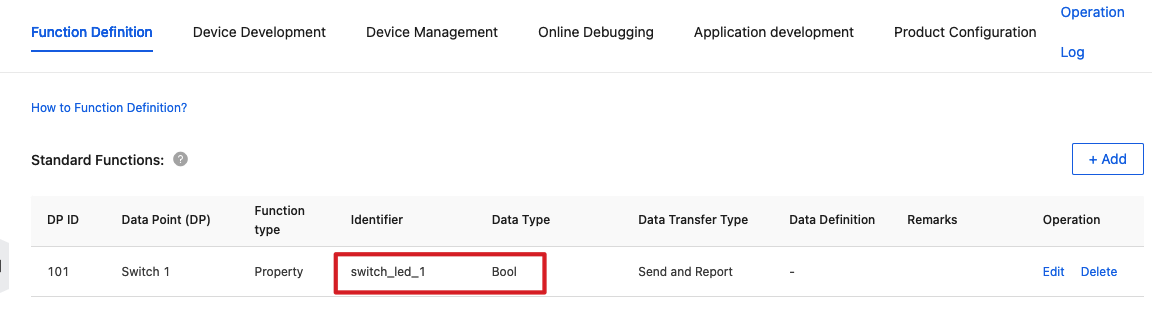
Define functions
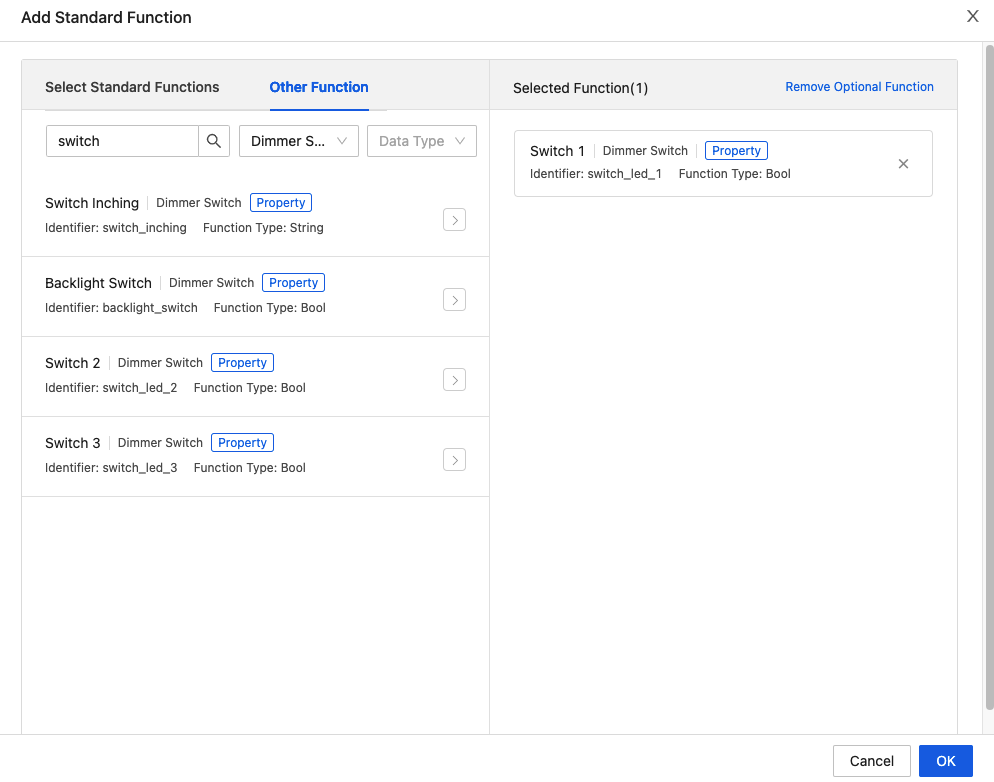
Under the Function Definition tab, add functions based on the features of your devices.
-
Click Add and select a function such as switch 1.
-
Click OK to add the selected function.
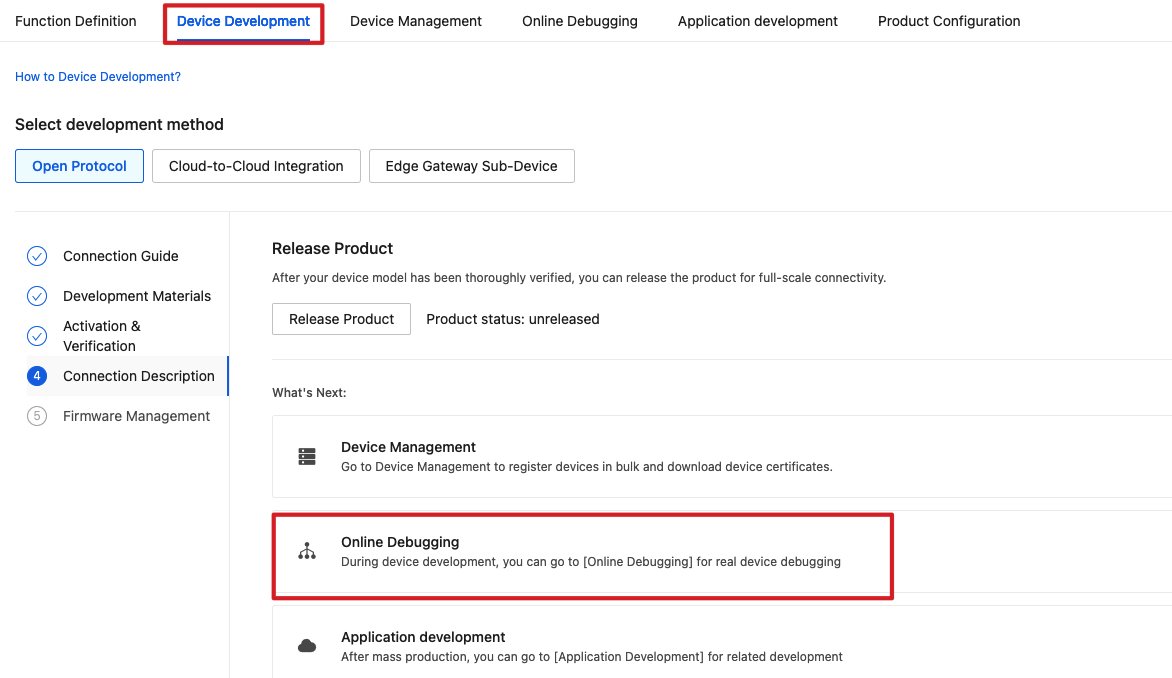
Develop device and verify connectivity
-
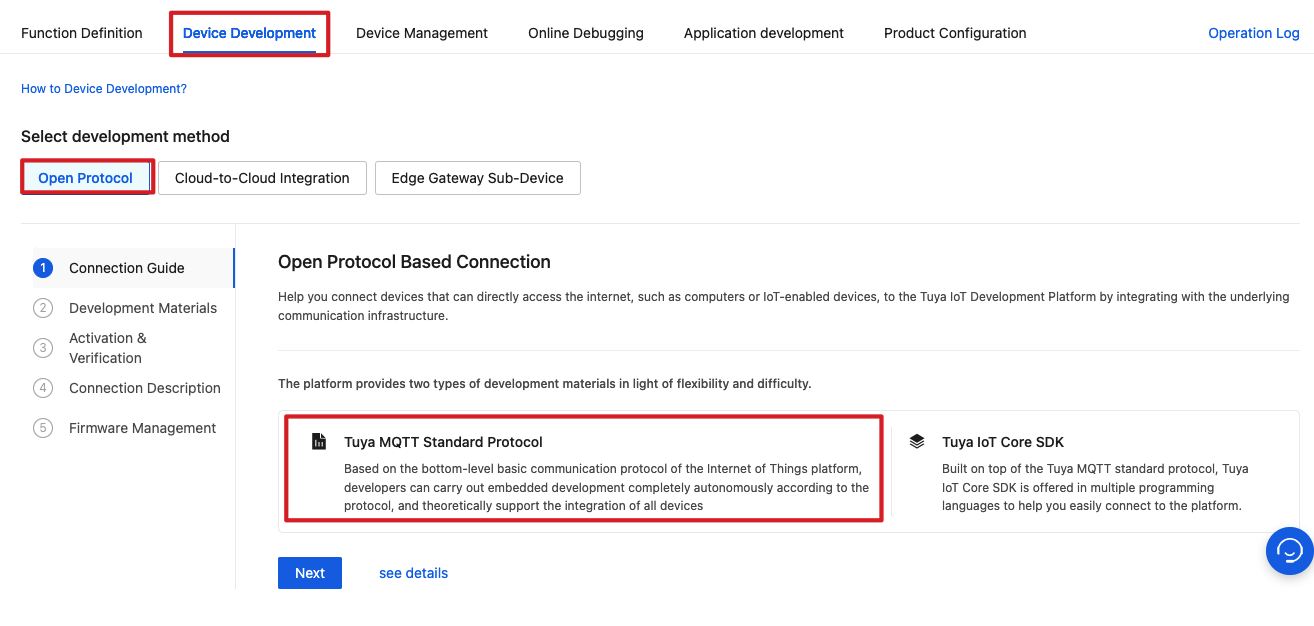
Under the Device Development tab, choose Open Protocol and click Next.
-
Check out the development guide and determine the resources you want to develop with, either the Tuya MQTT Standard Protocol or the Tuya IoT Core SDK. This topic uses the Tuya MQTT Standard Protocol to describe the process.
-
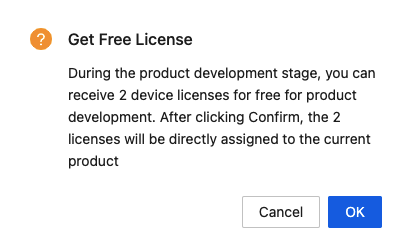
You can request free licenses or purchase a license to activate your device. In the example, we choose Free to receive authorization code.
-
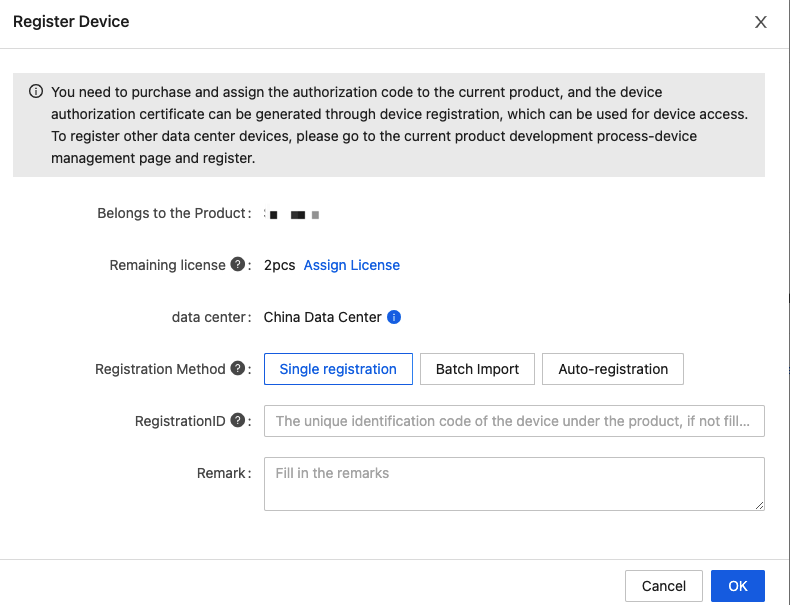
After you get the license, click Register Device to generate a device for debugging and verification.
-
In the Register Device dialog, select a registration method and click OK to generate a device certificate.
-
The Activation & Verification page displays the generated device certificates.
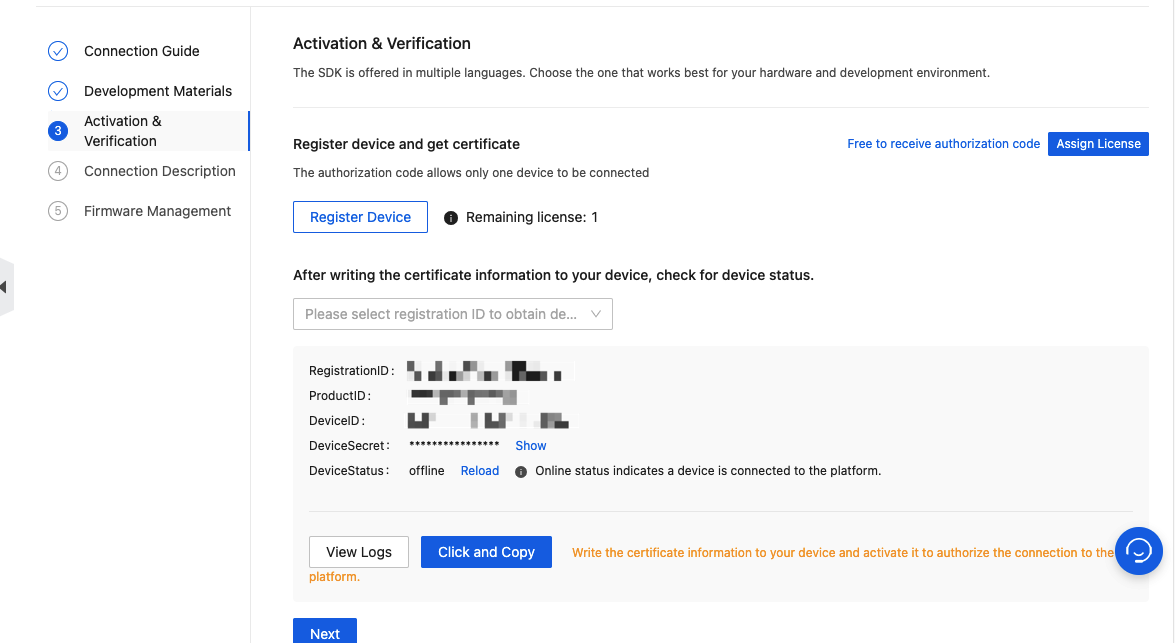
Identifier Example RegistrationID nFUDM2LnPFuL5jTrW*** ProductID gmabzdwevsvlt*** DeviceID 6cc87b39369b6fb754i*** DeviceSecret ***************** - The values in the above code snippet are for demonstration only. Replace them with your own.
- Device identity information is the unique credential to authenticate access to the Tuya Developer Platform. Keep it safe.
With the ProductID, DeviceID, and DeviceSecret, a device can report data to the cloud over MQTT.
Message Queuing Telemetry Transport (MQTT) is a lightweight, publish/subscribe messaging protocol based on TCP/IP. It allows two remote devices to communicate via messages asynchronously with a small code footprint and minimal network bandwidth. MQTT today is used in a wide variety of scenarios, such as IoT and mobile applications.
Step 2: Download and edit demo
This section describes how to use the Java code to connect a device to the Tuya Developer Platform and implement device-to-cloud messaging. The Java code is run on a physical host, which can represent a real device.
-
Download TuyaLink Demo from GitHub.
-
Unzip the downloaded file and import it to IntelliJ IDEA.
-
Open
TuyaMQTT3ClientDemo.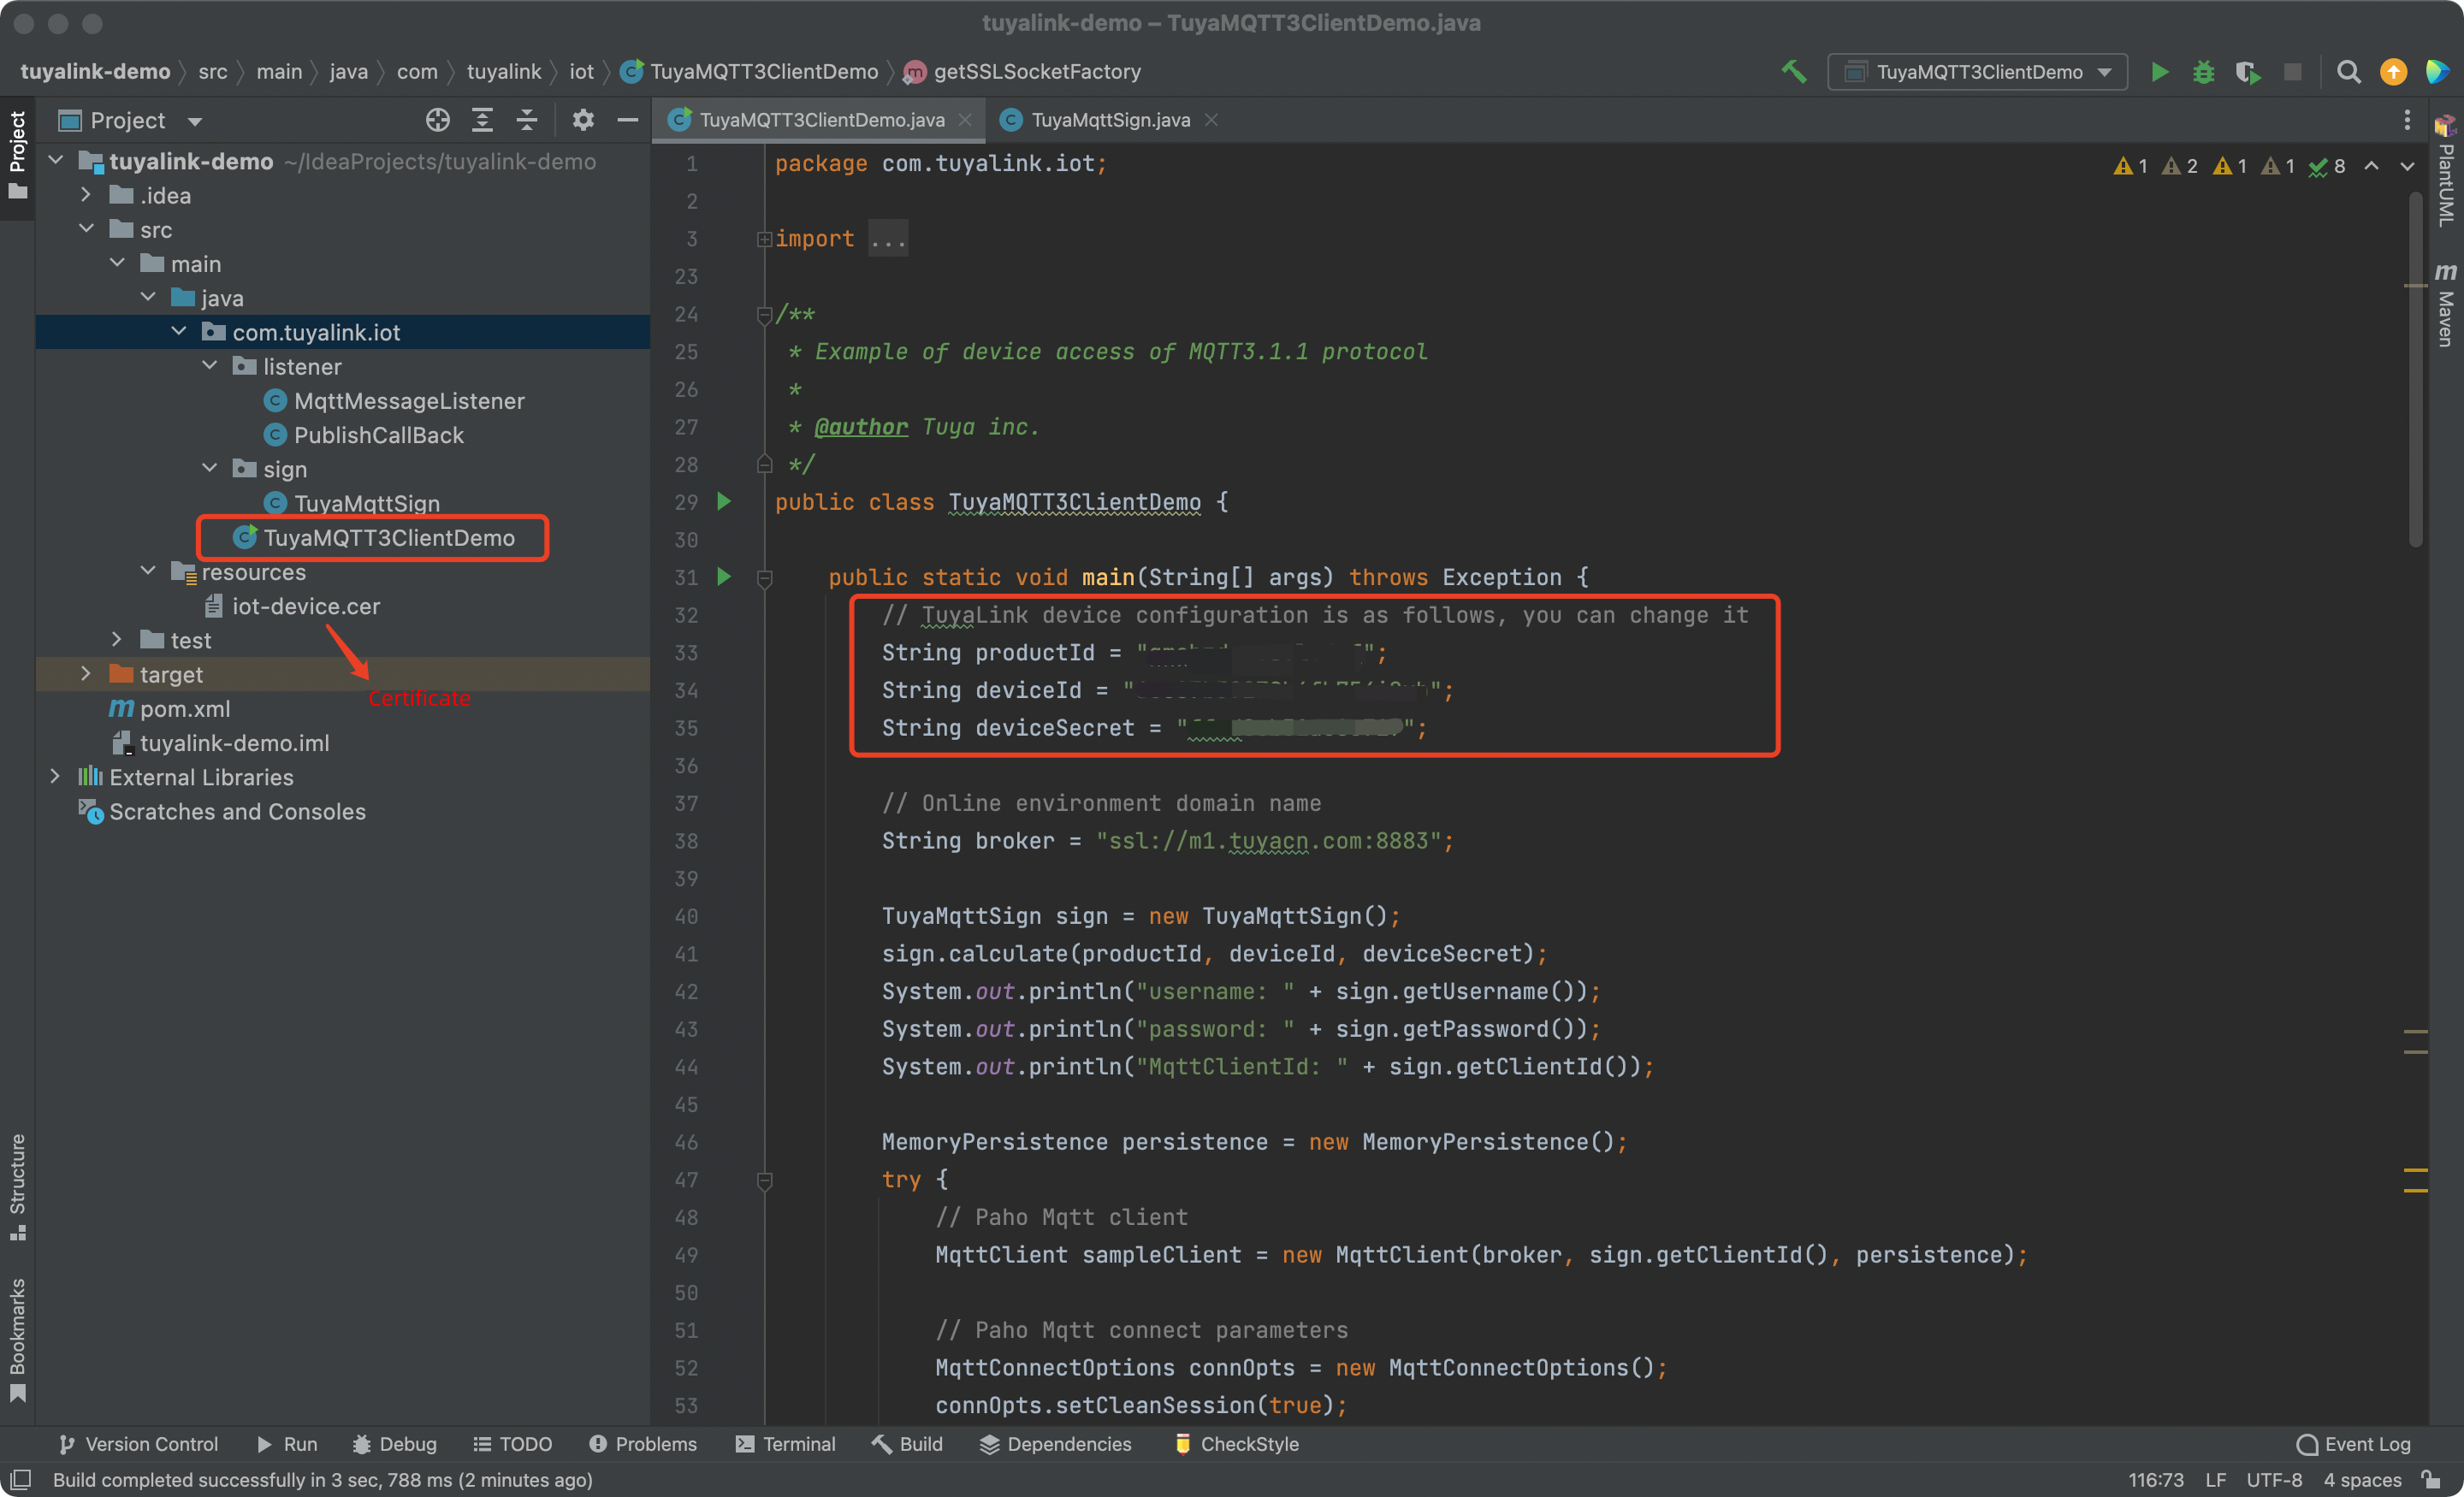
Important folders:
sign: Includes the signature logic for MQTT connection.listener: Includes the MQTT listener.resources: Includes the certificate.
-
In
TuyaMQTT3ClientDemo, replace the parameters marked in the following figure with yourProductID,DeviceID, andDeviceSecret.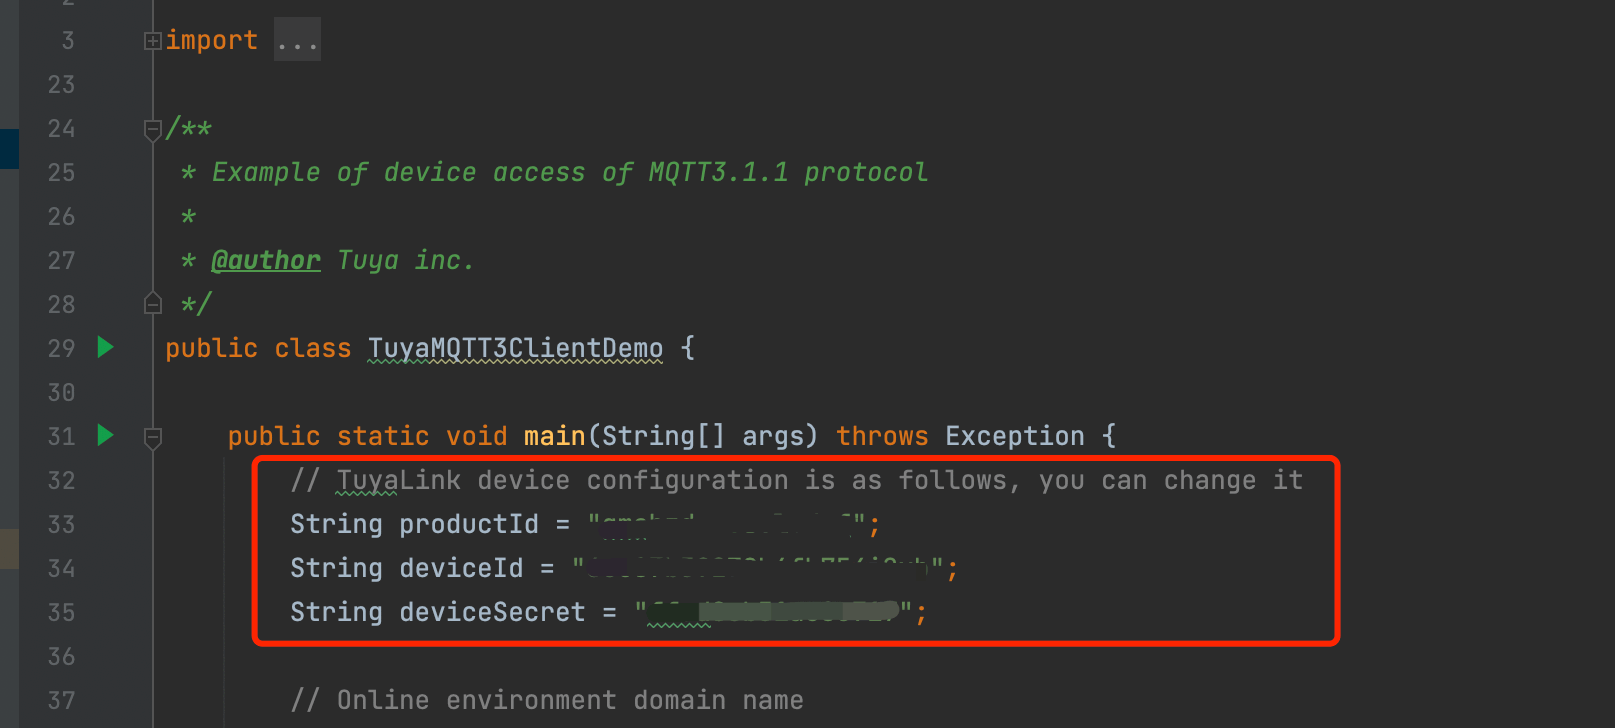
// TuyaLink device configuration is as follows, you must change it String productId = "dsadus***"; String deviceId = "6cc87b393436fb754i***"; String deviceSecret = "ffad8e******8c717";- The values in the above code snippet are for demonstration only. Replace them with your own.
- Do not modify the code outside these three parameters. The sample code has implemented the subscription to the topic used to report a property change.
Step 3: Device reports data to the cloud
Report device properties
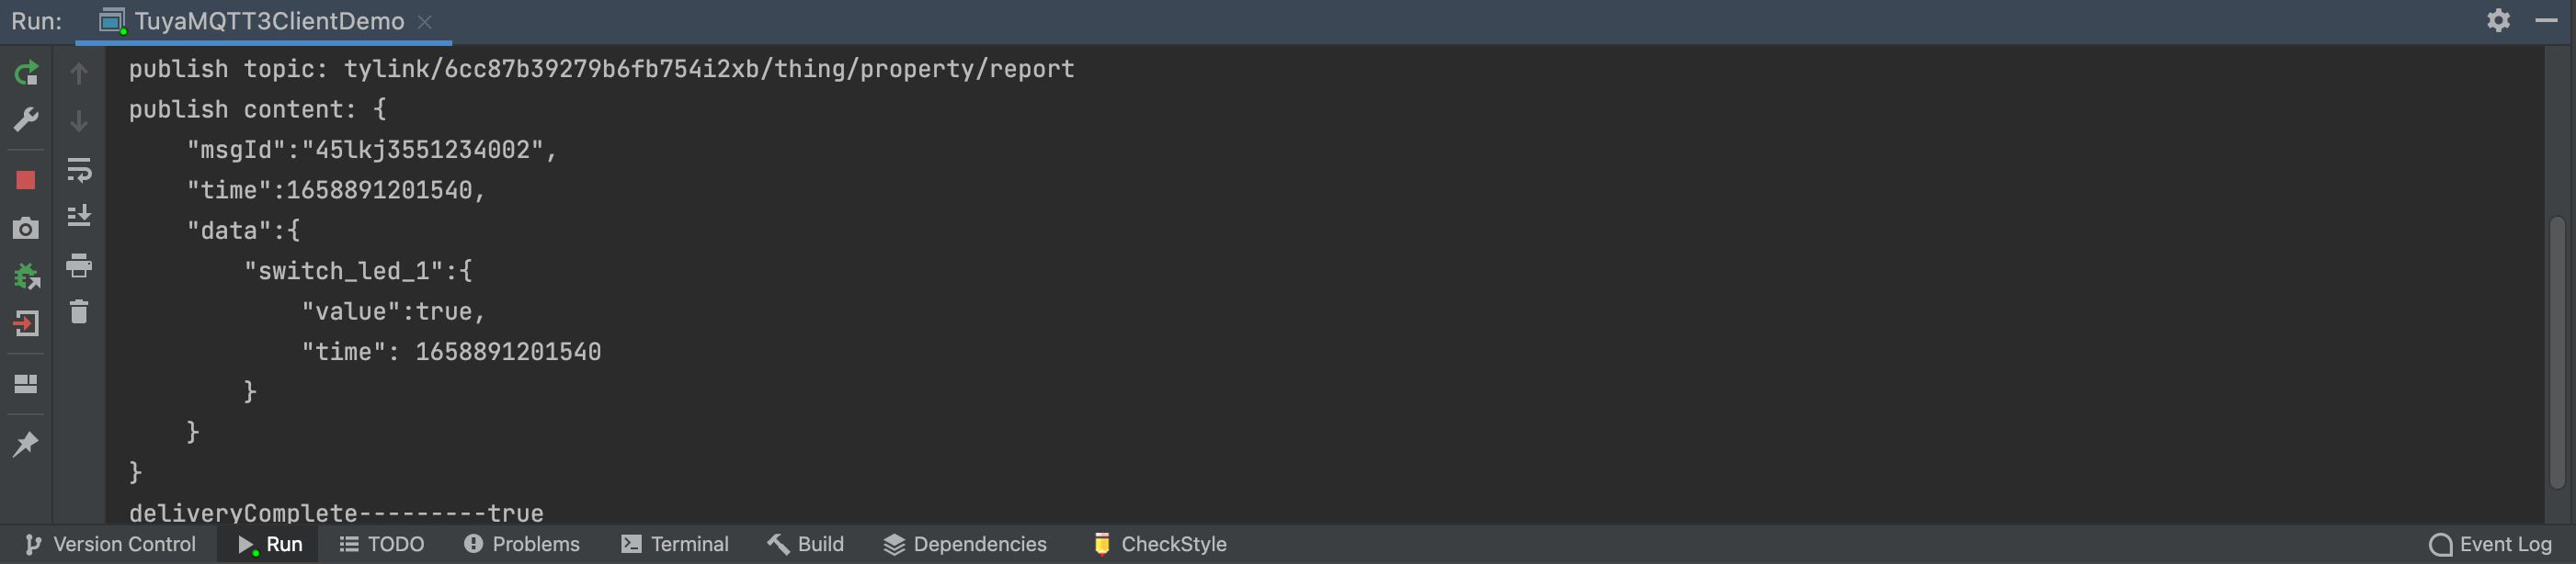
Topic: tylink/${deviceId}/thing/property/report
{
    "msgId":"45lkj3551234***",
    "time":1626197189638,
    "data":{
        "switch_led_1":{
            "value":true,
            "time": 1626197189638
        }
    }
}
Parameter
| Parameter | Type | Description | Required | Notes |
|---|---|---|---|---|
| ${deviceId} | String | Device ID | Yes | The device that requests the device model. |
| version | String | Protocol version | No | The protocol version defaults to 1.0, which is the only valid value currently. |
| msgId | String | Message ID | Yes | A string up to 32 characters in length. A message ID is used to correlate responses and requests. |
| time | Number | Message timestamp | Yes | The Unix timestamp when a message is sent, in seconds (10-digit value) or milliseconds (13-digit value). |
| data | Object | A collection of property values reported | Yes | key represents the property code. value represents the property value and the timestamp when the property value is changed. |
| data.${key} | Object | The property object | Yes | key represents the property code. |
| data.${key}.time | Number | The timestamp when the property value is changed. | Yes | The Unix timestamp, in seconds (10-digit value) or milliseconds (13-digit value). |
| data.${key}.value | Object | The property value reported | Yes | The specific property value. |
Example:
 //****************************************device property report********************************************

 // Property report topic
 String topic = "tylink/" + deviceId + "/thing/property/report";
 // Current timestamp
 long timestamp = System.currentTimeMillis();
 // Property report content
 String content = "{\n" +
         "\t\"msgId\":\"45lkj3551234002\",\n" +
         "  \t\"time\":" + timestamp + ",\n" +
         "\t\"data\":{\n" +
         "    \t\"switch_led_1\":{\n" +
         "        \t\"value\":true,\n" +
         "        \t\"time\": " + timestamp + "  \n" +
         "        }\n" +
         "\t}\n" +
         "}";

 MqttMessage message = new MqttMessage(content.getBytes());
 message.setQos(1);
 sampleClient.publish(topic, message);
 System.out.println("publish topic: " + topic);
 System.out.println("publish content: " + content);
The value of the property field in the code must be identical to that defined on the Tuya Developer Platform.
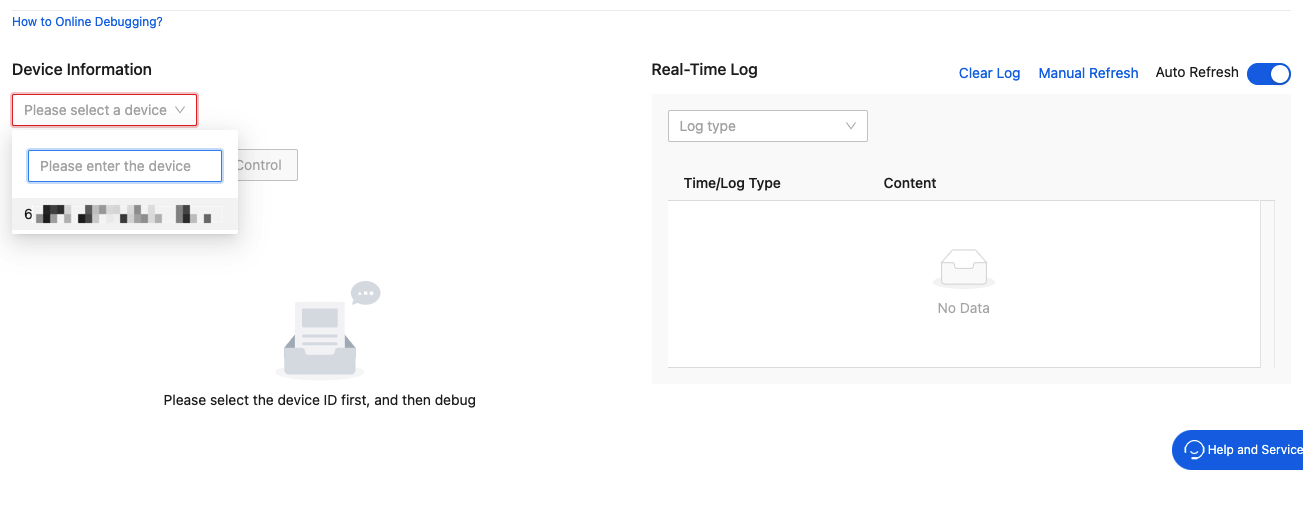
Debug online
-
When your code is ready to go, open the Tuya Developer Platform and choose Online Debugging in the development process.
(Optional) You can click the Online Debugging tab to directly navigate to the destination.

-
Select a device for debugging. You can search for the device you configured in the code by
DeviceID. -
The connection status will appear. You can click Manual Refresh to get the latest status.
-
Right-click the
TuyaMQTT3ClientDemofile and choose Run to run the code.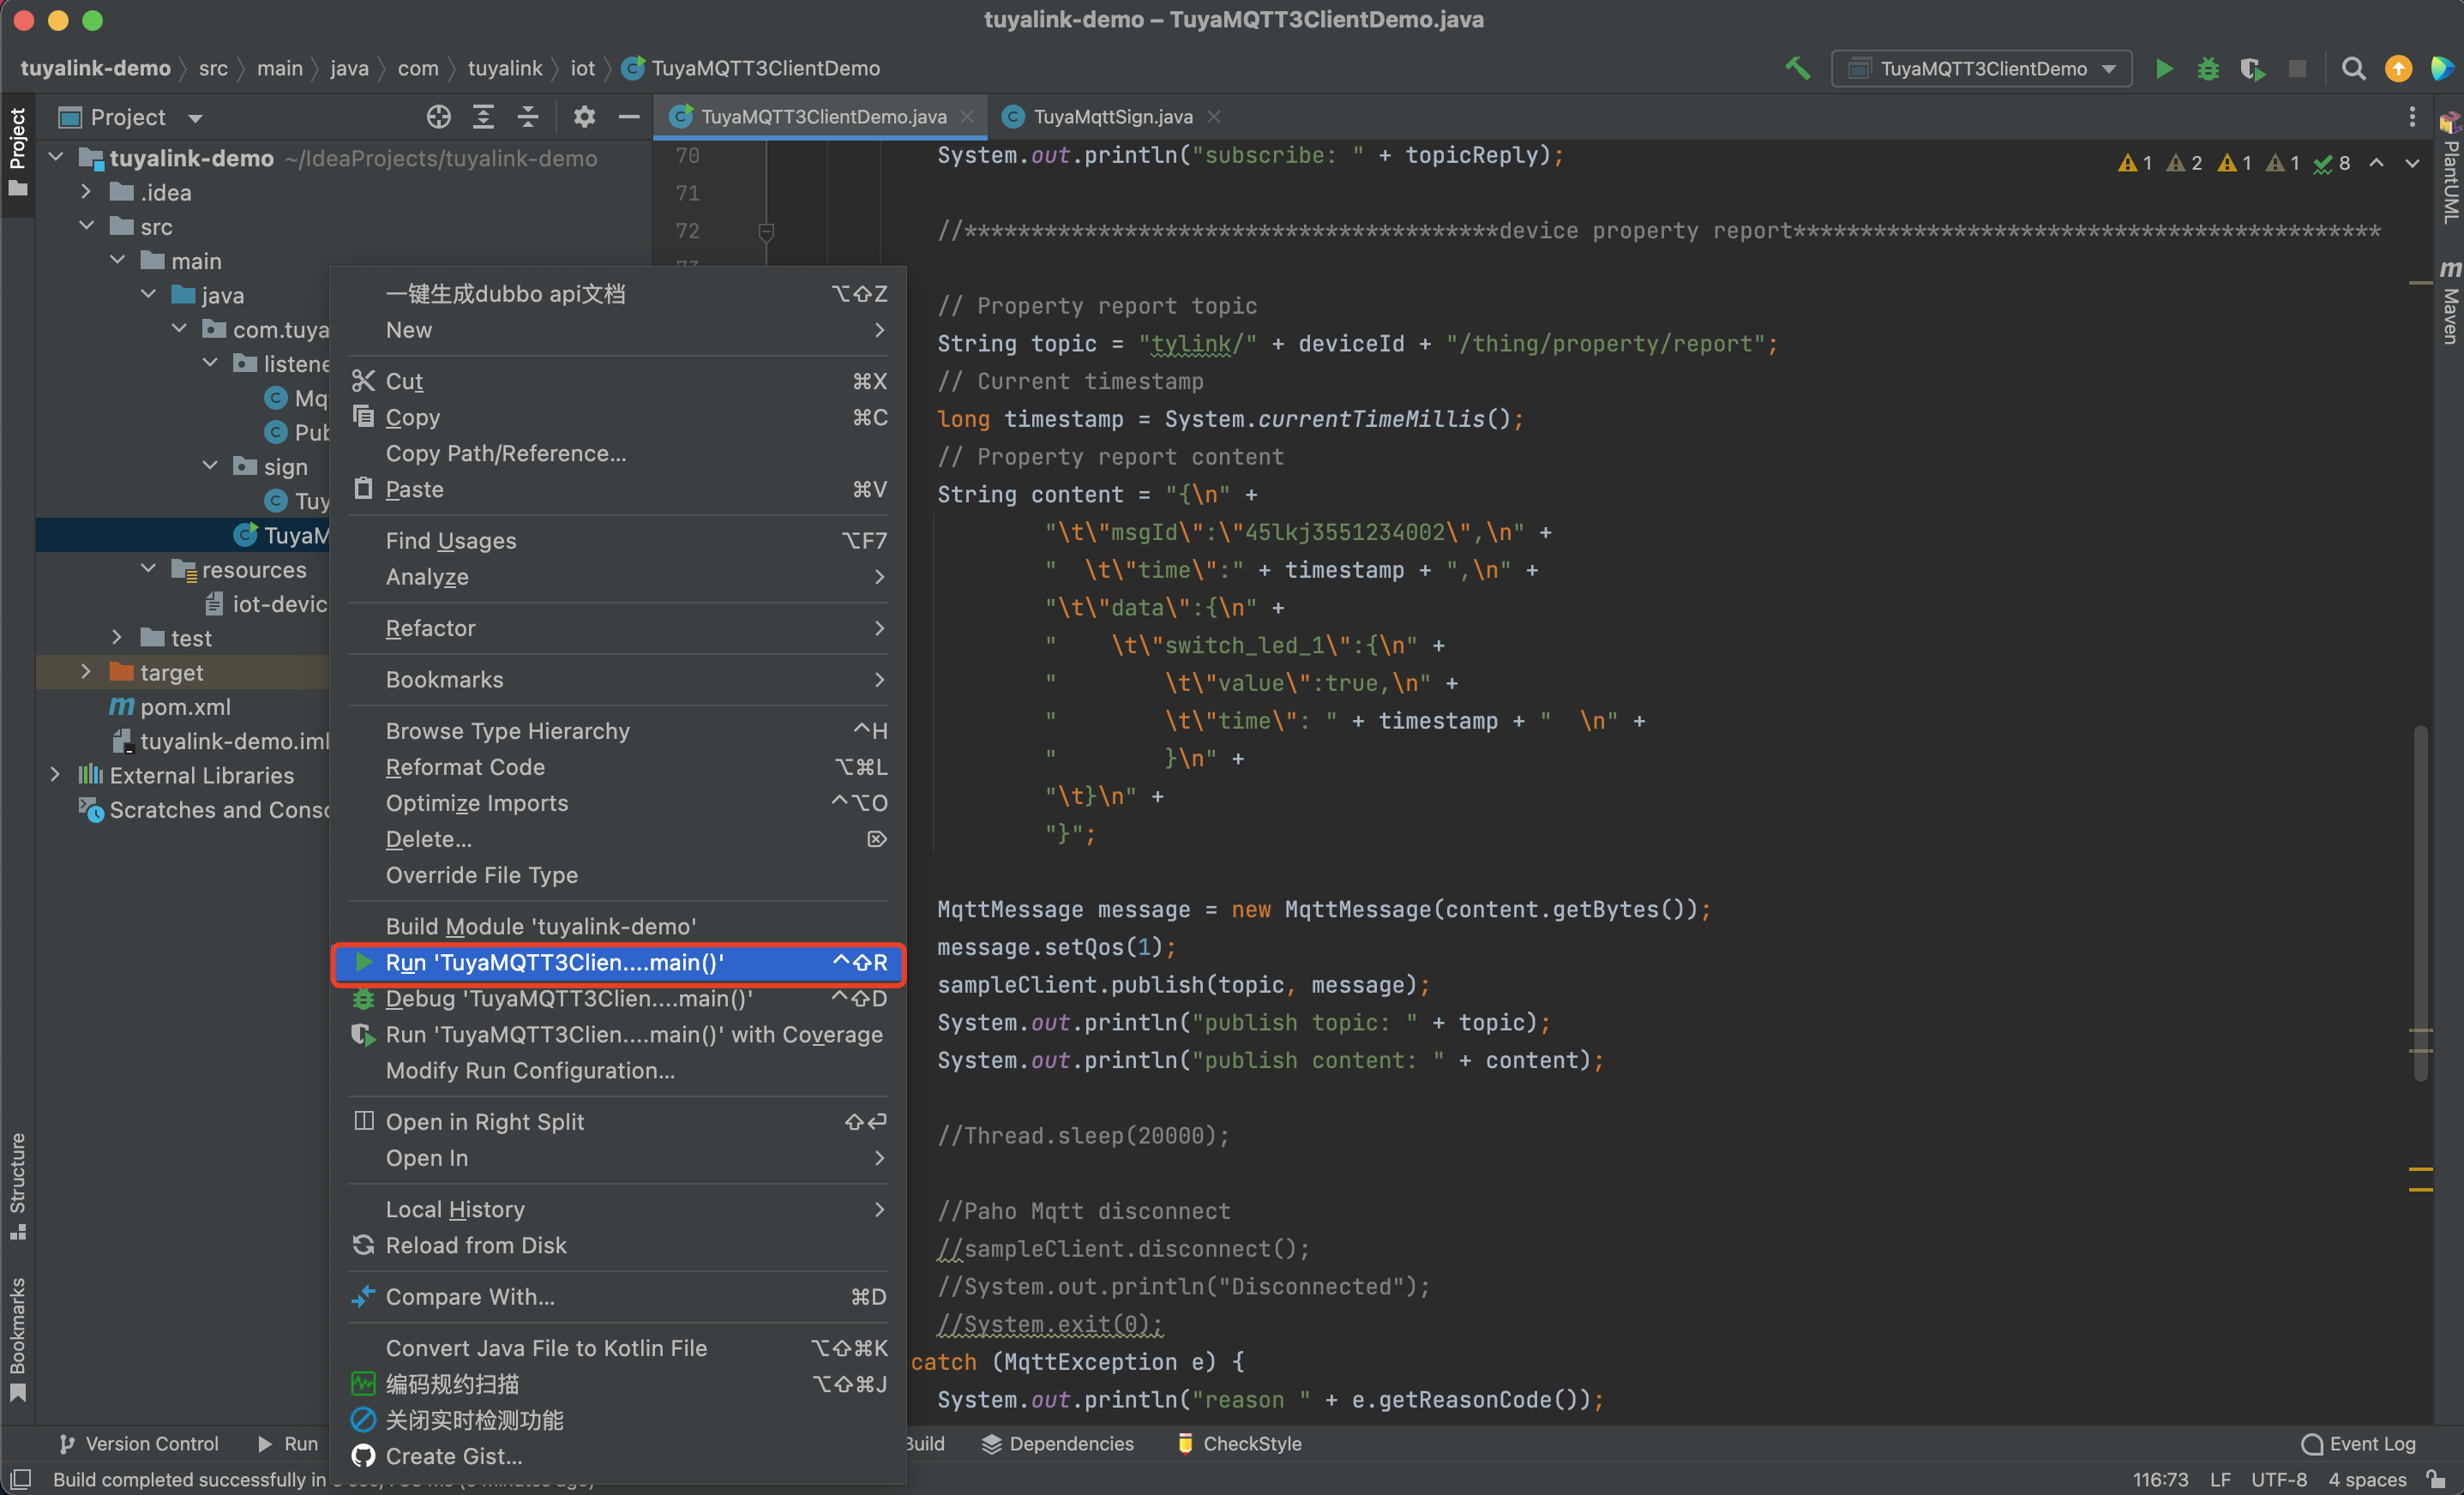
-
The output window shows successful data reporting to the cloud.
-
Navigate to Device Debugging on the Tuya Developer Platform and check the data reported from the device.
Step 4: Send messages to the device
This section describes how to send a message to the device.
-
Open the Tuya Developer Platform.
-
Navigate to the page of Device Debugging.
-
Select the target device.
-
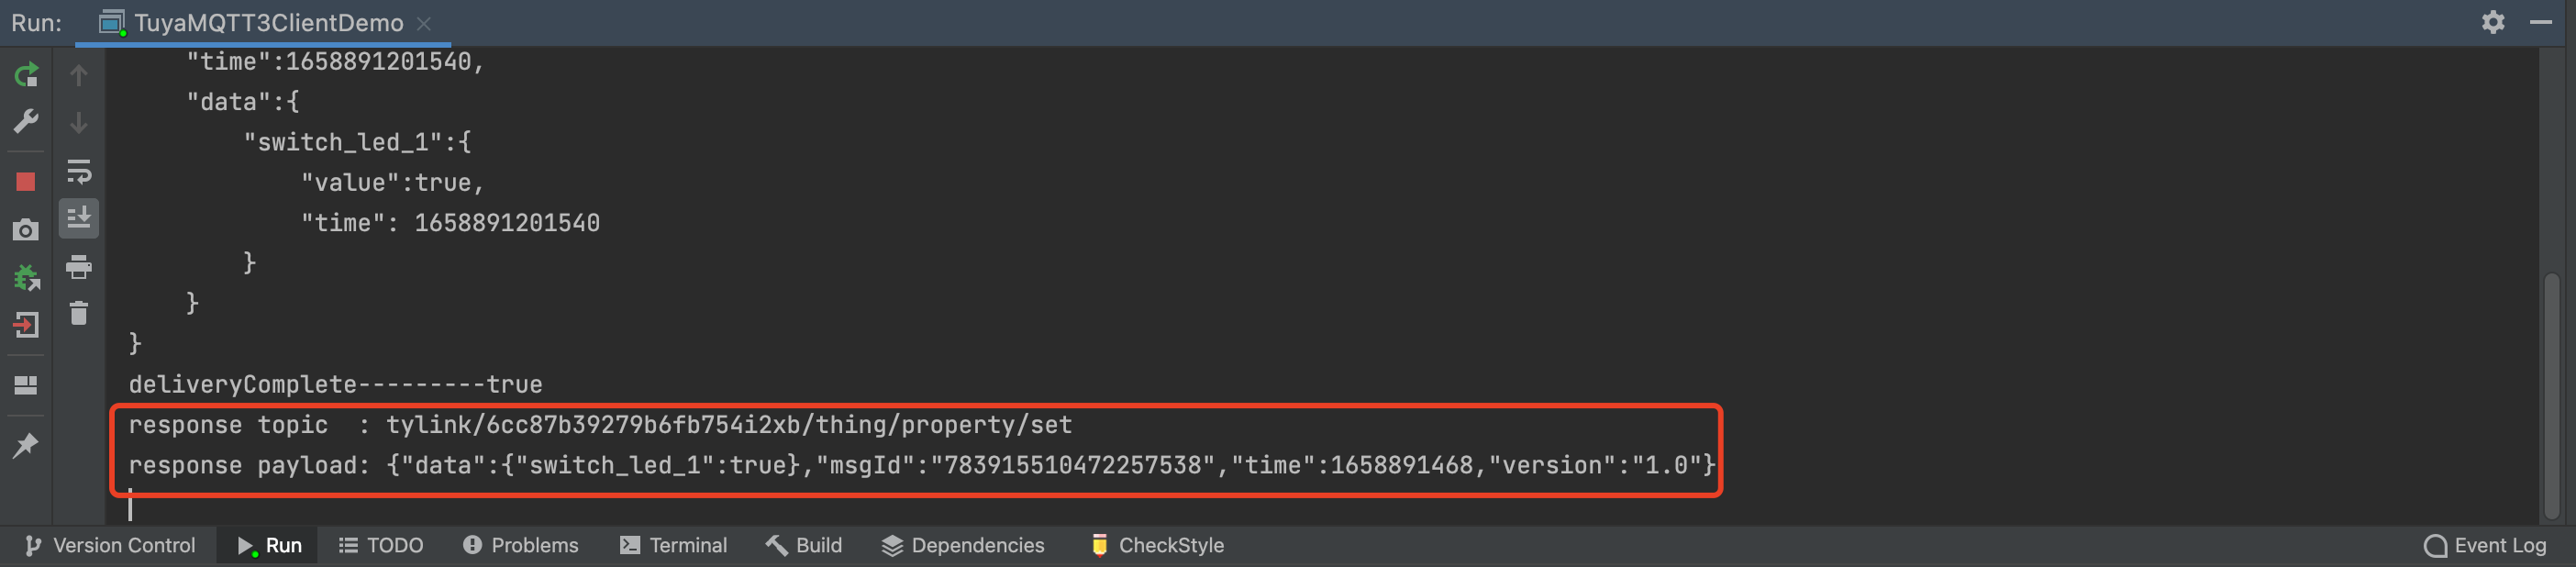
In Property Debugging, enter or change the value of a property and click Set. The cloud will send the desired property value to the device. The content sent to the device is printed in the log.
-
If the code runs correctly, the output in the IntelliJ IDEA should look like this.
Next steps
The sample Java code simulates the bidirectional commutation between the device and the cloud, which can help you quickly verify use cases.
You can practice what you have learned by starting with Create Product.
Is this page helpful?
YesFeedbackIs this page helpful?
YesFeedback


