Enterprise Management
Overview
As a system setting application, Enterprise Management enables you to create and maintain user accounts, set account permissions and validity periods, while also managing enterprise and sub-enterprise information.
Features
Set up permissions
Before using the enterprise management feature, make sure your account has been granted access permissions to the Enterprise Management application.
To grant permissions to accounts with different roles, click the avatar in the top right corner of the system. In the dropdown menu, click System Settings and navigate to the Role management application. Then, enable the Enterprise Management permission for the target role and select the specific operational permissions it should possess.


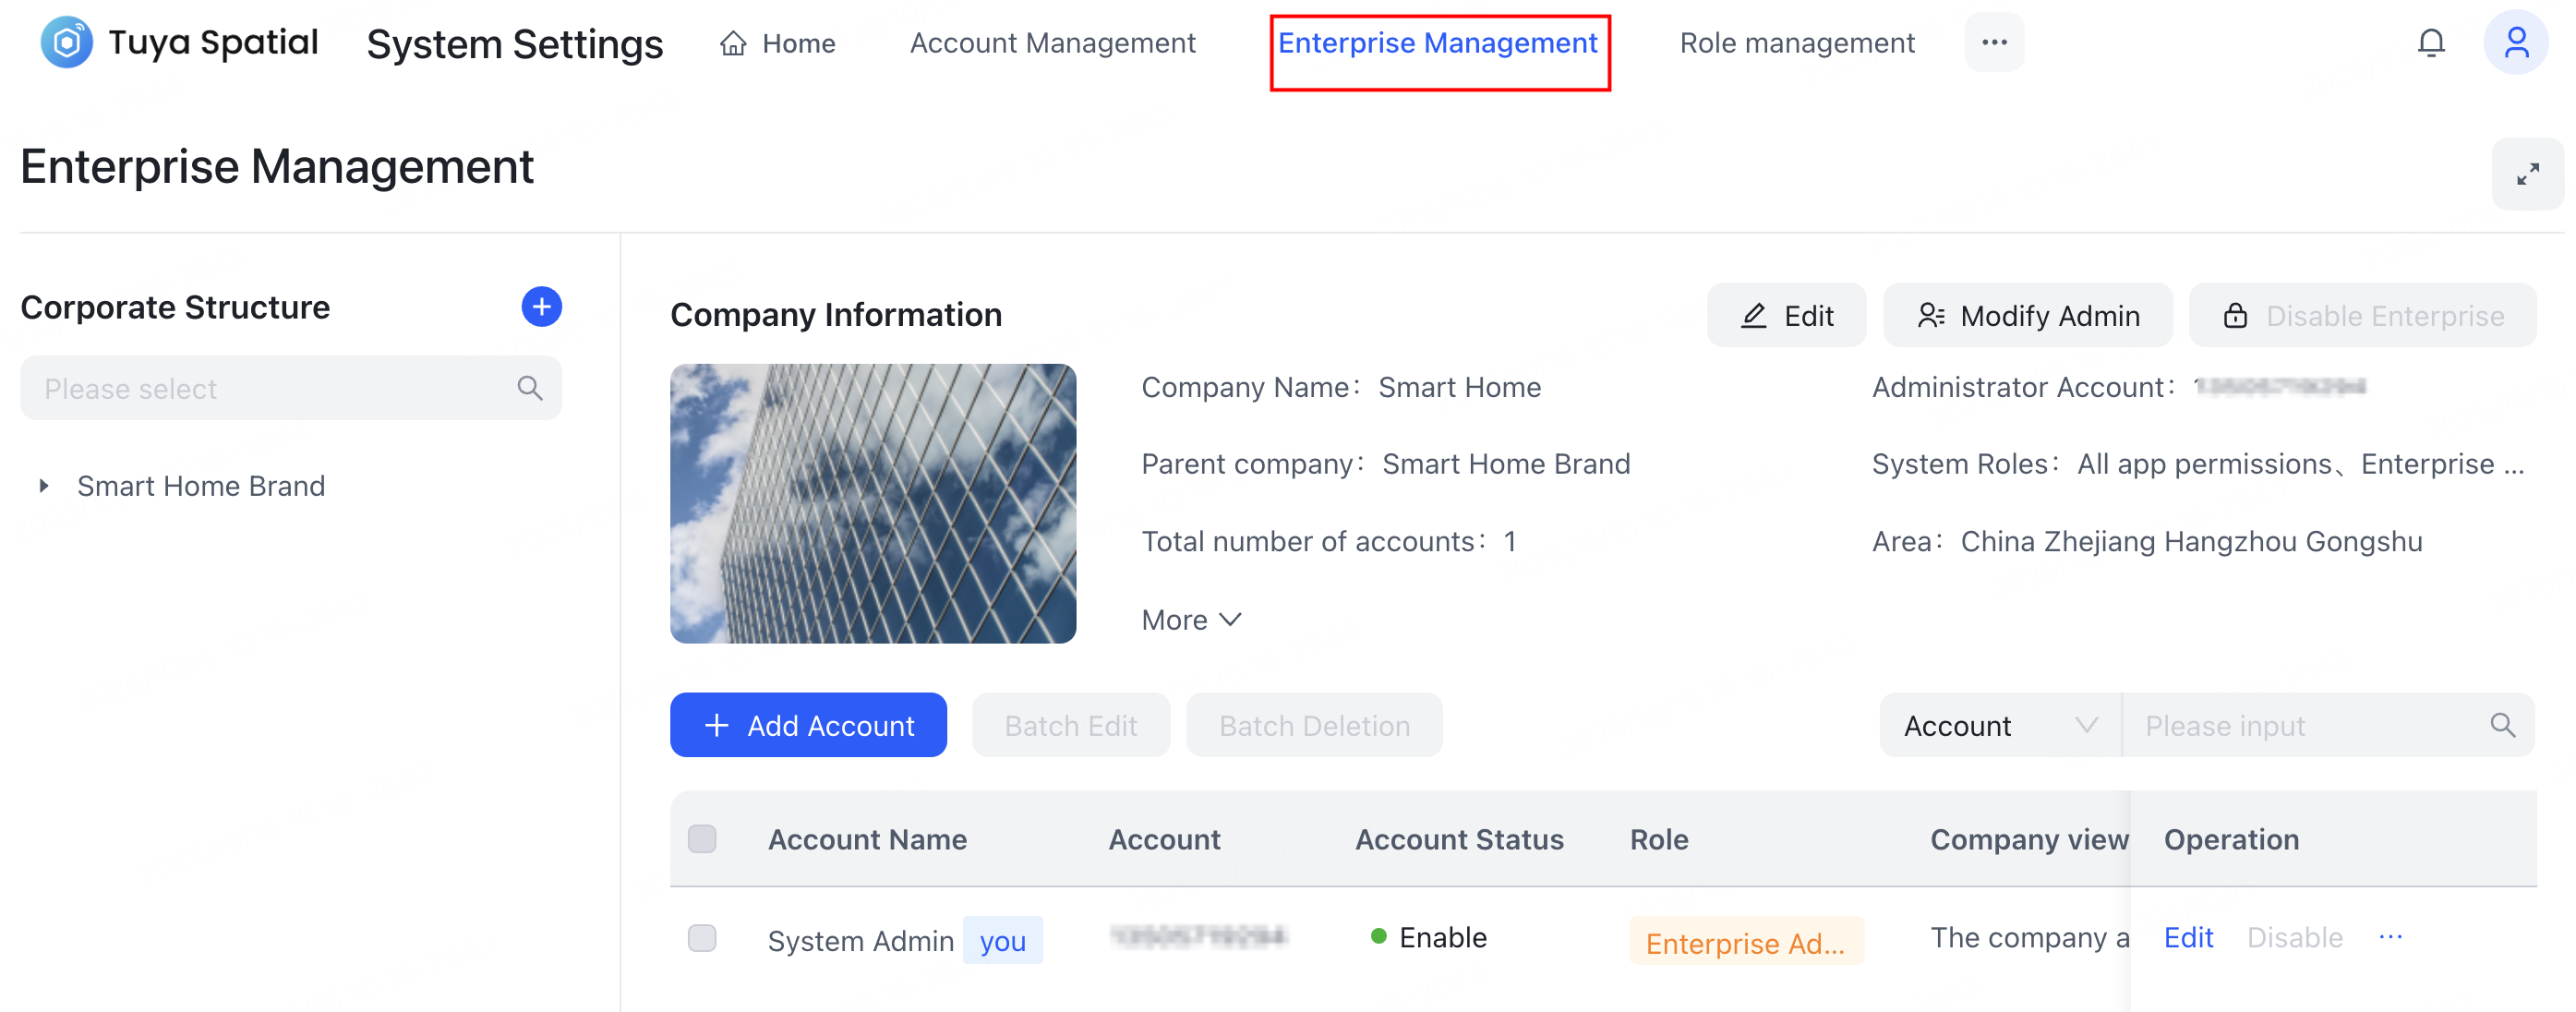
Entry to the feature
Click the avatar in the top right corner of the system. In the dropdown menu, click System Settings and select the Enterprise Management application.

Create enterprise
-
To create a sub-enterprise under the current enterprise, navigate to the Enterprise Management page > Corporate Structure section, and click the add (+) button on the right.
- Accounts and data between enterprises are completely isolated.
- A parent enterprise has default permissions to manage the accounts of its sub-enterprises.

-
On the page that appears, complete the following configurations:
- Configure basic information, such as name, area, and photo.

- Set an administrator: Assign a system administrator for the new enterprise. The system administrator account can be a non-administrator account from another enterprise within the system. This administrator will possess all permissions within the new enterprise and can only be replaced or deleted by the parent enterprise.

- Set up enterprise permissions: Define the functional permissions available for the new enterprise. You can select and copy existing roles from the current enterprise to the new one, or manually choose the scope of functions available to the new enterprise.

- Configure basic information, such as name, area, and photo.
-
When finished, click Confirm to save the configuration and create the new enterprise.
Edit enterprise information
To edit enterprise information, navigate to Corporate Structure, select the target enterprise, and click Edit in the top right corner. Then, on the page that appears, modify and save the basic information and permissions.


Modify administrator
To modify the enterprise administrator, first, navigate to Corporate Structure, select the target enterprise, and click Modify Admin in the top right corner.
On the Modify Admin page that appears, confirm the current administrator information and enter the account details for the new administrator.


If the selected enterprise is the one your current account belongs to, you cannot modify its administrator. You must contact the parent enterprise of your current enterprise to perform this modification.
Delete enterprise
To delete an enterprise, navigate to Corporate Structure, select the target enterprise, and click Edit in the top right corner. Then, on the page that appears, click Delete at the bottom and confirm the action.
You must first ensure the enterprise is no longer in use and that all sub-accounts within it have been deleted. After deletion, the enterprise can no longer be accessed.

Add account
To add an account under an enterprise, first, navigate to Corporate Structure, select the target enterprise, and click Add Account.

Then, on the Add Account dialog, configure the account information, select the Account Role (multiple selection is supported), and then set the Account expiration date. Click OK to save.

- Once the account expires, it will be unable to log in to the system.
- Company view permissions control whether the newly created account can manage sub-enterprises.
Edit account
To edit an account within an enterprise, first navigate to Corporate Structure and select the target enterprise. Then, click Edit in the Operation column.
On the Edit Account dialog, modify the account information and permissions. Click OK to save the changes.

A deleted account cannot log in. If an account exists in multiple enterprises, deleting it from one enterprise will not affect its access to others.
Delete account
To delete an account within an enterprise, navigate to Corporate Structure, select the target enterprise, and click … > Delete in the Operation column. Then, confirm the action.


Batch edit/deletion
To edit or delete accounts in bulk, select multiple accounts simultaneously, then click Batch Edit or Batch Deletion and proceed with the operation.
Changes made during batch editing will apply to all selected accounts.

Authorize projects
To grant project access to an account, in the target account’s Operation column, click Authorize Projects. In the dialog that appears, select the desired project(s) and click Authorization in its Operation column. Once authorized, the account will have access to the project(s).

Is this page helpful?
YesFeedbackIs this page helpful?
YesFeedback


