Configure Google Sign-In
Last Updated on : 2025-03-04 01:37:02download
The OEM apps that are created on the Tuya Developer Platform use new settings starting from v3.19. This allows users to use the Google Sign-In feature as expected. If your app version is earlier than v3.19, update the version on the Tuya Developer Platform and follow the steps in this topic to configure the Google Sign-In feature.
Prerequisites
You already have a Google account. Otherwise, you can log in to the Google Cloud Platform, and follow the instructions on the platform to create a Google account. This account is required for login to your app.
Create an app
-
Log in to the Google Cloud Platform.
-
In the top menu bar, click Select a Project > NEW PROJECT to create a project.

-
Enter the app information and click CREATE.
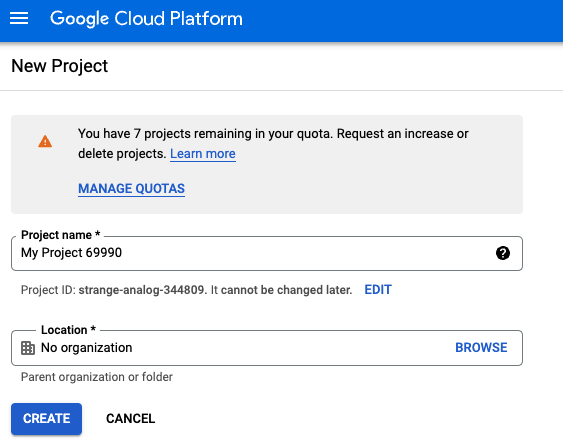
Configure OAuth consent screen
If the OAuth 2.0 authentication protocol is used, your app requests permissions for access to one or more domains with a Google account. For this purpose, Google shows users a consent screen, including the project information, policies, and requested domains. Perform the following steps:
-
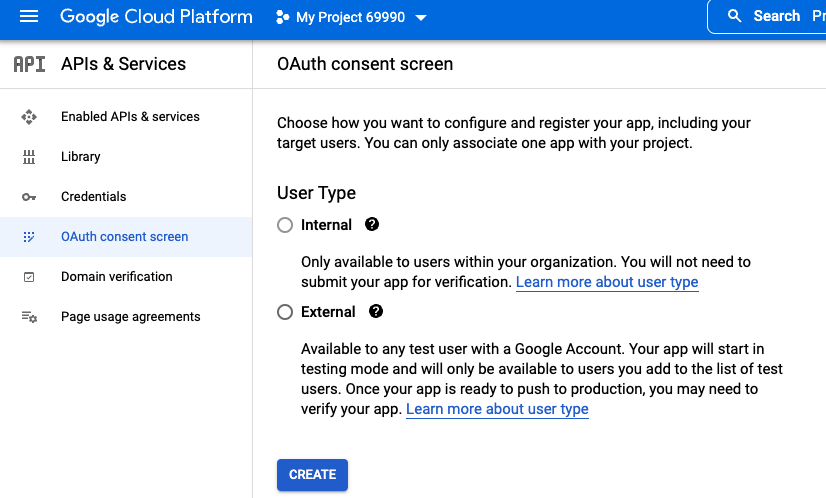
Go to OAuth consent screen.
-
Set User Type to External.
-
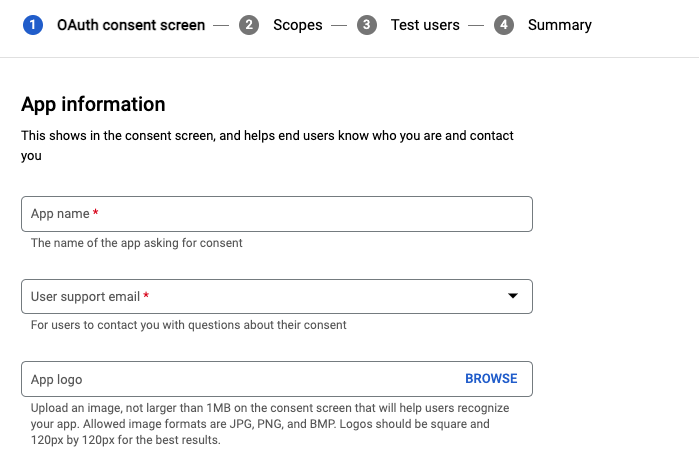
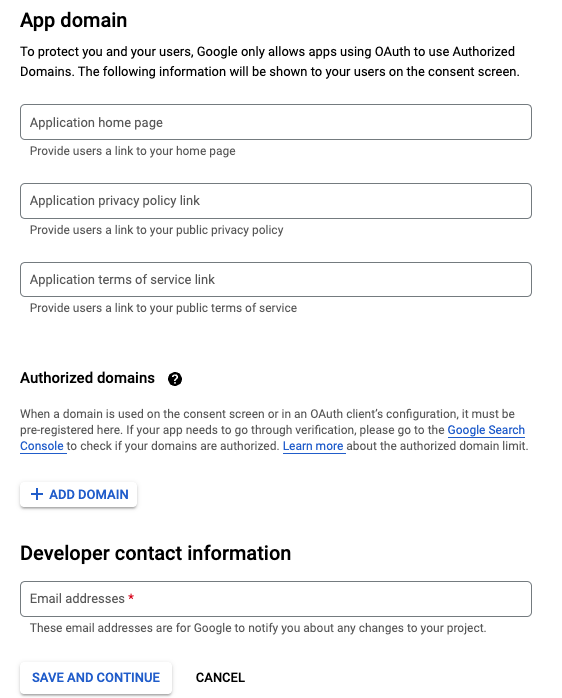
Configure information that appears on the OAuth consent screen:
-
App information:
-
App domain:
-
Add app platforms
Android
-
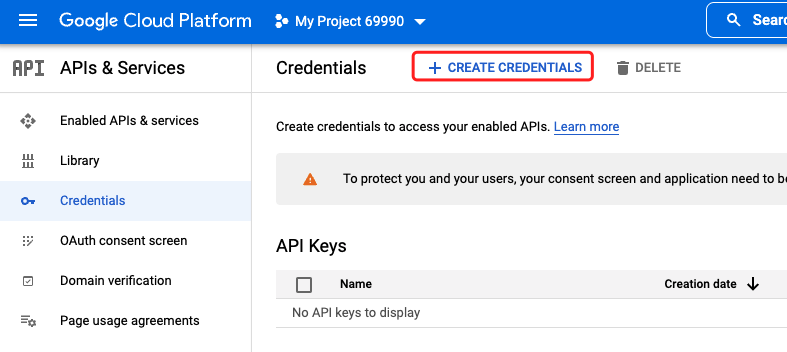
Click Credentials > + CREATE CREDENTIALS.
-
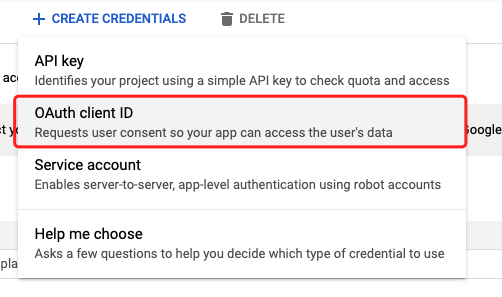
Select OAuth client ID from the drop-down list.
-
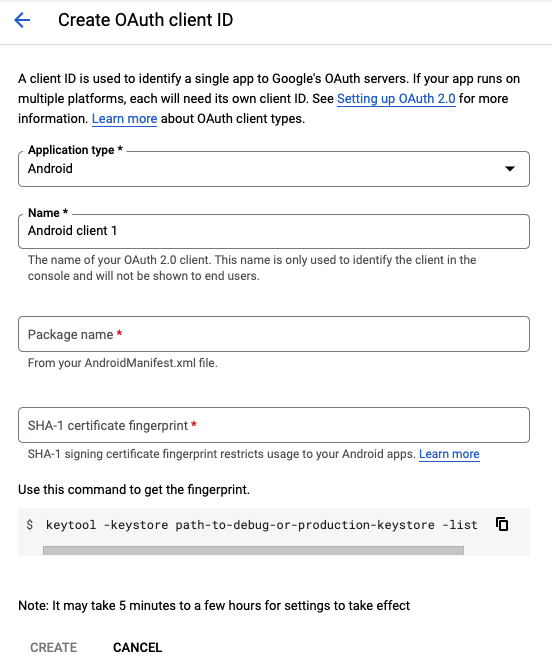
Create the OAuth client ID for Android.
-
Package Name: the name of your app package. It must be the same as the package name that is used for the app on the Tuya Developer Platform.

-
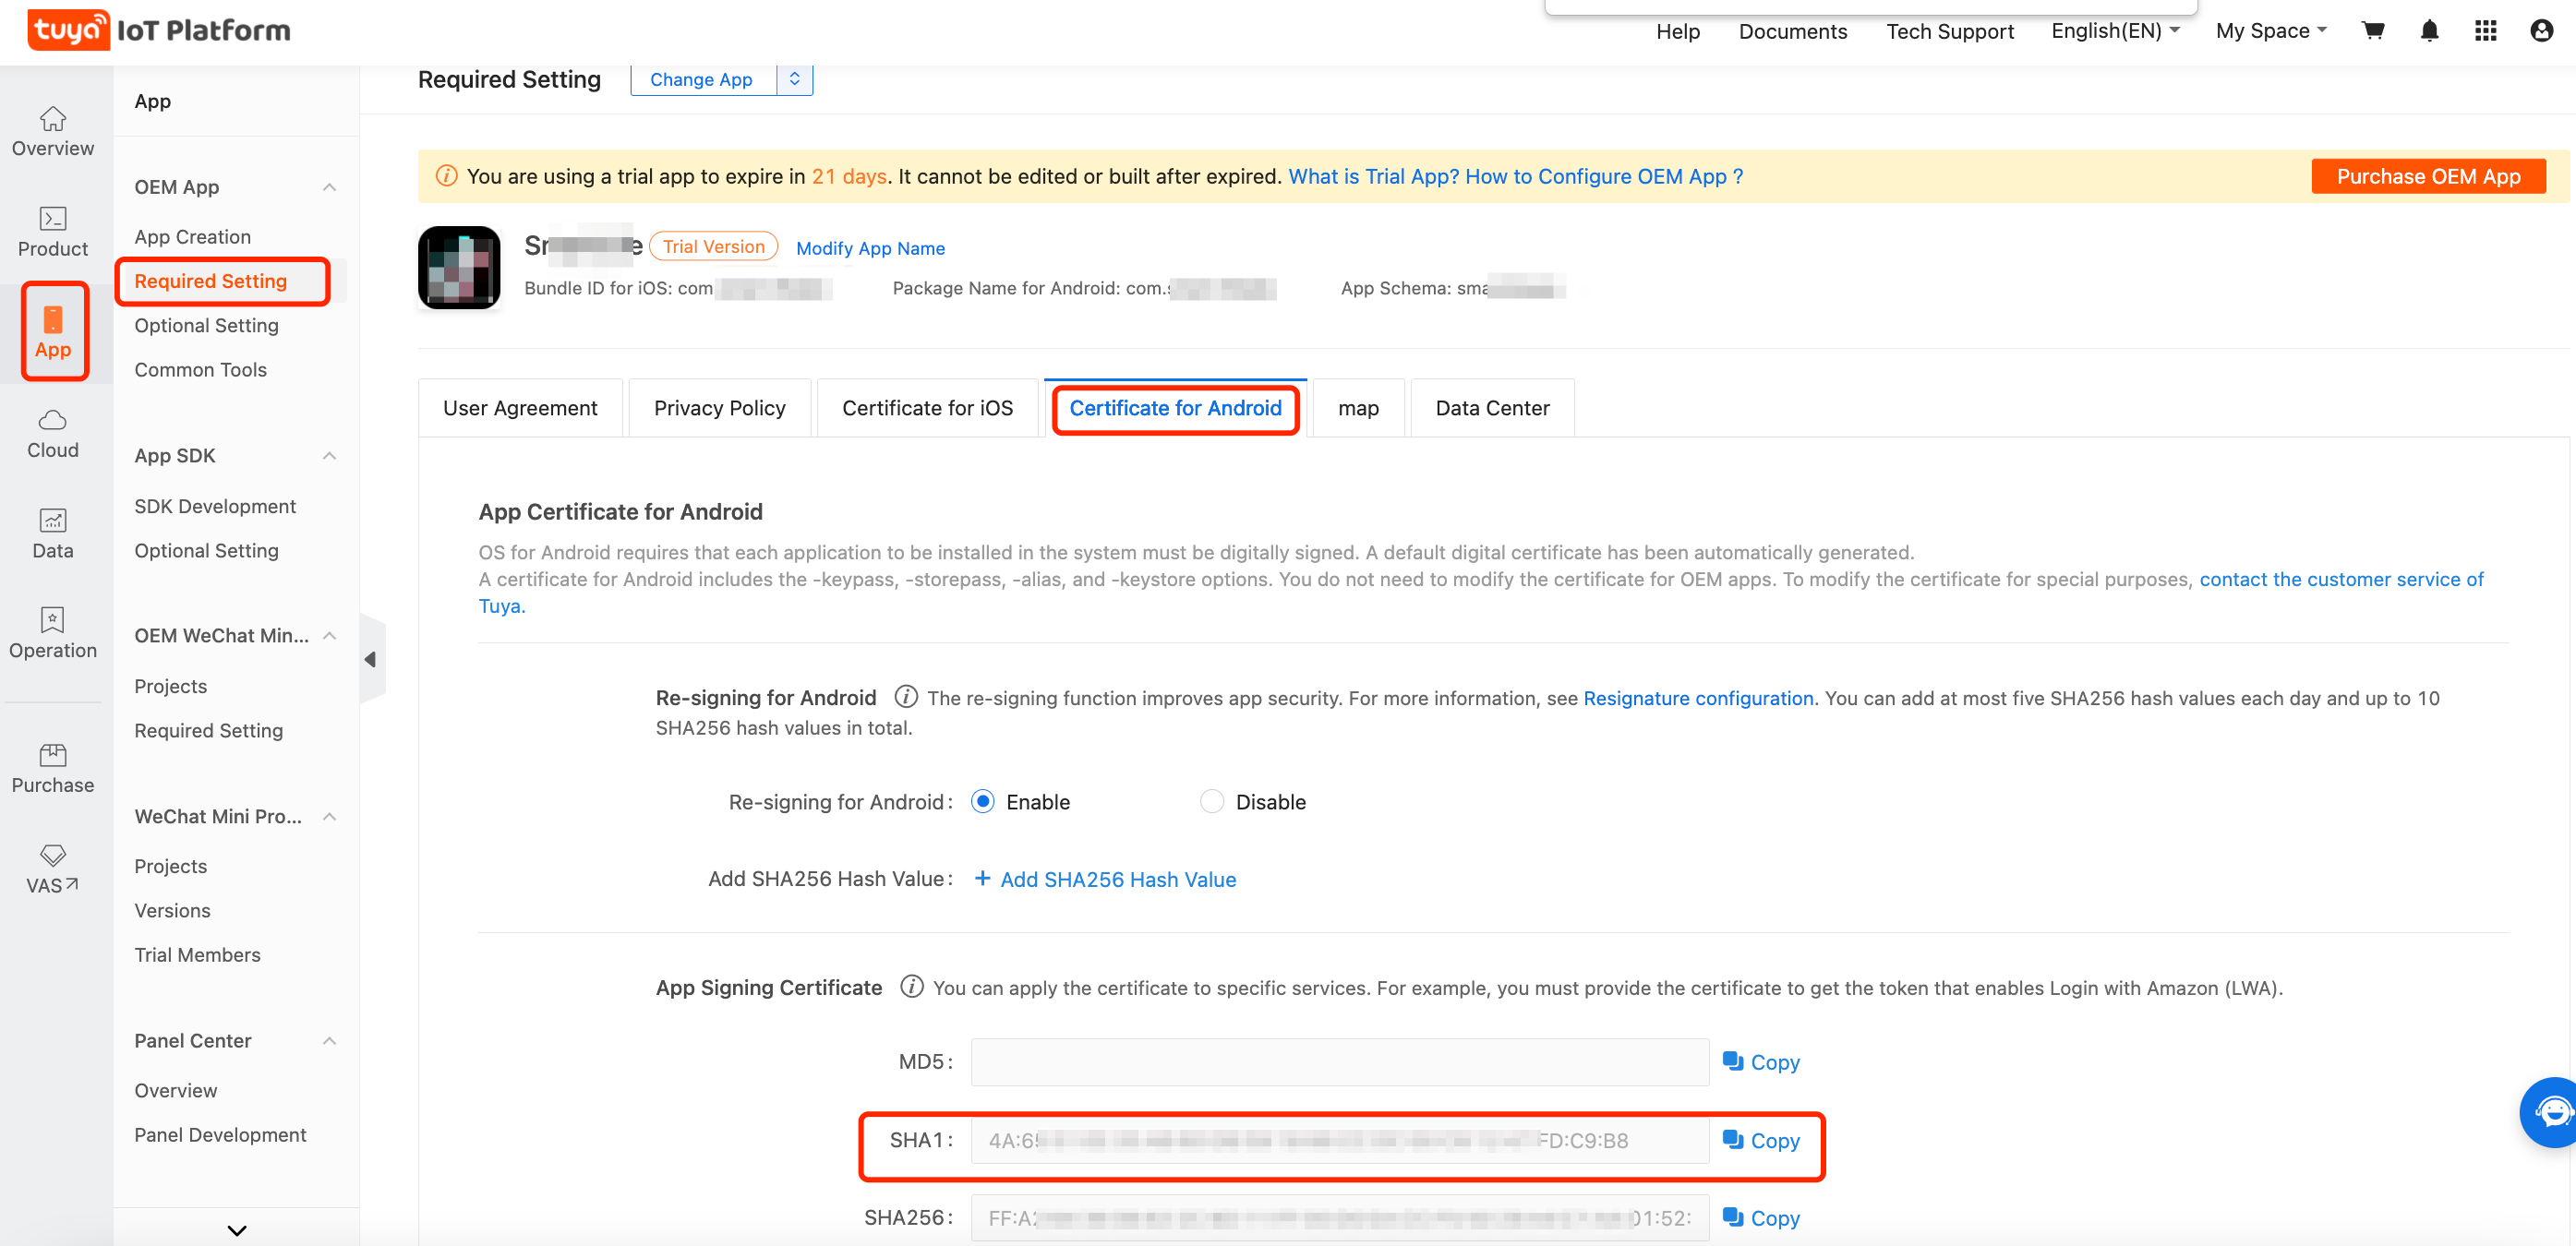
SHA-1: the SHA1 value of your app. It must be the same as the SHA1 value that is used for the app on the Tuya Developer Platform.
-
-
Create the OAuth client ID of web application type.
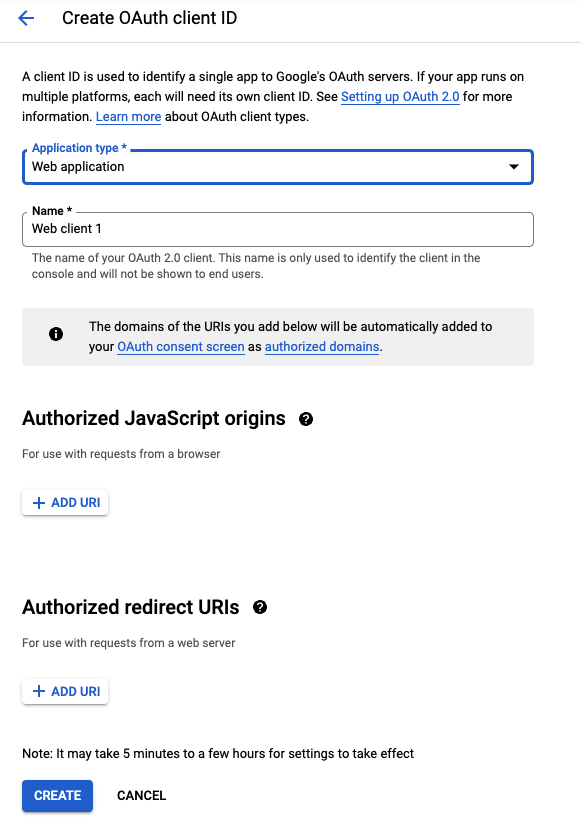
-
Copy and paste the OAuth client ID to the Tuya Developer Platform.
-
Copy the value in the Client ID column.

-
Go to Tuya Developer Platform > App > OEM App > Optional Setting, click Third-Party Integration tab, scroll down to the Login Configuration for Android section, and then paste the client ID to Client ID for Google.

-
iOS
-
Click Credentials > + CREATE CREDENTIALS.

-
Select OAuth client ID from the drop-down list.

-
Create the OAuth client ID for iOS.
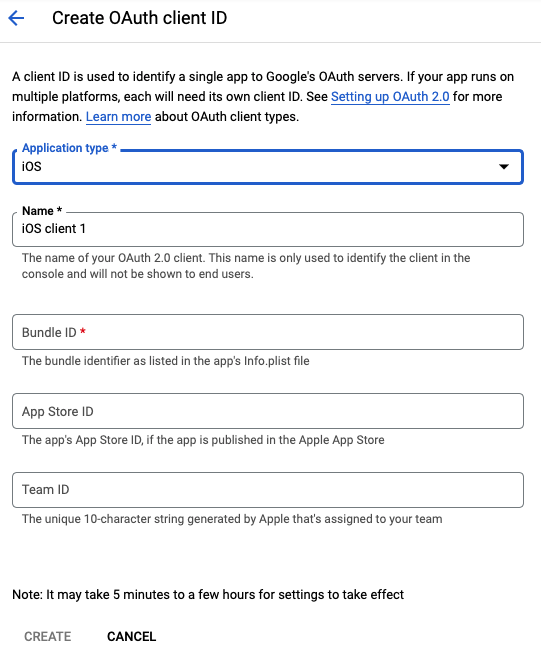
Bundle ID: the Bundle ID of your app. It must be the same as the Bundle ID that is used for the app on the Tuya Developer Platform.

-
Copy and paste the OAuth client ID to the Tuya Developer Platform.
-
Copy the value in the Client ID column.

-
Go to Tuya Developer Platform > App > OEM App > Optional Setting, click Third-Party Integration tab, scroll down to the Login Configuration for iOS section, and then paste the client ID to Client ID for Google.

-
Is this page helpful?
YesFeedbackIs this page helpful?
YesFeedback


