Launch App on App Store
This topic describes how to launch a Tuya-powered OEM app on Apple’s App Store when the app is taken to the Launch App step on the Tuya Developer Platform.
Prepare for initialization
-
Register an Apple developer account.
-
Prepare a test account that can be used to log in to the app. You can create this account that is registered in the USA with an email address. This account must be linked with a test device. A virtual device is allowed. This device must stay online during the review.
-
Prepare four to five images to preview device features:
- Use the app to pair a product. We recommend that you do not use products such as light bulbs, strip lights, and sockets. Their simple panel UI design might cause the review to be rejected in most cases. Create specially designed screenshots of different functional pages.
- Upload the 6.5-inch (1242 × 2688 pixels) iPhone screenshot and 5.5-inch (1242 × 2208 pixels) iPhone screenshot. Other dimensions are not required.
- Take these screenshots by using iPhones.
- Do not show other app icons on the notification bar in the screenshots. We recommend that you enable the airplane mode for the iPhones when taking the screenshots.
-
Create an app demo video. We recommend that you upload this video to YouTube. The following video is used as an example.
Step 1: Create app on App Store Connect
If you have created the target app, skip this section.
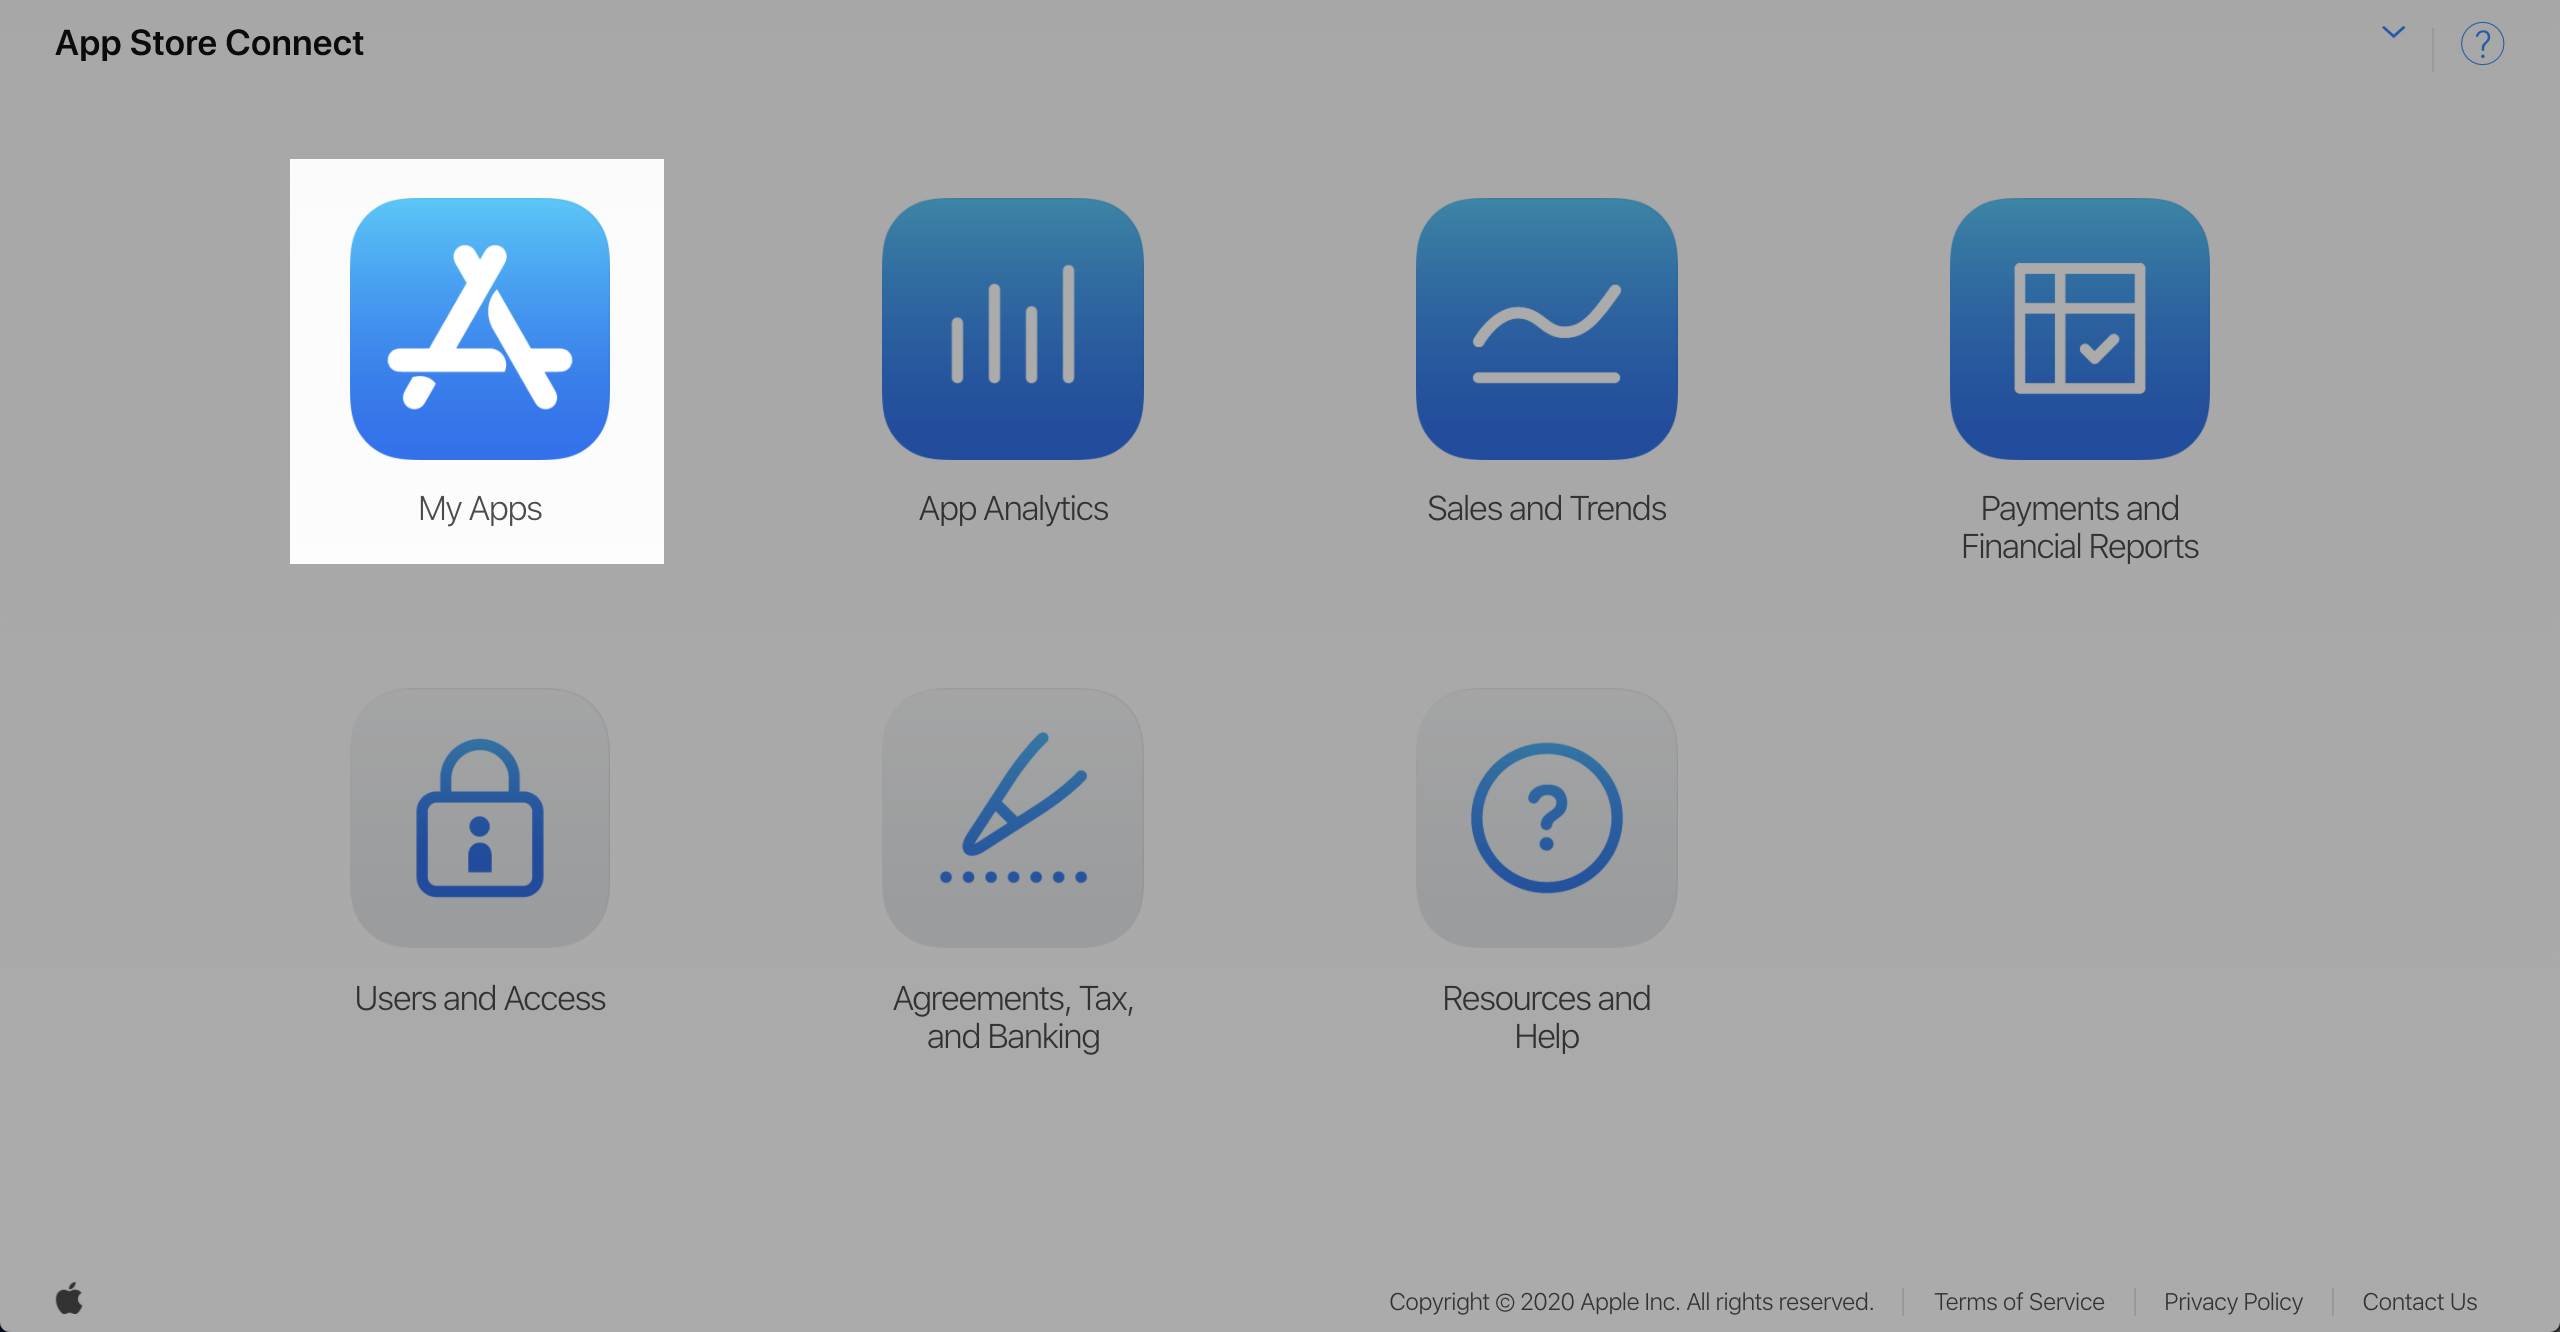
1. Create an app
-
Log in to App Store Connect and click My Apps.
-
Click the Add (+) sign and select New App.

-
Enter the required information in the dialog box that appears.
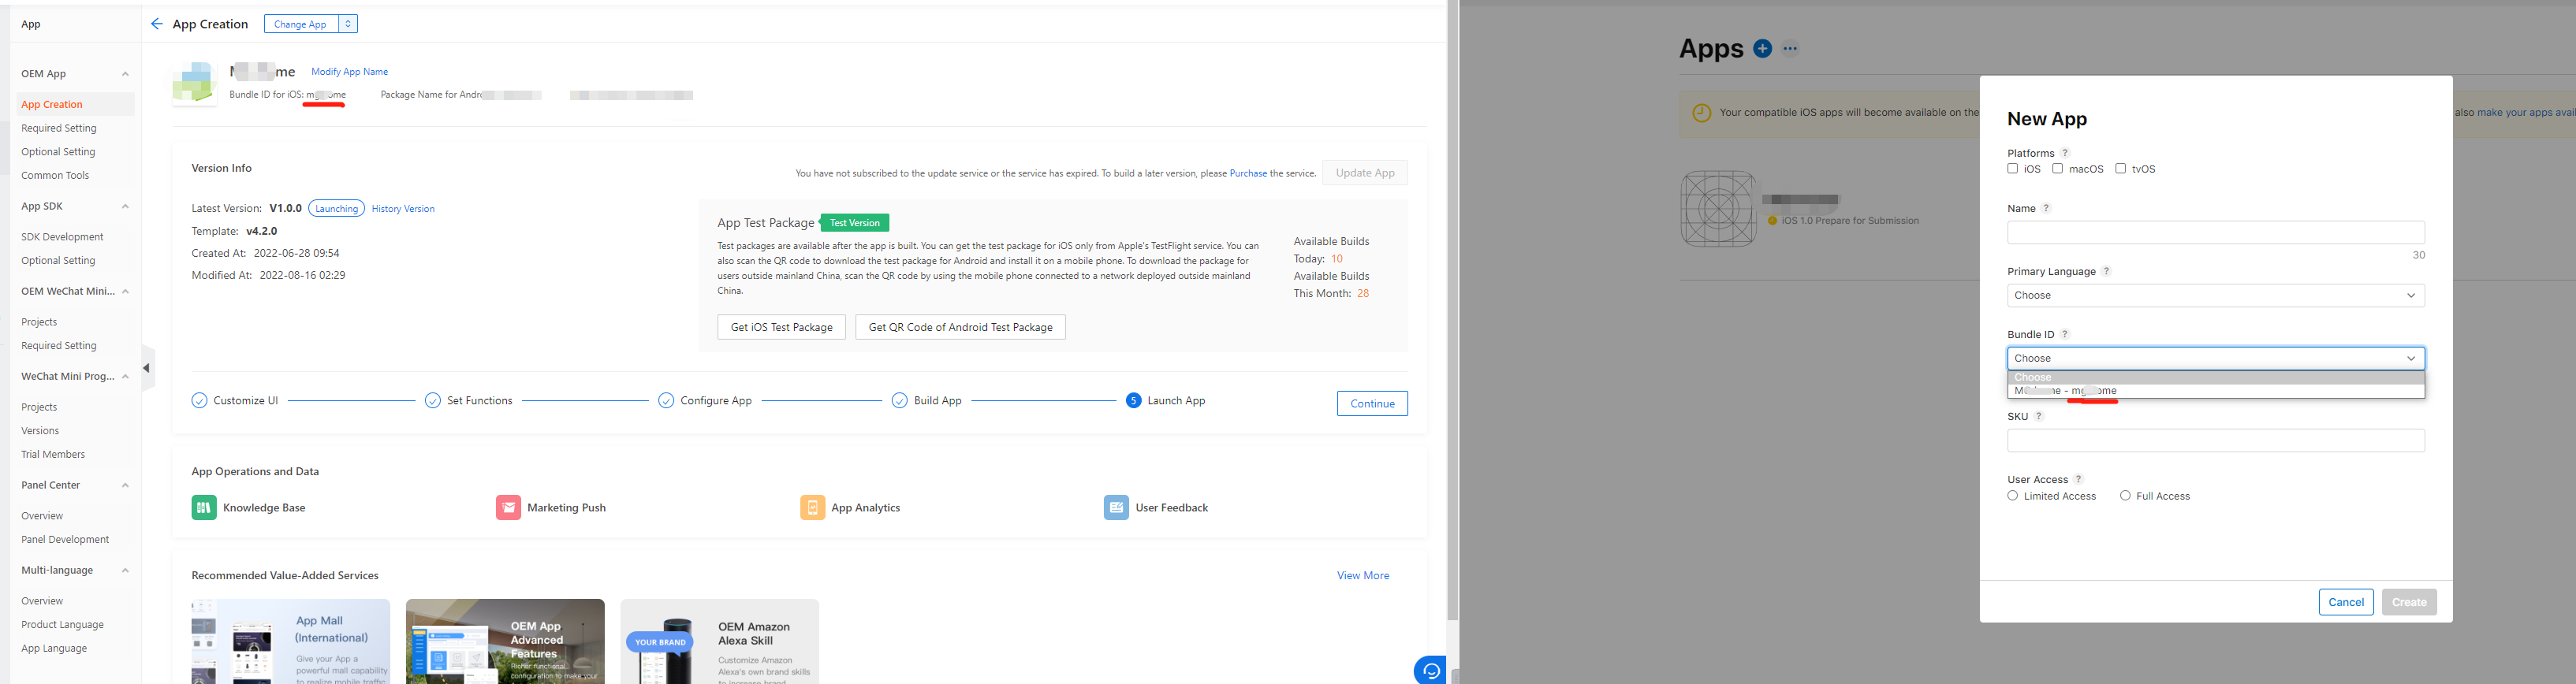
- Platforms: Select iOS.
- Name: Enter your app name.
- Primary Language: Select a language as the default language of the app as needed.
- Bundle ID: Select the Bundle ID used when you generate certificates. It is the same as the Bundle ID for iOS without the suffix.
- SKU: It can be the same as Bundle ID. The Bundle ID for iOS is recommended.
-
Click Create.
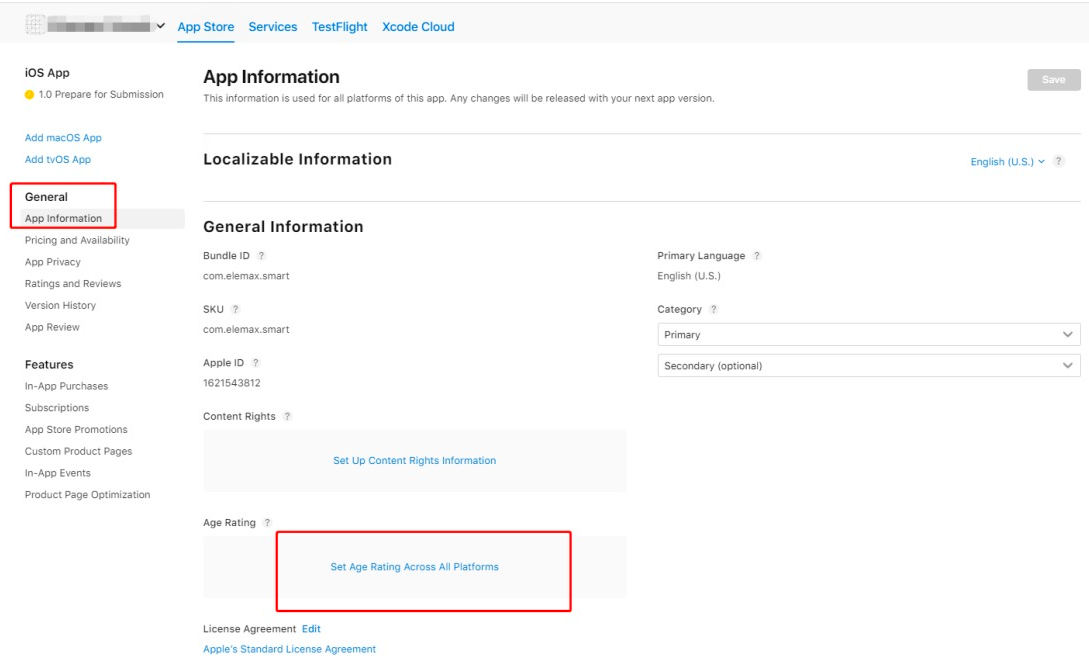
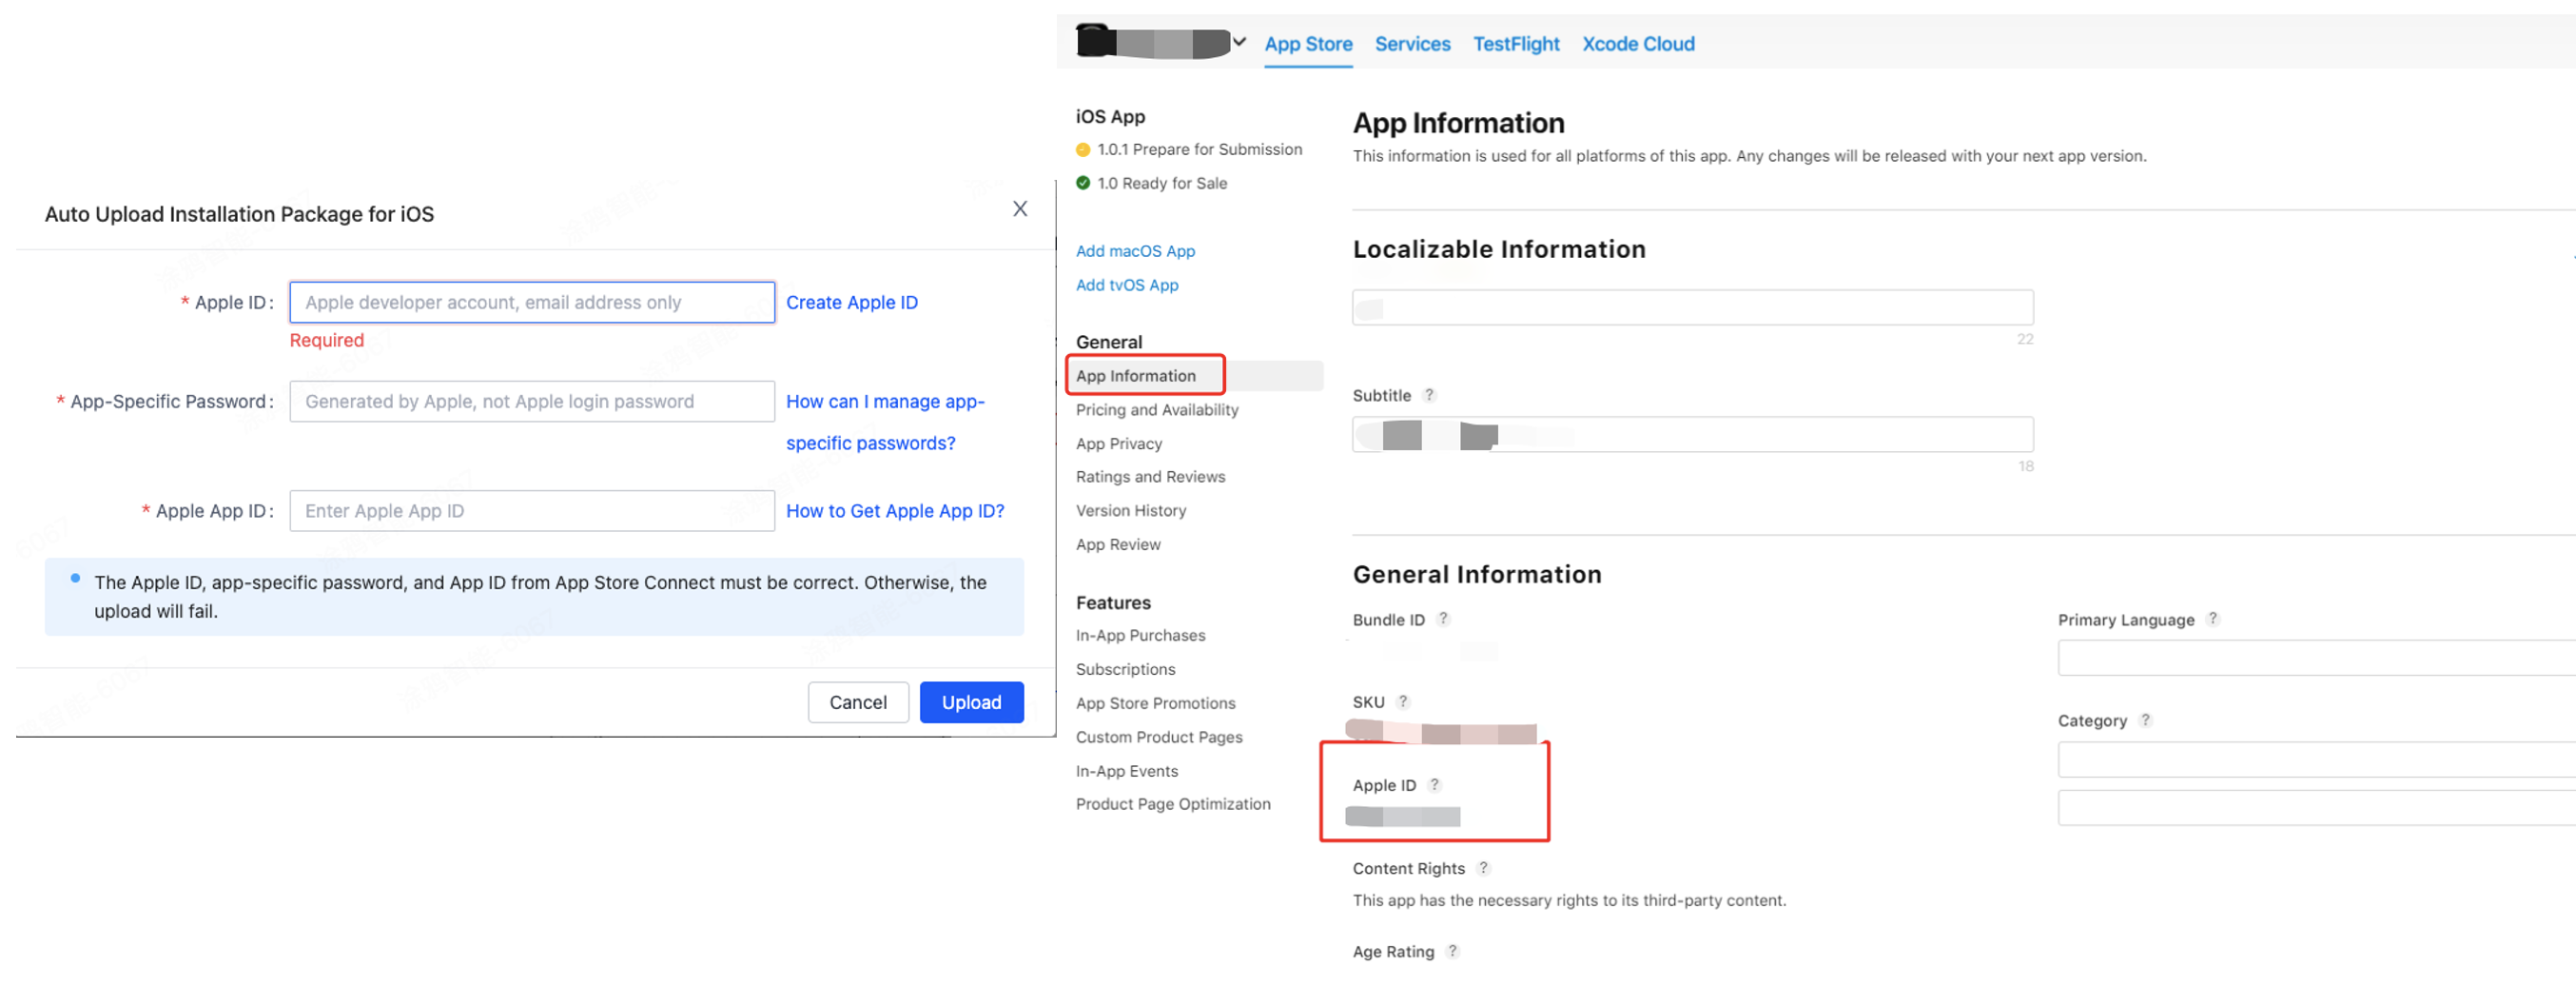
2. Enter general app information
Choose General > App Information and enter the following information about the app.
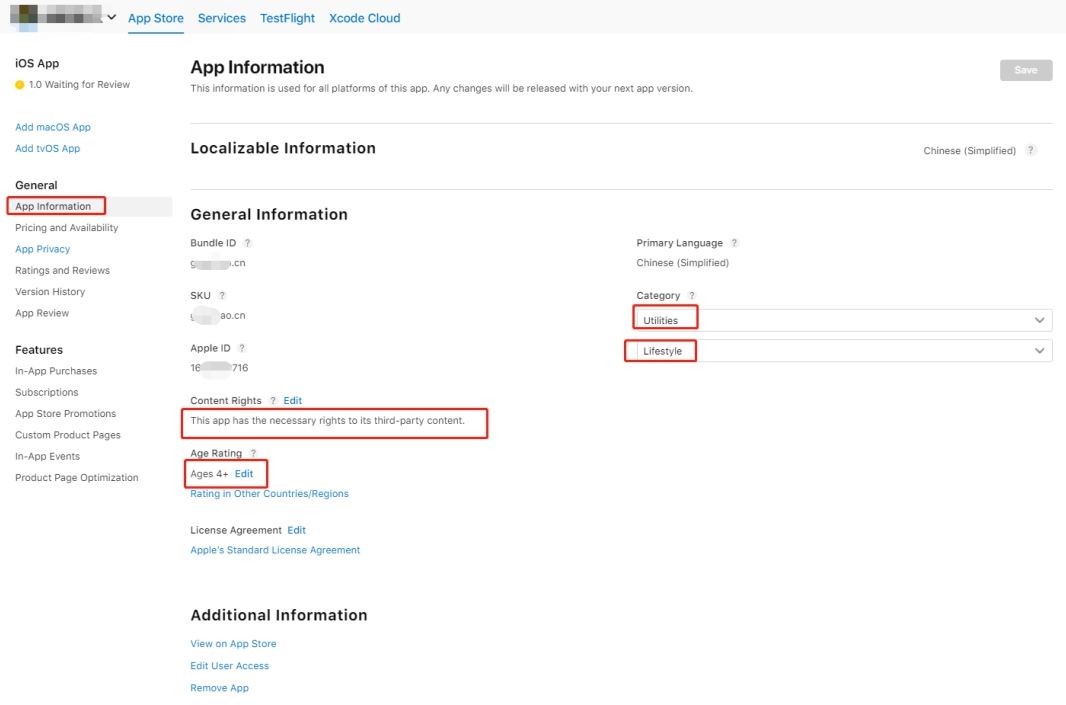
-
Subtitle: It is optional.
-
Category: Utilities and Lifestyle are recommended.
-
Content Rights: Set it to This app has the necessary rights to its third-party content.
-
Age Rating: Click Edit. In the dialog box that appears, select NONE for all options and click Done.
-
To make the app support multiple languages, click English (U.S.) in the top-right corner of the page and select other required languages.

-
Enter the app information for each specified language.
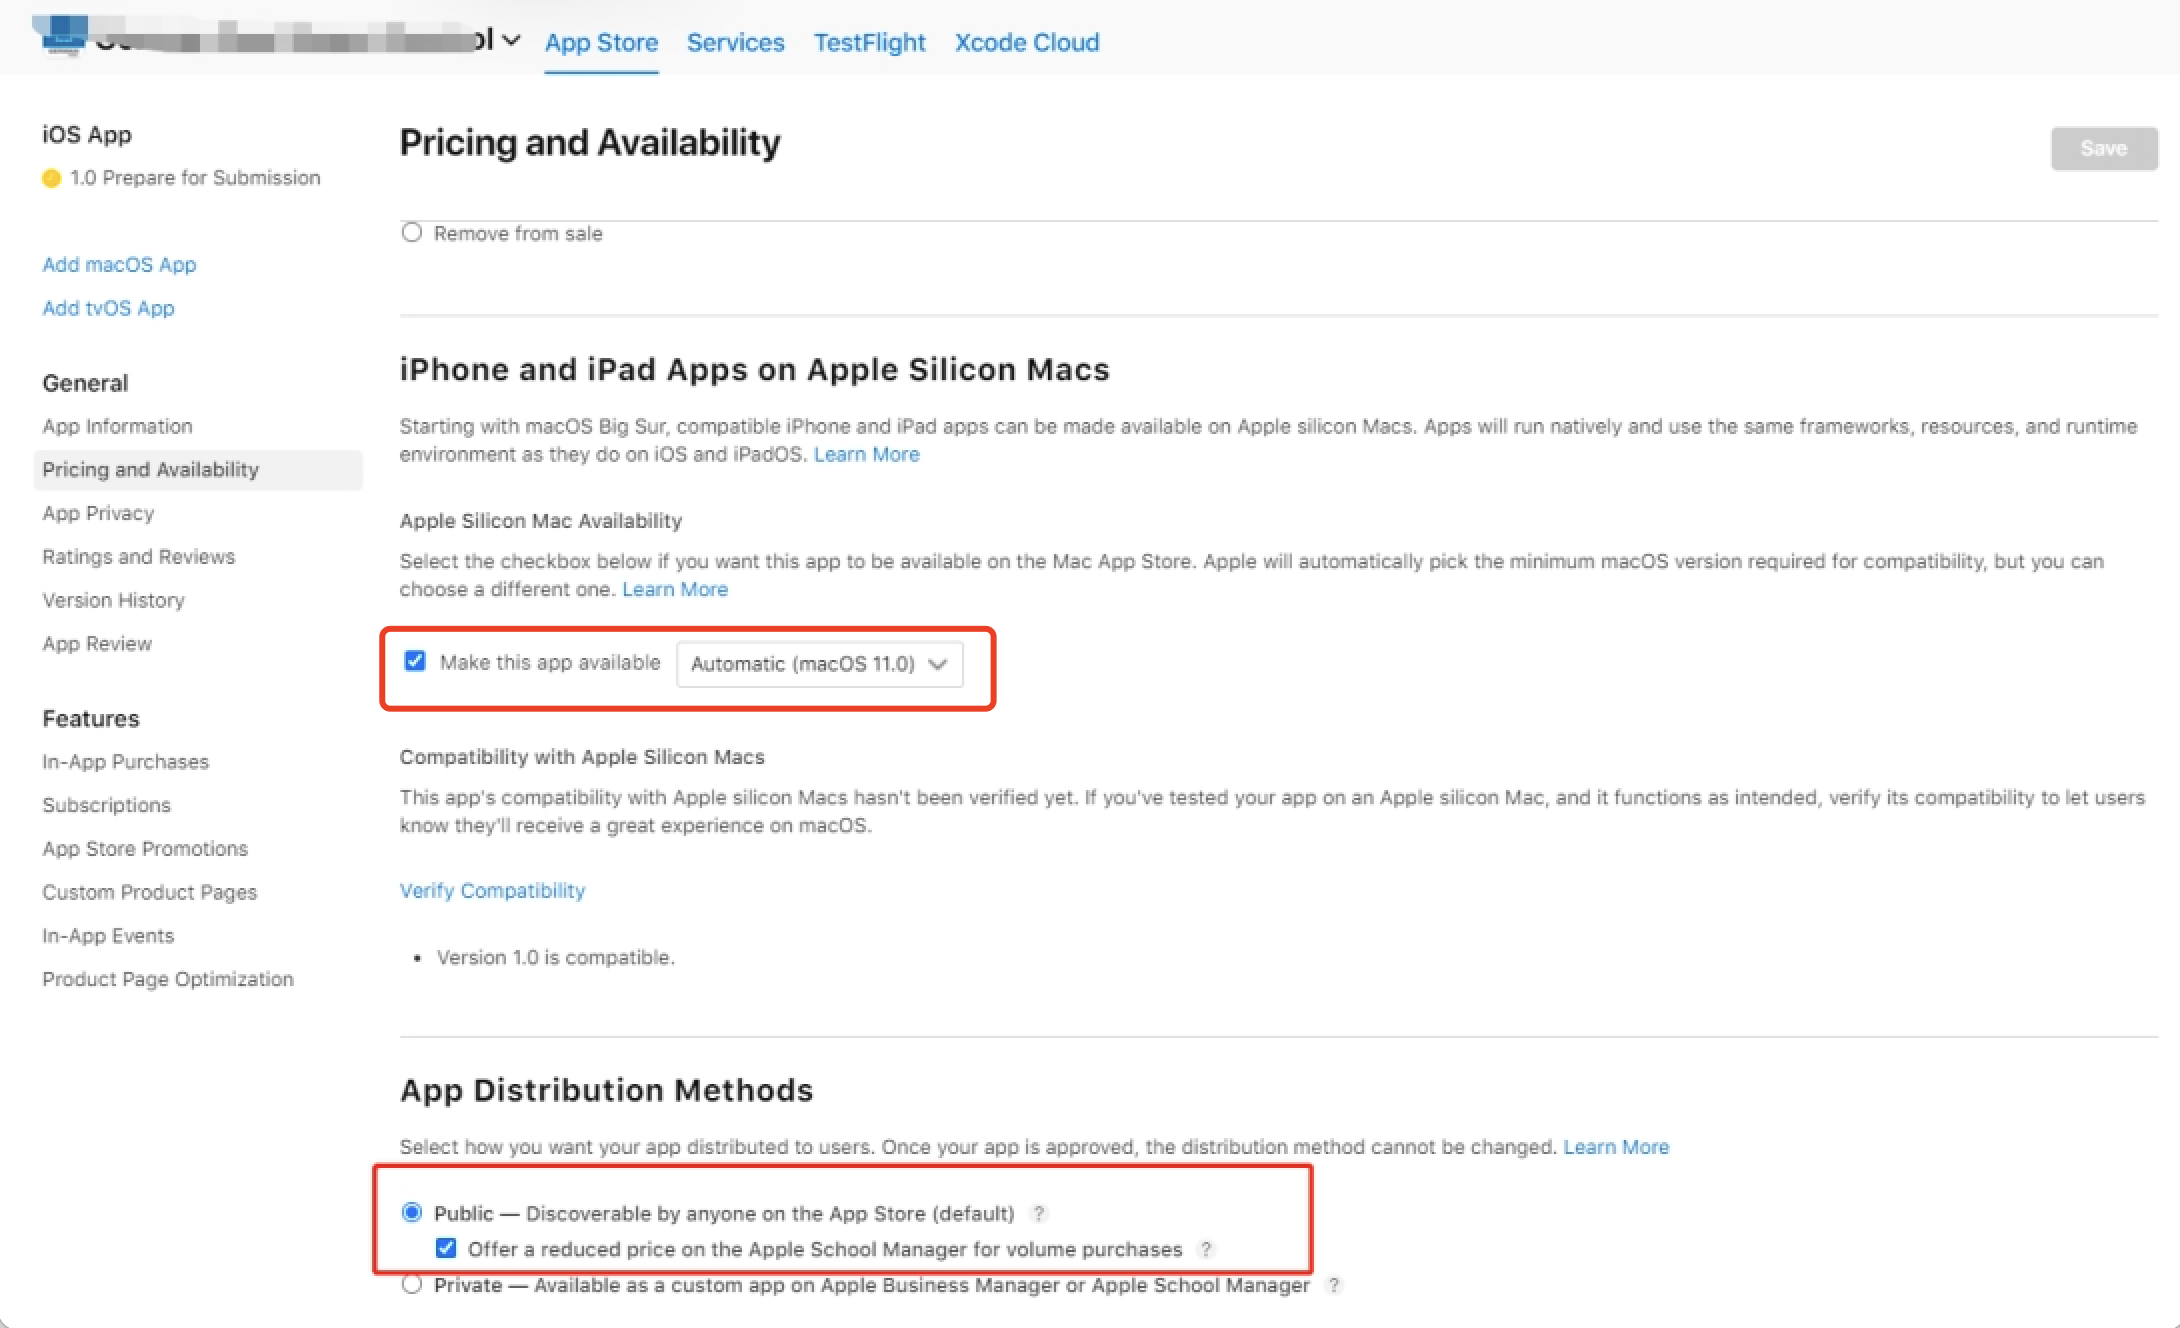
3. Set pricing and availability
Enter the following information about Pricing and Availability:
-
PRICE: Set the price based on your needs.
-
Availability: Select the locations in which your app will be launched. In most cases, all locations are selected.
-
App Distribution Methods: We recommend that you select Public—Discoverable by anyone on the App Store (default) and Offer a reduced price on the Apple School Manager for volume purchases.
-
Do not check the box that says Make this app available, Compatibility with Apple Silicon Macs. If this option is selected, users are allowed to download and run the app on Macs. However, as the app has not yet been adapted for the Mac environment, there might be unforeseen compatibility issues.
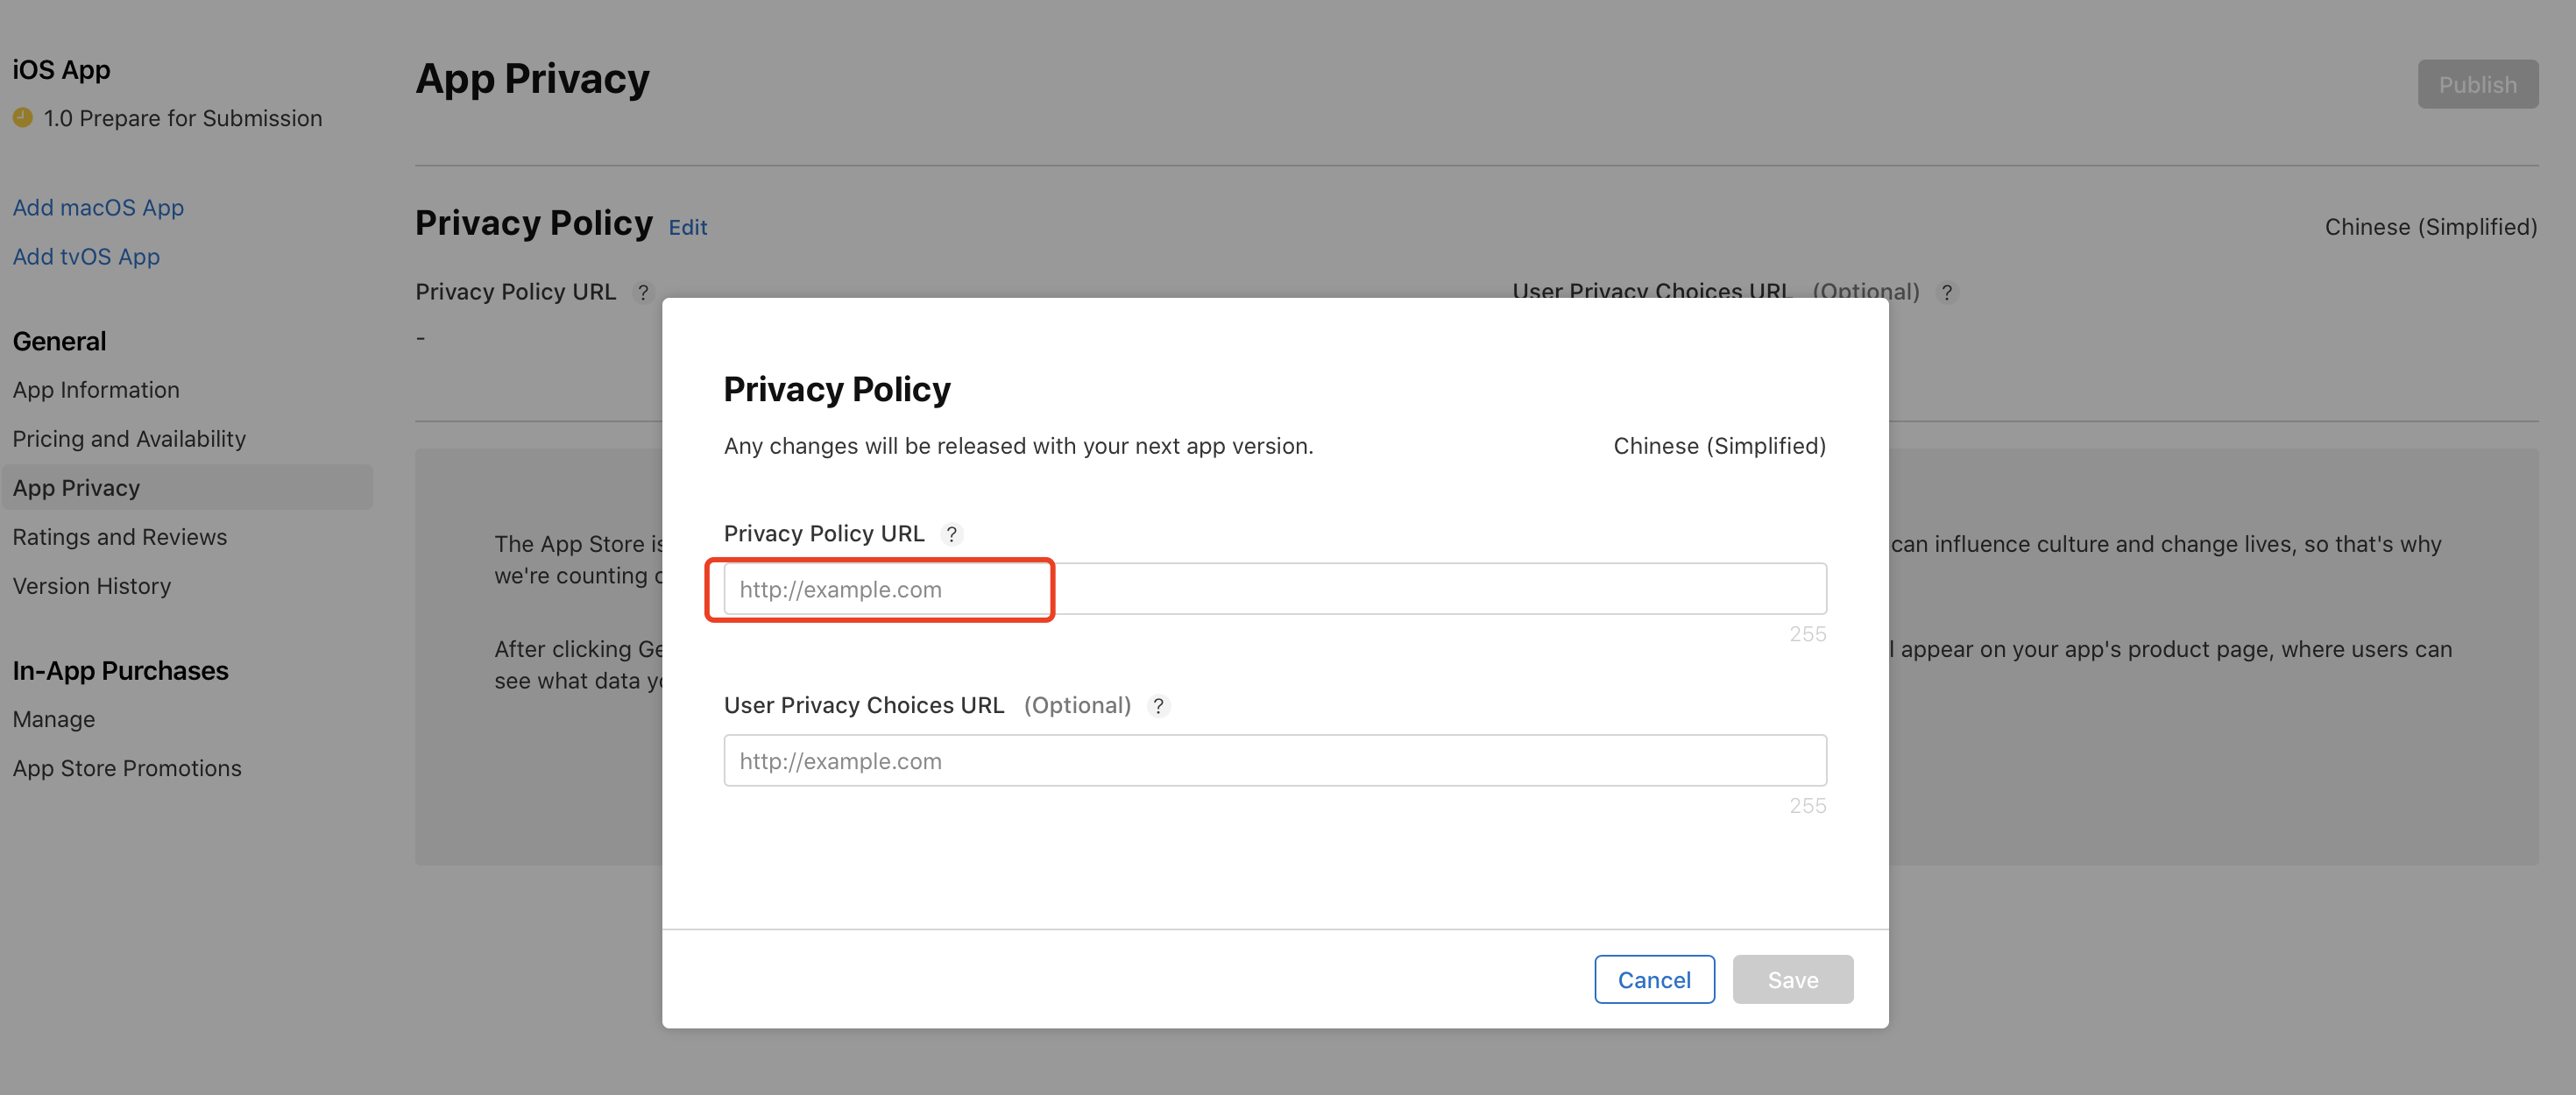
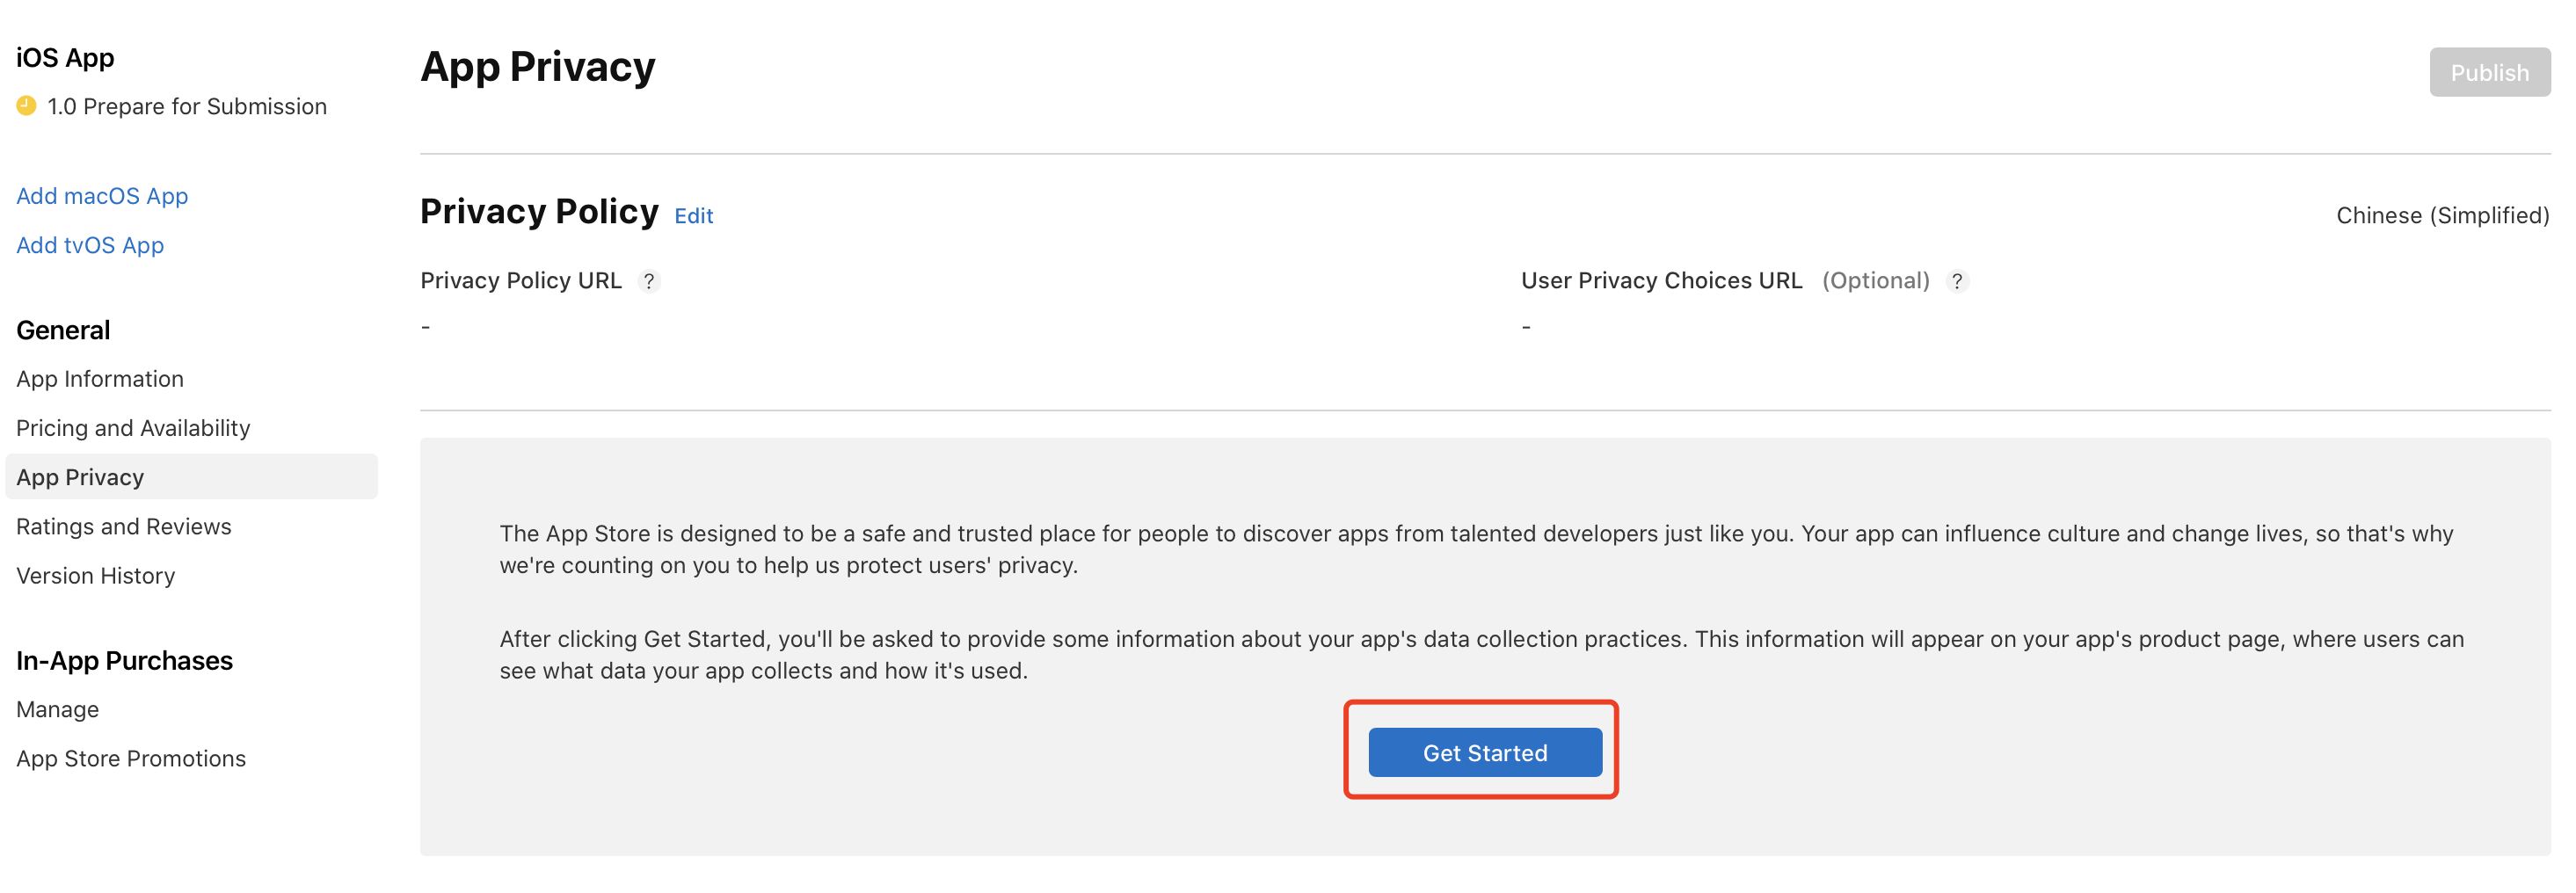
4. Set app privacy
Enter the following privacy information:
-
Privacy Policy is required. Click Edit next to Privacy Policy, and in the dialog box that appears, set the Privacy Policy URL field that can be the official website address of your organization.

-
Set data collection
Starting from December 8, 2020, the user data to be collected and used by an app must be disclosed before the app can be launched or updated on the App Store.
-
Perform the following steps to set Data Collection:
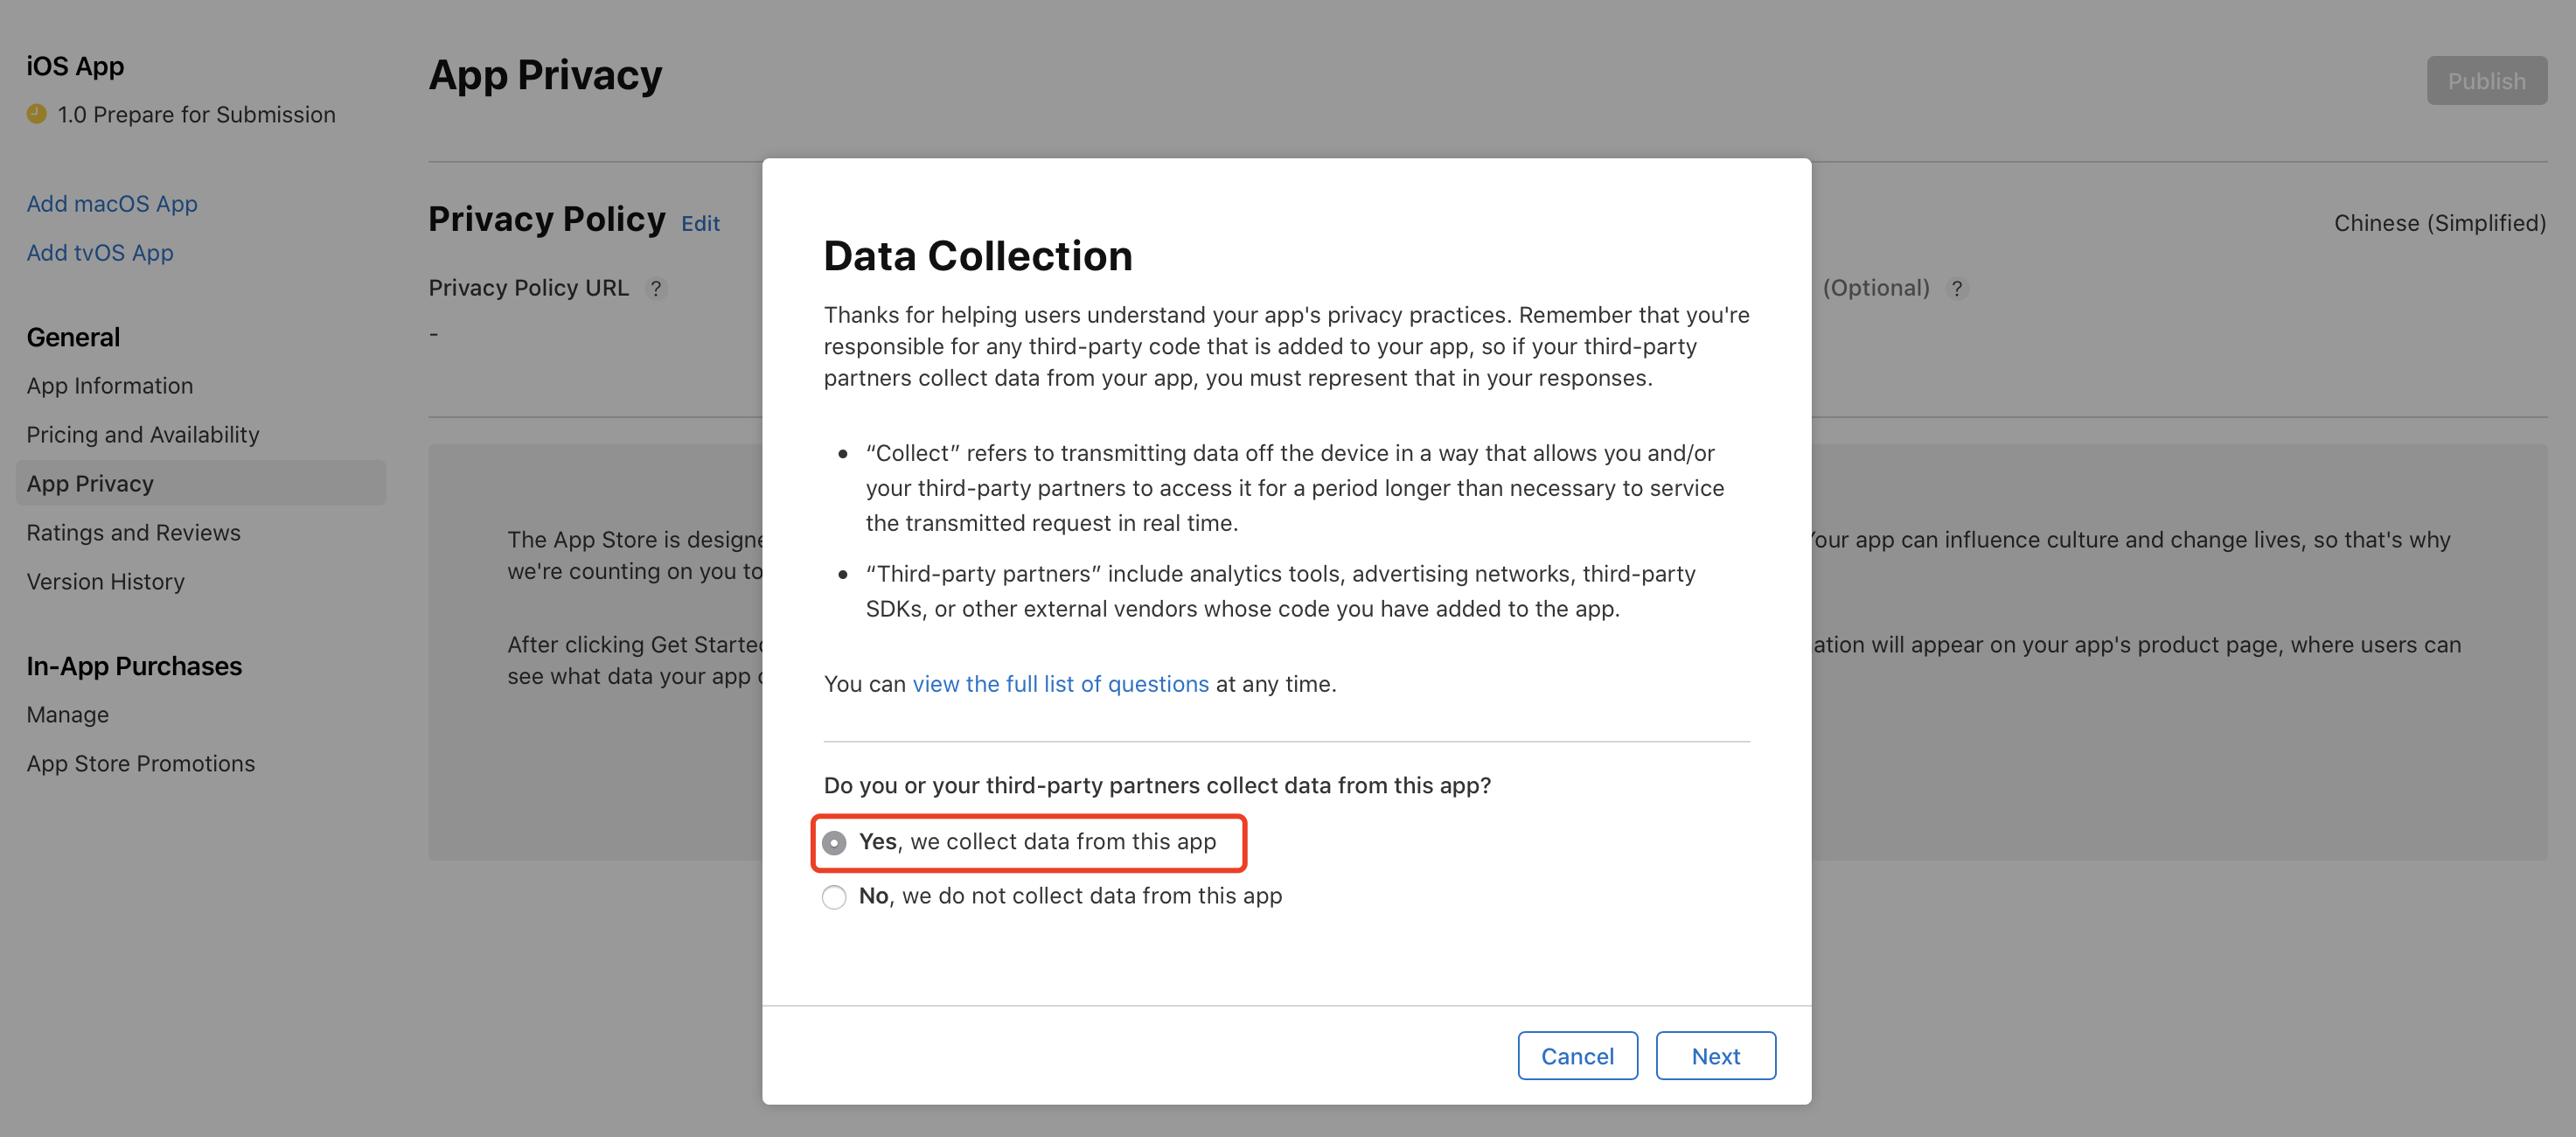
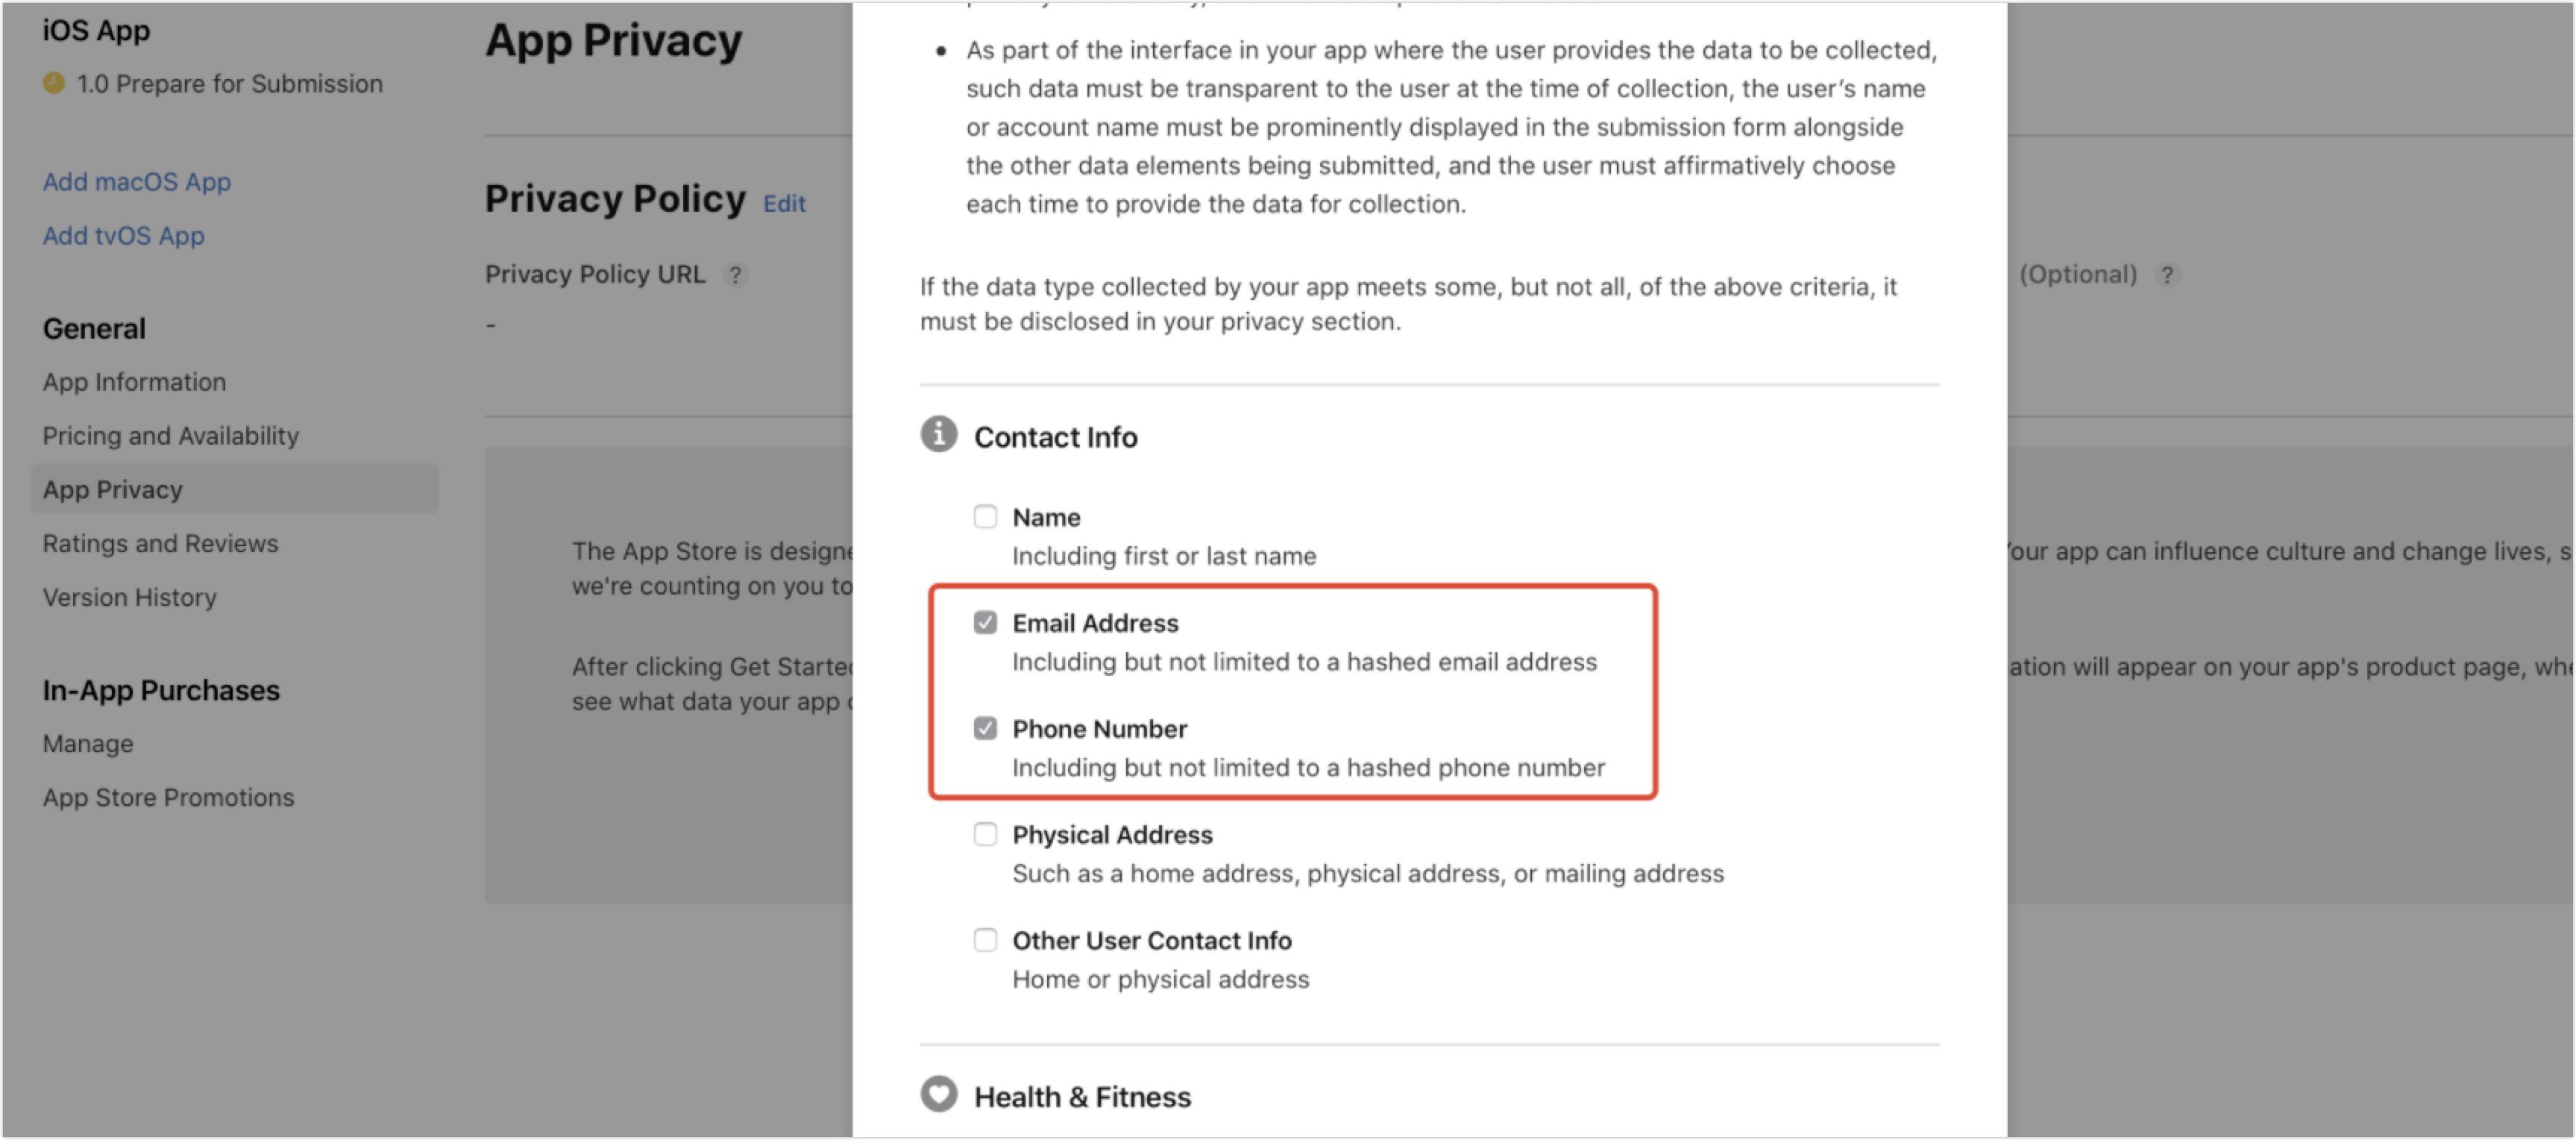

-
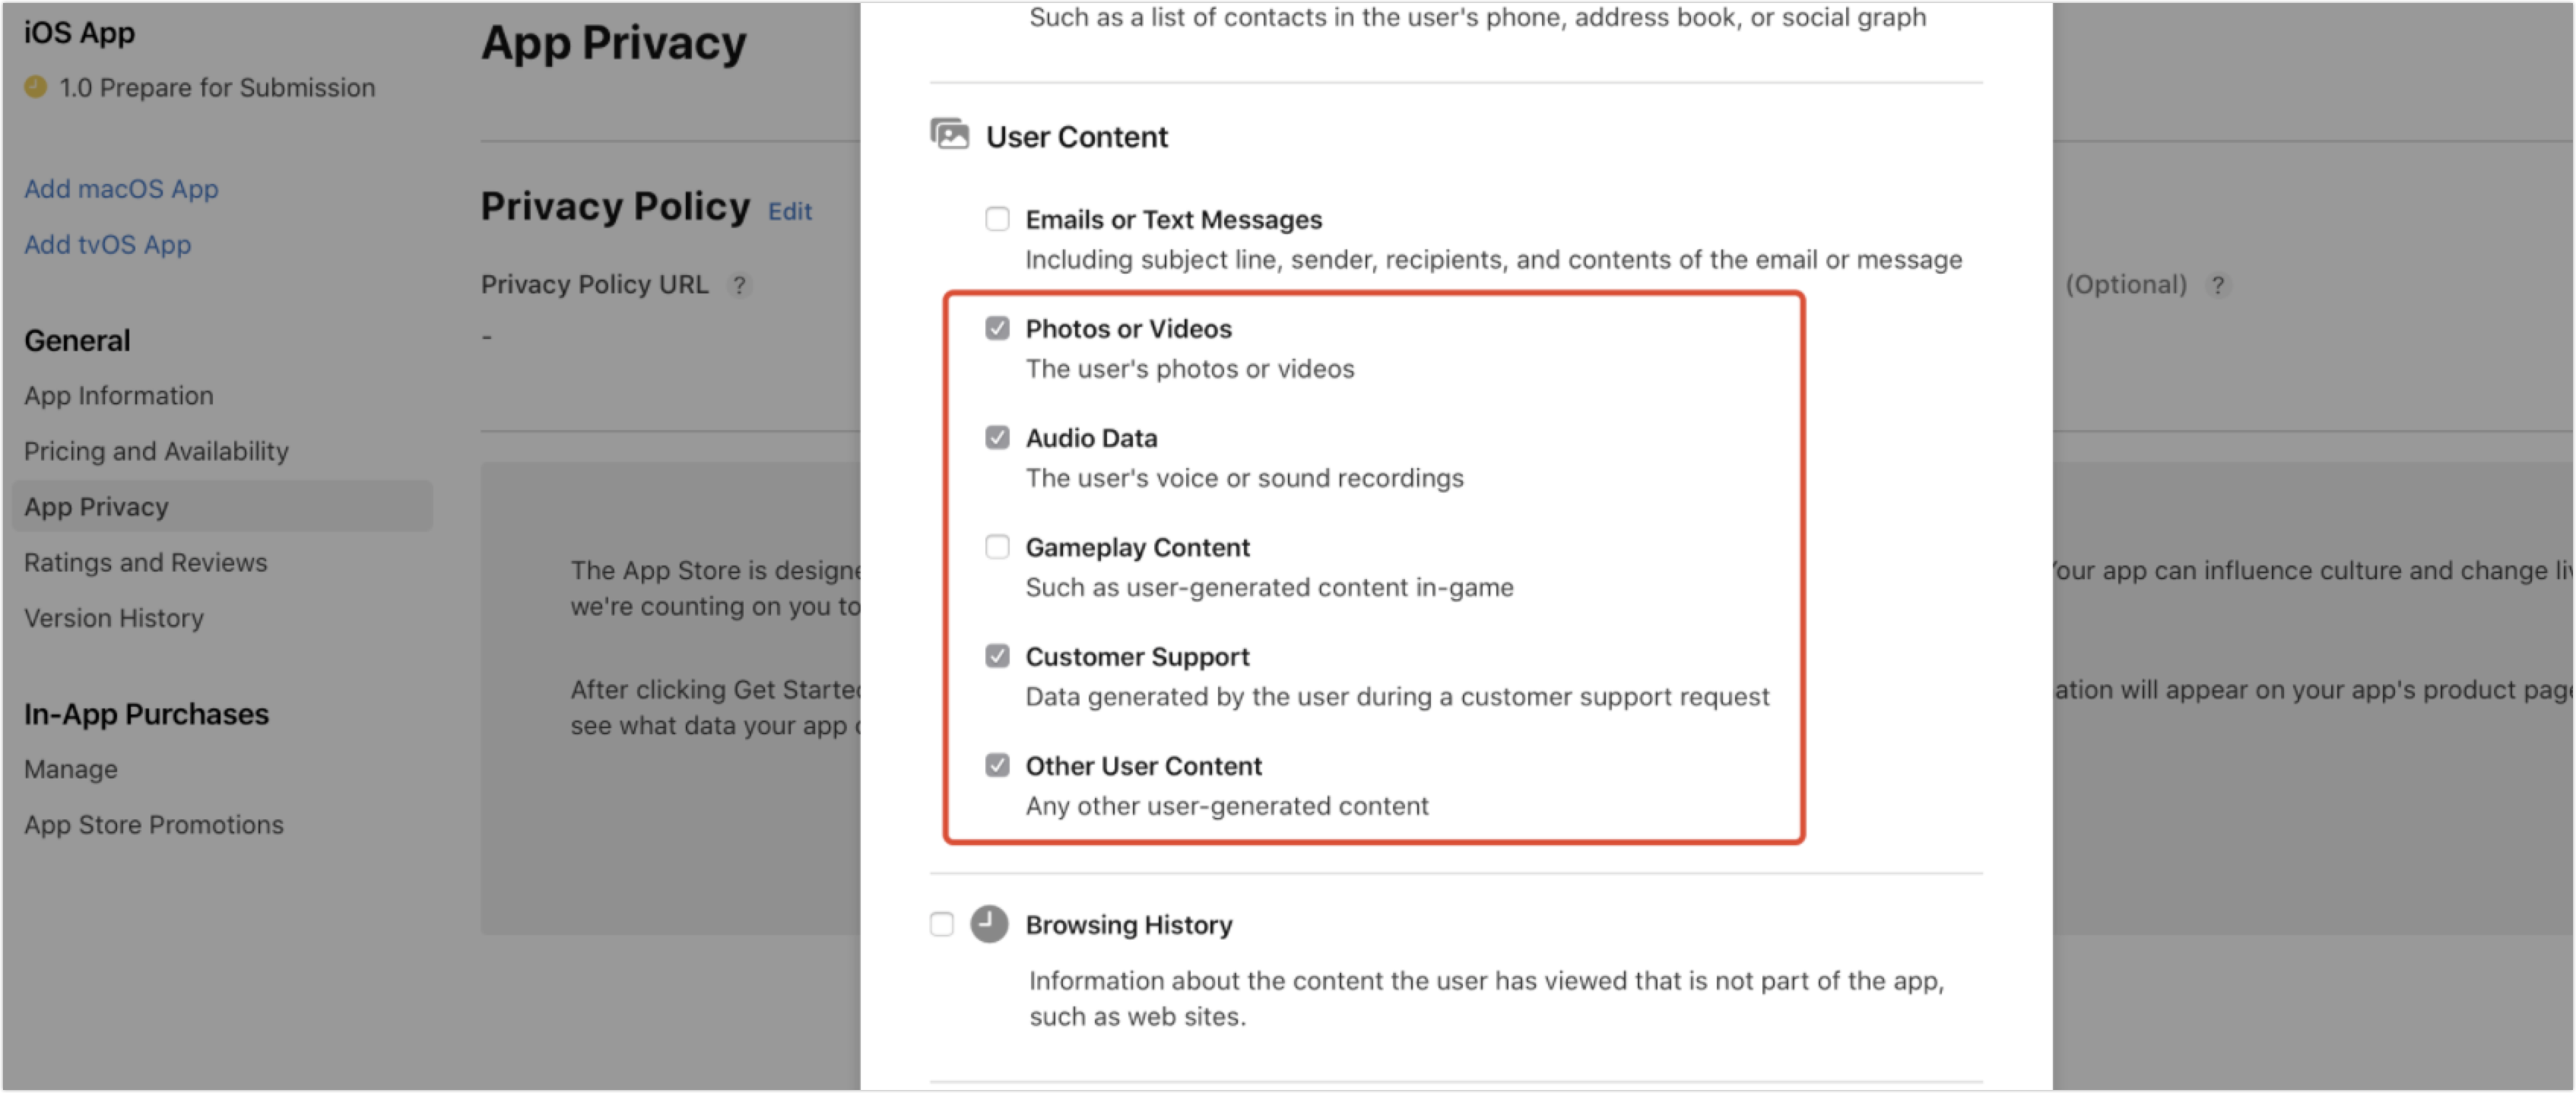
If your app does not support voice services, skip the Audio Data option.
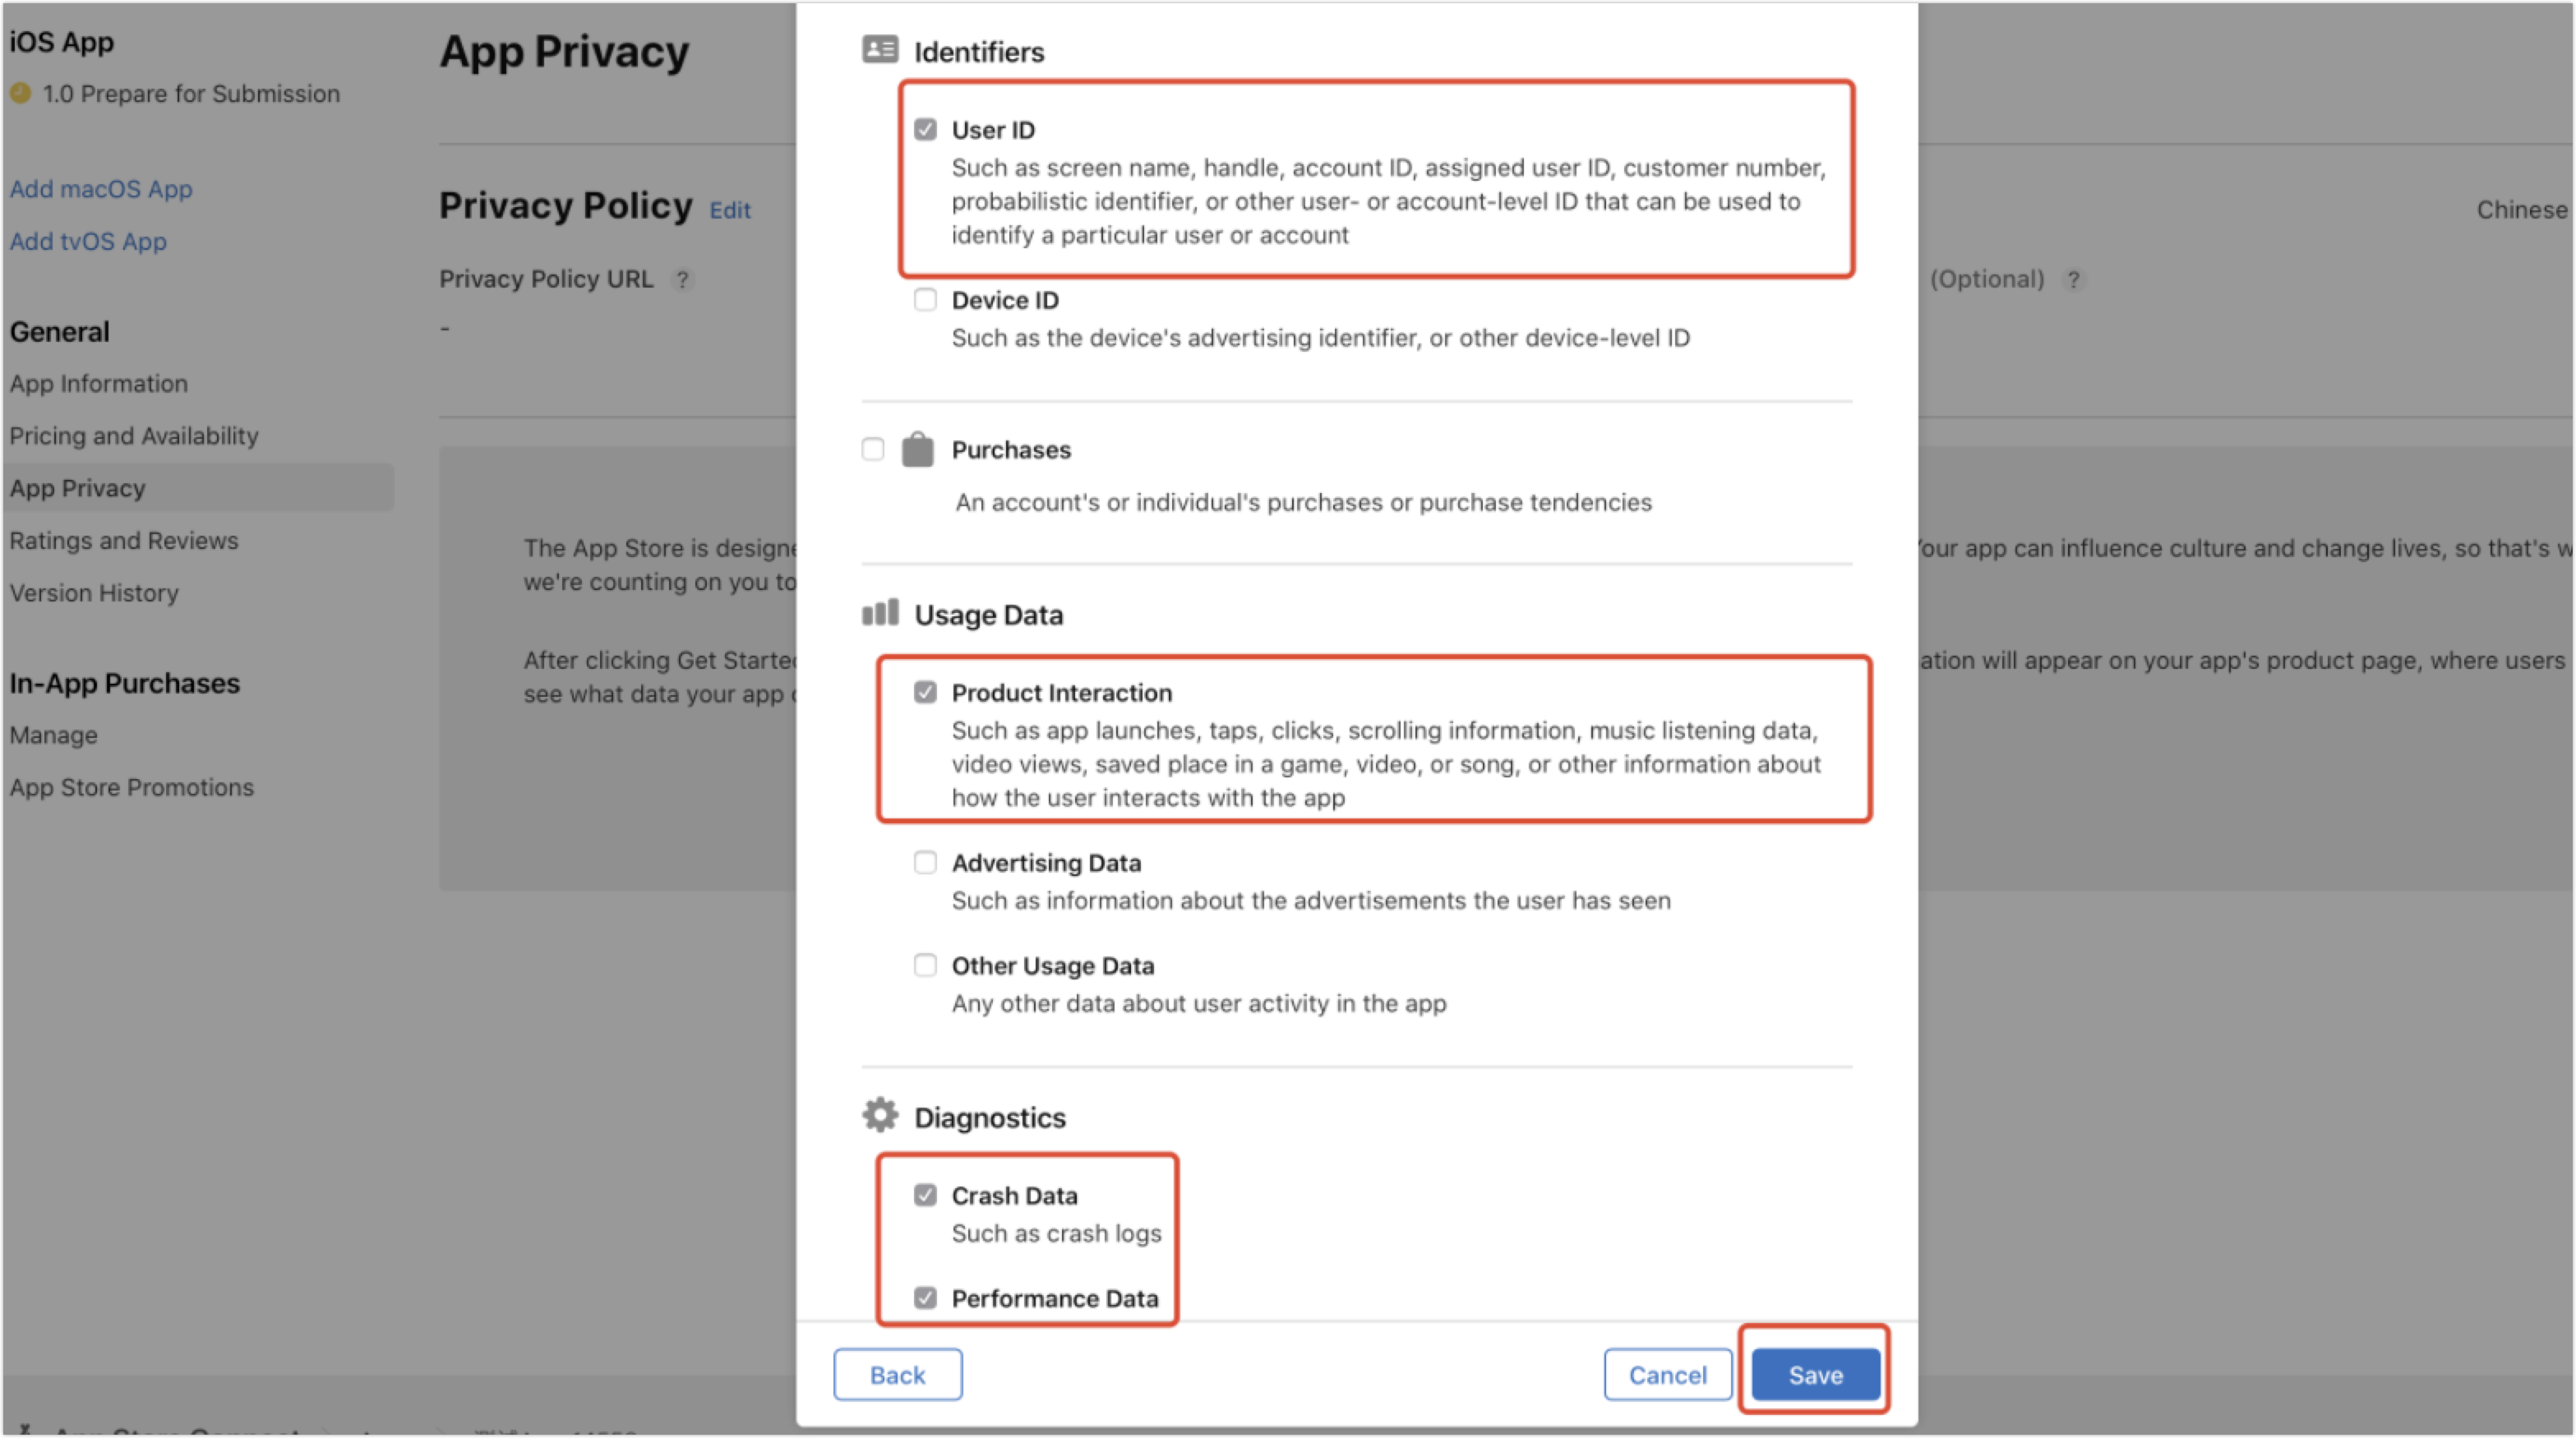
The Device ID option represents an iOS device that runs the app, rather than a smart device to be controlled by the app.
-
Click Save to show the following result.
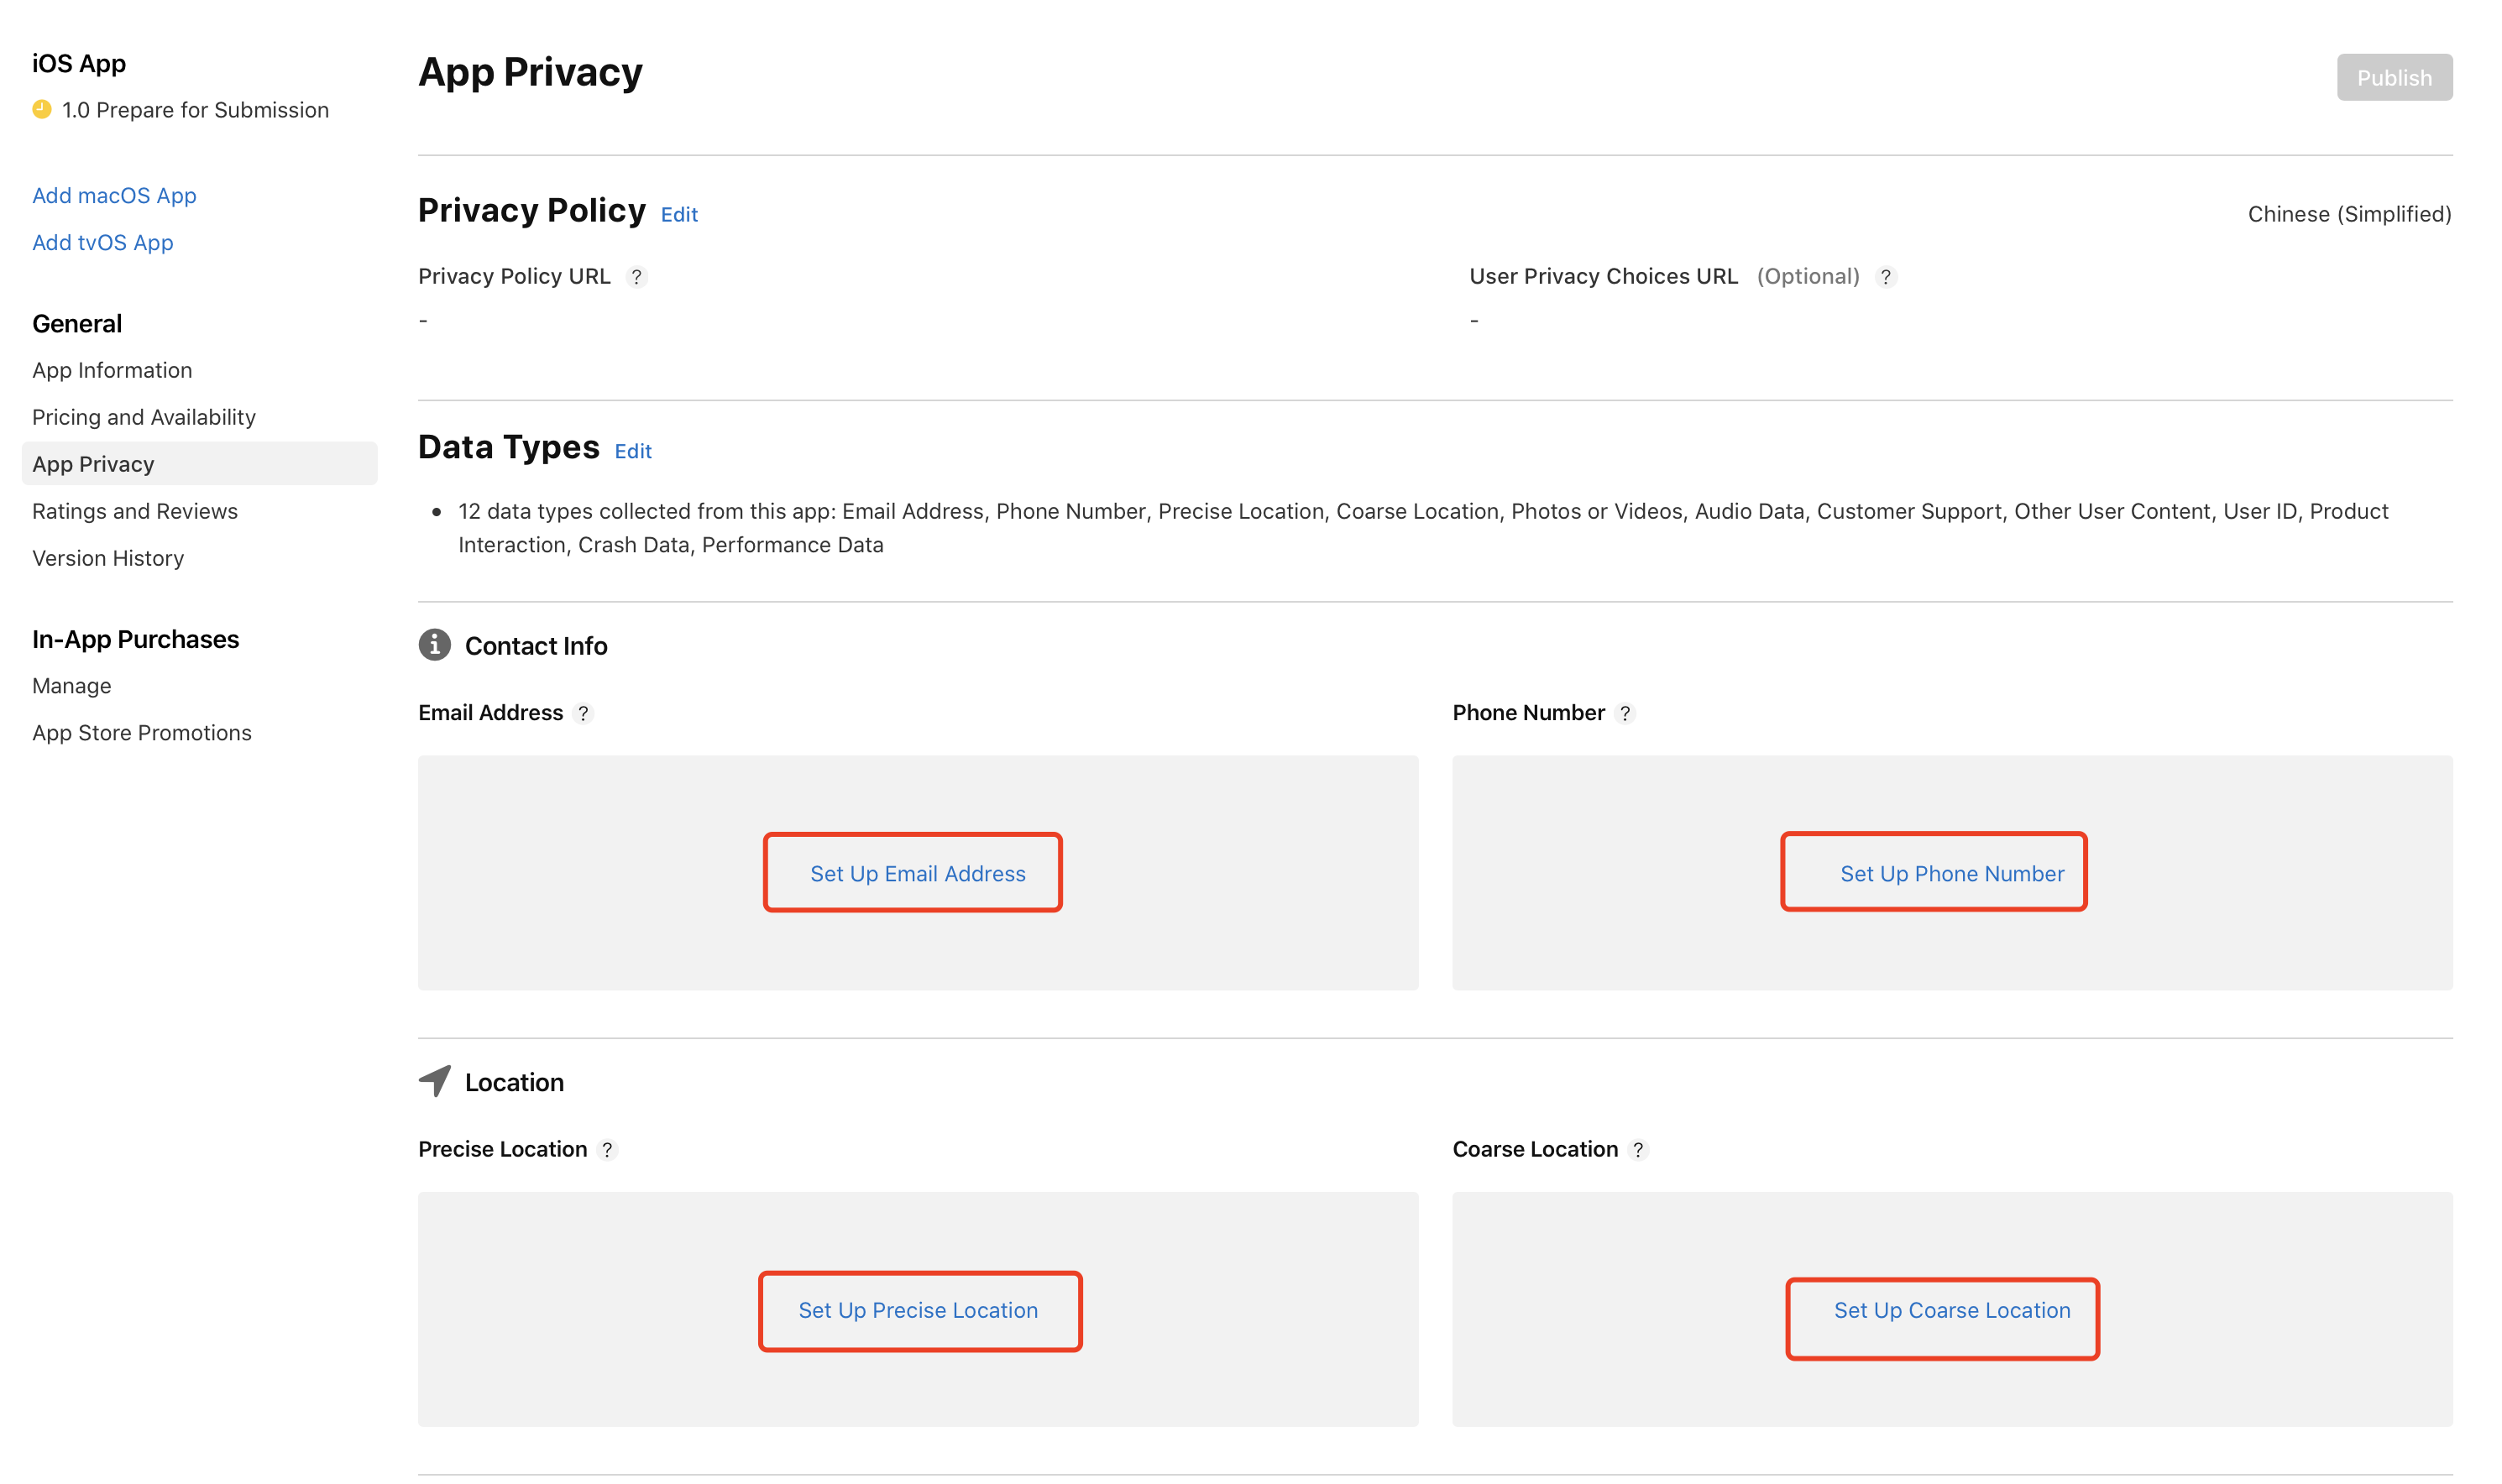
-
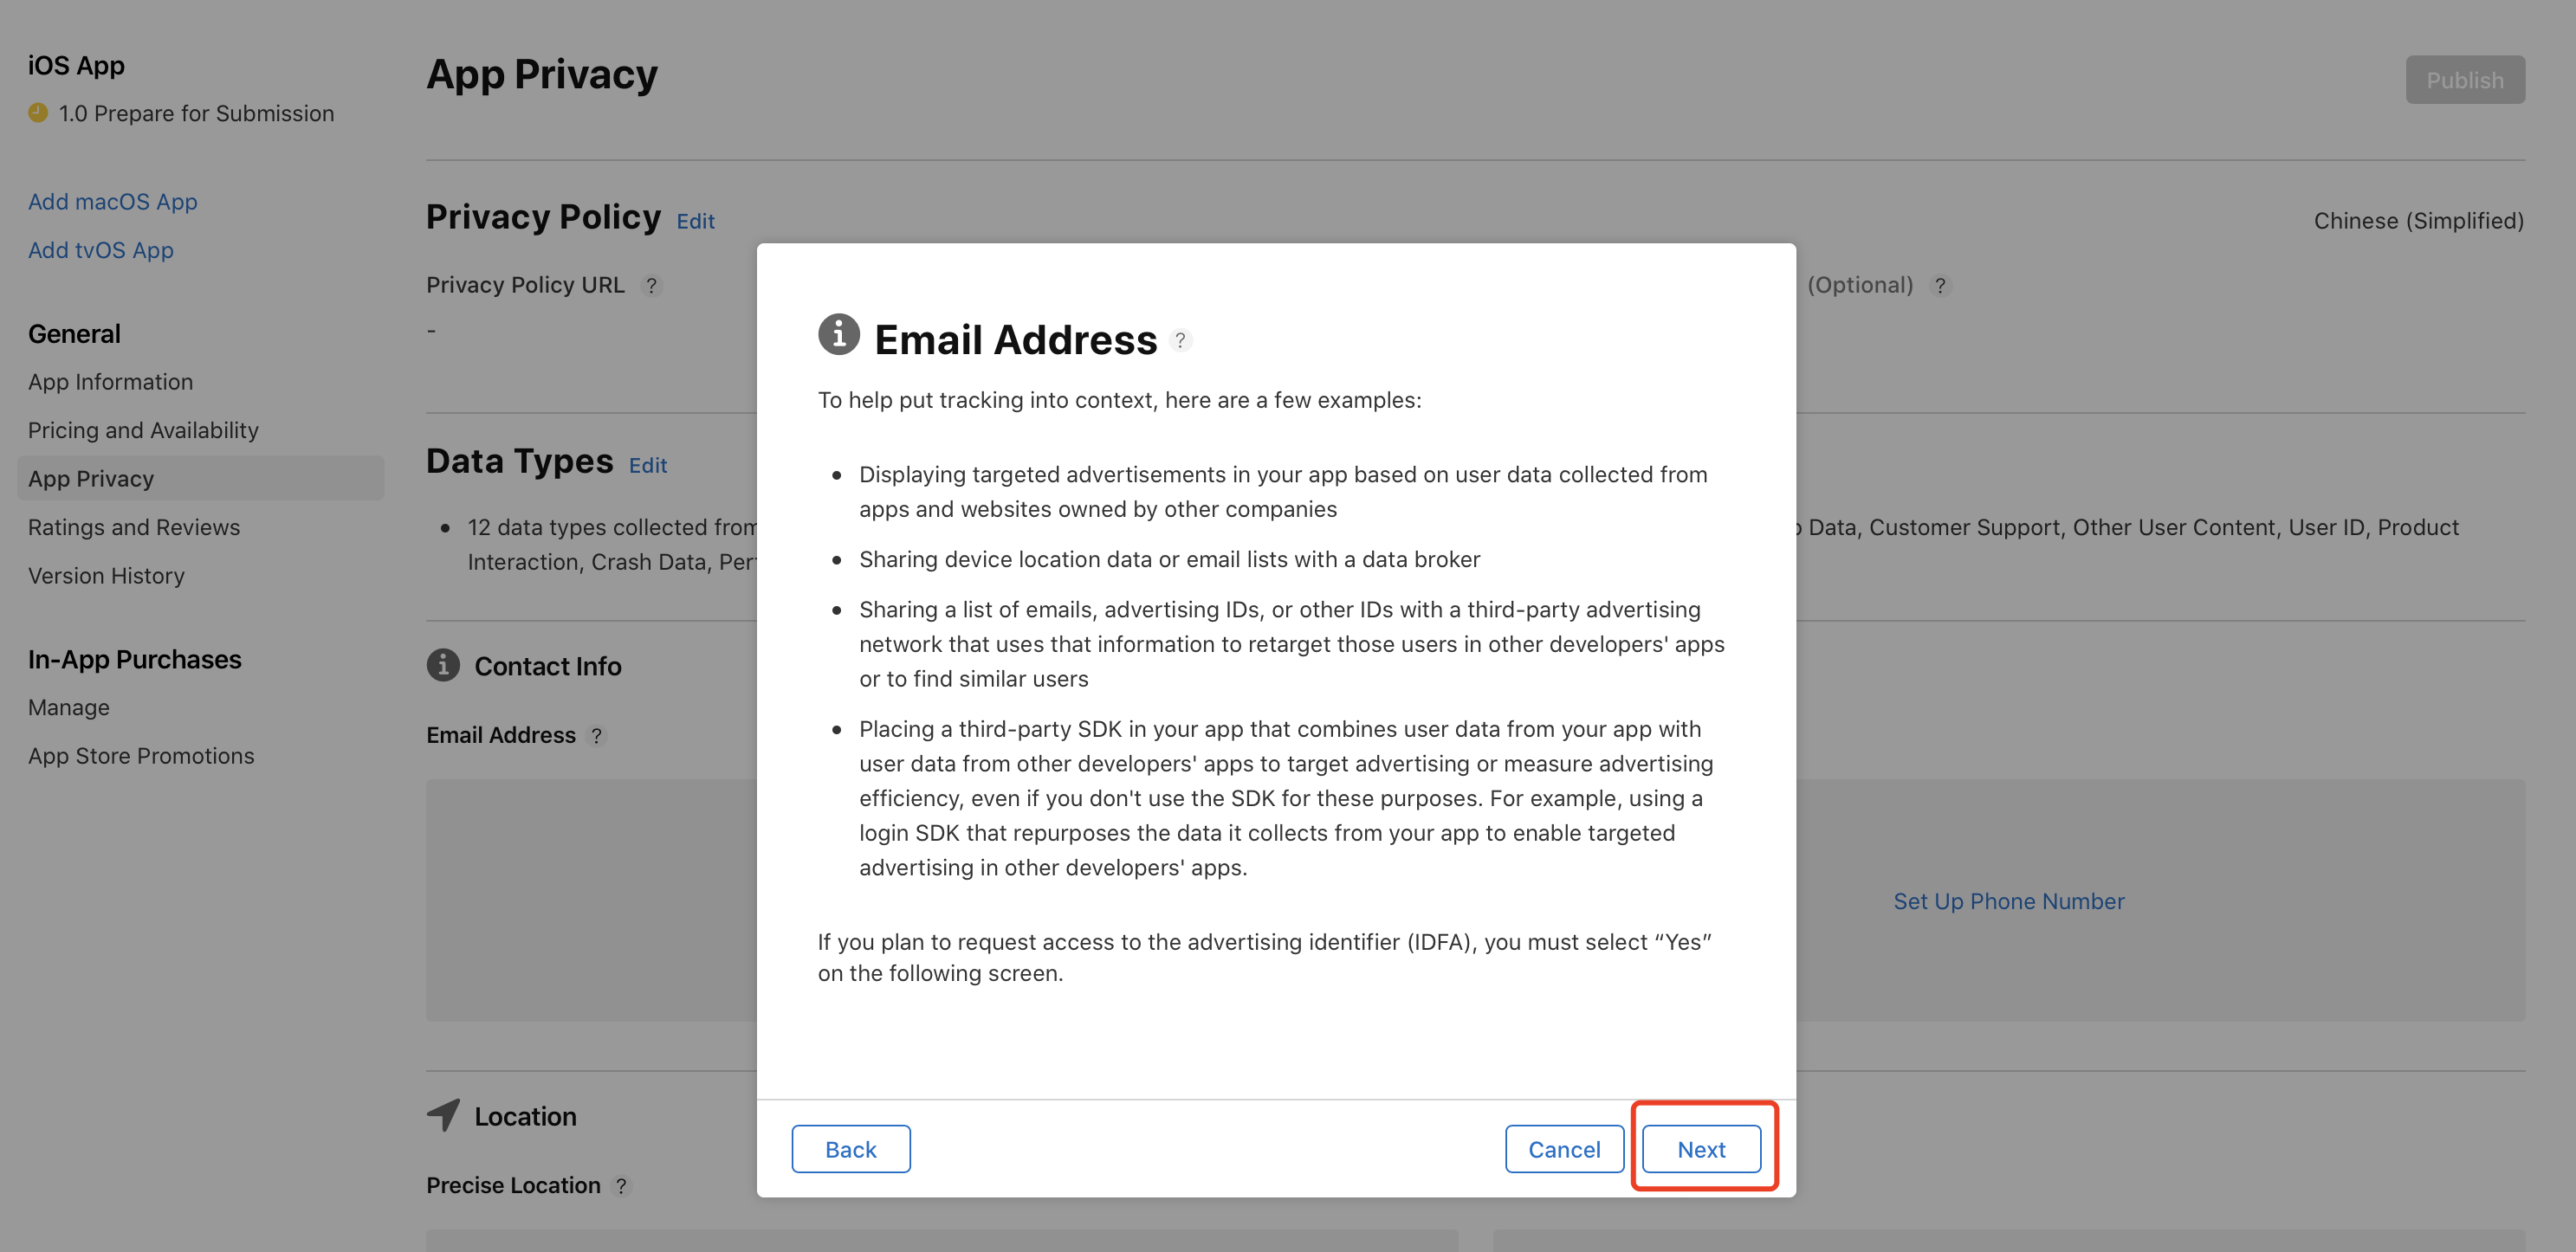
Click Set Up Email Address and other data types to set the purpose of data collection.
-
-
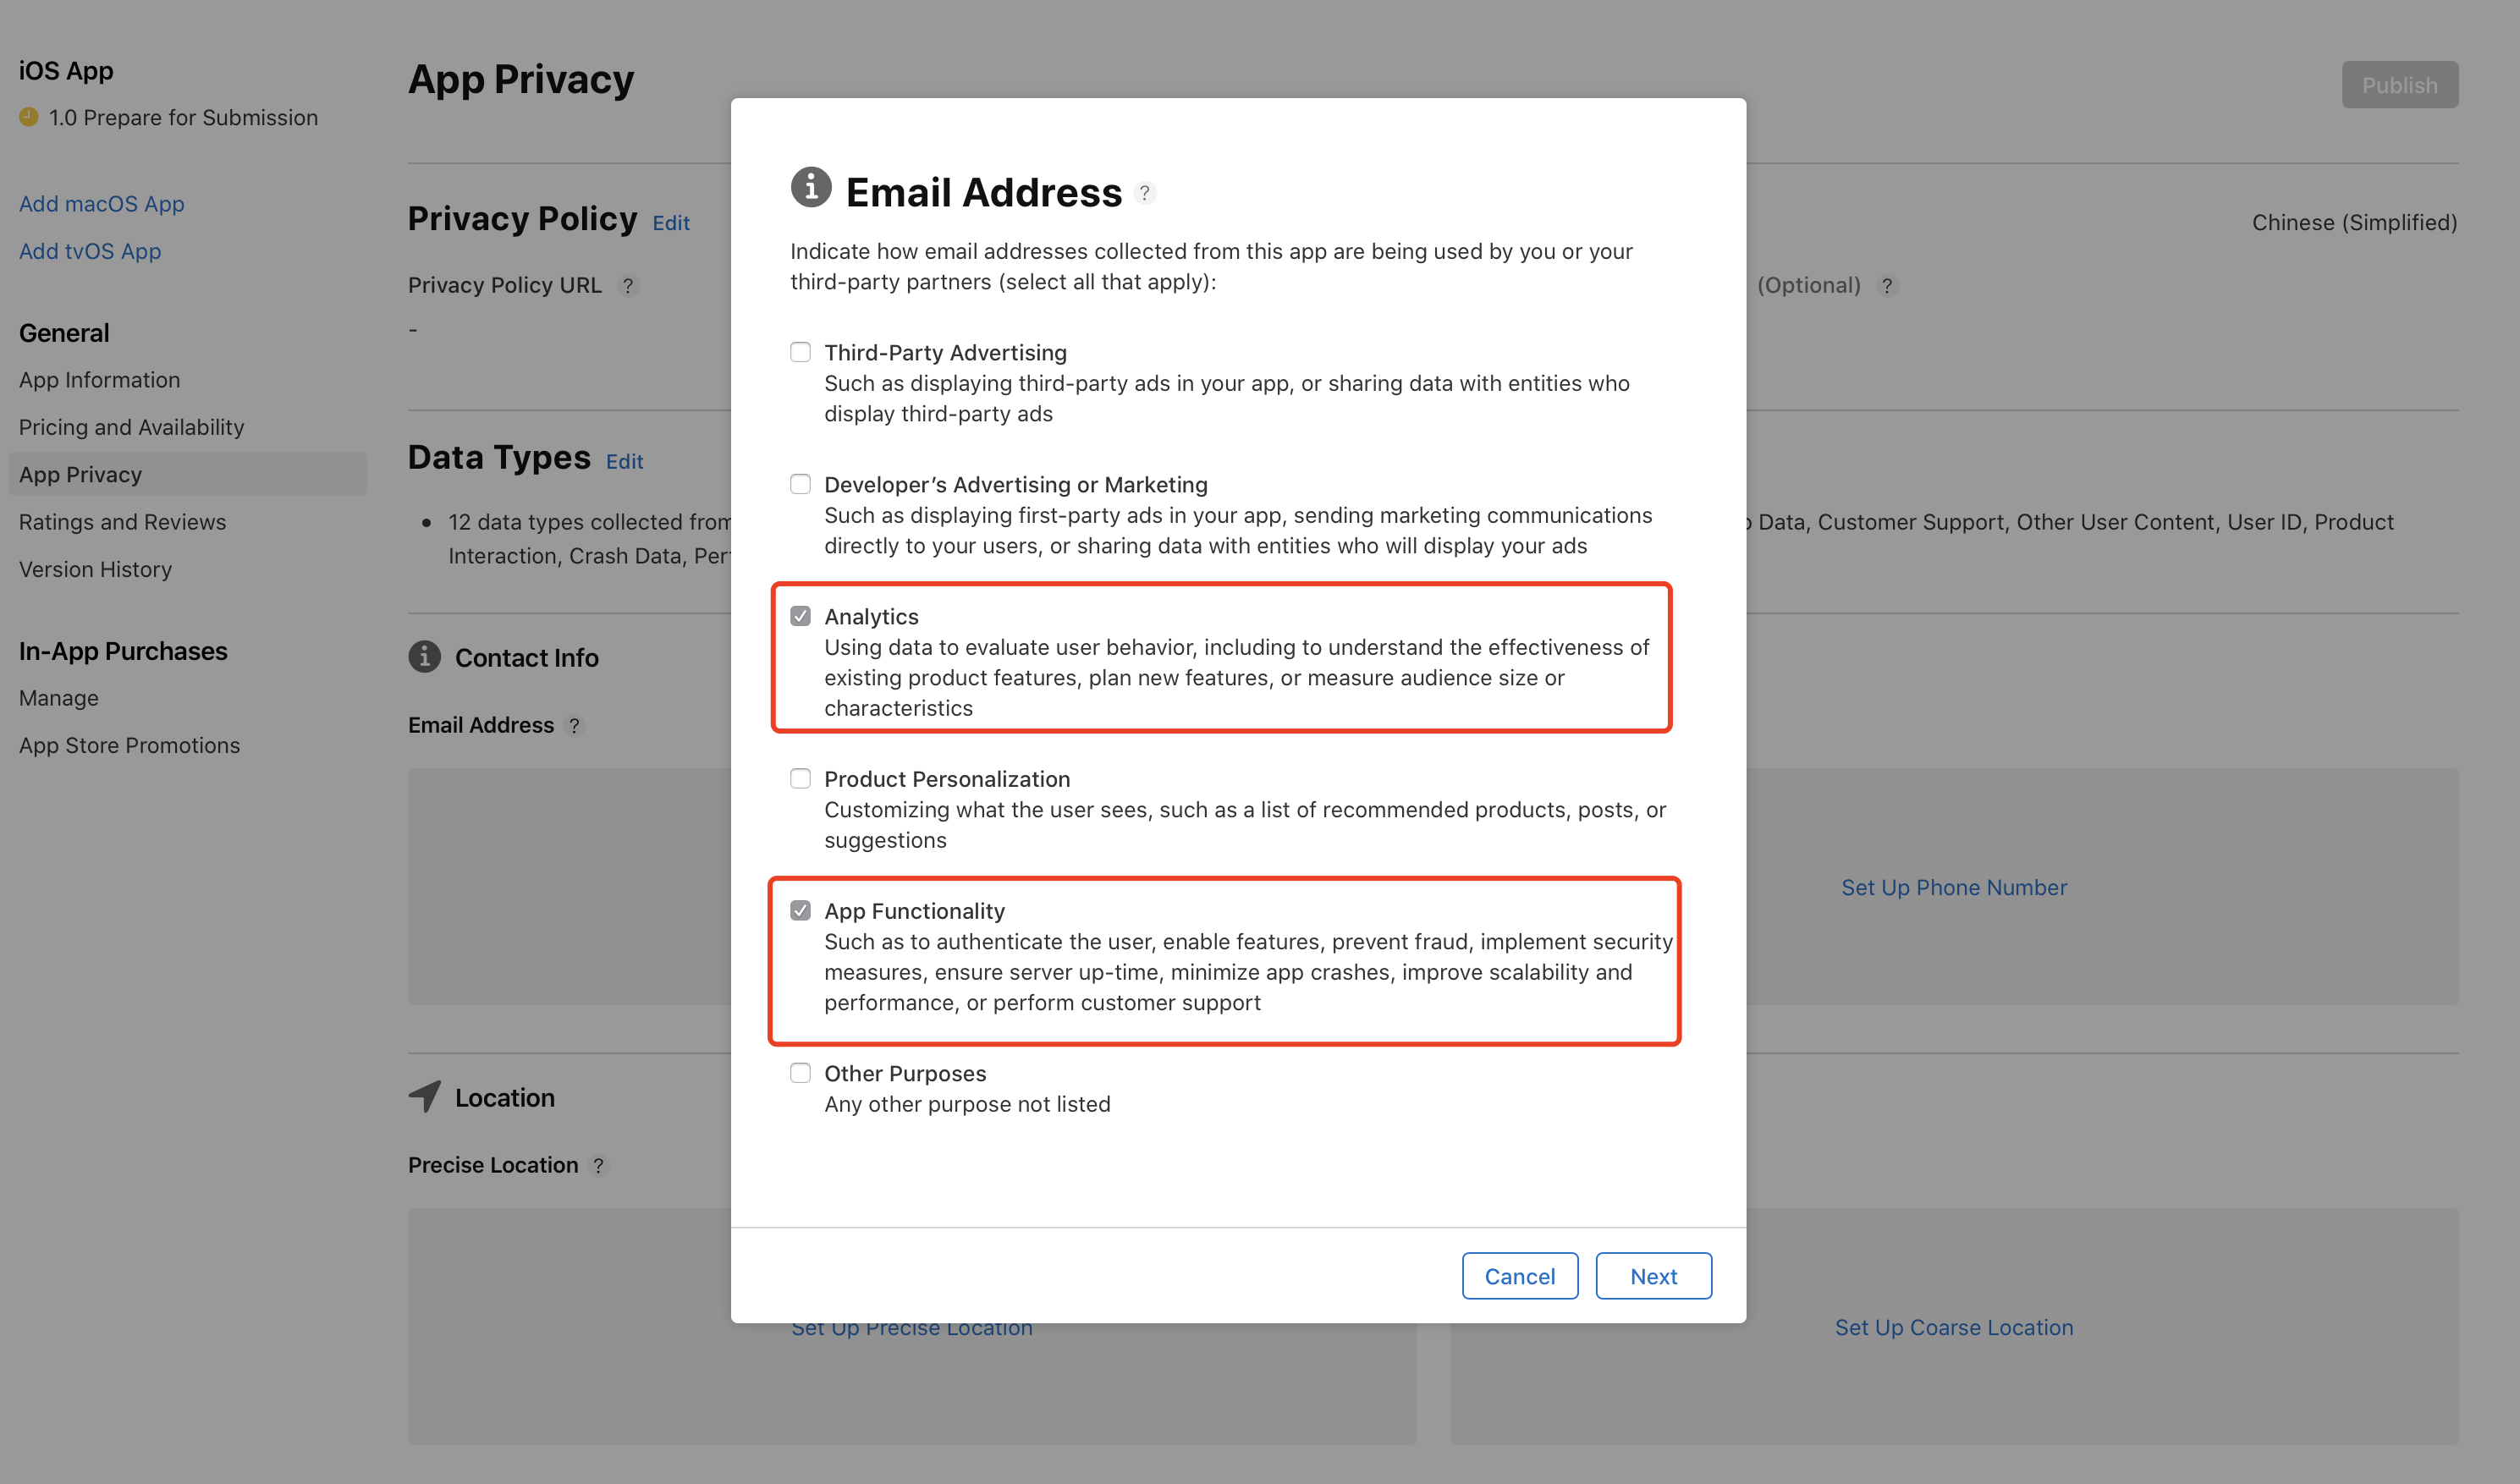
Set purpose of data collection
-
Set the purpose of the data to be collected.
-
Select Yes to link the email addresses collected from this app with the identities of users.
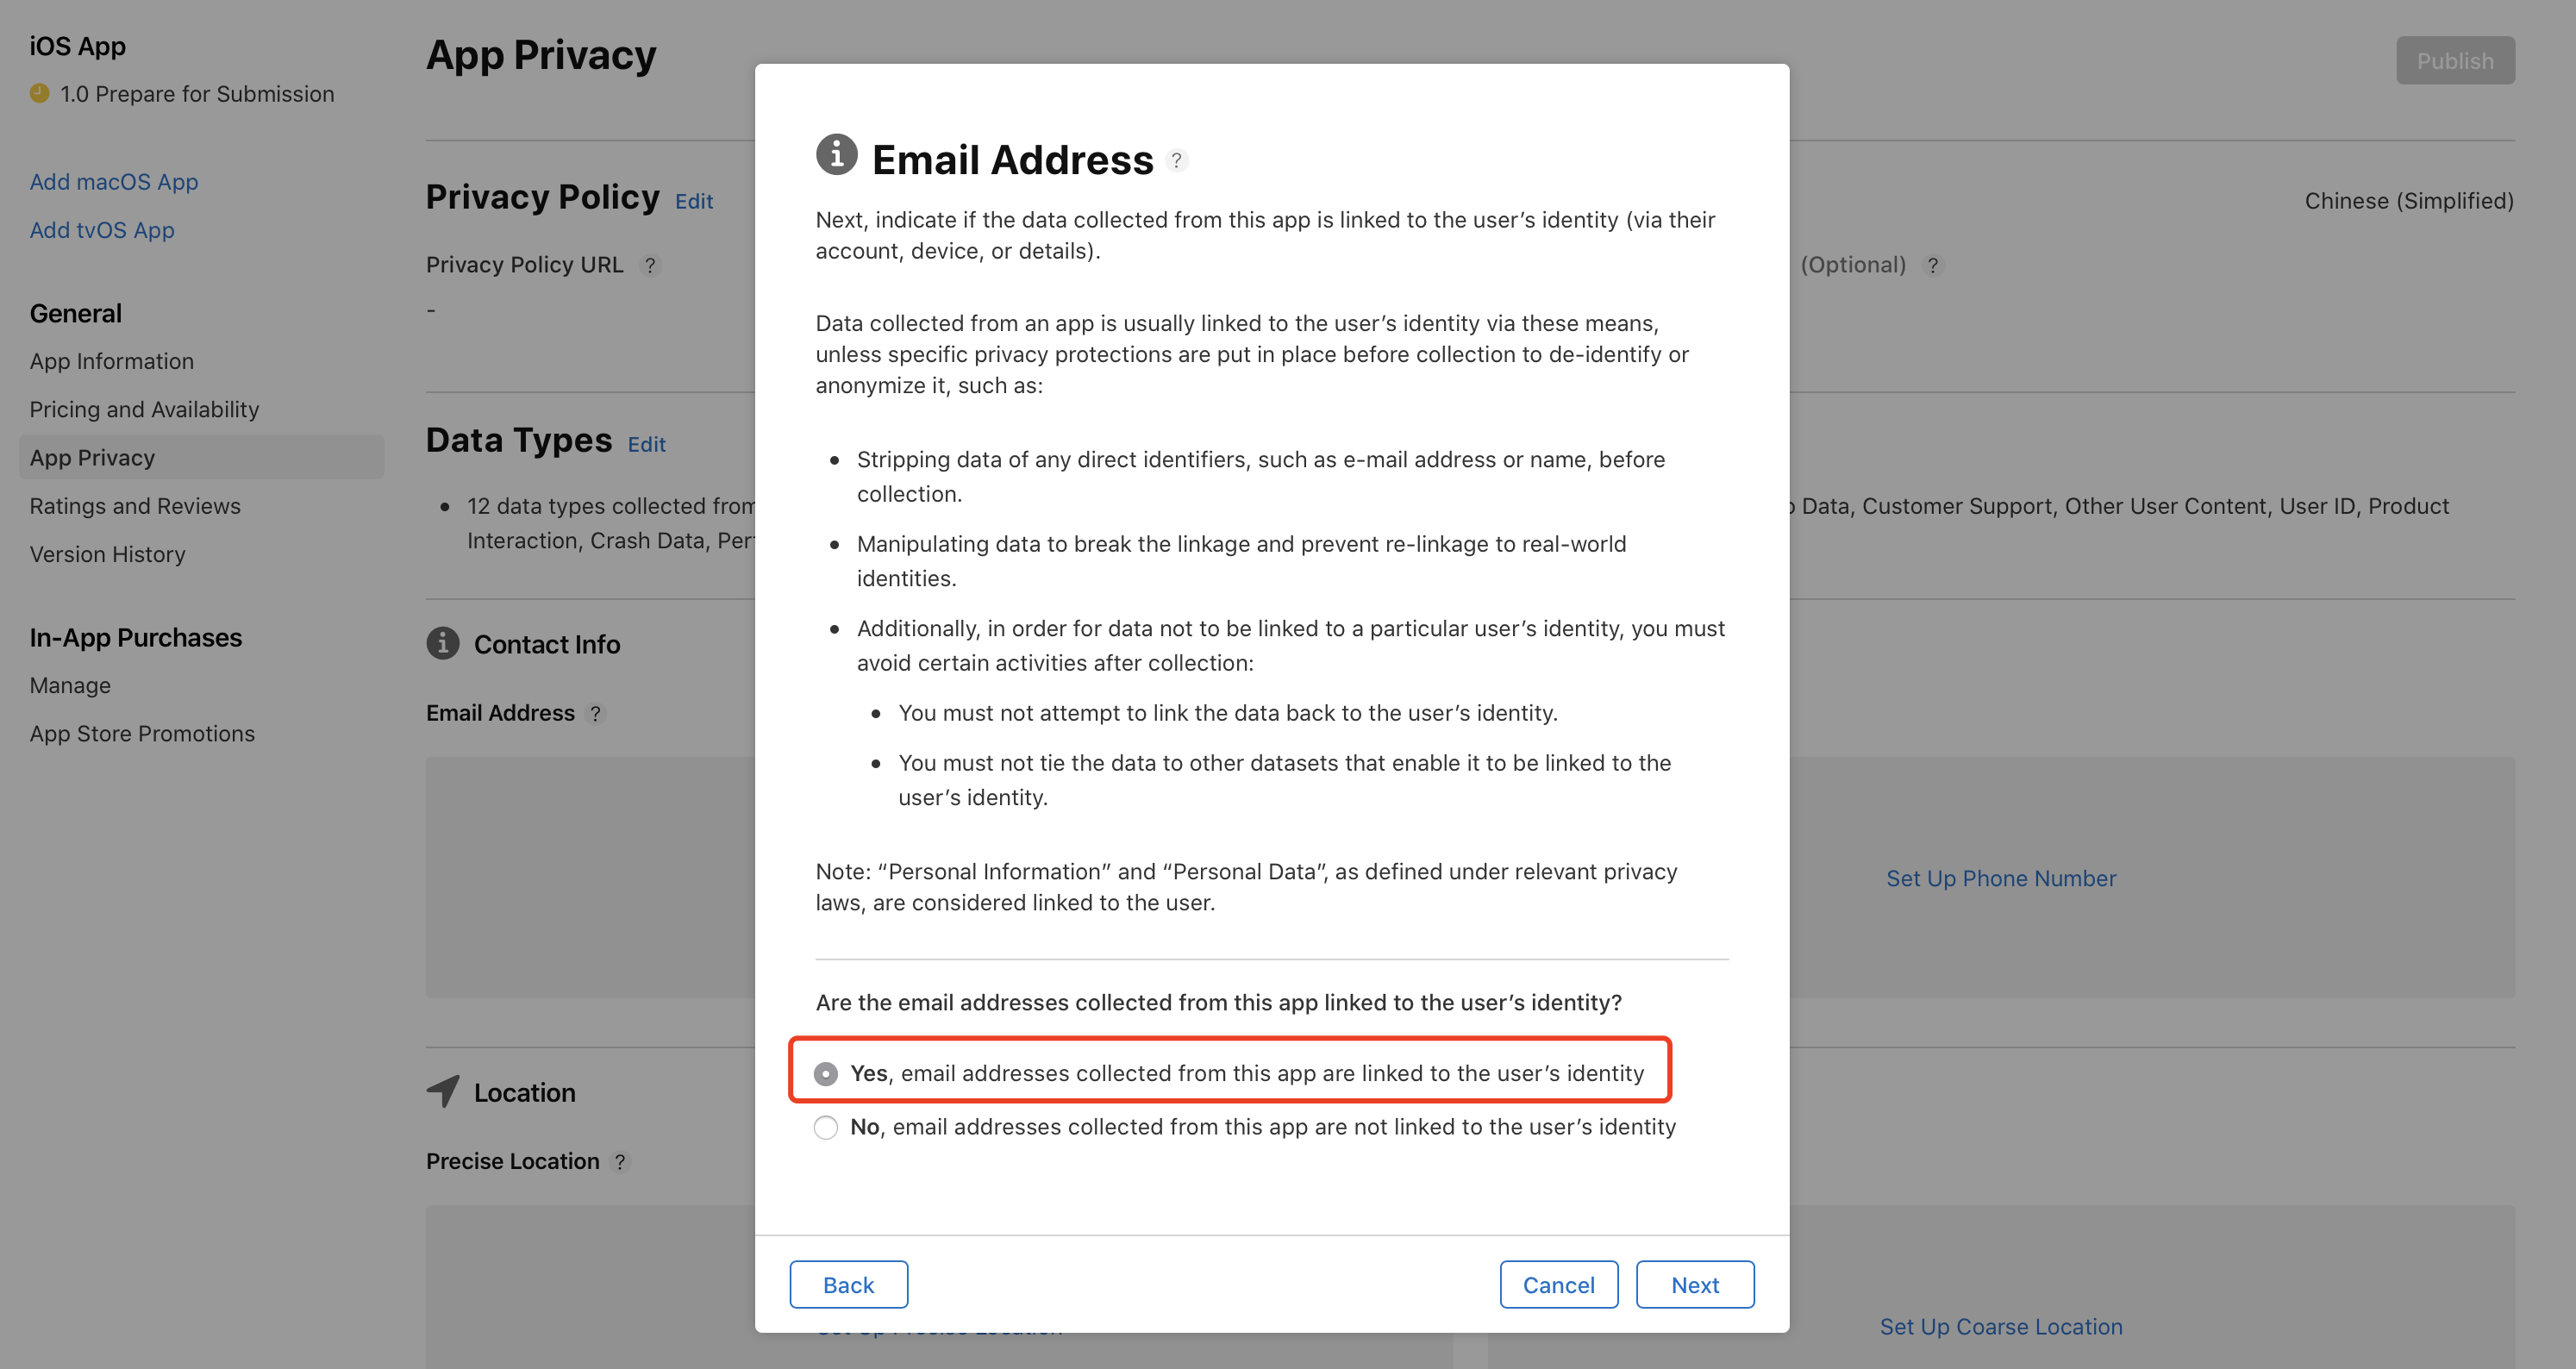
-
Select No, so the email addresses collected from the app will not be linked with the identities of users.
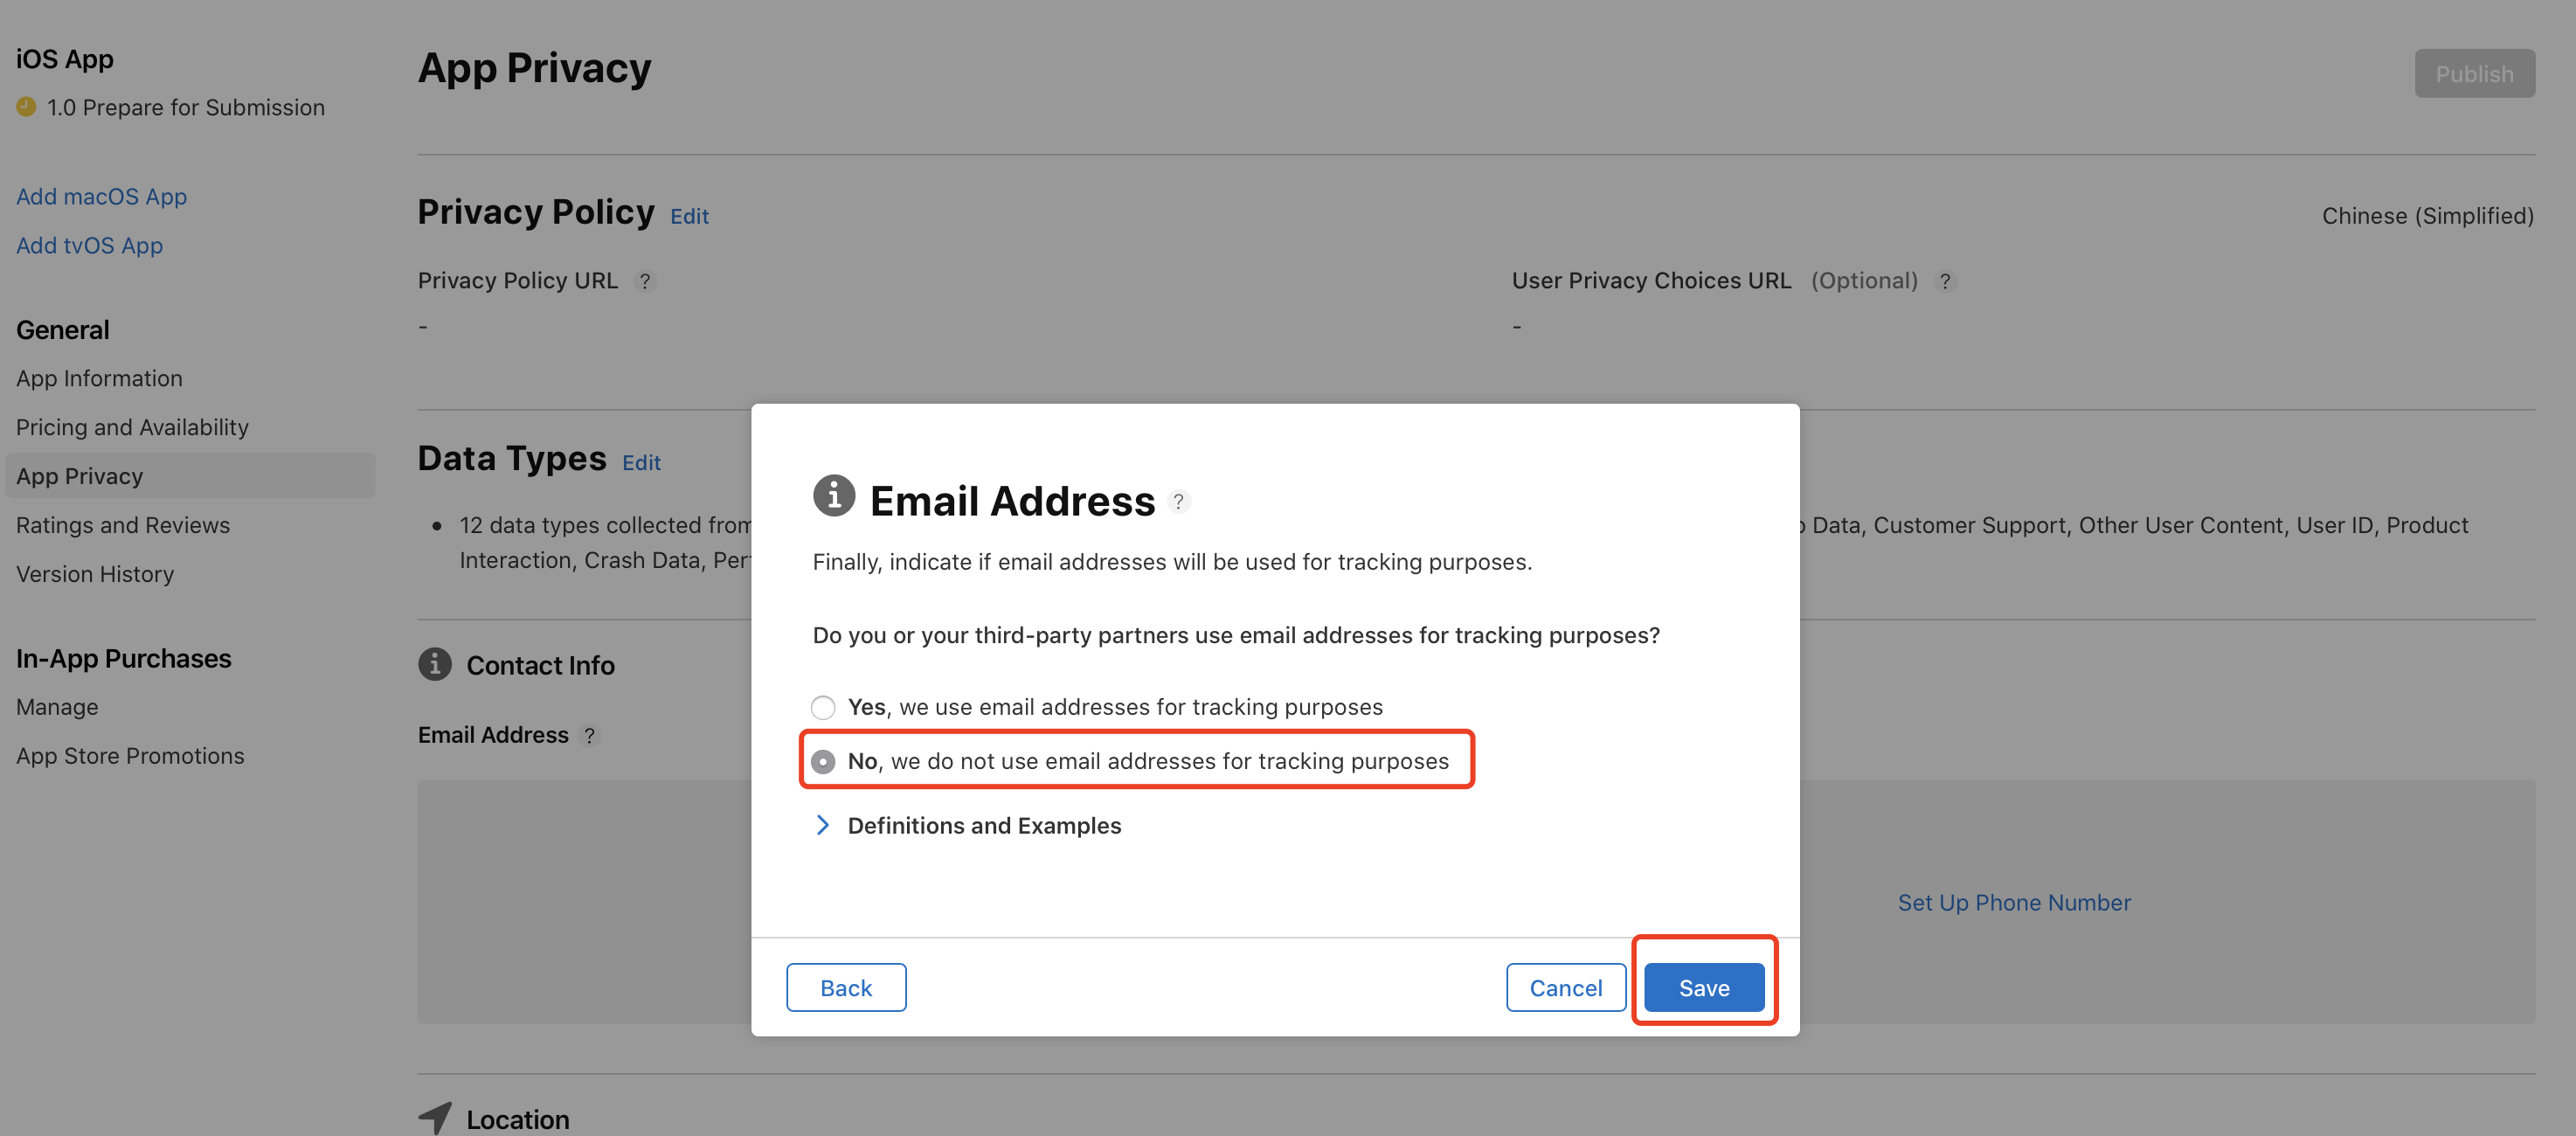
-
Other data types are similar to the preceding settings, as described in the following table.
If your app does not support voice services, skip the Audio Data option.
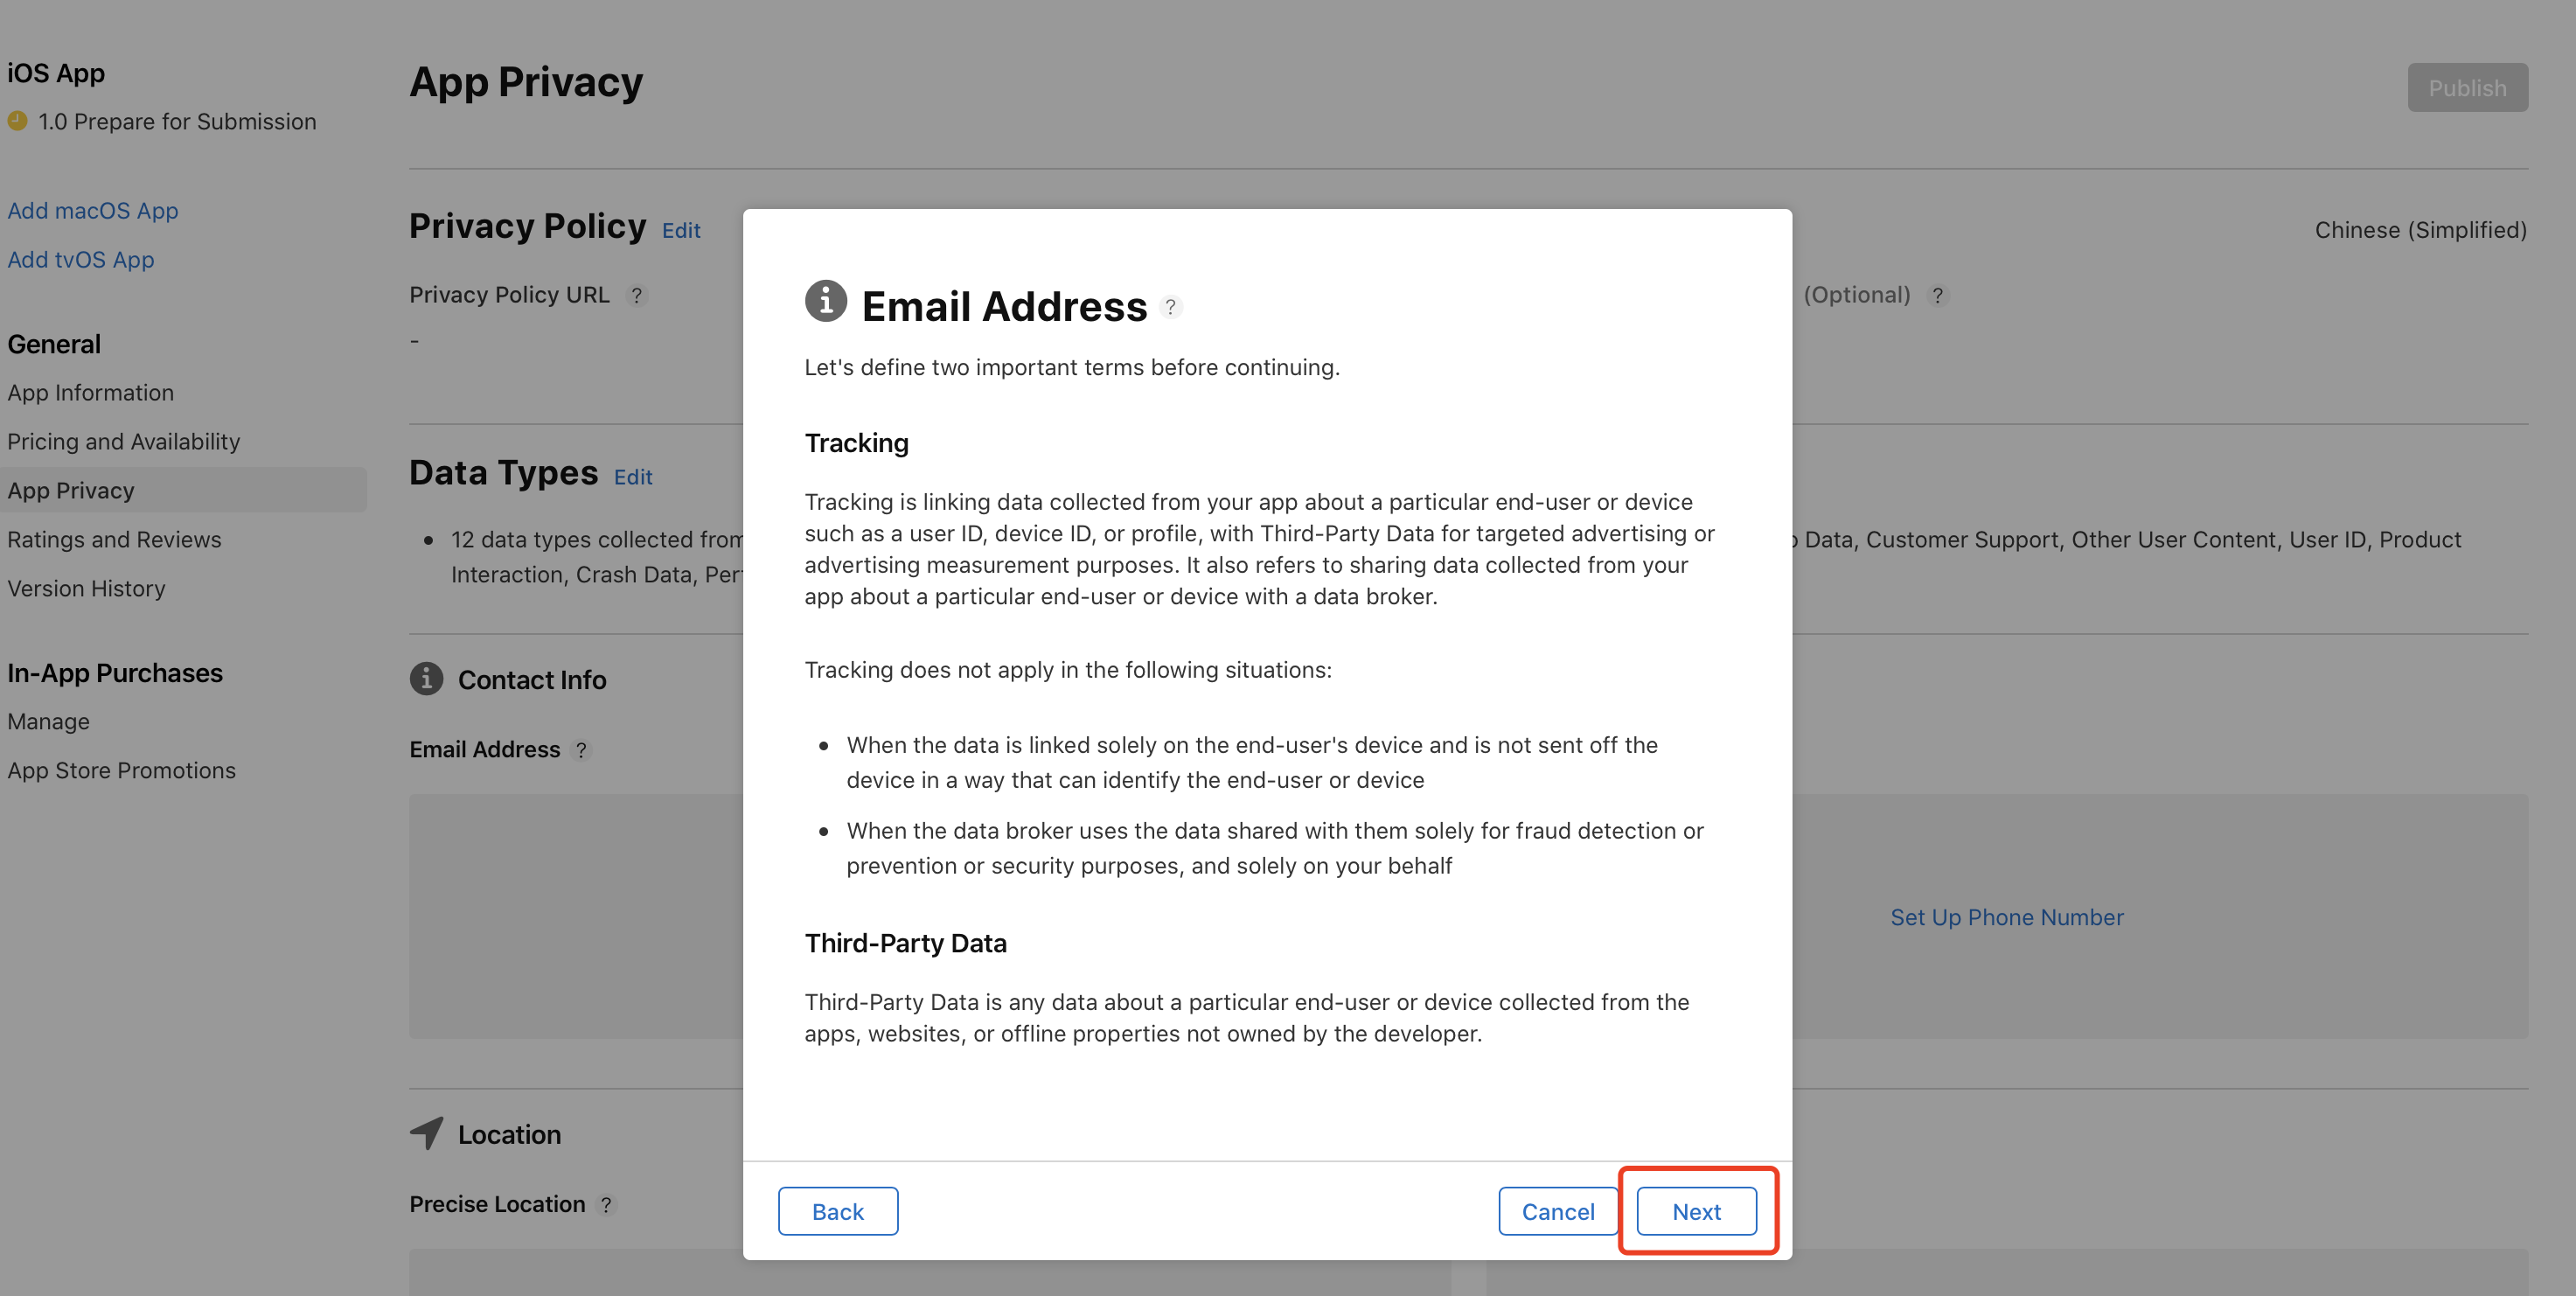
Data type Purpose Data linked to users Tracking Email address Analytics and app features Yes No Phone number Analytics and app features Yes No Precise location App functionality Yes No Rough location App functionality Yes No Photos or videos App functionality Yes No Audio data App functionality No No Customer support App functionality Yes No Other content of users App functionality Yes No User ID Analytics and app features Yes No Product interaction Analytics Yes No Crash data App functionality Yes No Performance data App functionality No No -
Save the settings to see the following result.
If your app does not provide voice capabilities, the Data Not Linked to You section does not display User Content.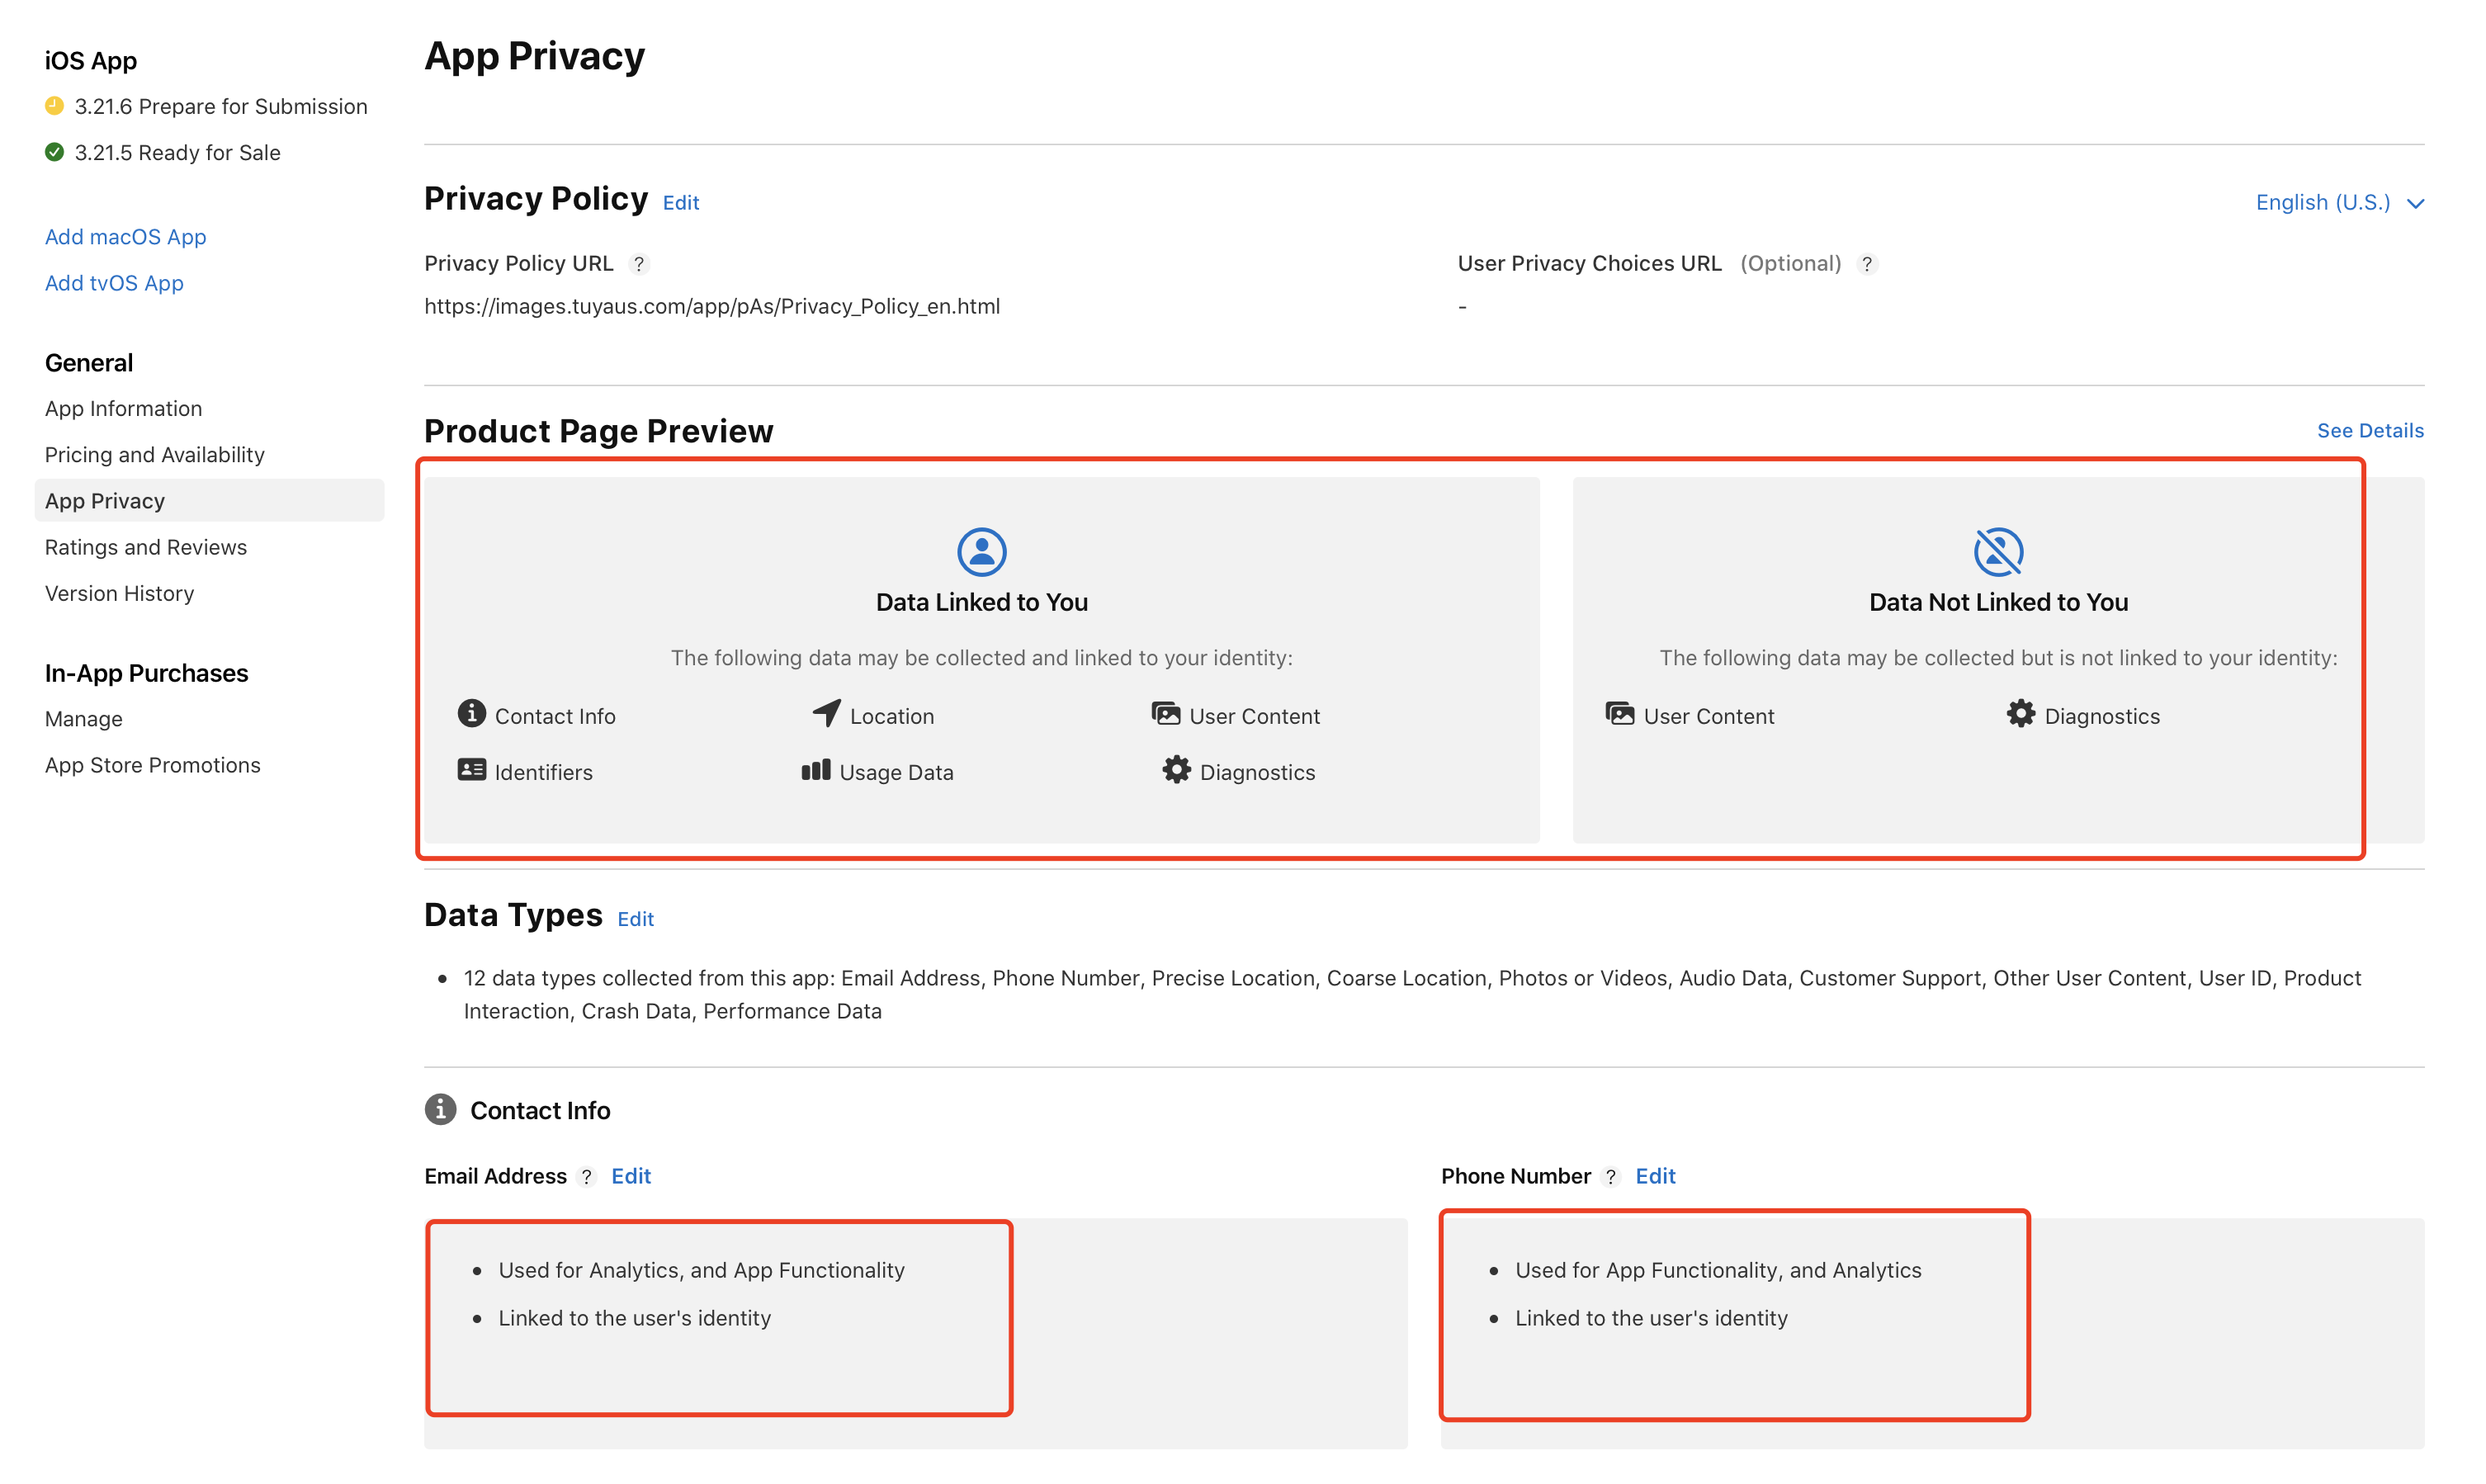
-
Click Publish.
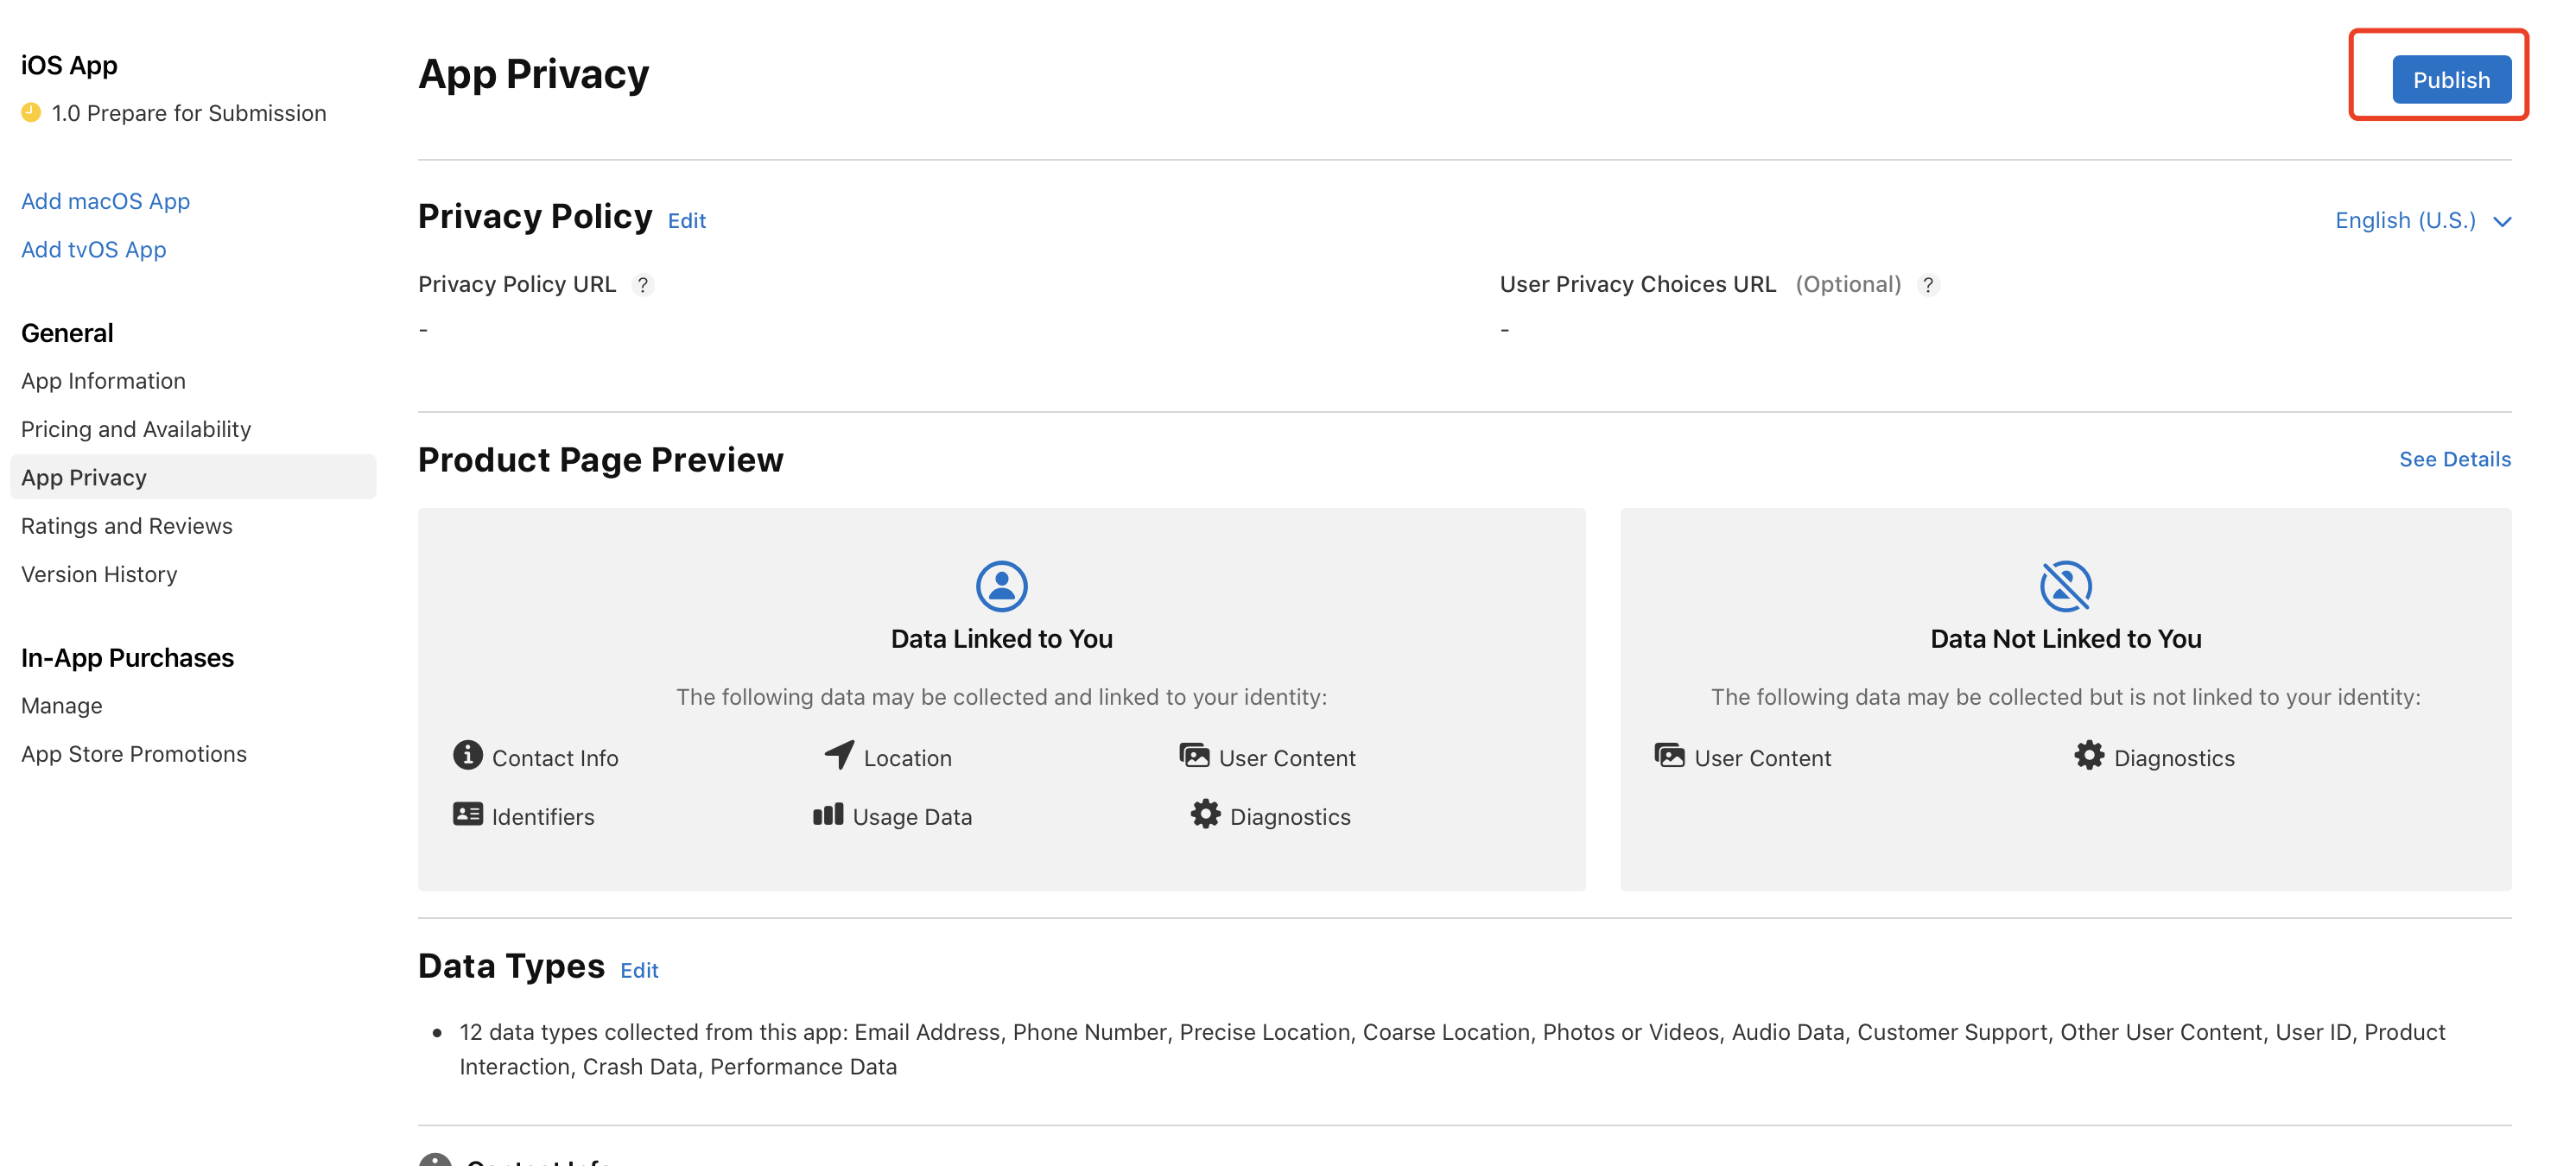
-
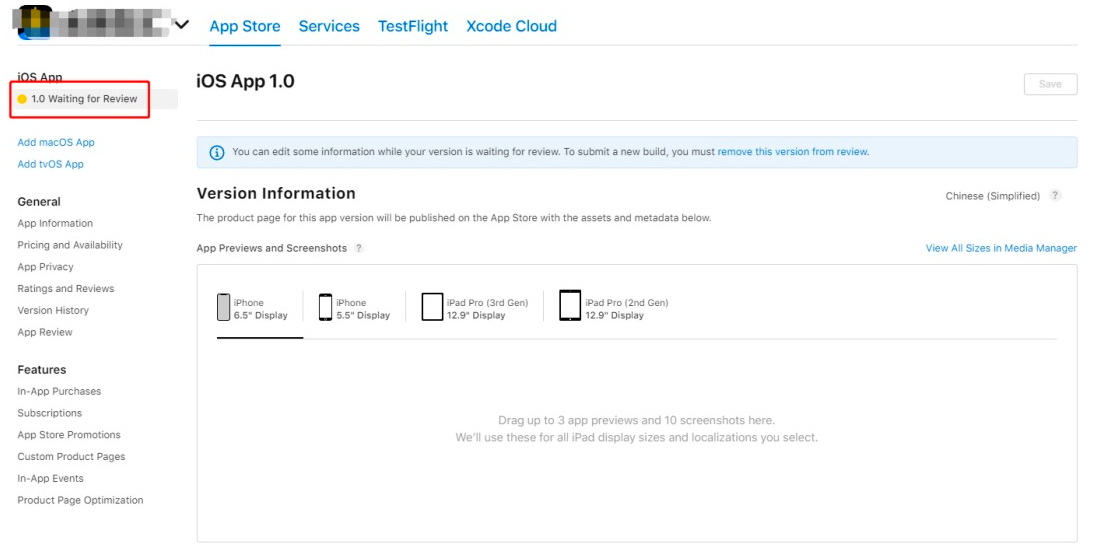
Step 2: Enter app version information
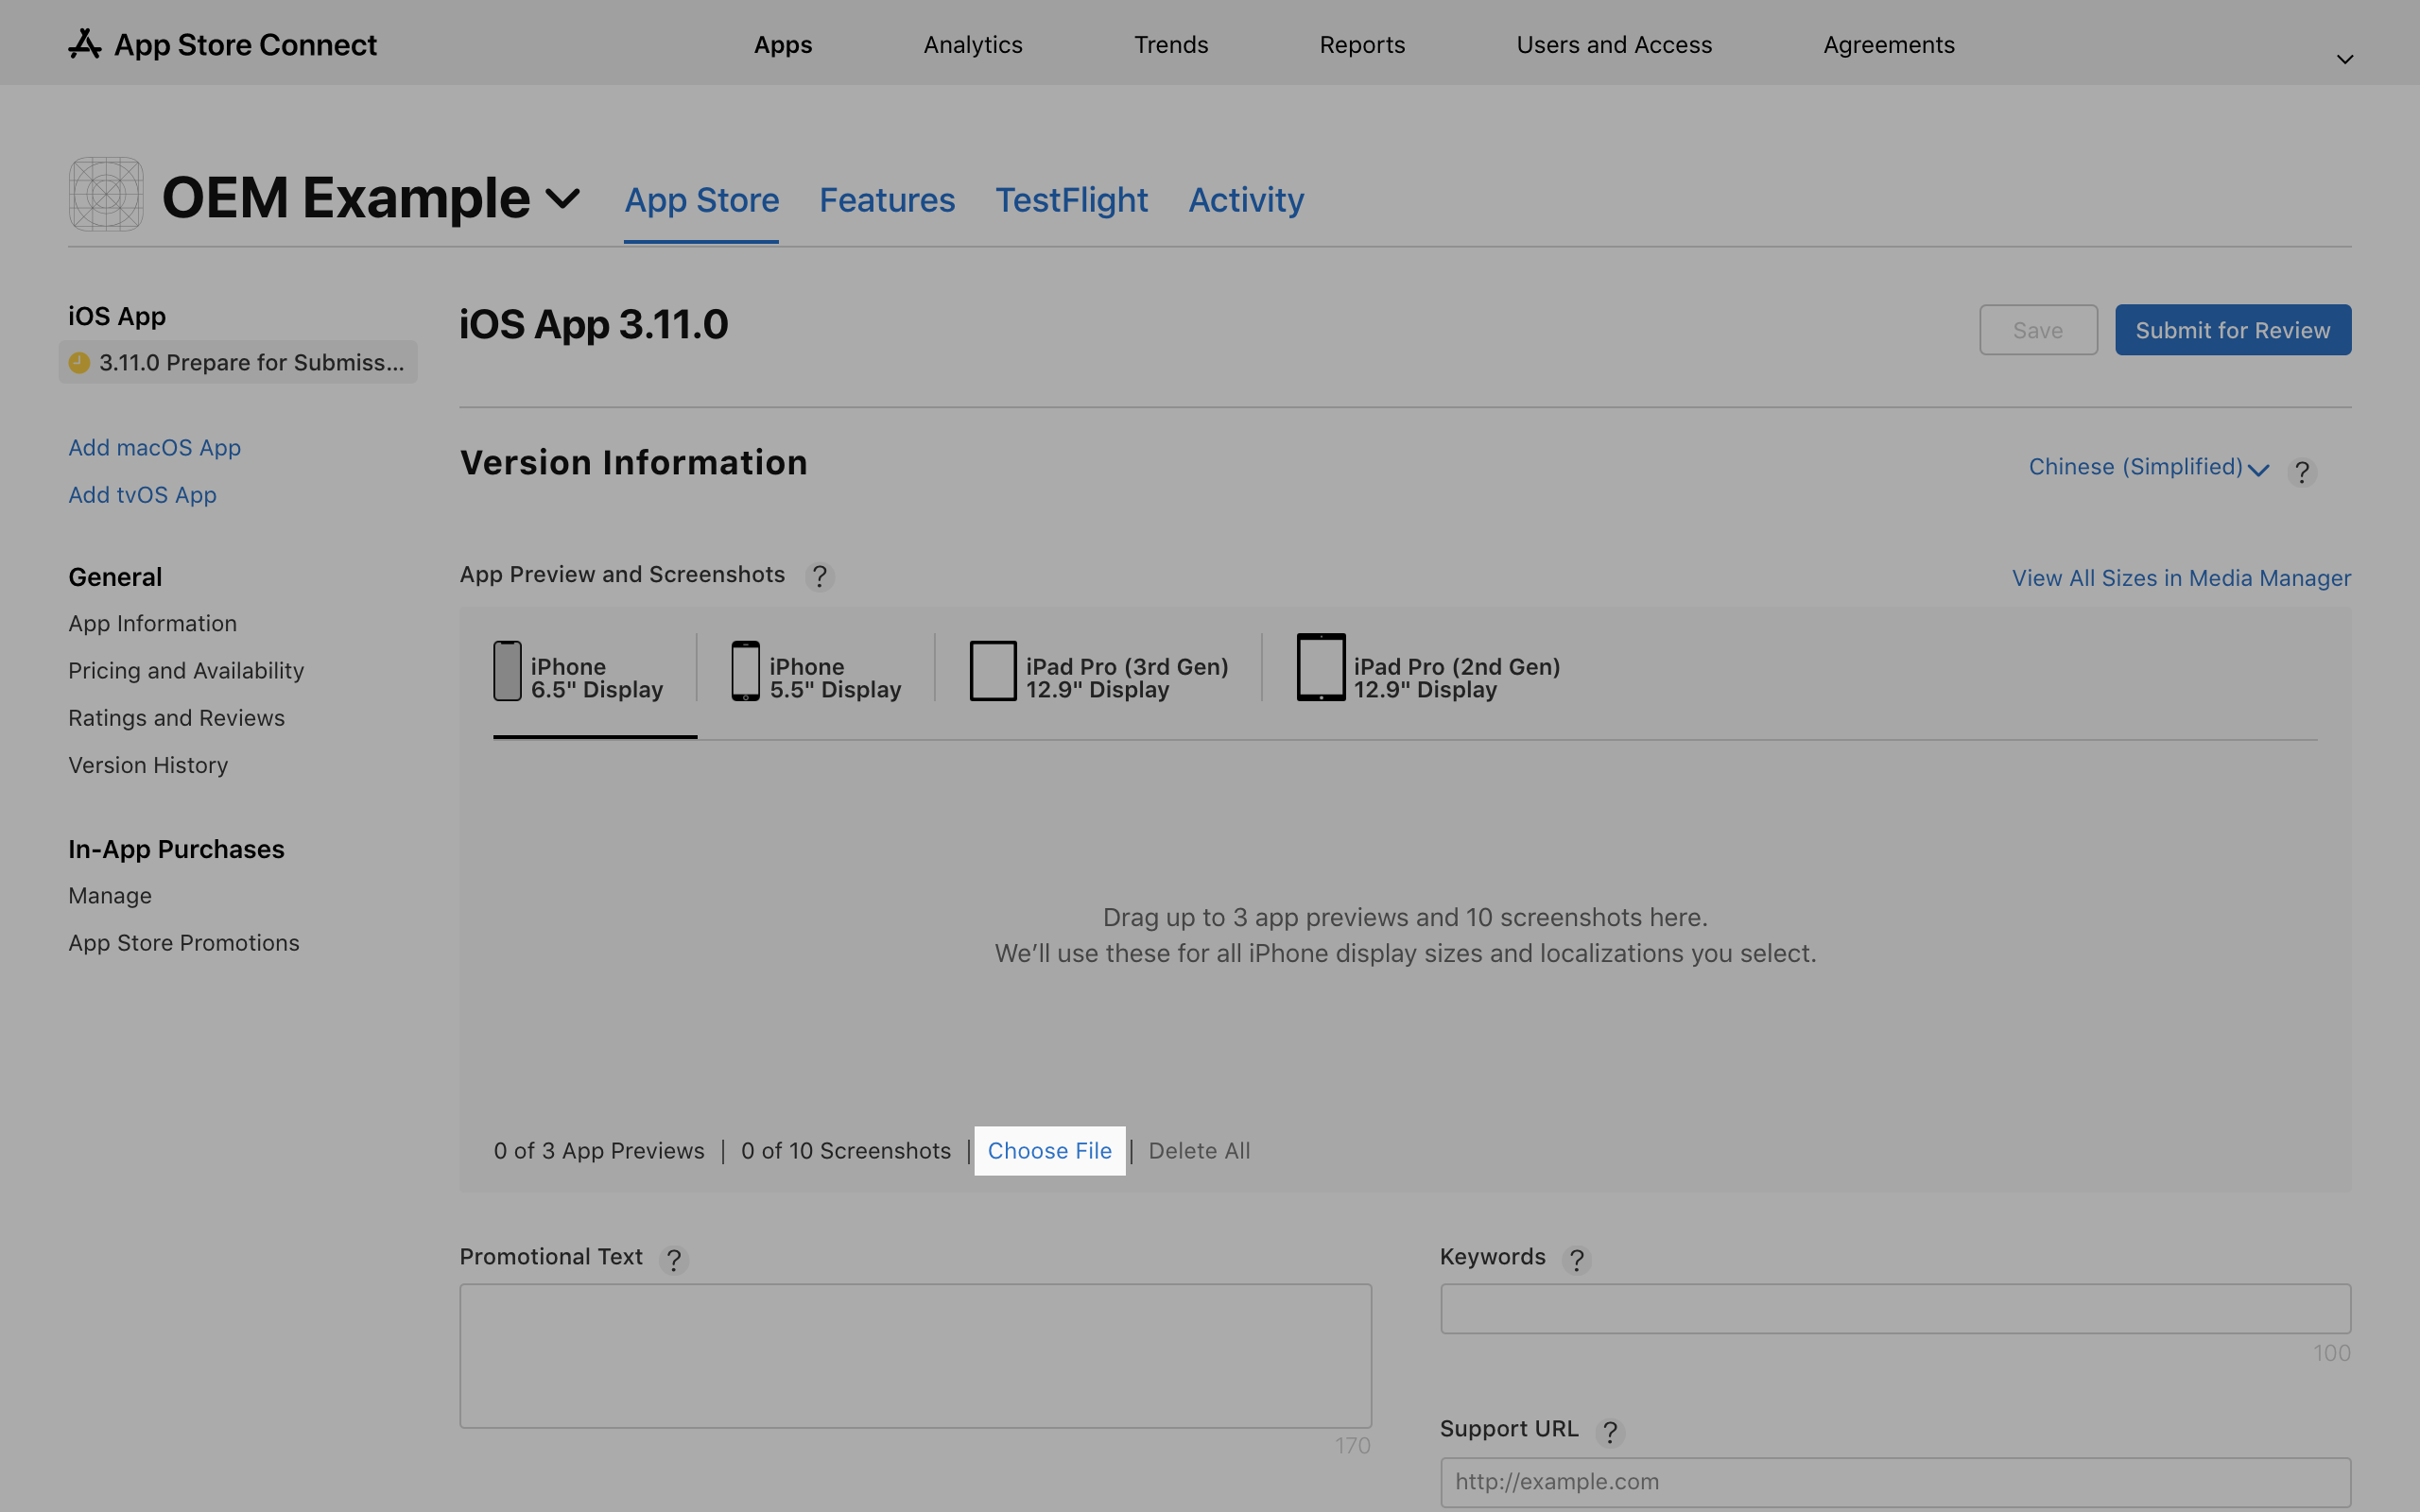
1. Preview app features
-
Upload the prepared preview images of the app features and use the app to pair a product. We recommend that you do not use products such as light bulbs, strip lights, and sockets. Their simple panel UI design might cause the review to be rejected in most cases. Create specially designed screenshots of different functional pages.
-
Upload the 6.5-inch iPhone screenshot and 5.5-inch iPhone screenshot. Other dimensions are not required.
-
Take these screenshots by using iPhones.
-
Do not show other app icons on the notification bar in the screenshots. We recommend that you enable the airplane mode for the iPhones when taking the screenshots.
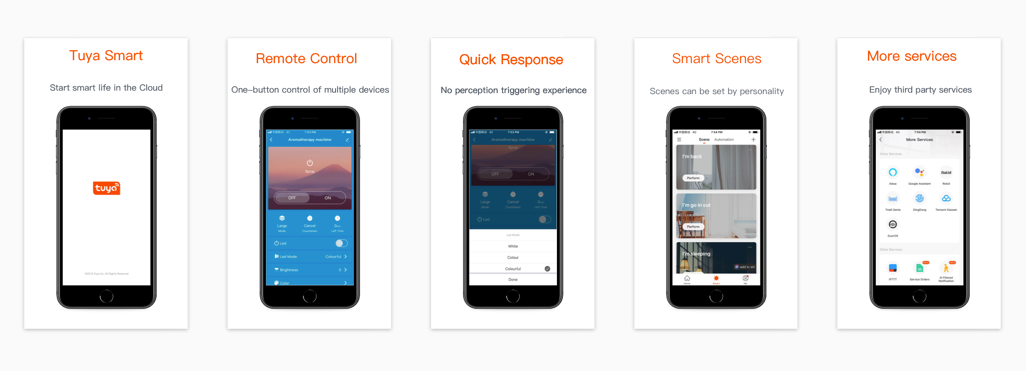
Examples of preview images
-
The background image dimensions are 1242 × 2688 pixels and the phone model is iPhone XR:
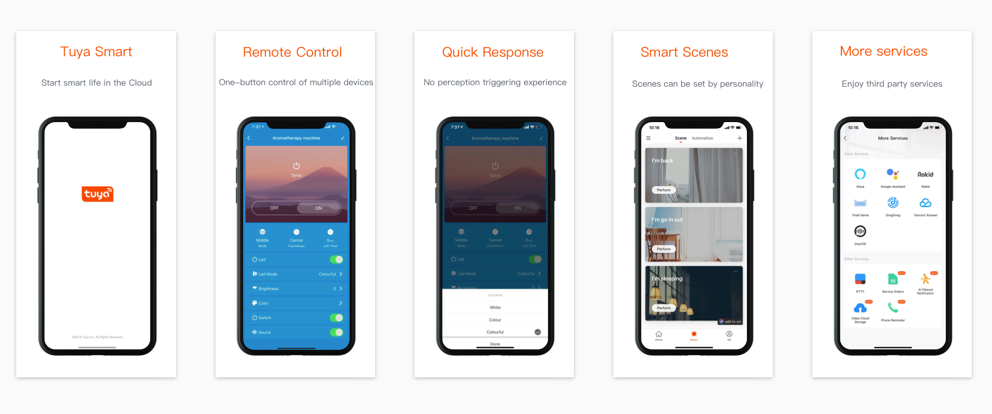
-
The background image dimensions are 1242 × 2208 pixels and the phone model is iPhone 6 Plus:
2. Enter app information
Version information
Enter the following version information.
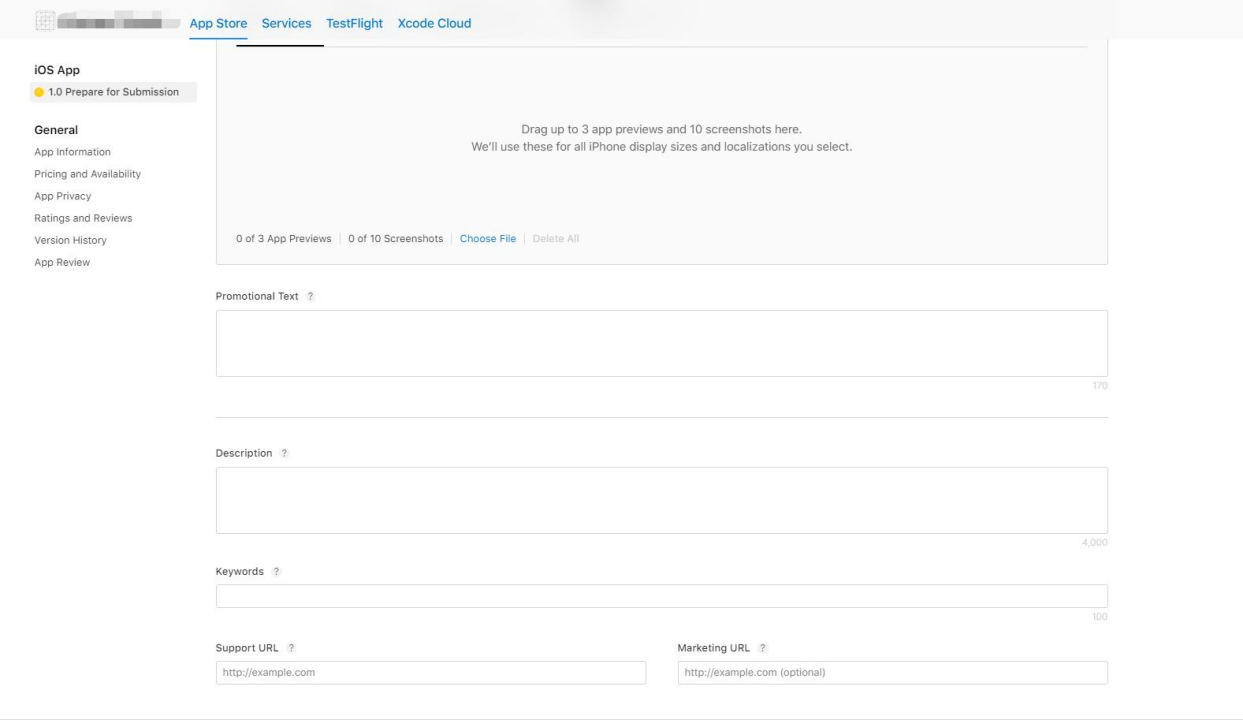
-
Promotional Text: the overview of the new features of the app. This text will appear below the app name on App Store.
-
Description: a detailed description of the app and its features.
-
Keywords: one or more keywords used to search for the app. Multiple keywords are separated with commas (,). Proper keywords will increase the probability of finding the app.
-
Support URL: a specific technical support URL. It can also be the official website address of your organization.
-
Marketing URL: optional.
-
Version: Enter the version number of the app. Try to make it the same as that used on the Tuya Developer Platform.
-
Copyright: Enter the copyright information of your organization. Example: ©2018 Tuya Inc..
-
If other languages are supported, click English (U.S.) in the top-right corner of the page to switch to other target languages, and enter the app information for each specified language.
If the app supports multiple languages, the promotional text and images must be configured for each target specified language.
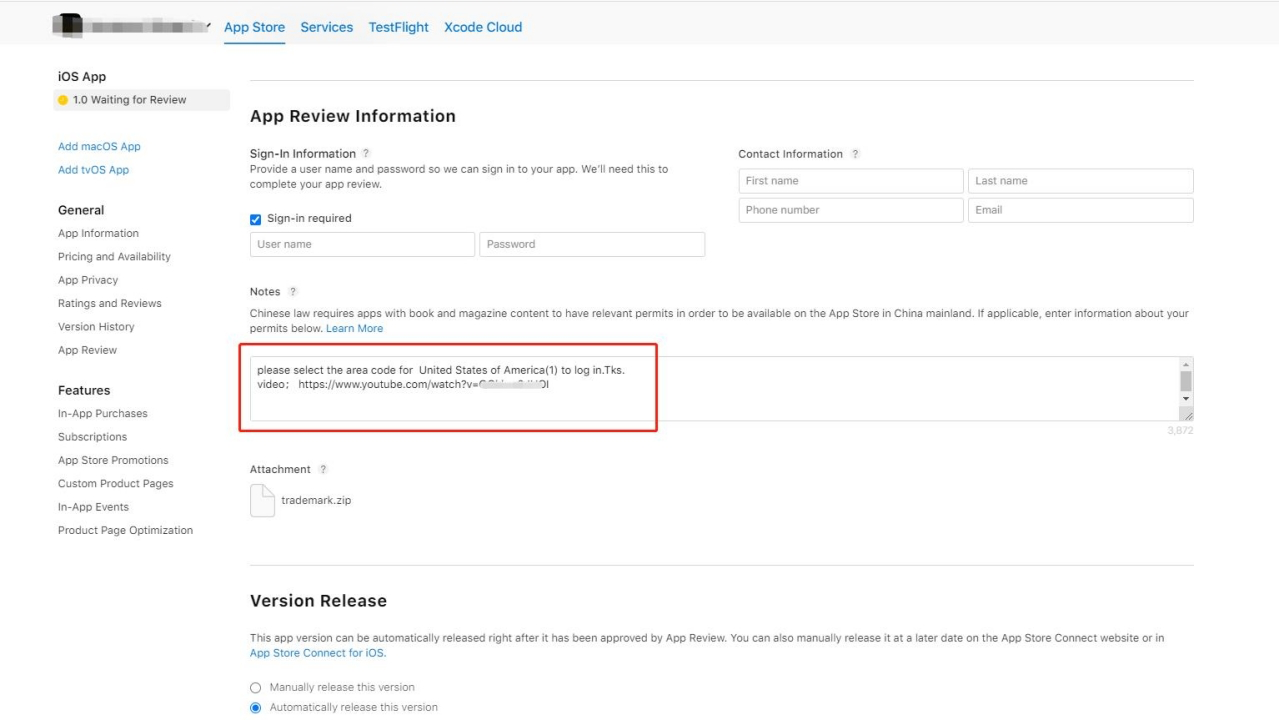
App review information
Enter the actual review information:
-
Sign-In Information: Select Sign-in required, and enter the prepared test account and login password respectively in the username and password fields below the checkbox.
If the app account is registered in the USA, a certain device must be linked with the account. This device must be the same as that used in the screenshots and demo video mentioned in the previous sections. We recommend that you link a virtual device. If a real device is used, it must stay online during the review.
-
Contact Information: Enter the actual contact information.
-
Notes: Enter the URL of the demo video.
3. Configure demo video
-
Meet the following requirements of the demo video:
- Place the smart device along with the iPhone.
- Perform the whole process from tapping the app on the Home screen to pairing the smart device, controlling the switch of the smart device, and other features with the app on the iPhone.
The following video is used as an example.
-
We recommend that you upload the video to YouTube, and set the video to Unlisted. In this mode, the video can be accessed only from its URL.
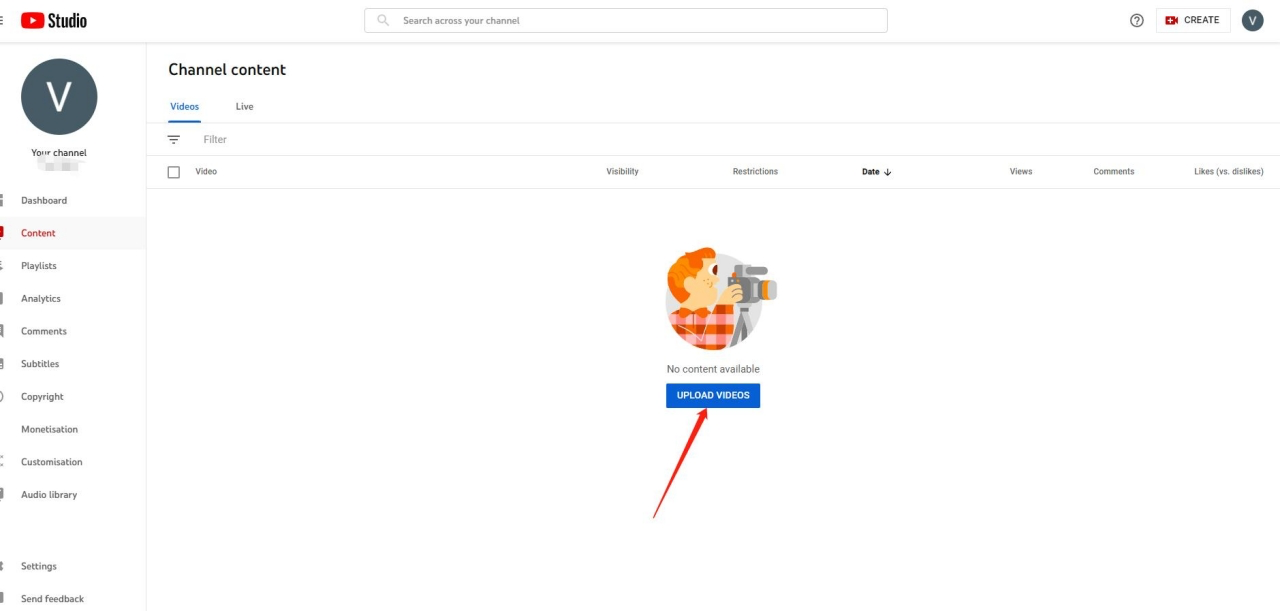
-
The URL appears on the page after the video is uploaded. However, the video cannot be watched as expected. Access the URL with a new browser tab to test its validity.
-
Pass the robot verification. This verification cannot be skipped. Otherwise, the reviewer cannot watch the video and will reject your request.
-
Copy the URL of the video page that appears after the robot verification is passed, and paste it to the Notes field on the App Review Information page.
Do not use an IP camera (IPC) that has cloud storage configured to make the video. Otherwise, the request might be rejected due to in-app purchase.
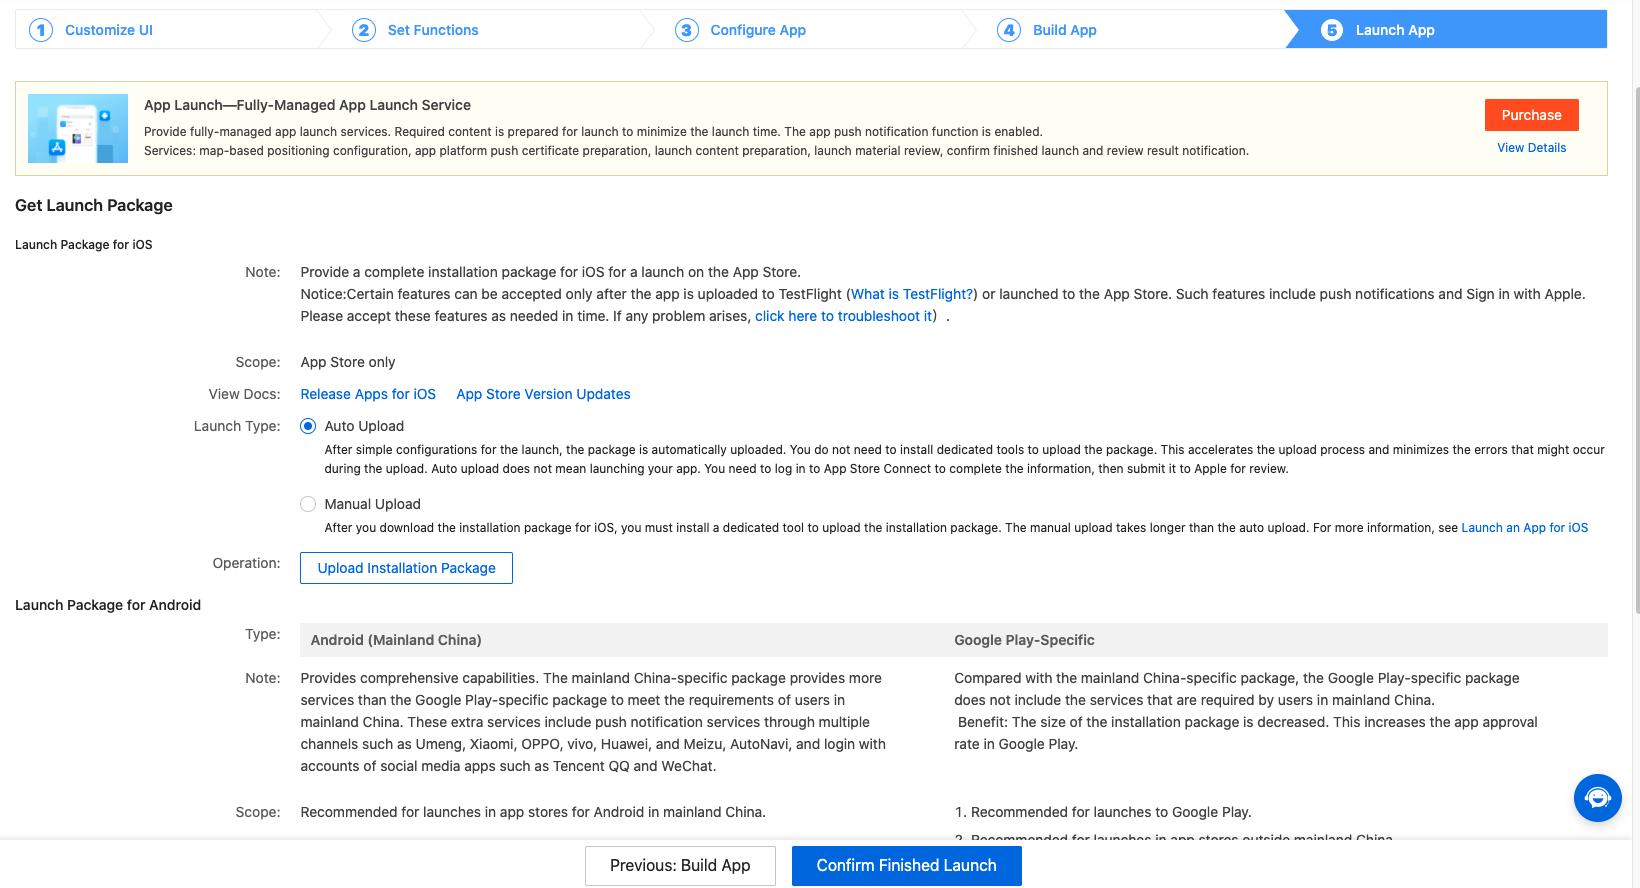
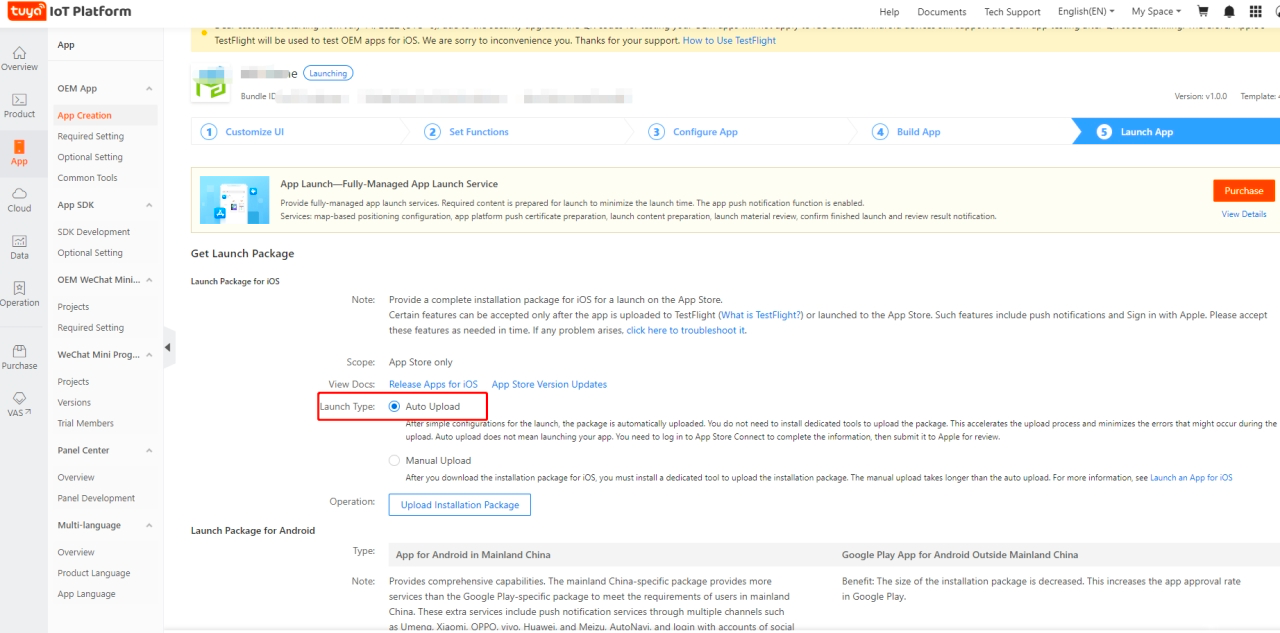
Step 3: Upload app package
Method 1: Tuya Developer Platform
-
Log in to the Tuya Developer Platform.
-
Go to the Launch App step, set Launch Method to Automatic Upload, and then click Upload Installation Package.
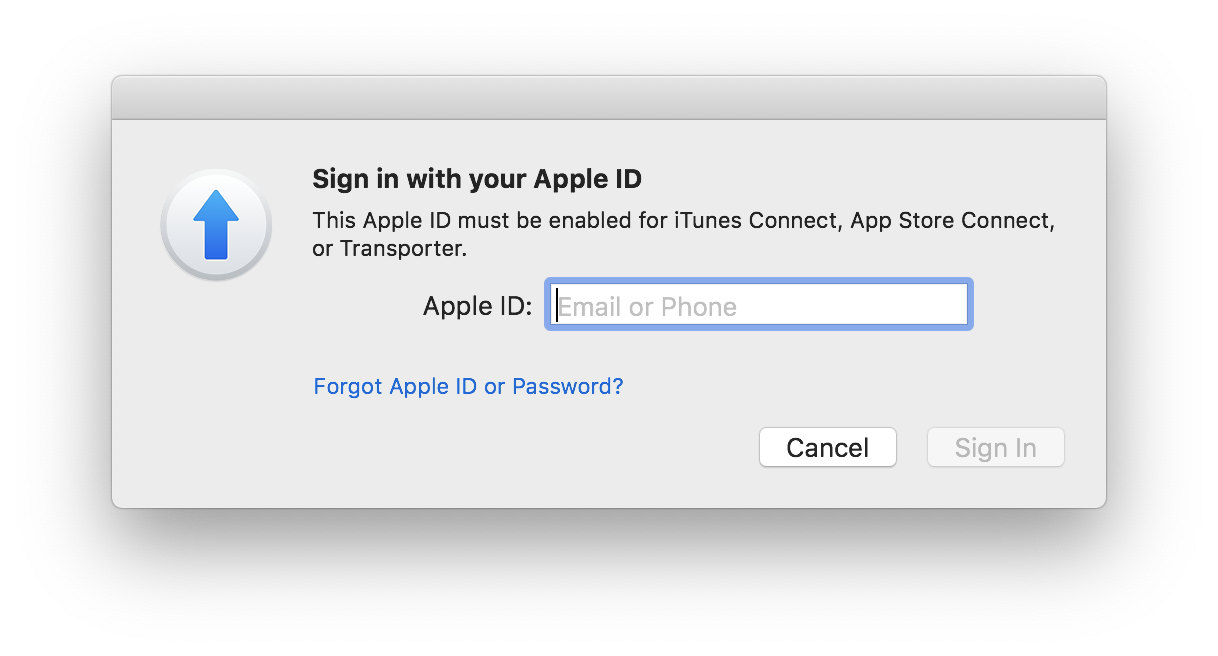
-
In the dialog box that appears, enter the Apple ID and app-specific password to upload the package to App Store Connect.
To view the documentation about how to check the Apple App ID, click How to Get Apple App ID next to the Apple App ID field.
Method 2: Transporter
Do not use the Application Loader tool for the upload. Otherwise, certain unknown issues might cause the upload to be failed. Instead, use the newly launched Transporter tool to upload the package.
-
Use a Mac computer to log in to the Transporter app.
-
Click ADD CONTENT and select the prepared official version of the app installation package suffixed with
.ipa.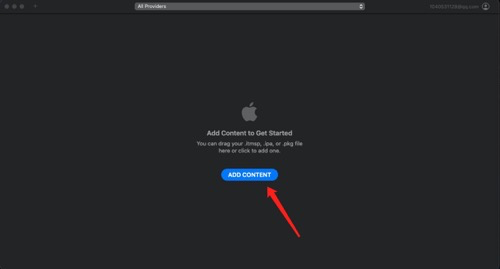
-
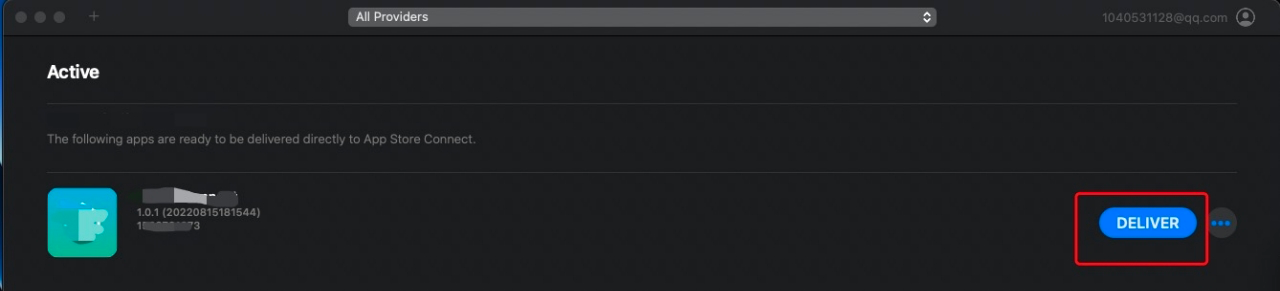
Click DELIVER. If the package upload is stuck, try again.
-
After the app installation package is uploaded, wait for 15 to 60 minutes, return to the App Store Connect page, select this installation package in the Build section, and then click Complete.
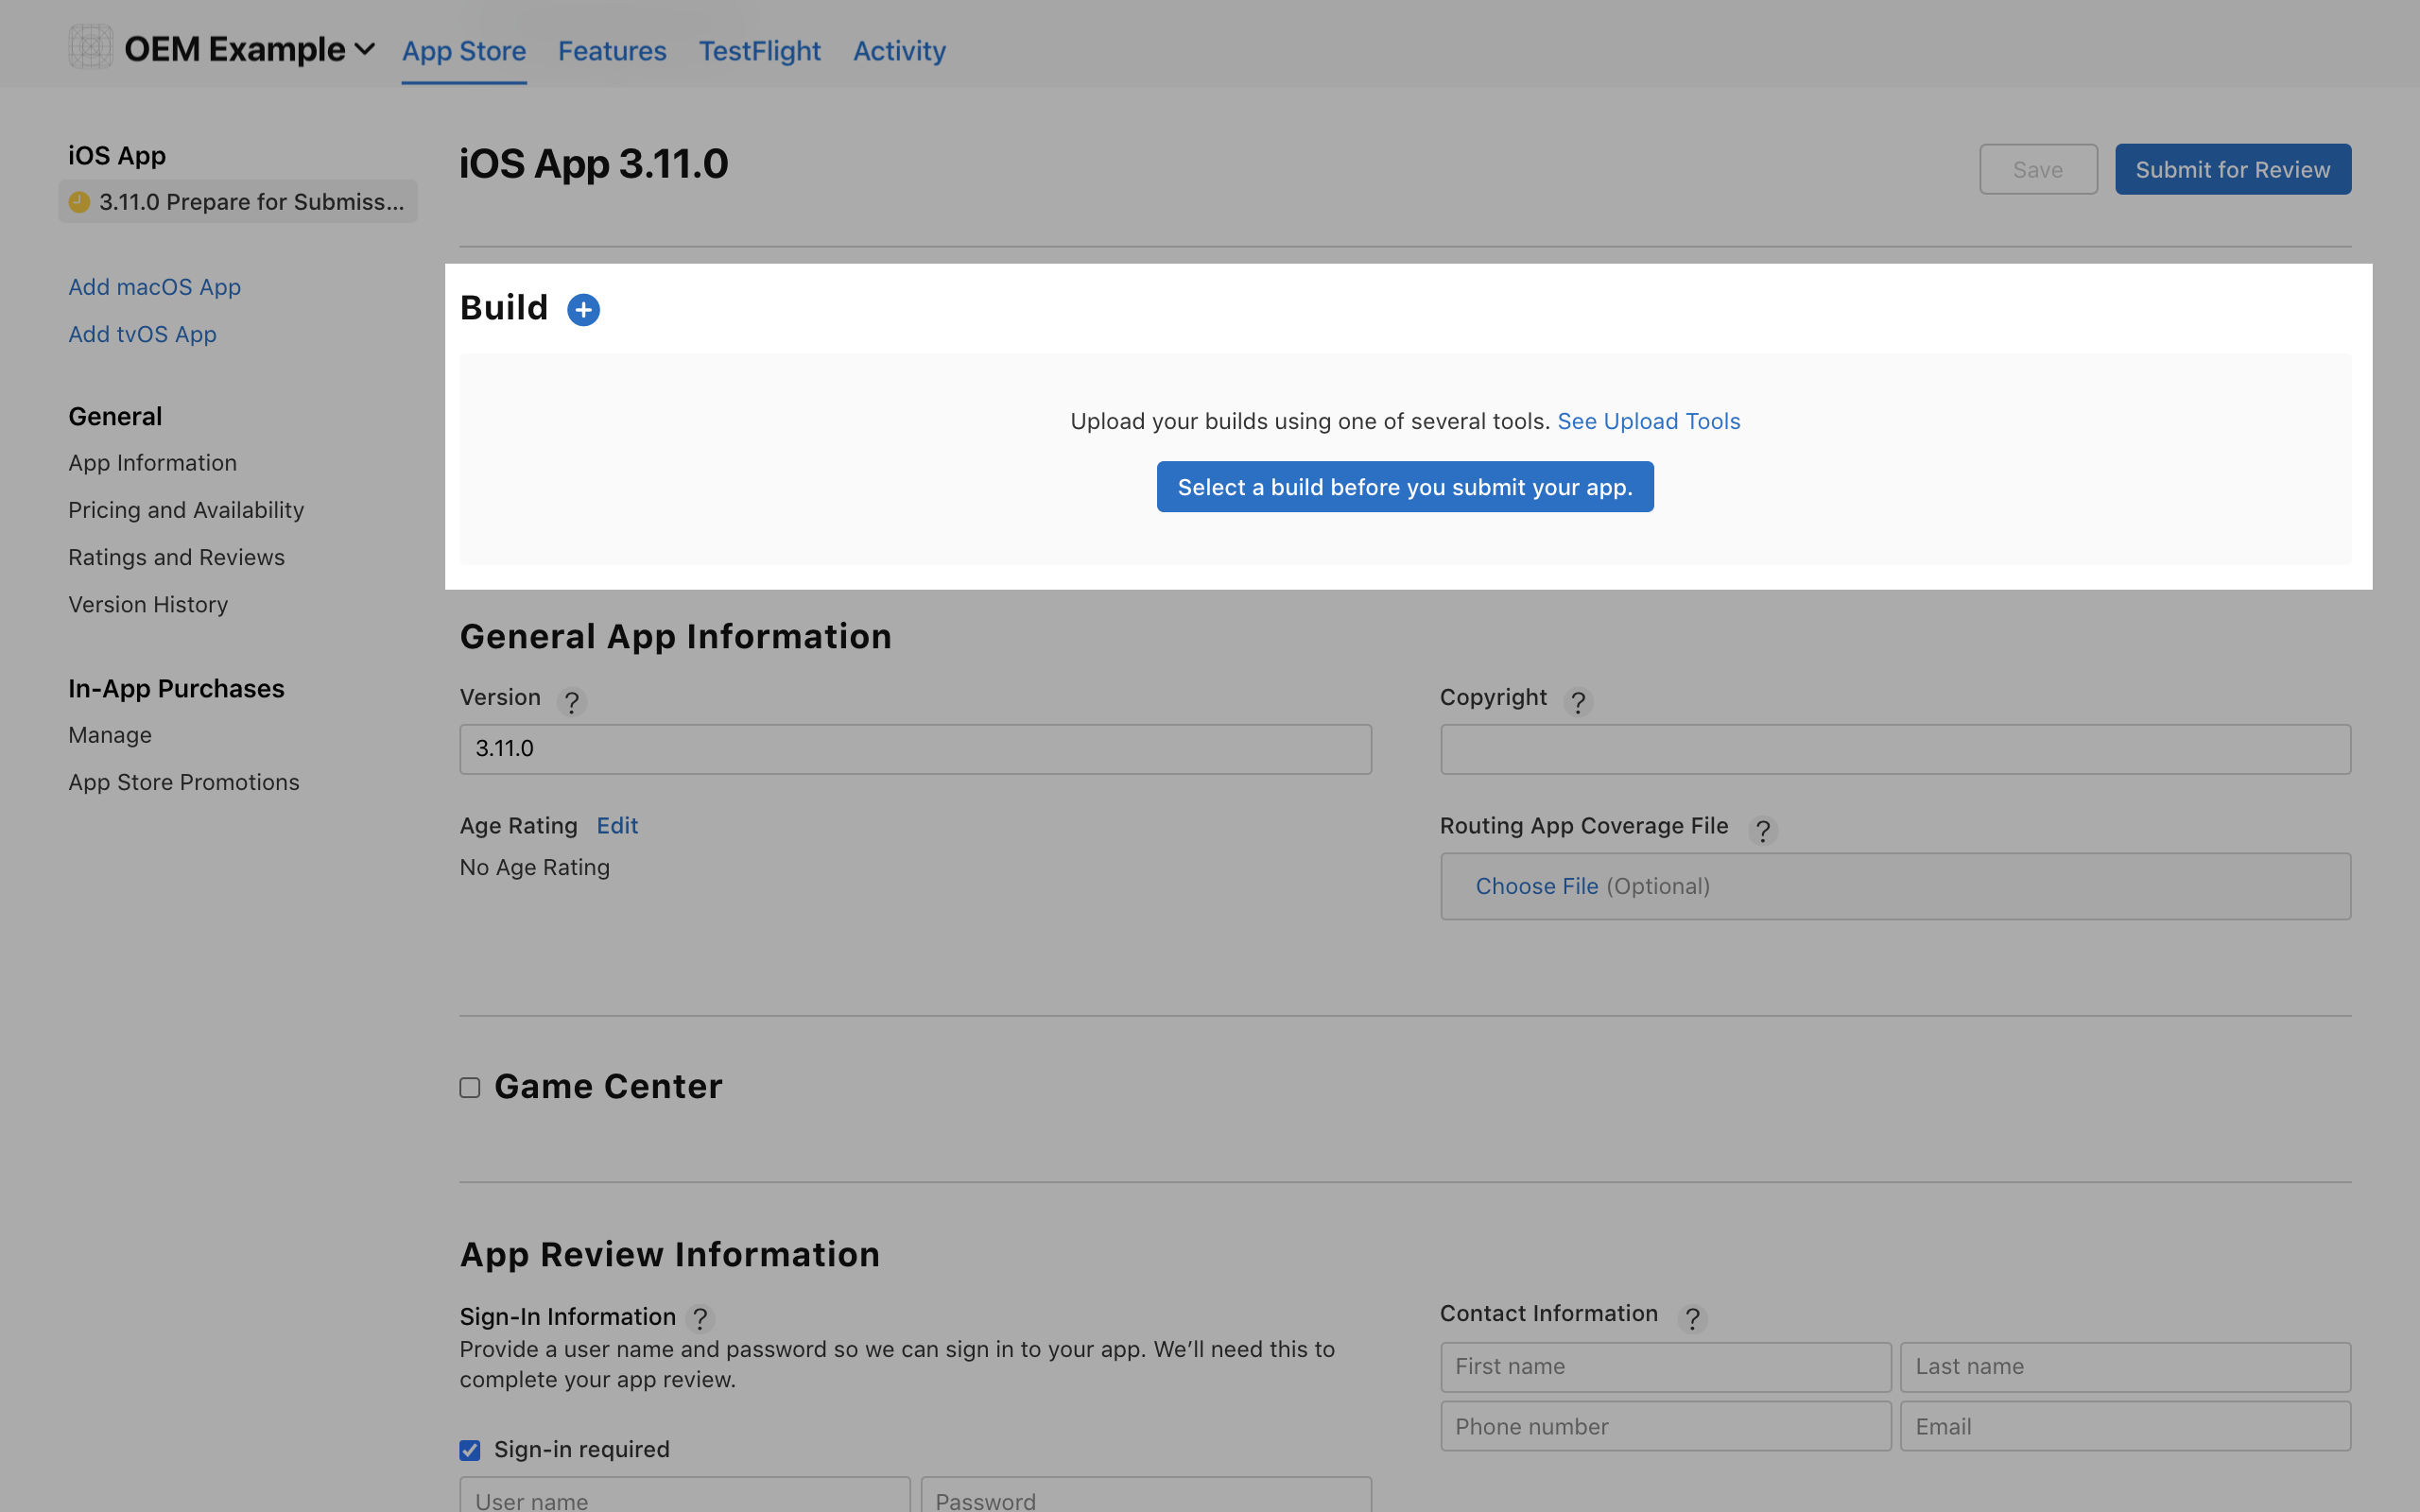
Step 4: Submit for review
Click Submit for Review in the top right corner of the page to submit all information.
It takes one to three workdays to complete the review. The approved app will be automatically launched on the App Store. An approval notification will be sent to the contact email address.
You can contact Tuya to request support if any problem arises when you launch an app.
Is this page helpful?
YesFeedbackIs this page helpful?
YesFeedback


