Configure Siri for iOS
This topic describes how to configure Siri on iOS for your OEM app.
Before you start
Log in to the Apple Member Center and select Certificates, Identifiers & Profiles.

Step 1: Create App Group
If an App Group already exists in your Apple Developer account and the Identifier of the App Group is group.Bundle ID, you can skip this step and proceed to Step 2: Enable Siri for main application ID.
To add Siri to your existing app (referred to as the main application in this topic), you need to create an App Group.
-
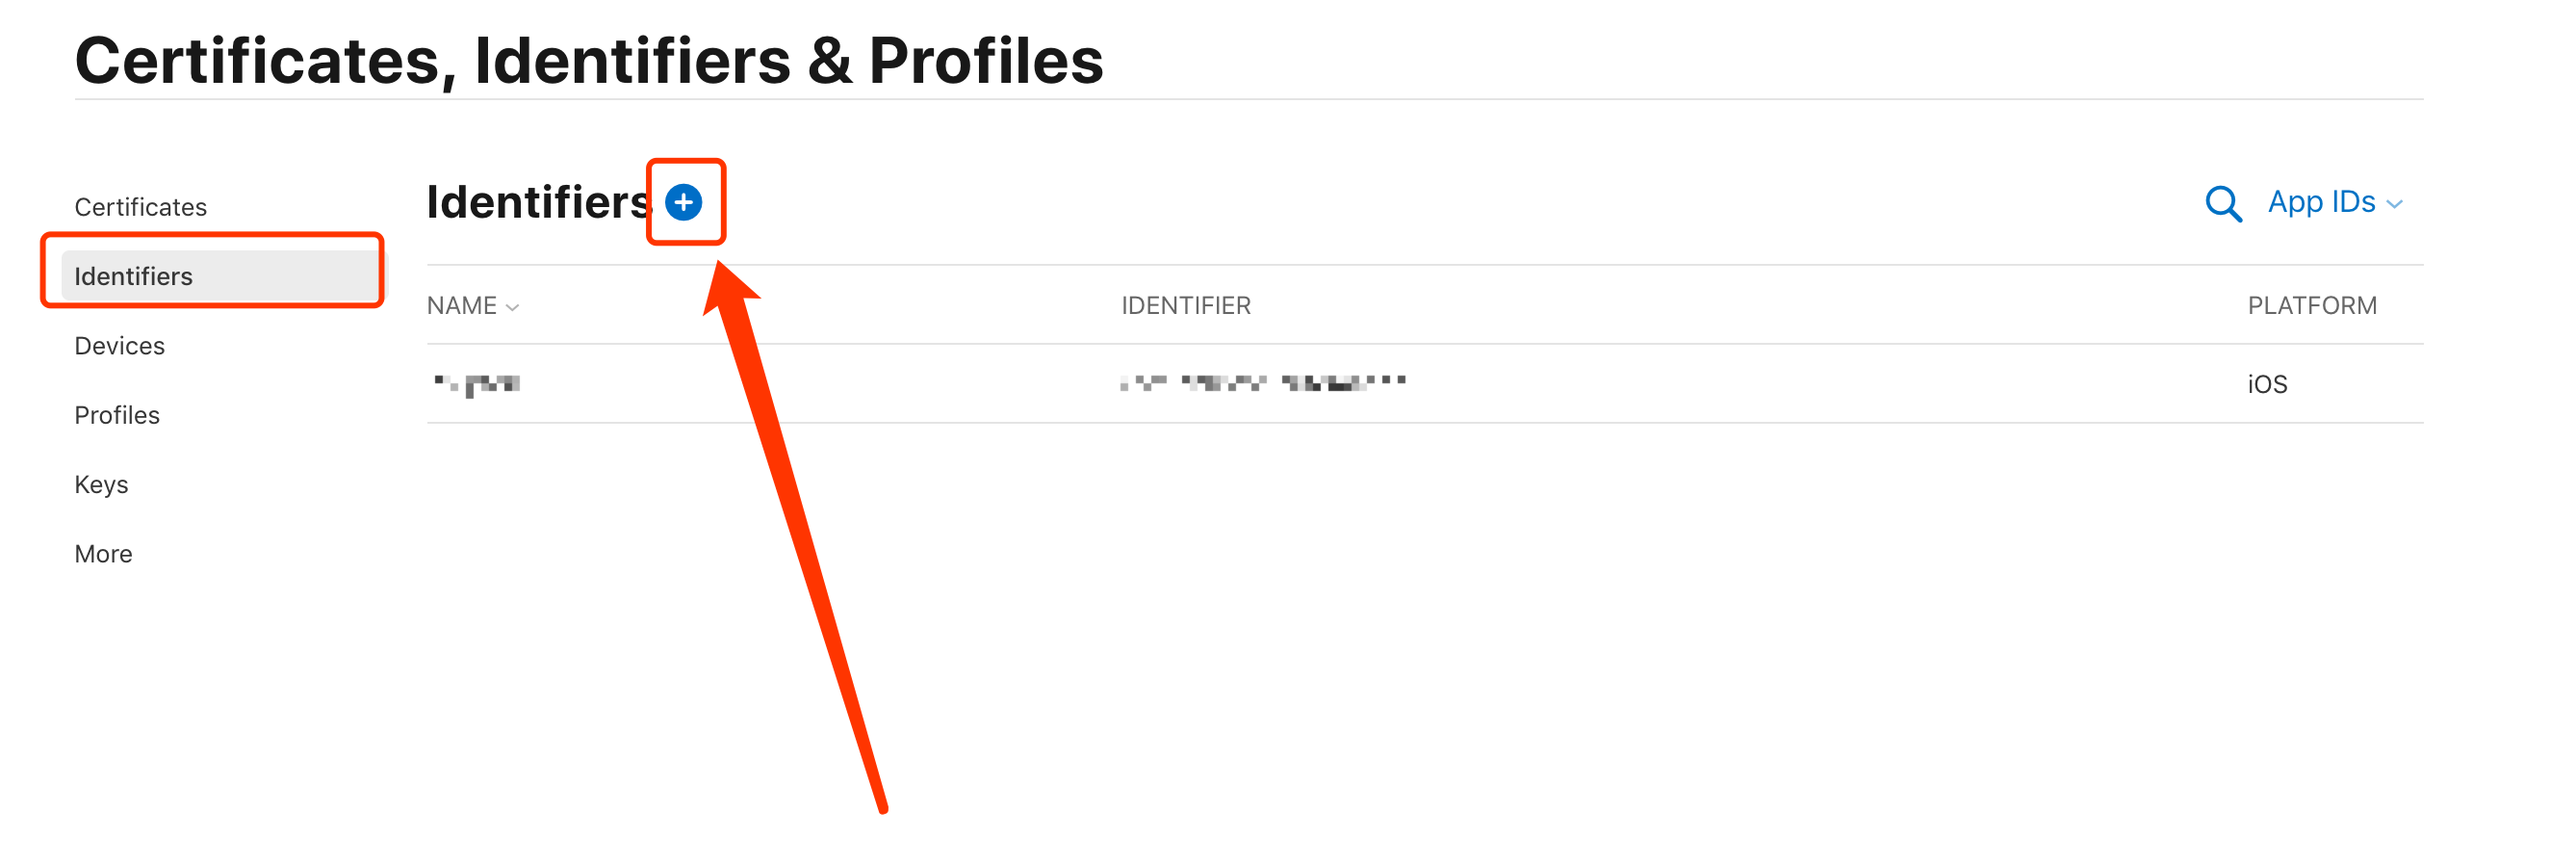
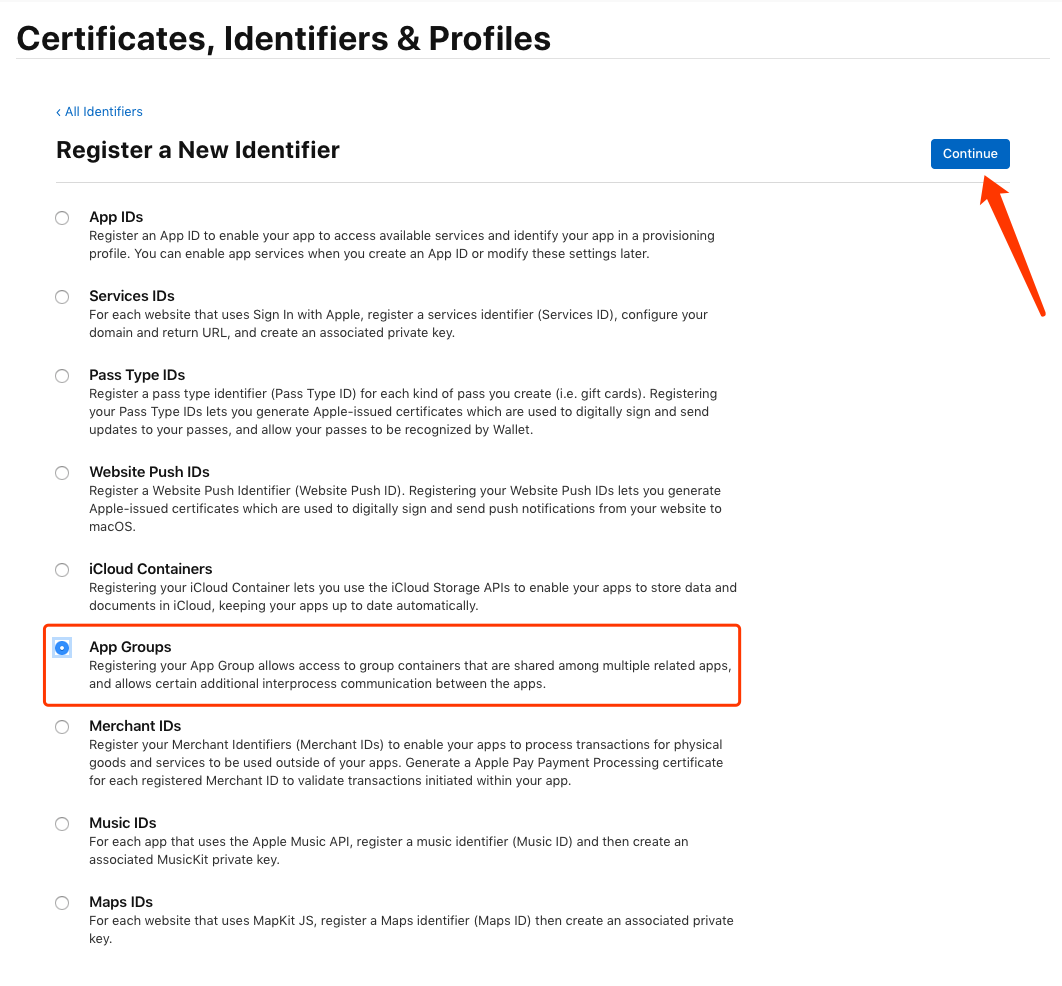
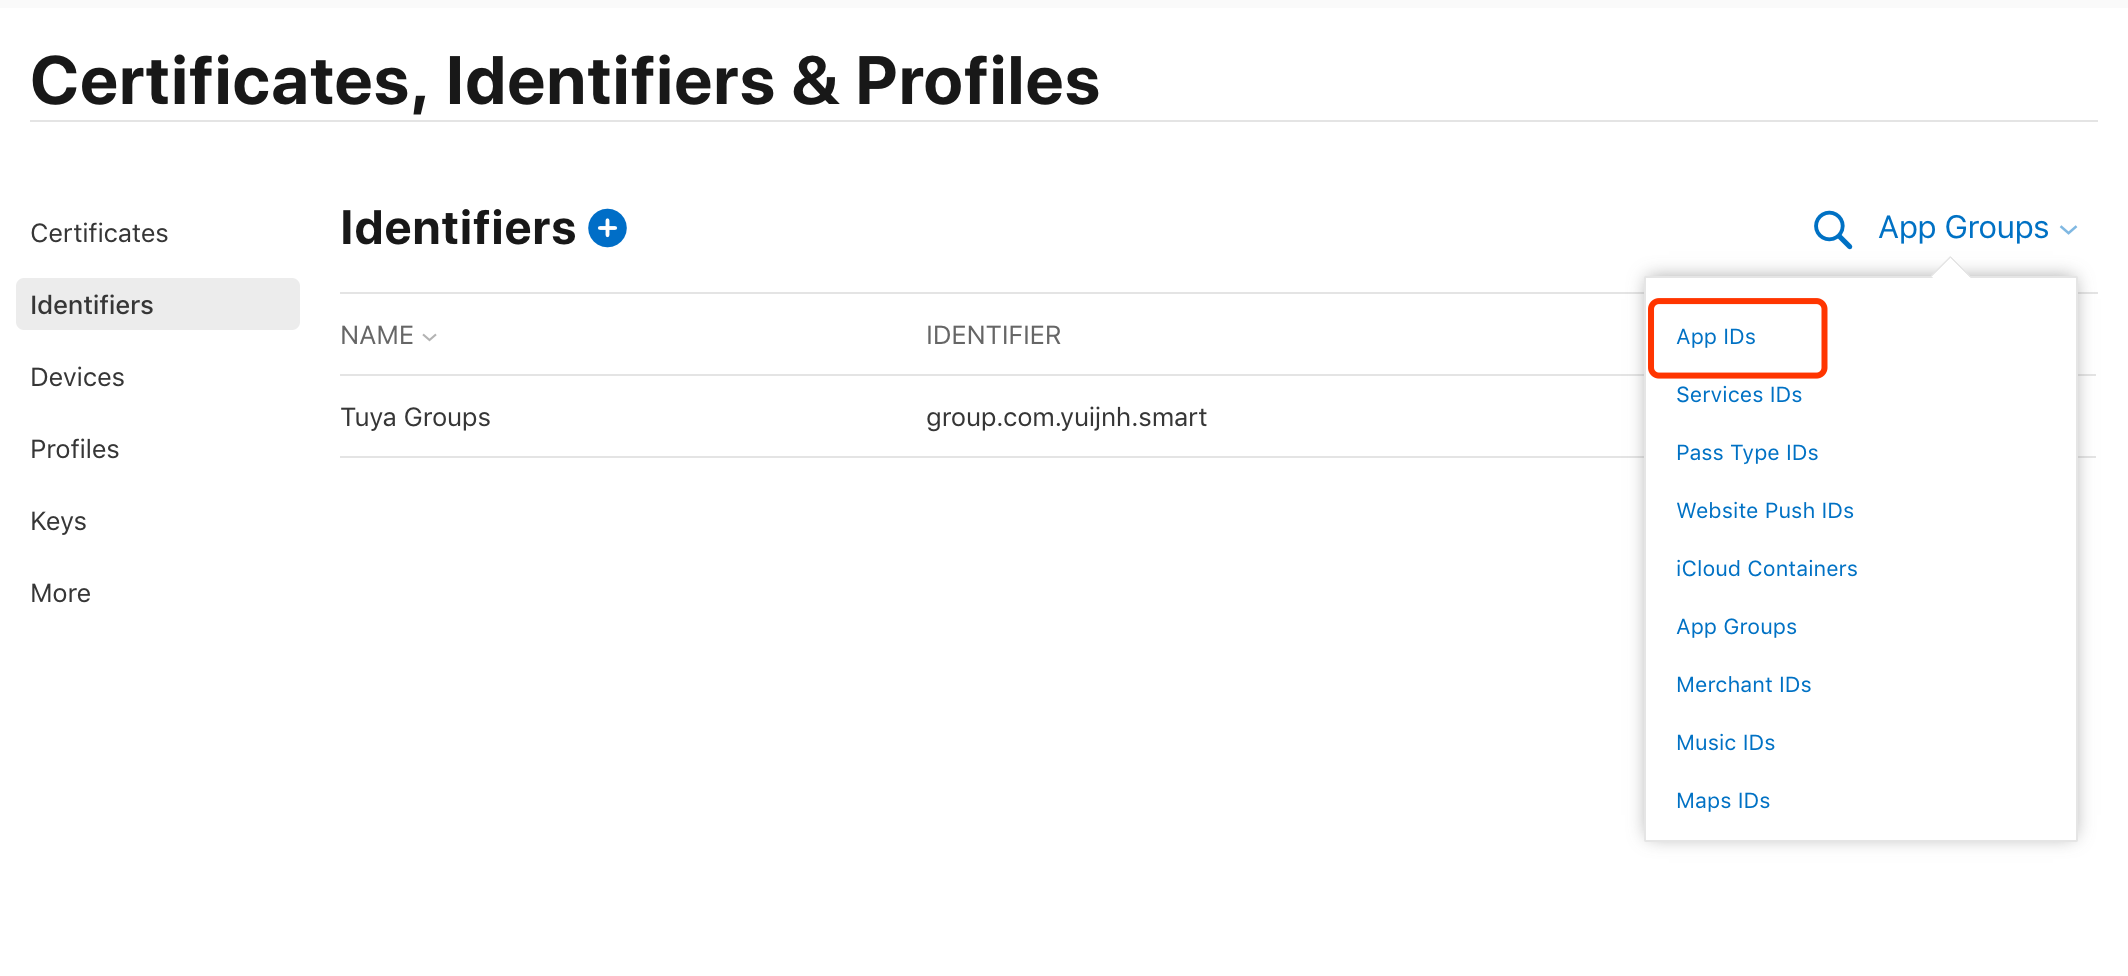
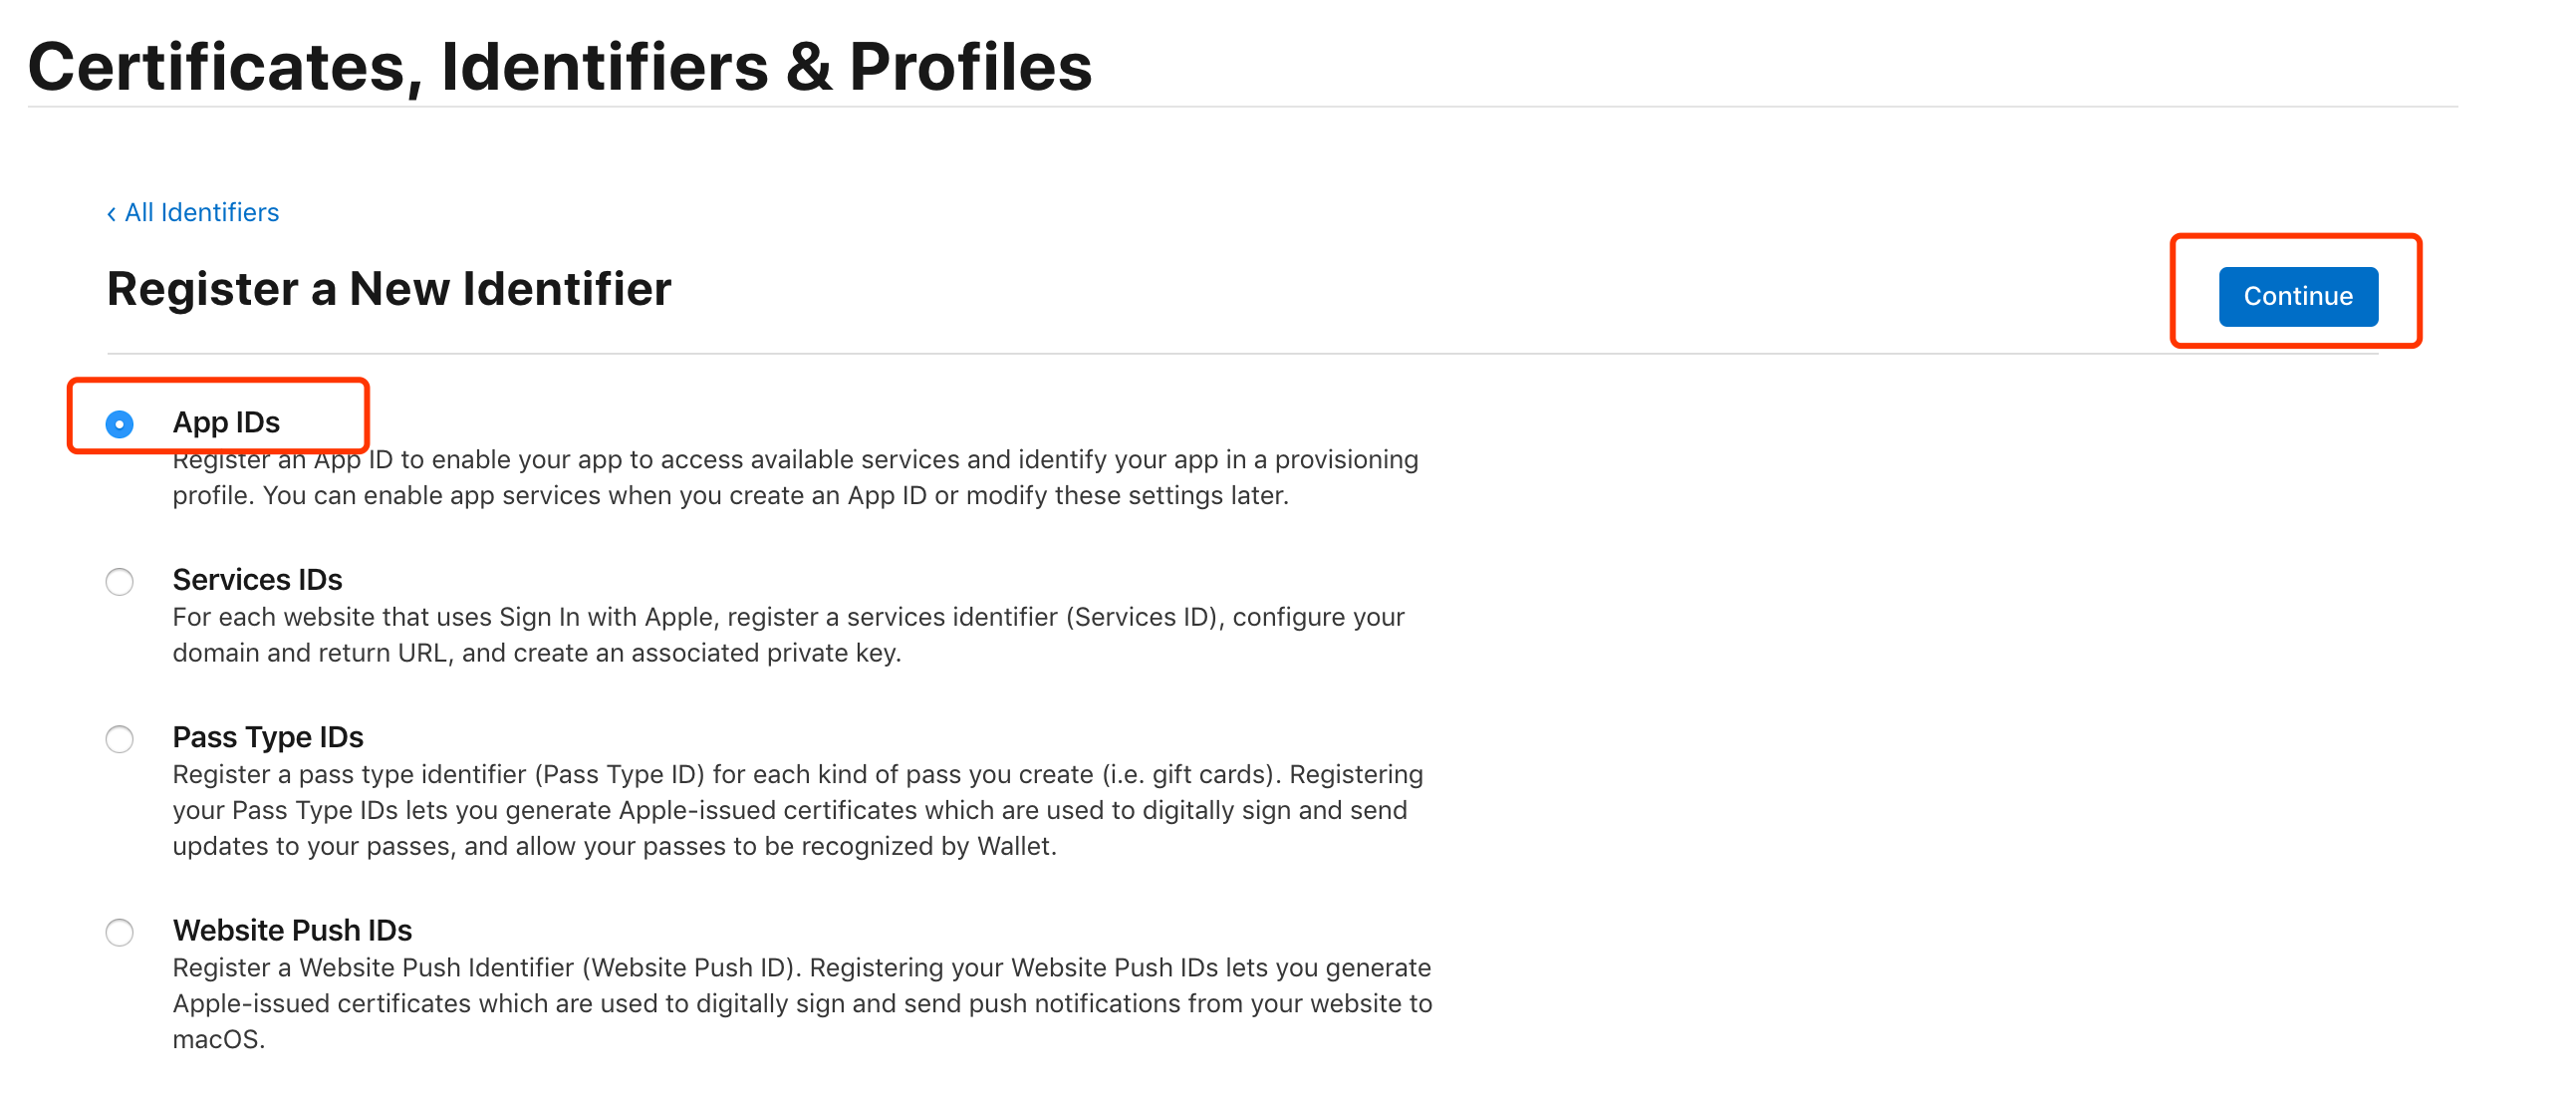
Go to the Identifiers page and click +. Select App Groups.
-
In the top right corner of the page, click Continue.
-
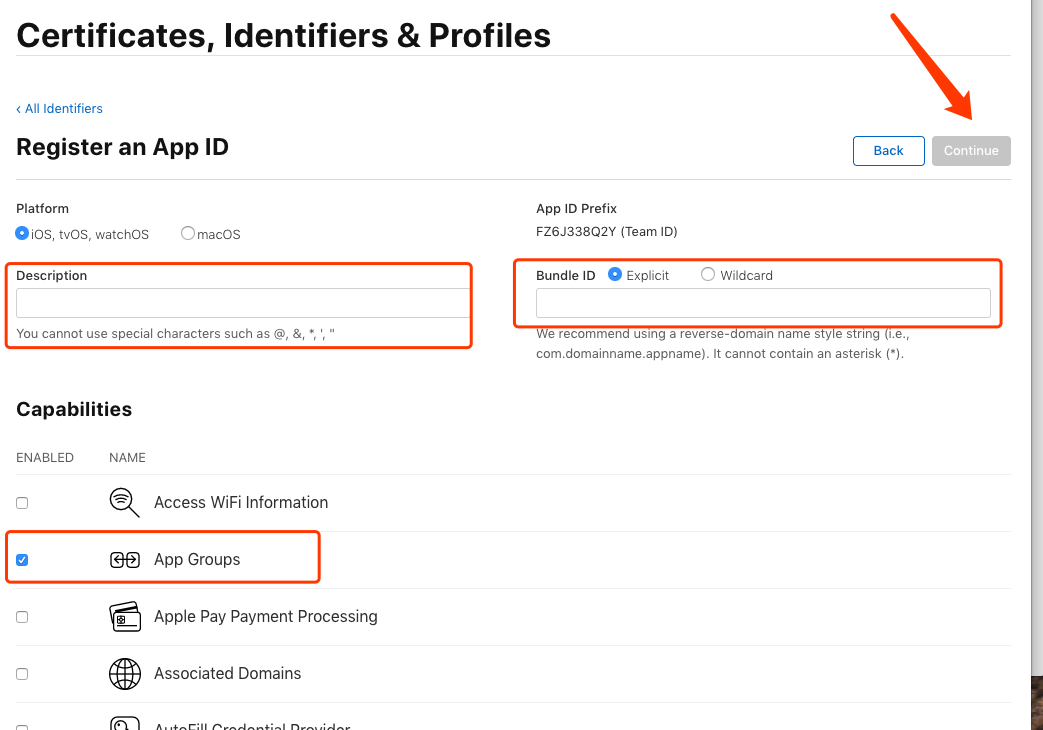
Fill in the following information:
-
Description: Enter a name for the App Group.
-
Identifier: Enter an identifier for the main application, in the following format:
group.com.xxx.xxx.com.xxx.xxxis the bundle ID of your existing app. Then, click Continue.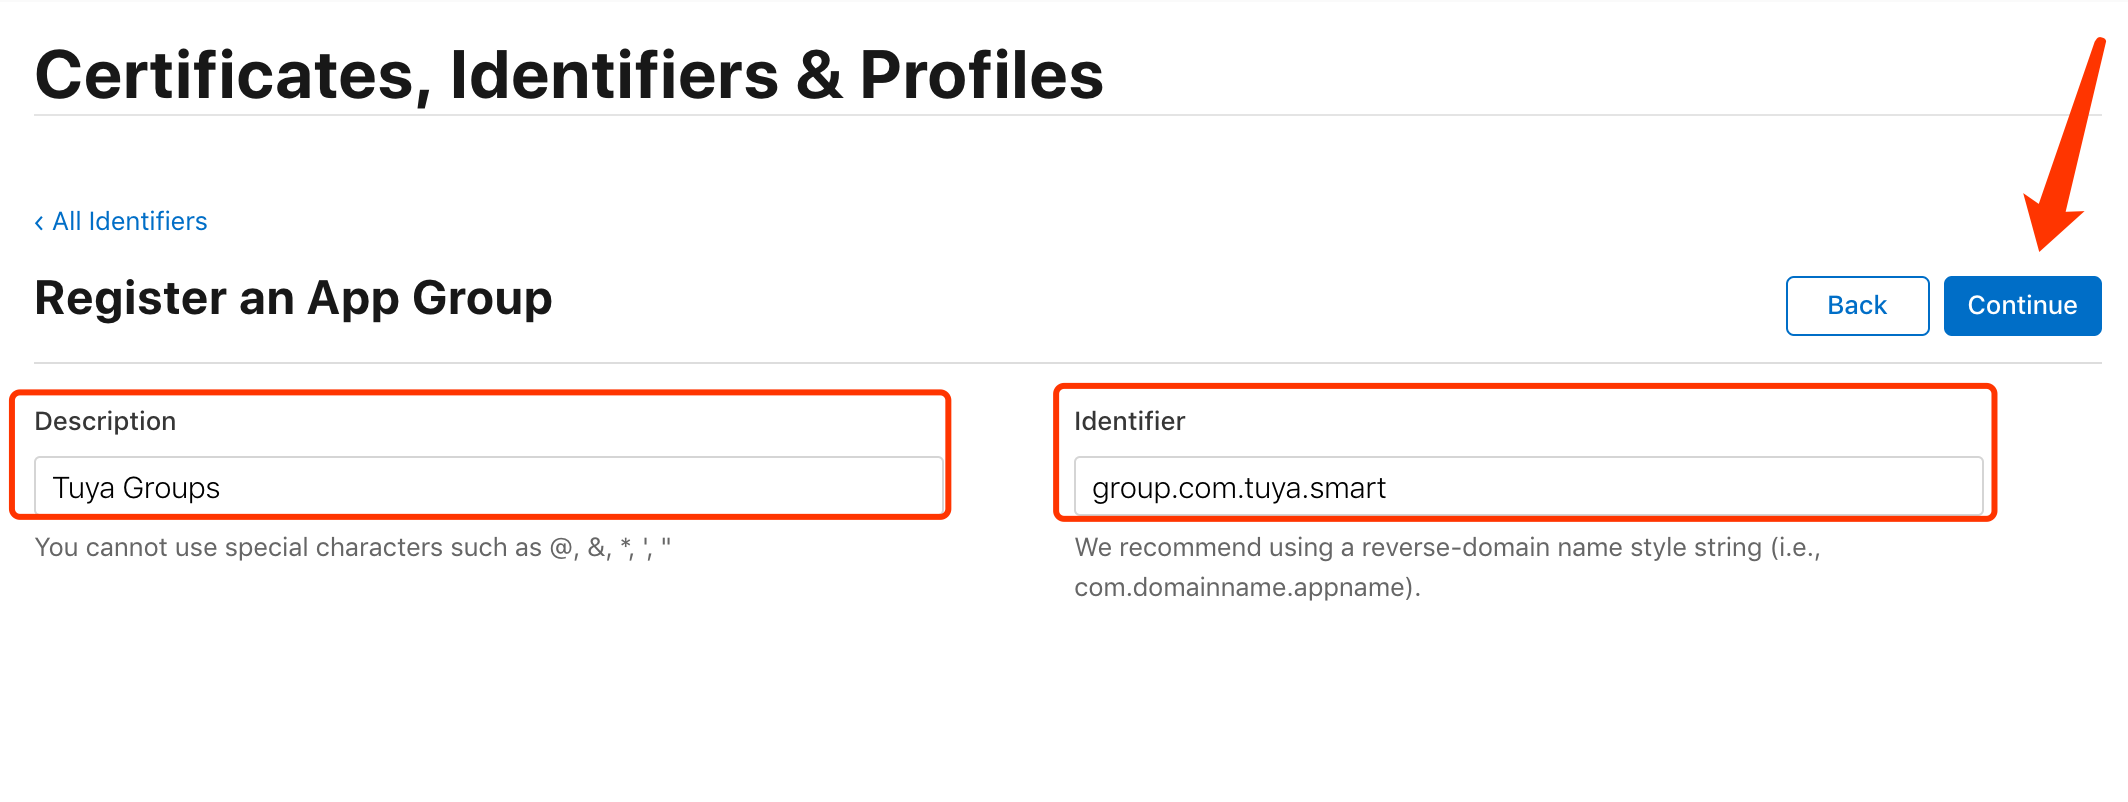
-
-
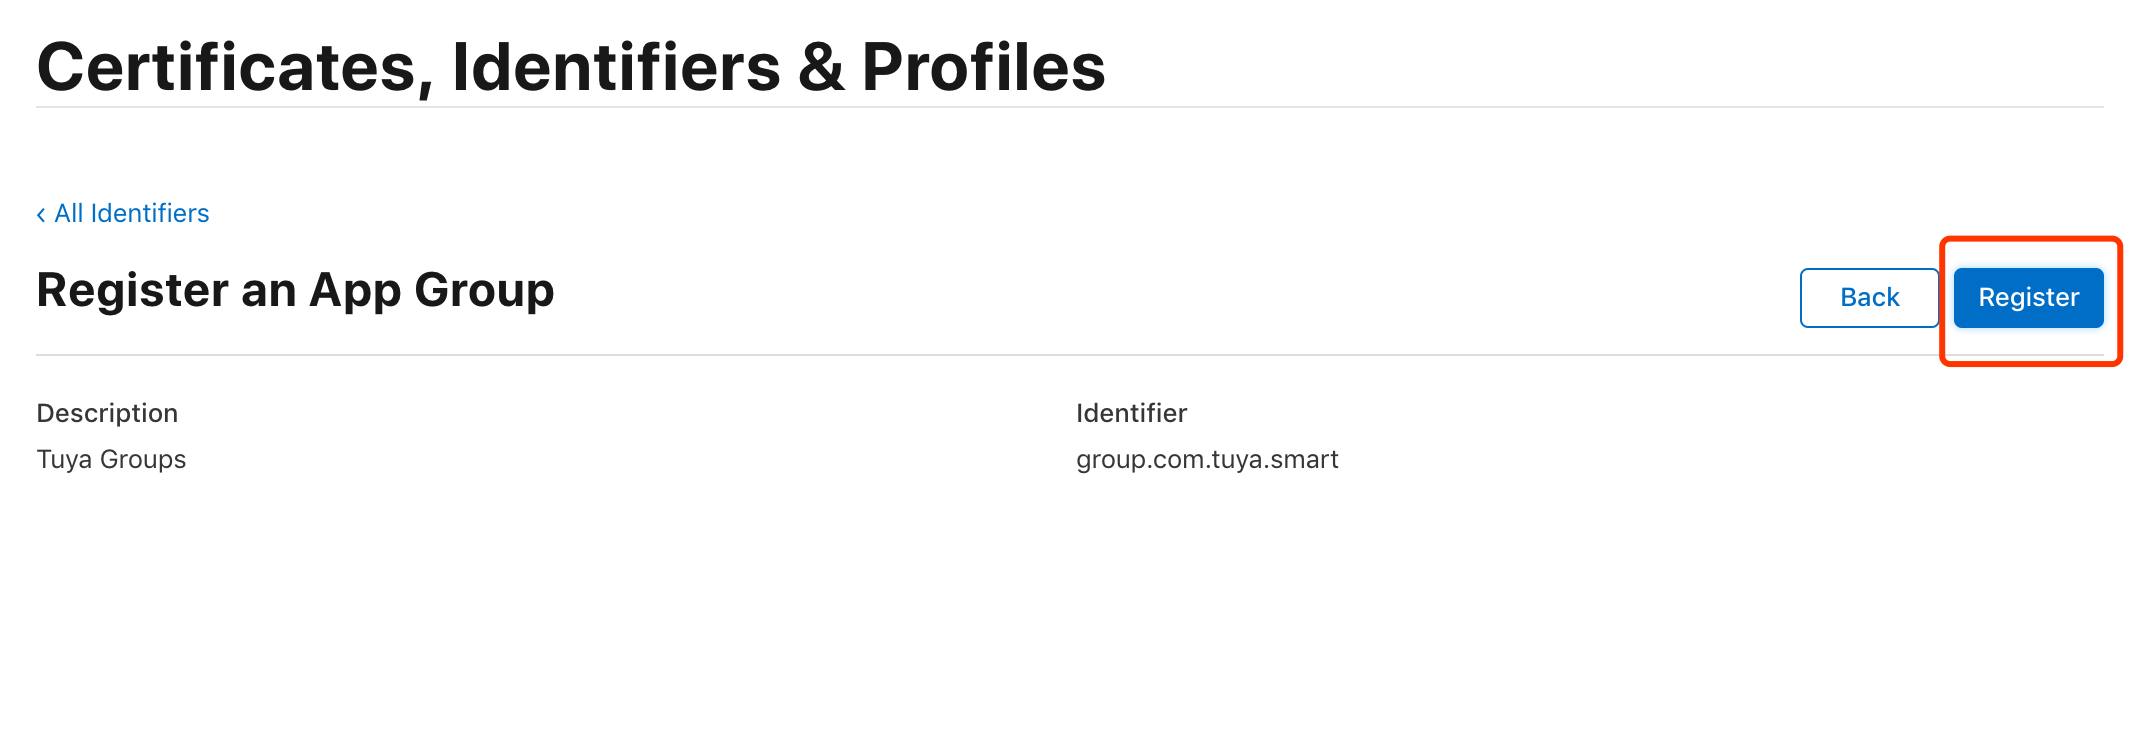
Verify the information about the App Group. To rectify any error, click Back and modify the information. After all information is confirmed, click Register.
-
Now, the App Group is created.
Step 2: Enable Siri for main application ID
-
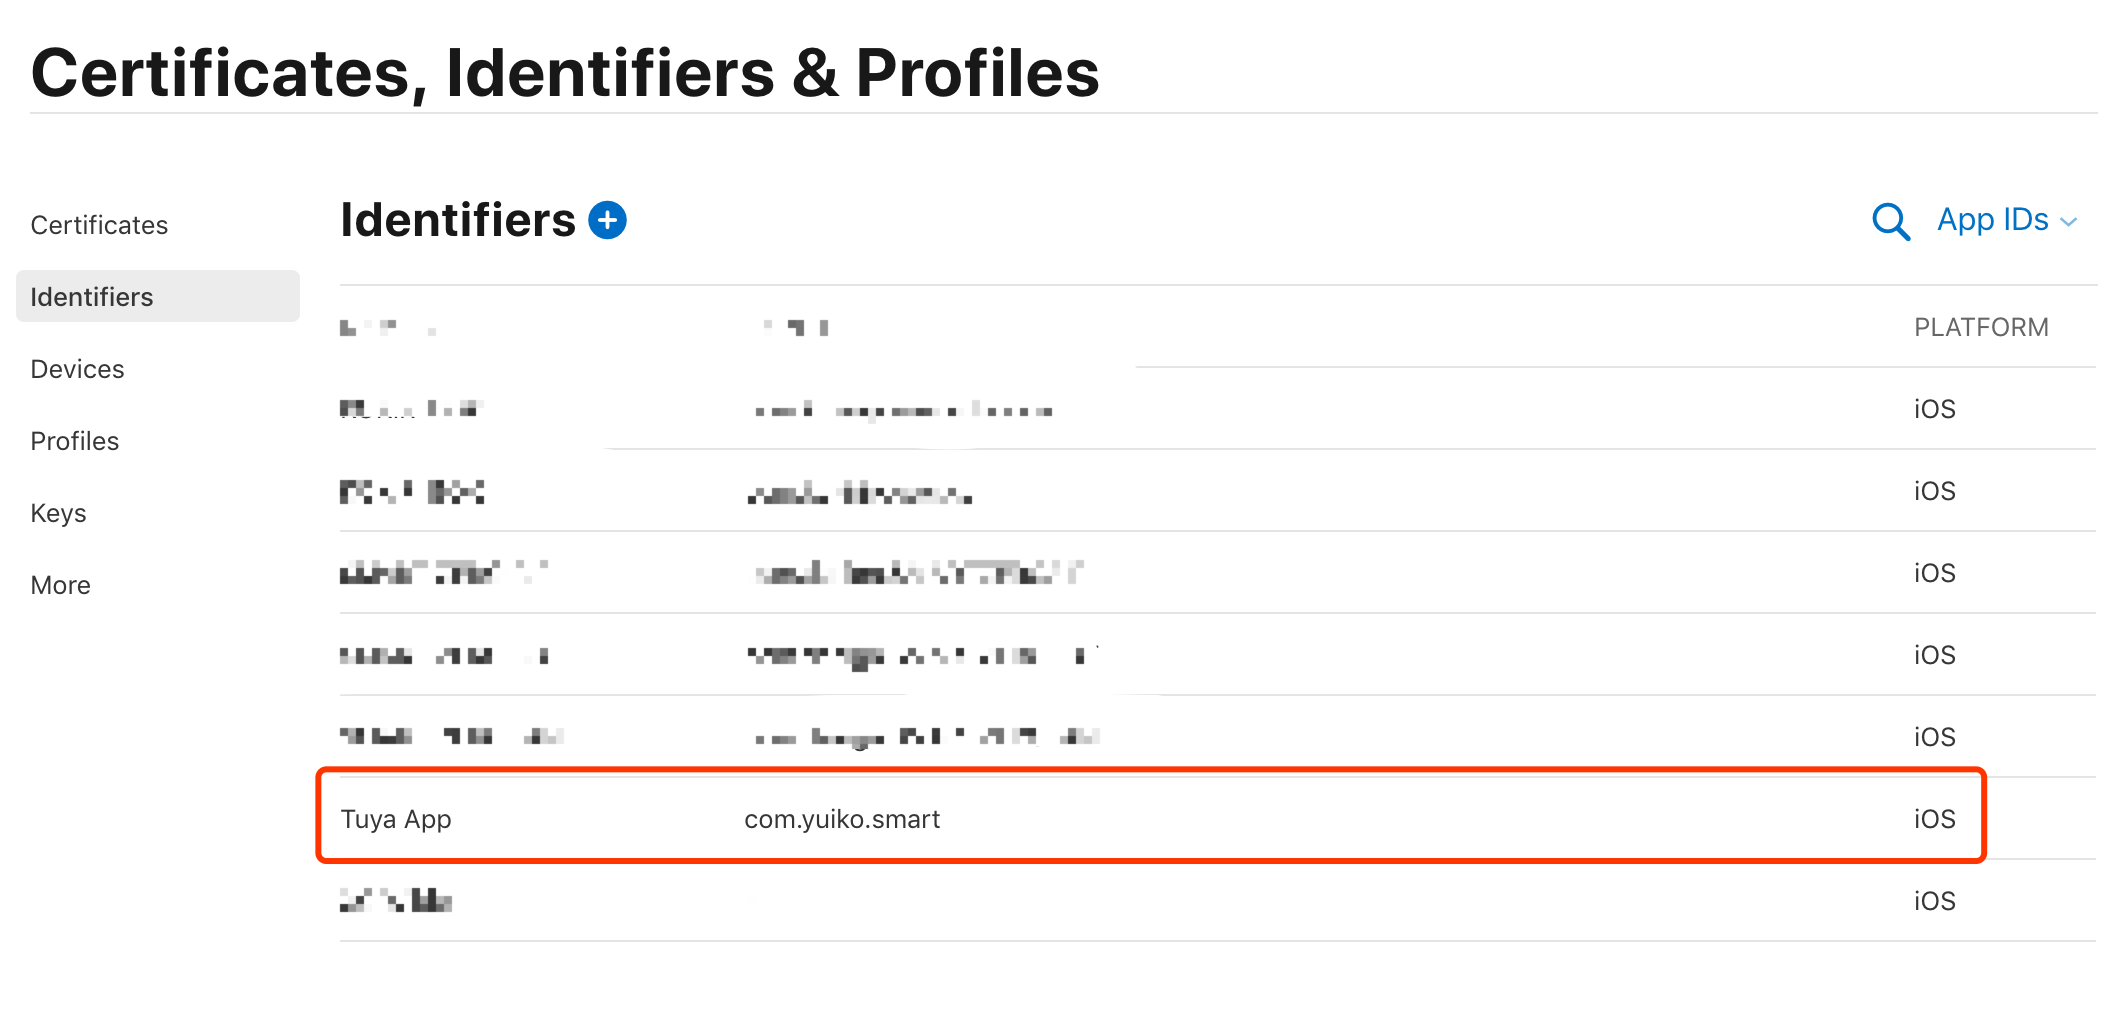
In the top right corner of the Identifiers list, select App Groups > App IDs.
-
Find and click the App ID of the main application to enter the configuration page.
-
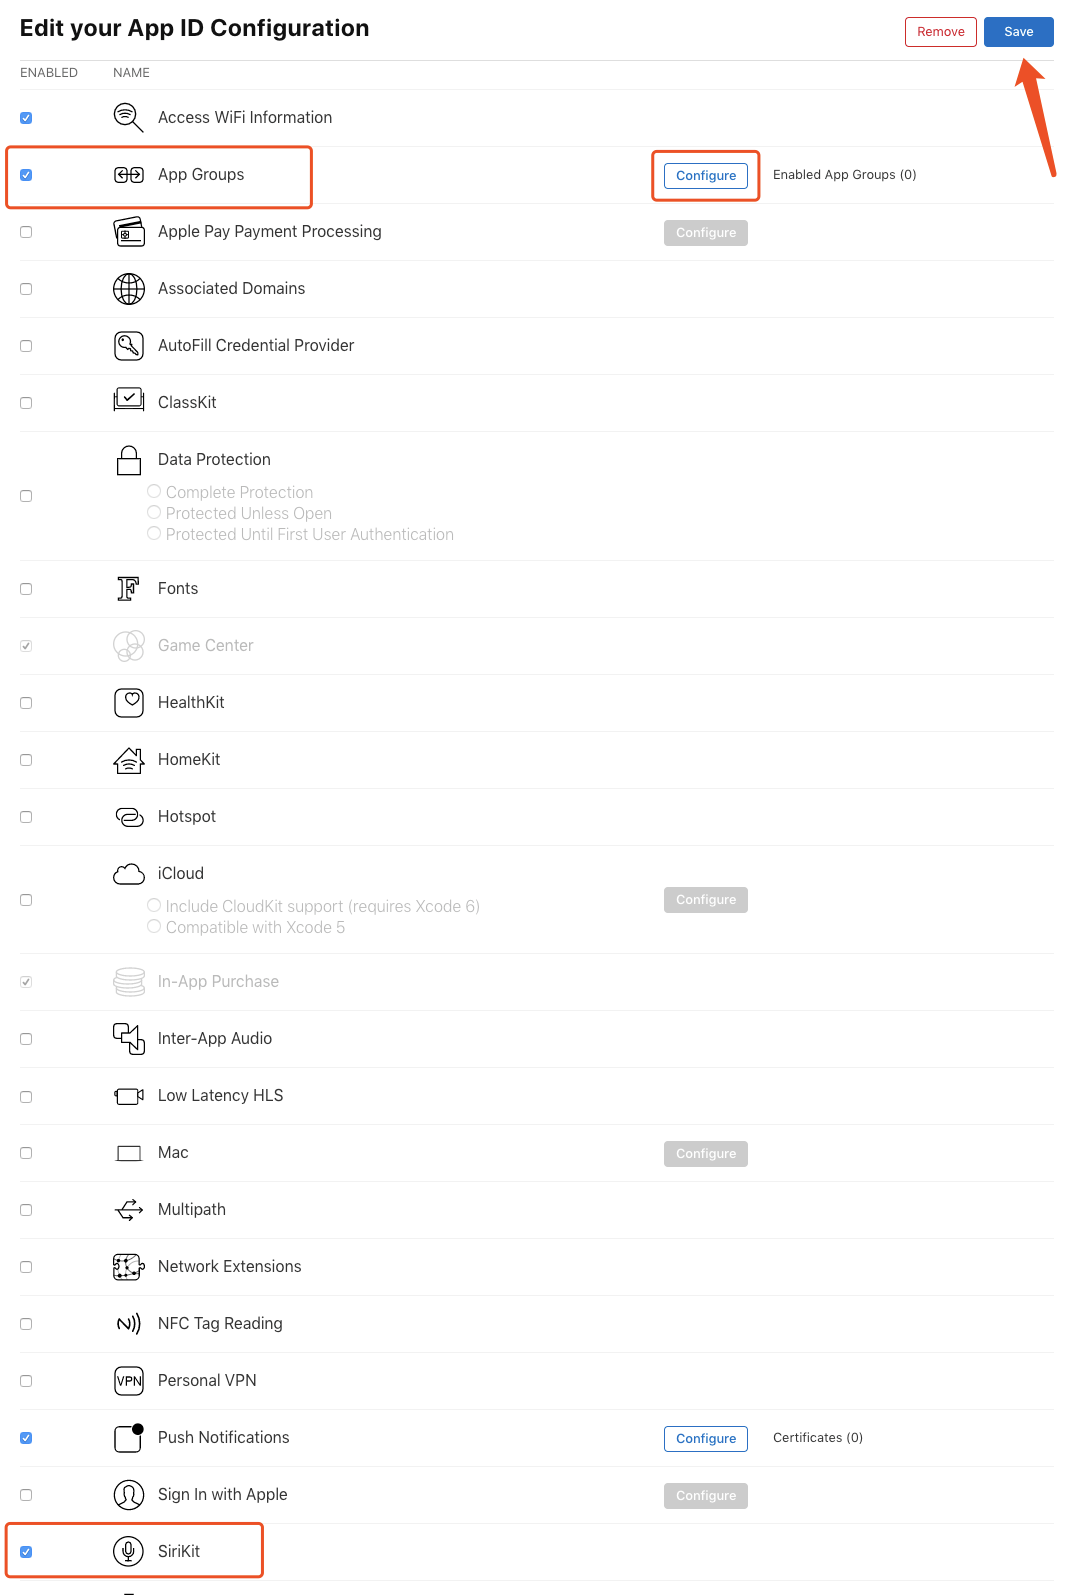
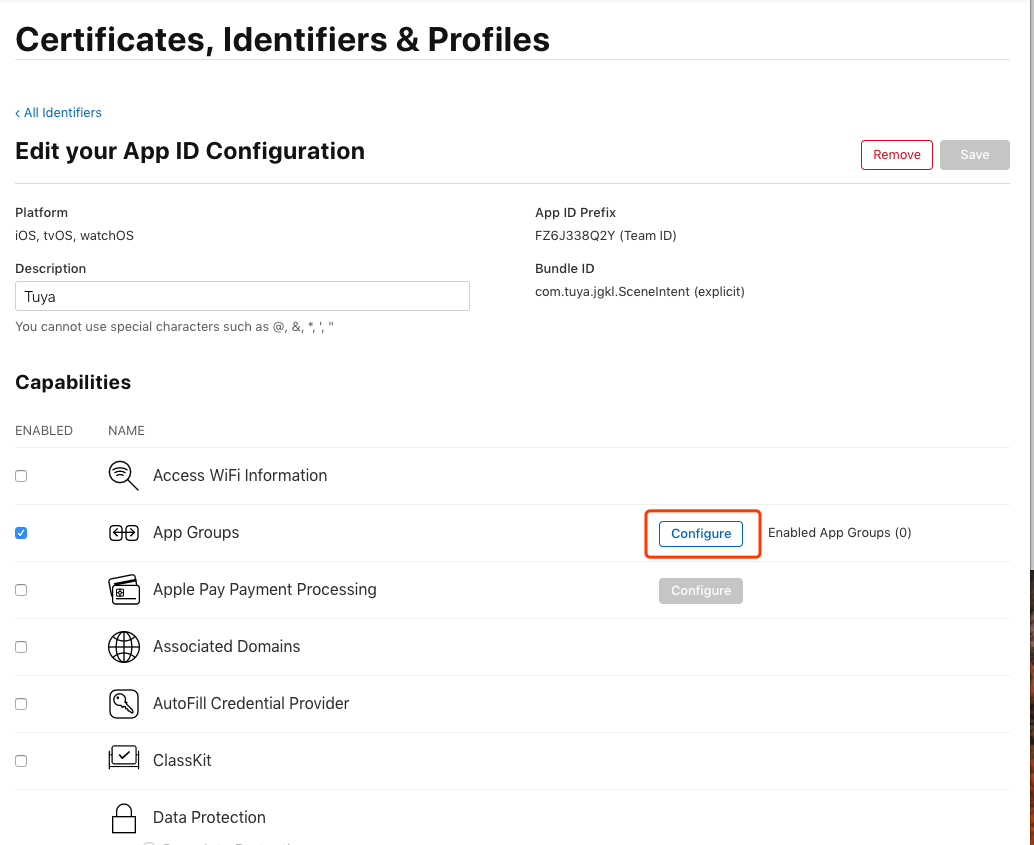
Check whether the feature App Groups is enabled. If not, select the checkbox ☑️ for this feature. Then, click Configure and select the previously created App Group. Scroll down the page and check whether the feature SiriKit is enabled. If not, select the checkbox ☑️ for this feature. Click Save in the top right corner of the page.
Step 3: Create Siri App ID
-
Go to the Identifiers page and click +. Select App IDs, and in the top right corner of the page, click Continue.
-
Fill in the following information:
-
Description: Enter a name for Siri.
-
Bundle ID: Enter a Bundle ID for Siri, in the format of Bundle ID of main application.intent.
-
Select the checkbox ☑️ for App Groups and click Continue.
-
-
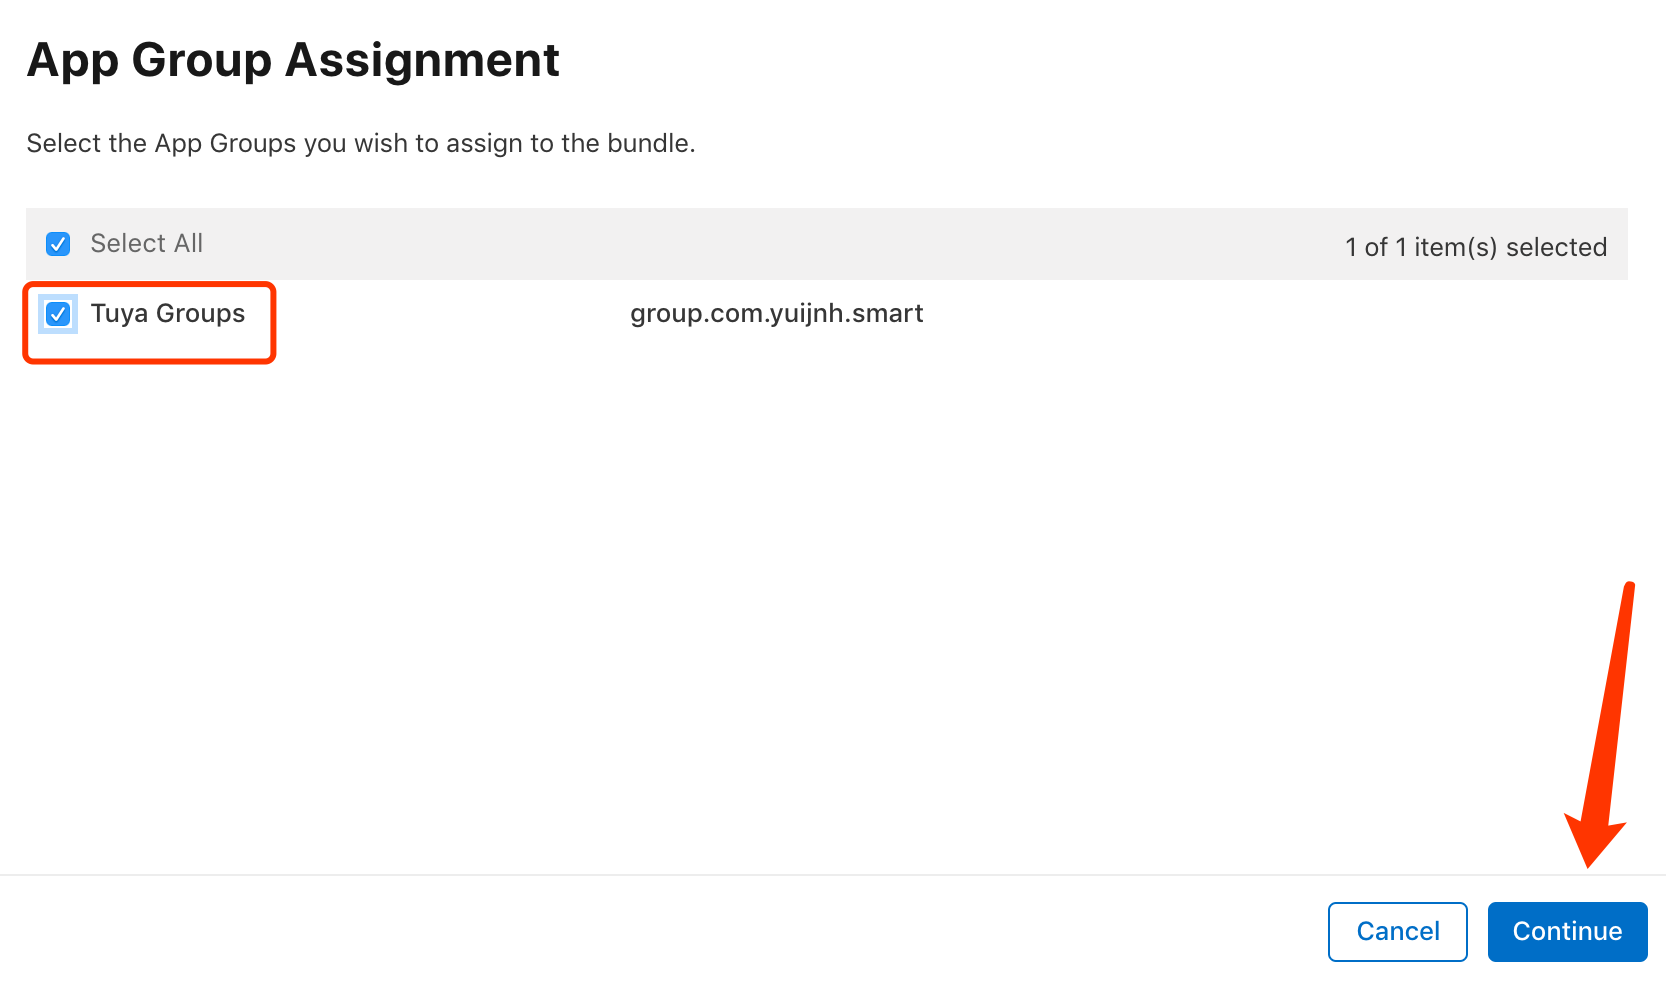
Select the previously created App ID, click Configure, and then select the App Group created in Step 1 to bind the Siri App ID with the App Group.
Step 4: Create Siri UI app ID
-
Go to the Identifiers page and click +. Select App IDs.
-
In the top right corner of the page, click Continue.
-
Fill in the following information:
-
Name: Enter a name for Siri UI.
-
Bundle ID: Enter a Bundle ID for Siri UI, in the format of
Bundle ID of main application.intentui. -
Select the checkbox ☑️ for App Groups and click Continue.
-
-
Select the previously created App ID, click Configure, and then select the App Group created in Step 1 to bind the Siri UI App ID with the App Group.
Step 5: Generate new .mobileprovision profile for main application
The configuration of the main application has been modified with Siri added, so a new .mobileprovision profile must be generated.
-
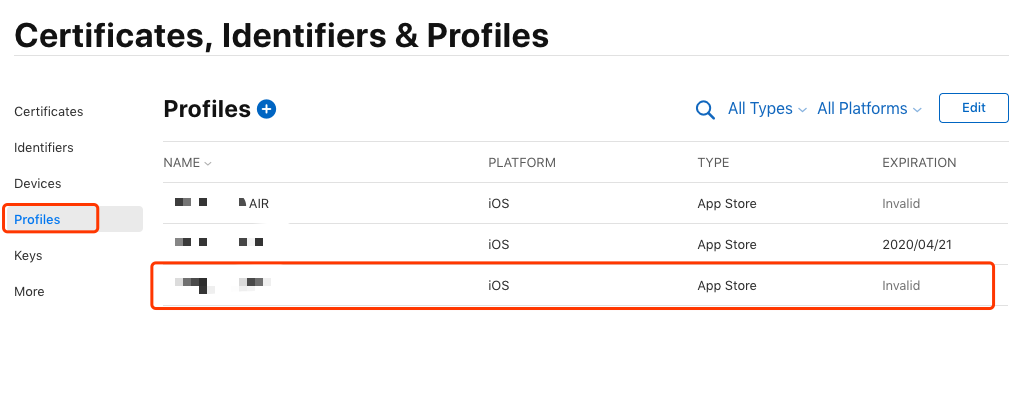
Go to the Profiles page and click the main application to modify its information.
-
In the Certificates section, select a new distribution certificate. Multiple distribution certificates with the same name might occur. In this case, determine the creation time of each certificate by the expiration time next to the certificate name. If the creation time is uncertain, select the last certificate and click Save.
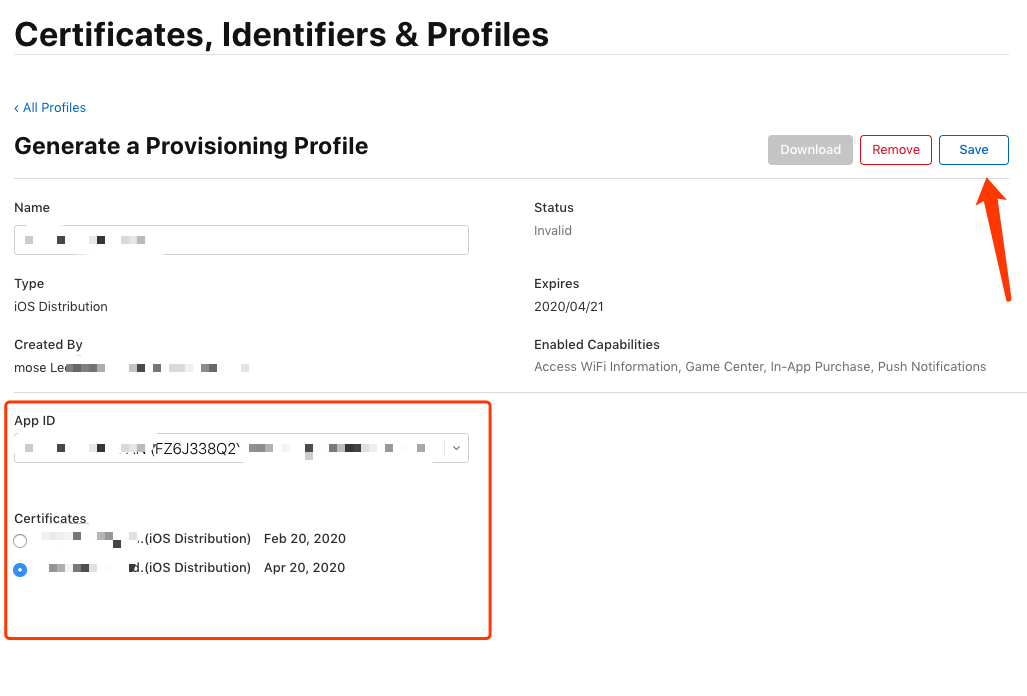
-
Now, the
.mobileprovisionprofile for the main application is configured. Click Download to download the profile and send it to Tuya’s staff.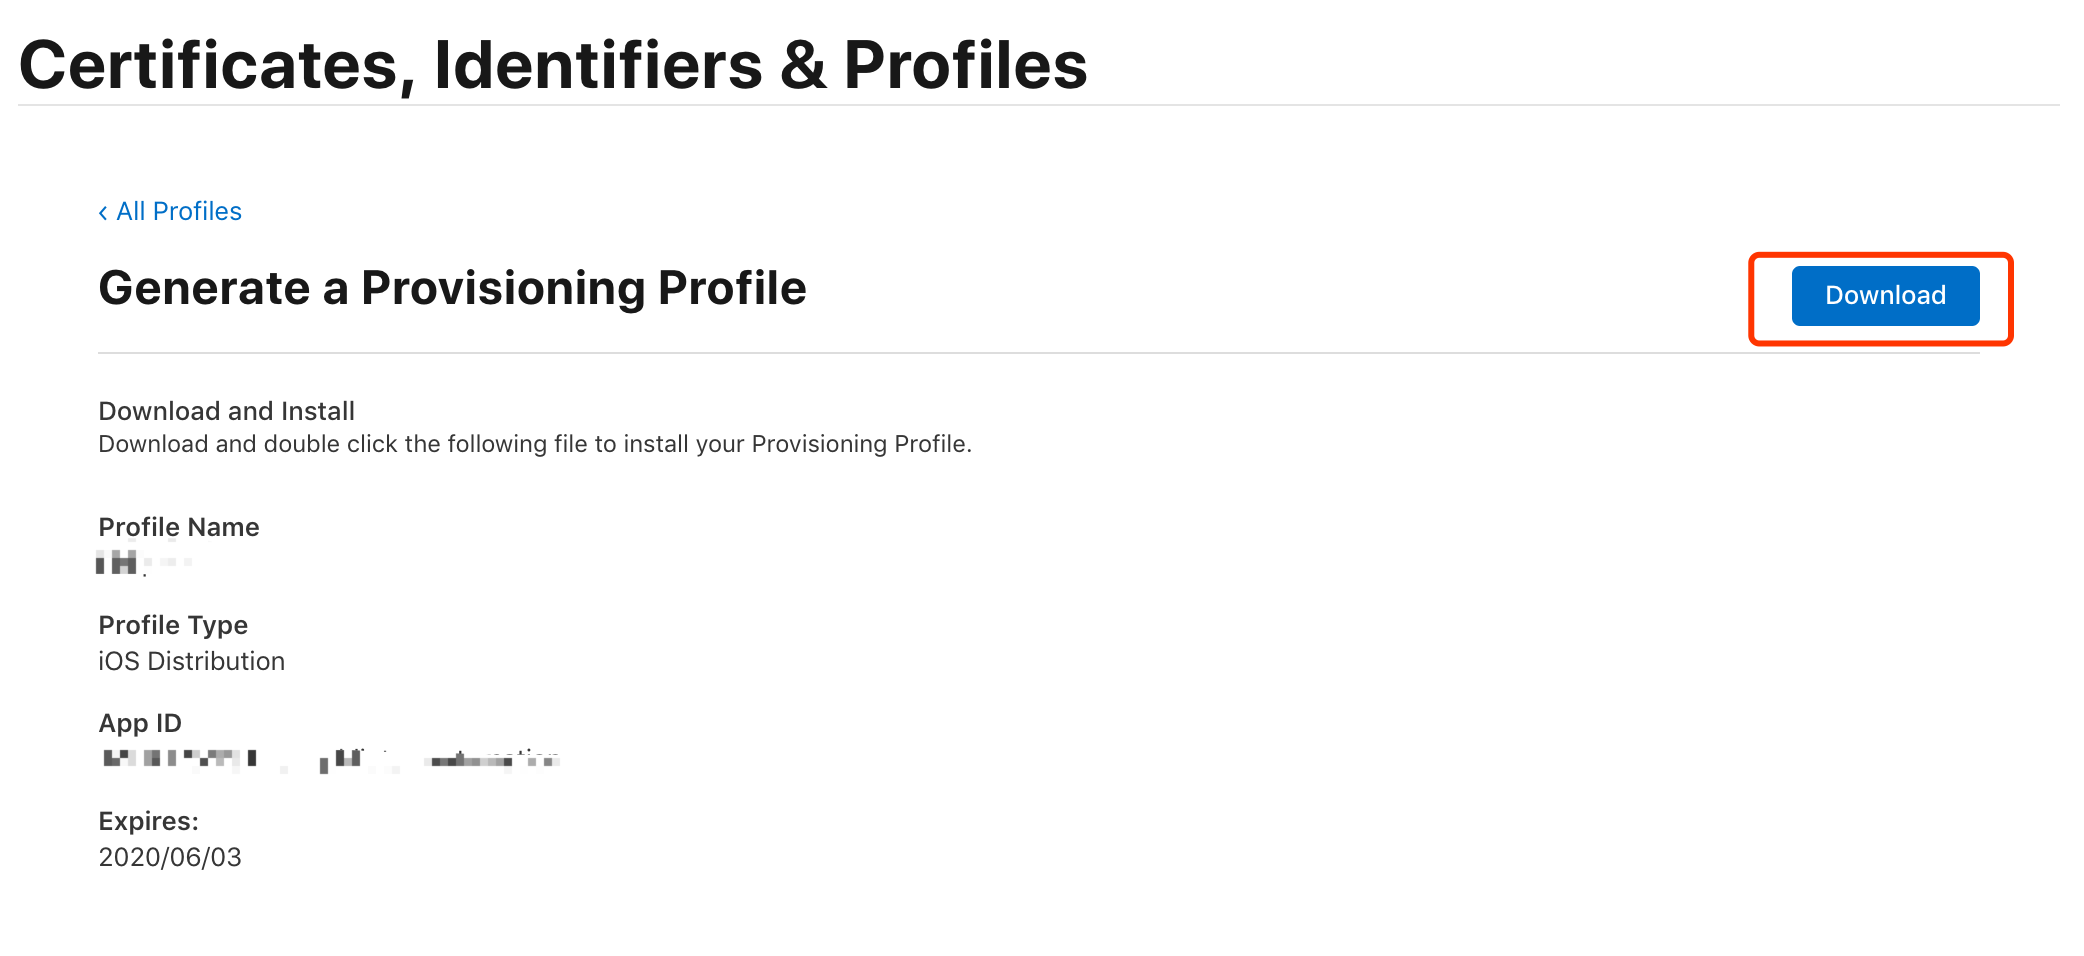
Step 6: Generate .mobileprovision profile for Siri
-
Go to the Profiles page and click +.
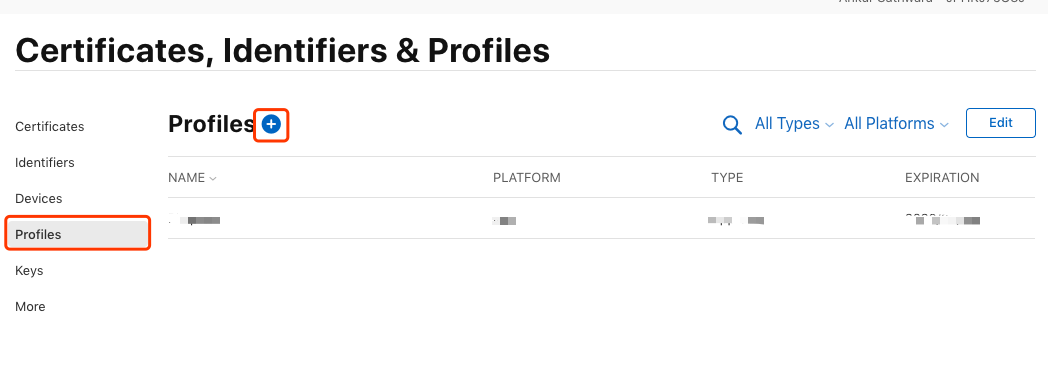
-
In the Distribution section, select App Store and click Continue.
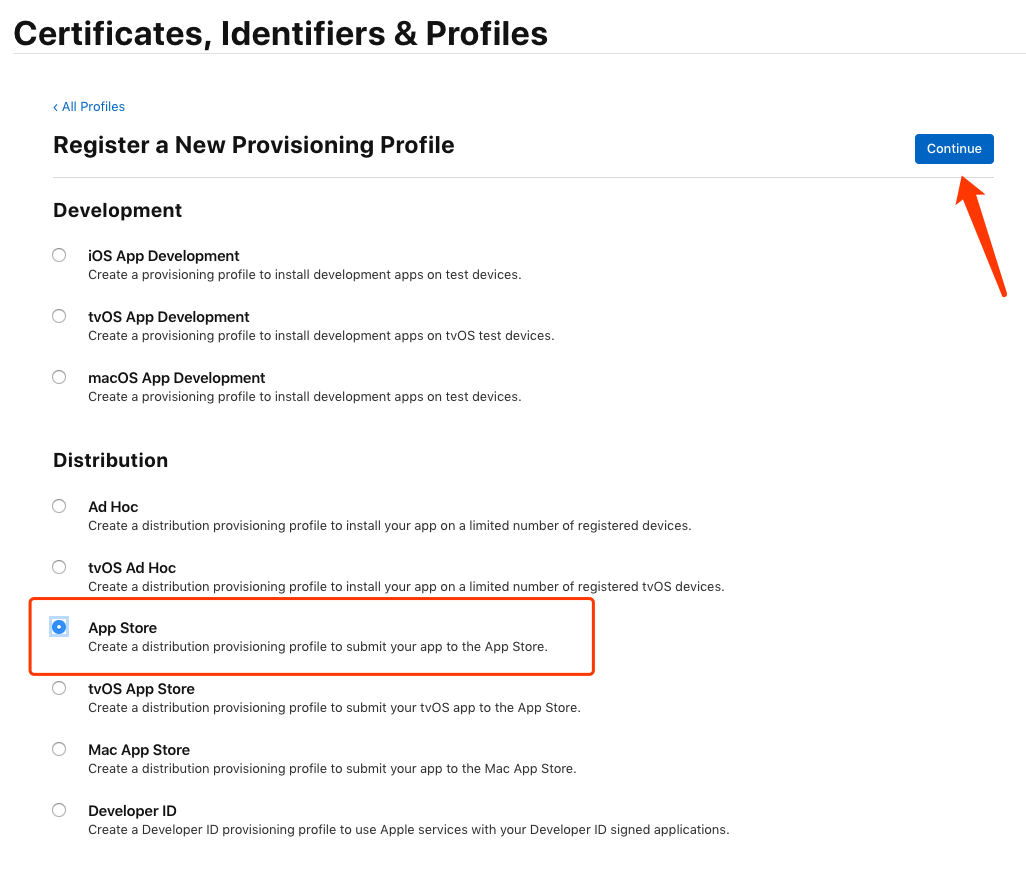
-
From the App ID drop-down list, select the App ID in the format of
Bundle ID of main application.intent, and click Continue.
-
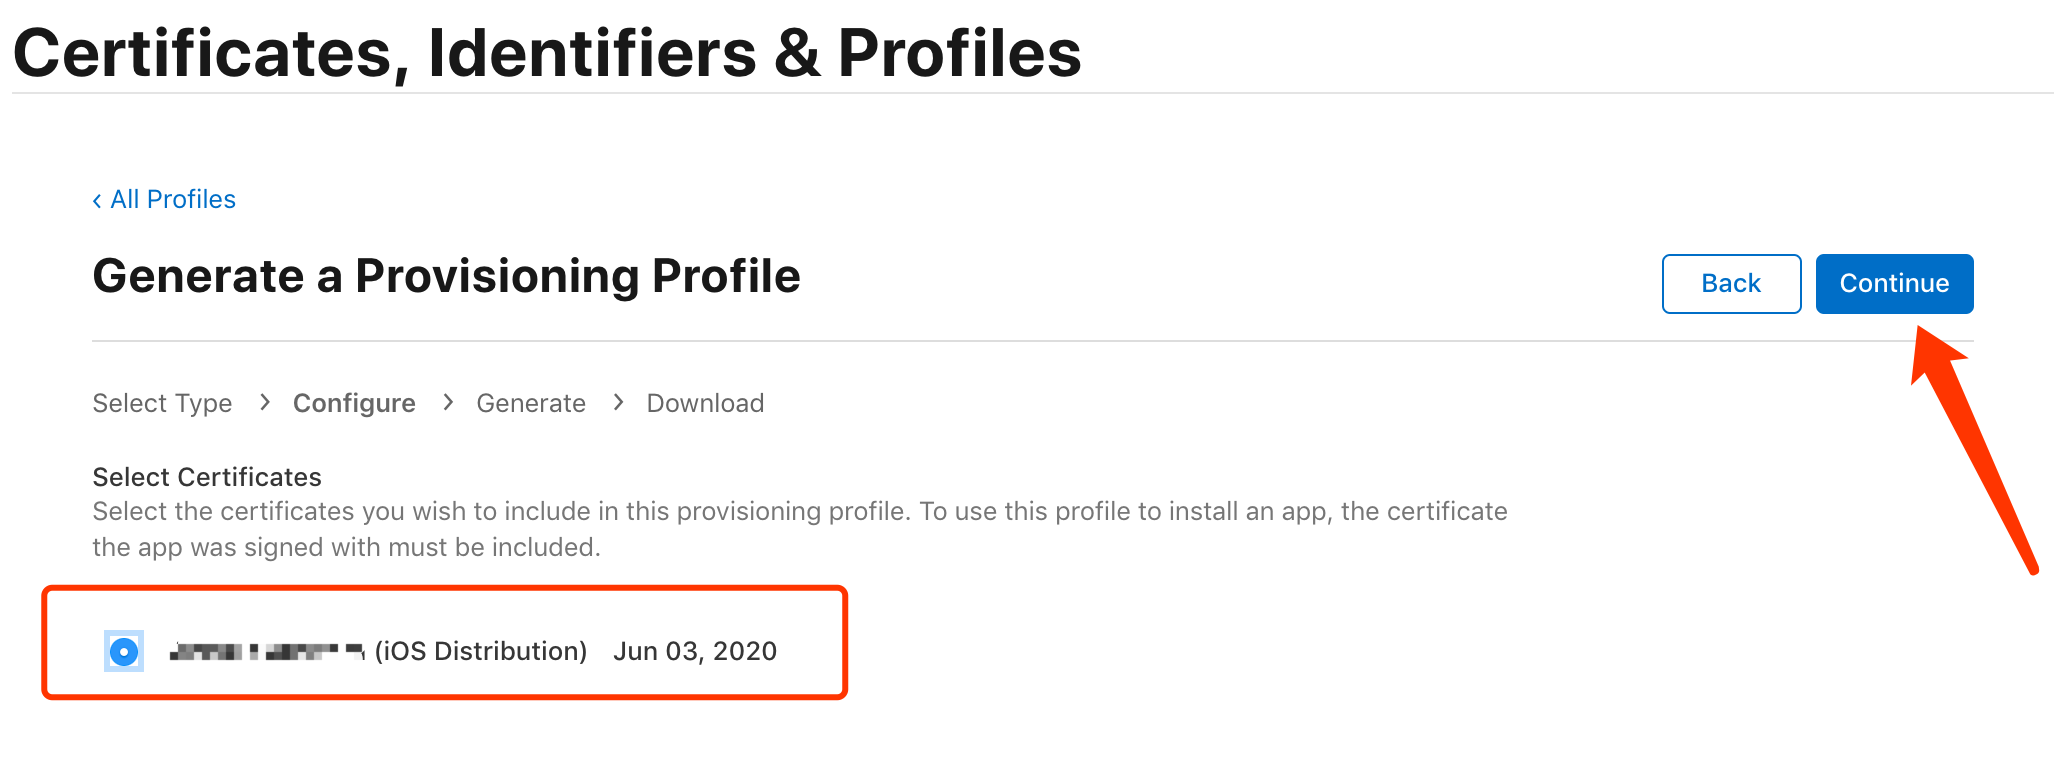
Select the same distribution certificate as selected in Step 6 for the main application and click Continue.
-
Find the Provisioning Profile Name field, and enter a name for the
.mobileprovisionprofile for Siri.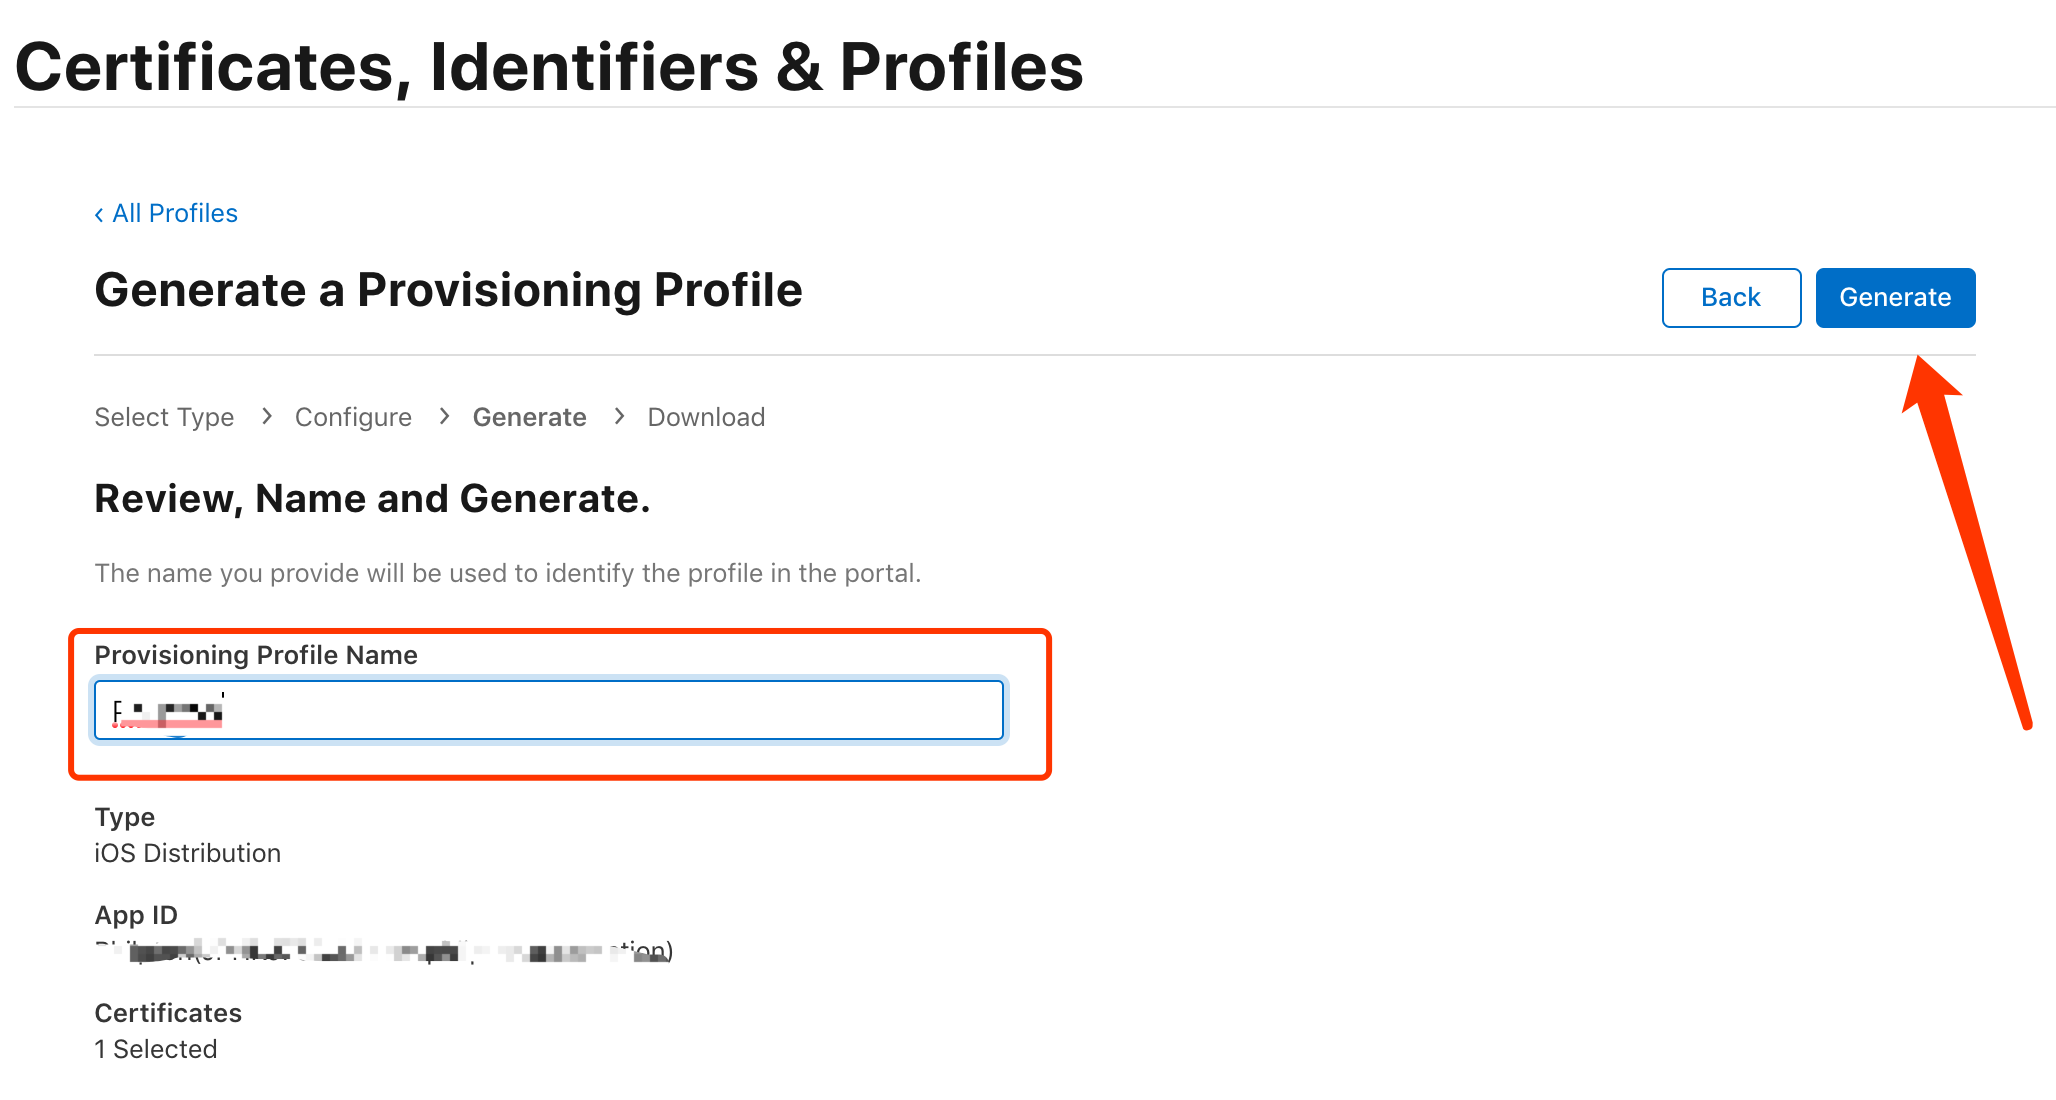
-
Now, the
.mobileprovisionprofile for Siri is configured. Click Download to download the profile and send it to Tuya’s staff.
Step 7: Generate UI .mobileprovision profile for Siri
-
Go to the Profiles page and click +.
-
In the Distribution section, select App Store and click Continue.
-
From the App ID drop-down list, select the App ID in the format of
Bundle ID of main application.intentui, and click Continue.
-
Select the same distribution certificate as selected in Step 6 for the main application and click Continue.
-
Find the Provisioning Profile Name field, and enter a name for the
.mobileprovisionprofile for Siri.
-
Now, the UI
.mobileprovisionprofile for Siri is configured. Click Download to download the profile and send it to Tuya’s staff.
Is this page helpful?
YesFeedbackIs this page helpful?
YesFeedback


