Configure iOS Certificates for Widget
This topic describes how to configure iOS certificates for your OEM app. These certificates are required for the app to run on Apple Widget.
Preparation
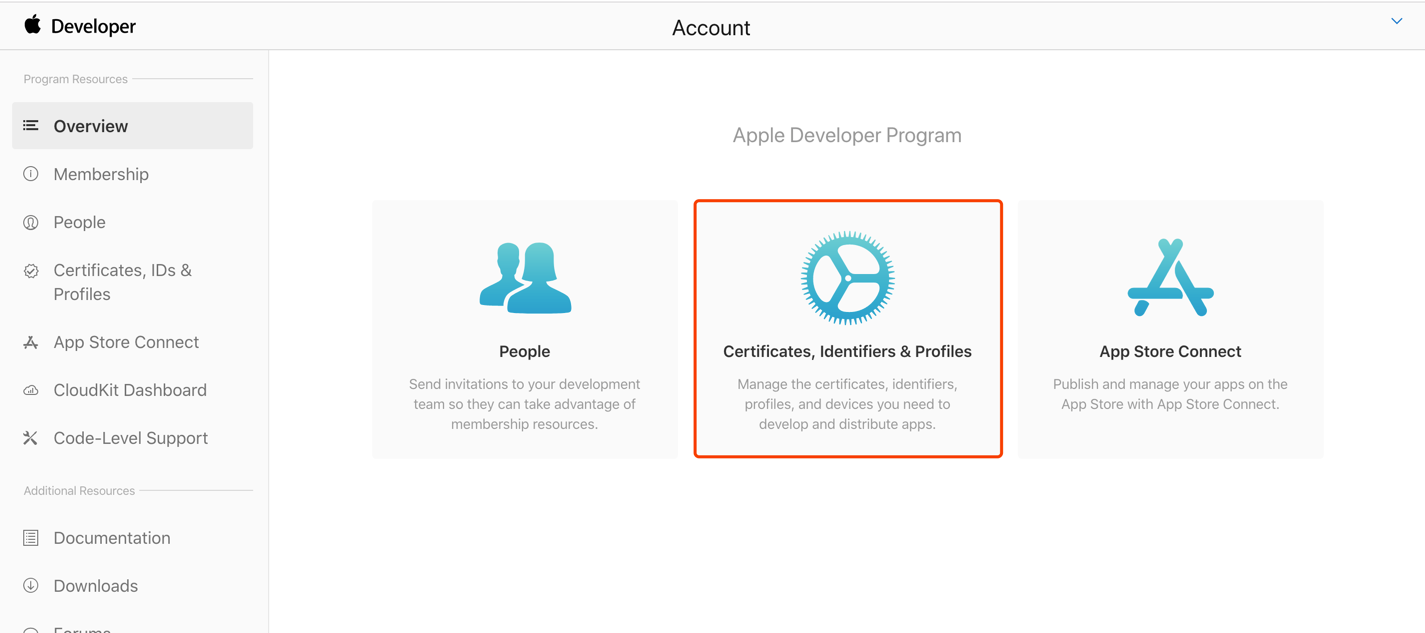
Log in to the Apple Developer platform and select Certificates, Identifiers & Profiles.
Step 1: Create app group
If an app group already exists in your account and the value of Group ID is group.Bundle ID, you can skip this step and proceed to Create Device Control, Scene Tap-To-Run Widgets app ID.
To allow your app to run on Apple Widget, you must create an app group for the existing main app.
-
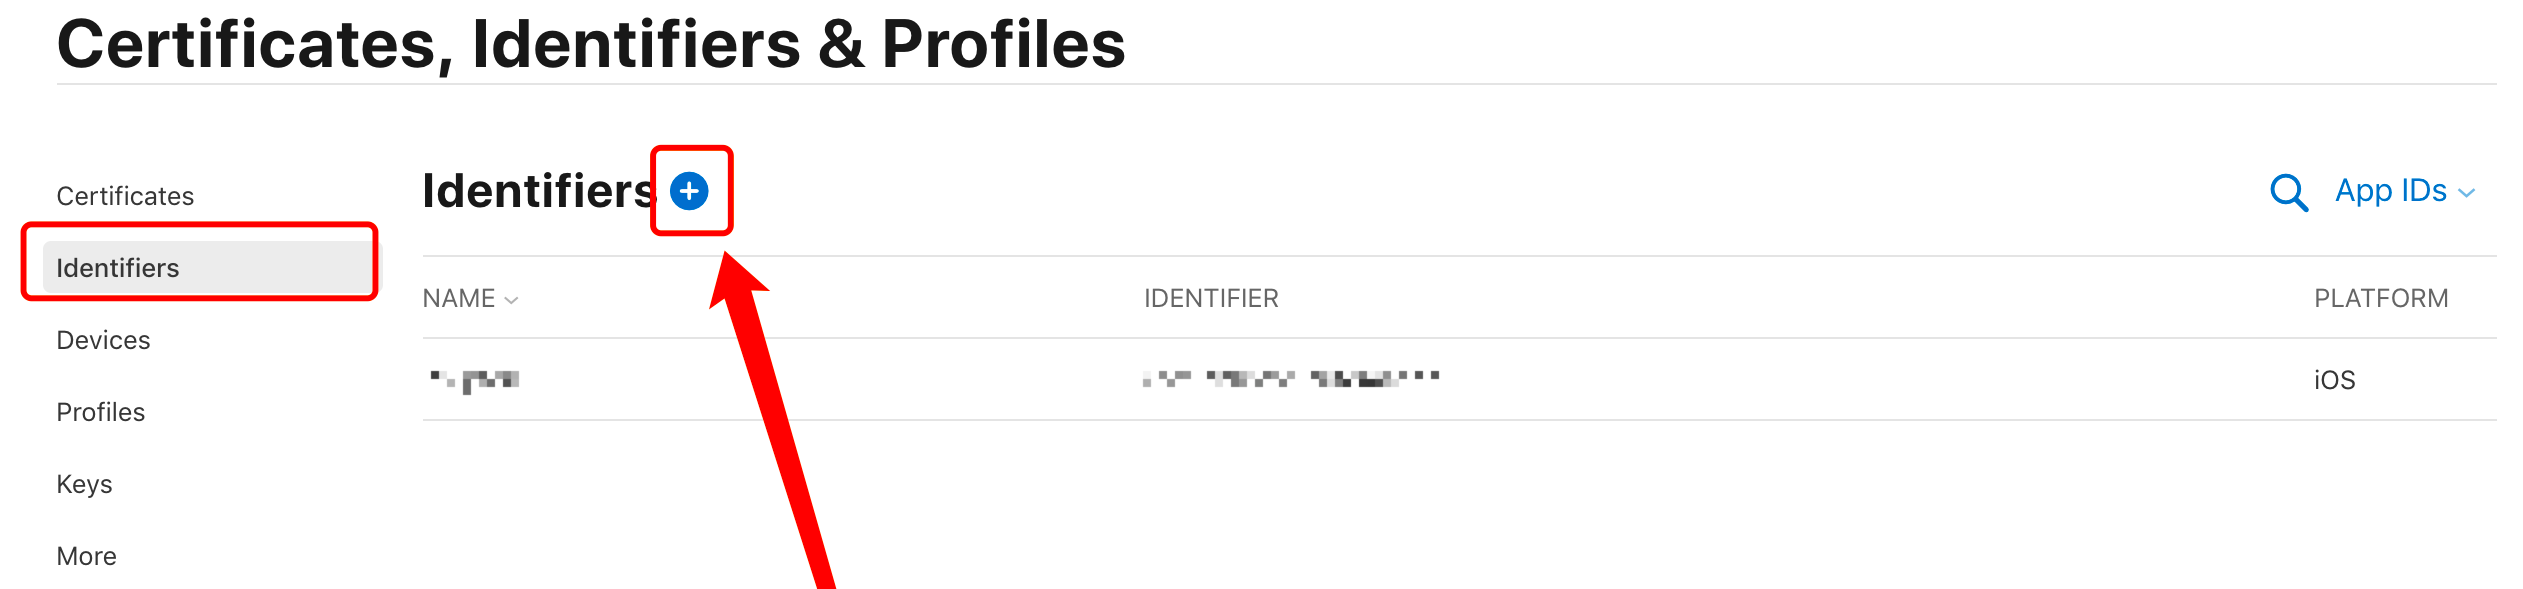
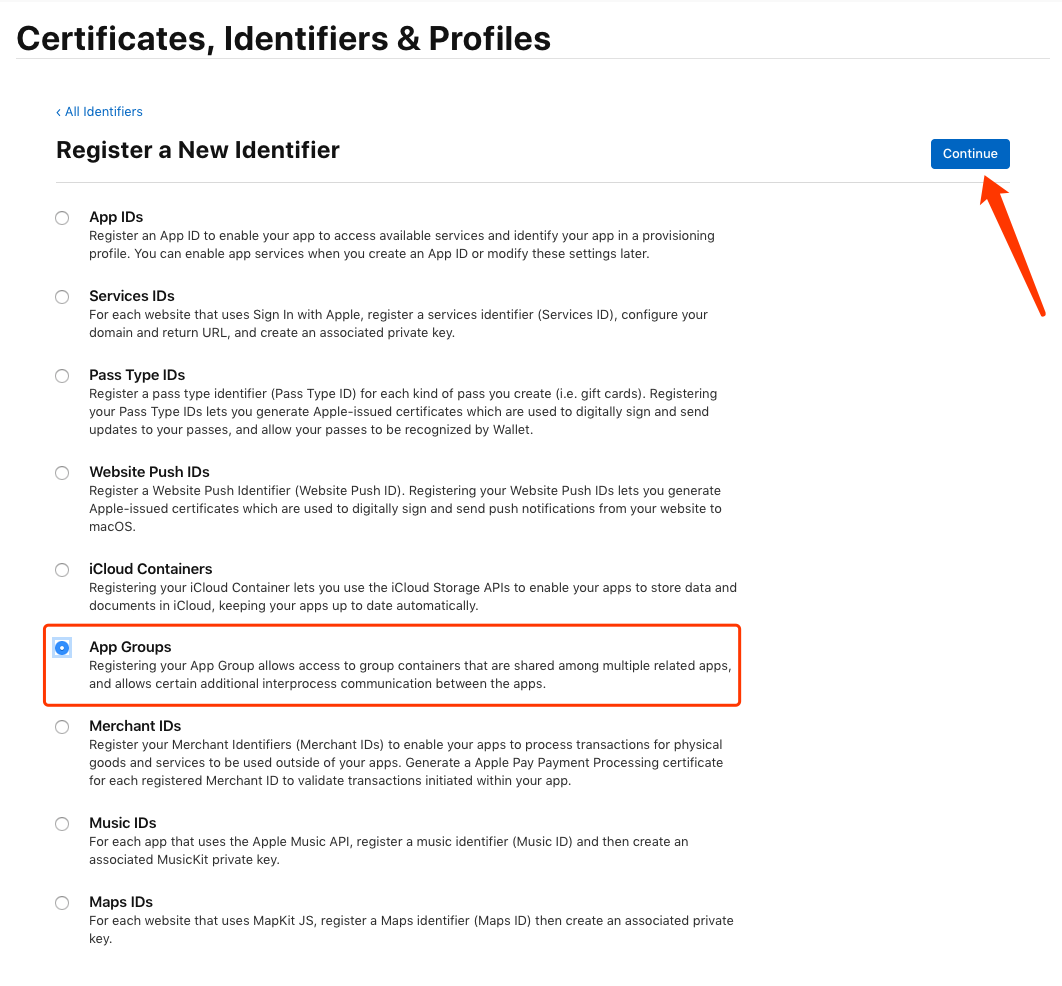
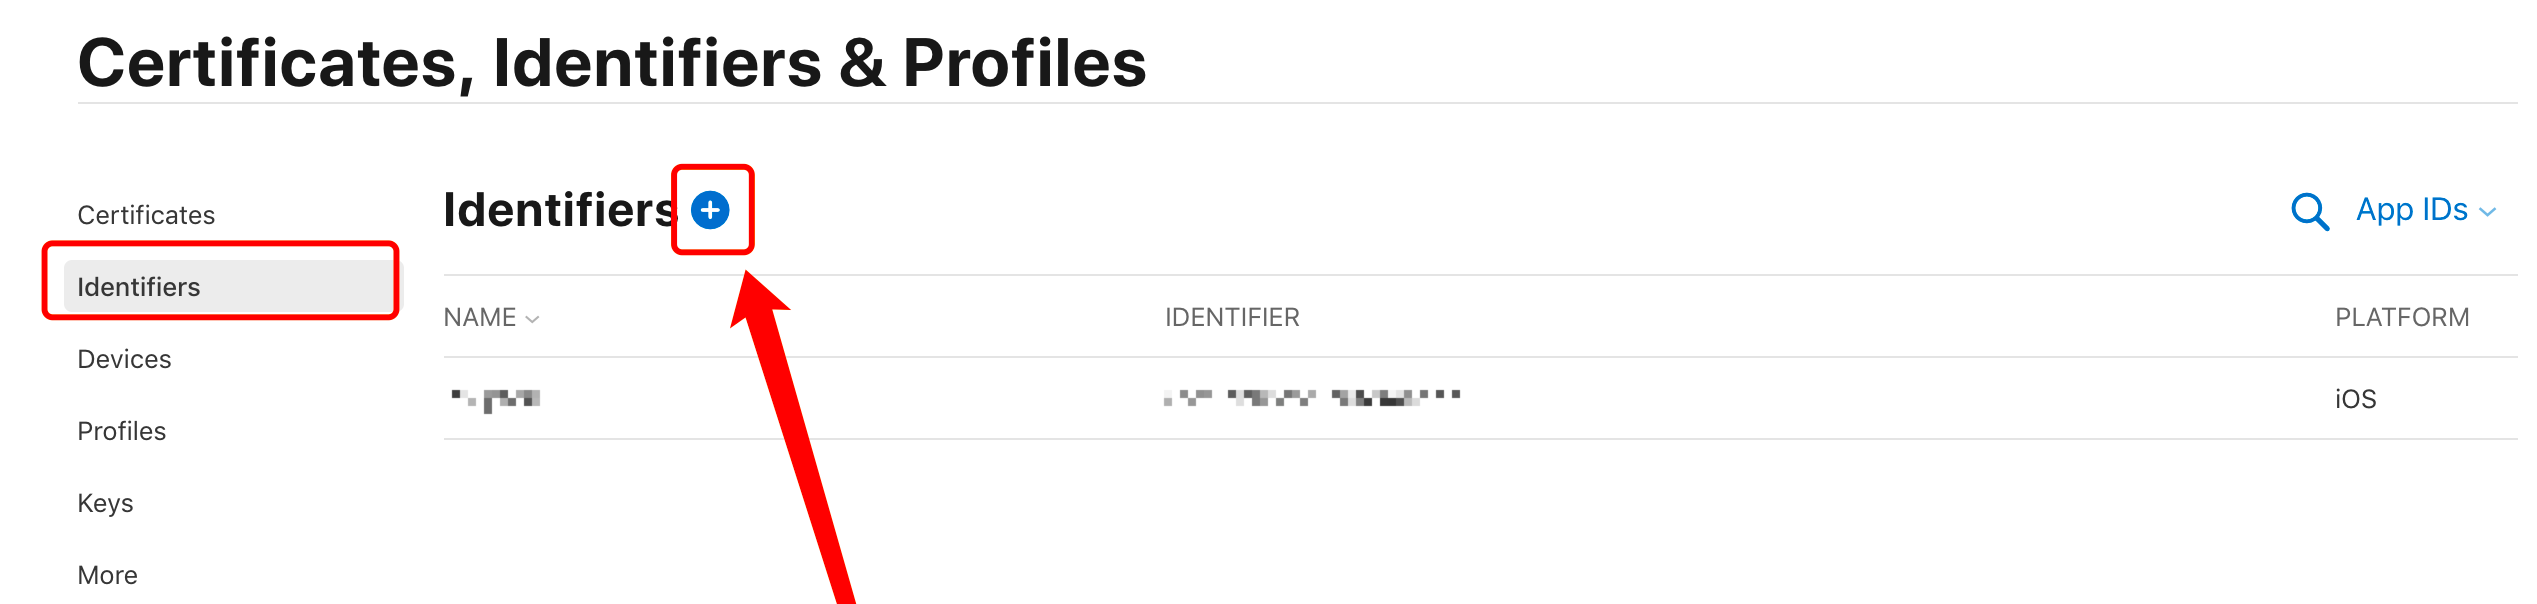
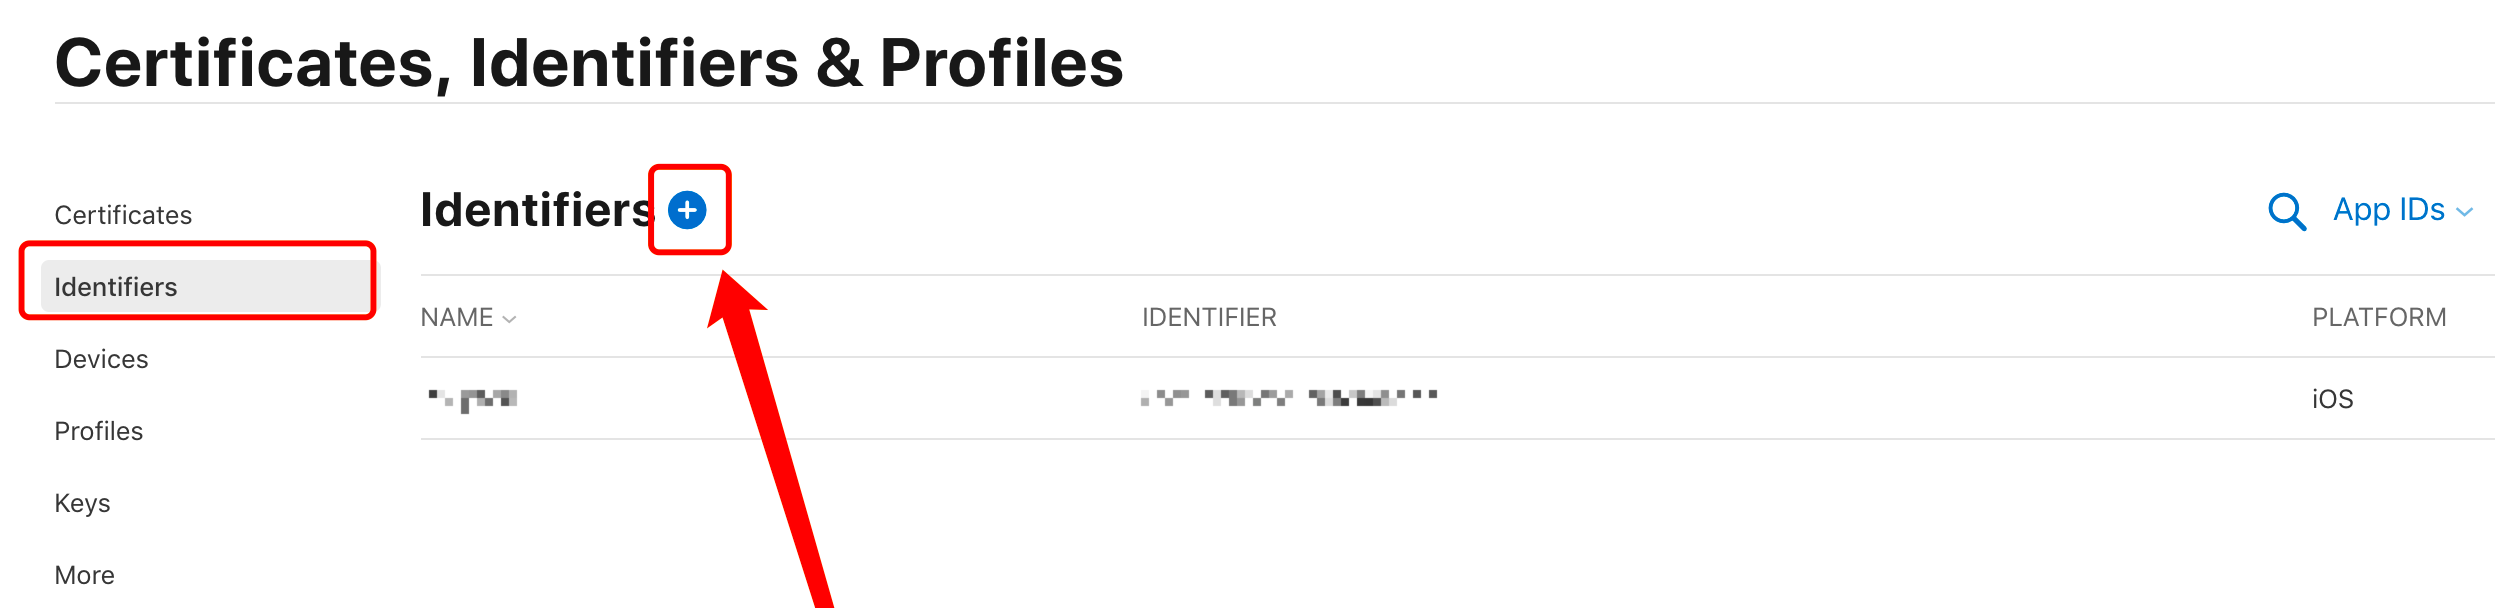
Go to the Identifiers page and click +. Select App Groups, and in the top right corner of the page, click Continue.
-
Enter the following information and click Continue.
-
Description: Enter a name for the app group.
-
ID: Enter the bundle ID of the main app, in the following format:
group.Bundle ID. Format ofBundle ID: com.xxx.xxx.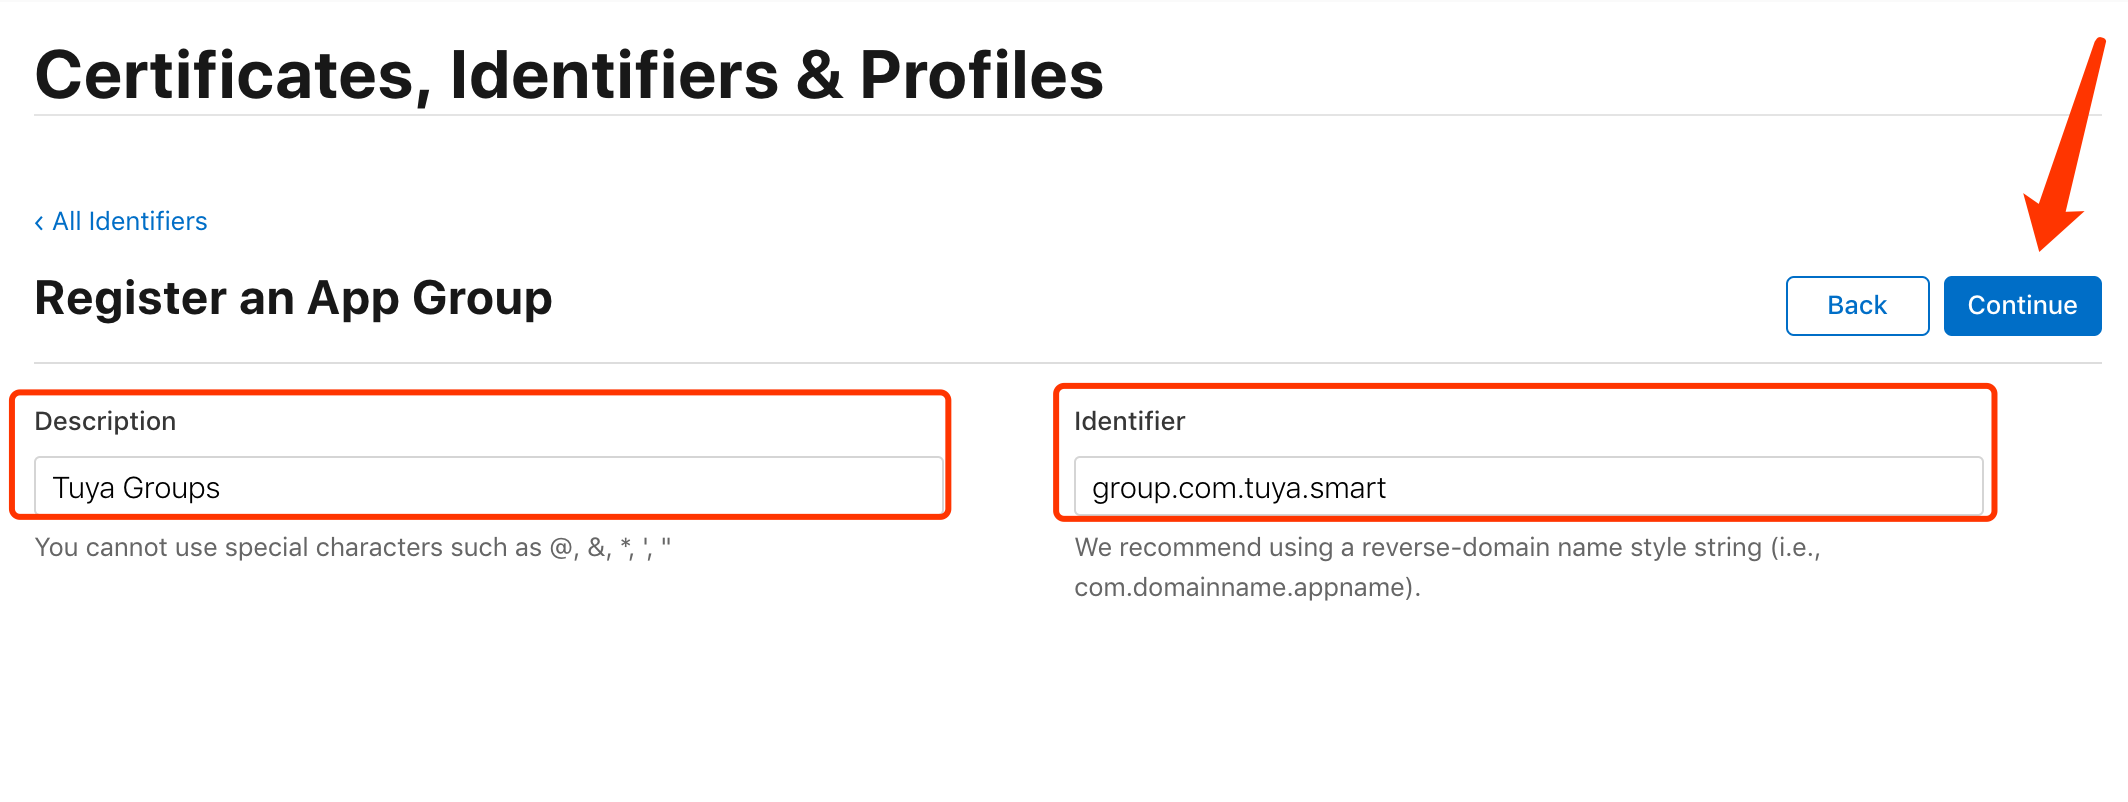
-
-
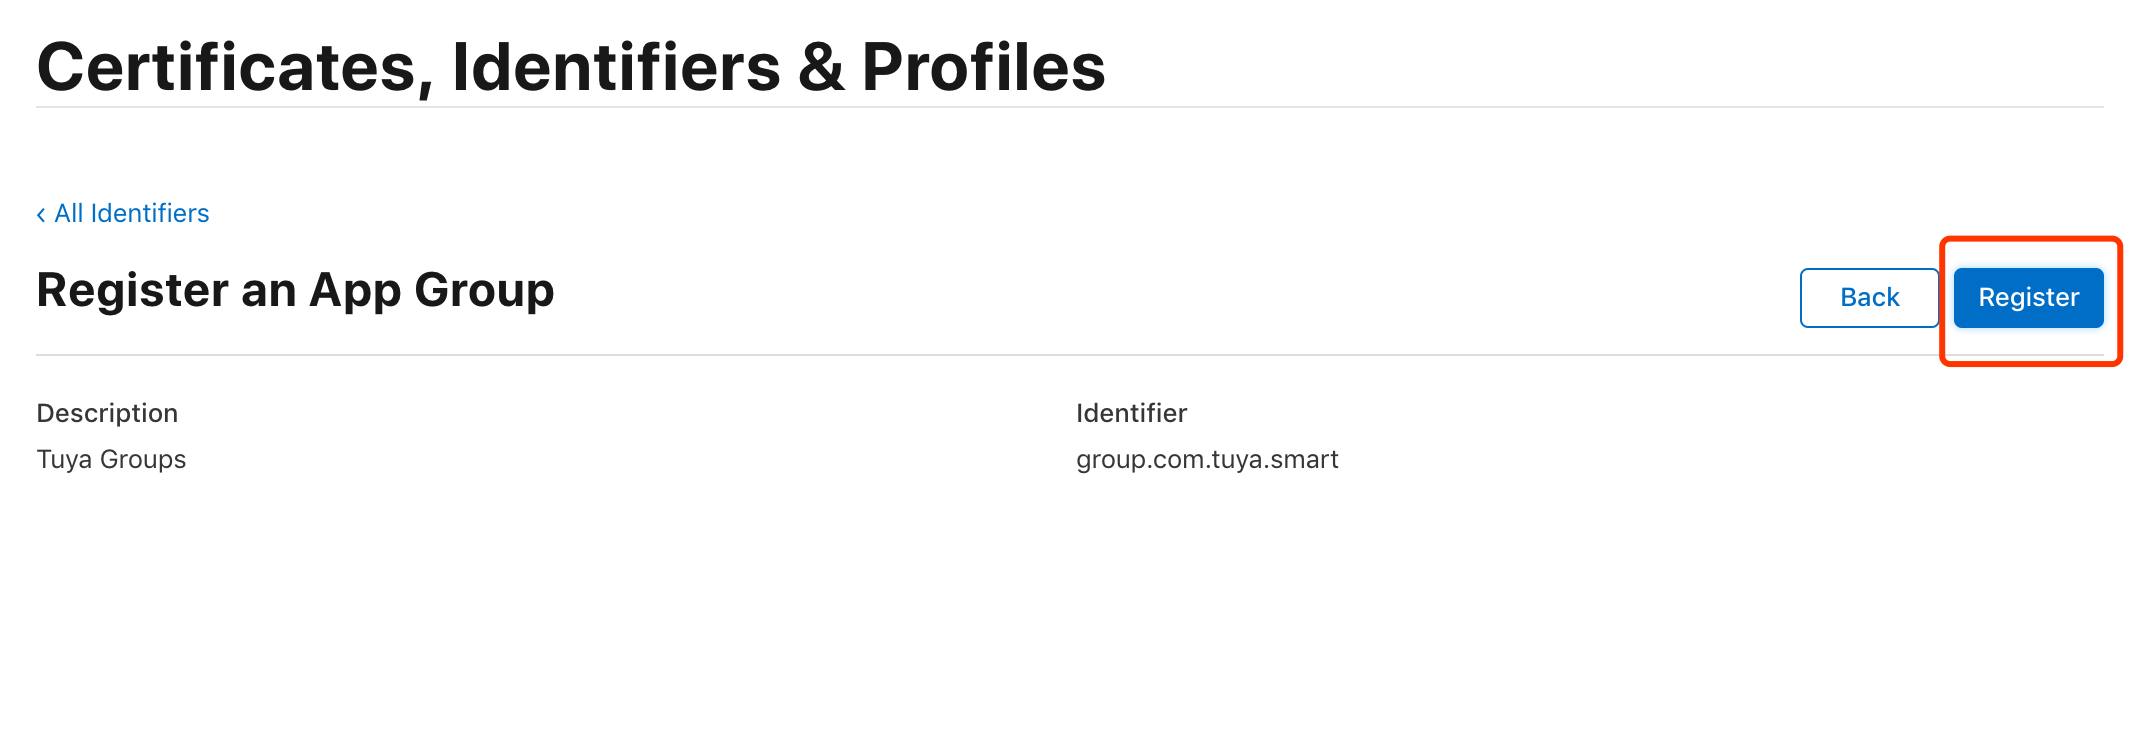
Confirm the information about the app group. To rectify any error, click Back and modify the information. After all information is confirmed, click Register.
-
Now, the app group is created.
Step 2: Create [Device Control, Scene Tap-To-Run Widgets] app ID
-
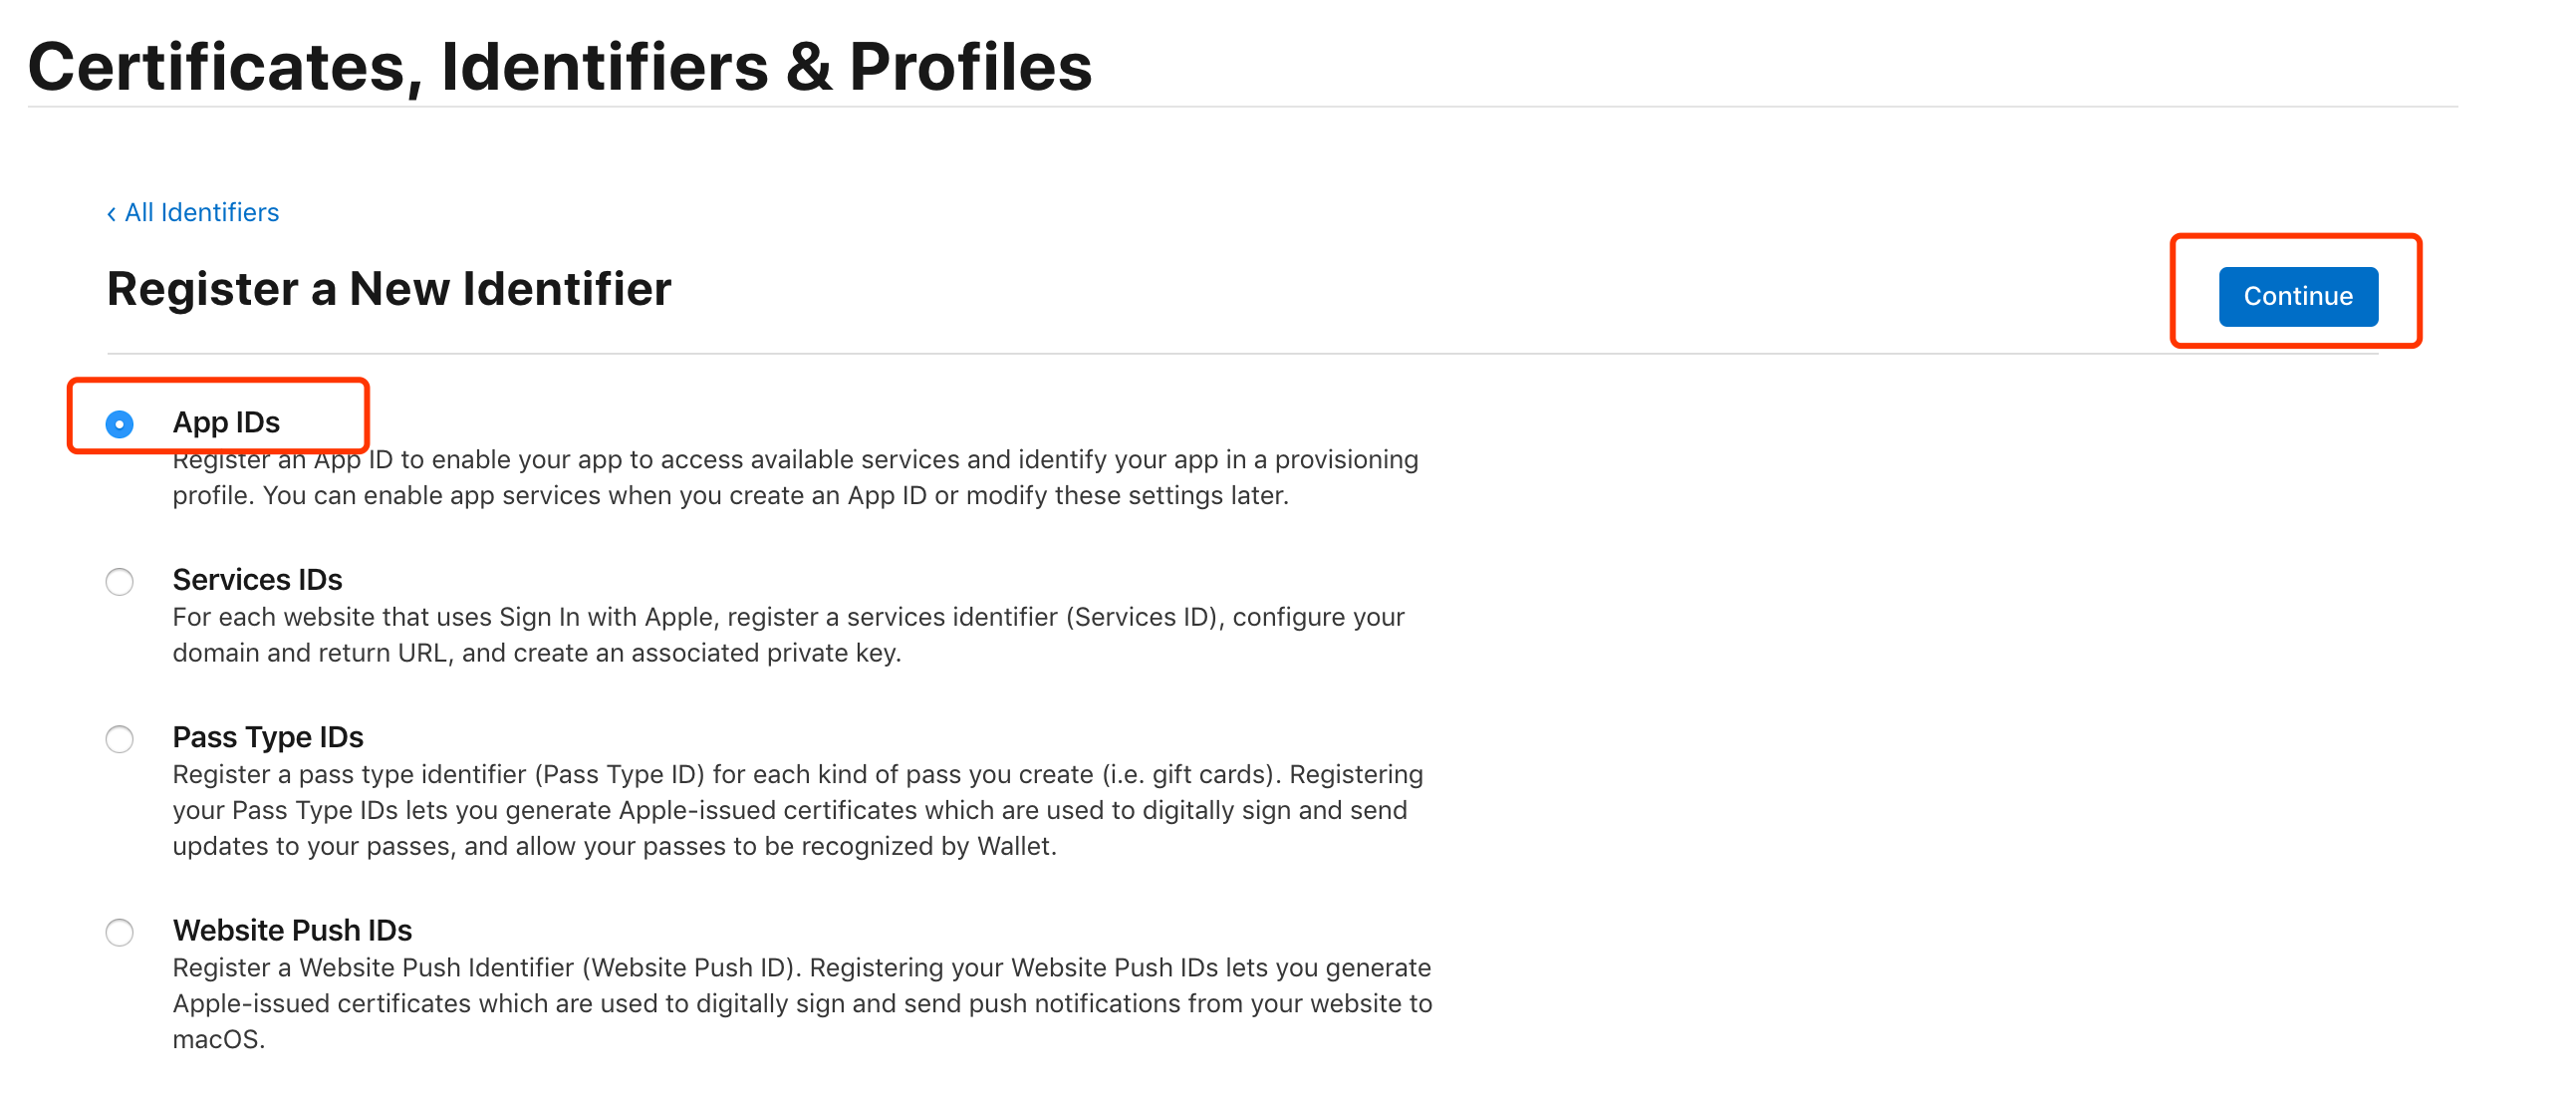
Go to the Identifiers page and click +. Select App IDs, and in the top right corner of the page, click Continue.
-
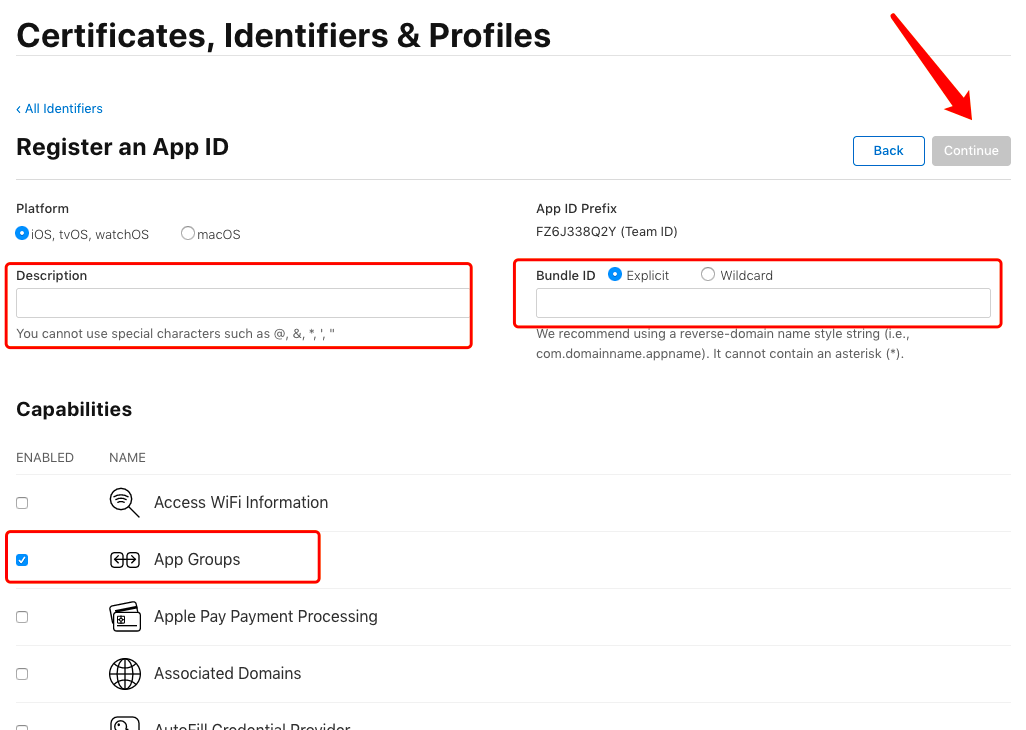
Enter the following information:
-
Description: Enter the certificate name for the app to run on Widget.
-
Bundle ID: Enter the Widget bundle ID, in the format of
Bundle ID of main app.controlWidgetExtension.After you enter the preceding information, you must select App Groups in the Capabilities section and then click Continue.
-
-
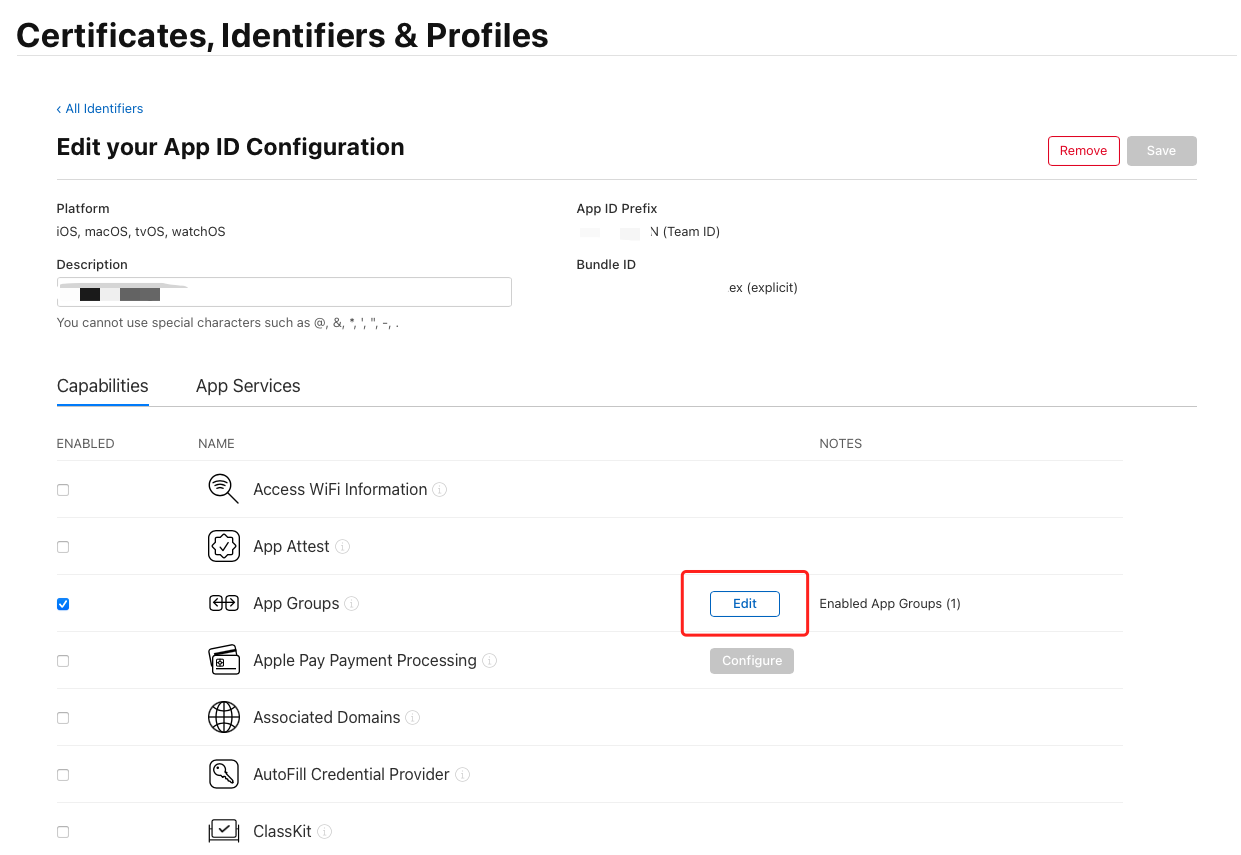
Bind the app ID with the app group. Perform the following steps:
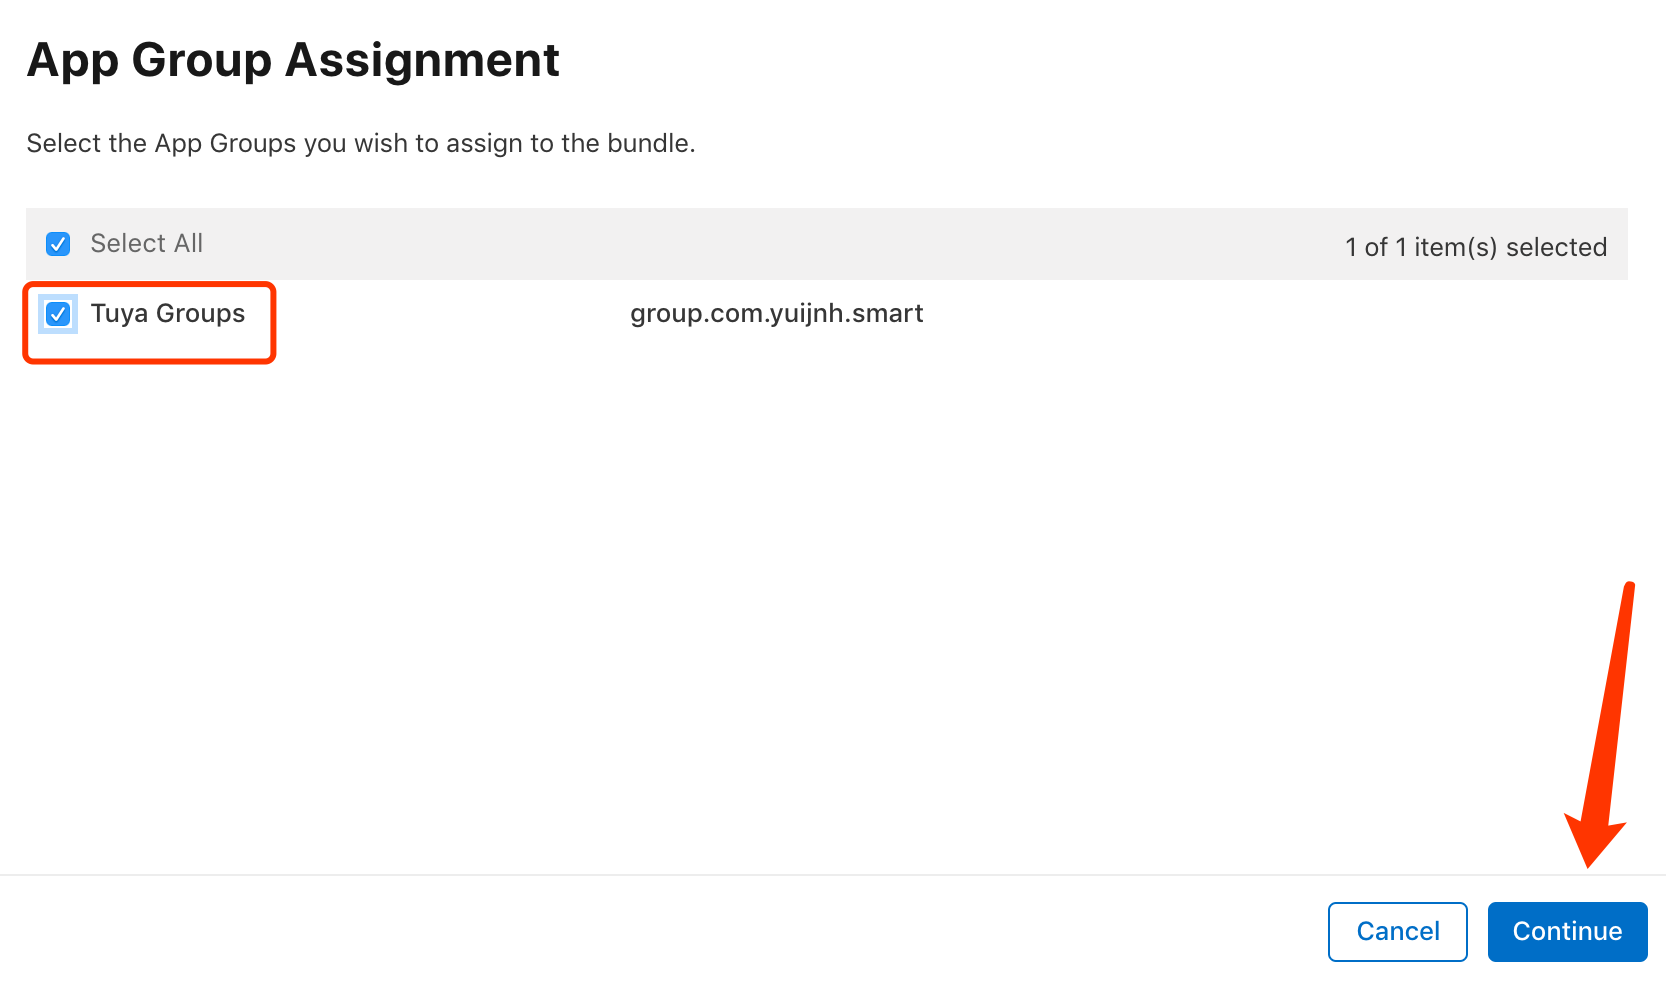
Click the newly-created app ID, find Capabilities > App Groups, click Edit, select the app group for Widget created in Step 1, and then click Continue.
Step 3: Create device widget app ID
-
Go to the Identifiers page and click +. Select App IDs, and in the top right corner of the page, click Continue.
-
Enter the following information:
-
Description: Enter the certificate name for the app to run on Widget.
-
Bundle ID: Enter the Widget bundle ID, in the format of
Bundle ID of main app.widgetdevice.After you enter the preceding information, you must select App Groups in the Capabilities section and then click Continue.
-
-
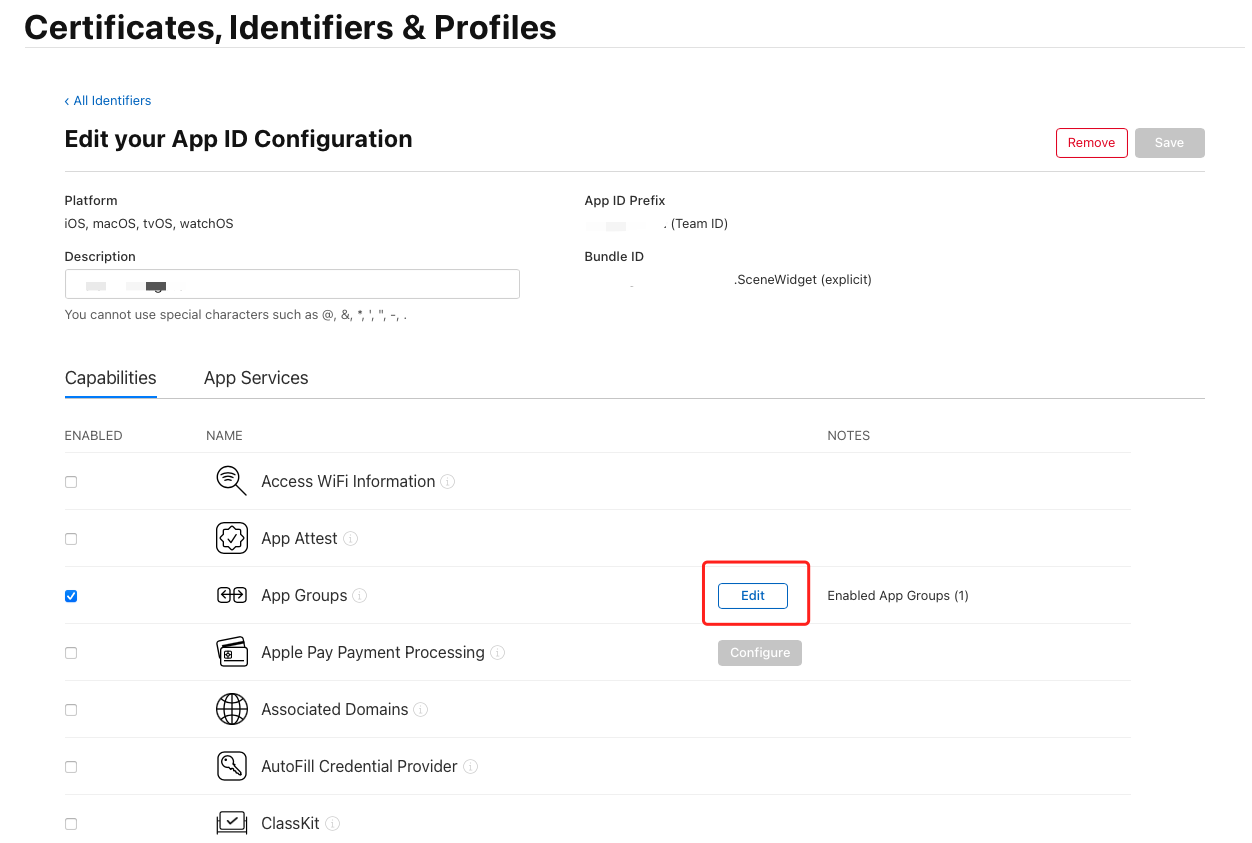
Bind the app ID with the app group. Perform the following steps:
Click the newly-created app ID, find Capabilities > App Groups, click Edit, select the app group for Widget created in Step 1, and then click Continue.
Step 4: Create scene widget app ID
-
Go to the Identifiers page and click +. Select App IDs, and in the top right corner of the page, click Continue.
-
Enter the following information:
-
Description: Enter the certificate name for the app to run on Widget.
-
Bundle ID: Enter the Widget bundle ID, in the format of
Bundle ID of main app.widgetscene.After you enter the preceding information, you must select App Groups in the Capabilities section and then click Continue.
-
-
Bind the scene widget app ID with the app group. Perform the following steps:
Click the newly-created scene widget app ID, find Capabilities > App Groups, click Edit, select the app group for Widget created in Step 1, and then click Continue.
Step 5: Generate [Device Control, Scene Tap-To-Run Widgets] mobileprovision certificate
-
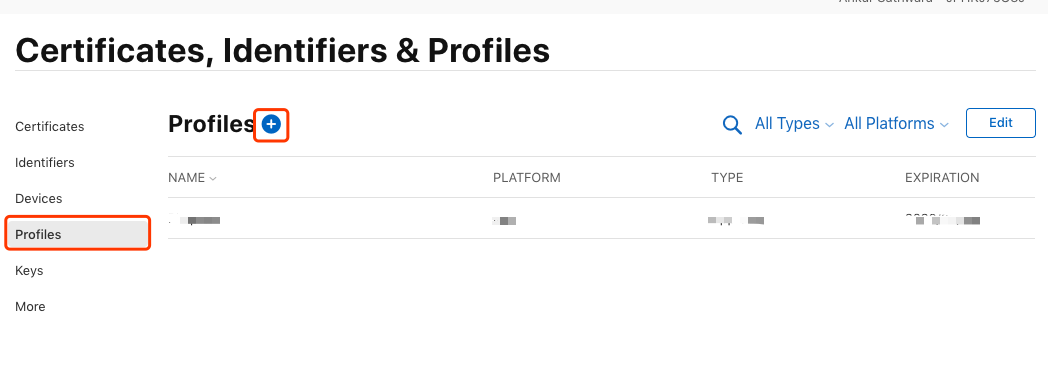
Go to the Profiles page and click +.
-
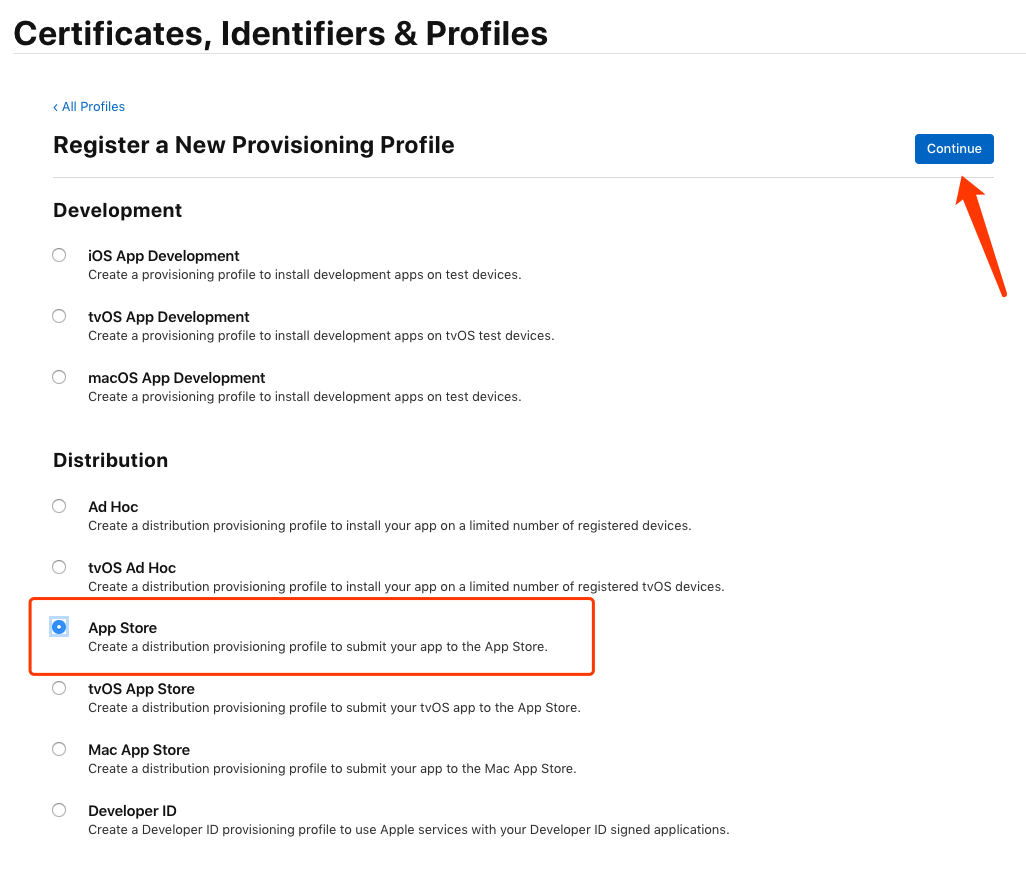
In the Distribution section, select App Store and click Continue.
-
From the App ID drop-down list, select the app ID in the format of
Bundle ID of main app.controlWidgetExtension, and click Continue.
-
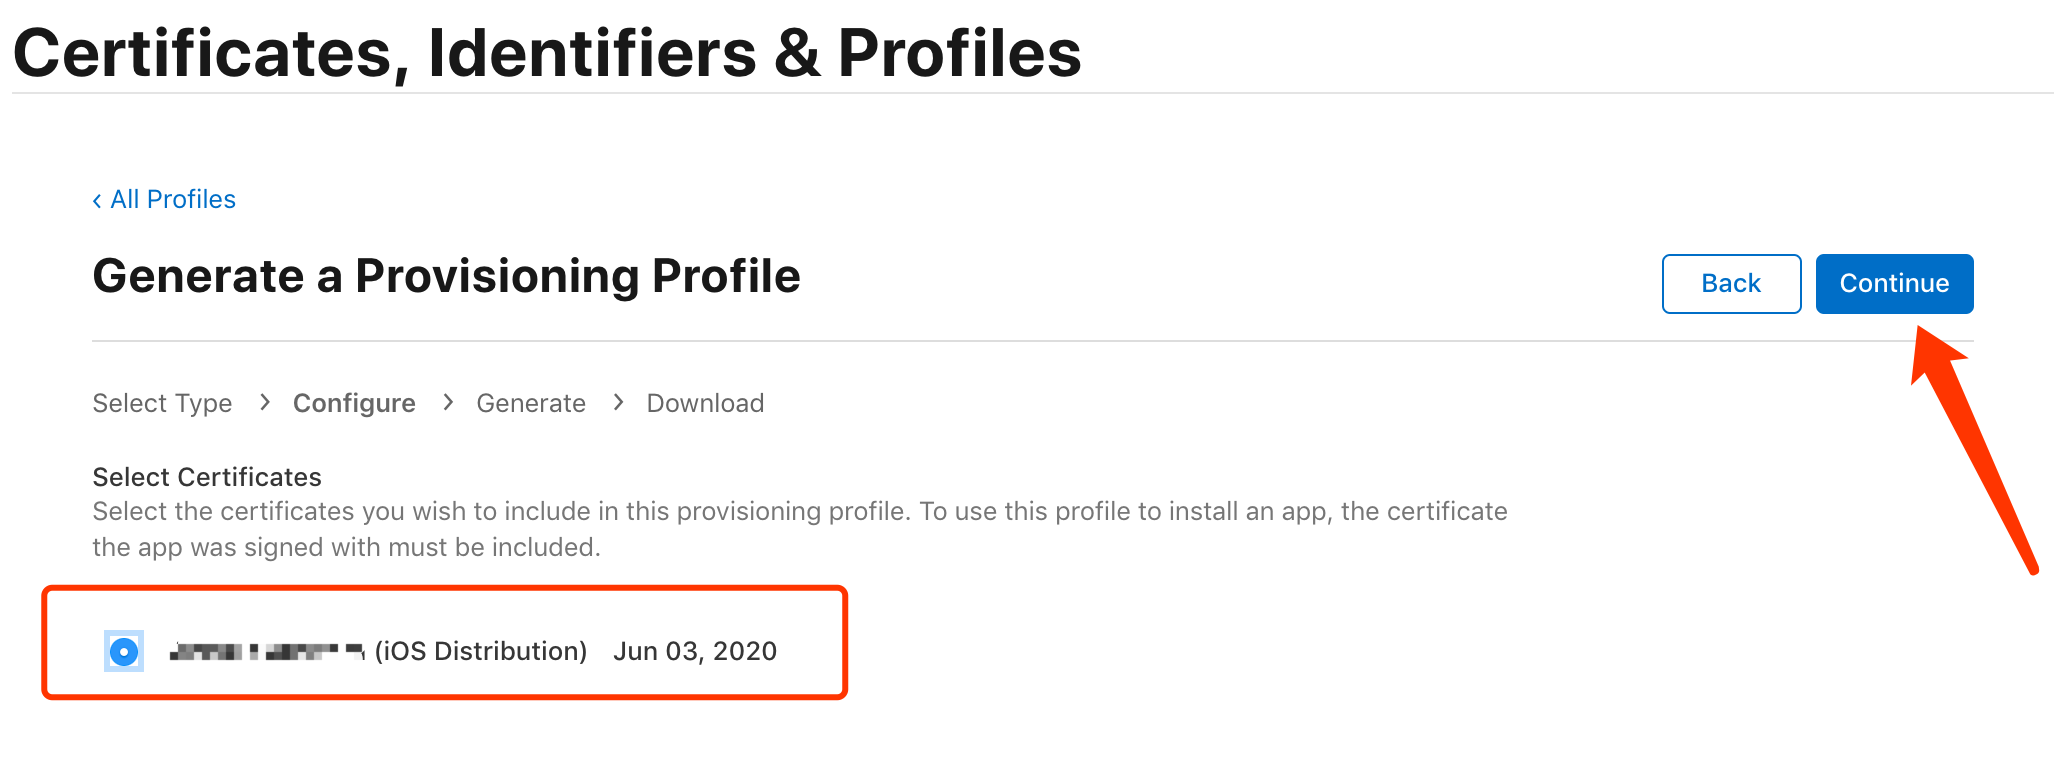
Select the distribution certificate for the main app and click Continue.
In certain cases, multiple certificates with the same name might appear. You can distinguish these certificates by their expiration time, and select the one that matches the actual expiration time of the distribution certificate.
-
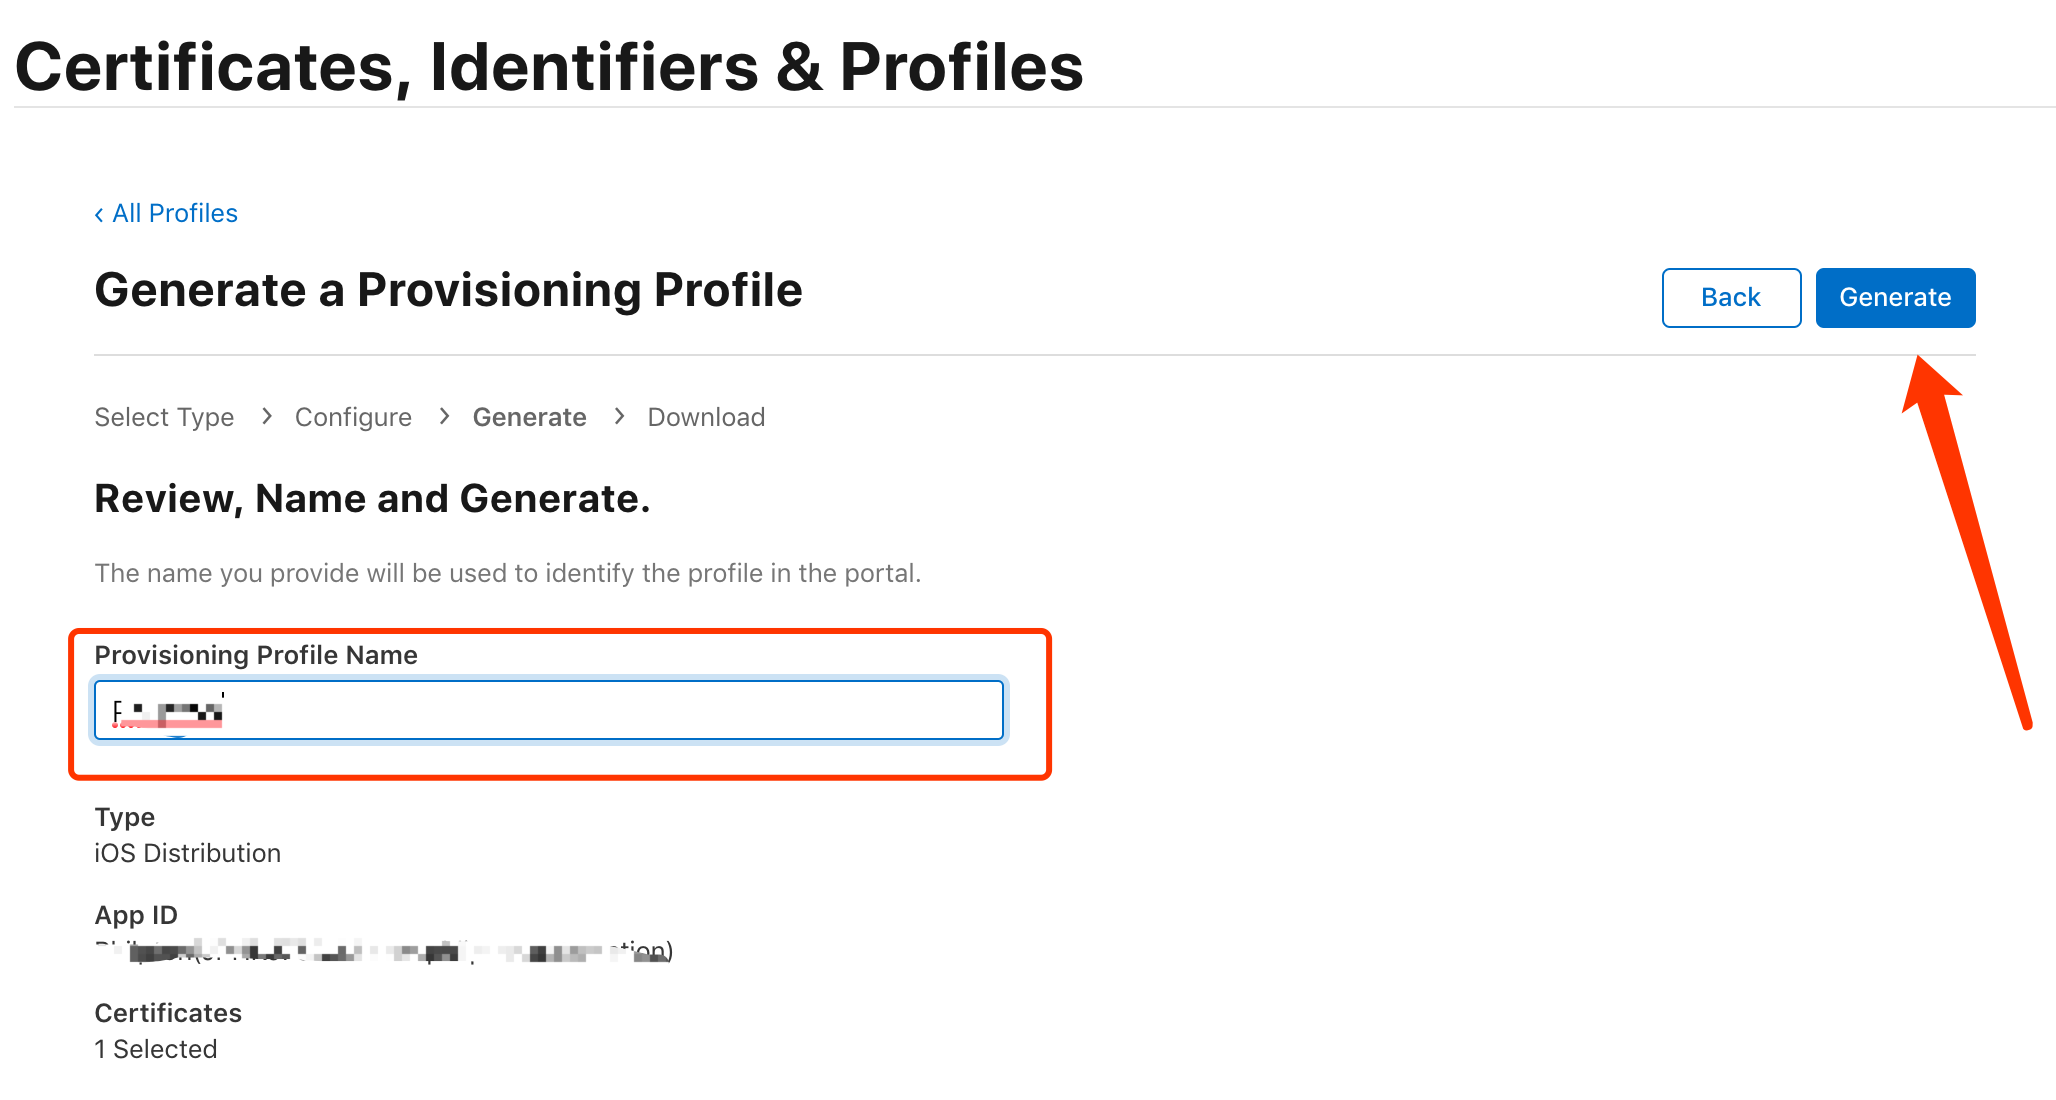
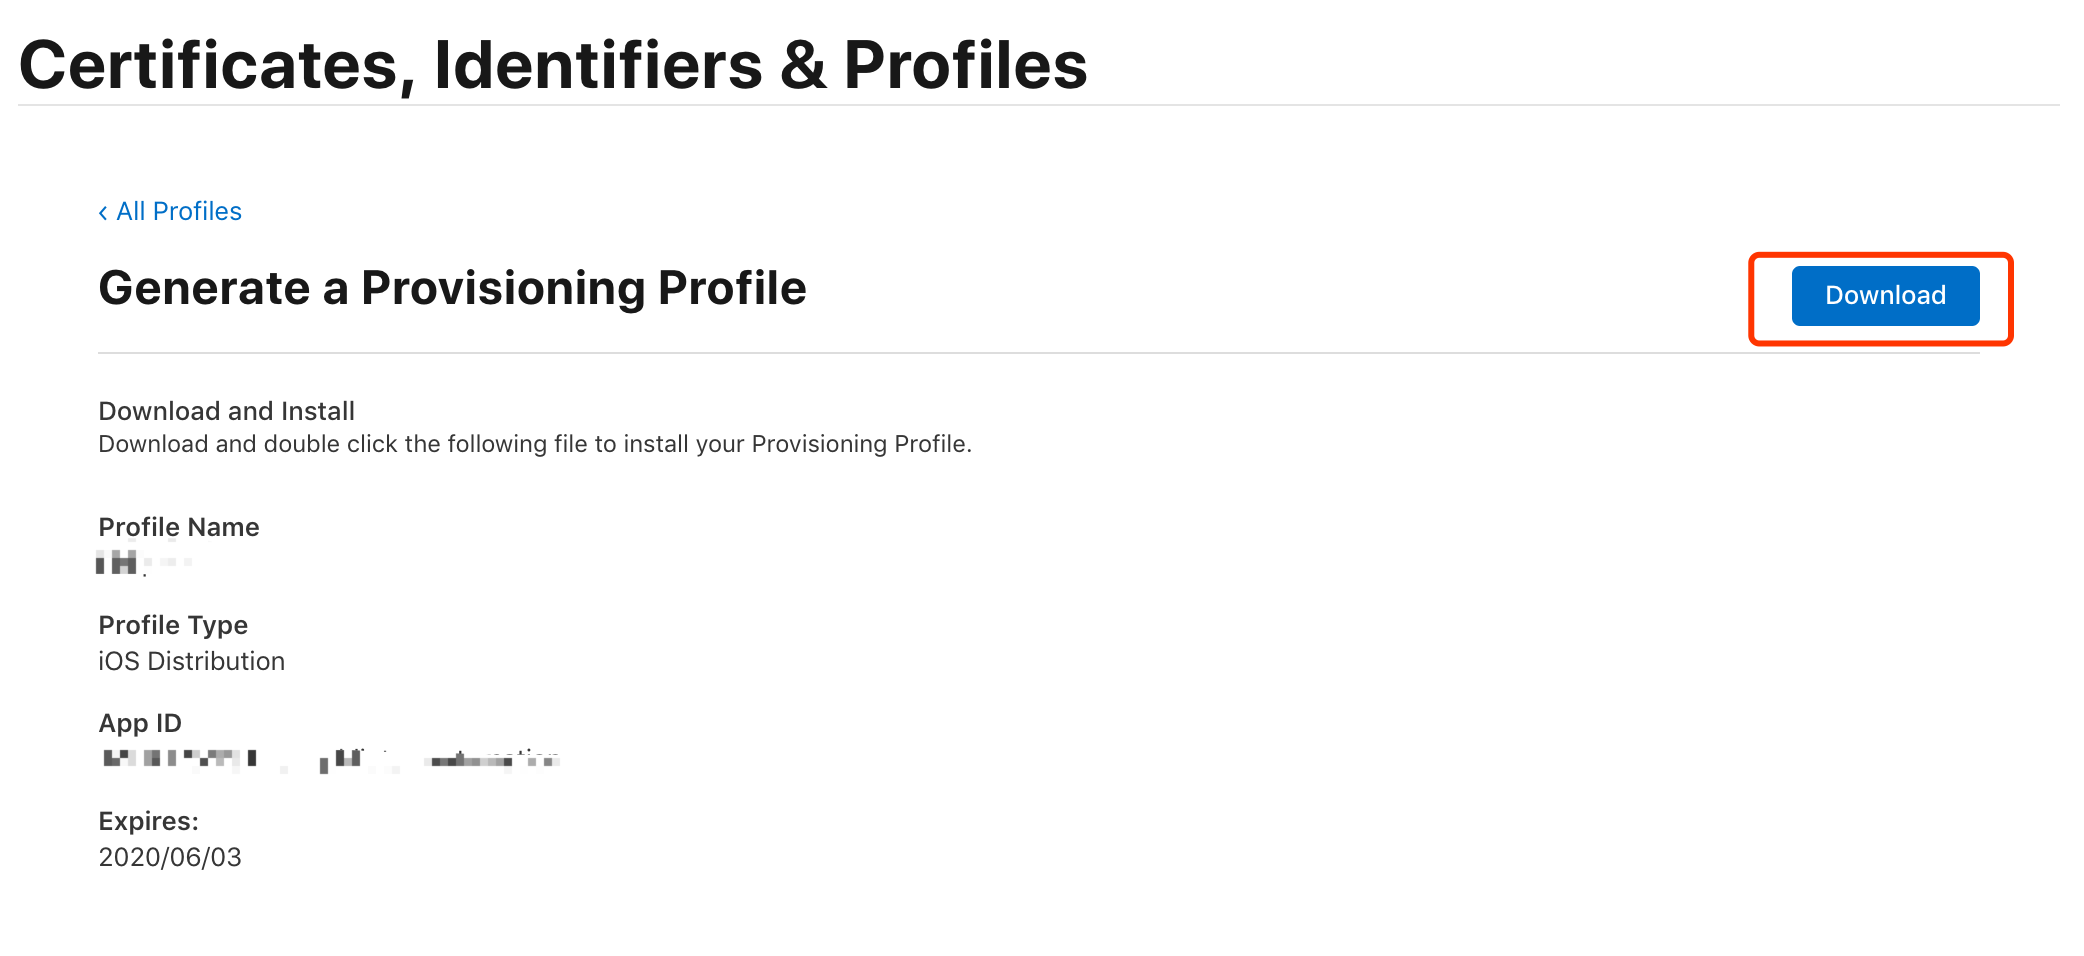
In the Provisioning Profile Name field, enter the name of the .mobileprovision certificate for Widget, and click Generate.
-
Now, the [Device Control, Scene Tap-To-Run Widgets] mobileprovision certificate is configured. Click Download to download the certificate file, and upload to Tuya Developer Platform.
Step 6: Generate device widget .mobileprovision certificate
-
Go to the Profiles page and click +.
-
In the Distribution section, select App Store and click Continue.
-
From the App ID drop-down list, select the app ID in the format of
Bundle ID of main app.widgetdevice, and click Continue.
-
Select the distribution certificate for the main app and click Continue.
In certain cases, multiple certificates with the same name might appear. You can distinguish these certificates by their expiration time, and select the one that matches the actual expiration time of the distribution certificate.
-
In the Provisioning Profile Name field, enter the name of the .mobileprovision certificate for Widget, and click Generate.
-
Now, the device widget .mobileprovision certificate is configured. Click Download to download the certificate file, and upload to Tuya Developer Platform.
Step 7: Generate scene widget .mobileprovision certificate
-
Go to the Profiles page and click +.
-
In the Distribution section, select App Store and click Continue.
-
From the App ID drop-down list, select the app ID in the format of
Bundle ID of main app.widgetscene, and click Continue.
-
Select the distribution certificate for the main app and click Continue.
In certain cases, multiple certificates with the same name might appear. You can distinguish these certificates by their expiration time, and select the one that matches the actual expiration time of the distribution certificate.
-
In the Provisioning Profile Name field, enter the name of the .mobileprovision certificate for Widget, and click Generate.
-
Now, the scene widget .mobileprovision certificate is configured. Click Download to download the certificate file and upload to Tuya Developer Platform.
To display and control a certain product feature on a device widget, perform the following steps:
Go to Tuya Developer Platform > Product > Tuya OS > Development, and open the development wizard for the target product. Select Step 4: Product Configuration > Quick toggle settings > Settings. In the Select functional points field, select the data point (DP) applicable to the product feature.
Is this page helpful?
YesFeedbackIs this page helpful?
YesFeedback


