Navigation Links
This topic describes how to set a navigation link for a link component on the Panel Studio. The following navigation link scenarios are supported: Panel Page, App Page, and URL.
Overview
Before you configure the link component, you can get familiar with the navigation link scenarios. The following sections describe each navigation link scenario. 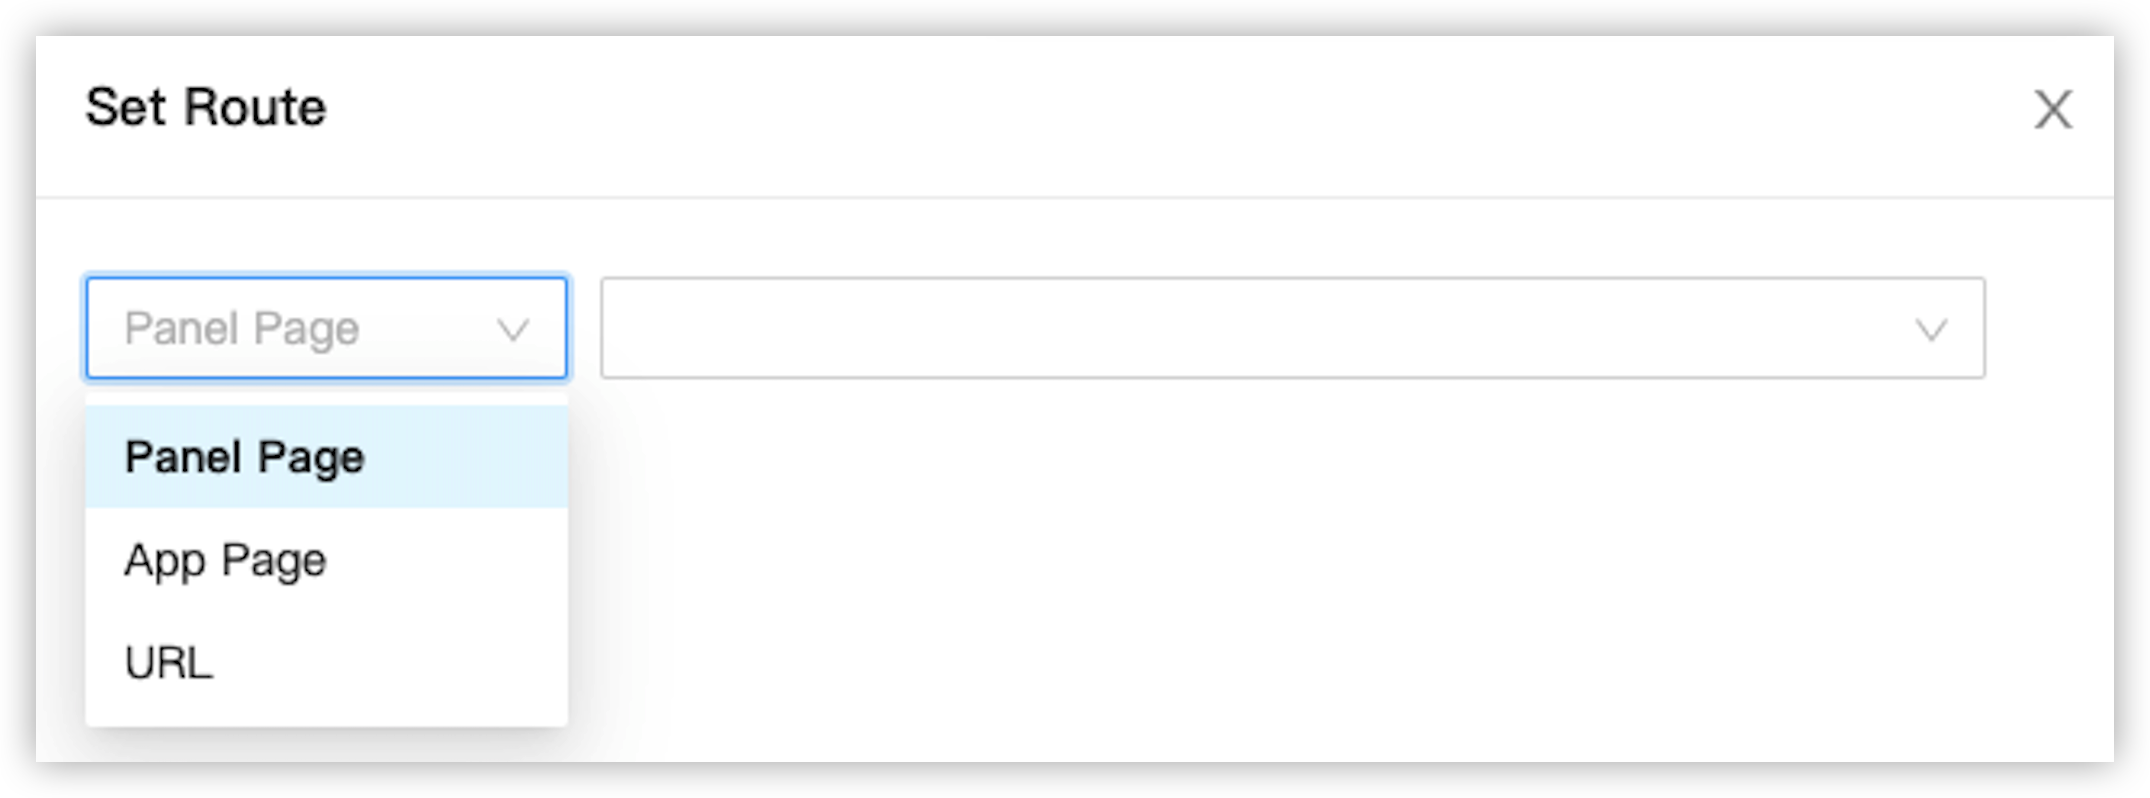
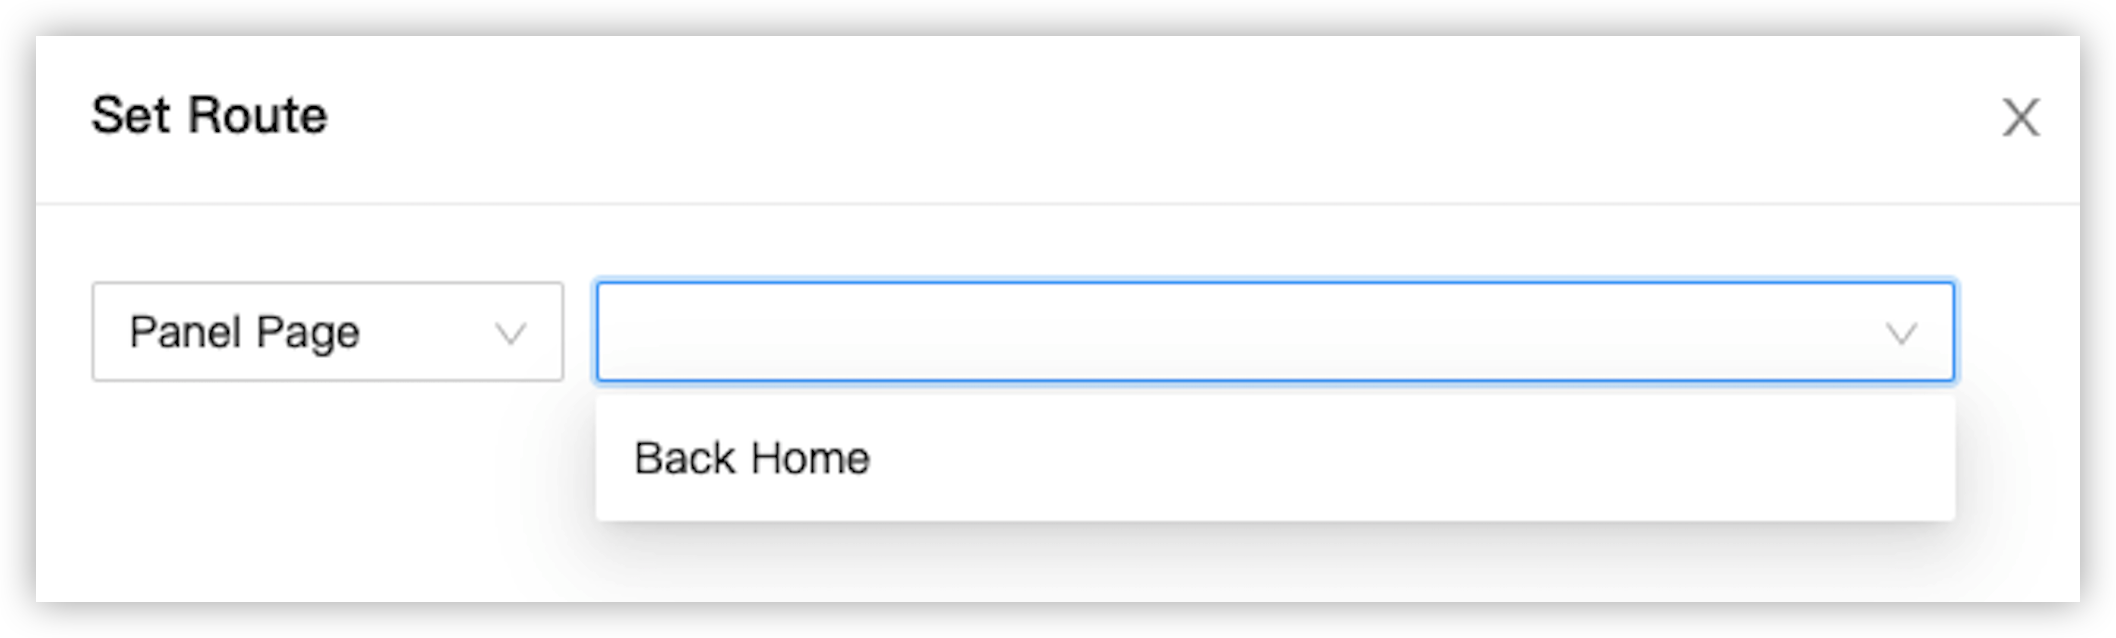
- Choose Set Route > Panel Page: If multiple pages exist on a panel, you can set a navigation link to jump from a page to another page on the panel.
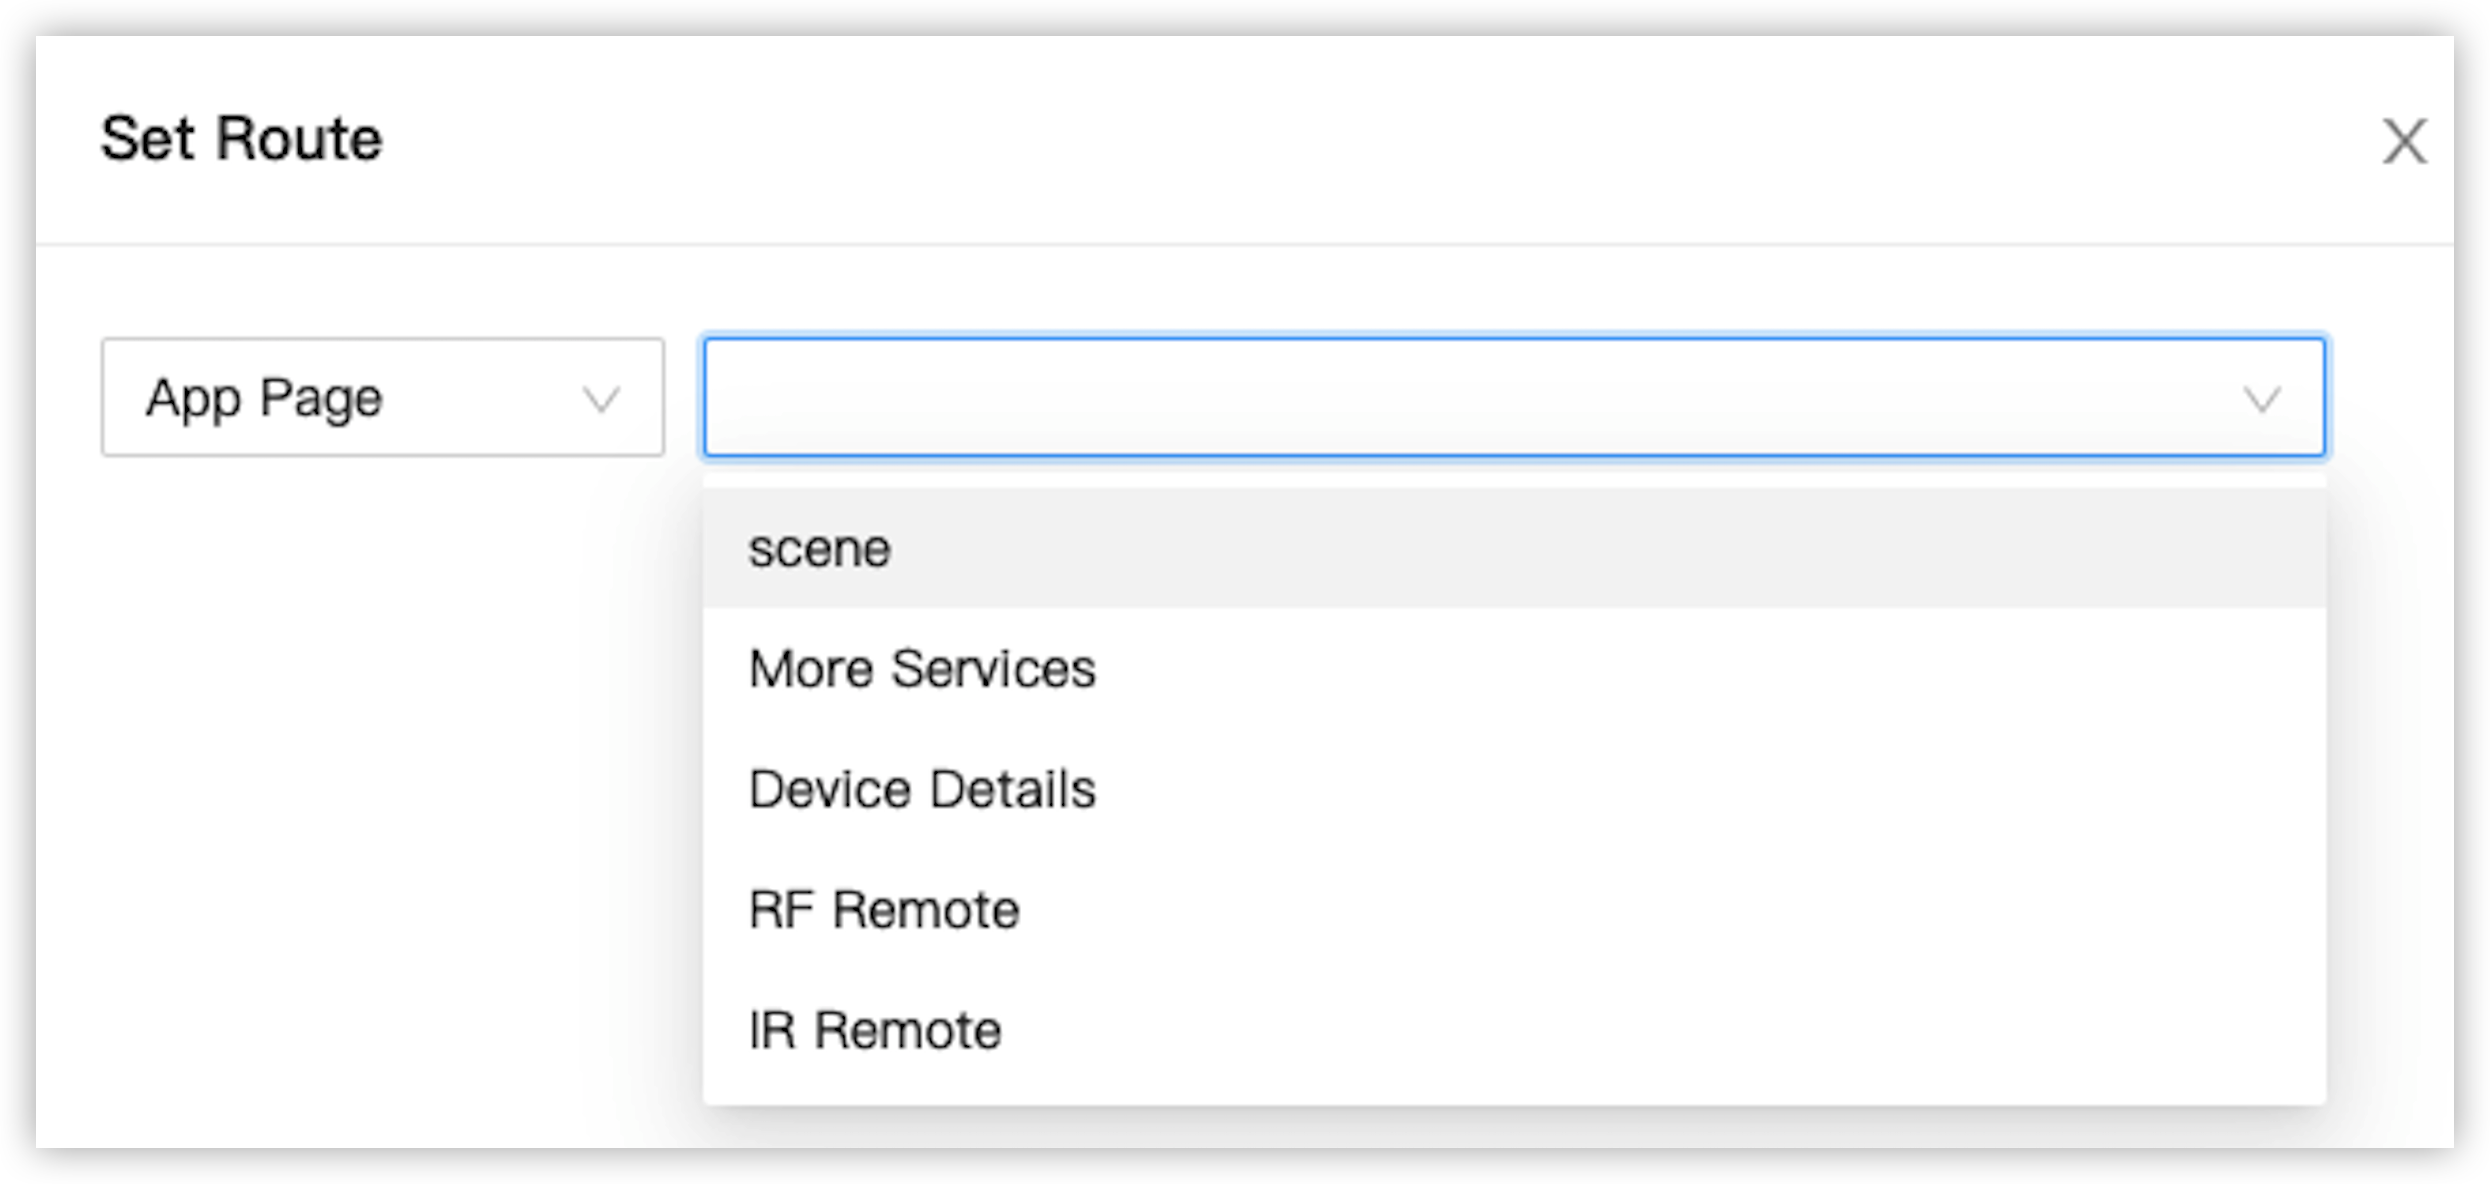
- Choose Set Route > App Page: To support different scenes, you can set a navigation link to jump from the panel to another app, such as Cloud Recipes.
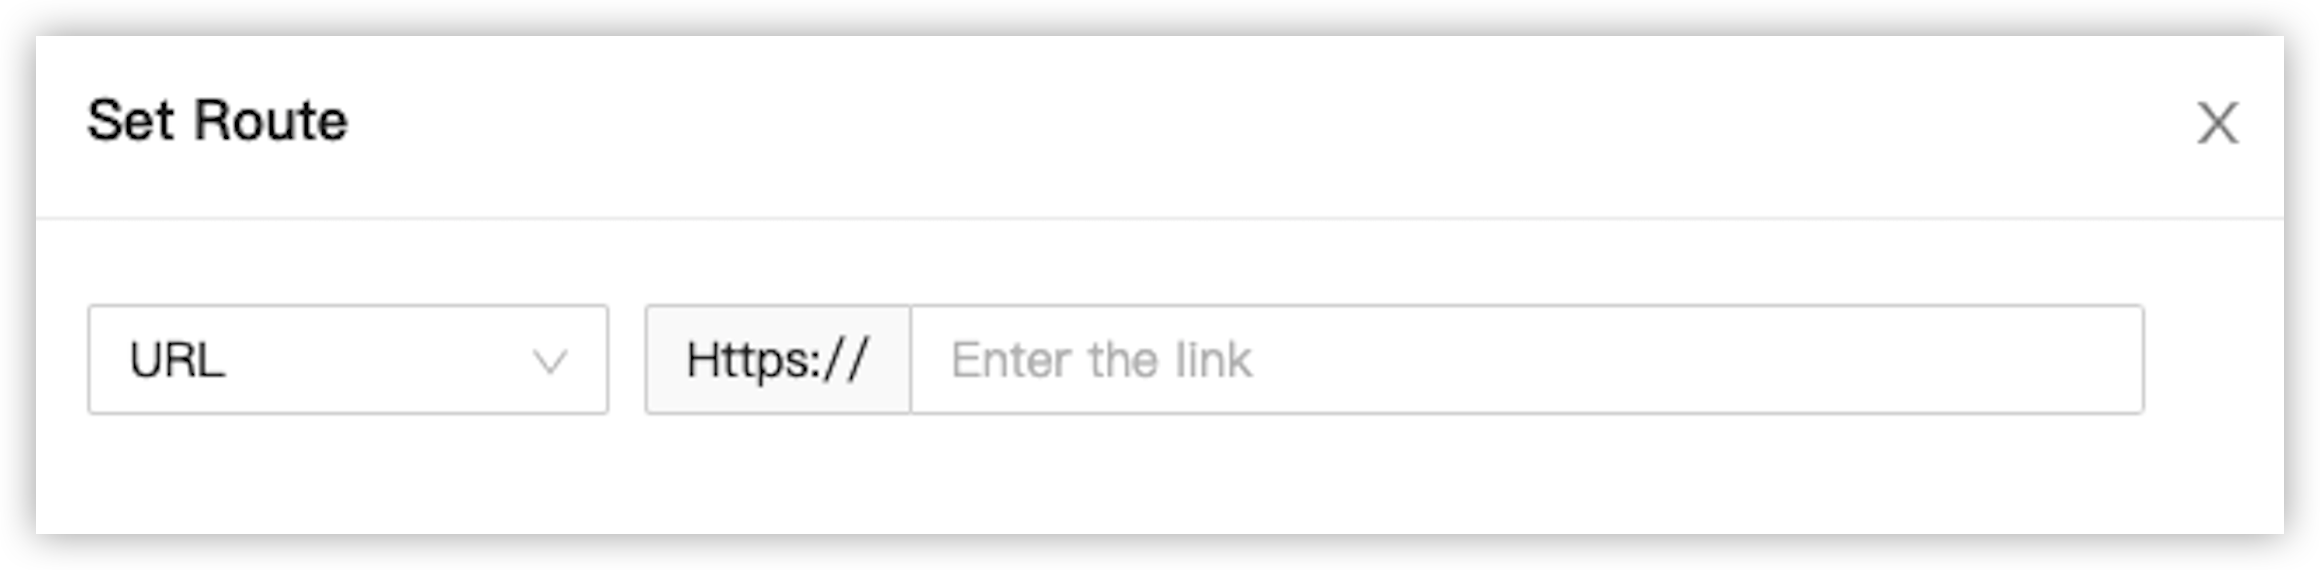
- Choose Set Route > URL: You can set a navigation link to jump from the panel to another page, such as Tuya’s official website.
Procedure
-
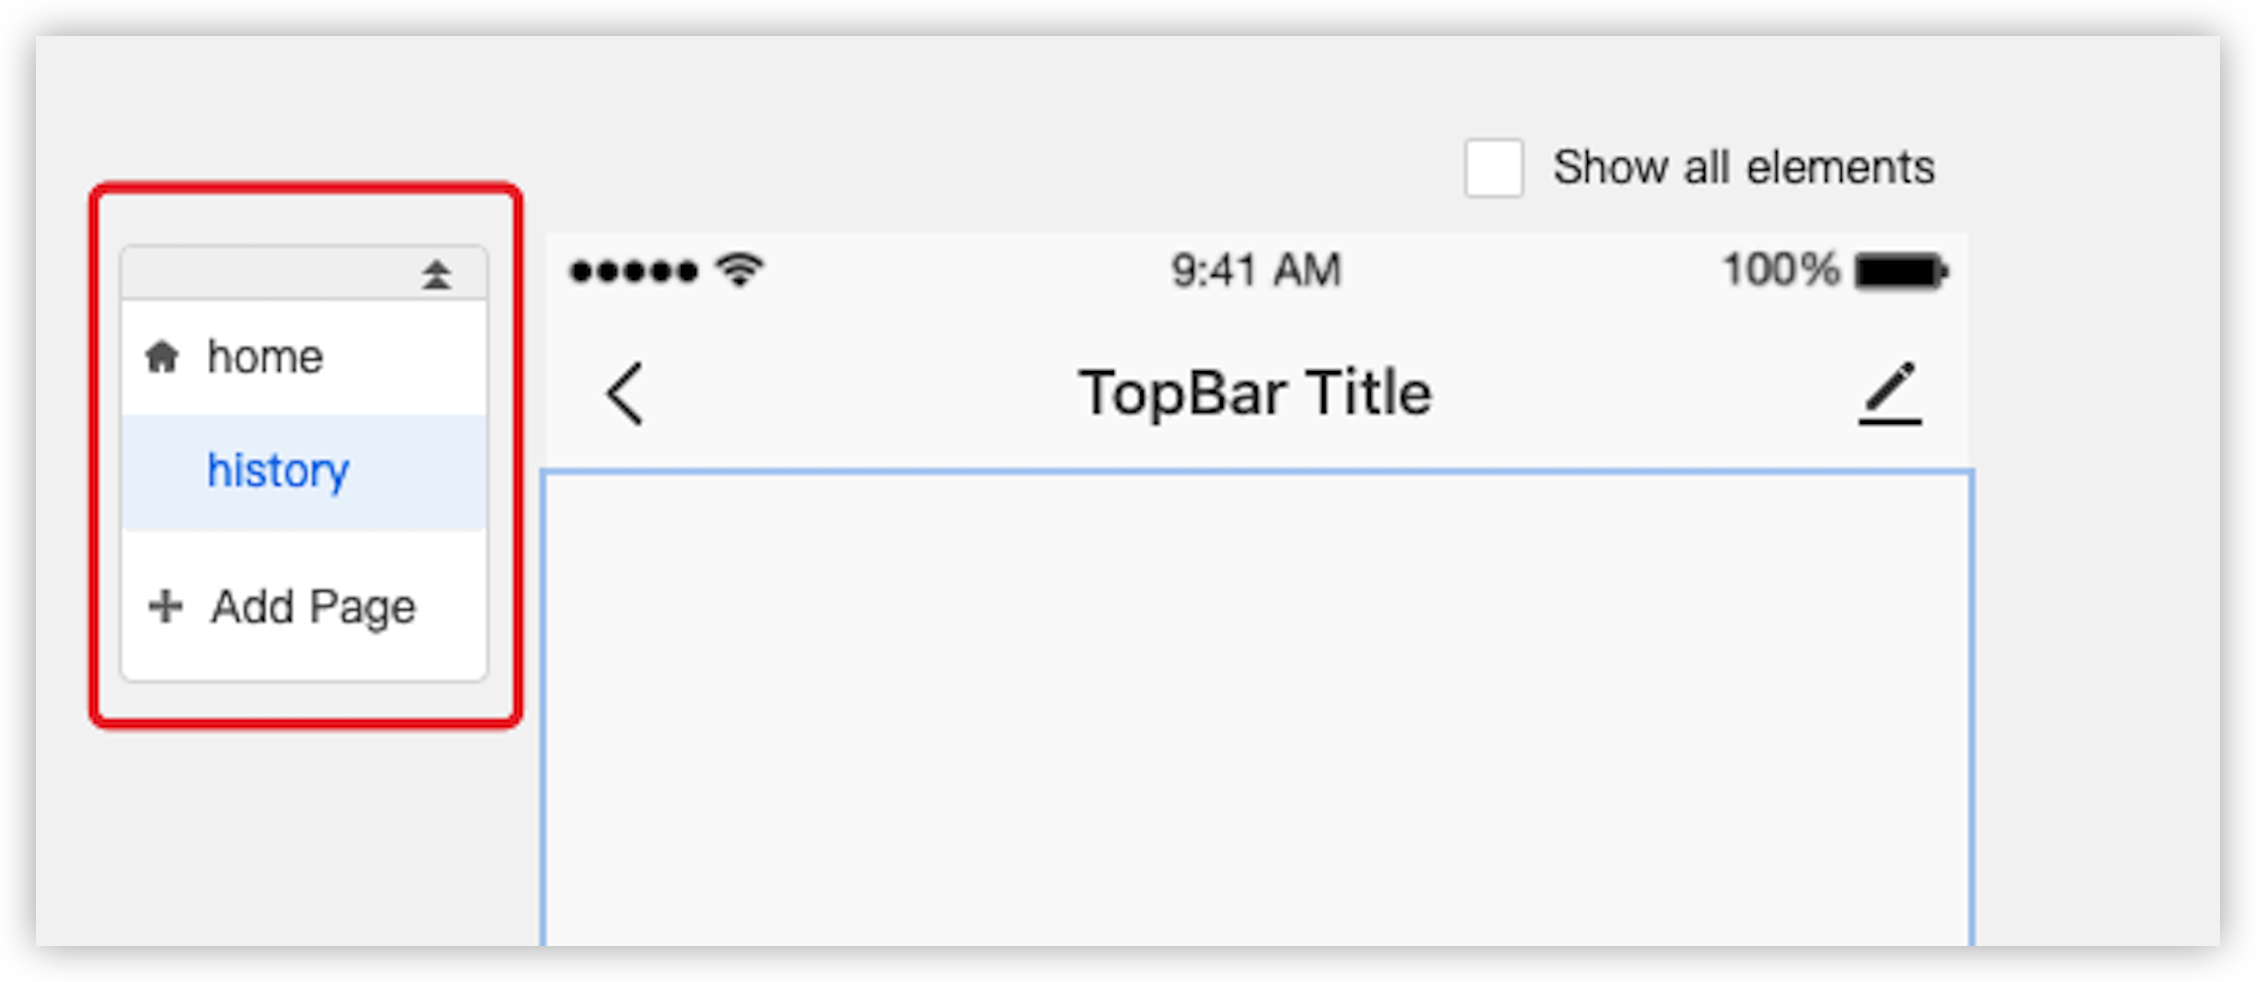
In the Panel Studio, create a new page and rename it to history.
-
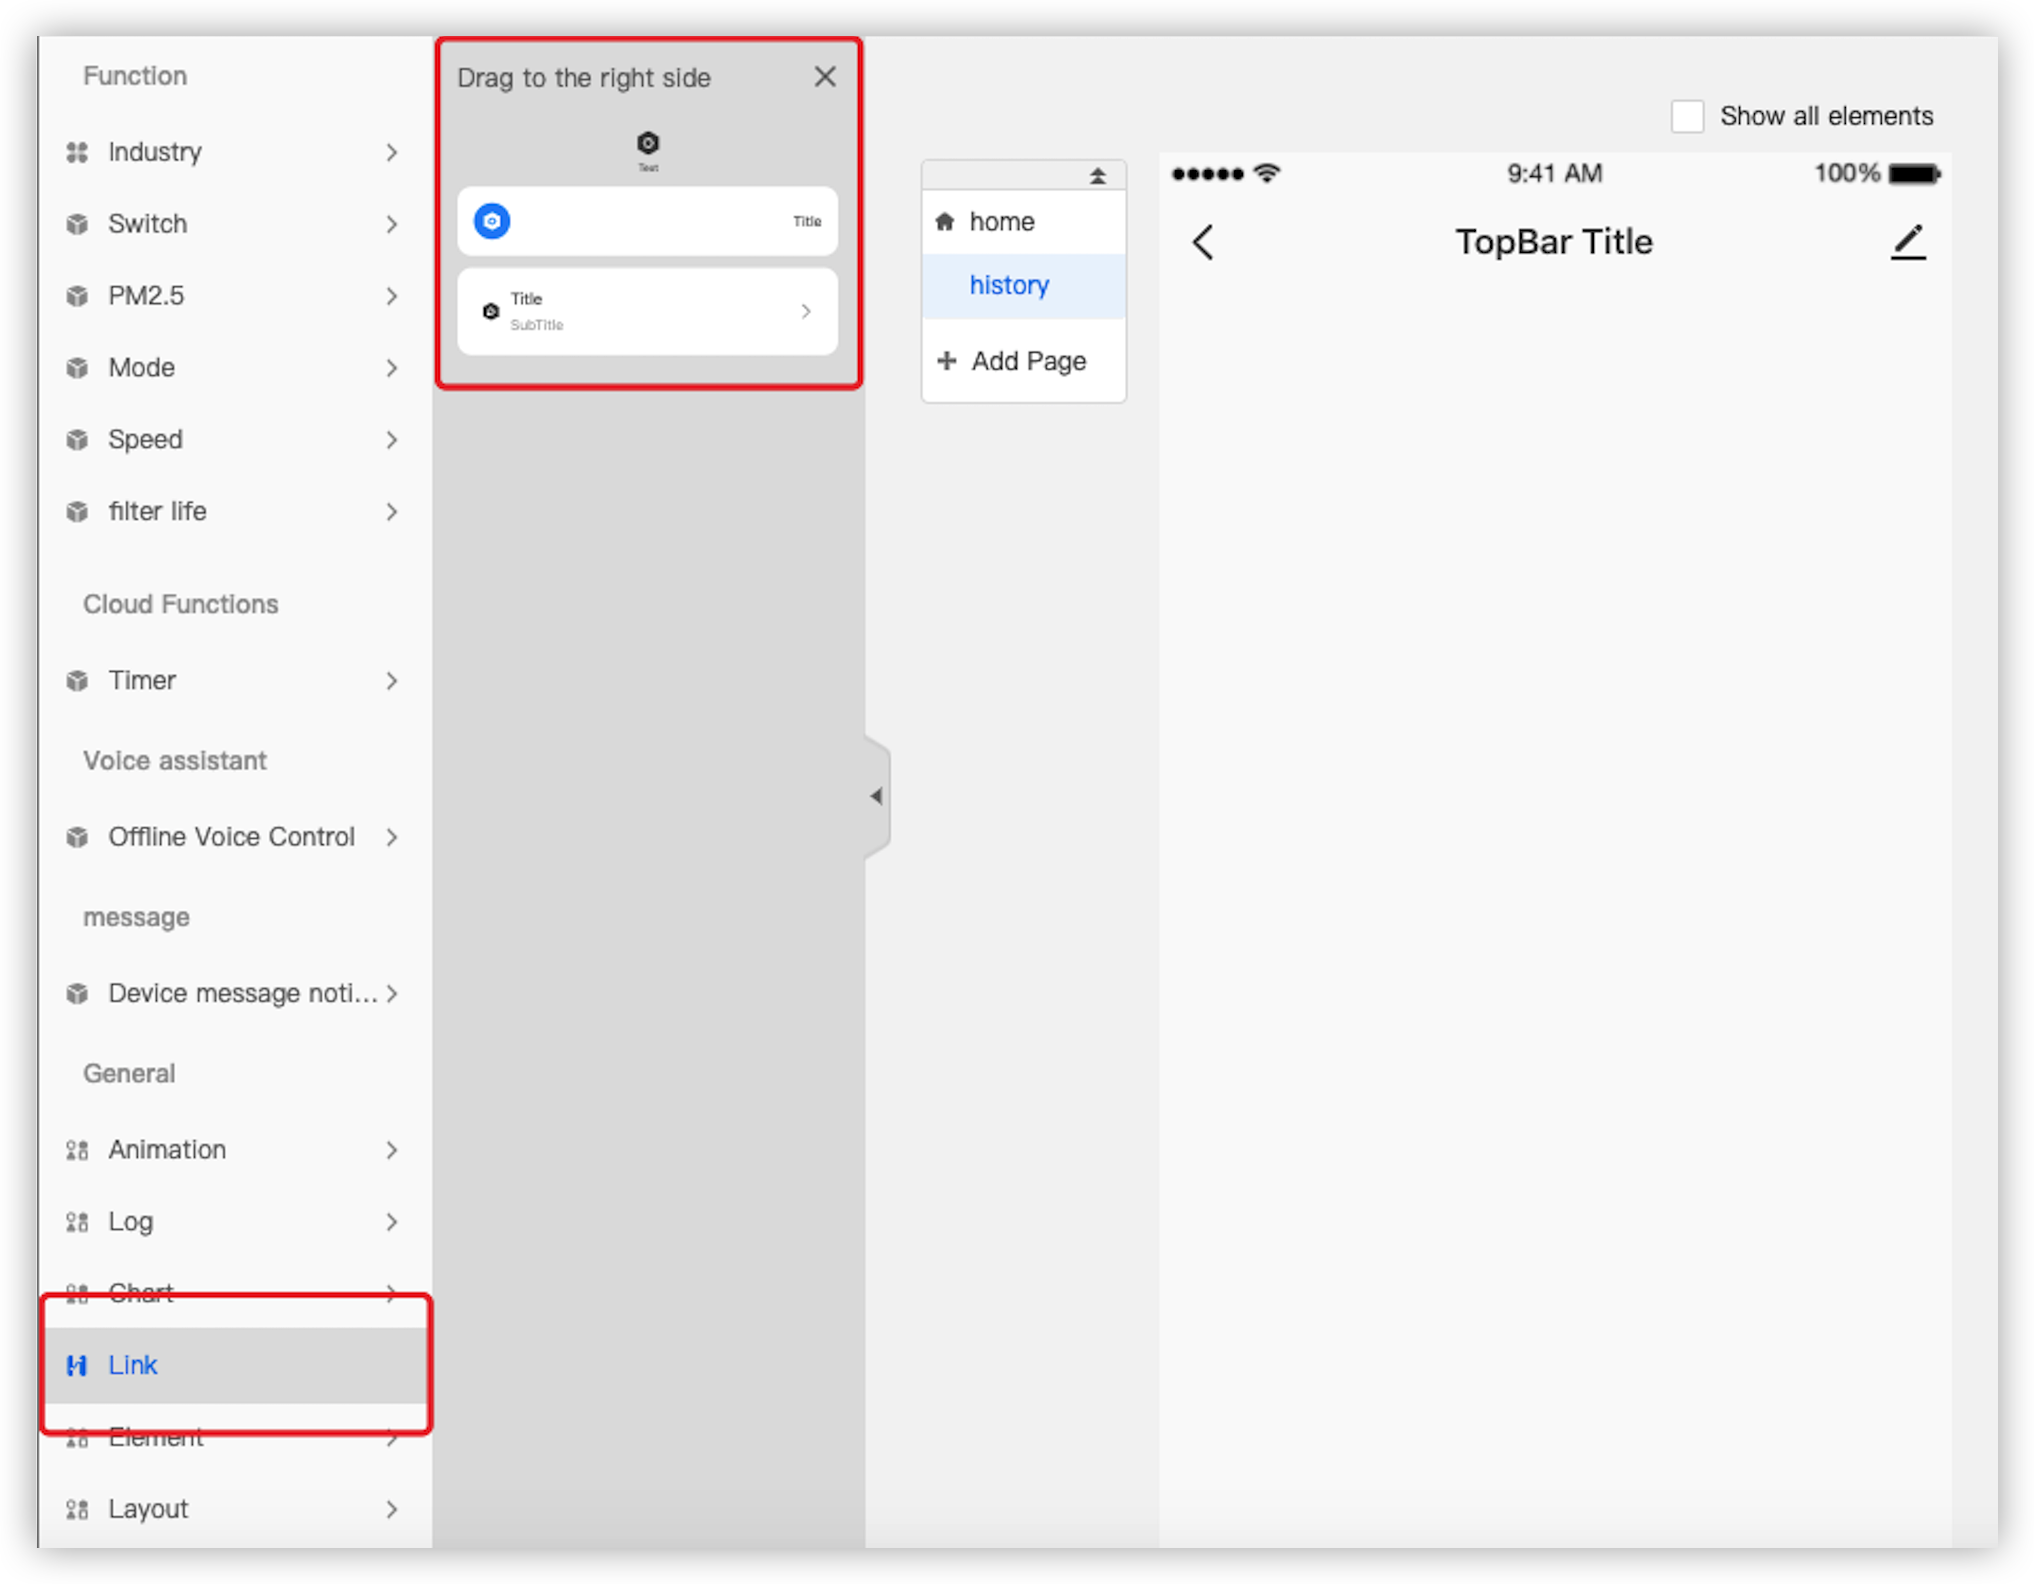
In the left-side navigation pane of the Panel Studio, drag a link component to the canvas.
-
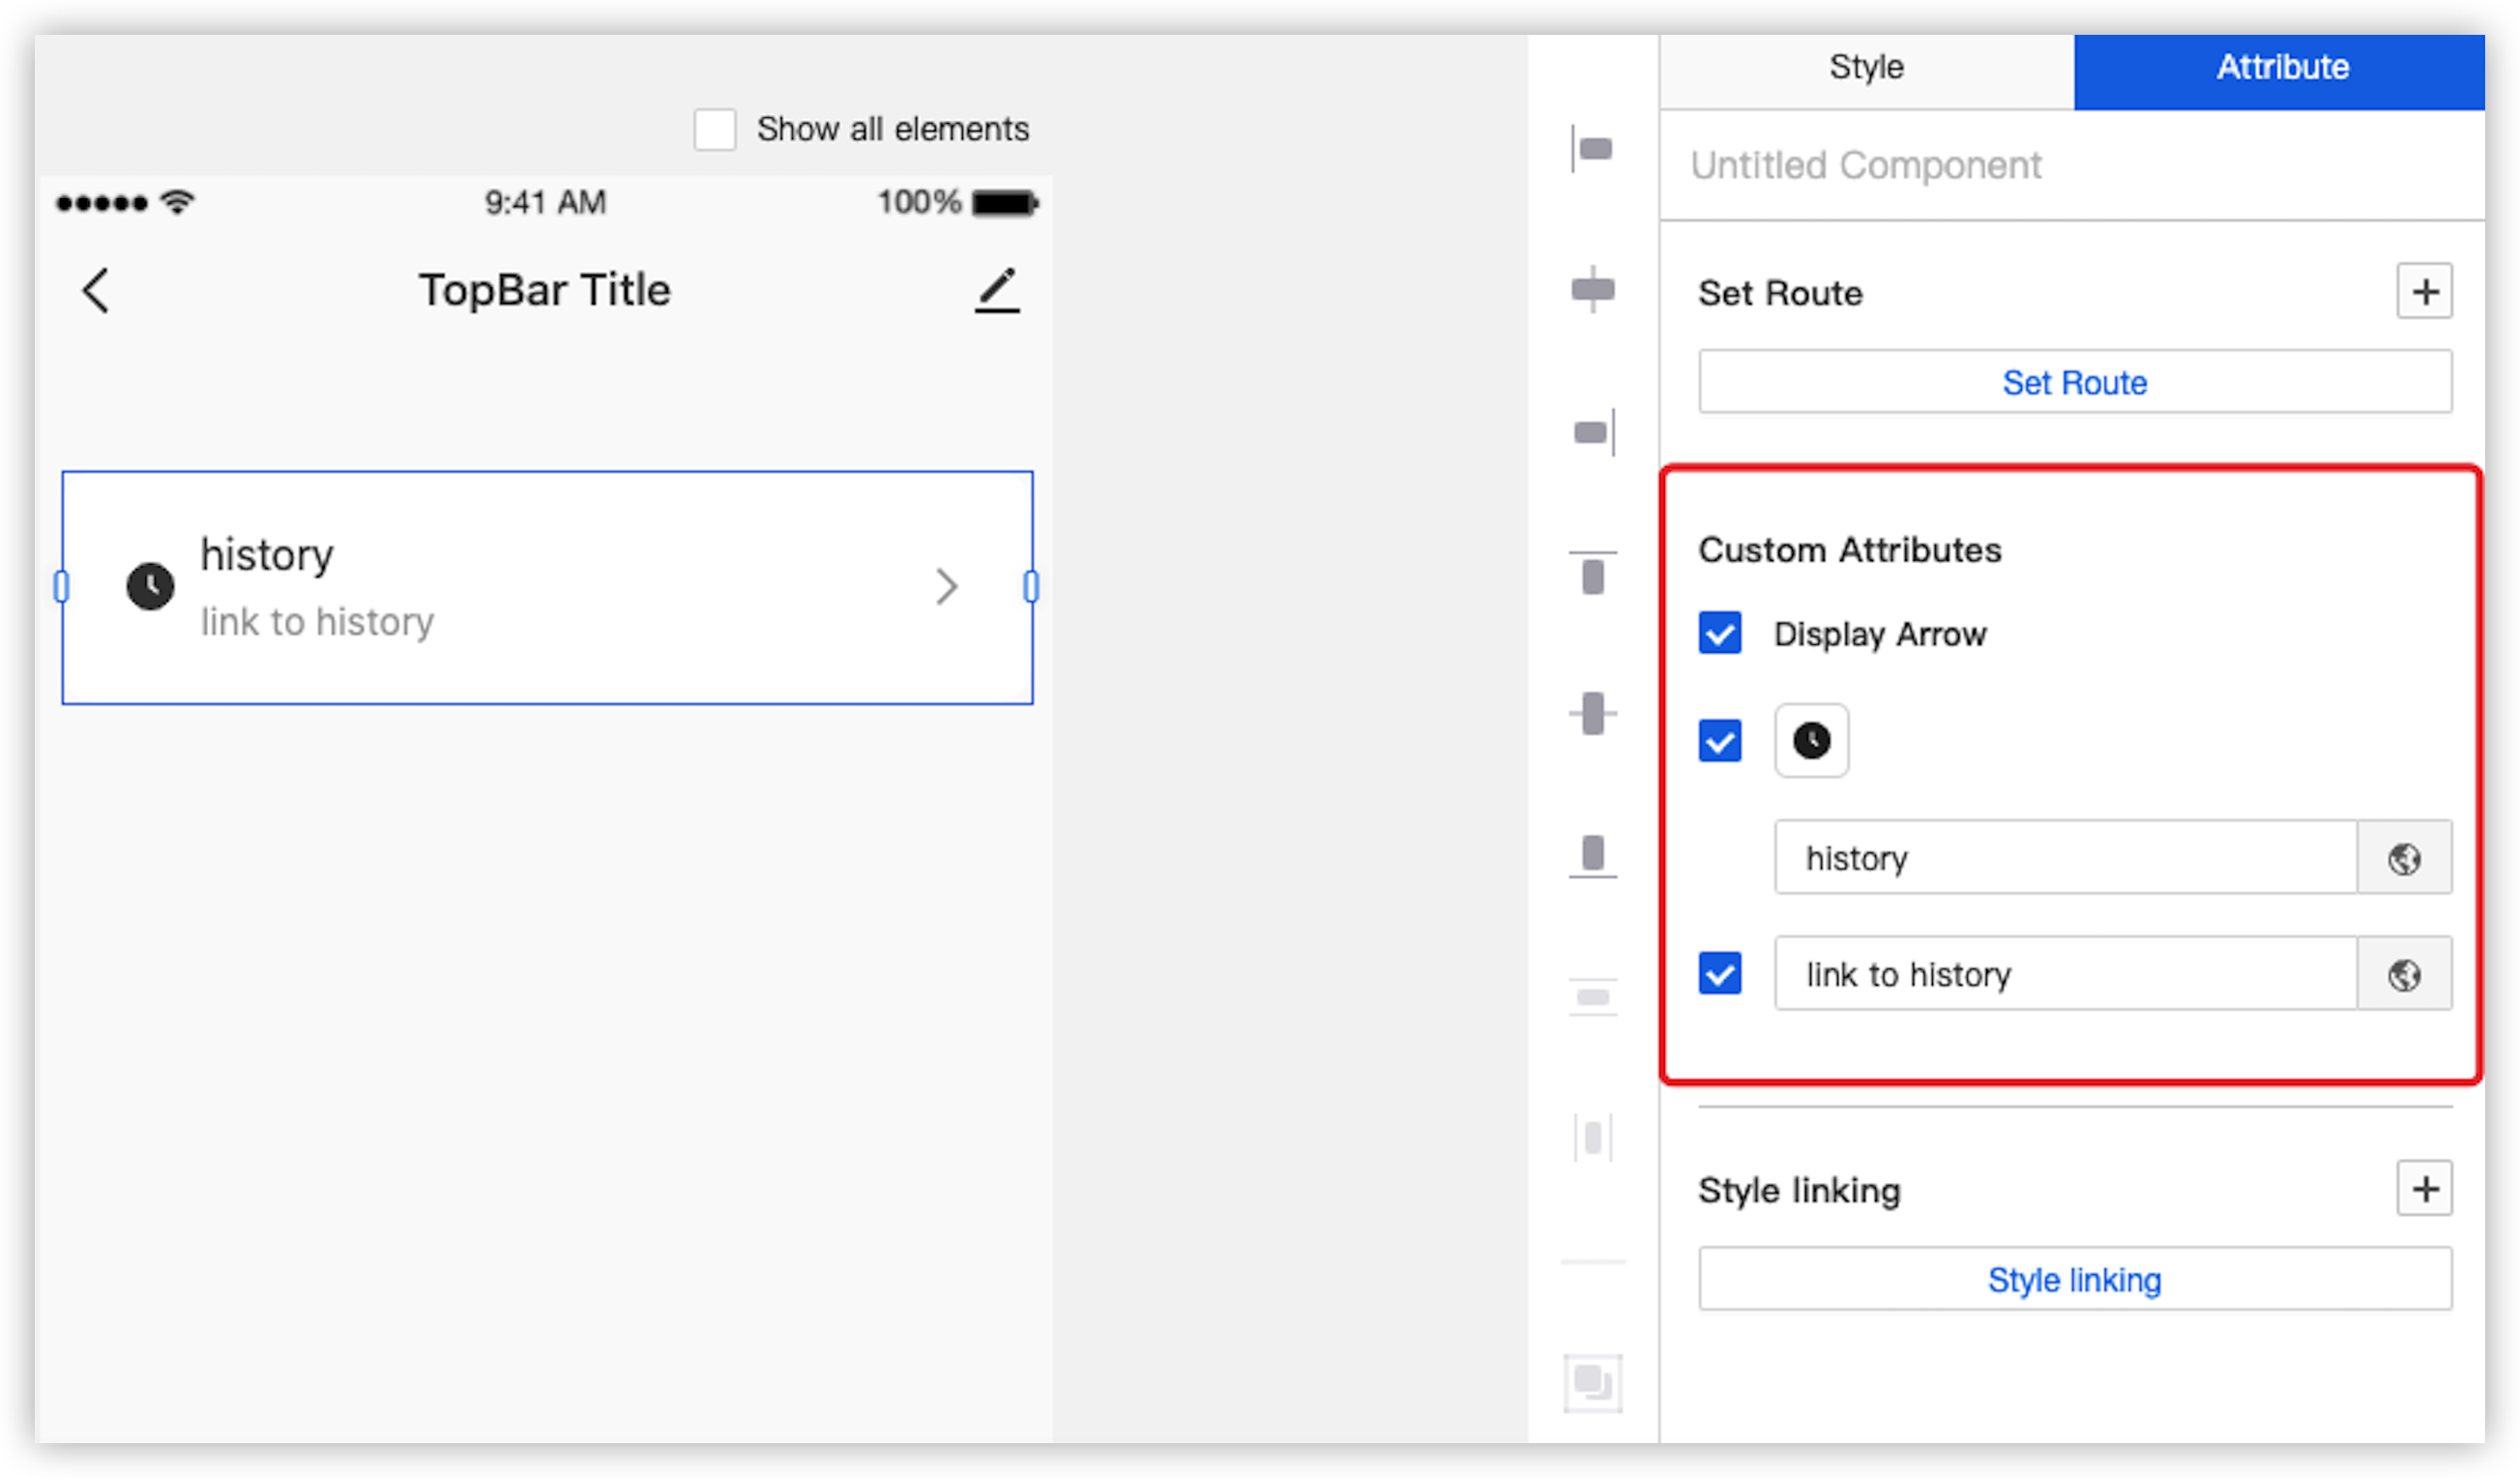
Go to the Attribute tab, set the icon of the navigation link, and then rename the link title to history.
-
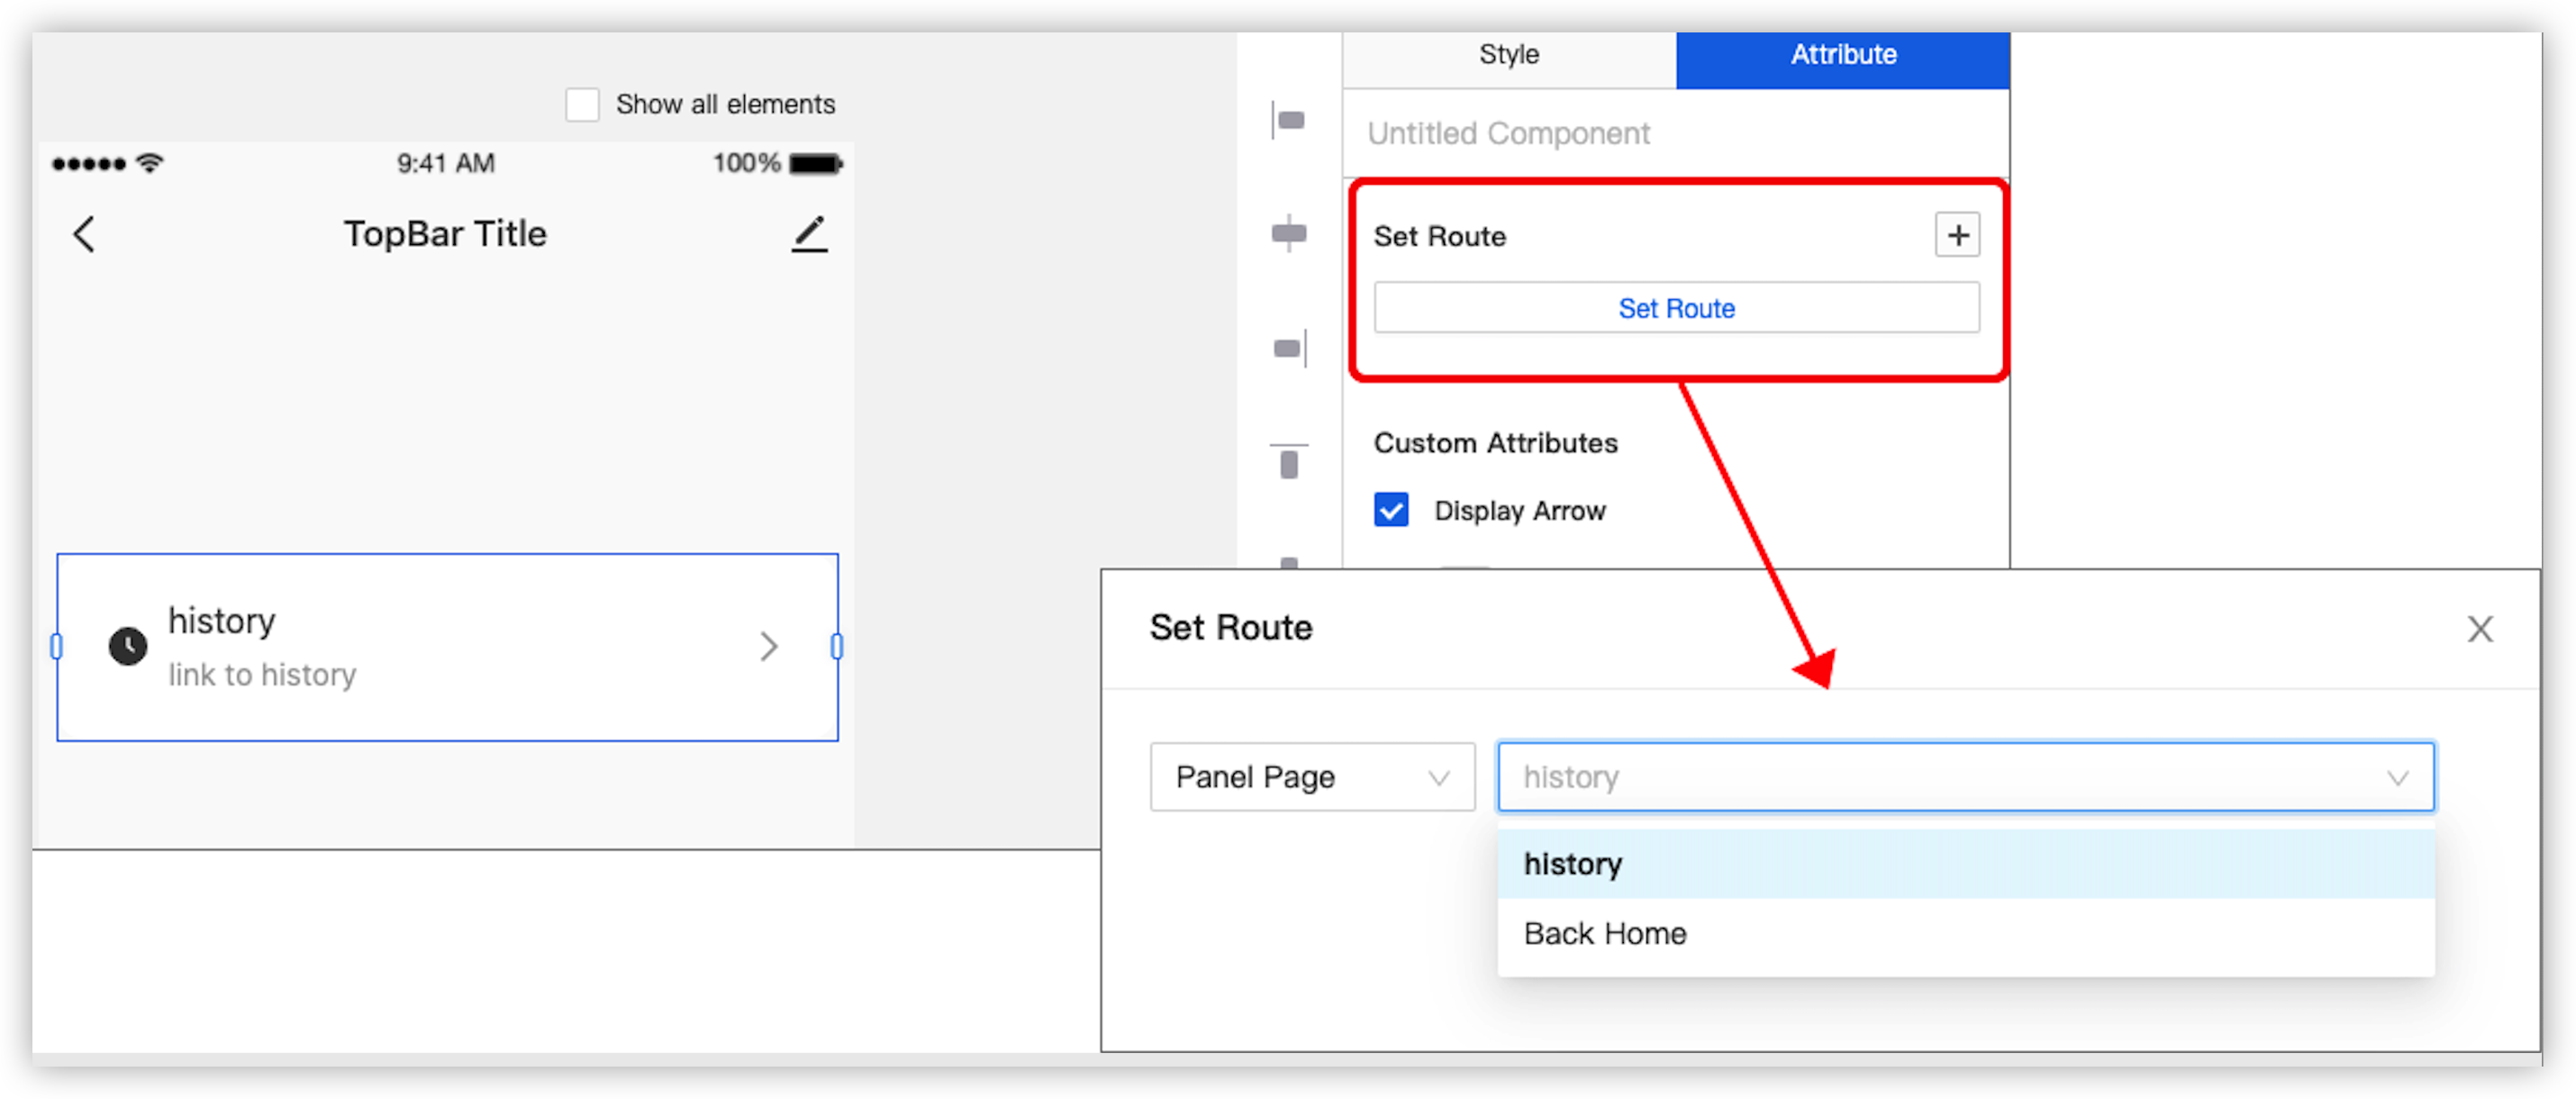
On the Attribute tab, click Set Route. In the dialog box that appears, select history from the Panel Page drop-down list.
Is this page helpful?
YesFeedbackIs this page helpful?
YesFeedback


