Test Drivers for Tuya Edge Gateway
Last Updated on : 2024-06-20 07:05:17download
This topic describes how to test drivers and driver instances for Tuya Edge Gateway (TEdge). An OPC Unified Architecture (UA) driver is used in the following example. Driver configurations might slightly vary based on different drivers. But the configuration procedure is similar.
Test the driver with the edge gateway
Prerequisites
The edge gateway is deployed and activated. For more information, see Deploy and Activate Tuya Edge Gateway.
How it works
Use the ID of the driver instance that matches the driver protocol at the edge gateway to run the driver on the on-premises host. Before you run the driver on the premises, stop the driver at the edge gateway.
Procedure
-
Deploy the Docker image of the driver to your host. The package can be placed in the directory
/var/tedge/edgex-driver-data/upload/library/. You can also start the image on the premises without image packaging. -
Add your driver to the driver library: Visit the URL http://localhost:3000. In the left-side navigation pane of Tuya Edge Gateway, choose Driver Settings > Driver Libraries and click Create.

In the dialog box that appears, select the required driver file from the Driver File field, click Download Configuration Template, modify the downloaded template, click Upload Configuration File, and then continue to configure the template.
-
Configure the template: The template must be in the JSON format and consist of the following parts:
deviceServer,deviceProtocols, anddiviceDpAttrs.deviceProtocols: Enter the value ofProtocolsdefined in[[DeviceList]]of the driver configuration filecmd/res/configuration.toml.diviceDpAttrs: Enter the value ofattributesdefined indeviceResourcesof the device configuration file. The file is the YAML file in the directorycmd/res/.
For example, the following code block shows the configuration file
[[DeviceList]]:[[DeviceList]] Name = "SimulationOpcuaDevice" Profile = "ABC.Device.Opcua.Profile" Description = "OPC UA Device" Labels = ["test", "opcua"] [DeviceList.Protocols] [DeviceList.Protocols.opcua] Endpoint = "opc.tcp://0.0.0.0:40840/tuyaopcua/server/"The following code block shows the device configuration file
deviceResources:deviceResources: - name: "1" description: "Switch" attributes: { nodeId: "ns=2;i=2" } properties: value: { type: "Bool", readWrite: "R", defaultValue: False }The following code block shows the configuration template based on the preceding configuration files. The fields that are not set must be reserved and cannot be deleted.
{ "deviceServer": {}, "deviceProtocols": { "opcua": [ { "name": "Endpoint", "display": "endpoint", "type": "string" } ] }, "deviceDpAttrs": [ { "name": "nodeId", "display": "nodeId", "type": "string" } ] } -
Create a driver instance: In the left-side navigation pane, choose Driver Settings > Driver Instances and click Create. In the dialog box that appears, enter a preferred but unique driver instance name. Set Driver Library Name to the name of the newly created driver library.
The newly created driver instance is stopped by default. You do not need to start the instance for the on-premises test. The driver instance ID is used to start the driver instance on the premises.:::

-
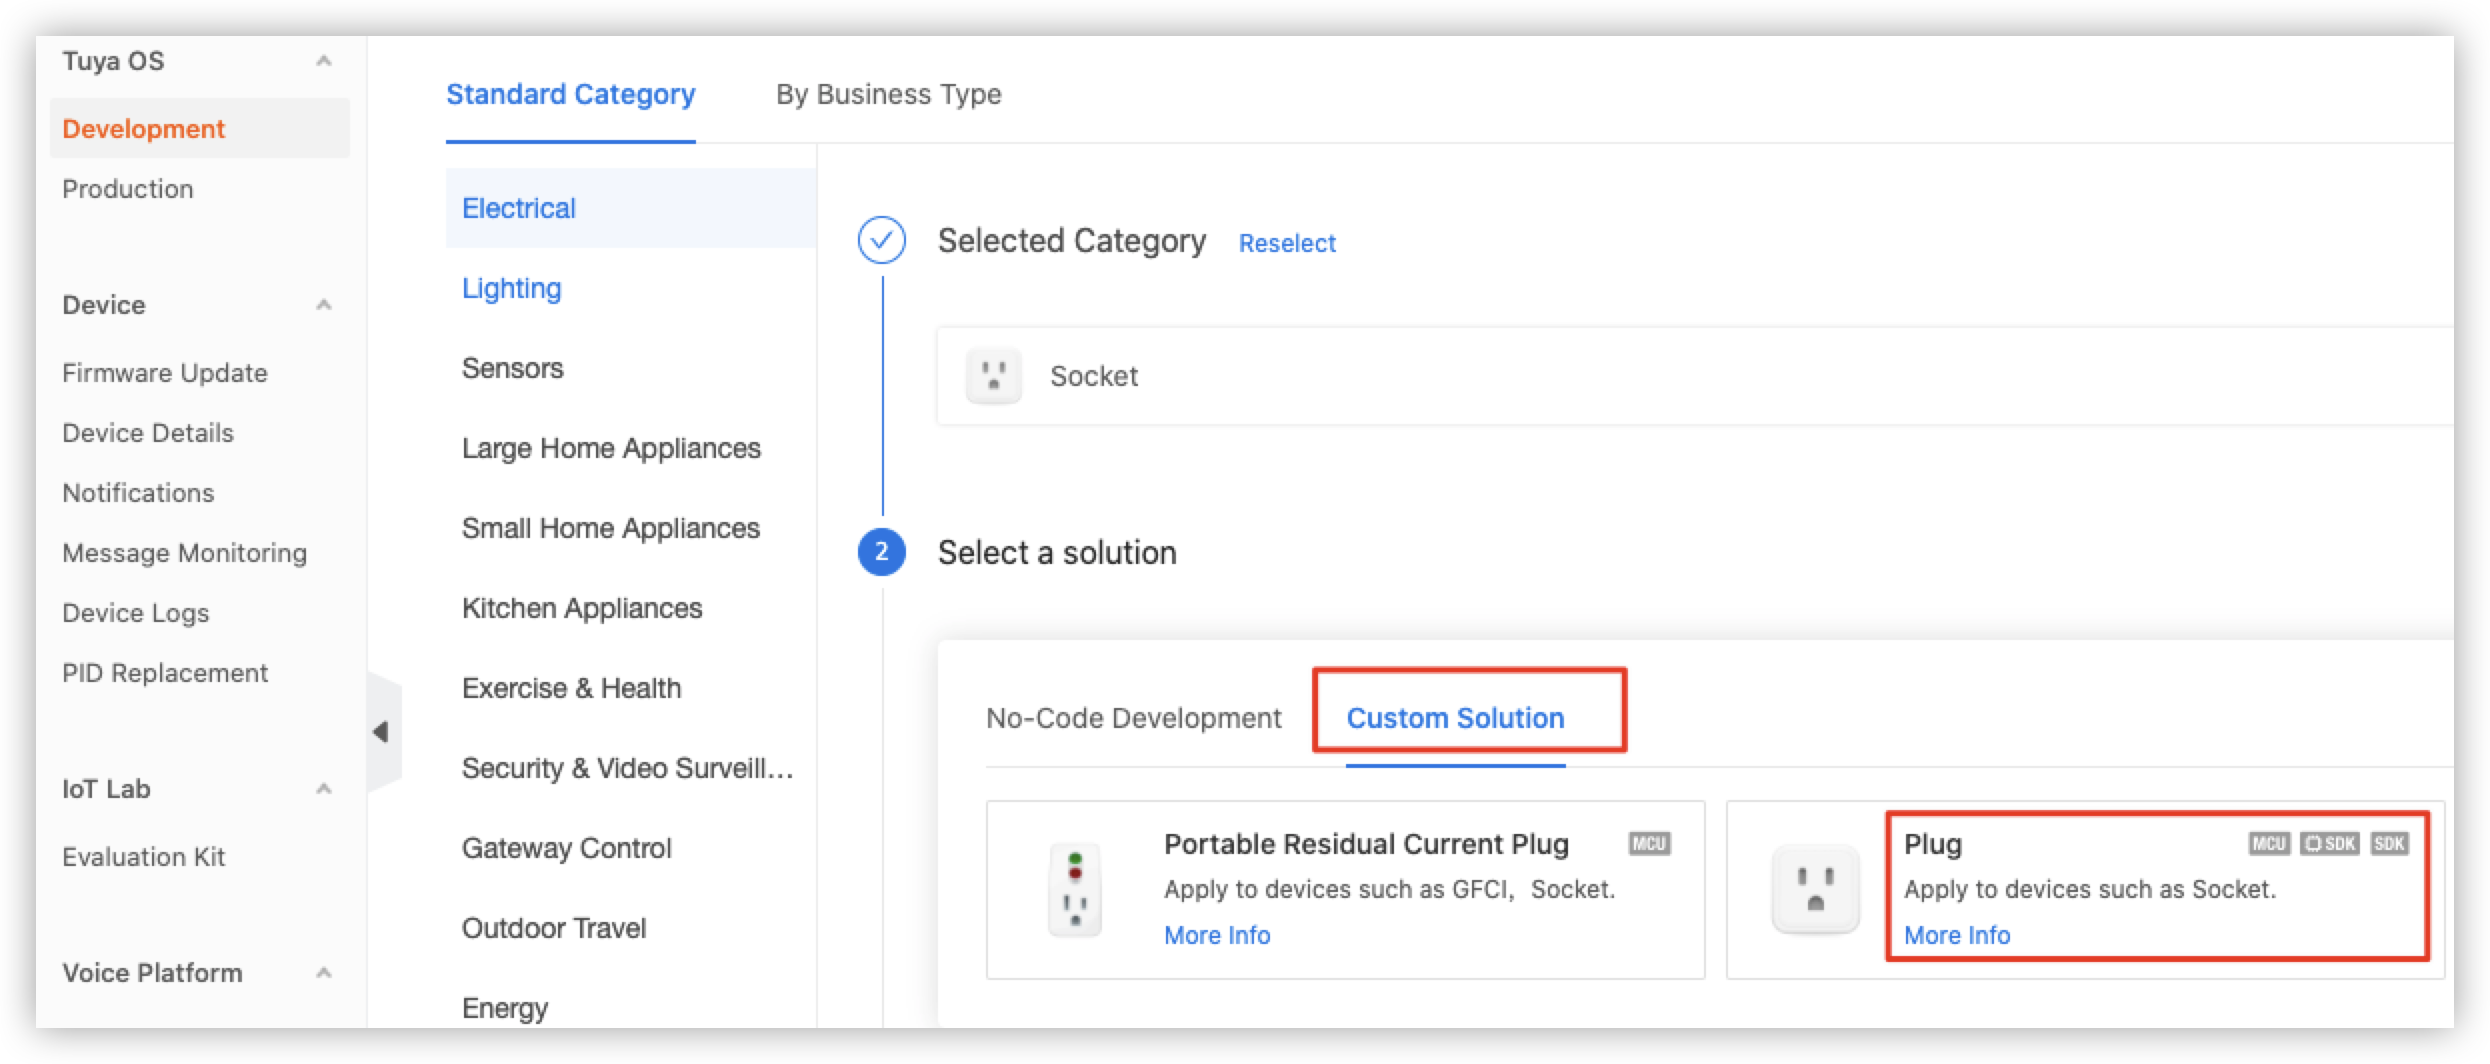
Create a test product on the Tuya Developer Platform: Go to the Create page on the platform. On the Standard Category tab, choose Electrical > Socket.
Click the Custom Solution tab and select Plug or another type of product.
Enter the product name and keep the default settings of Protocol and Power Type.
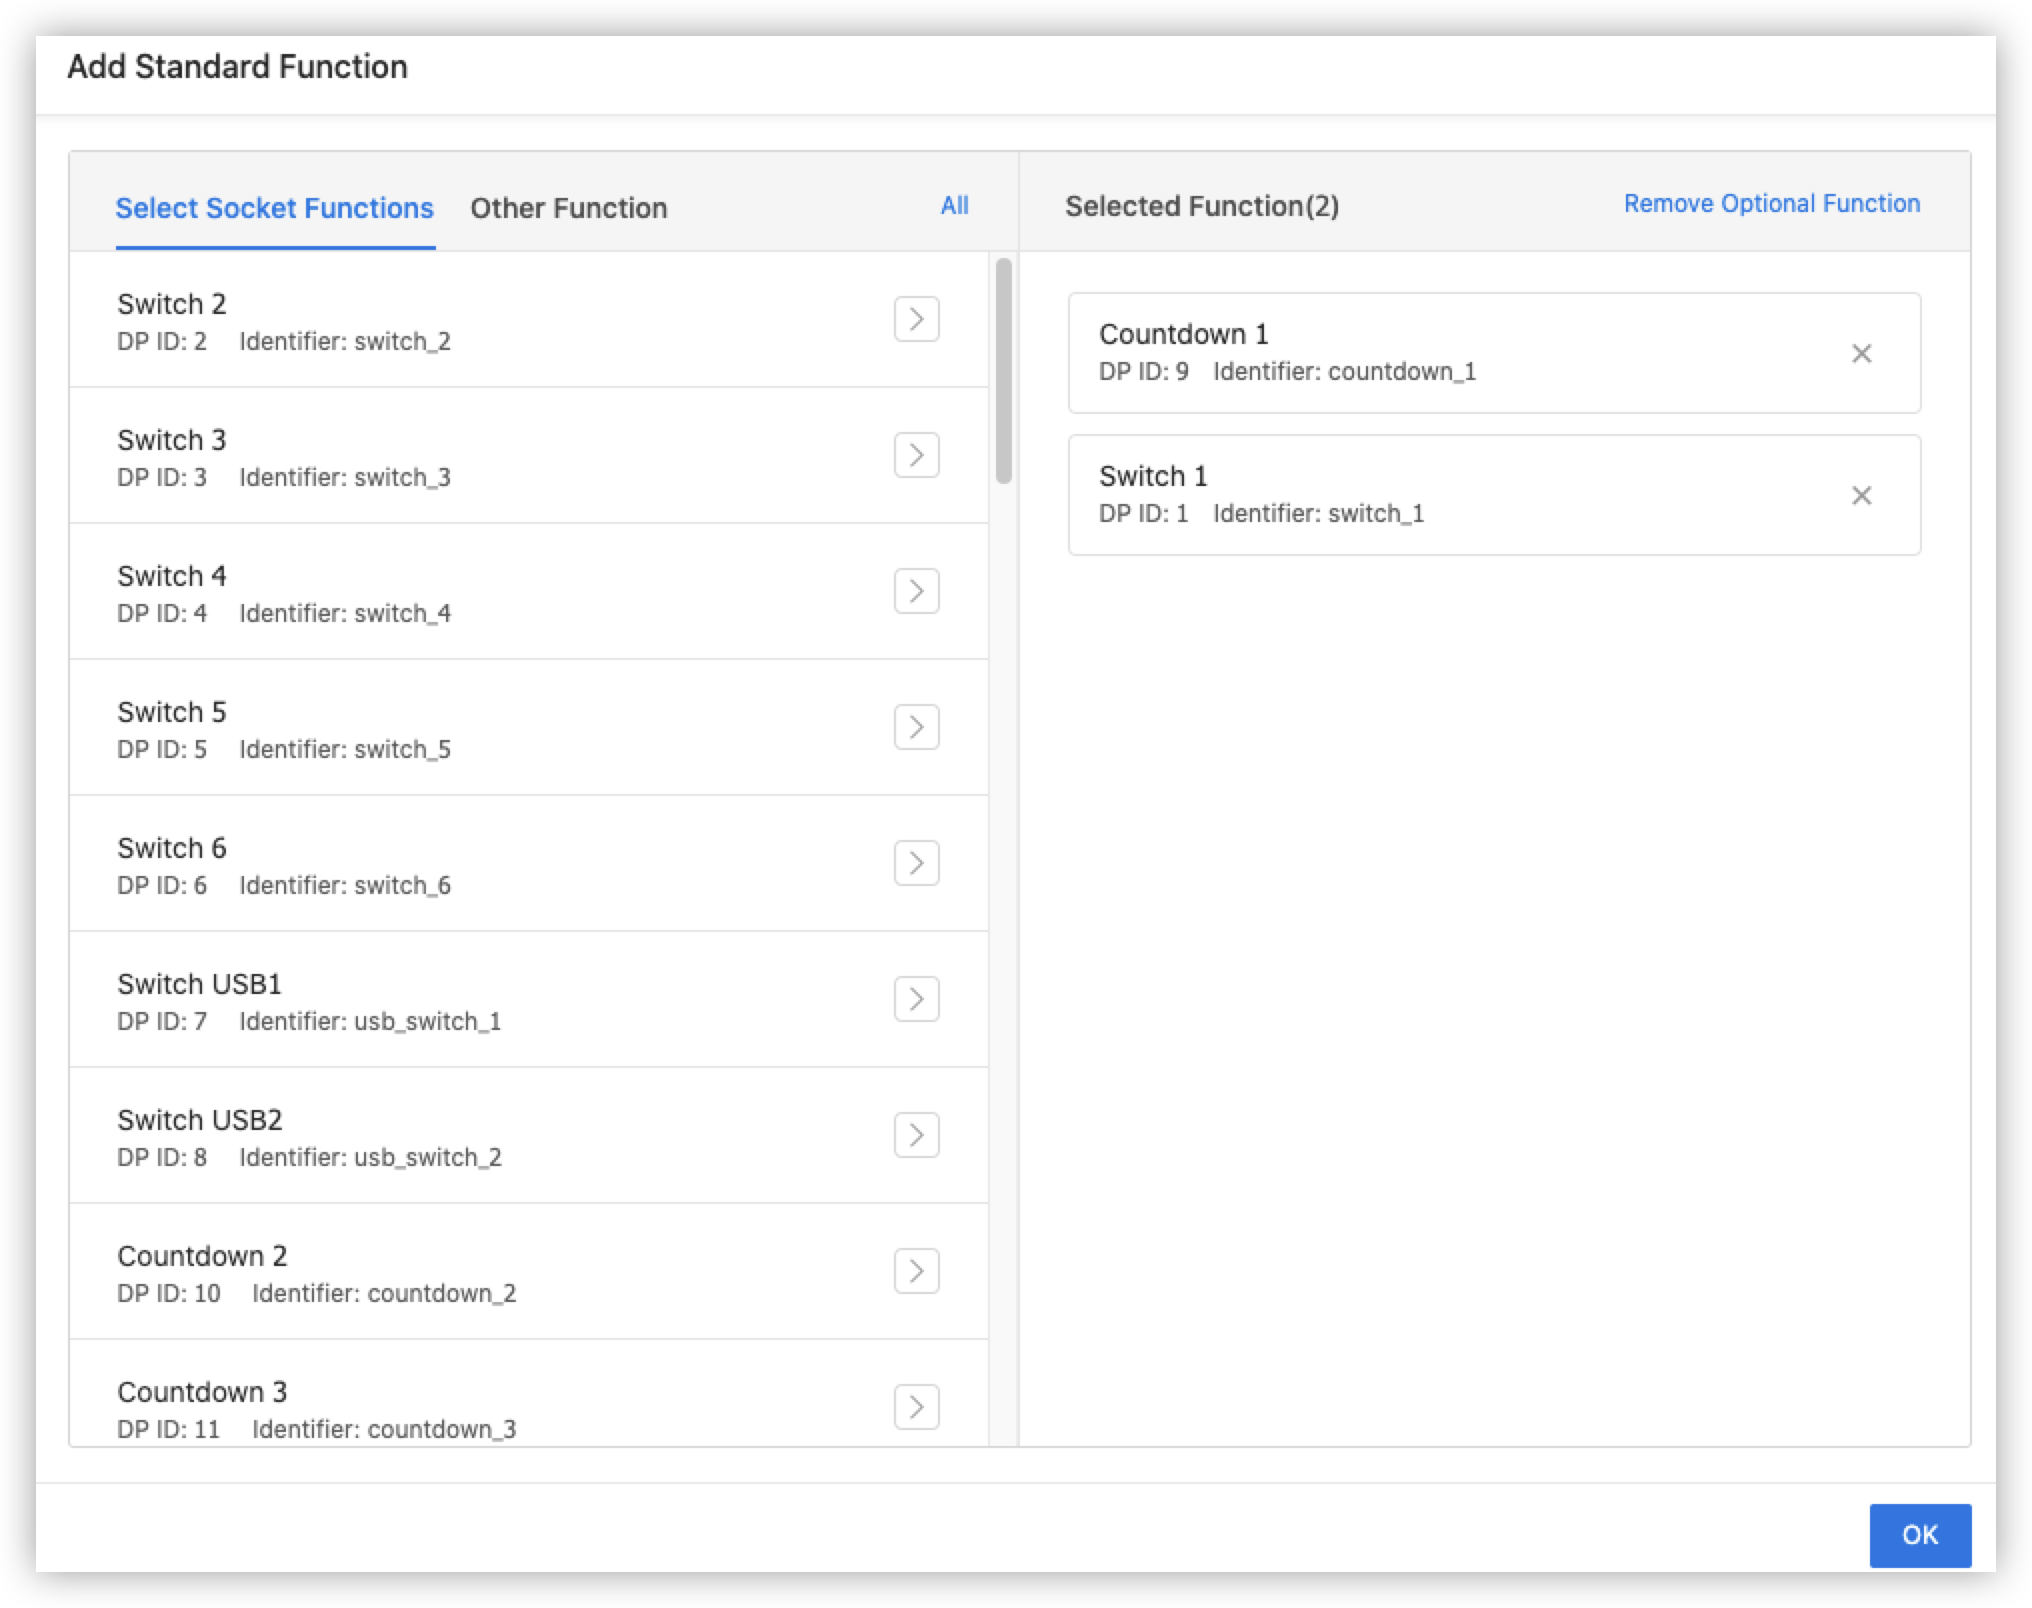
Then, select socket data points (DPs). In this example, Switch 1 and Countdown 1 are selected.
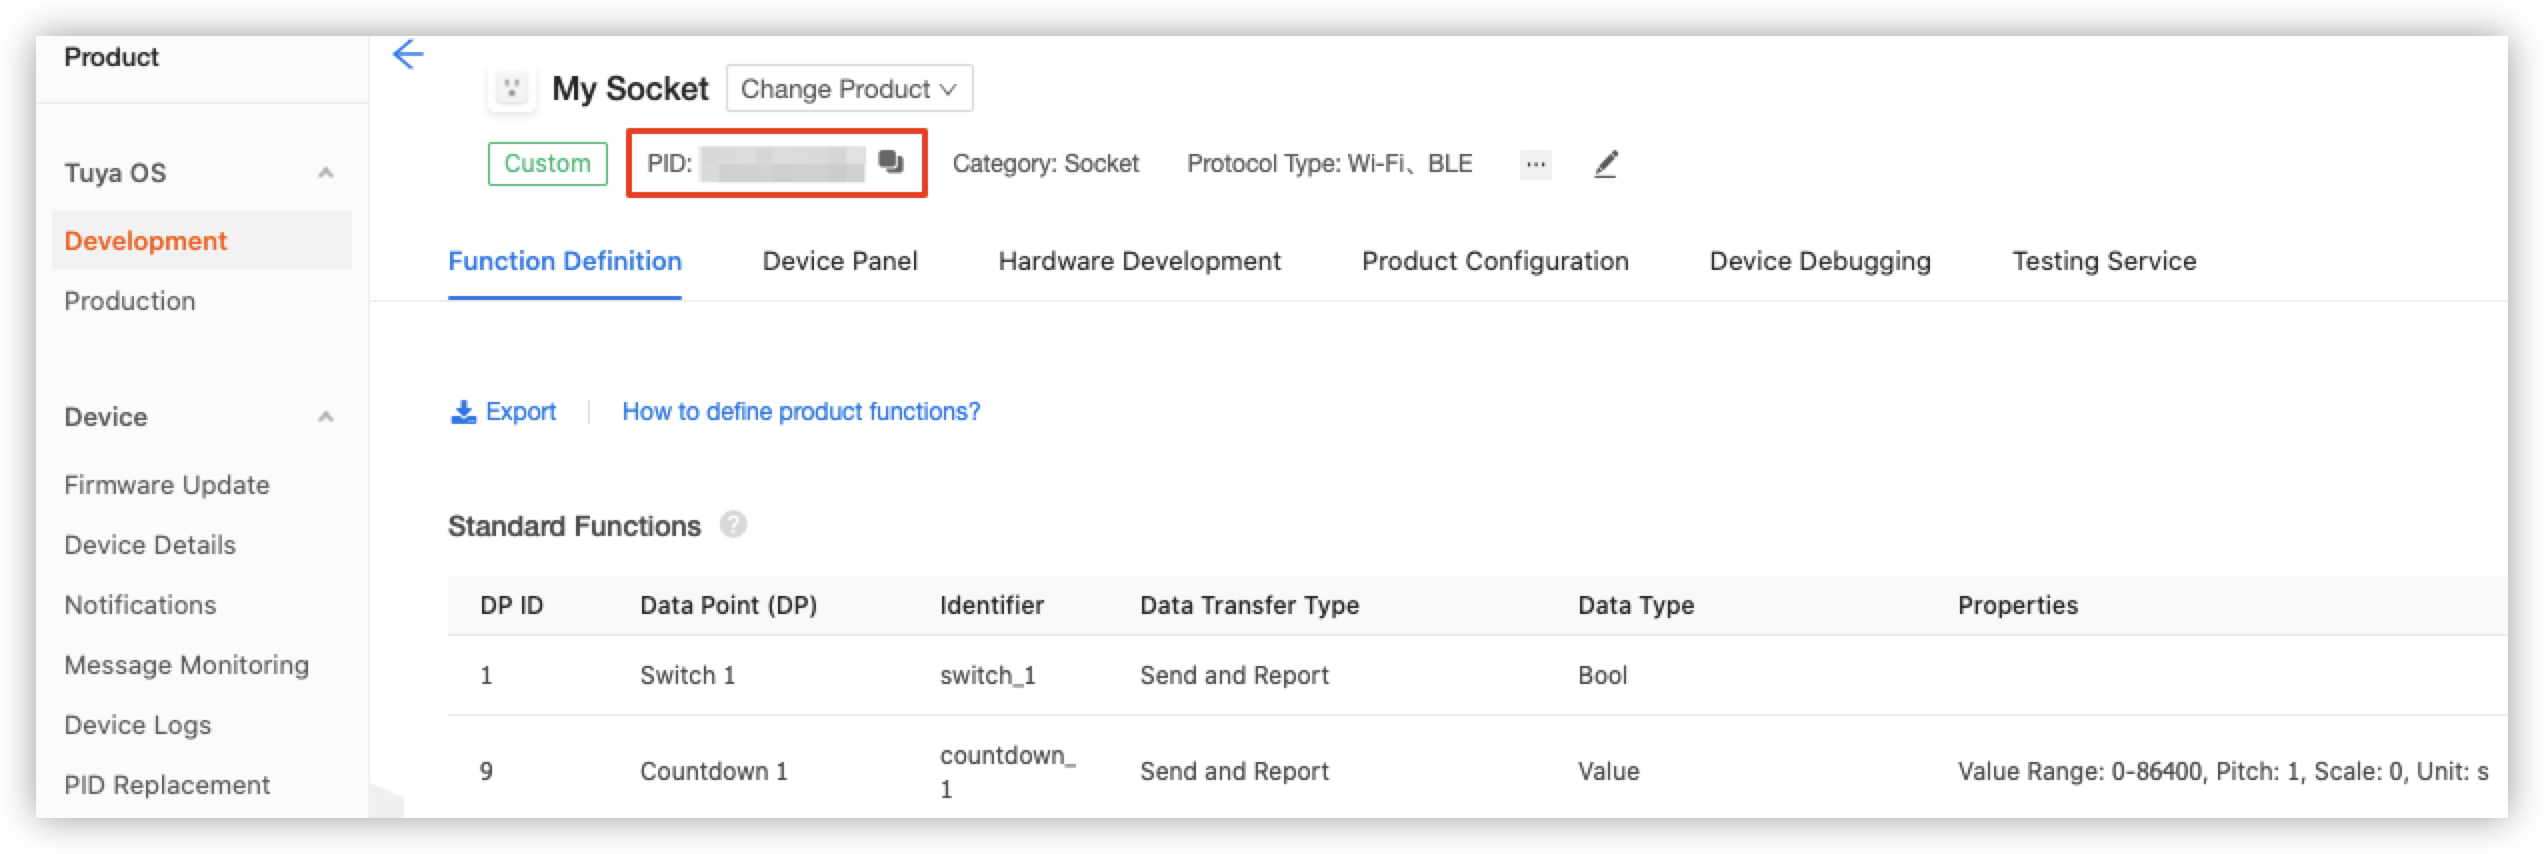
After you create the product, the product ID (PID) appears in the product details section. Save the PID for later use.
-
Add the socket product to Tuya Edge Gateway: Visit the URL http://localhost:3000. In the left-side navigation pane of Tuya Edge Gateway, choose Devices > Products and click Add.

Enter the details of the product that is newly created on the platform.
- PID: Copy the saved PID and paste it to this field.
- Name: Enter a preferred product name such as My Socket.
- Description: Enter the product description.
- Driver Library: Select a driver library. Fuzzy matching is supported. For example, to support the OPC UA protocol, enter the keyword opcua and select the driver that appears.
Go back to the deployed edge gateway. In the left-side navigation pane, choose Devices > Products. Click DP for the newly added product and click Create. The created DPs must be the same as those specified on the platform.

Note: nodeId is set to the value of
deviceDpAttrsthat is defined in the configuration template. You can customize deviceDpAttrs.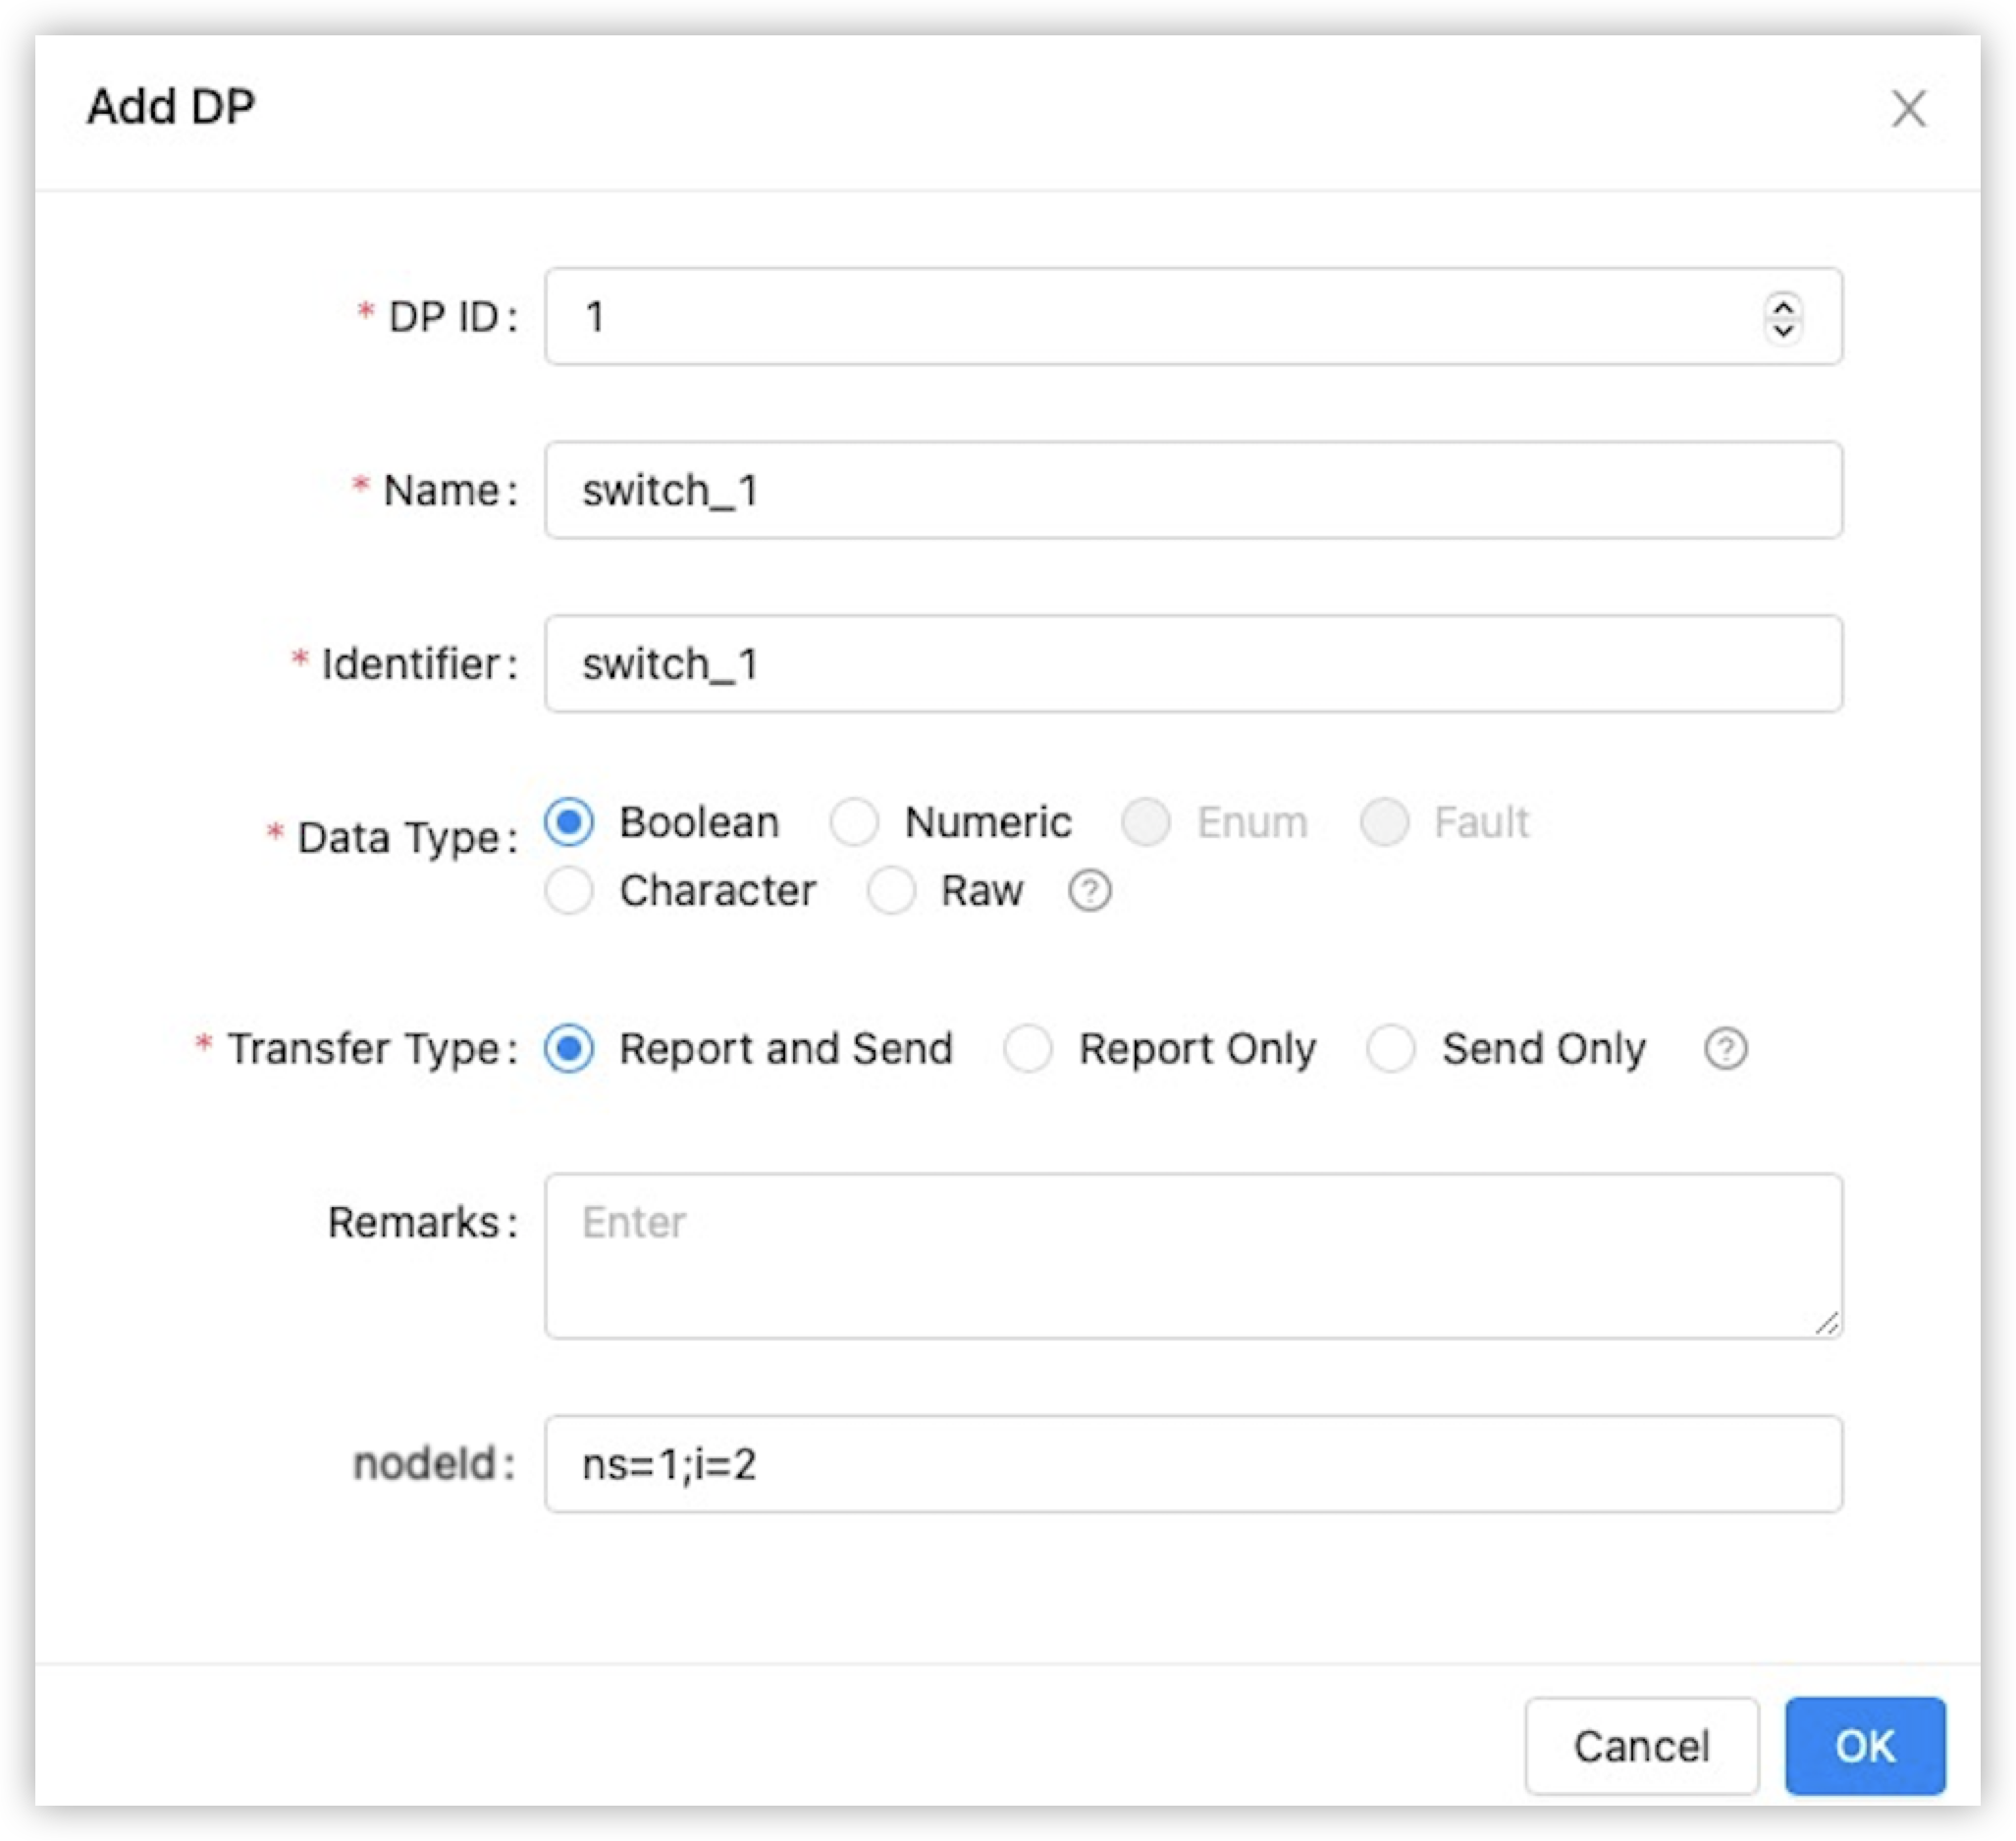
The following figure shows the added DPs.

-
Create a sub-device: In the left-side navigation pane of Tuya Edge Gateway, choose Devices > Sub-devices and click Add Sub-device.

In the dialog box that appears, enter the details of the sub-device: In the Product field, fuzzy matching is supported. You can enter the keyword socket and select the newly created socket product that appears. In the Driver Instance field, enter the keyword opcua and select the OPC UA driver that appears. In the Protocol Type field, select the protocol to be tested.
Endpoint is set to the value of
deviceProtocolsdefined in the configuration template. You can customizedeviceProtocols.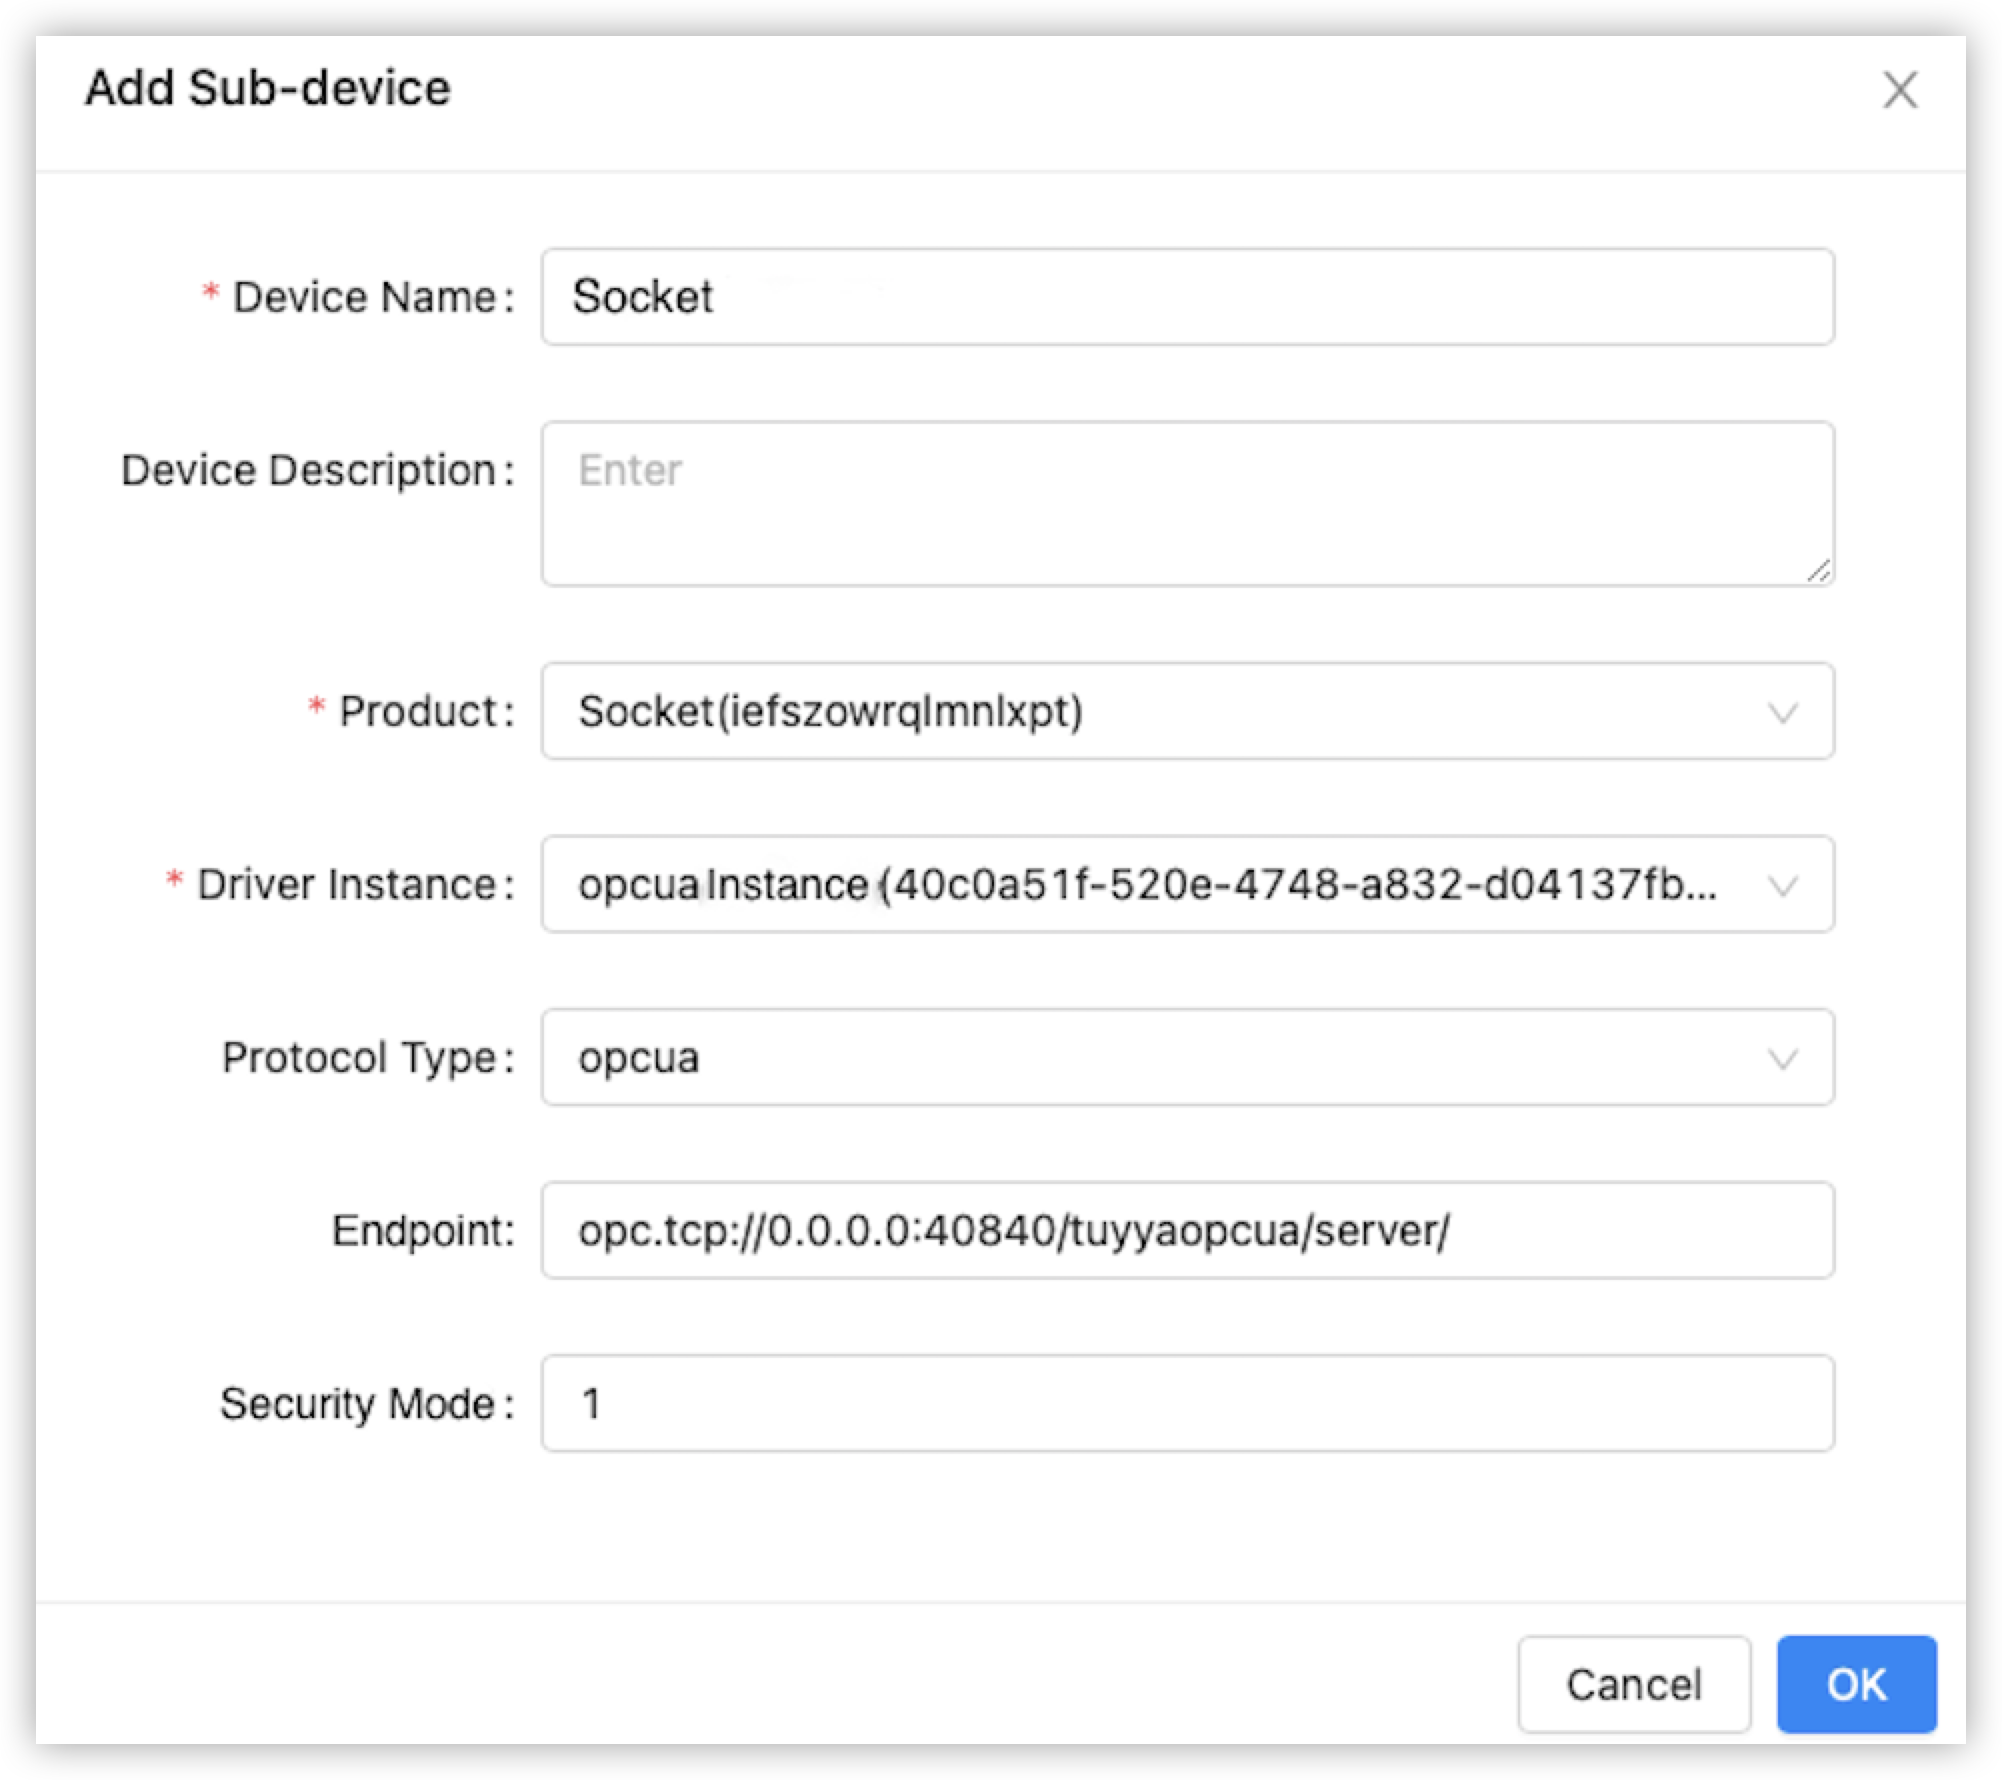
-
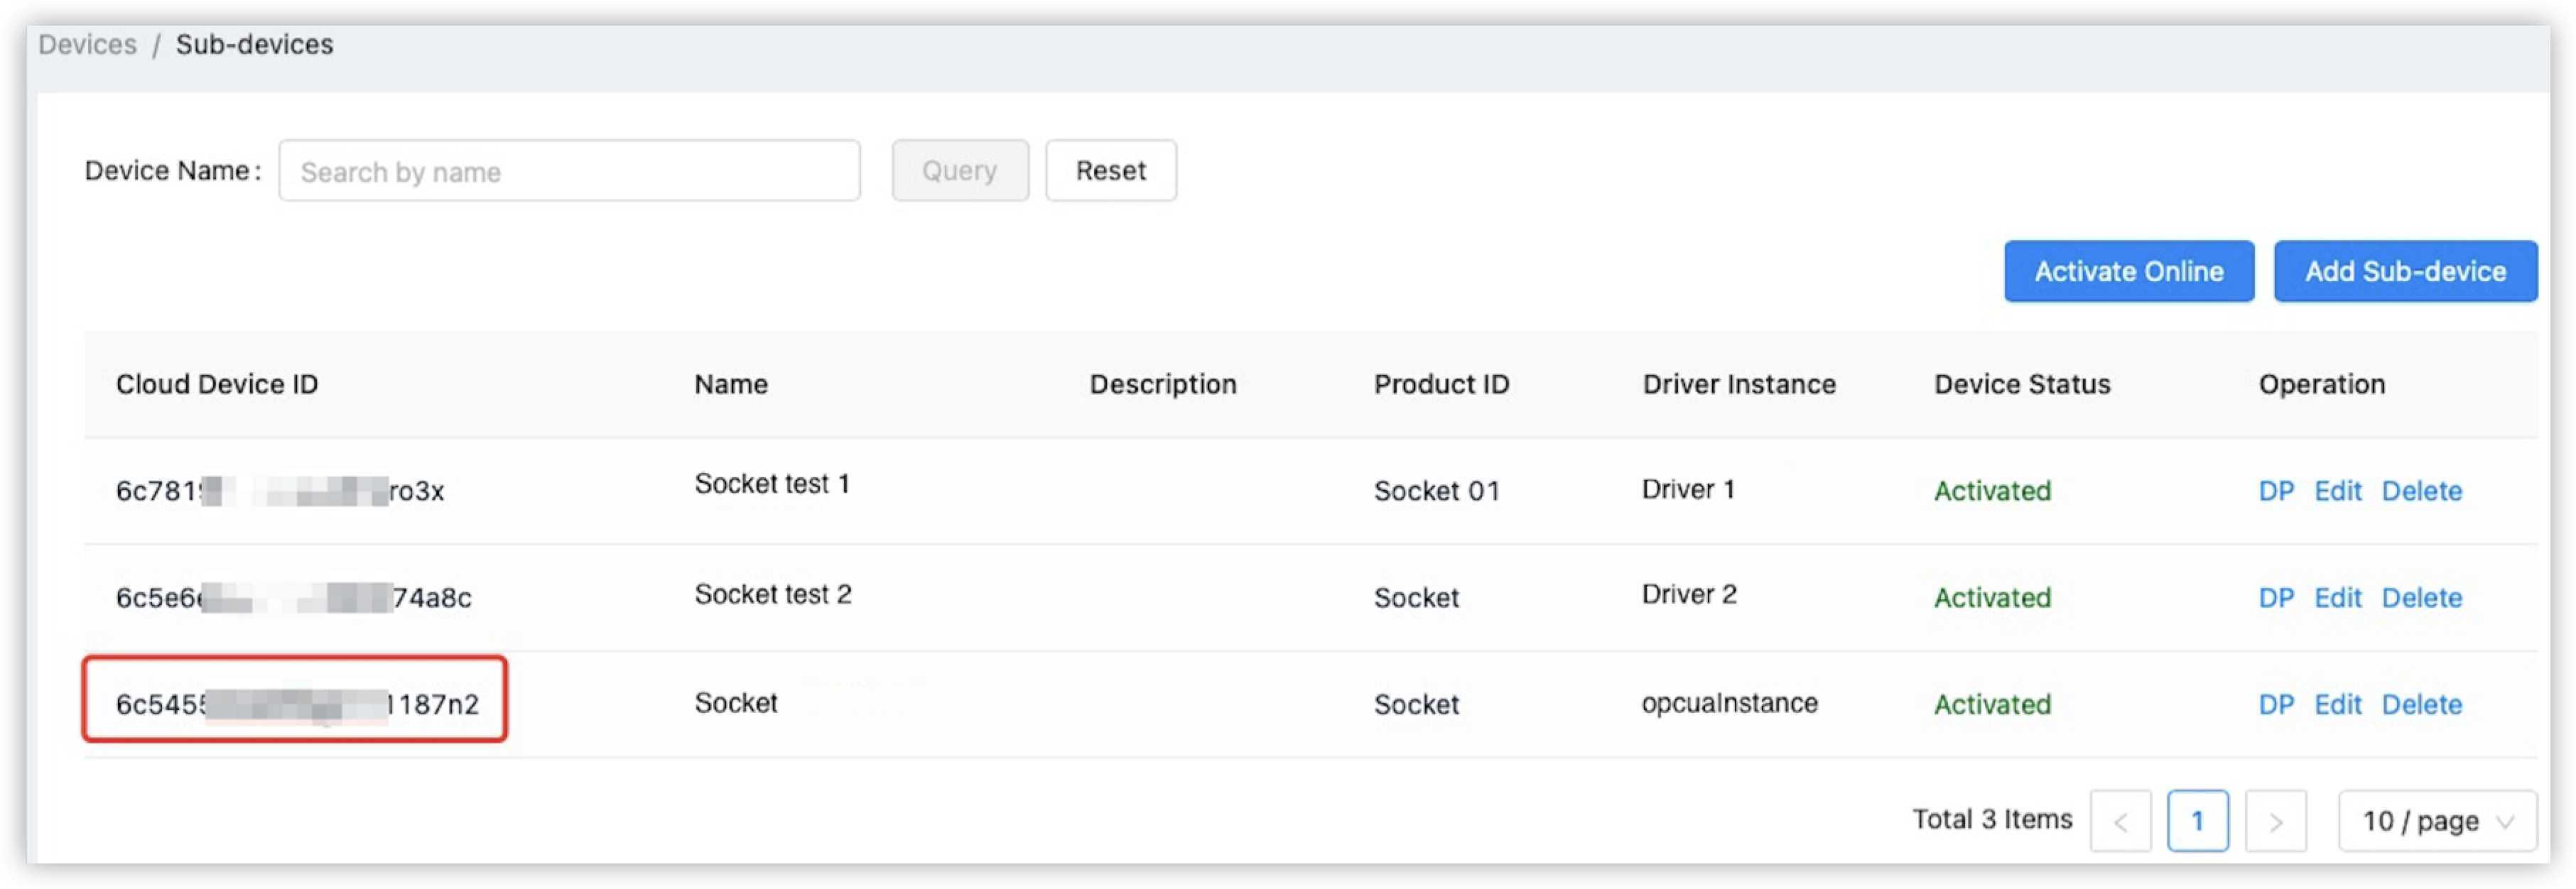
Activate the sub-device.
The newly added sub-device is inactive by default. Click Activate Online to activate the sub-device.

After the sub-device is activated online, you can copy and save the device ID that will be used to send commands in the follow-up management.
-
Run the driver on the premises.
-
The edge gateway and the host must be connected to the same network.
-
Modify the configuration file
/cmd/res/configuration.toml. The fields boxed in red in the following figure must be modified. Other fields can be modified as needed.Set
IDin[Service]to the driver instance ID andHostto the driver service IP address.Set
hostin[Client.Data]and[Client.Metadata]to the IP address of the host.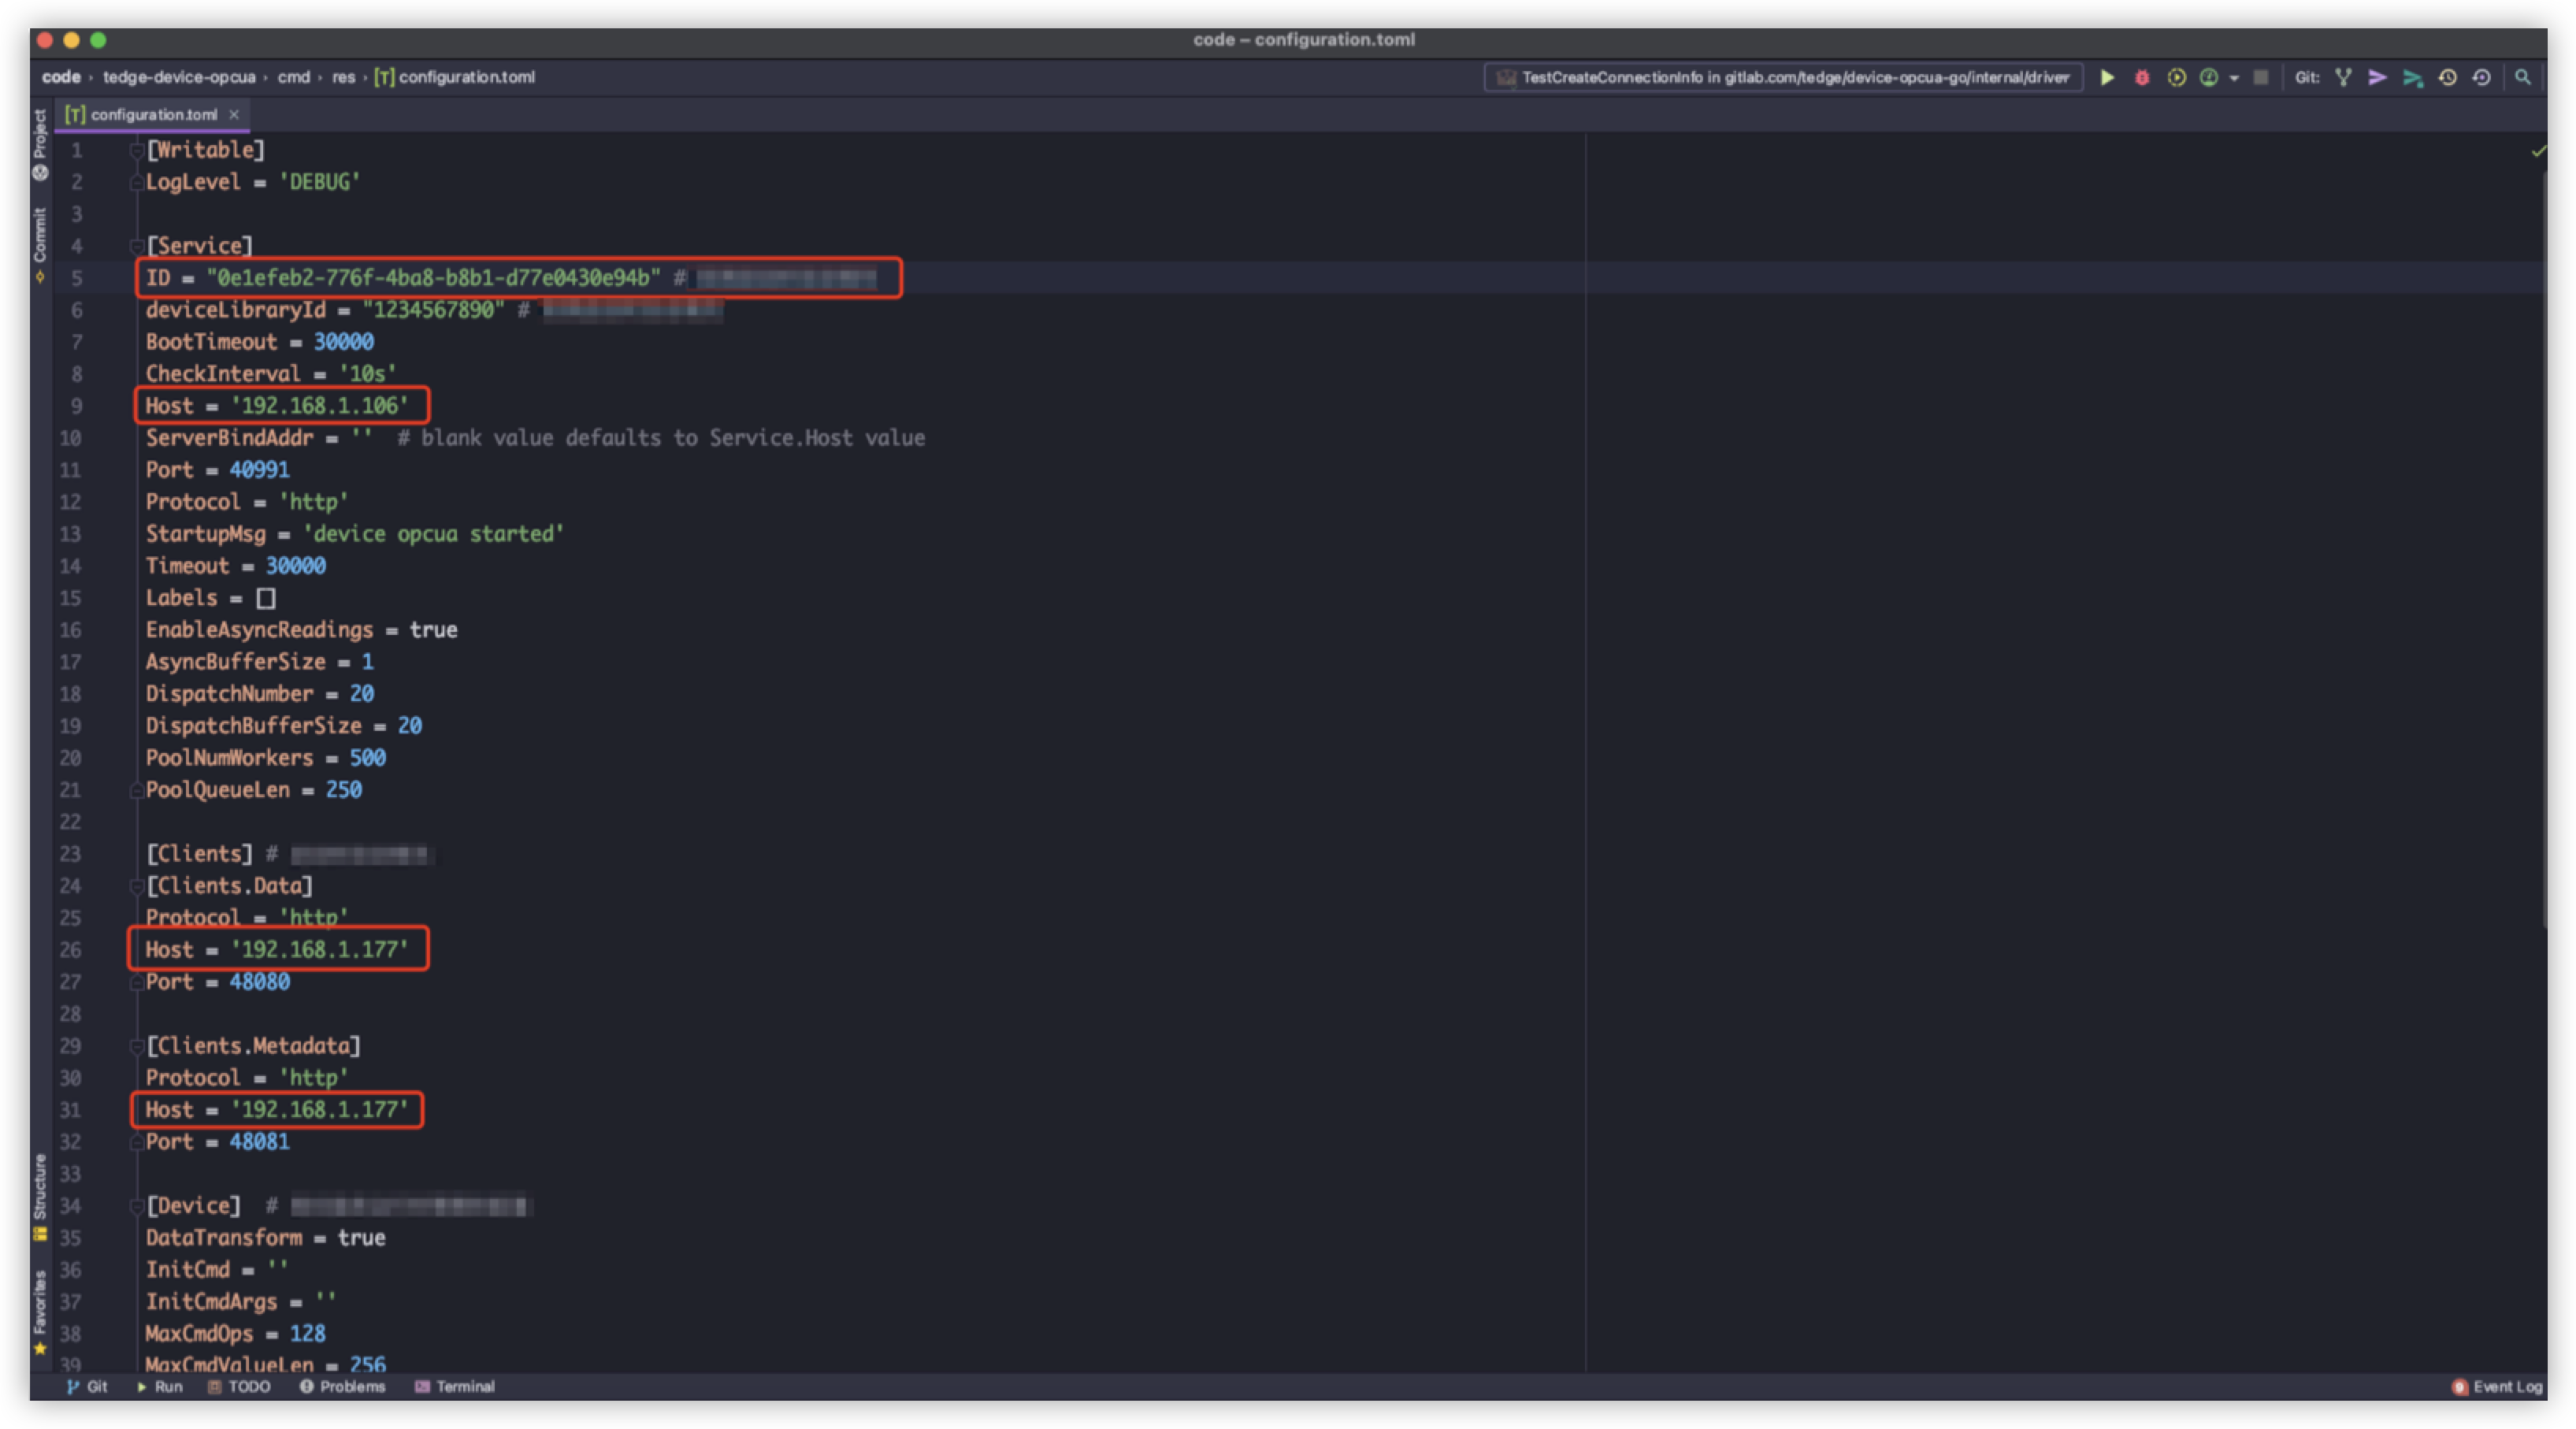
The following figure shows the driver instance ID.

-
-
Run the device simulator: You can create a simulator that can vary based on different drivers. You can also use a real device for the test.
-
Check the driver logs: After a simulator is started, the driver runs automatic tasks. By default, the driver reads information about the simulator at an interval of 20 seconds. The driver logs can indicate whether these tasks are completed as expected.
Test the driver on a standalone host
Prerequisites
Only the basic functions of the driver are tested. The Arm platform does not support this test.
How it works
During the driver initialization, information about other services is required. In this test, the information can be read from local configuration files.
Procedure
-
Create the
testdirectory in the project file. The following code block shows the structure of thetestdirectory:device-service-template └── test ├── README.md ├── data │ ├── device │ │ ├── devices.json │ │ └── service.json │ └── deviceprofile │ ├── profile1.json │ └── profile2.json ├── main.go └── res ├── Simple-Driver.yaml └── configuration.toml -
In the
datadirectory, configure the.jsonfiles of the service, device, and product.The structure of the
datadirectory cannot be modified. -
Call the
test.Bootstrapmethod to start the program on the standalone host.
For more information about the implementation example, see tedge-driver-sdk-go/device-service-template/test and README.md in tuya-edge-driver-sdk-go.
Is this page helpful?
YesFeedbackIs this page helpful?
YesFeedback


