Deploy and Activate Tuya Edge Gateway
This topic describes how to install and activate Tuya Edge Gateway (TEdge). This is the first step towards the development of the edge gateway.
Deploy the edge gateway
Perform the following steps to deploy a specific version of TEdge. You can download more versions from Tuya’s Docker image repositories.
Note: In the following shell code, the Username field must be set to your
Username.
-
Create a project directory.
sudo mkdir /var/tedge -
Check the current user.
ps aux | grep docker -
Grant directory permissions.
sudo chown Username /var/tedge -
Create required directories.
sudo -u Username mkdir /var/tedge/res sudo -u Username mkdir /var/tedge/edgex-db-data sudo -u Username mkdir -p /var/tedge/edgex-driver-data/upload/library sudo -u Username mkdir /var/tedge/edgex-driver-data/run_config -
Deploy core services of the edge gateway.
docker run --name "tuya-edgex" --restart=always \ -p 58880:58880 \ -v /var/tedge/edgex-db-data:/dbdata \ -v /var/tedge/res:/res \ -v /var/tedge/edgex-driver-data/run_config:/run_config \ -v /var/tedge/edgex-driver-data/upload:/upload \ -v /var/run/docker.sock:/var/run/docker.sock \ -d tuya/tedge-server:latest -
Deploy frontend services of the edge gateway.
docker run --name "web-client" --restart=always \
-p 3000:3000 \
-d tuya/tedge-web:latest
Activate the edge gateway
Create a gateway product
You can create a smart product on the Tuya Developer Platform. This section describes how to create a gateway based on the low-code development solution. For more information, see Create Products.
- Log in to the Tuya Developer Platform.
- On the Standard Category tab, choose Gateway Control > Edge Gateway.
- Enter the required information.
- Get a list of licenses.
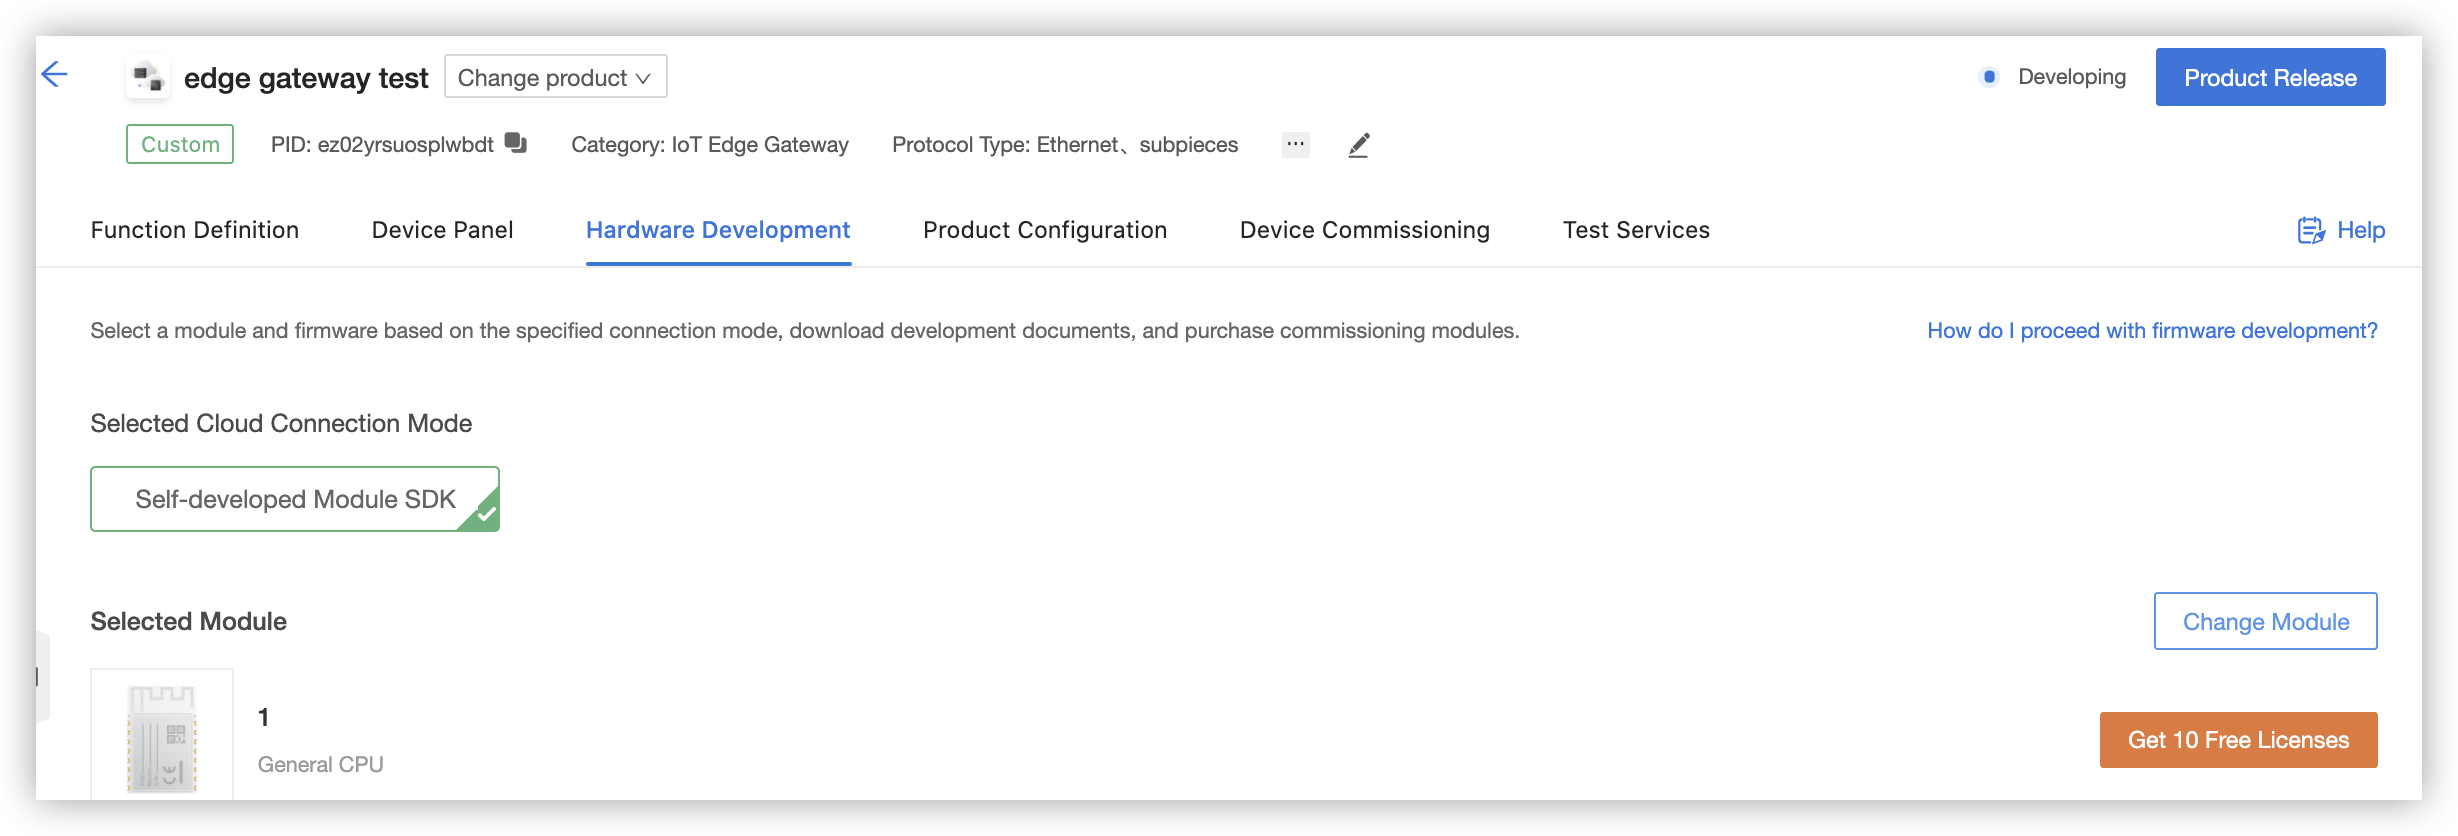
- Go to the Hardware Development tab.
- Set Selected Cloud Connection Mode to Self-Developed Module SDK.
- Enter information about the chipset platform, click OK, and then click Get 10 Free Licenses.
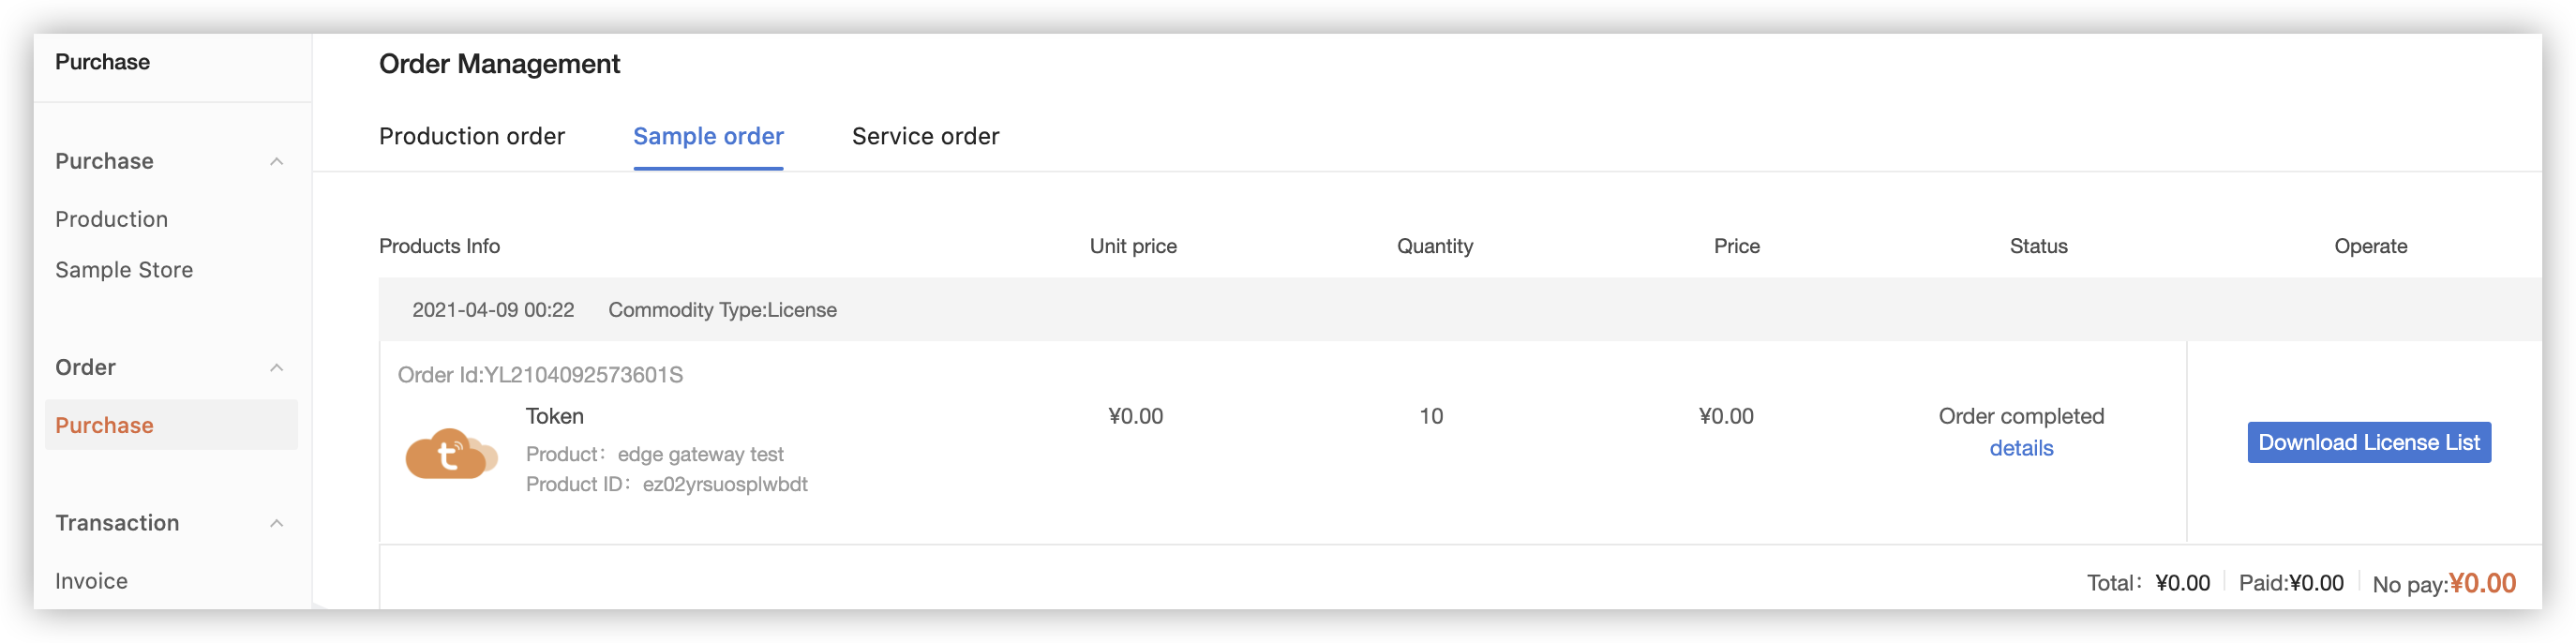
- On the Purchase page, choose License List from the Delivery form drop-down list.
- In the left-side navigation pane, choose Purchase > Order > Purchase > Sample order.
- Find the newly placed order and click Download License List to download the license list.
Create a cloud development project
You can create a cloud project and configure assets and user information for the project with Tuya’s Cloud Development. When you create a project, set Project Type to Industry Solutions. For more information, see:
Activate the edge gateway
-
Connect to the URL localhost:3000 and log in to the locally deployed edge gateway.
-
Activate the gateway.
- Token: generated by a mini program / Add Devices with Device Management App for pairing. You can develop the mini program and generate the token. For more information, see Link devices.
- Gateway Product ID: the PID of the gateway product. It is generated when you create the product in Step 1.
- UUID and AuthKey: You can check both field values from the list of licenses that are downloaded in Step 1.
Activate a sub-device
Create a sub-device
-
Create a sub-device on the Tuya Developer Platform.
-
On the Standard Category tab, choose Electrical > Socket > Custom Solution.
-
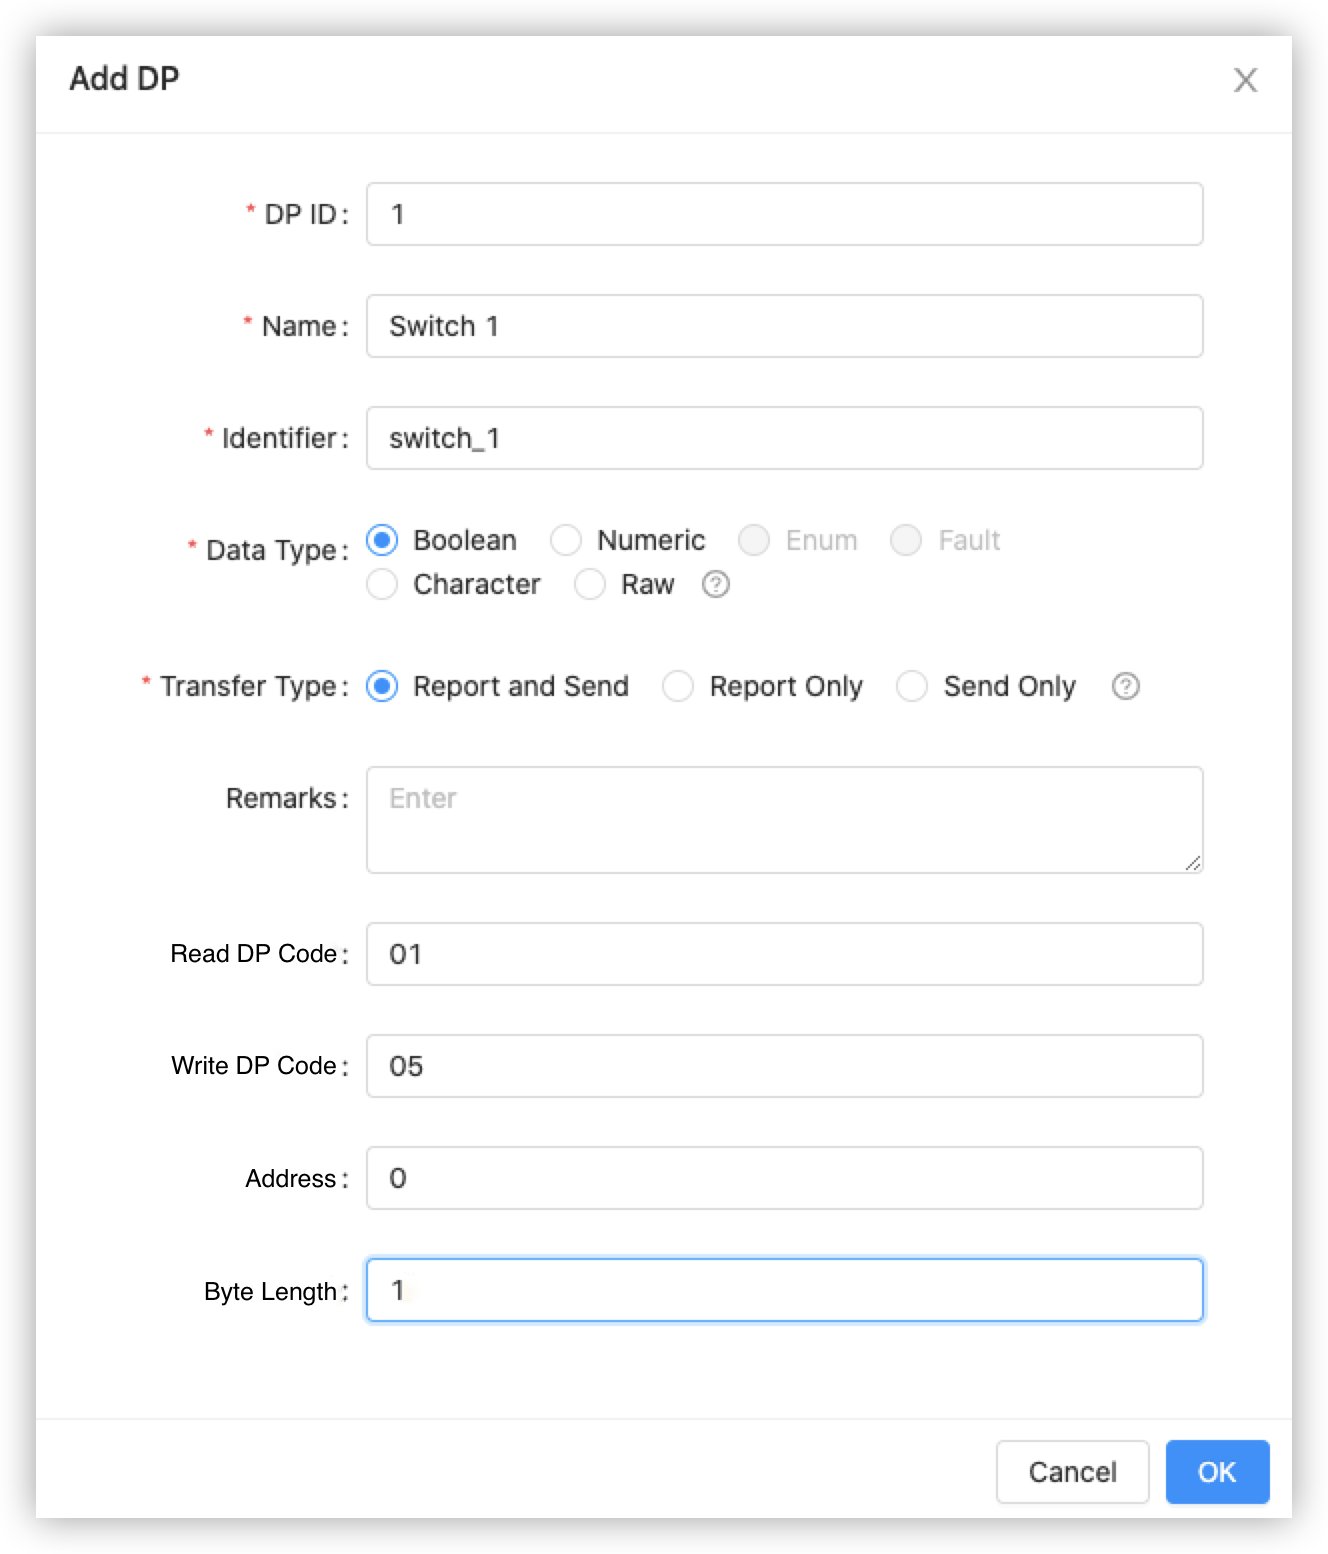
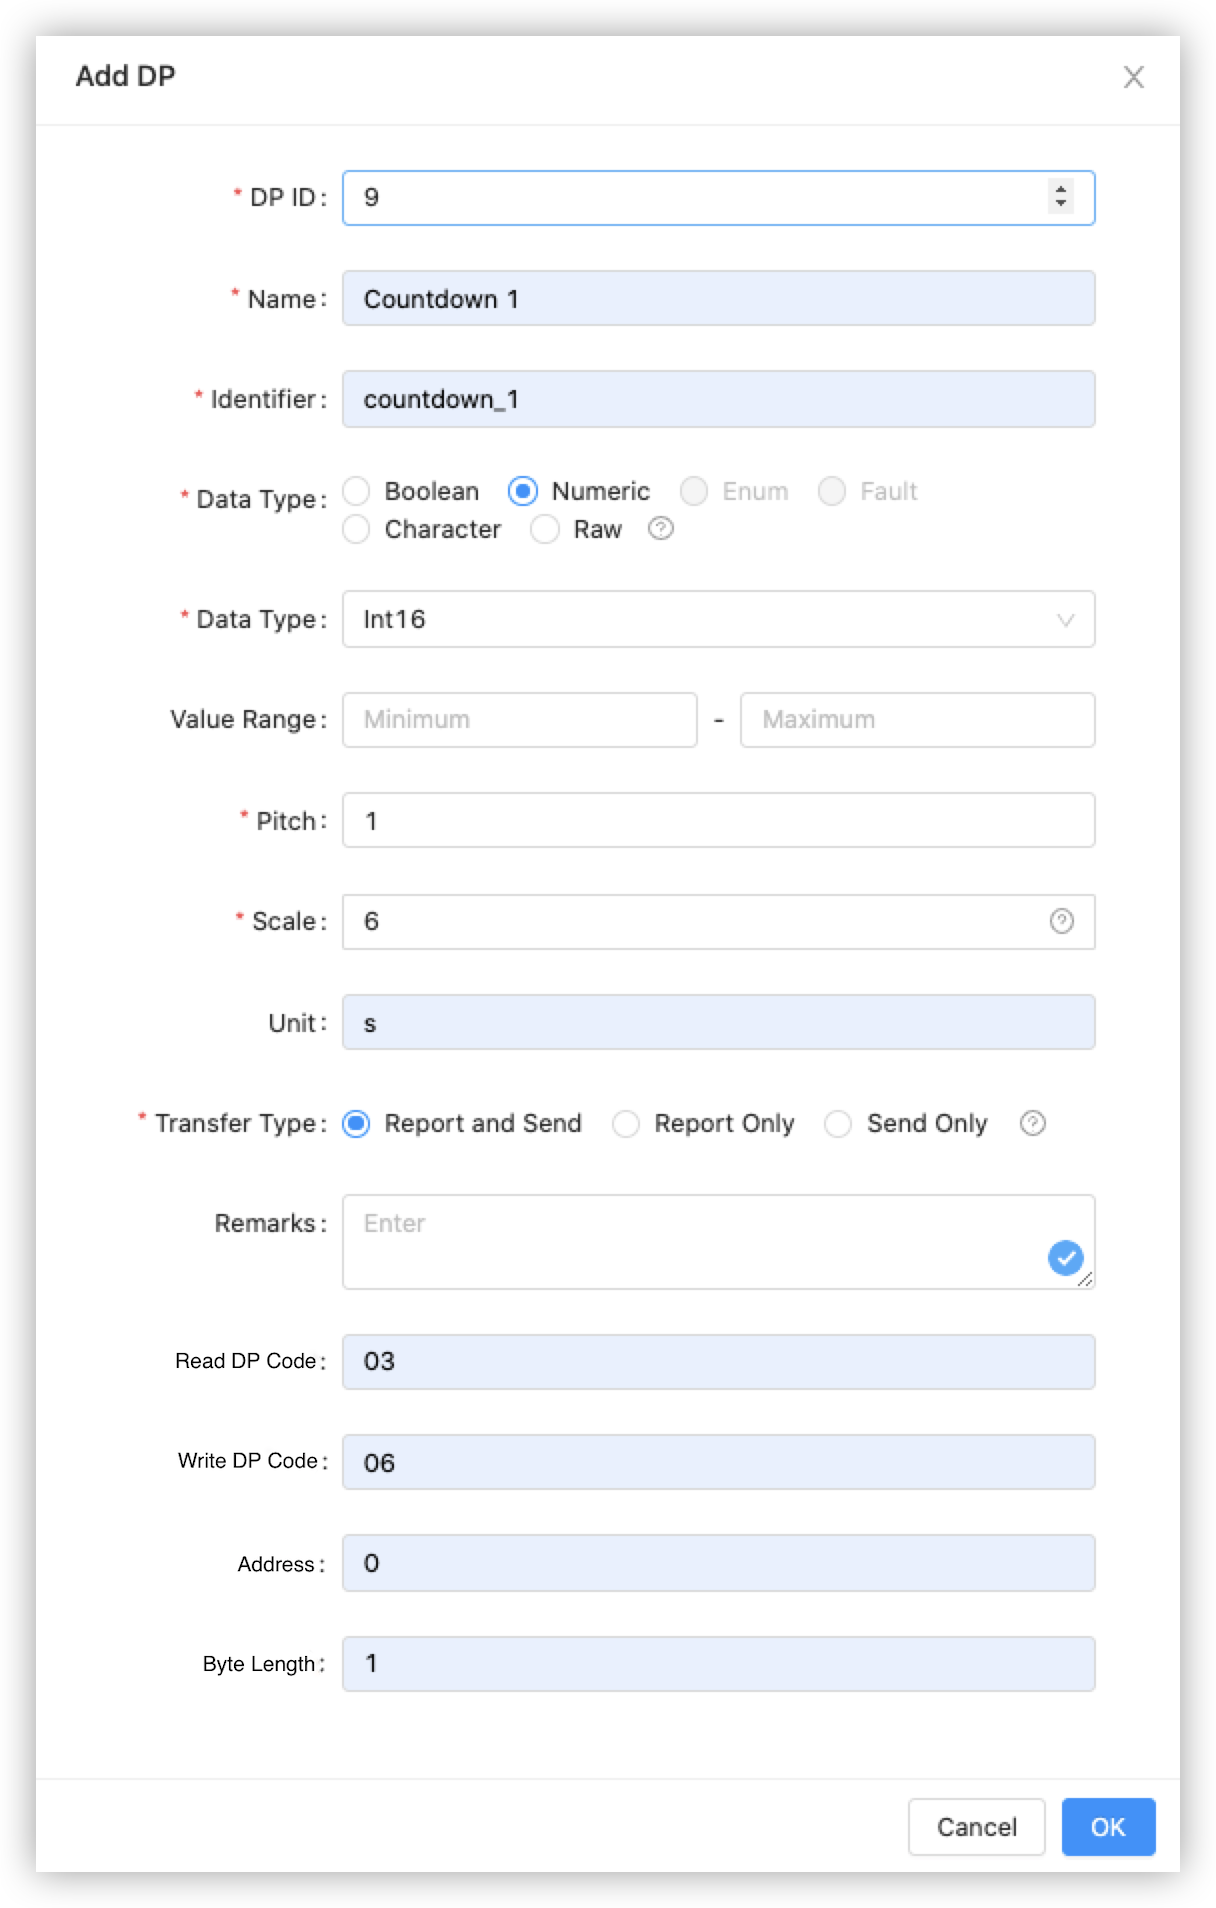
Add the data points (DPs) Switch 1 and Countdown 1.
Add a product to the edge gateway
-
Go back to the deployed edge gateway. In the left-side navigation pane, choose Devices > Products > Add.
-
In the Add Product dialog box, enter the PID, product name, and product description that are used on the Tuya Developer Platform.
-
Search the driver library by name, such as Modbus or MQTT. Fuzzy matching is supported.
Add DPs to the edge gateway
-
Go back to the deployed edge gateway. In the left-side navigation pane, choose Devices > Products. Click DP for the newly added product and click Create.
-
Add both DPs that are specified on the Tuya Developer Platform to the edge gateway. Configure the Modbus information.
- Switch 1
- Countdown of switch 1
- Switch 1
Add a sub-device to the edge gateway
-
Search the newly created socket by name in the Product Type field. Fuzzy matching is supported.
-
Select Modbus from the Driver Instance drop-down list that is automatically loaded after you select a product type.
-
Select the protocol type modbus-tcp.
-
In the IP Address field, enter the Docker IP address of the simulated device. This IP address is generated by the Modbus device simulator that is described in Manage Devices on Tuya Edge Gateway.
-
Set Port to 1502.
-
Set UnitID to 1 as the address of the simulated Modbus device. The value of UnitID starts from 1 and must be unique and progressively increased. Each value indicates a sub-device. In this example, the value
1indicates the first sub-device of the edge gateway. -
After the sub-device is added, click Activate Online to activate the sub-device on the Tuya Developer Platform.
Is this page helpful?
YesFeedbackIs this page helpful?
YesFeedback


