Device Connection Using MQTT.fx
This topic describes how to connect a device to the Tuya Developer Platform over MQTT, using the software MQTT.fx as an example.
Prerequisites
Log in to the Tuya Developer Platform and create a product to get the following parameters. For more information about the detailed processes of product creation, see Create Products.
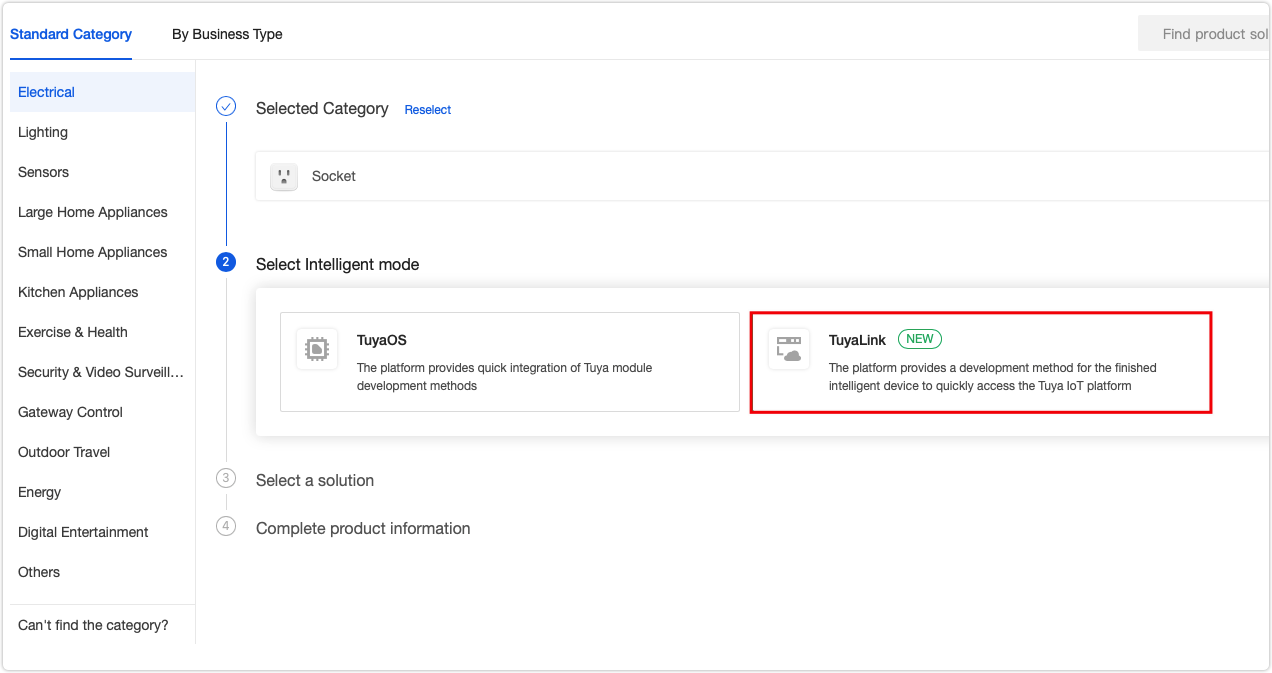
| Parameter | Description |
|---|---|
| ProductID | The product ID. |
| DeviceID | The device ID that is used for cloud authentication and communication. |
| DeviceSecret | The device secret that is used for cloud authentication and communication. |
Example
MQTT.fx configuration
-
Download the MQTT.fx software from its official website.
-
Open MQTT.fx. Click Extras and choose Edit Connection Profiles.

-
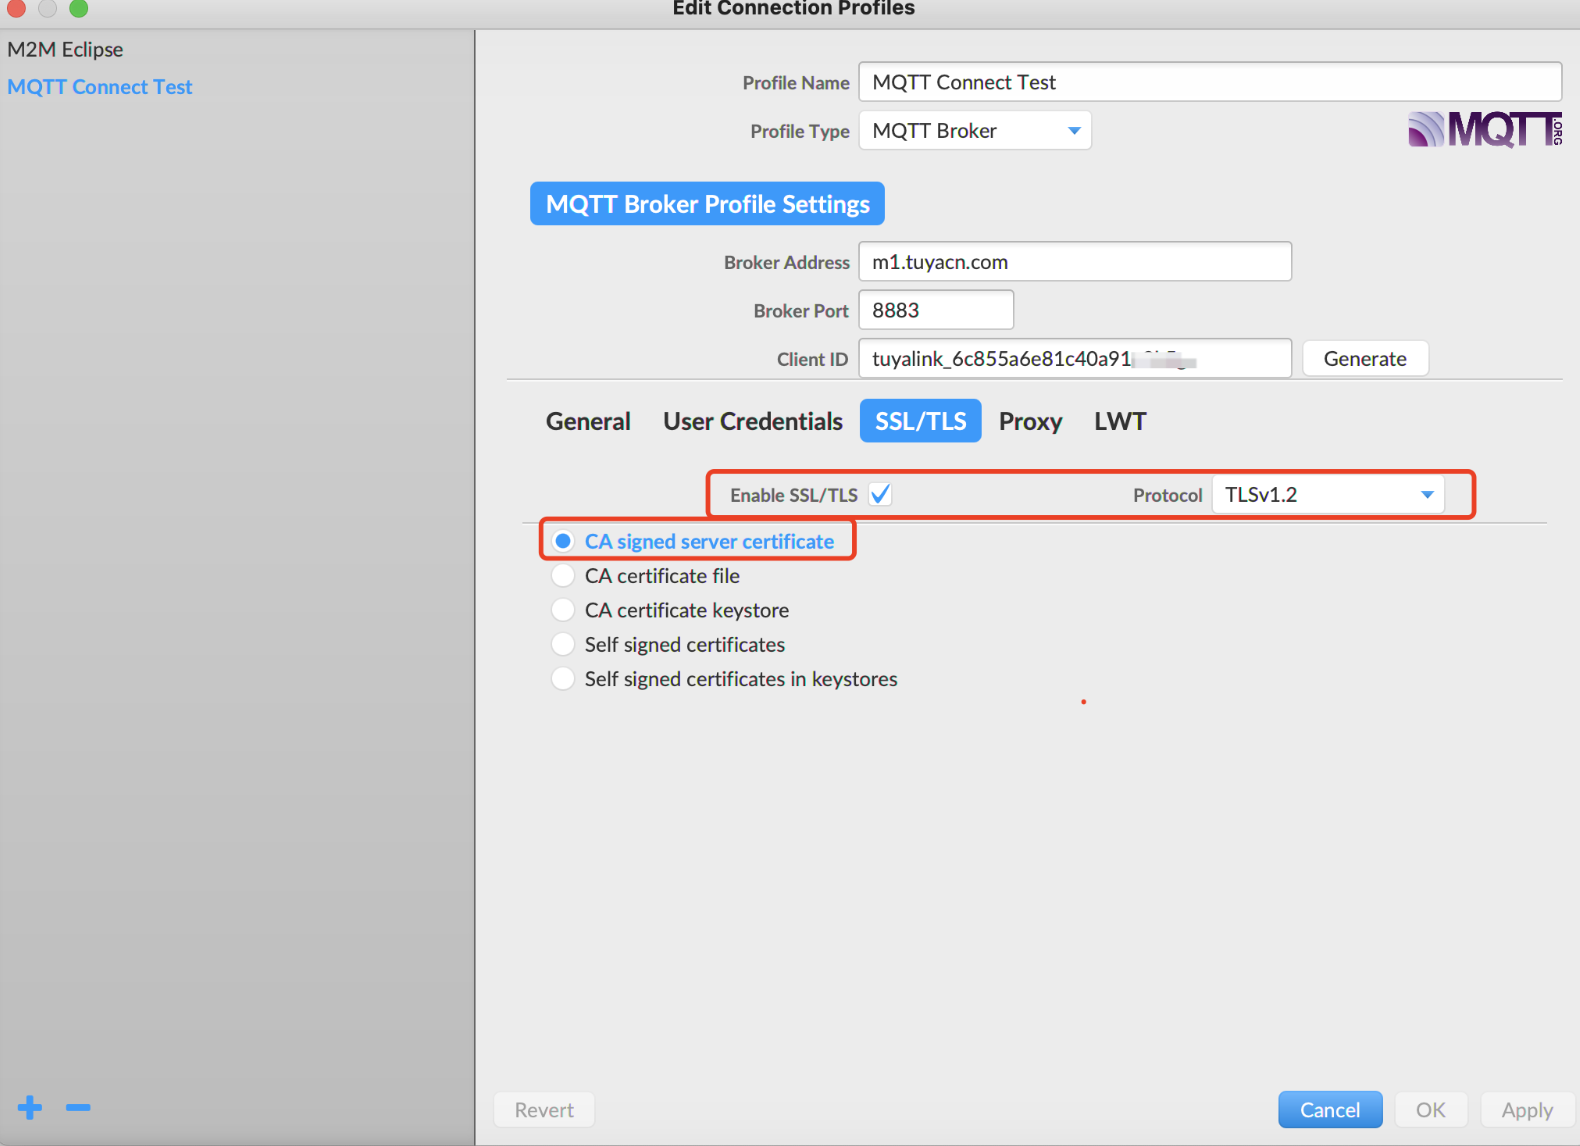
Complete the required information on the Edit Connection Profiles page.
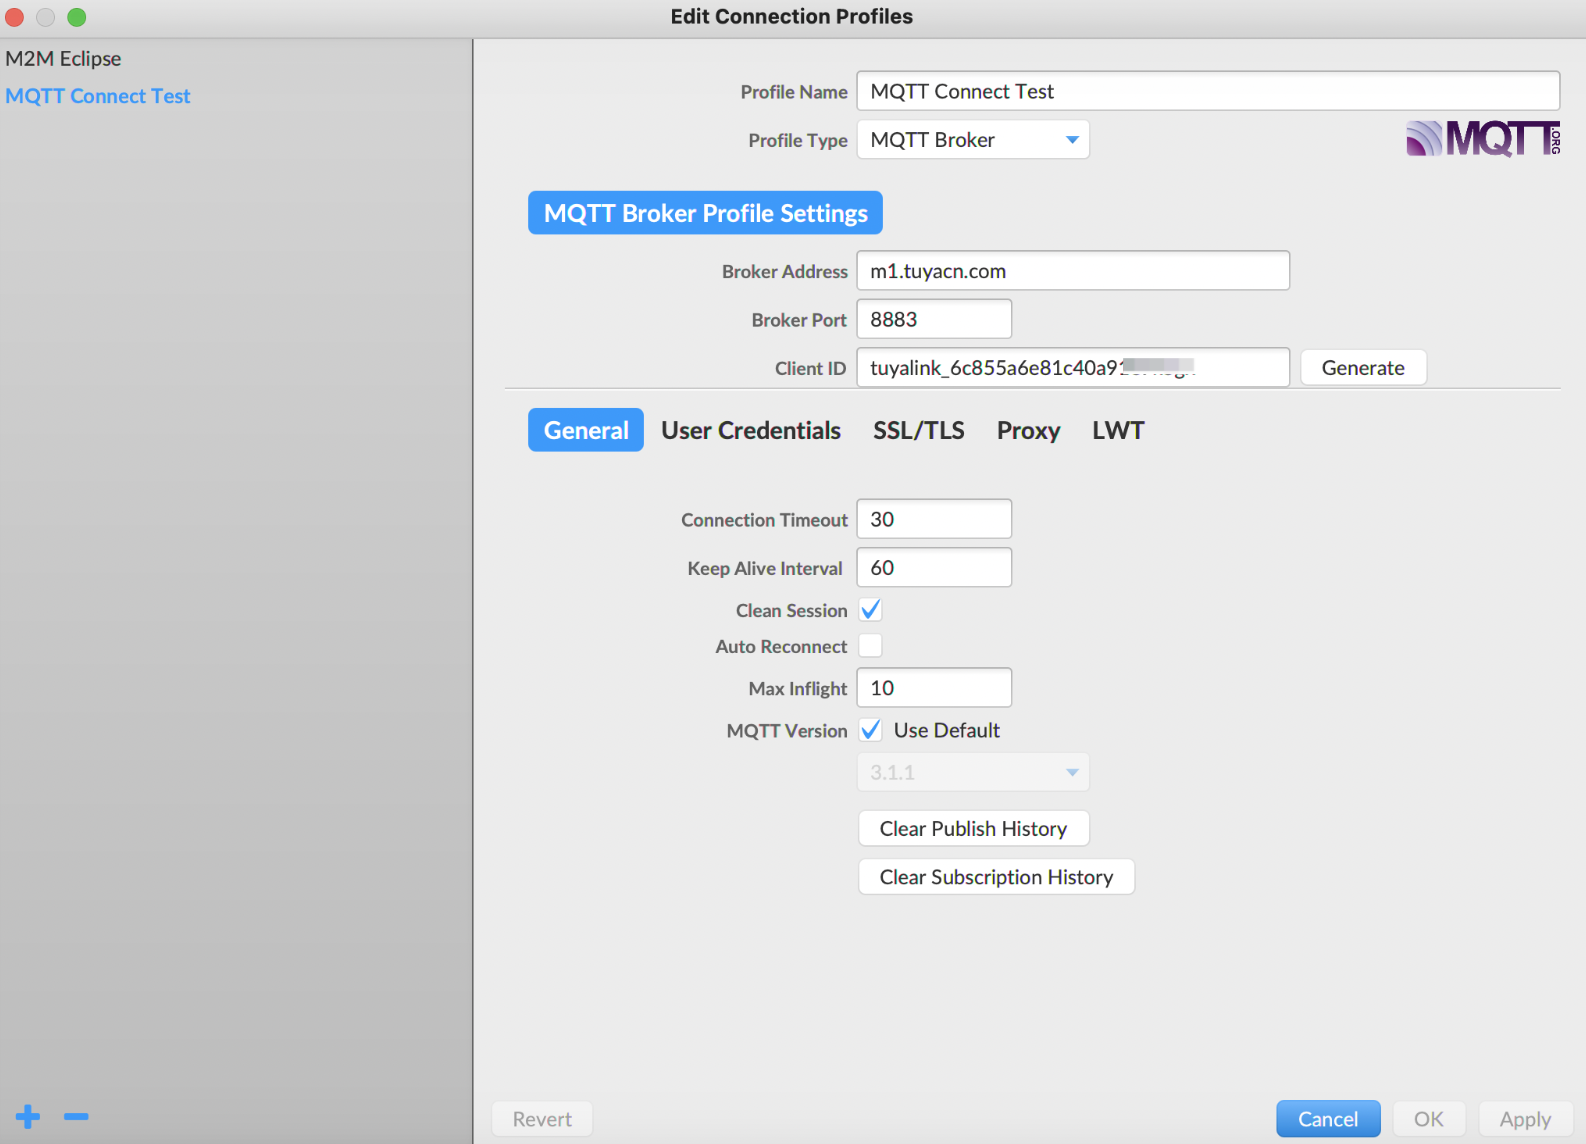
Parameter Description Profile Name Enter a custom name. Profile Type Select MQTT Broker as the connection mode. Broker Address Enter an endpoint specified in the MQTT protocol. For example, m1.tuyacn.comshown in the screenshot.Broker Port Enter a port number. Set this parameter to 8883.Client ID Enter a value in the format tuyalink_{$deviceid}.deviceidis specified in the MQTT protocol.General Use the default value. -
Complete the required information on the User Credentials page.
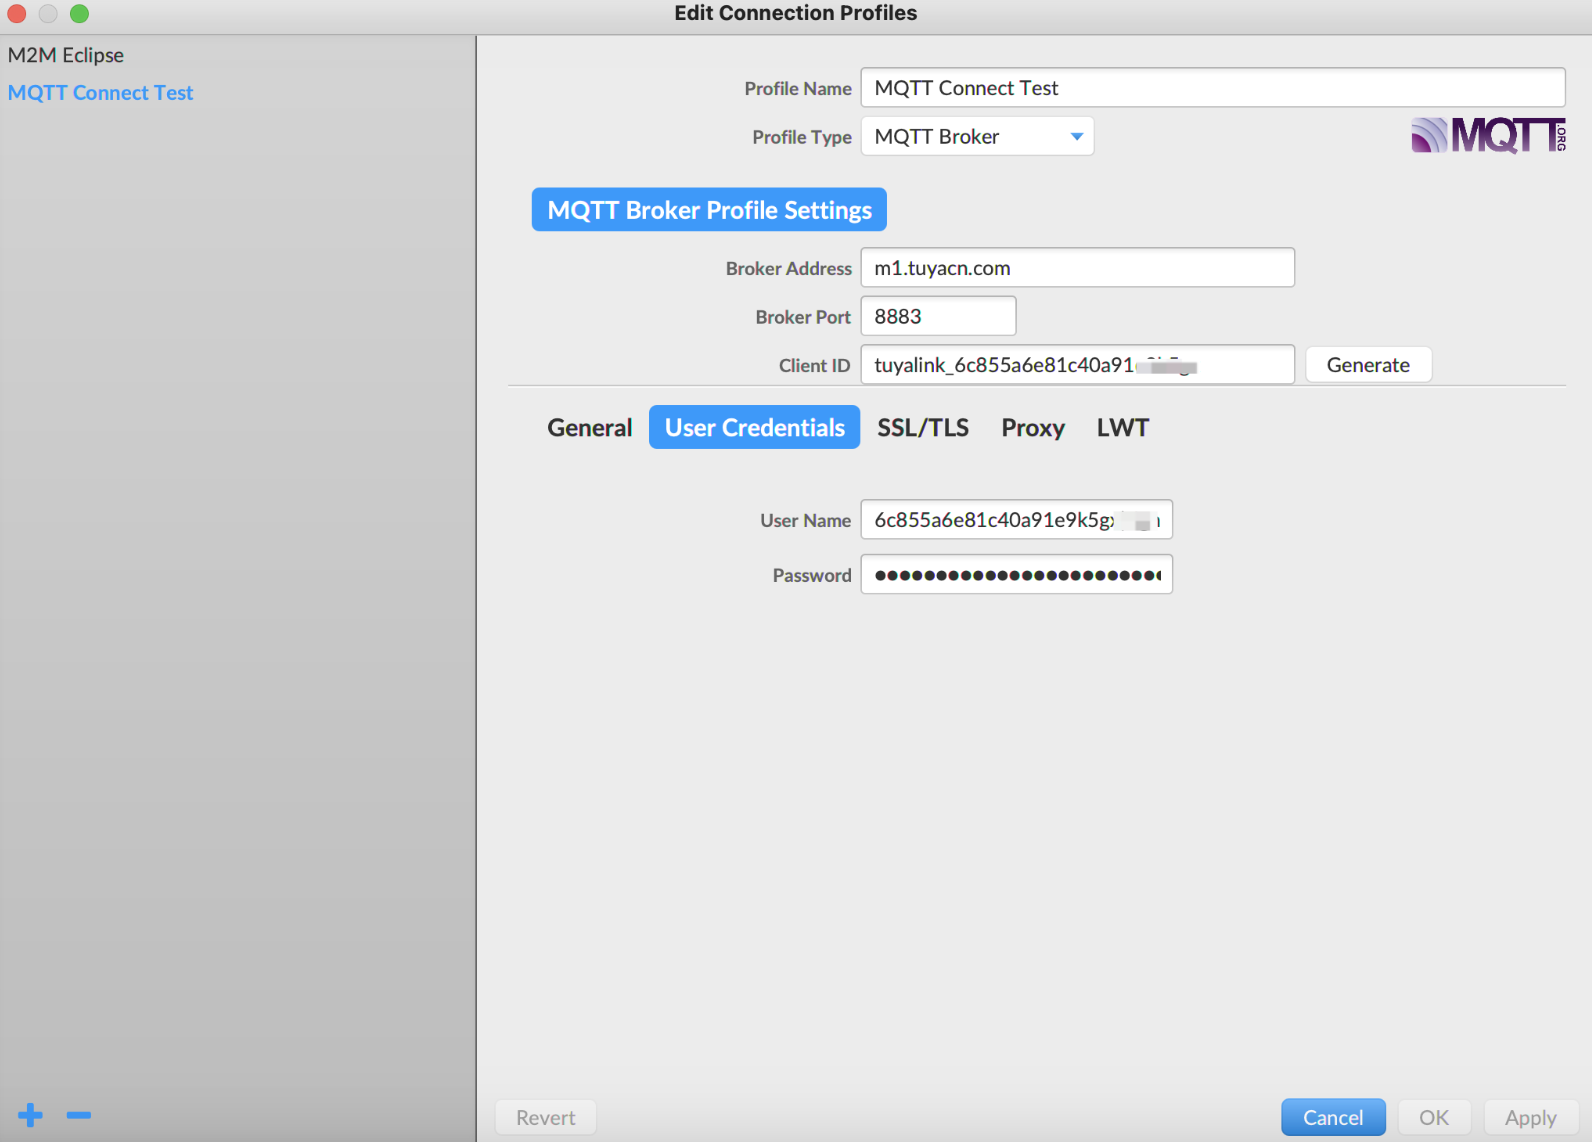
Parameter Description User Name ${deviceId}|signMethod=hmacSha256,timestamp=${10-digit current timestamp},secureMode=1,accessType=1
For example,6c828cba434ff40c074wF2|signMethod=hmacSha256,timestamp=1607837283,secureMode=1,accessType=1Password hmacSha256(content, deviceSecret)
The plaintext ofcontentis a string concatenated withdeviceId,timestamp,secureMode, andaccessTypein sequence.
For example,contentis made ofdeviceId=6c828cba434ff40c074wF2,timestamp=1607635284,secureMode=1,accessType=1The password is a 64-character hexadecimal value. Pad the left-most bits with zero if necessary.-
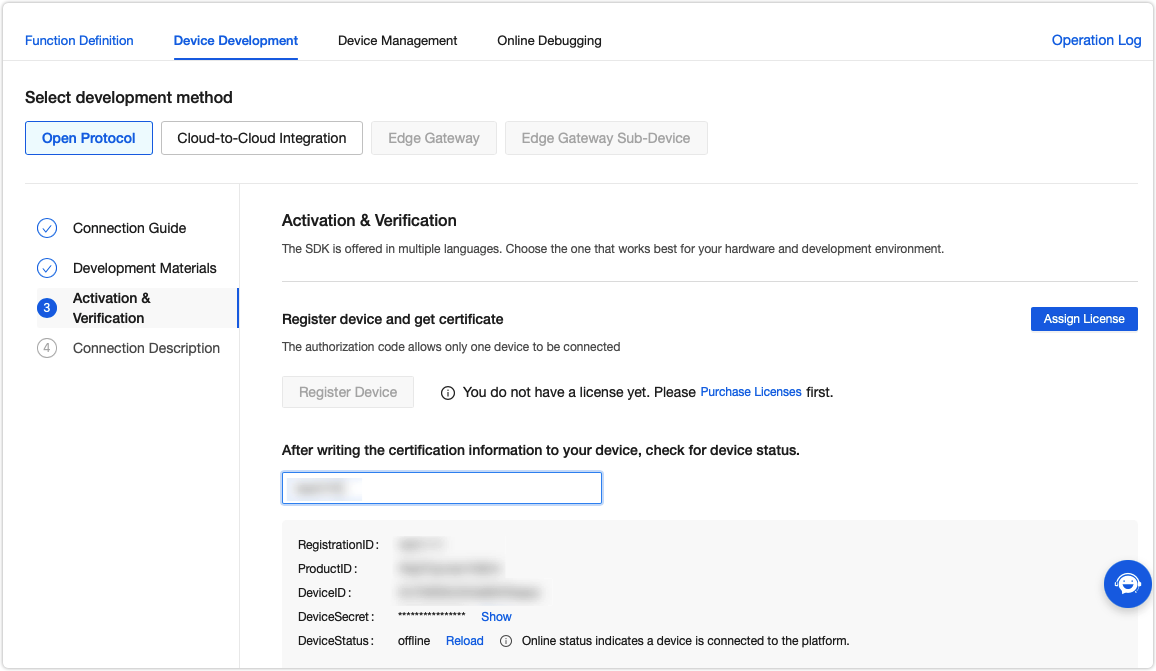
The
DeviceIDandDeviceSercetare generated after you register a device. For more information, see Prerequisites. -
Password: Open the online Python environment. Copy the code below, replaceDeviceIDandDeviceSecretwith your own values, and then run it to obtain the result.# Get device information from the Tuya Developer Platform. DeviceID = '6cae4****b285b5t0d2' DeviceSecret = 'f9df8***bbaddc941' # Default settings Address='m1.tuyacn.com' Port = 8883 # Calculate Client ID ClientID = 'tuyalink_'+DeviceID # Calculate user name import time T = int(time.time()) UserName= f'''{DeviceID}|signMethod=hmacSha256,timestamp={T},secureMode=1,accessType=1''' # Calculate password import hmac from hashlib import sha256 data = f'''deviceId={DeviceID},timestamp={T},secureMode=1,accessType=1'''.encode('utf-8') # Encrypted data appsecret = DeviceSecret.encode('utf-8') # Secret key Password = hmac.new(appsecret, data, digestmod=sha256).hexdigest() # Print the parameters required for connecting to MQTT. print('-'*20) print('Client ID: ',ClientID) print('Server address: ',Address) print('Port: ',Port) print('*Username: ',UserName) print('*Password: ',Password) print('SSL/TLS: true\nCertificate type: CA signed server\nSSL secure: Enable') print('-'*20)
-
-
Click SSL/TLS, select Enable SSL/TLS, and set Protocol to TLSv1.2.
-
Click OK in the lower-right corner. Click Connect.
If the indicator on the right side turns green, the MQTT connection is established.
Test communication
Device-to-cloud communication
-
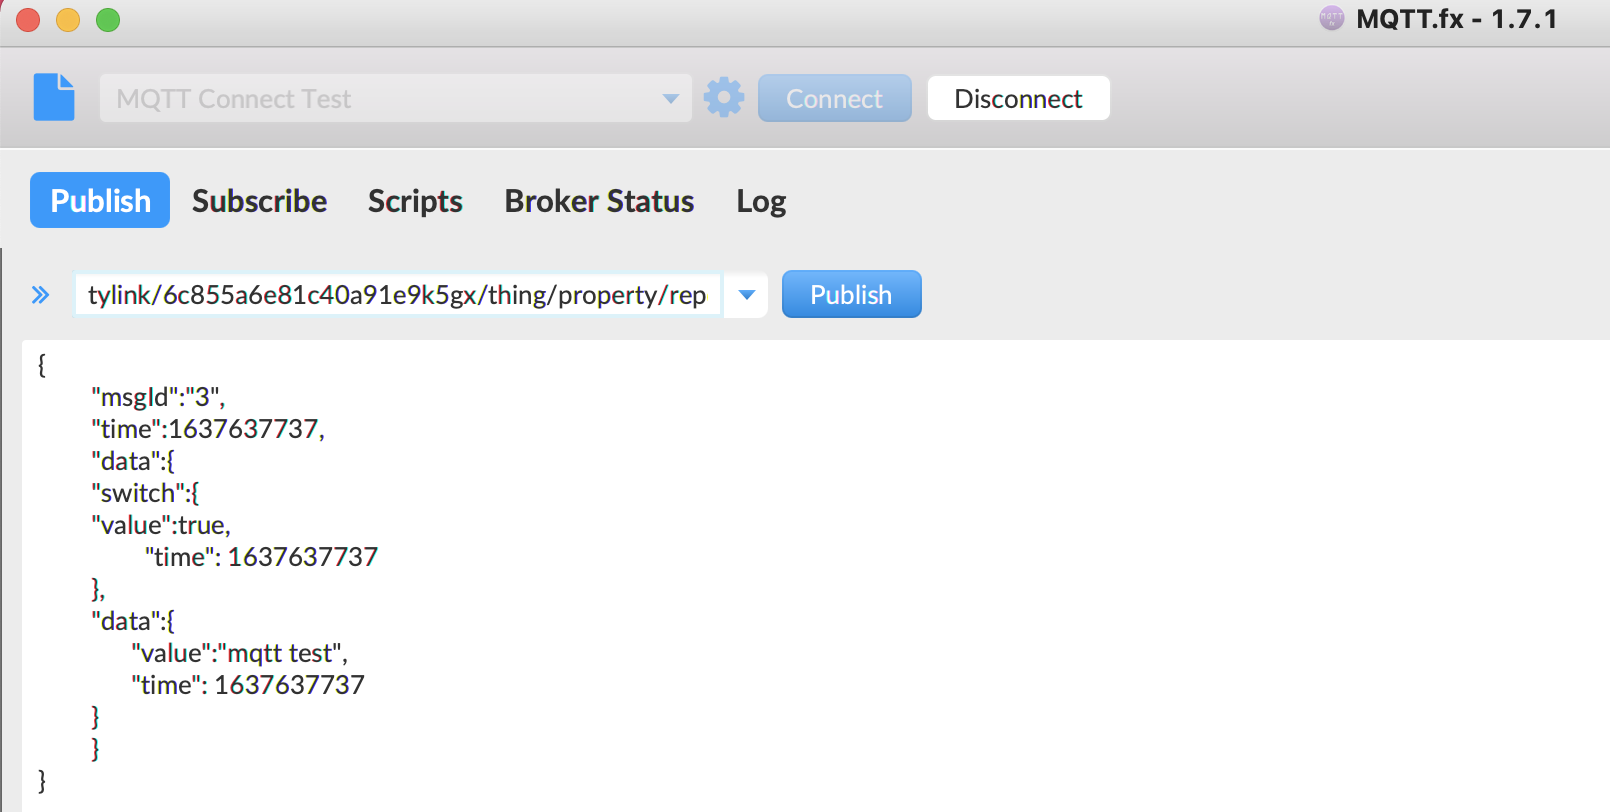
In the Publish field, enter the topic and the payload and then click Publish. We use the topic
tylink/6c855a6e81c40a91e9k5gx/thing/property/reportas an example to describe the process.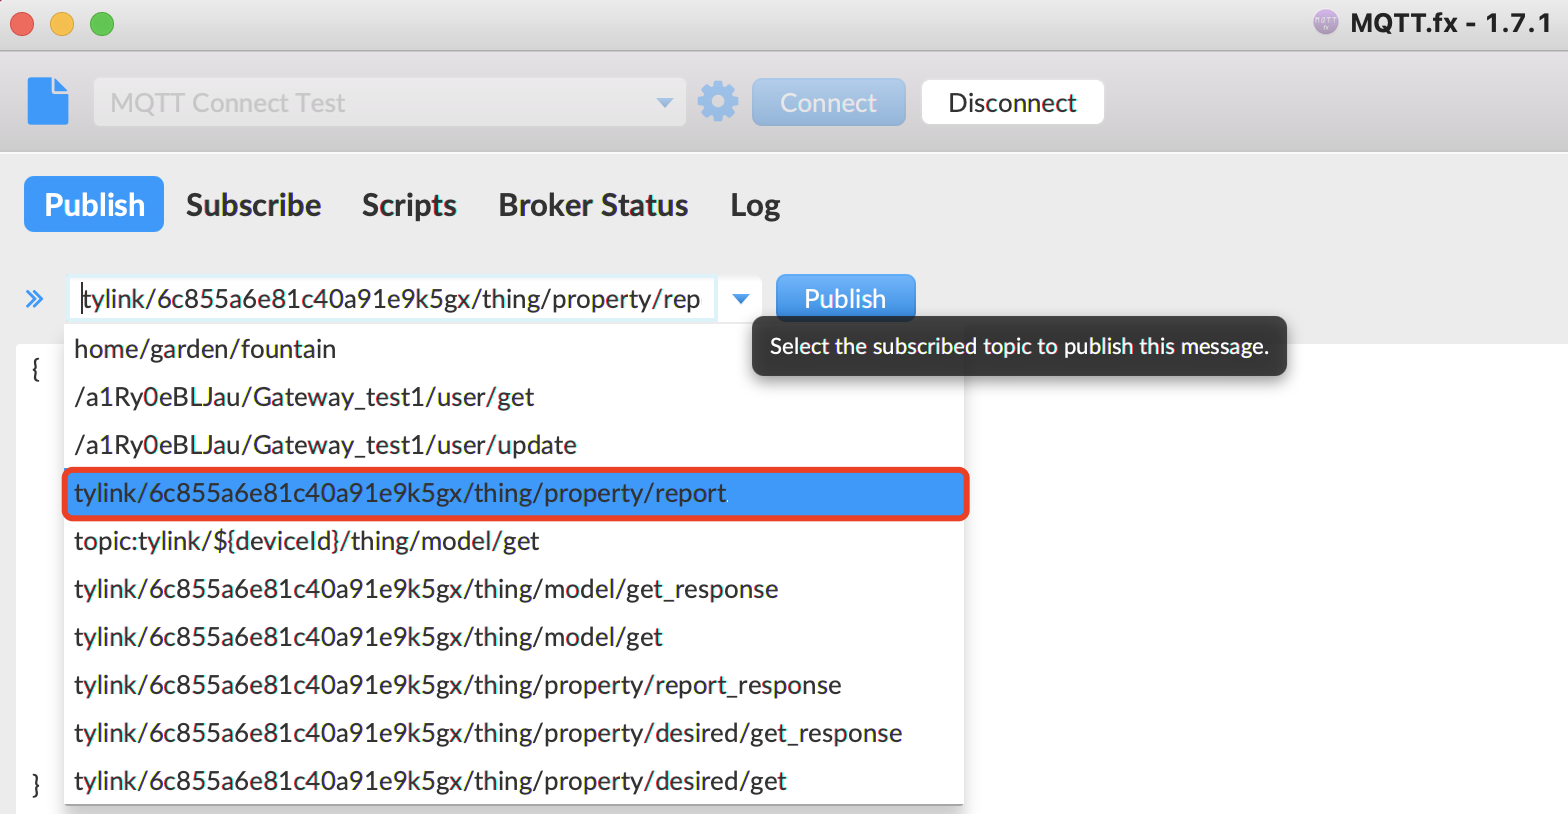
-
Check Device Logs on the Tuya Developer Platform. Enter the
DeviceID. If the published message is displayed, the upstream communication is successful.
Cloud-to-device communication
-
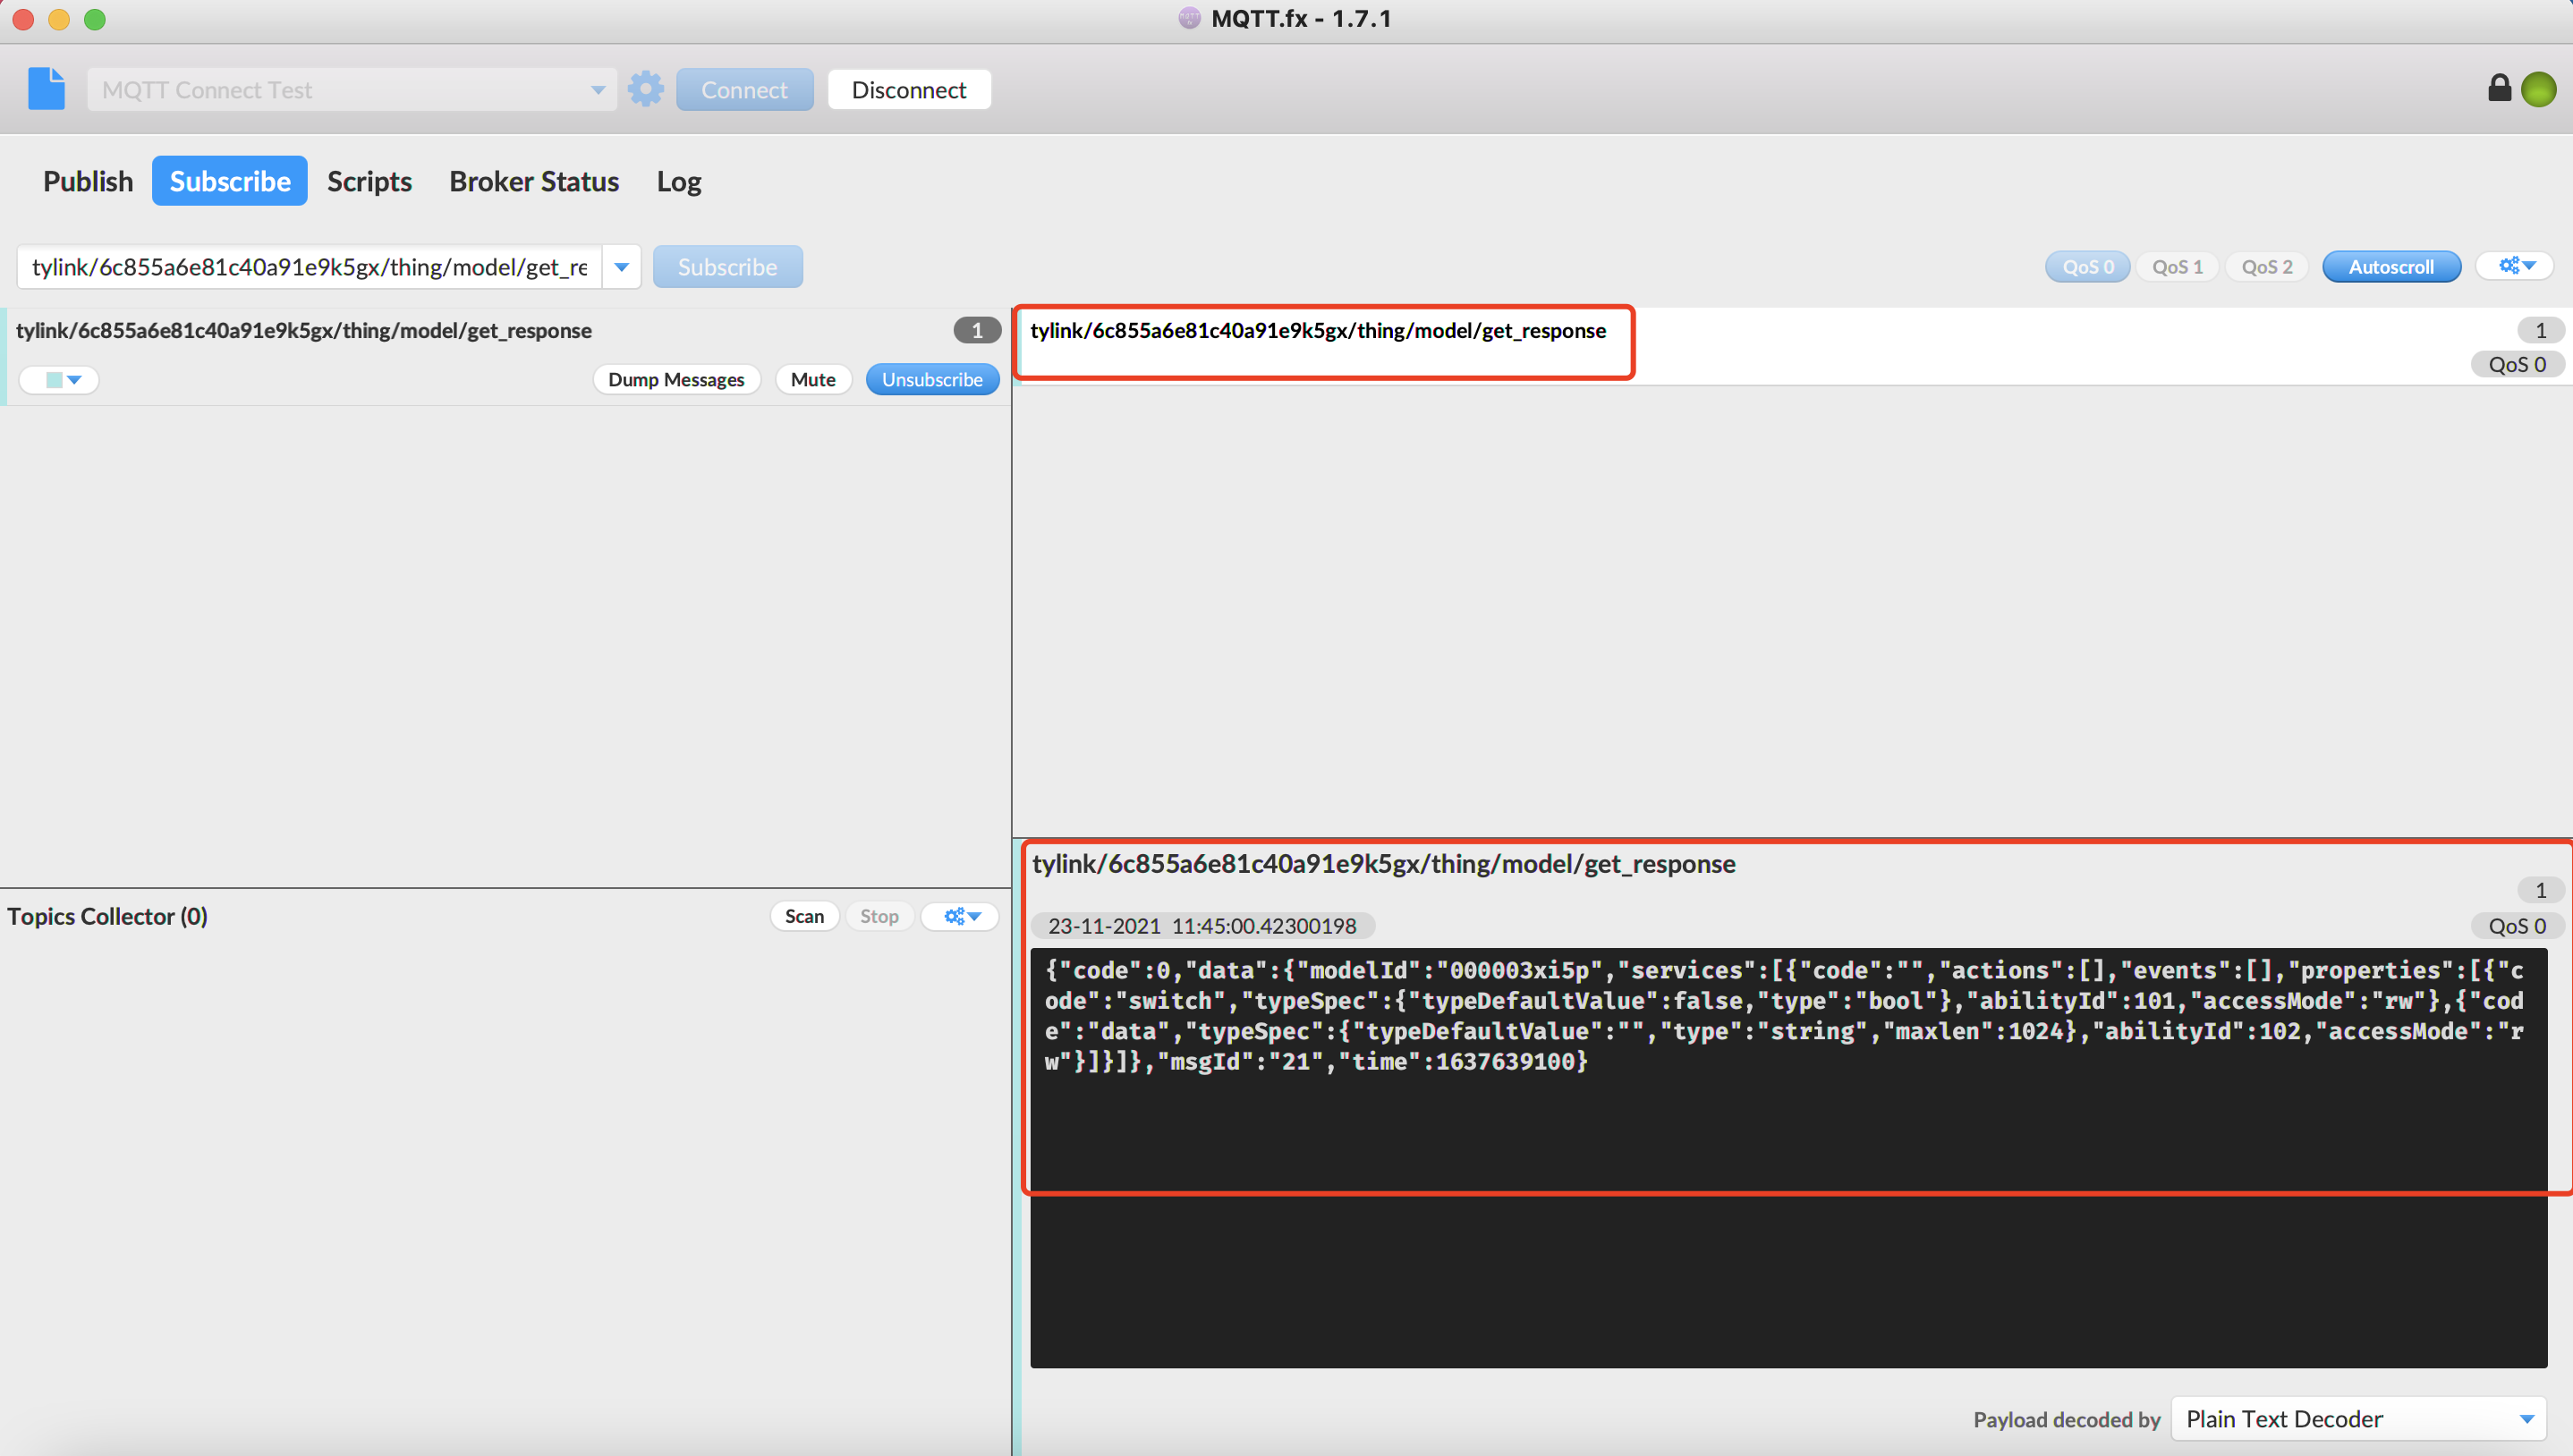
In the Subscribe field, enter the topic and then click Subscribe. A subscription message will be displayed on the client. We use the topic
tylink/6c855a6e81c40a91e9k5gx/thing/model/get_responseas an example to describe the process.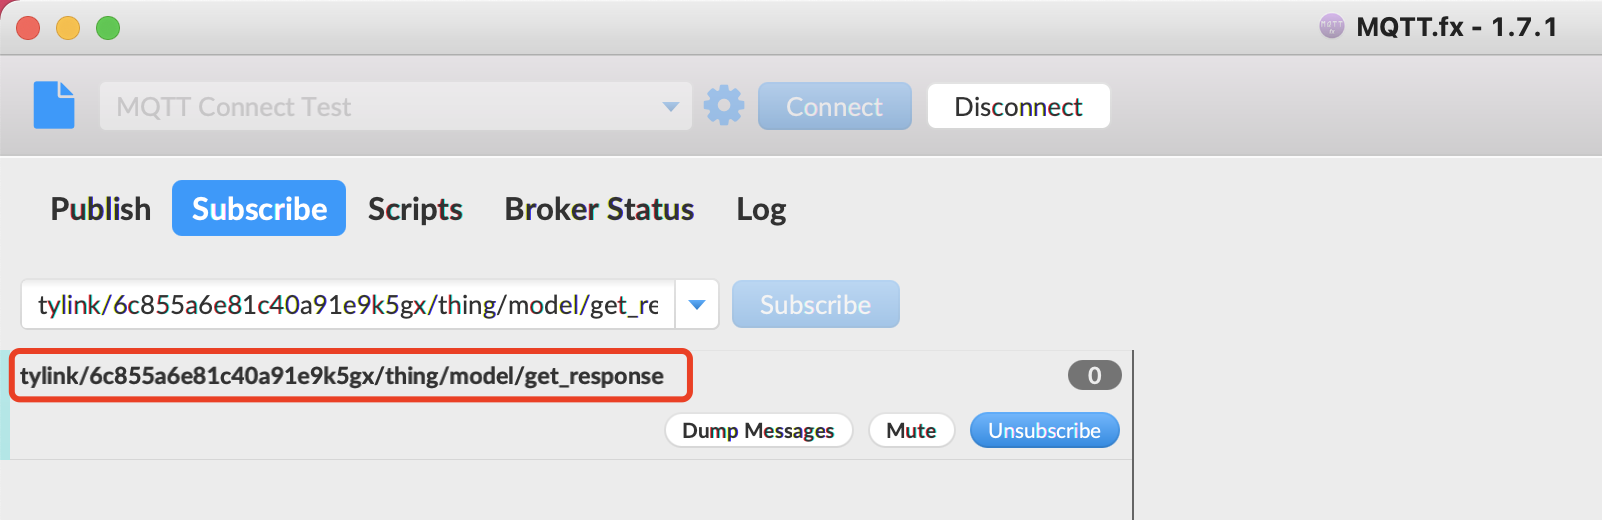
-
In the Publish field, enter the subscribed topic and then click Publish.
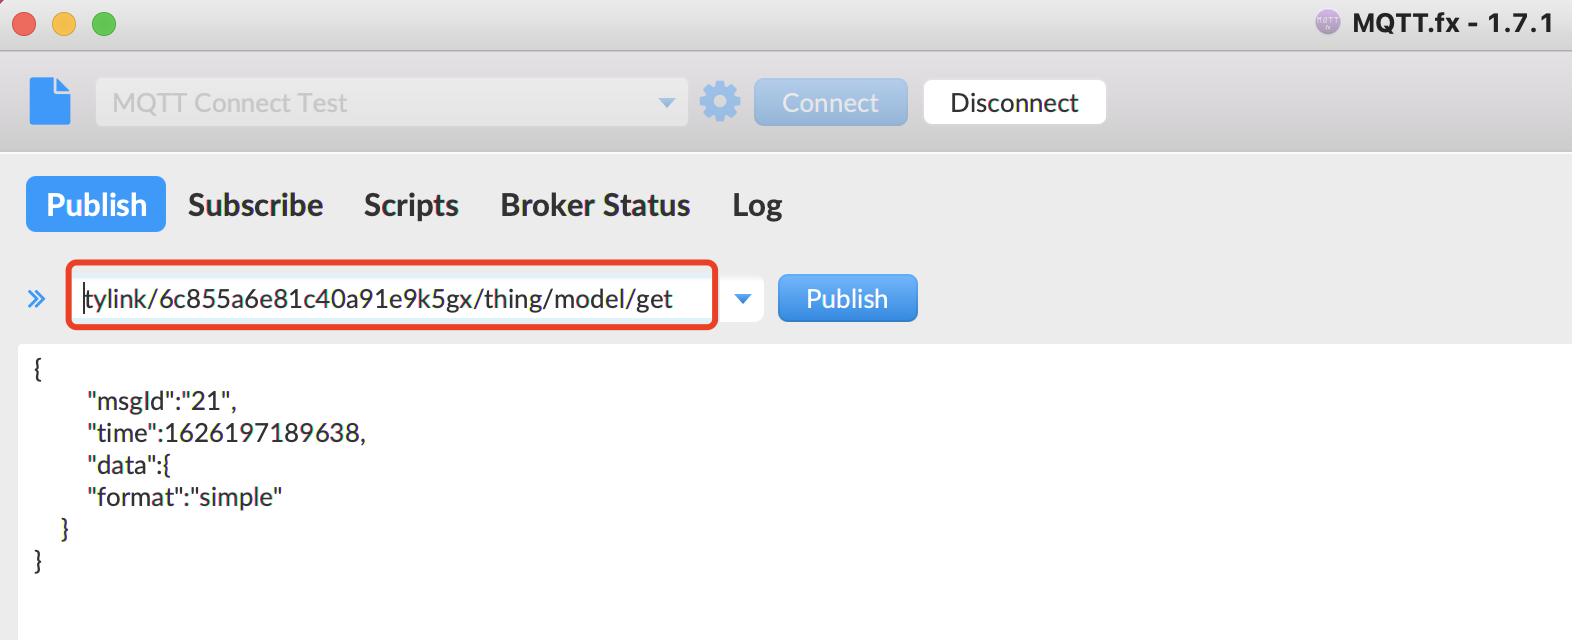
-
Click the Subscribe tab. If the subscribed topic receives a message from the cloud, the downstream communication is successful.
Is this page helpful?
YesFeedbackIs this page helpful?
YesFeedback


