Firmware Test Laboratory
This topic describes how to use the Firmware Test Laboratory in the Tuya Cloud Test app to perform firmware testing.
Preparation
-
Download and install the Tuya Cloud Test app and sign up for an account.
-
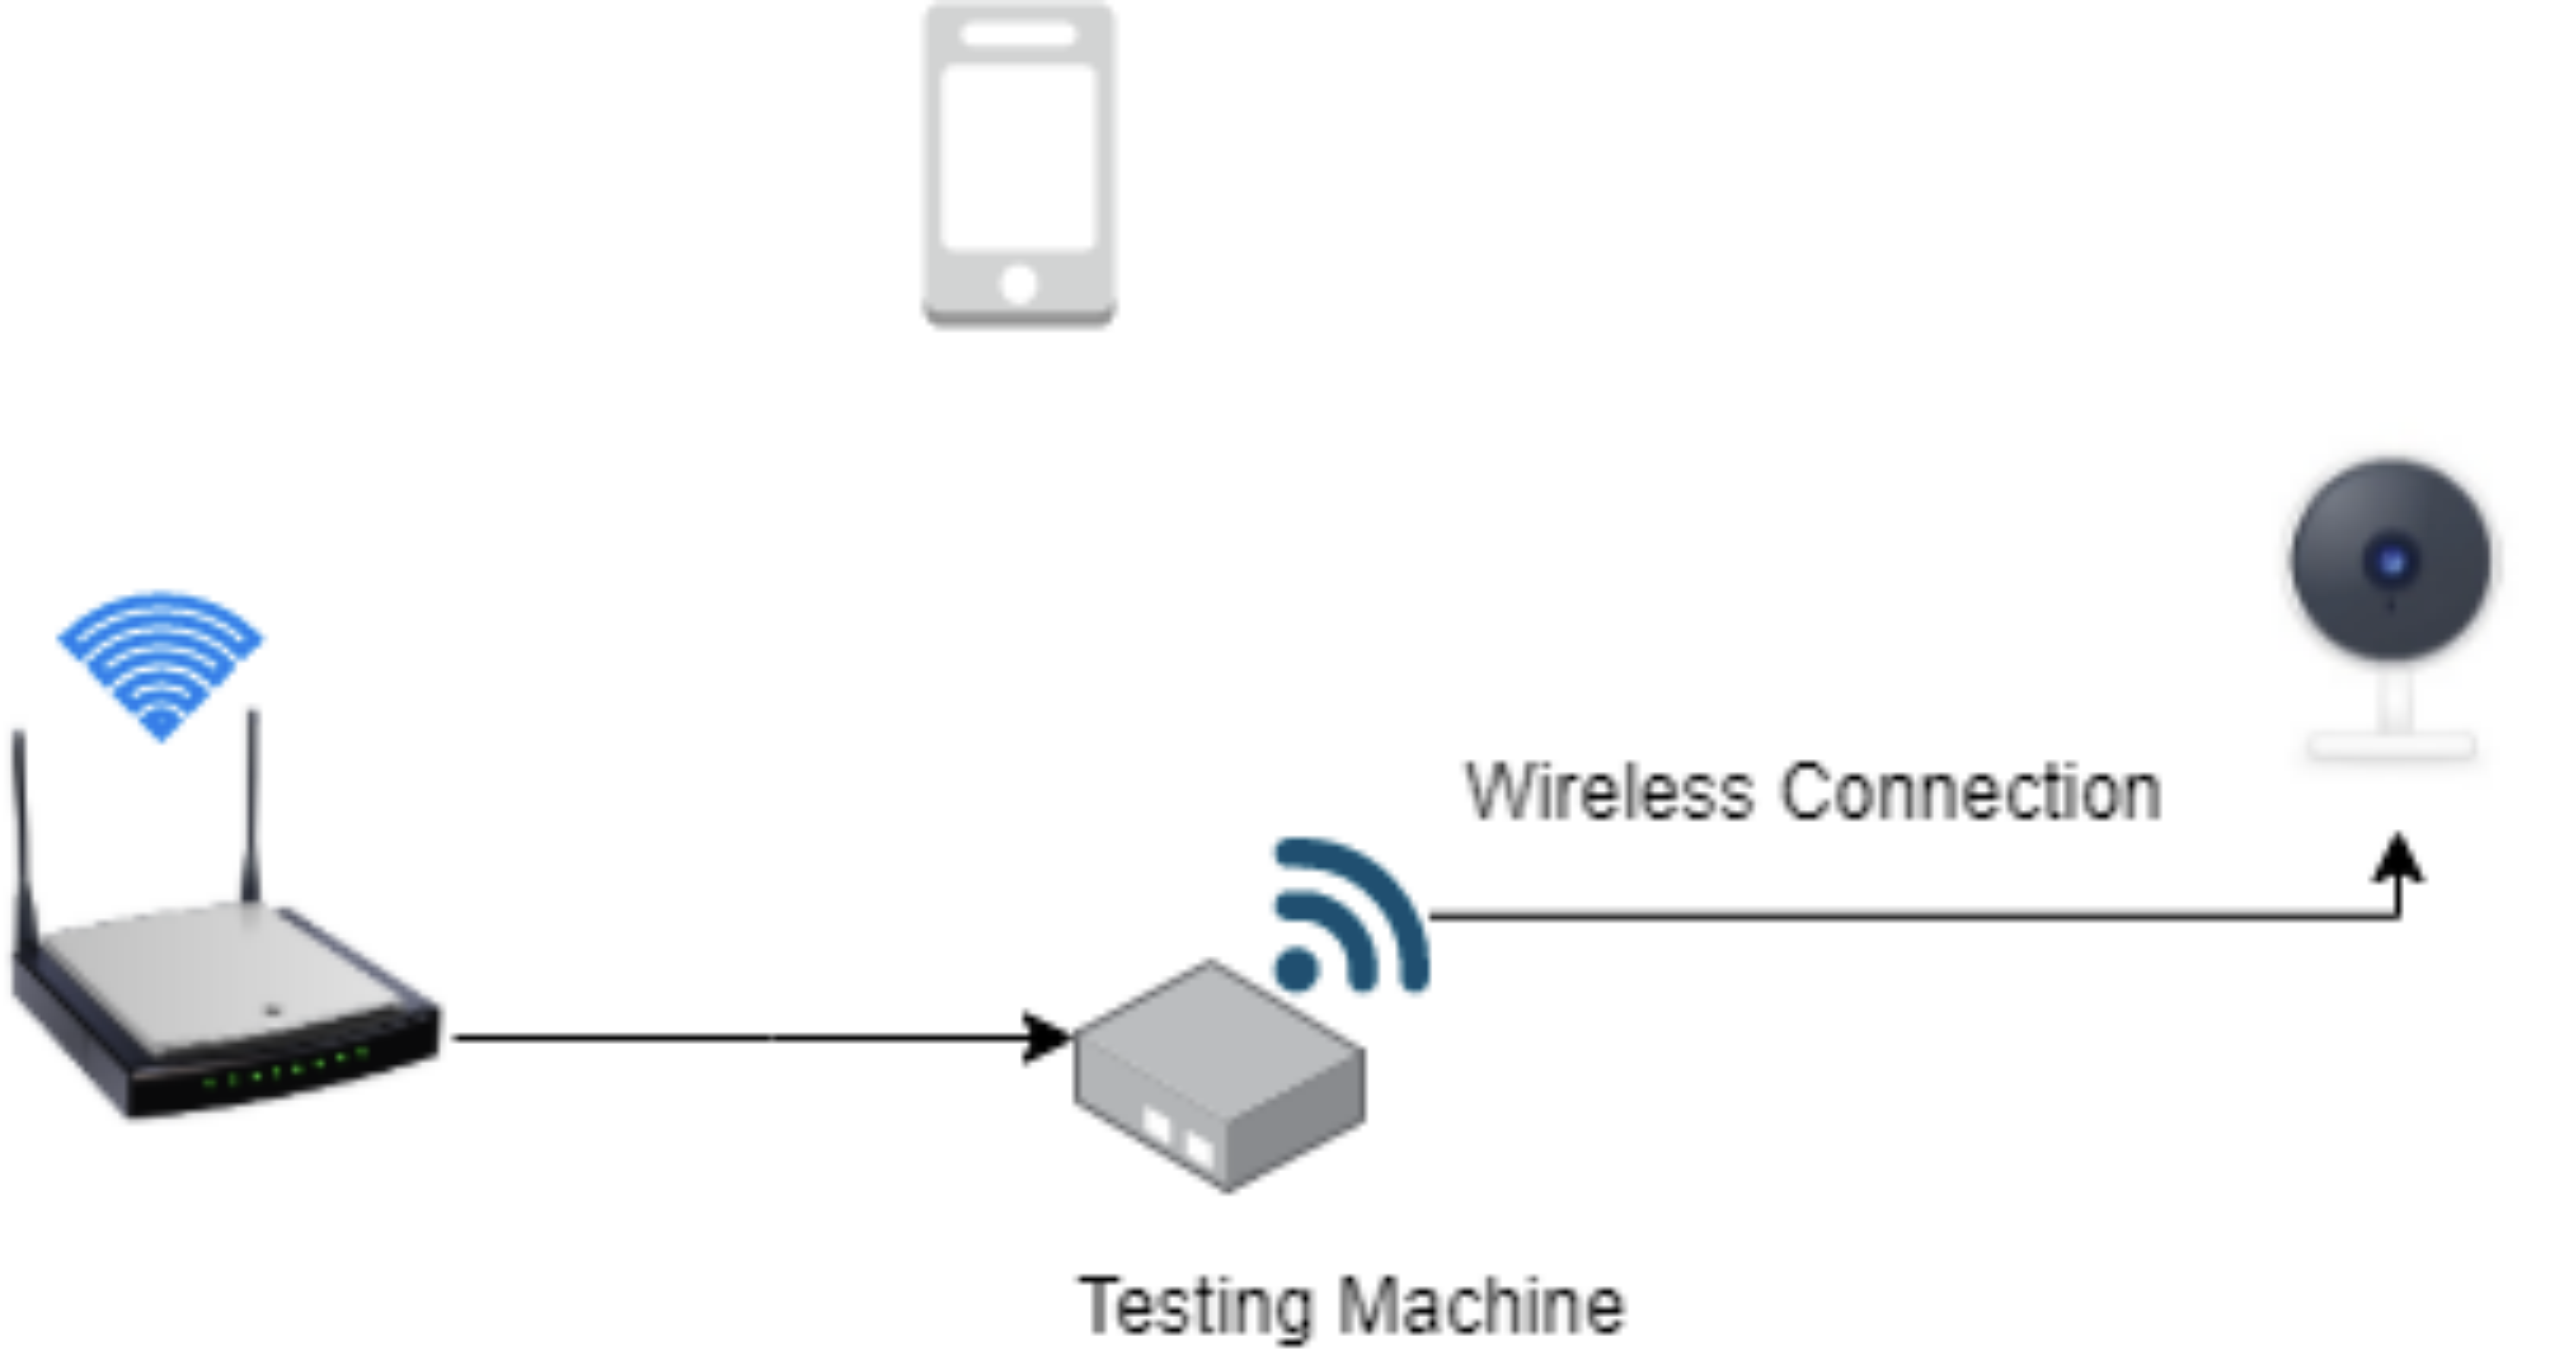
Power on the testing machine and connect it to the router by using an Ethernet cable.
-
Set up the testing environment, as shown below.
-
Check if the testing machine has been bound with another Tuya Cloud Test account. If so, you must remove it from the current account. After that, the testing machine will enter the pairing mode automatically, and its red LED blinks.
Background
Data security testing
Data security is an essential part of Tuya’s security baseline for embedded systems. Global deployment of smart devices comes with data compliance in different countries or regions. A device registered in a country or region is expected to access the country or region specific IP address or domain name. Otherwise, the practice will be considered non-compliant.
How it works
The testing machine captures packets during the communication between the device under test (DUT) and the server and analyzes the captured packets to check whether an undesired IP or domain name is included.
Testing process
Perform the following steps in the Tuya Cloud Test app.
Pair the testing machine
-
Connect your mobile phone and the testing machine to the same router.
-
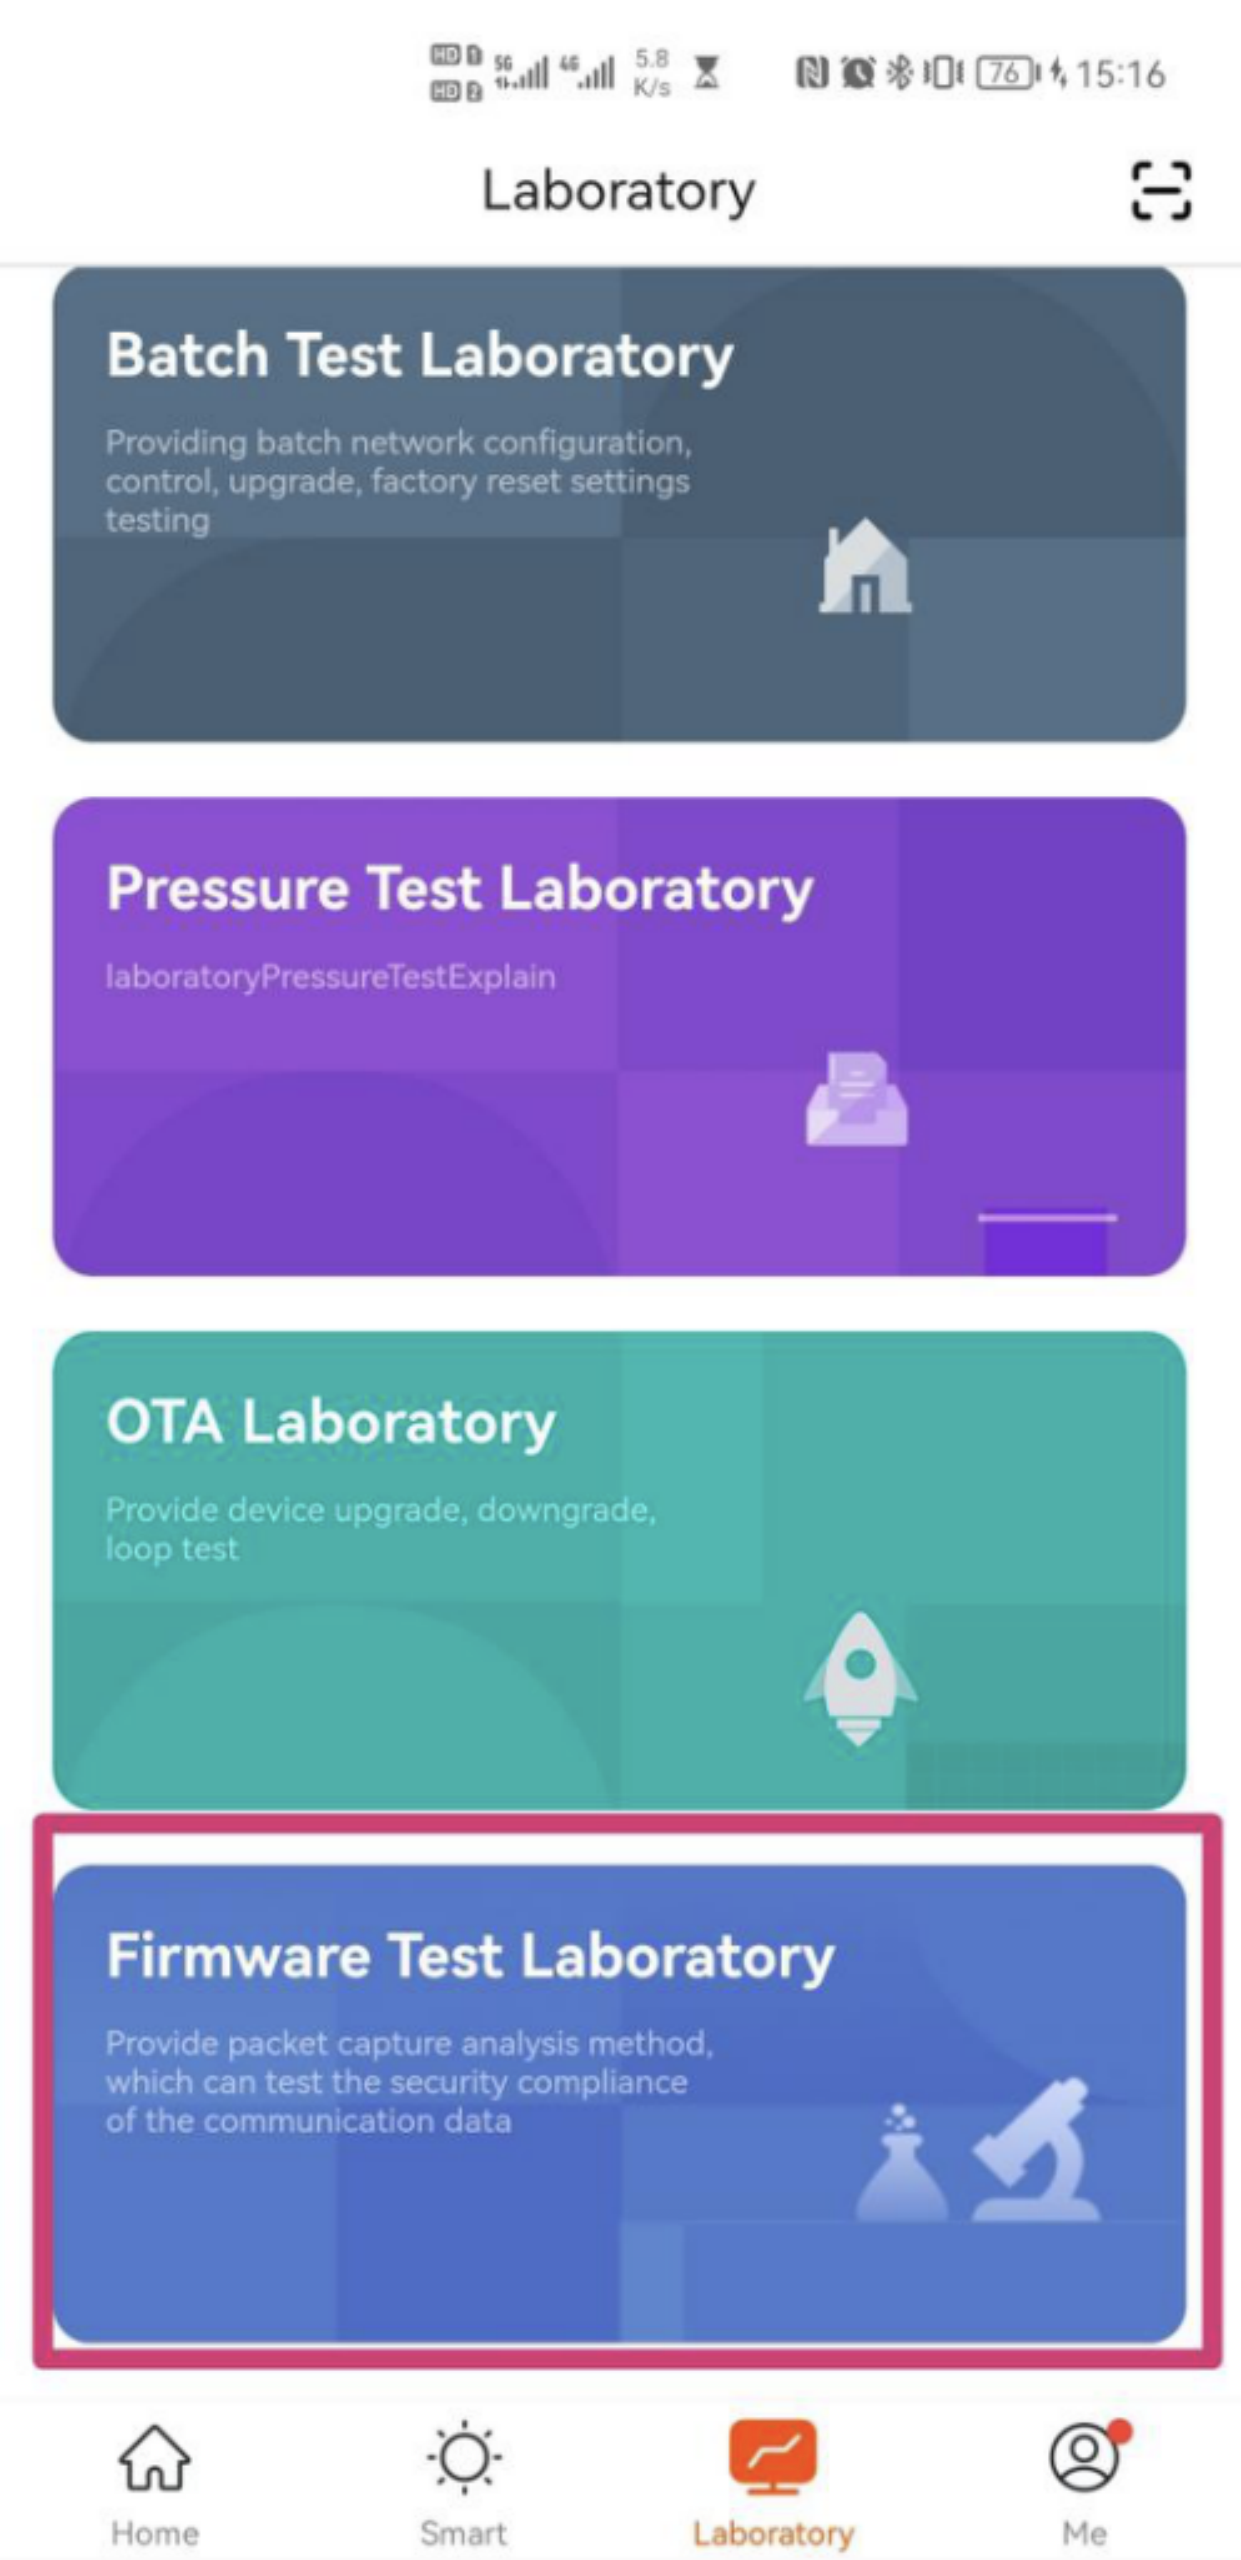
Log in to the Tuya Cloud Test app and go to Laboratory > Firmware Test Laboratory.
-
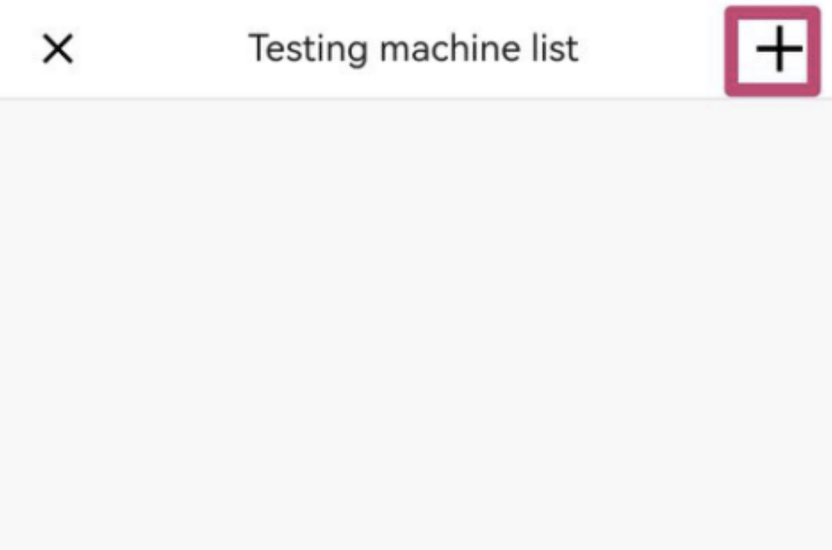
On the Testing Machine List page, tap + in the top right corner to add a testing machine.
-
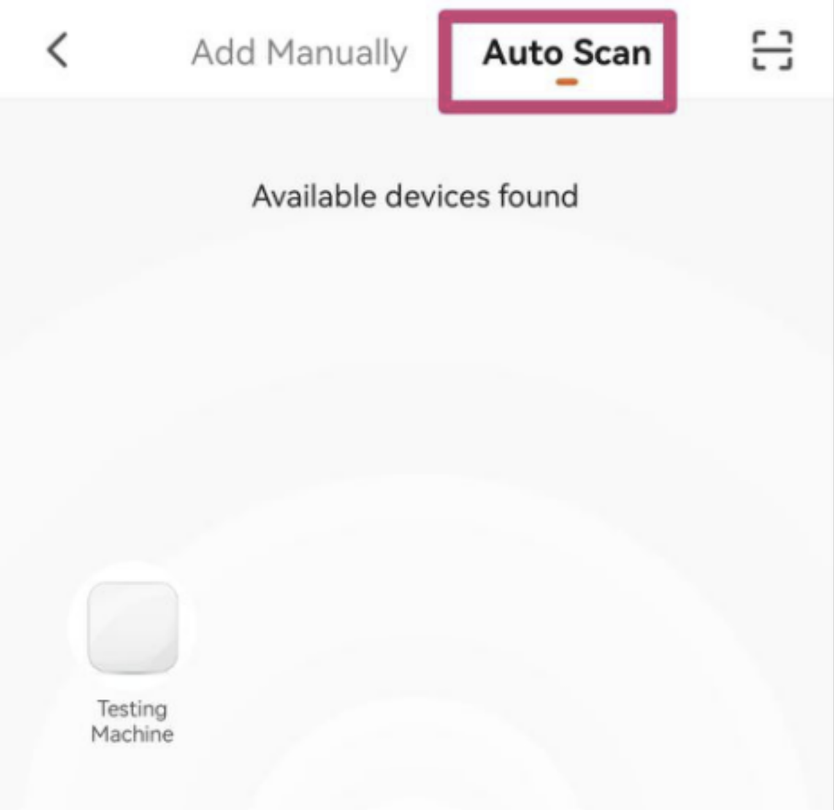
You can pair the testing machine through either QR code scanning or auto scan.
-
QR code scanning
Tap the scan icon in the top right corner of the app to scan the QR code and pair the testing machine.
-
Auto scan
Tap Auto Scan. The icon of the testing machine will appear on the page. Tap the icon to initiate the connection. Wait for the pairing to complete.
-
-
Your testing machine is displayed on the Testing Machine List.
-
For Android devices, tap < in the top left corner and then Refresh to update the list.
-
For iOS devices, tap < in the top left corner, and the Laboratory page appears. You can tap the Firmware Test Laboratory to enter the Testing Machine List page.
-
Create a test task and bind a DUT
Create a packet capture analysis task
-
Tap a testing machine.
-
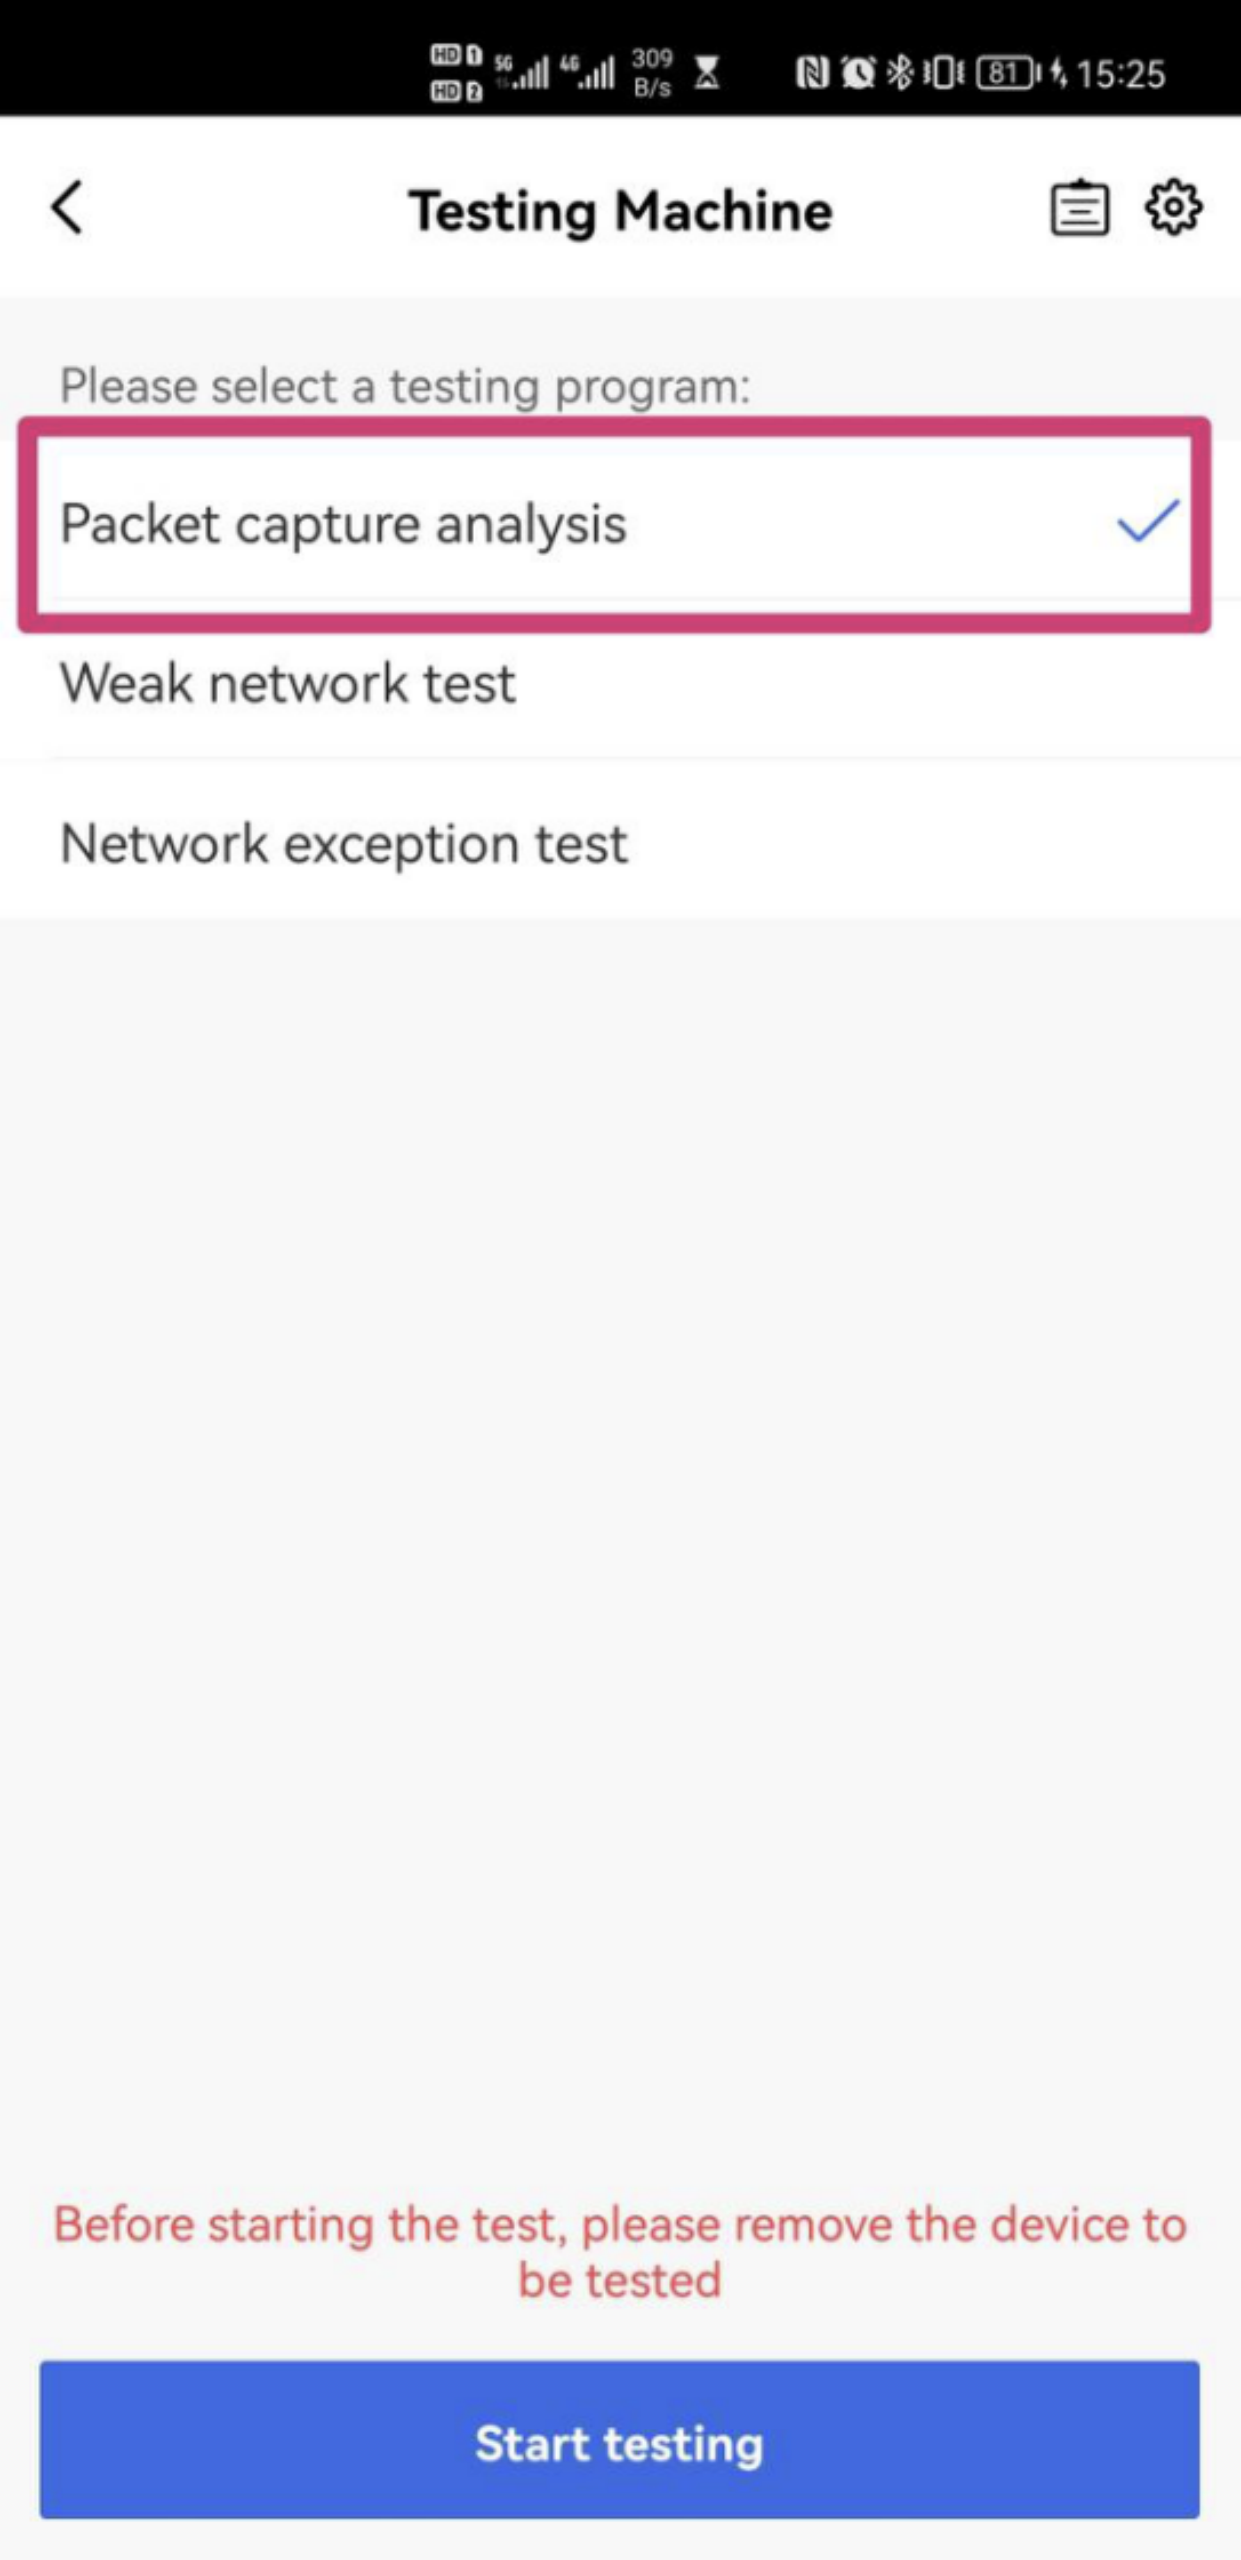
Tap Please select the Packet Capture Analysis.
-
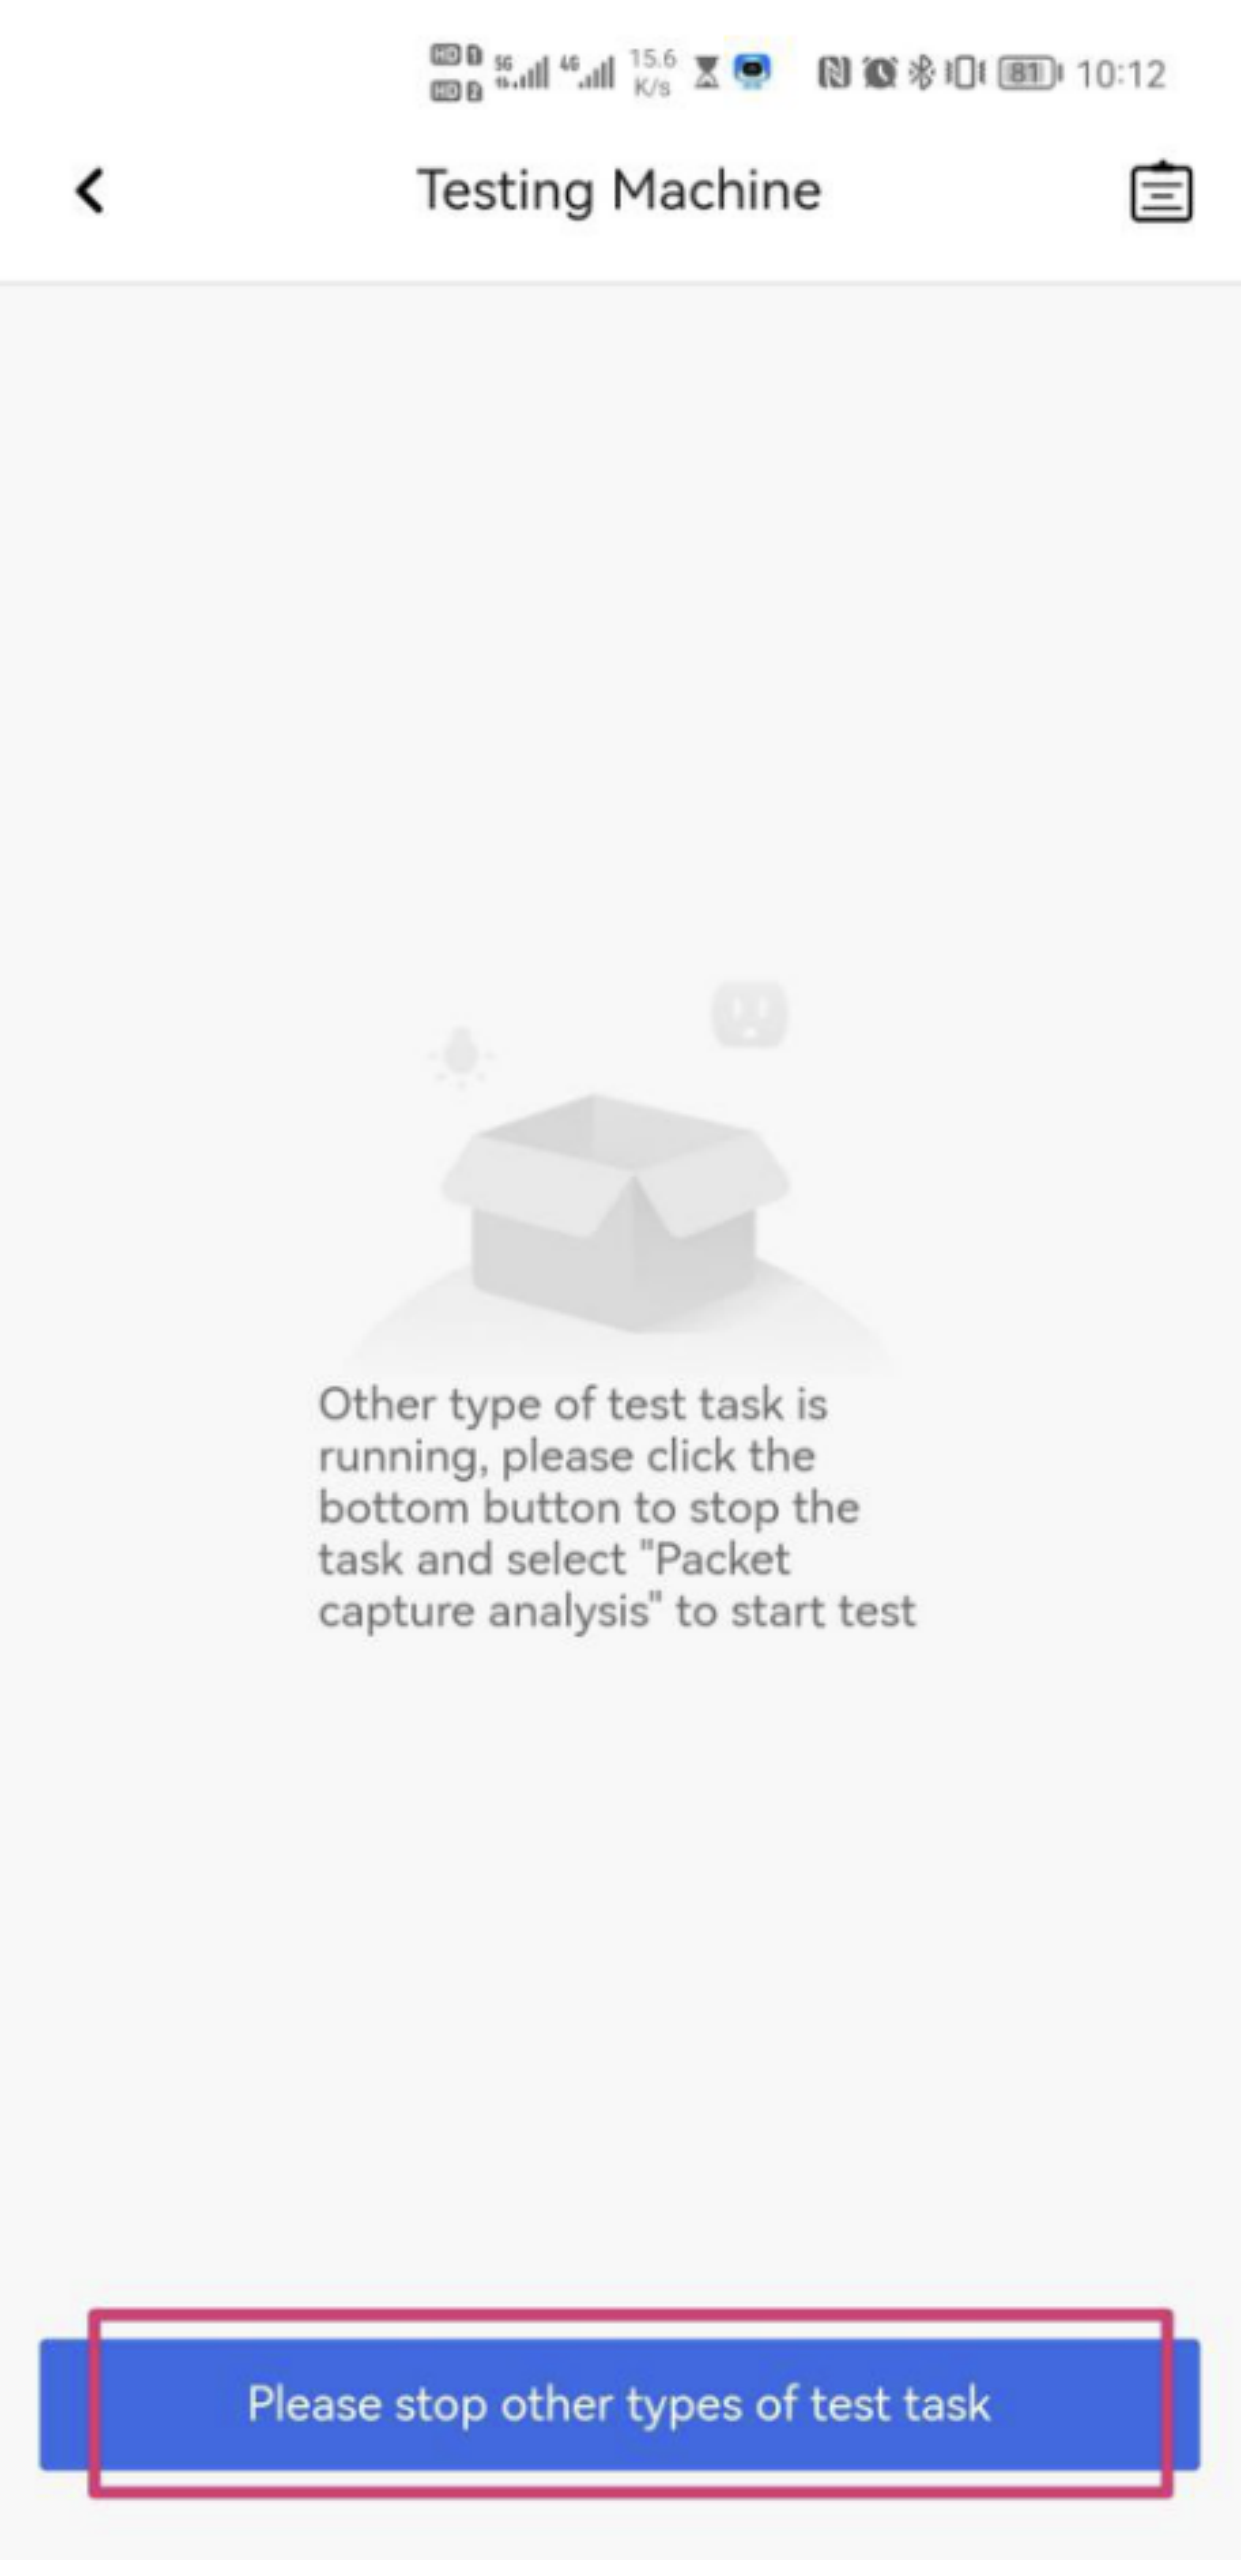
(Optional) If tasks of other types are running, you will be prompted to stop the running task before you can create the packet capture analysis task. If so, tap Please stop other types of test task.
-
Tap Packet capture analysis to start testing.
-
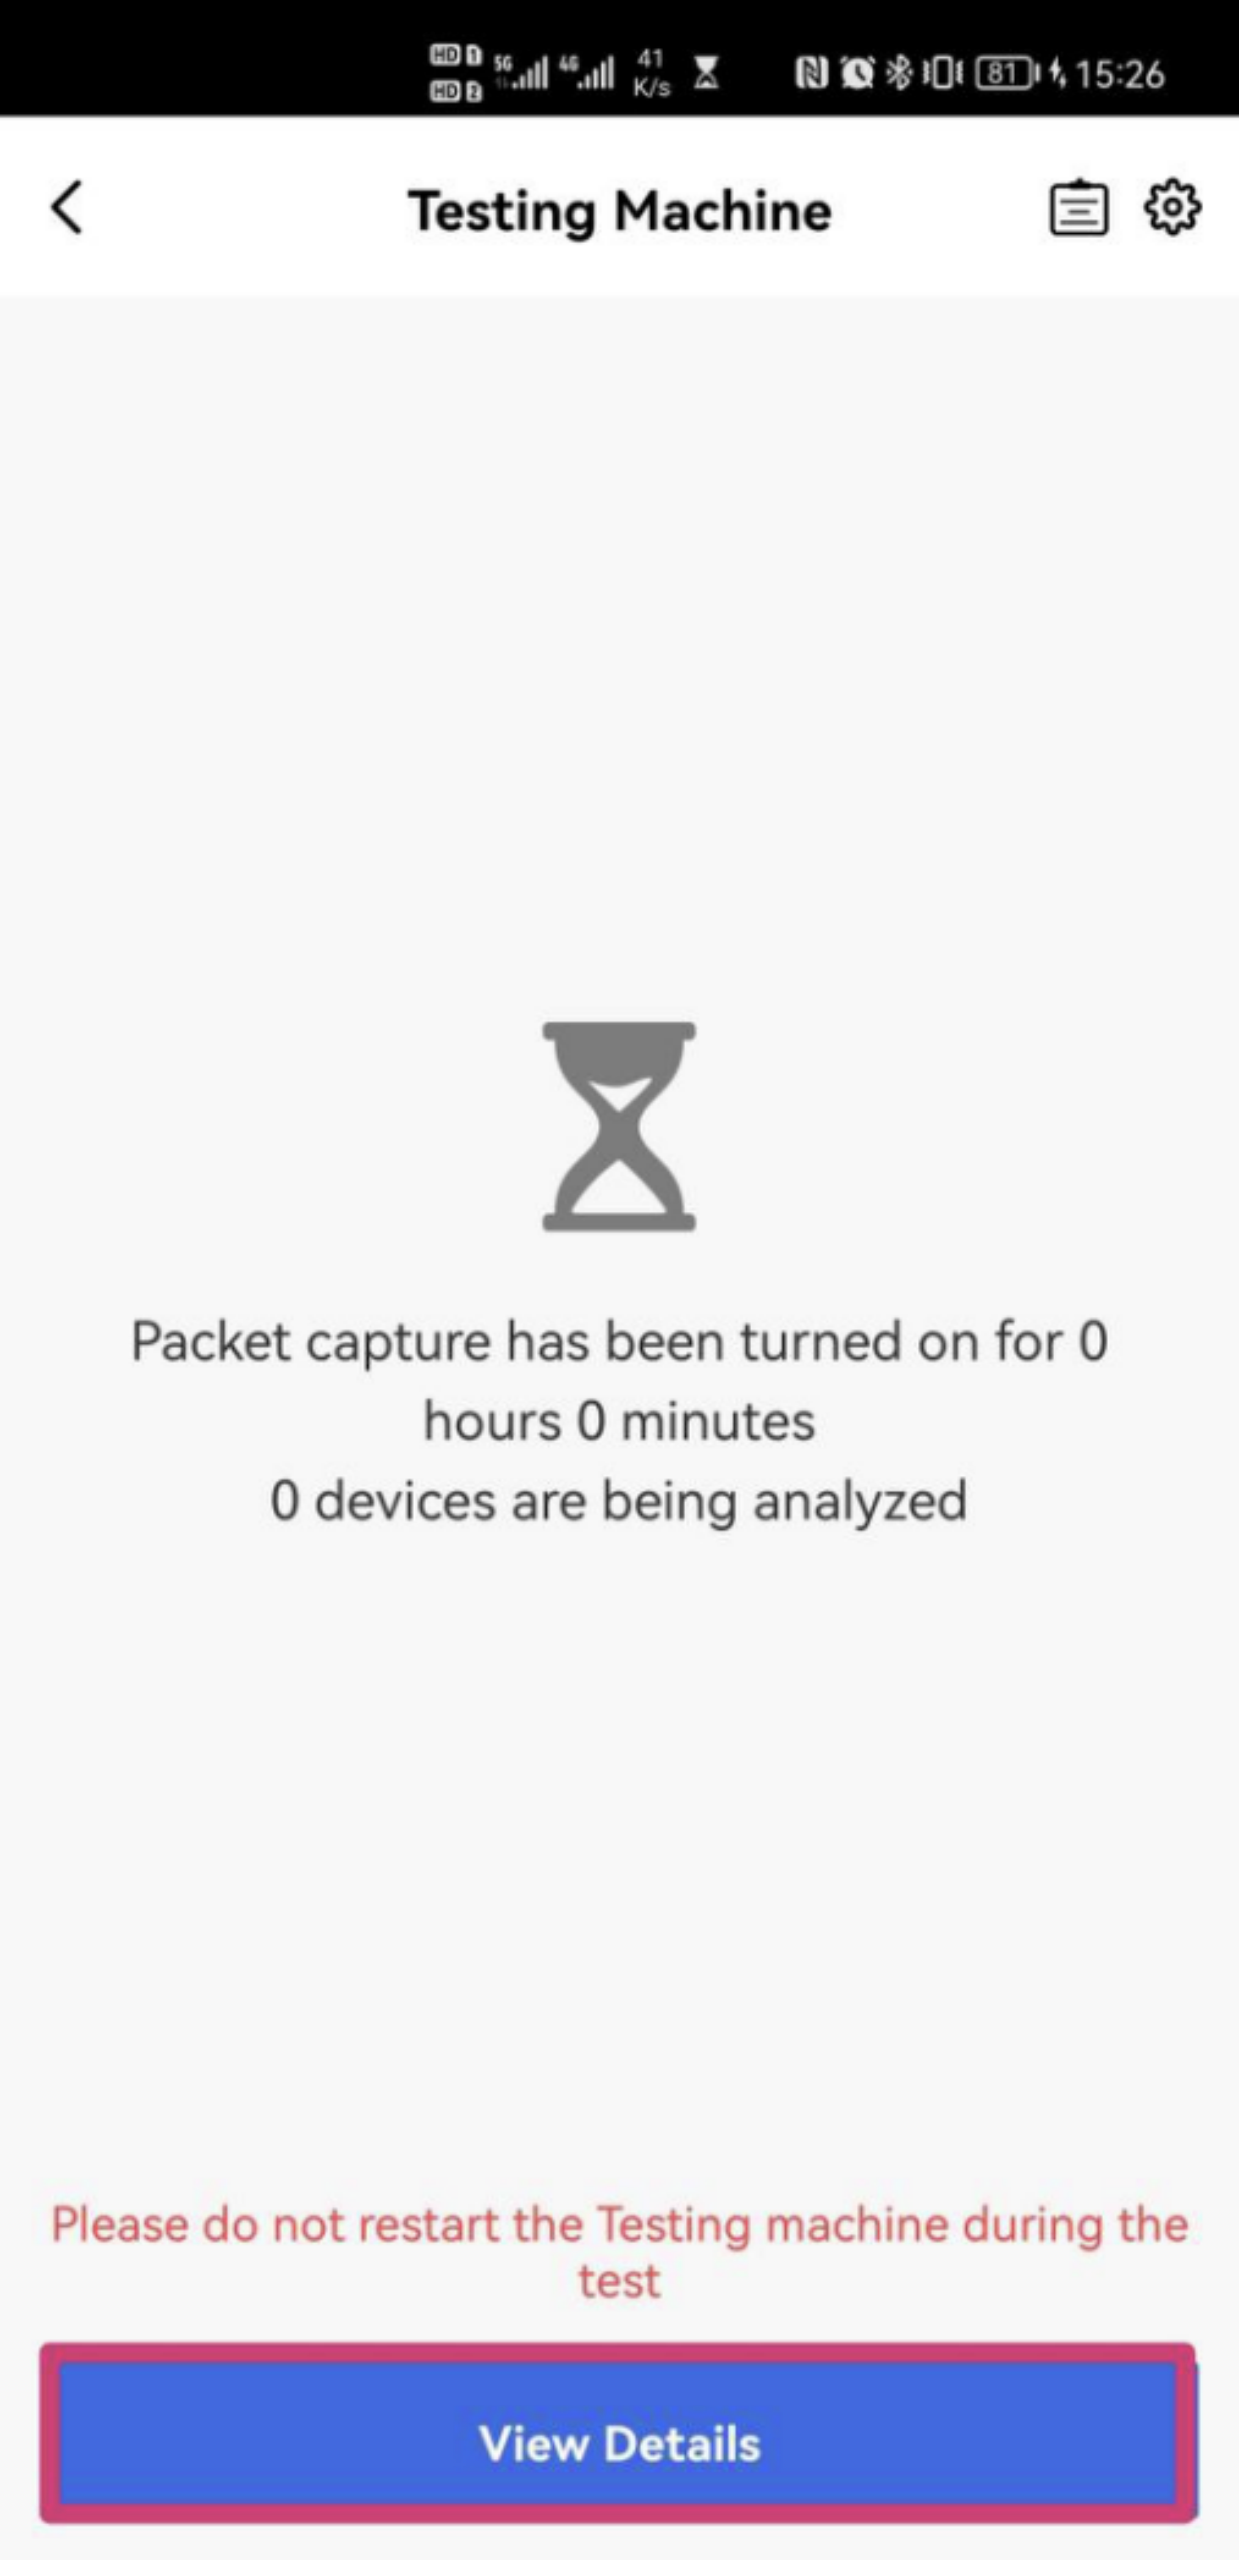
After the test is started, the Testing Machine page displays the packet capture duration and the number of devices being analyzed.
-
Tap View Details to enter the Packet capture analysis page.

Add a DUT
-
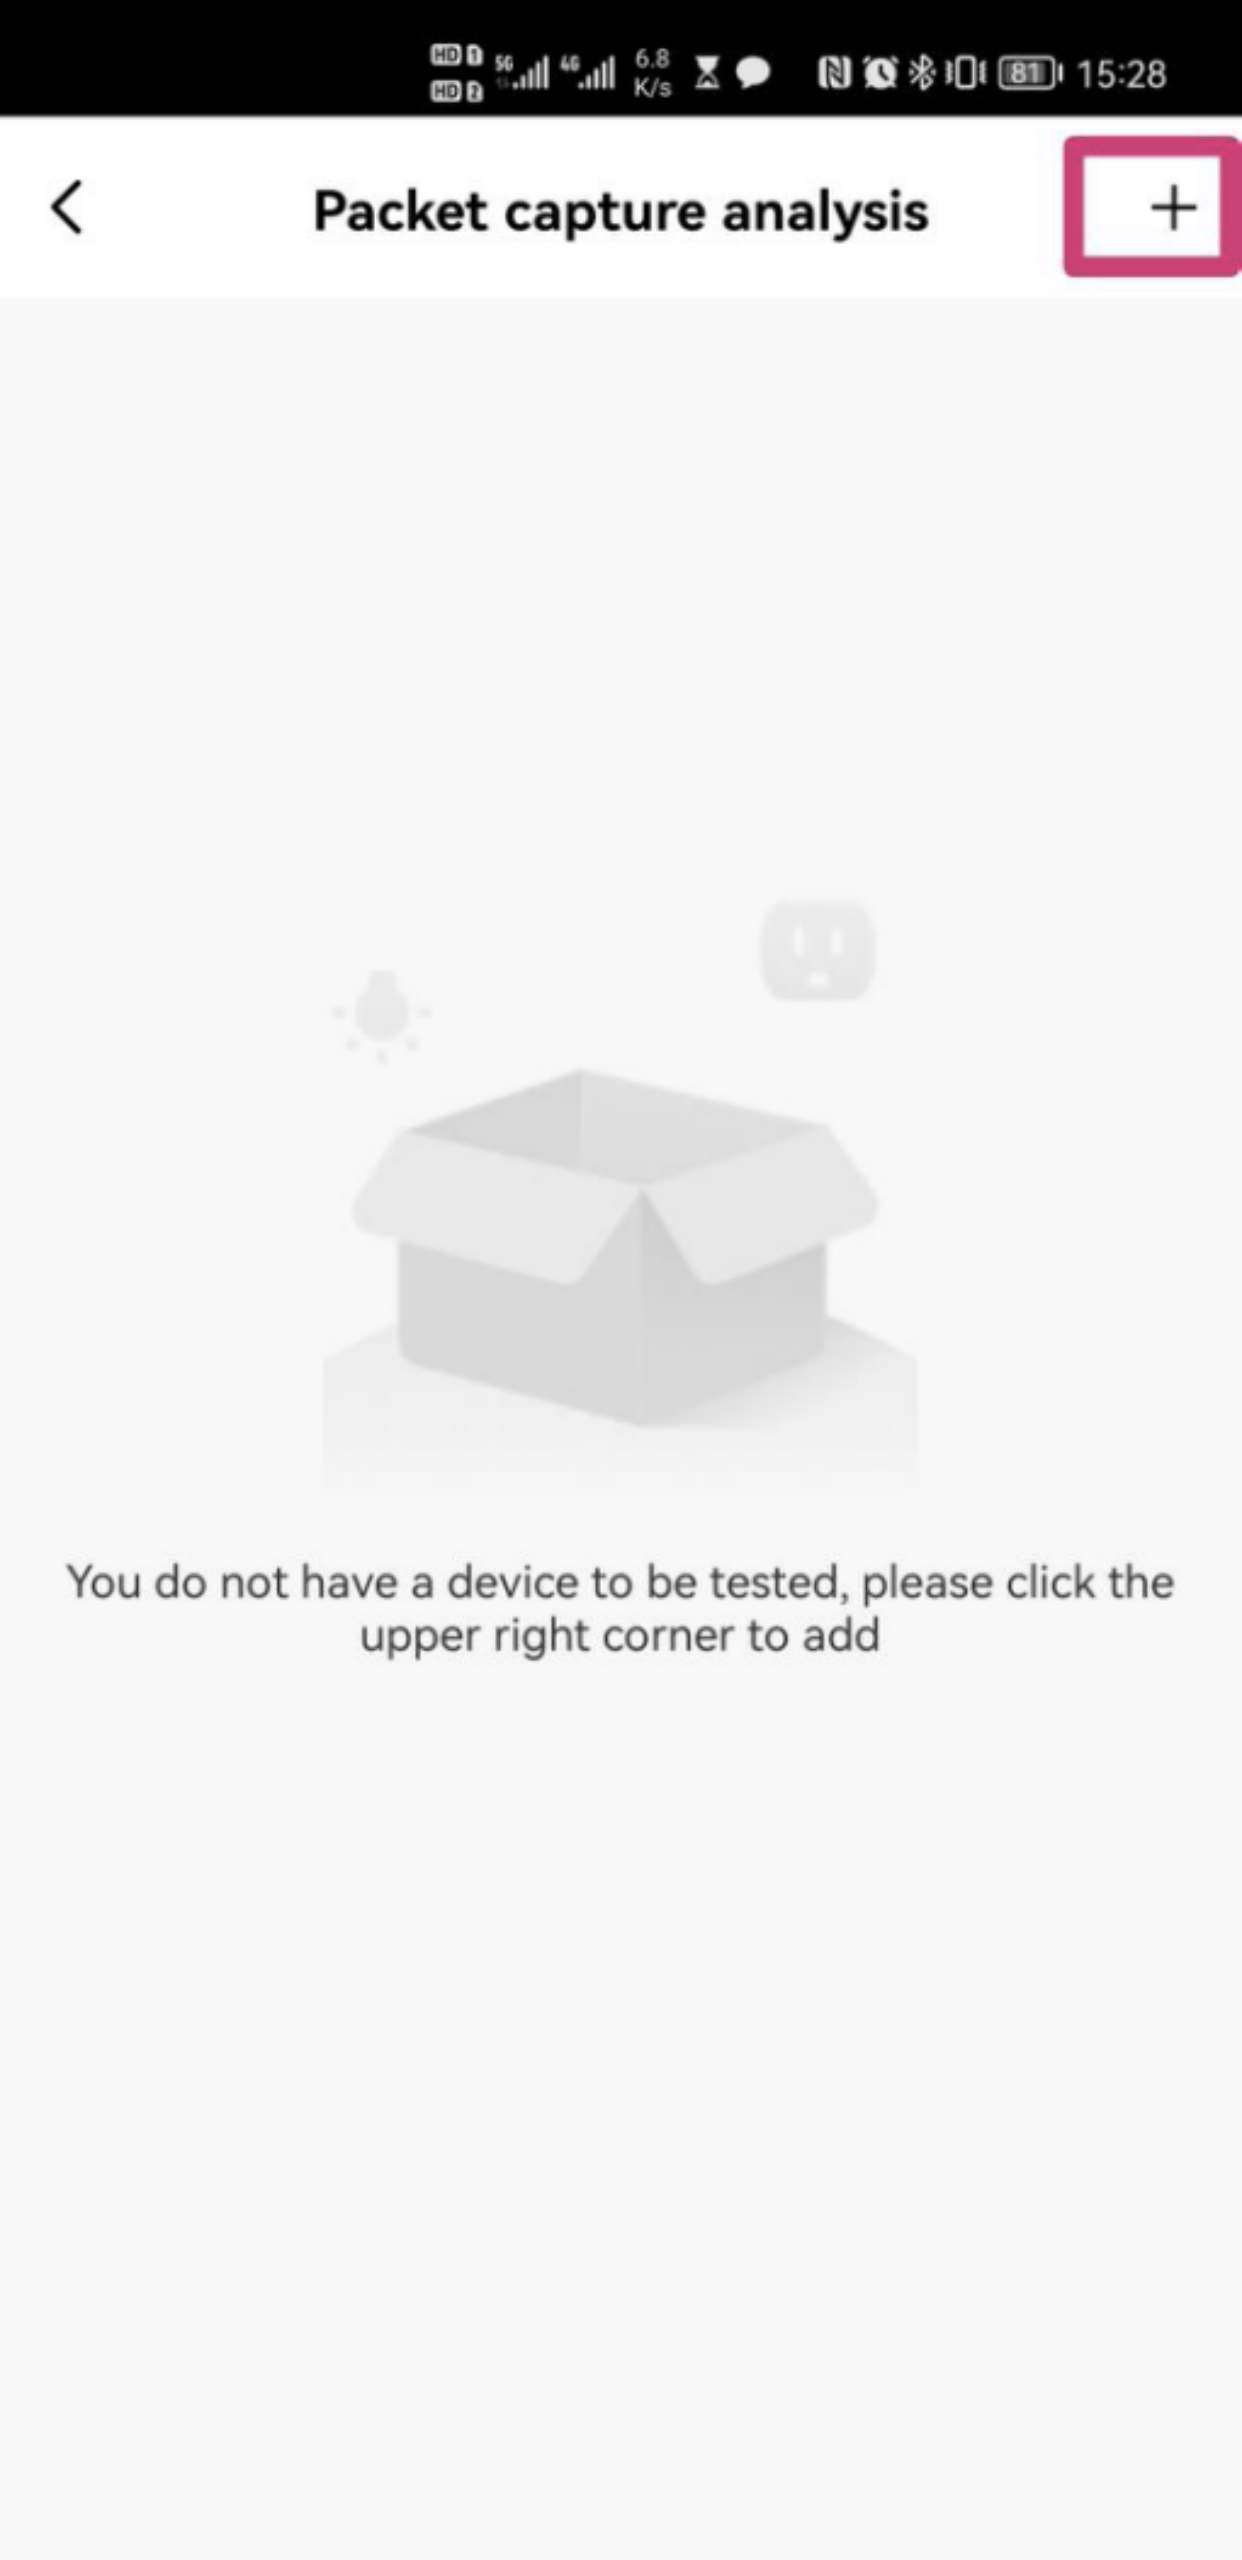
Tap + in the top right corner to enter the Add Devices page.
-
Enter the SSID and password.
You can tap and hold the password to copy it for later use.
- After the testing machine is removed from and added to the app again, the SSID remains unchanged and a new random password is generated.
- If you restart the testing machine, both the SSID and password remain unchanged.

-
Connect your mobile phone to the Wi-Fi network provided by the testing machine. Tap Please add the device to the tested to add a DUT.
Bind a DUT
-
Enter the Packet capture analysis page.
-
For iOS devices, tap < in the top left corner, and the Laboratory page appears. You can tap Firmware Test Laboratory and enter the Packet capture analysis page again.
-
For Android devices, tap < in the top left corner twice to return to the Packet capture analysis page.
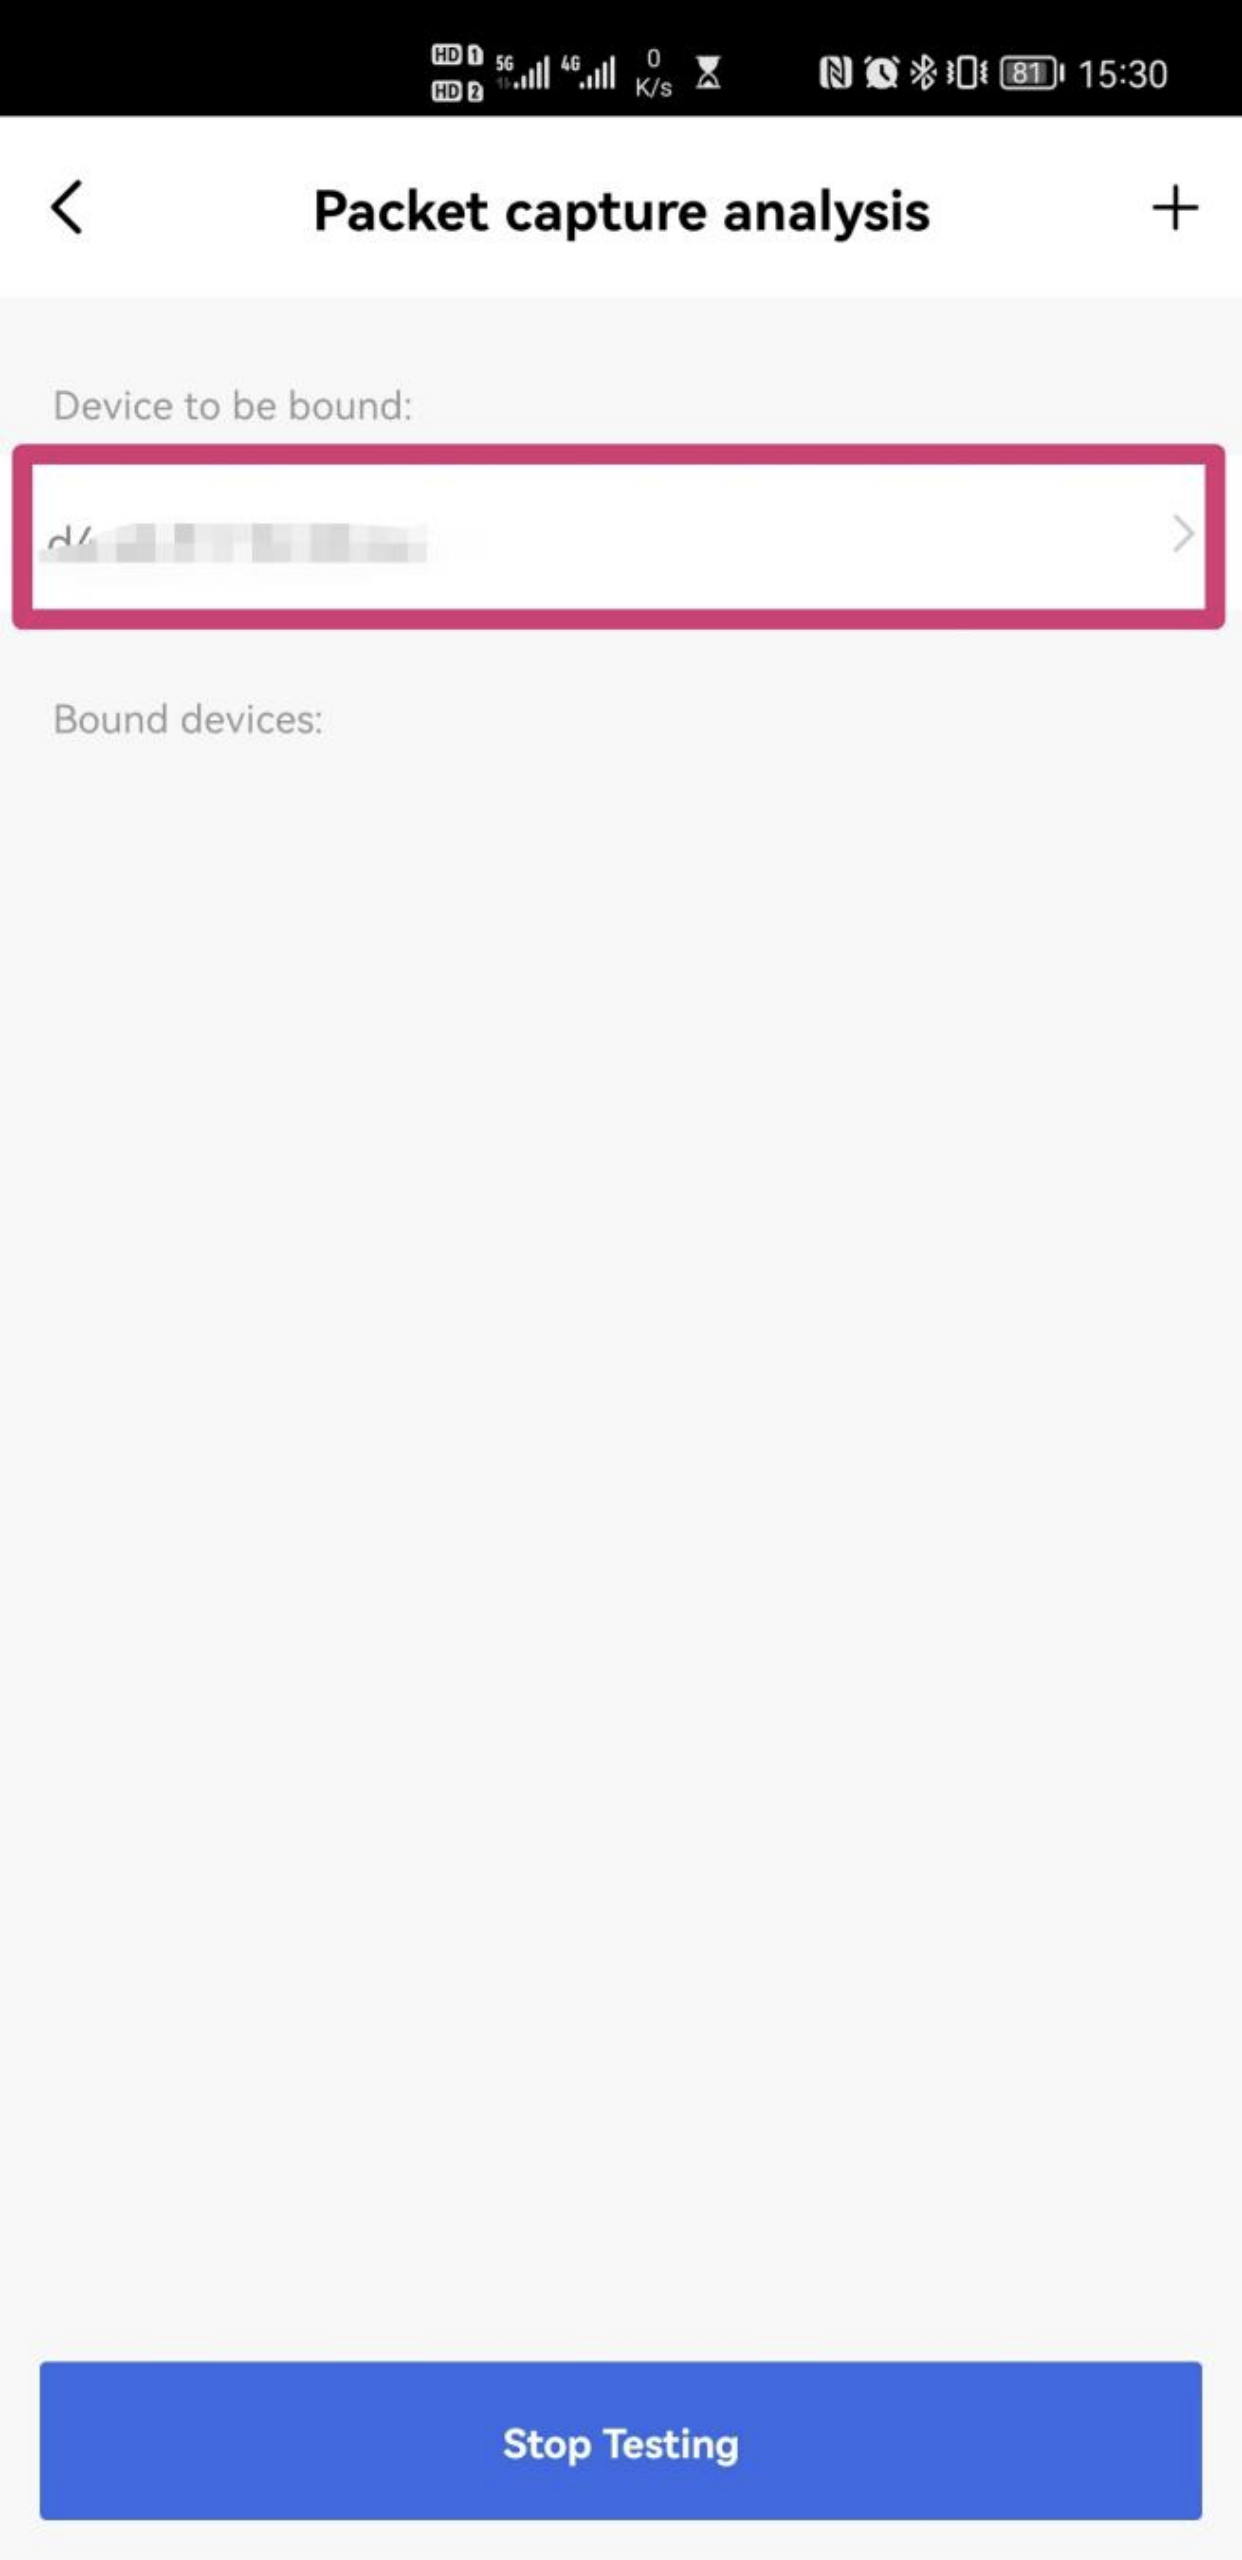
On the Packet capture analysis page, the Device to be bound section displays the MAC addresses of all mobile phones and DUTs connected to the Wi-Fi network provided by the testing machine.
-
-
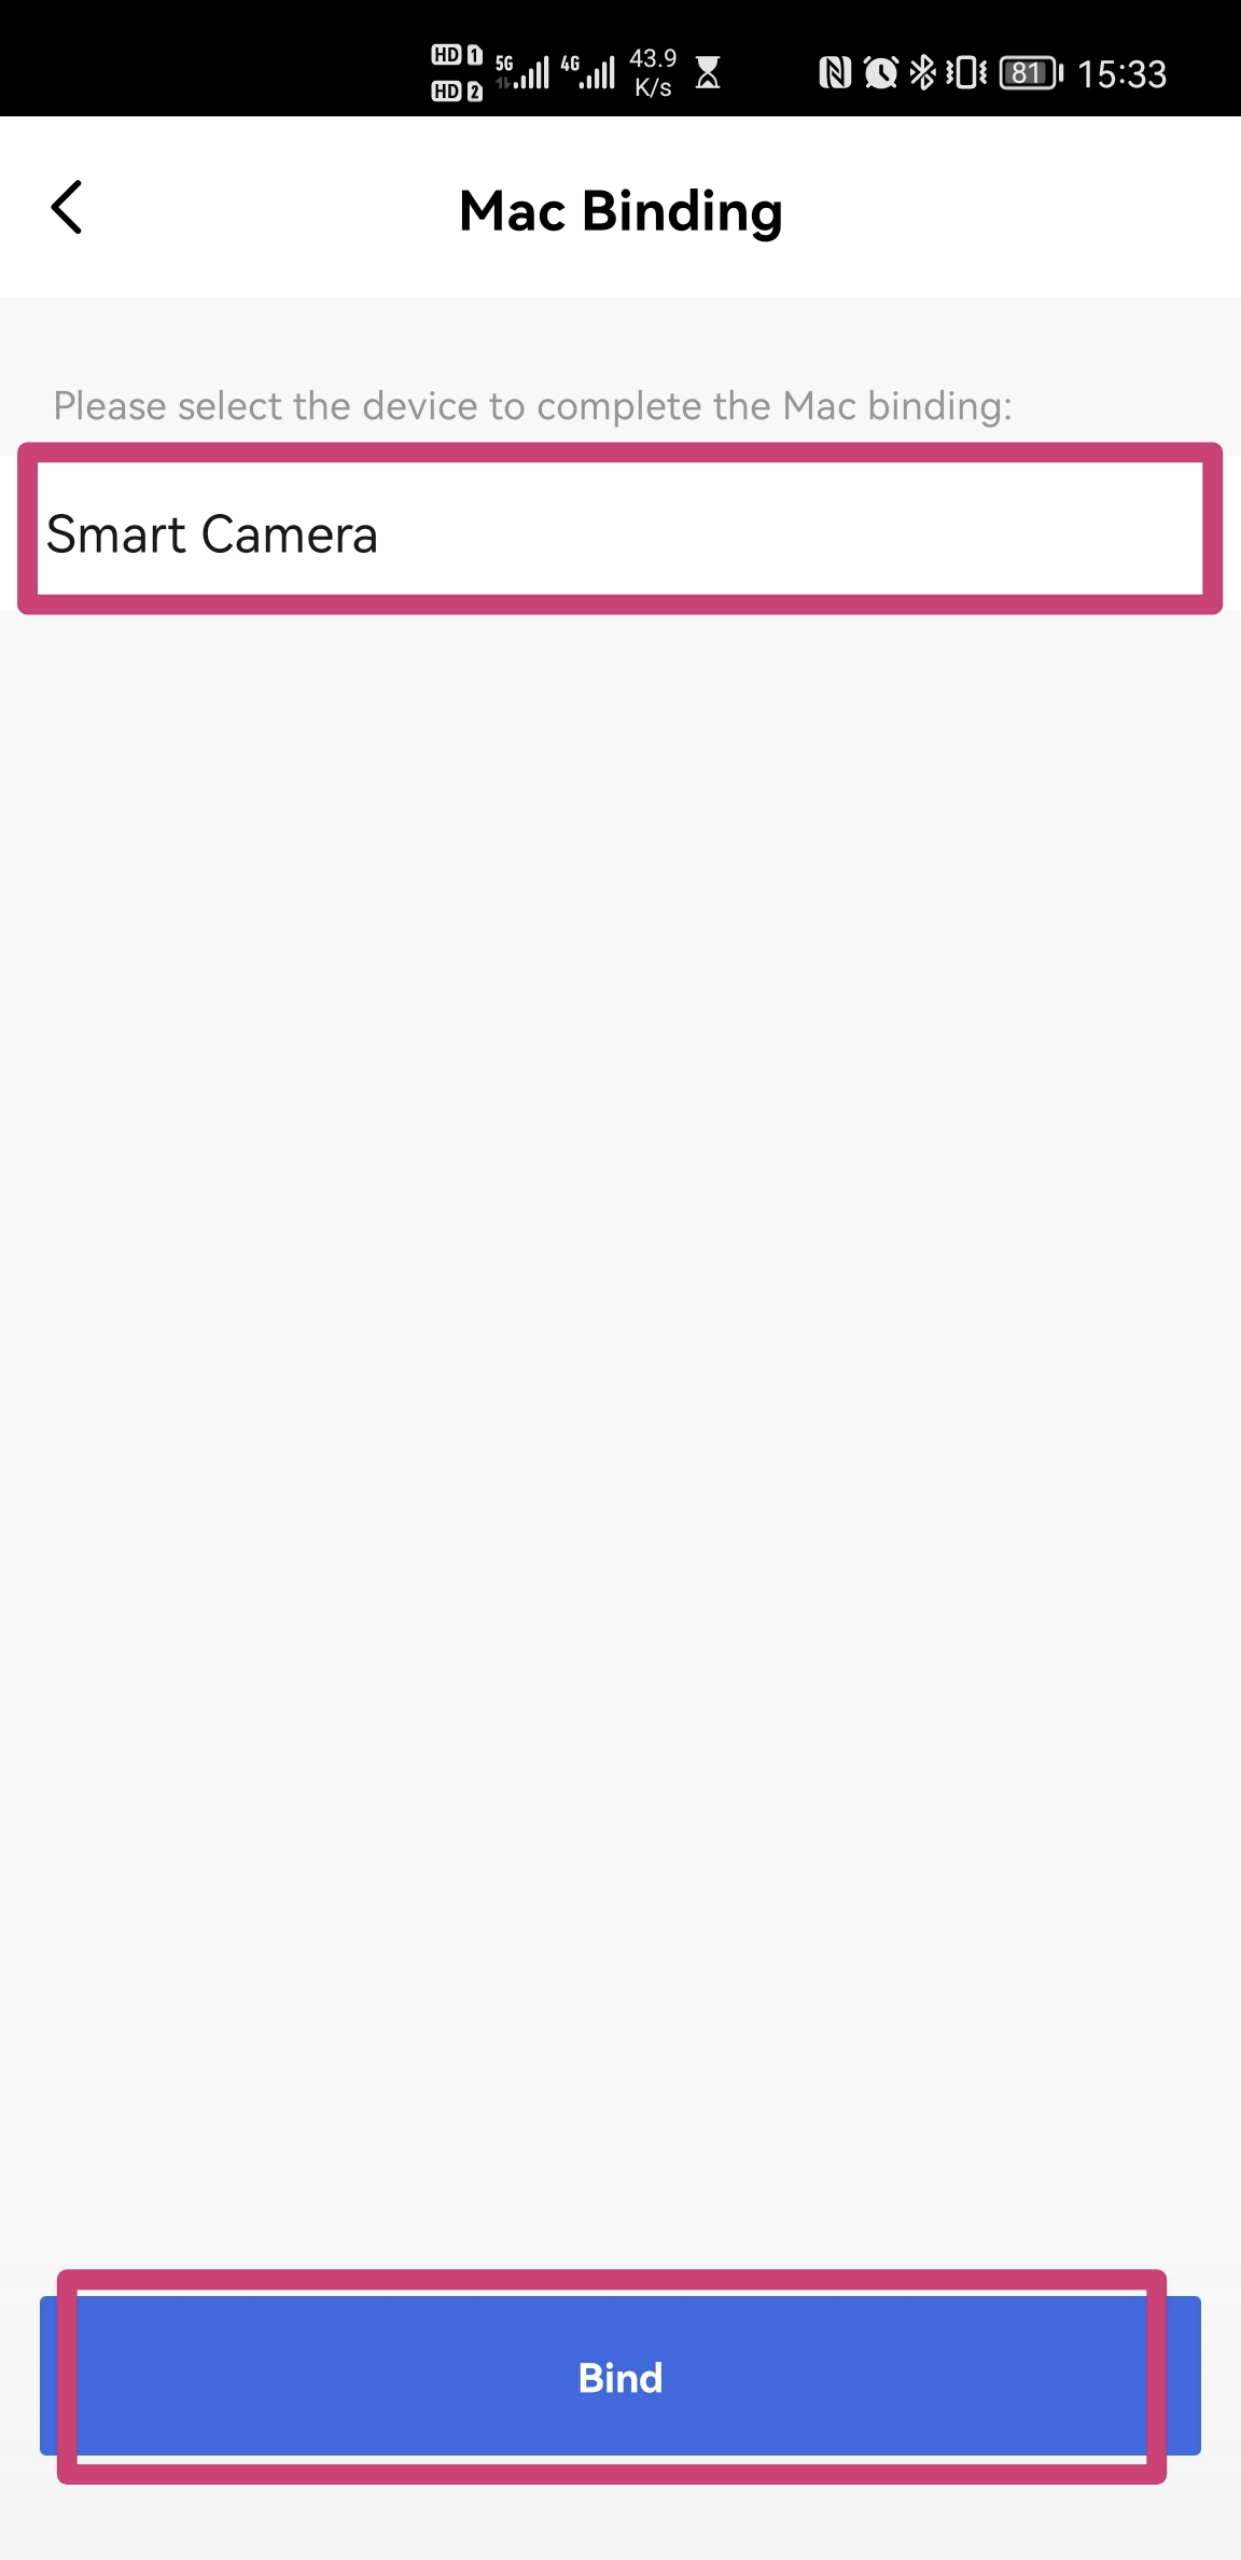
Tap the MAC address of the DUT to enter the MAC Binding page.
The MAC Binding page displays all the devices under the current account, excluding the testing machine. Make sure that the MAC address is that of the DUT.
-
After you select the device corresponding to the MAC address, tap Bind and return to the Packet capture analysis page. The Bound devices section displays all devices that have been bound.
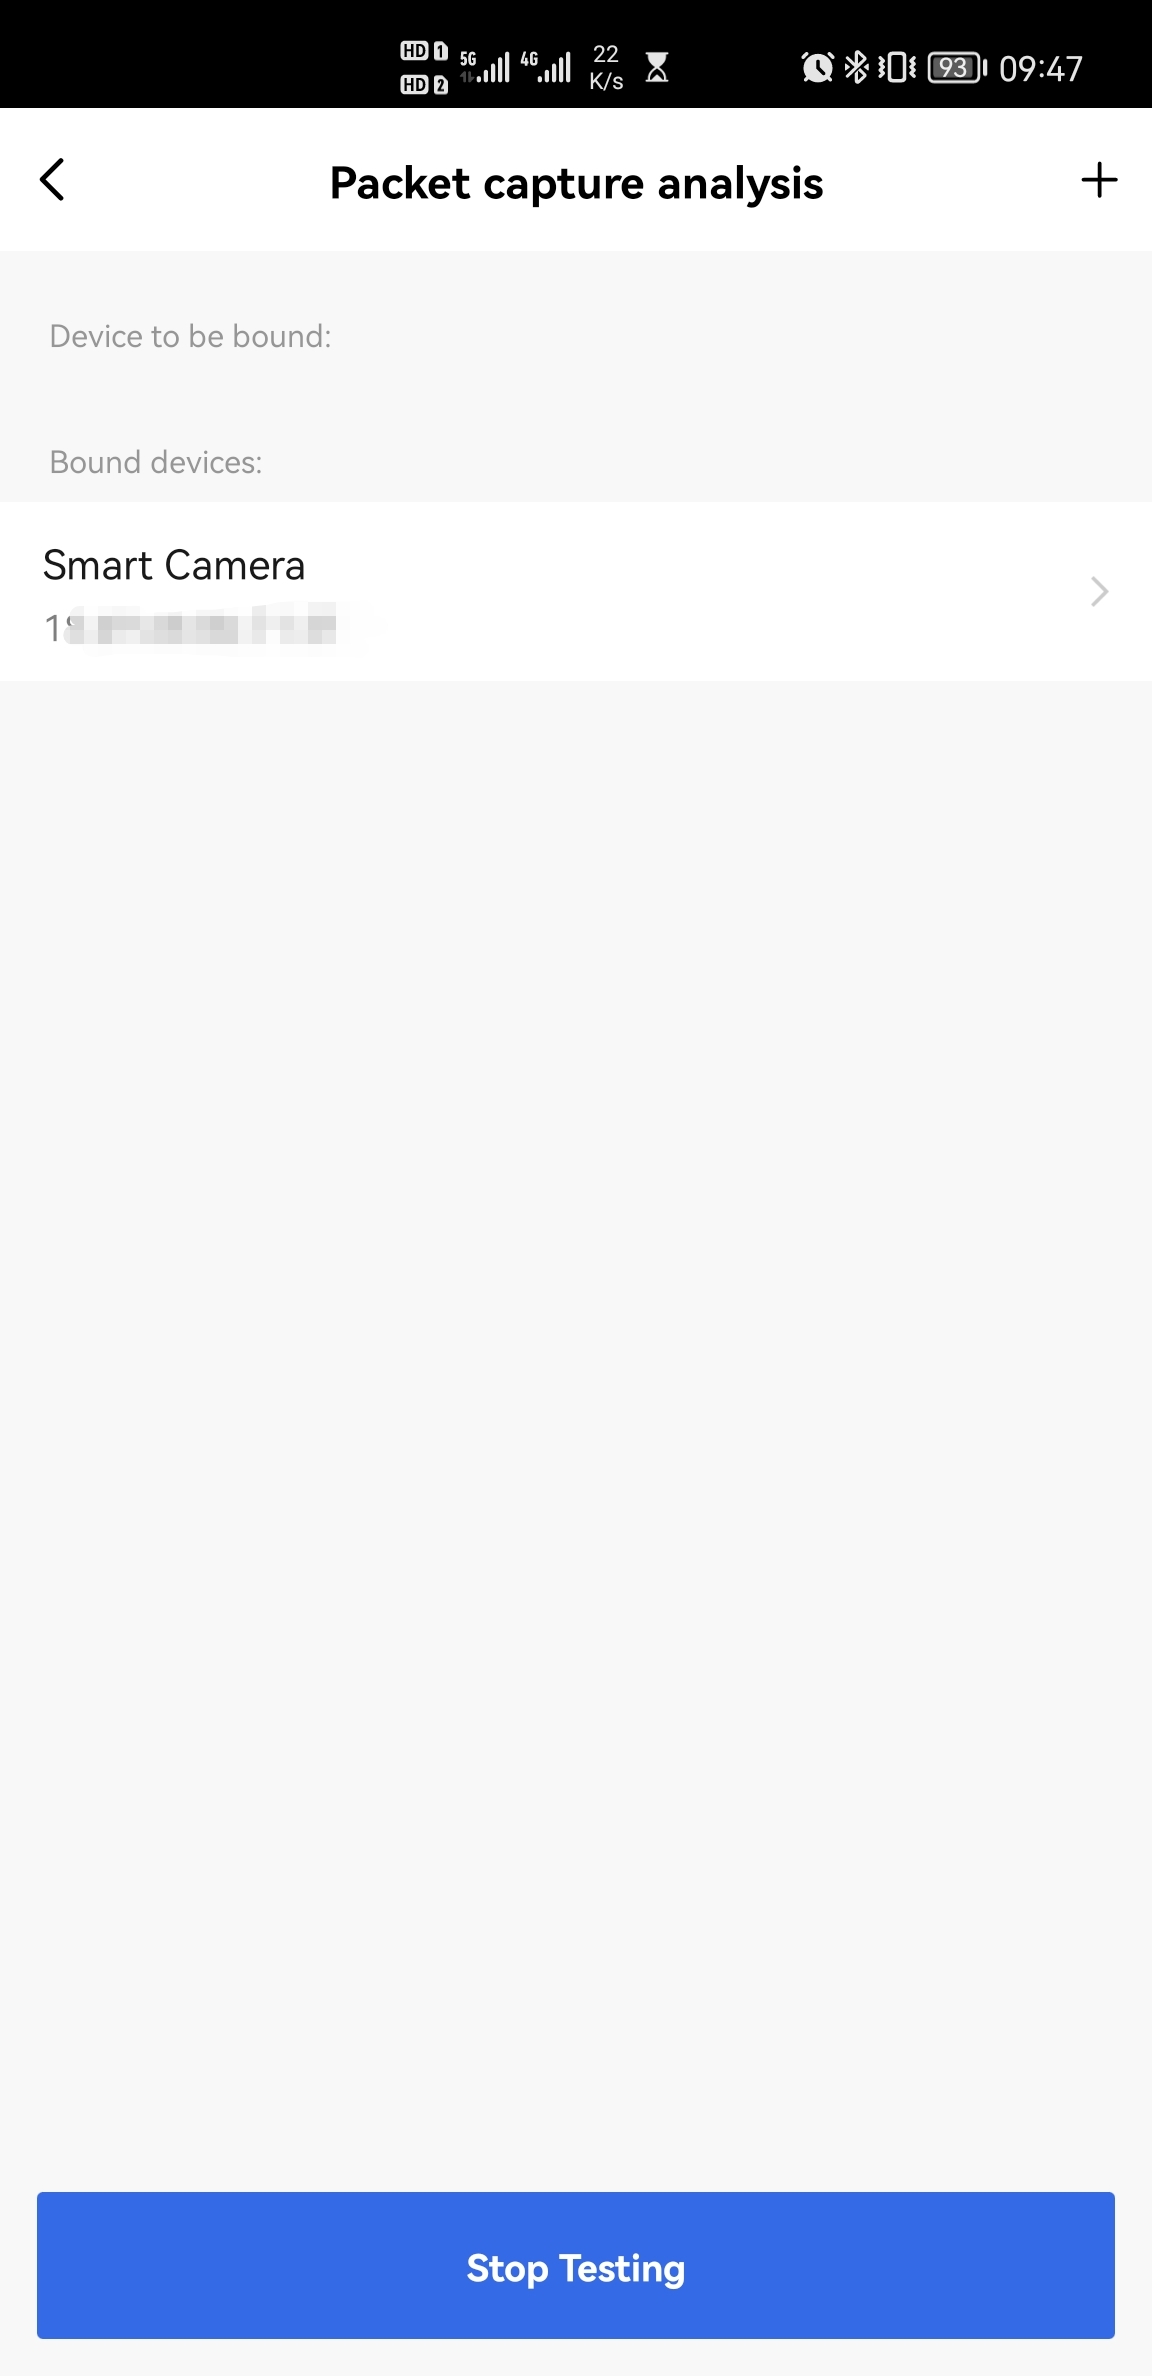
After binding, do not tap Stop Testing. During the testing process, tap < twice to return to the Testing Machine page and perform the following security test. The running task will not be canceled.
-
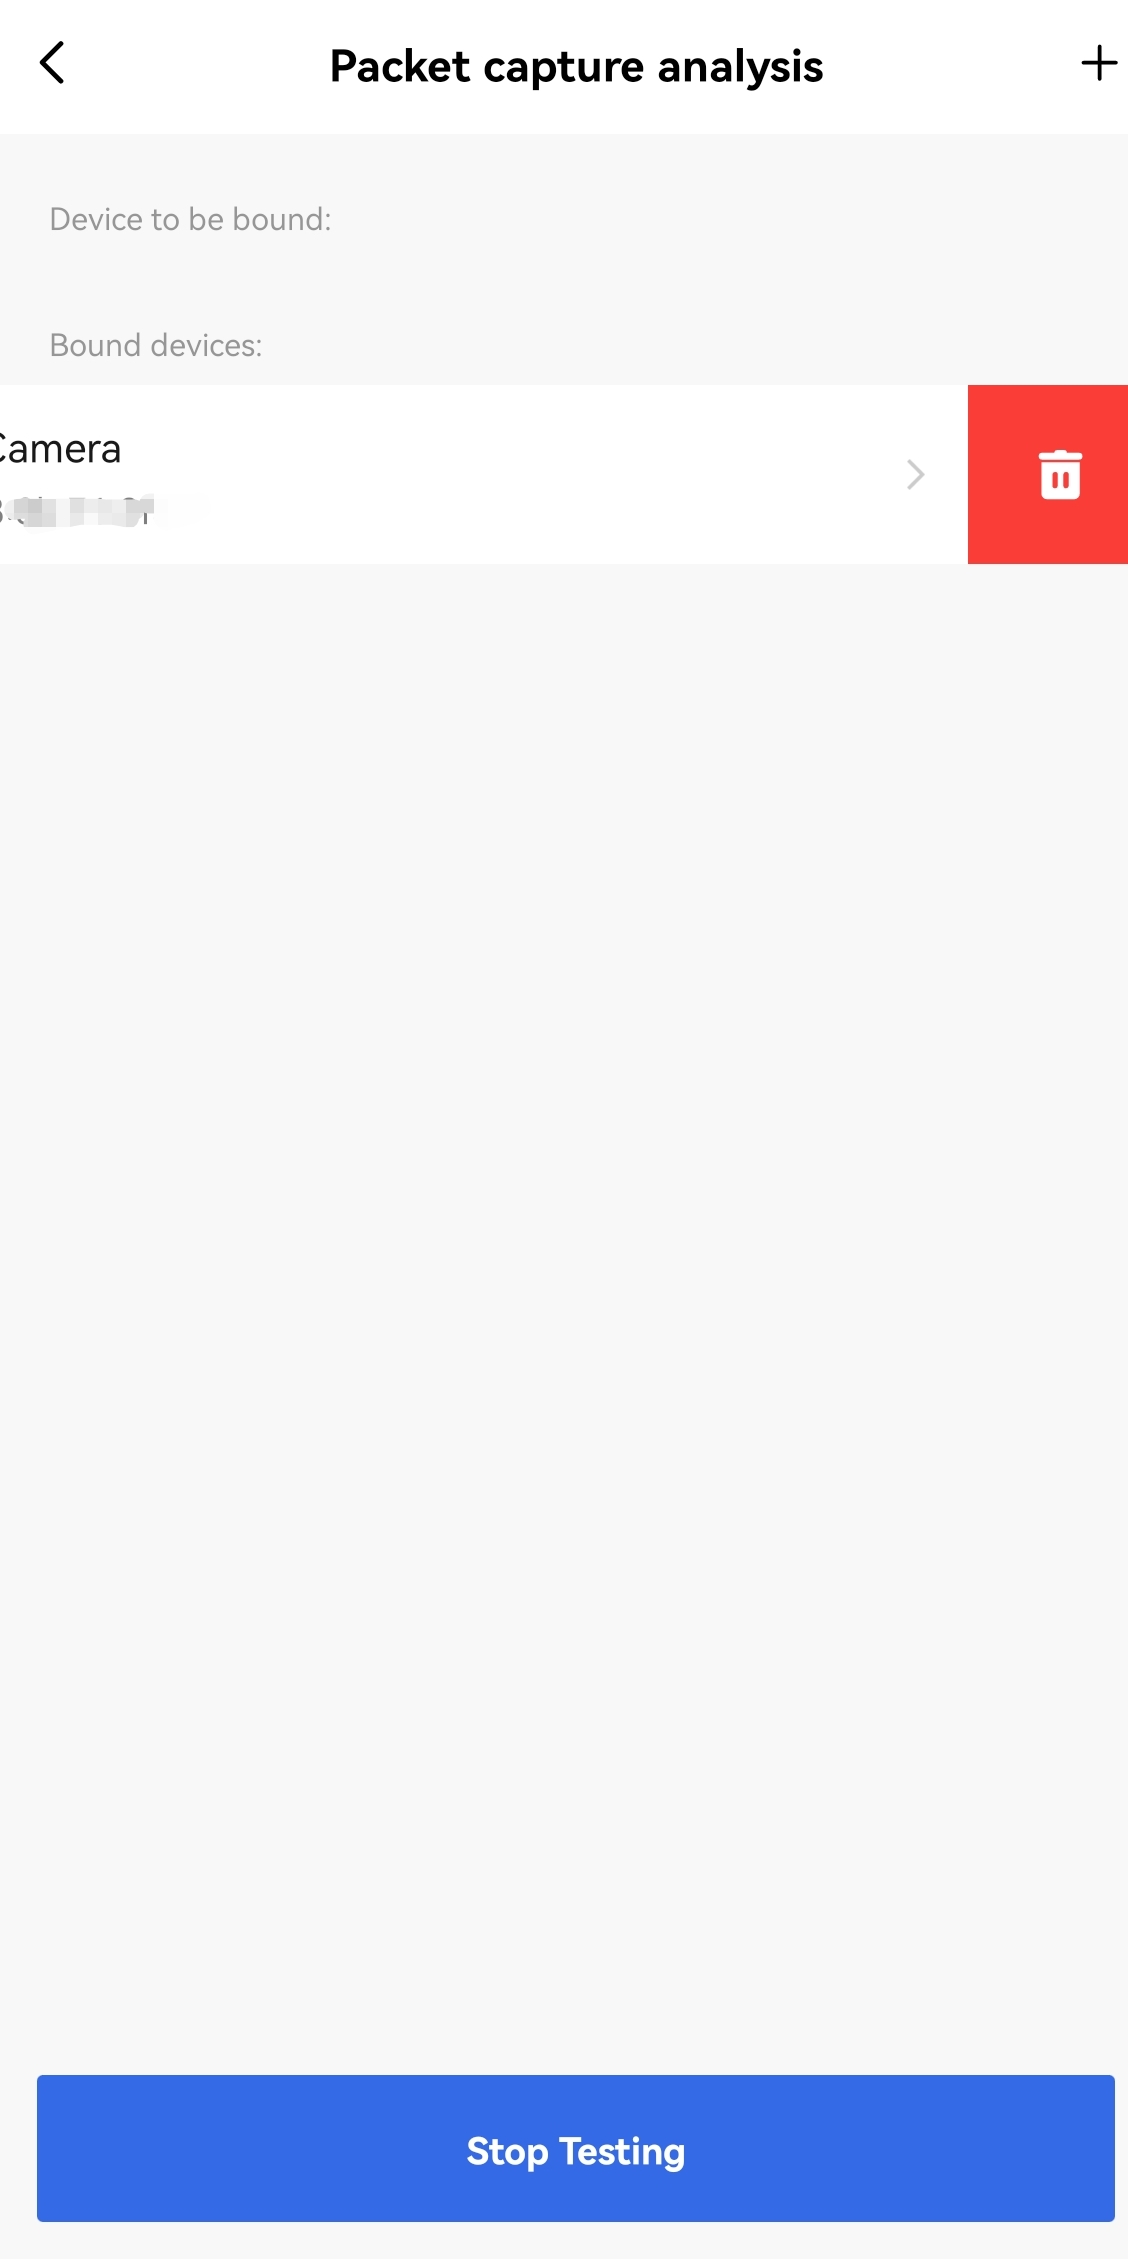
After binding, check whether the bound MAC address matches the device that you want to test.
If it does not, swipe left on the bound device and tap the trash bin icon to unbind the device. After the device is unbound, no test report will be generated for the device.
Perform a security test
-
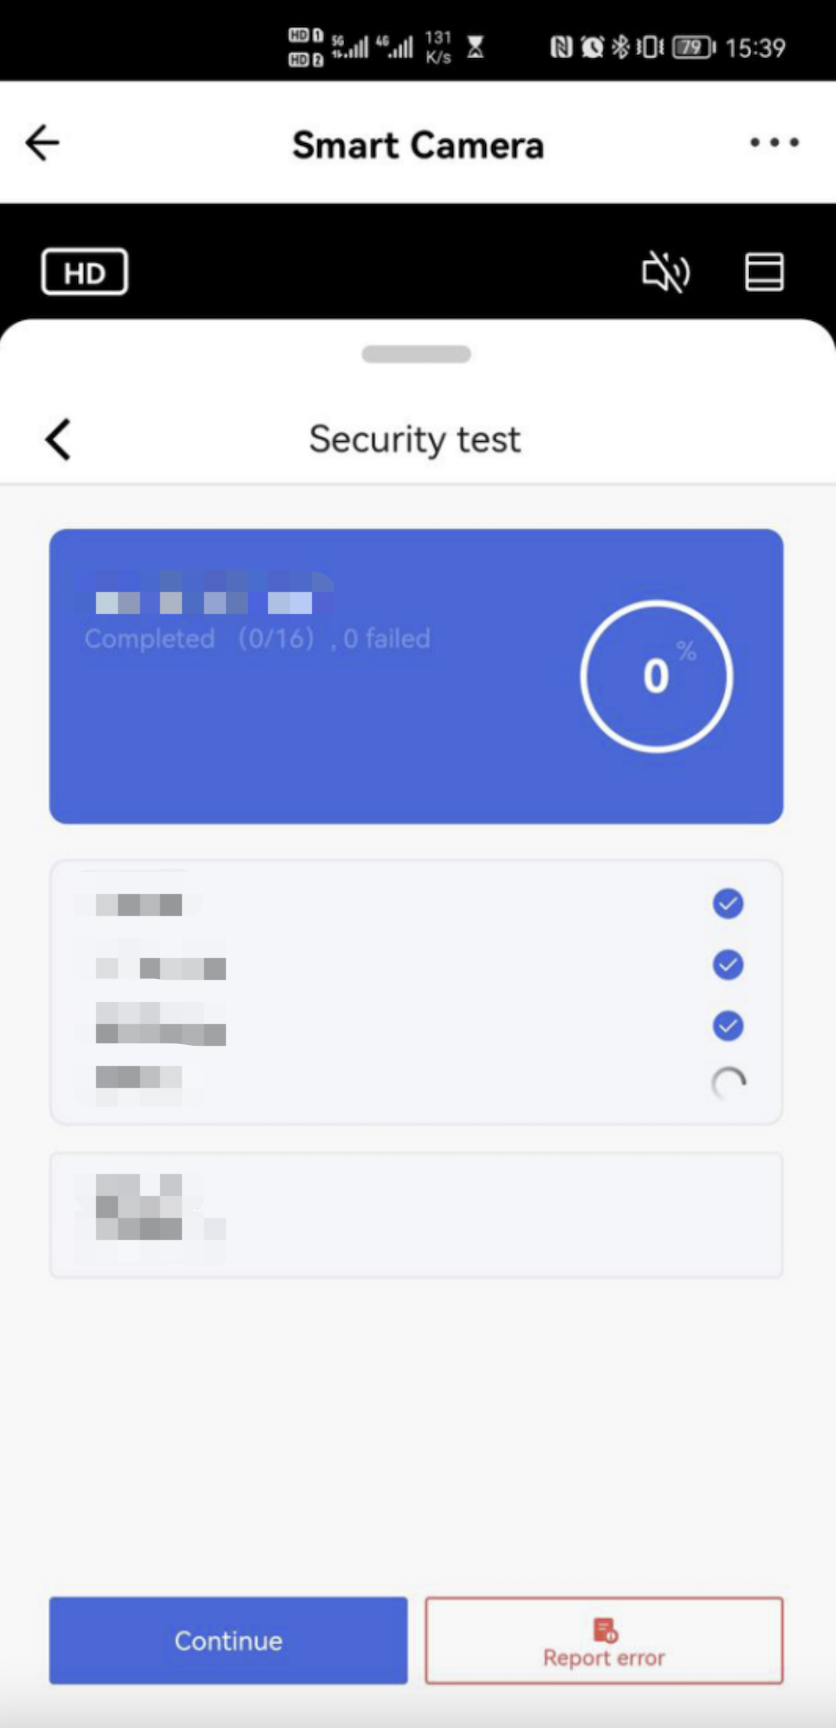
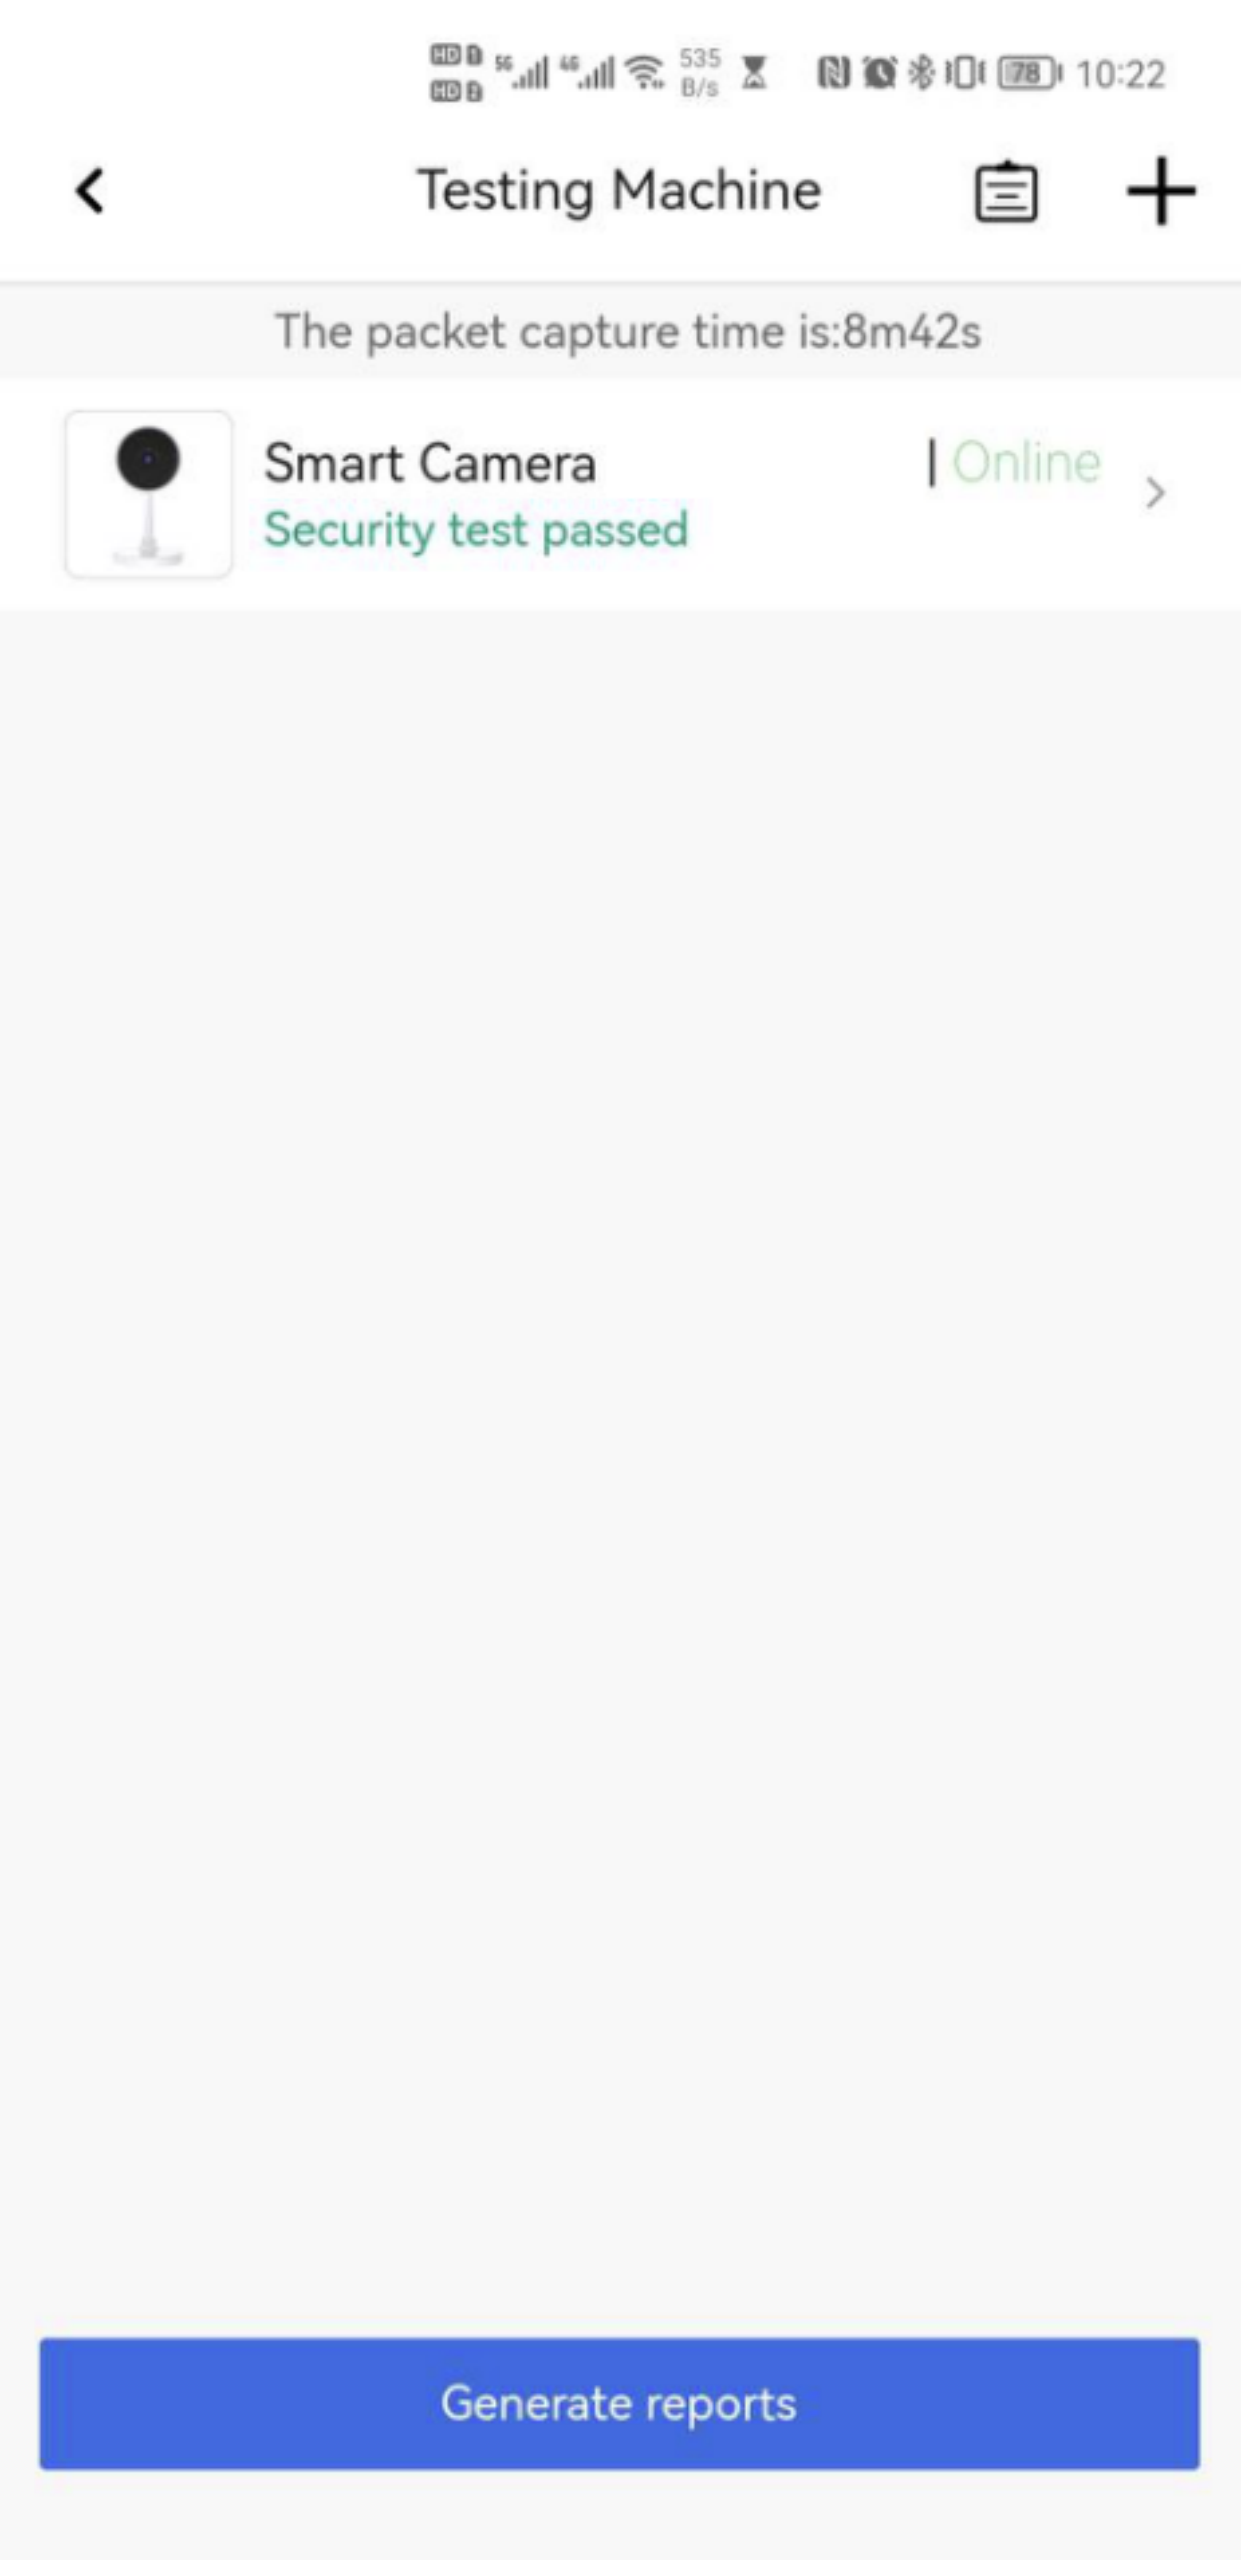
Go to Firmware Test Laboratory > Testing Machine. The Testing Machine page displays the name, test result, and online/offline status of the DUT that you specified.
The execution duration of the packet capture analysis task is displayed above the DUT name.
-
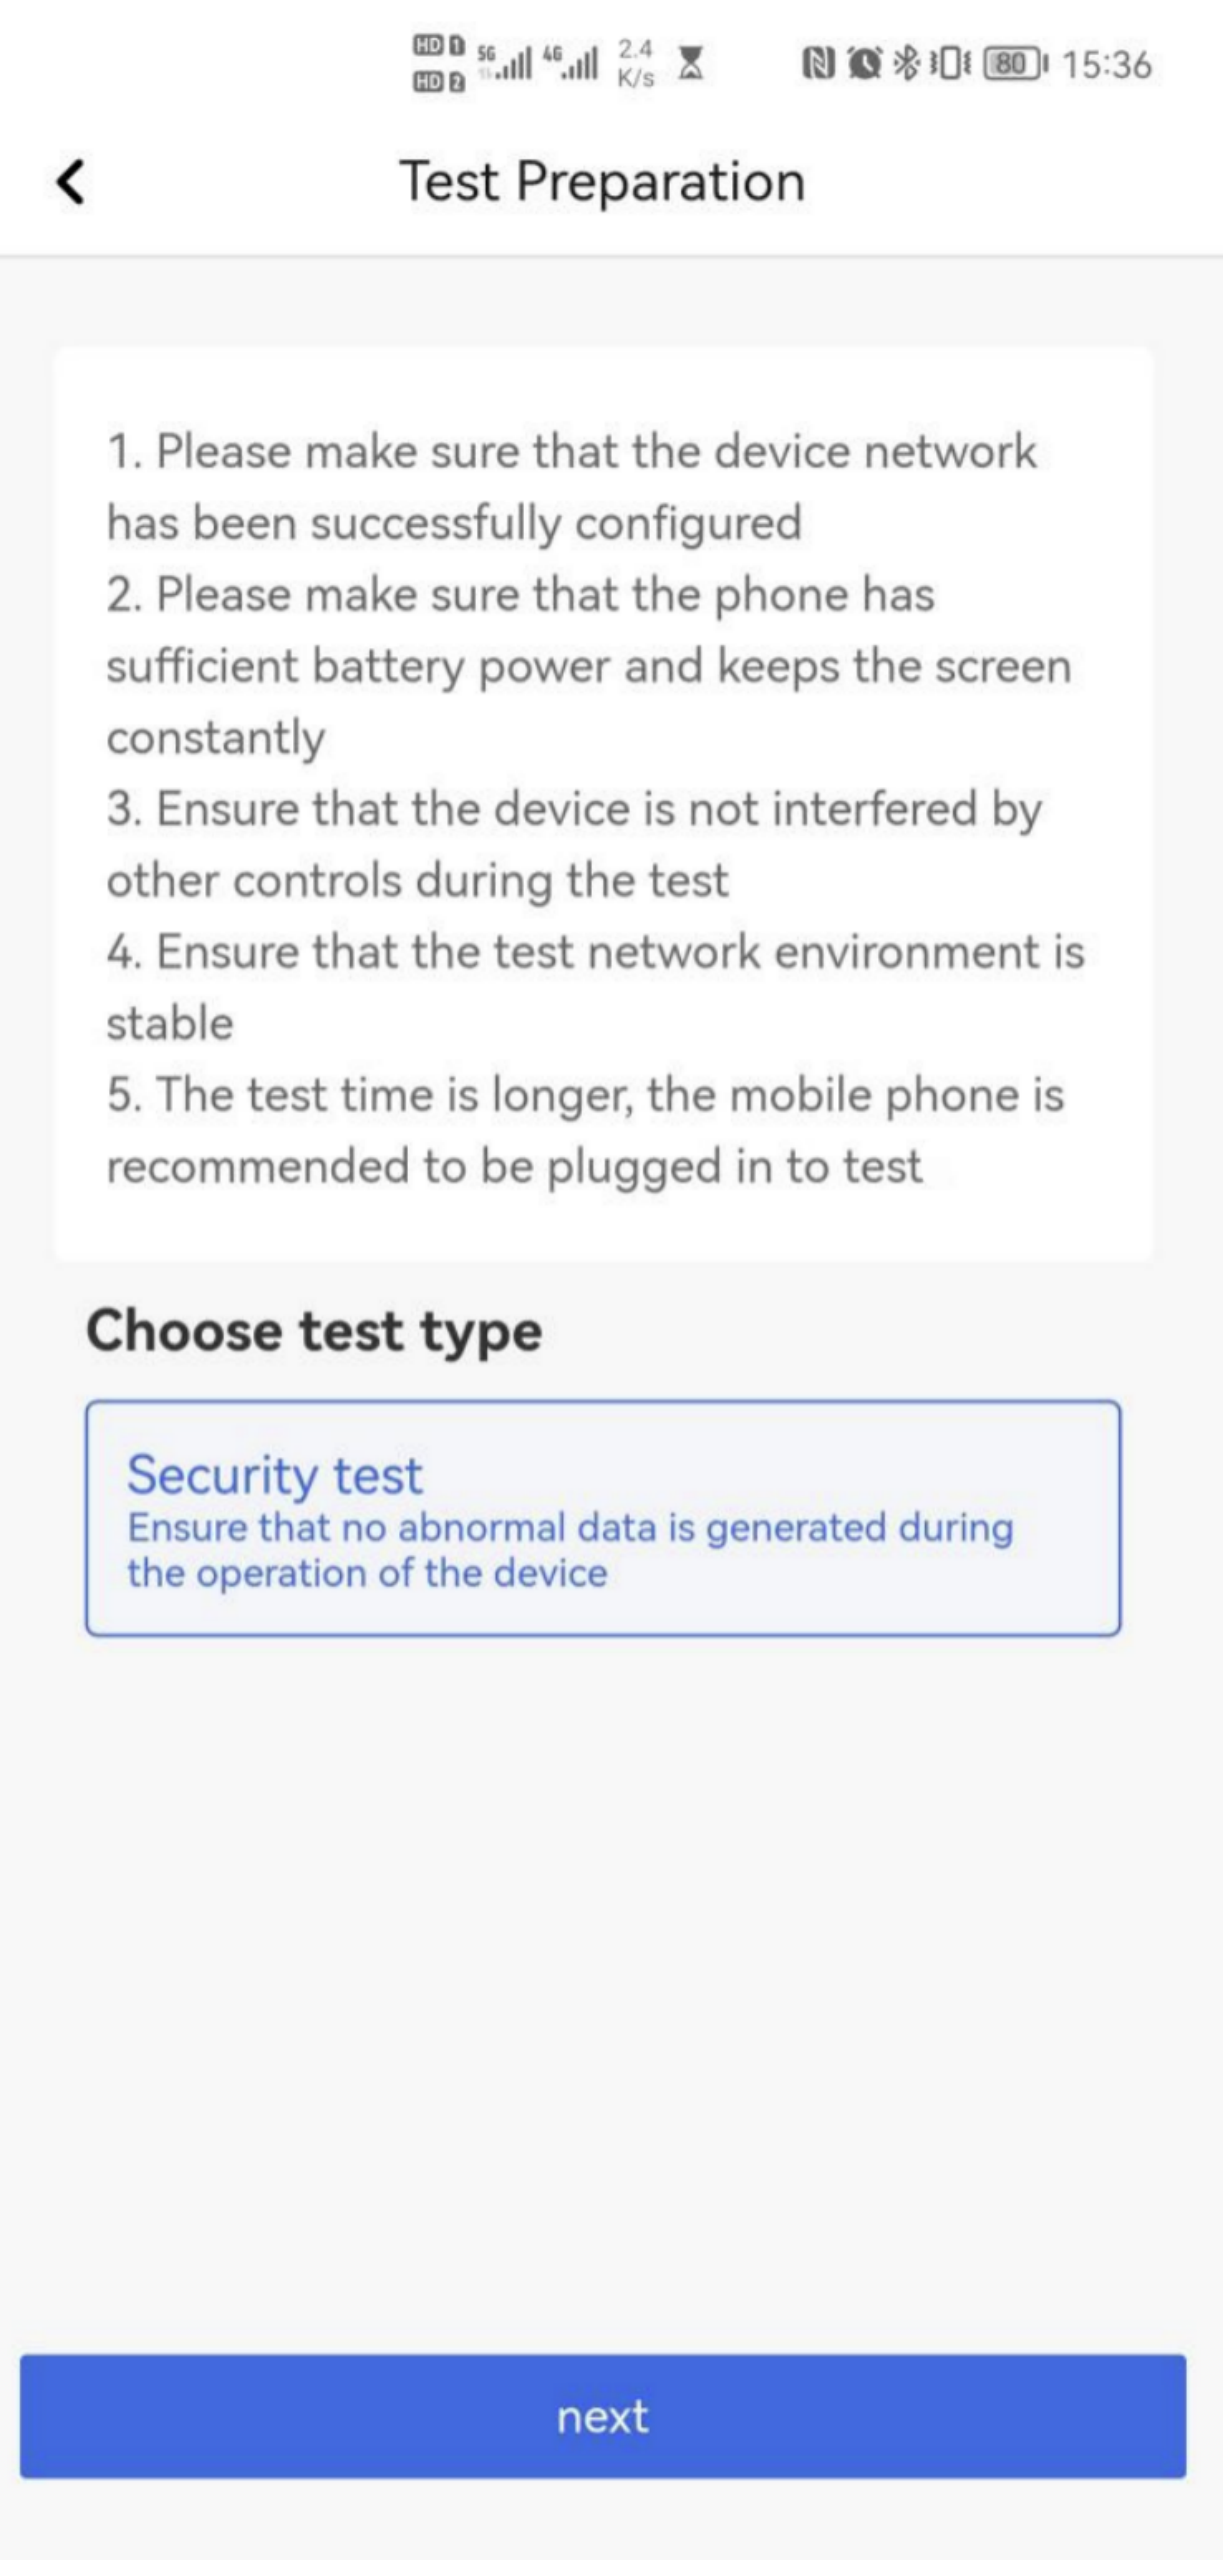
Perform pre-test checks listed on the Test Preparation page and tap Next.
-
On the Security Test page, tests will be run one by one.
-
If any issues occur, tap Report Error in the lower right corner.
-
If testing works fine, tap Continue.
-
-
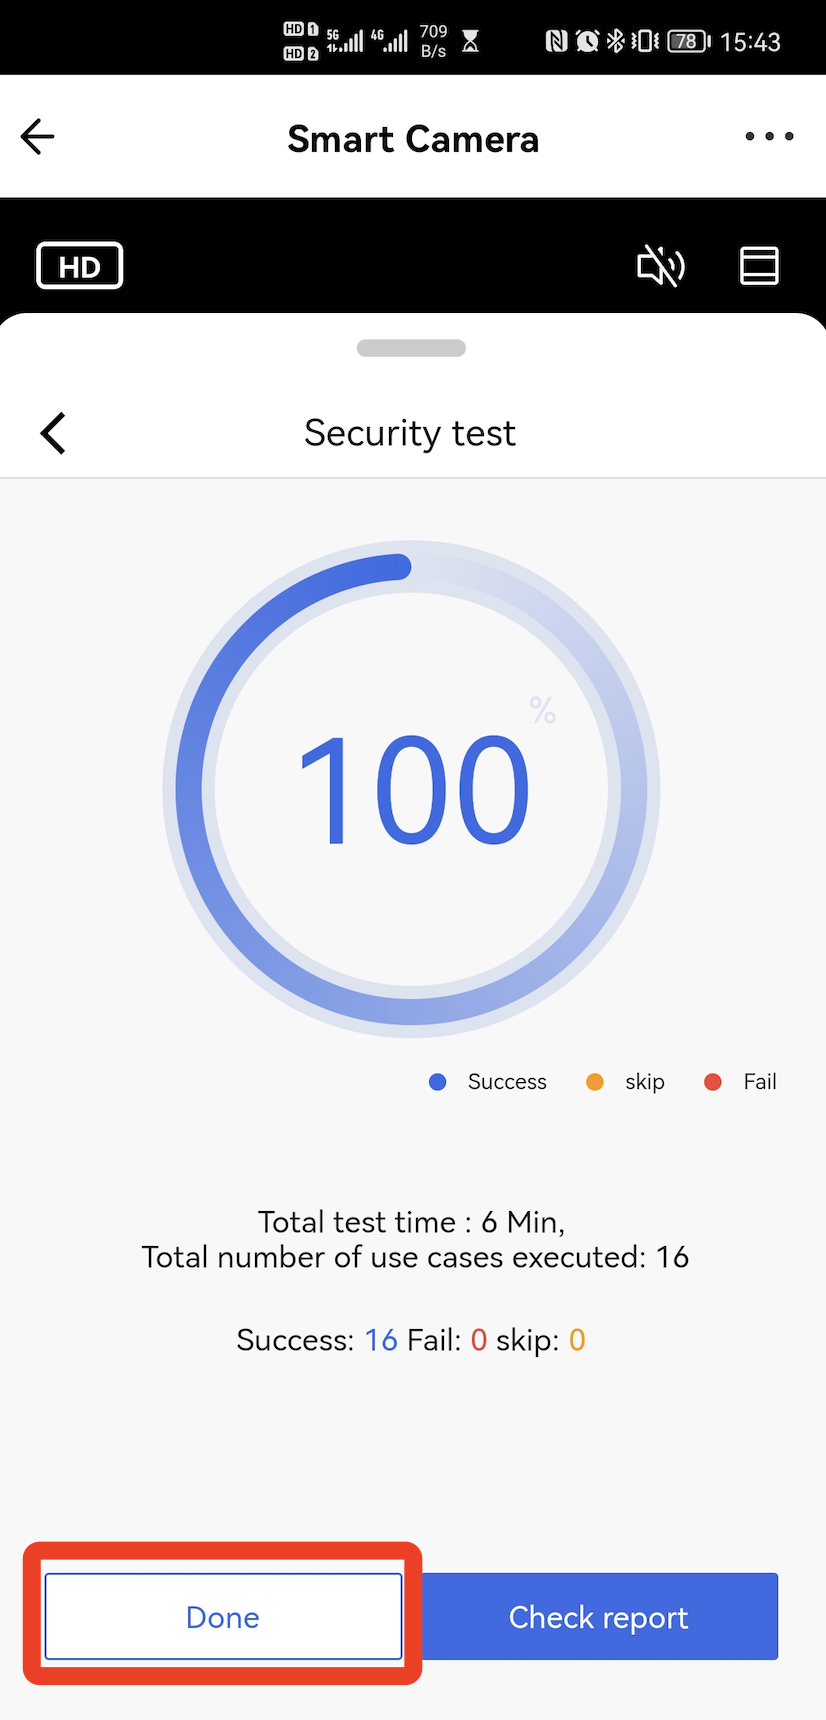
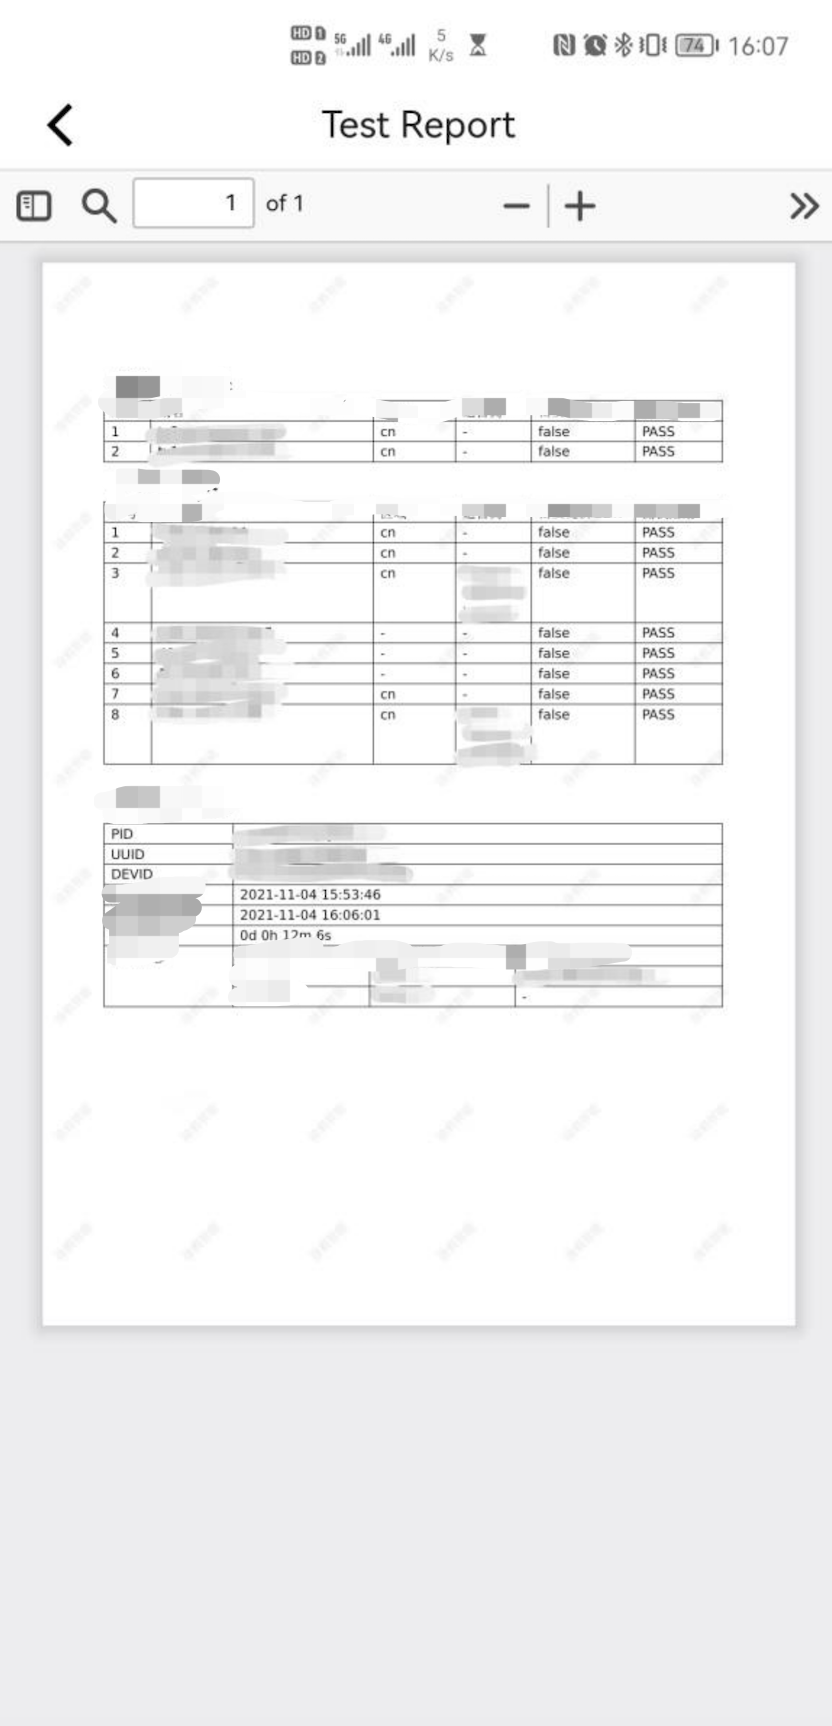
After the security test is completed, the test result is displayed. Tap Check Report in the lower right corner.
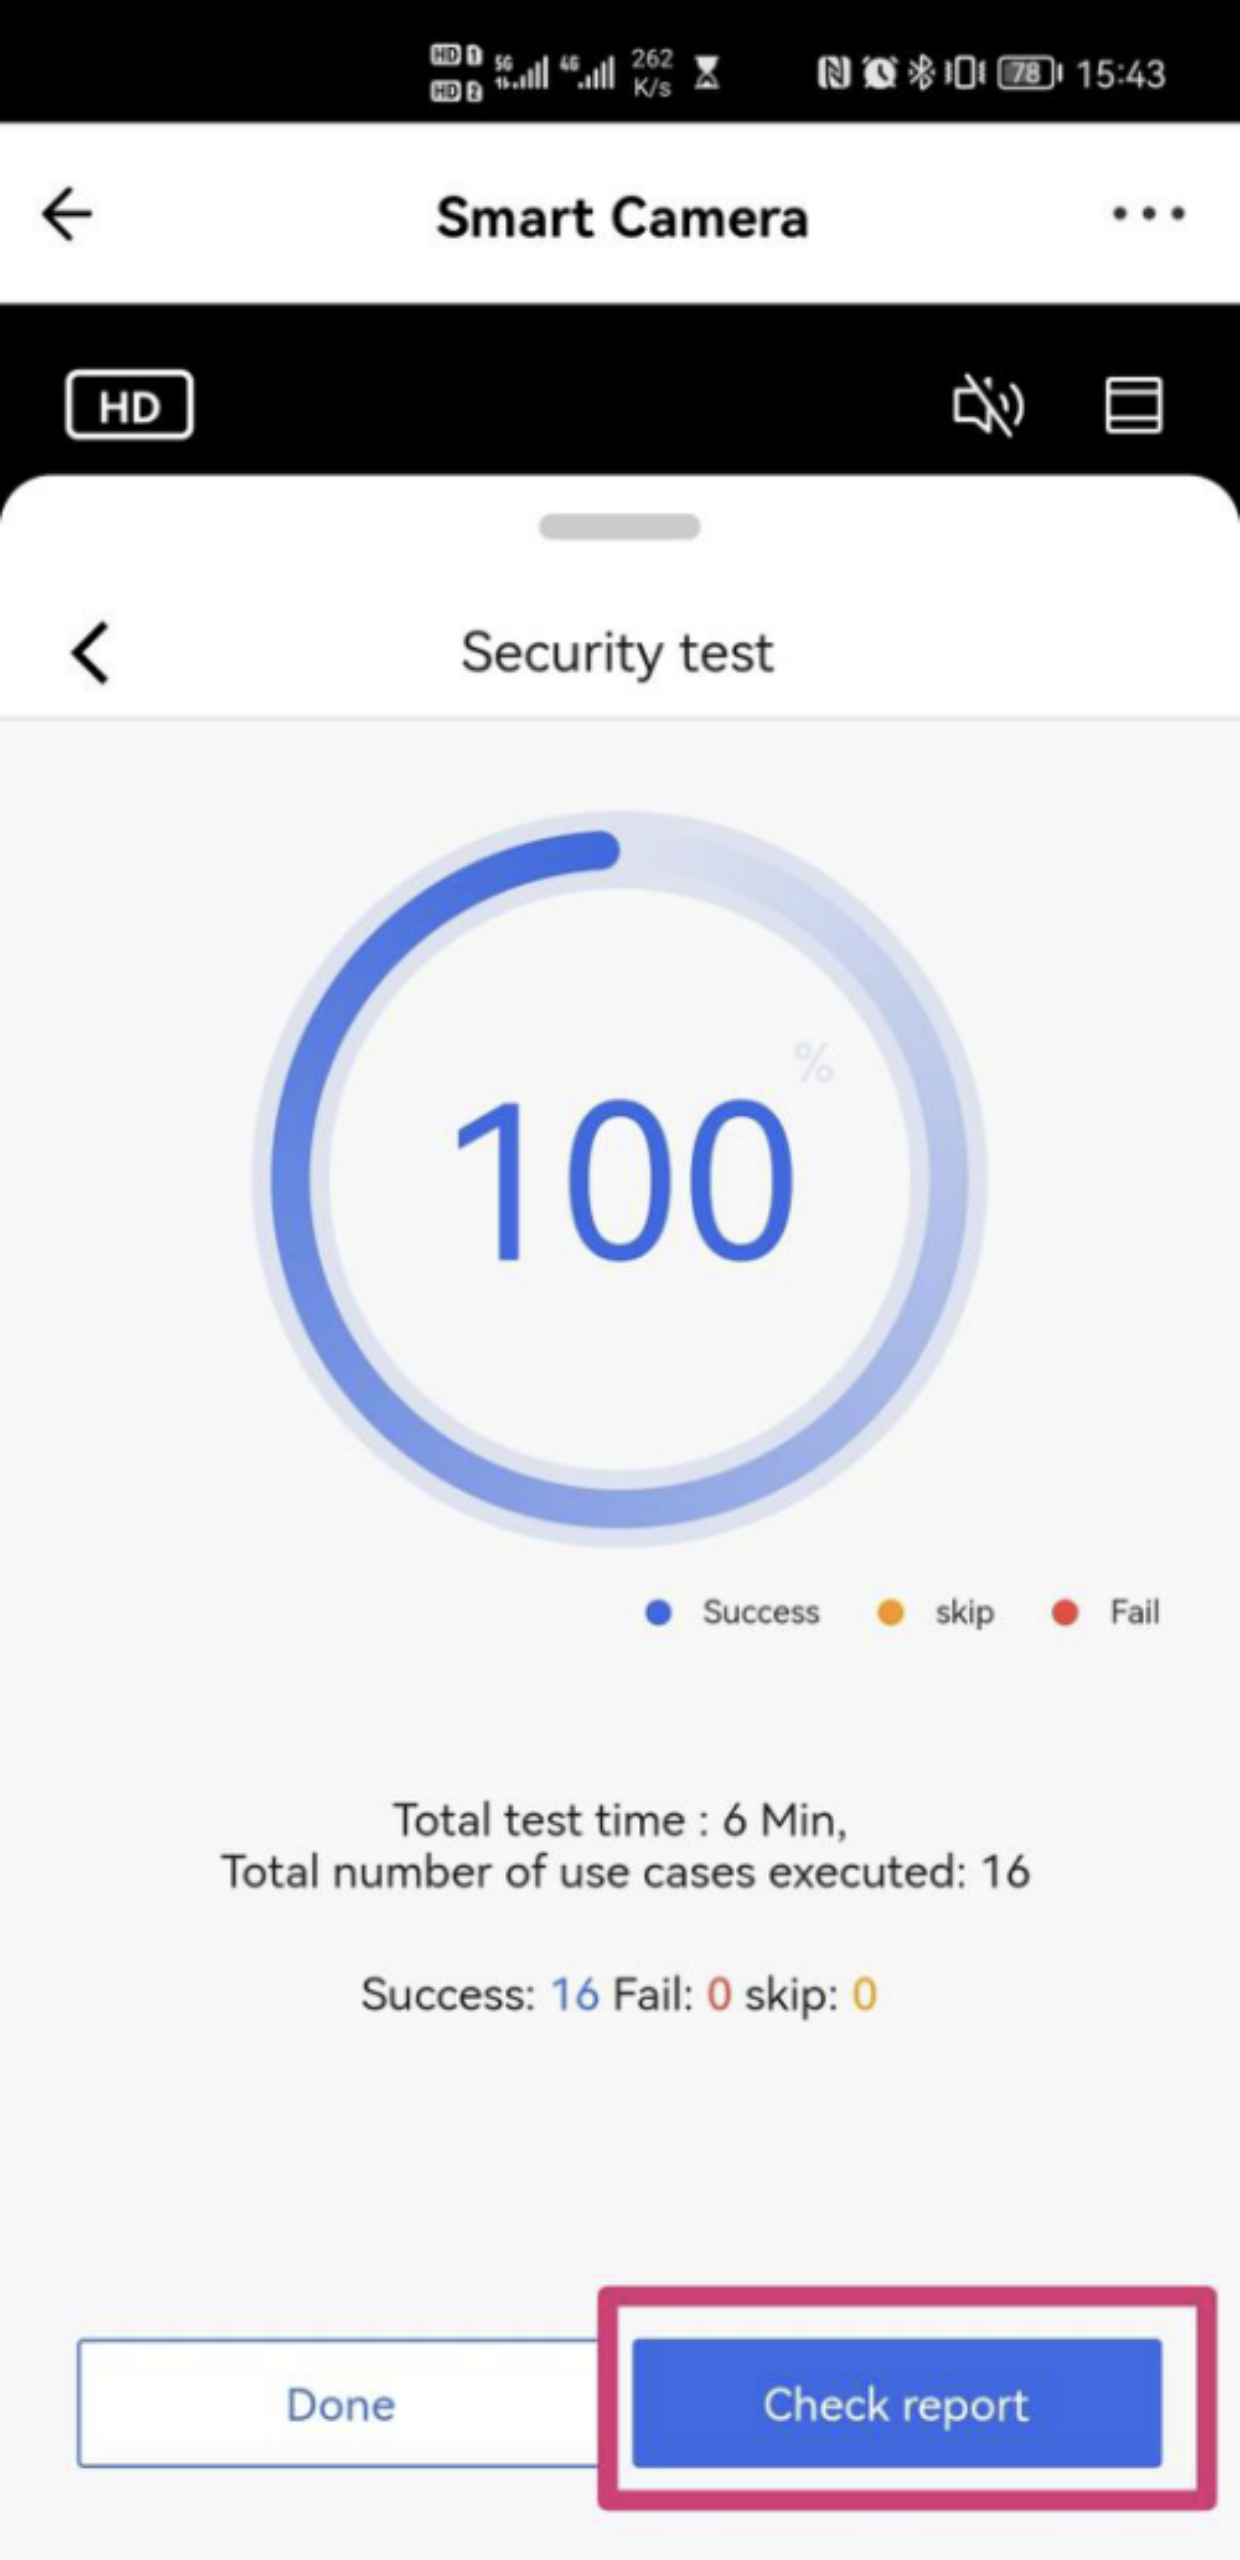
-
Tap Upload Report to upload the report to the Tuya Developer Platform.
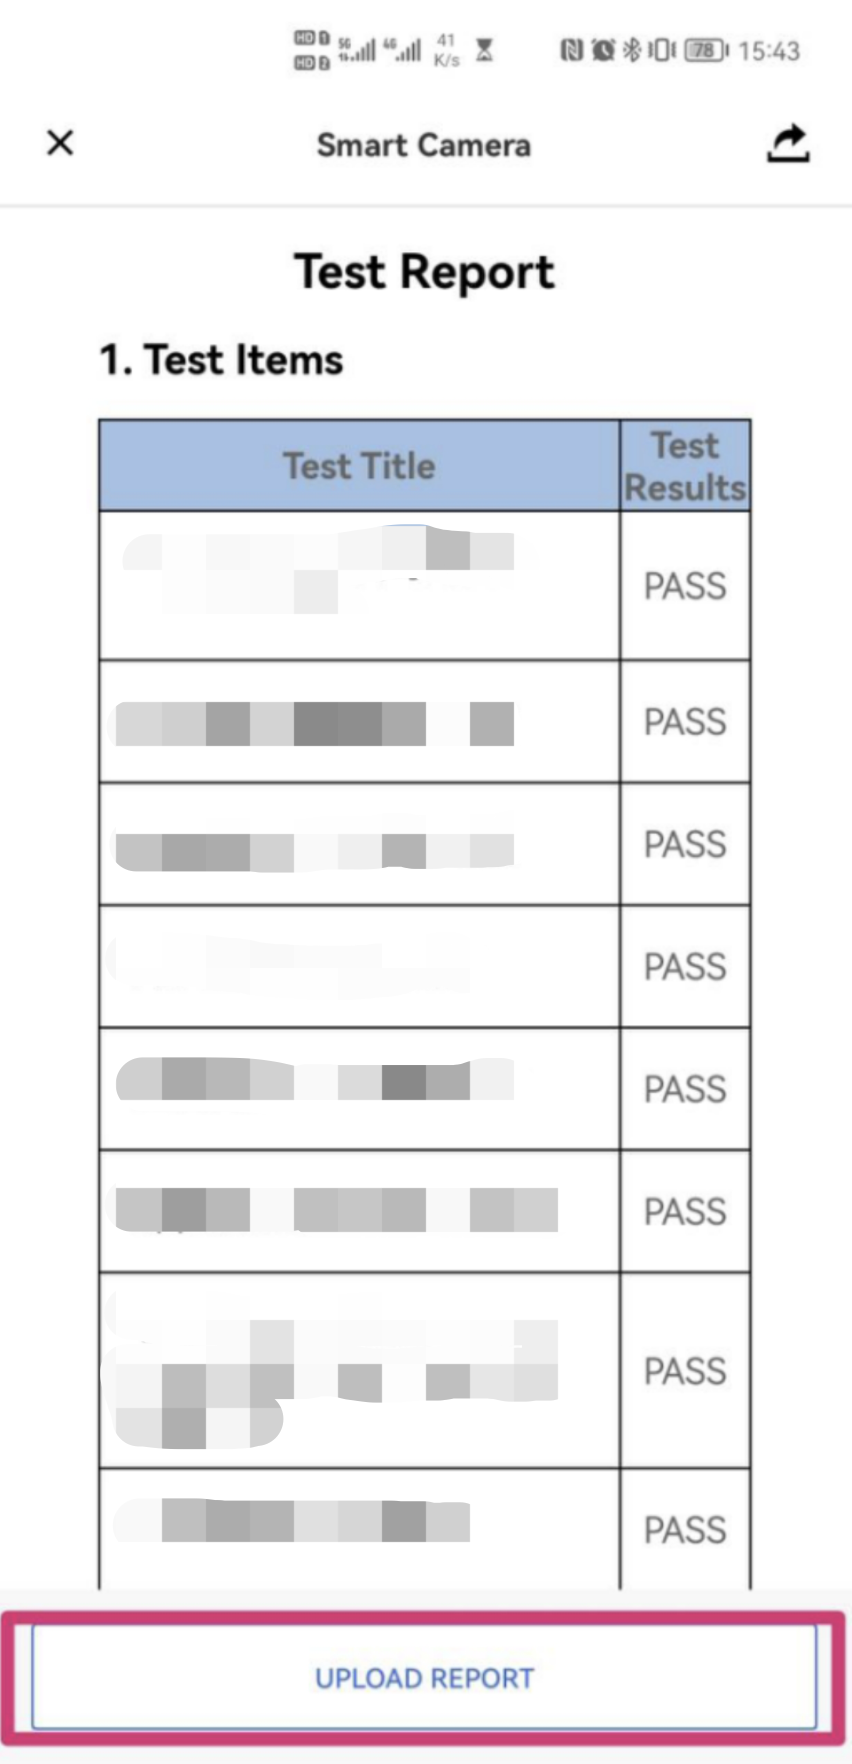
After the security test is done, remember to upload the test report. If you do not upload the test report, your DUT is determined as Security Test Failed even if its pass rate reaches 100%.
-
After the report is uploaded, tap Done to return to the Testing Machine page.
-
If the test pass rate is 100% and the test report is uploaded, a green-colored Security Test Passed message is displayed below the DUT name.
The Security Test Passed message is displayed only if the security test pass rate reaches 100% and the test report is uploaded.
Generate security reports
-
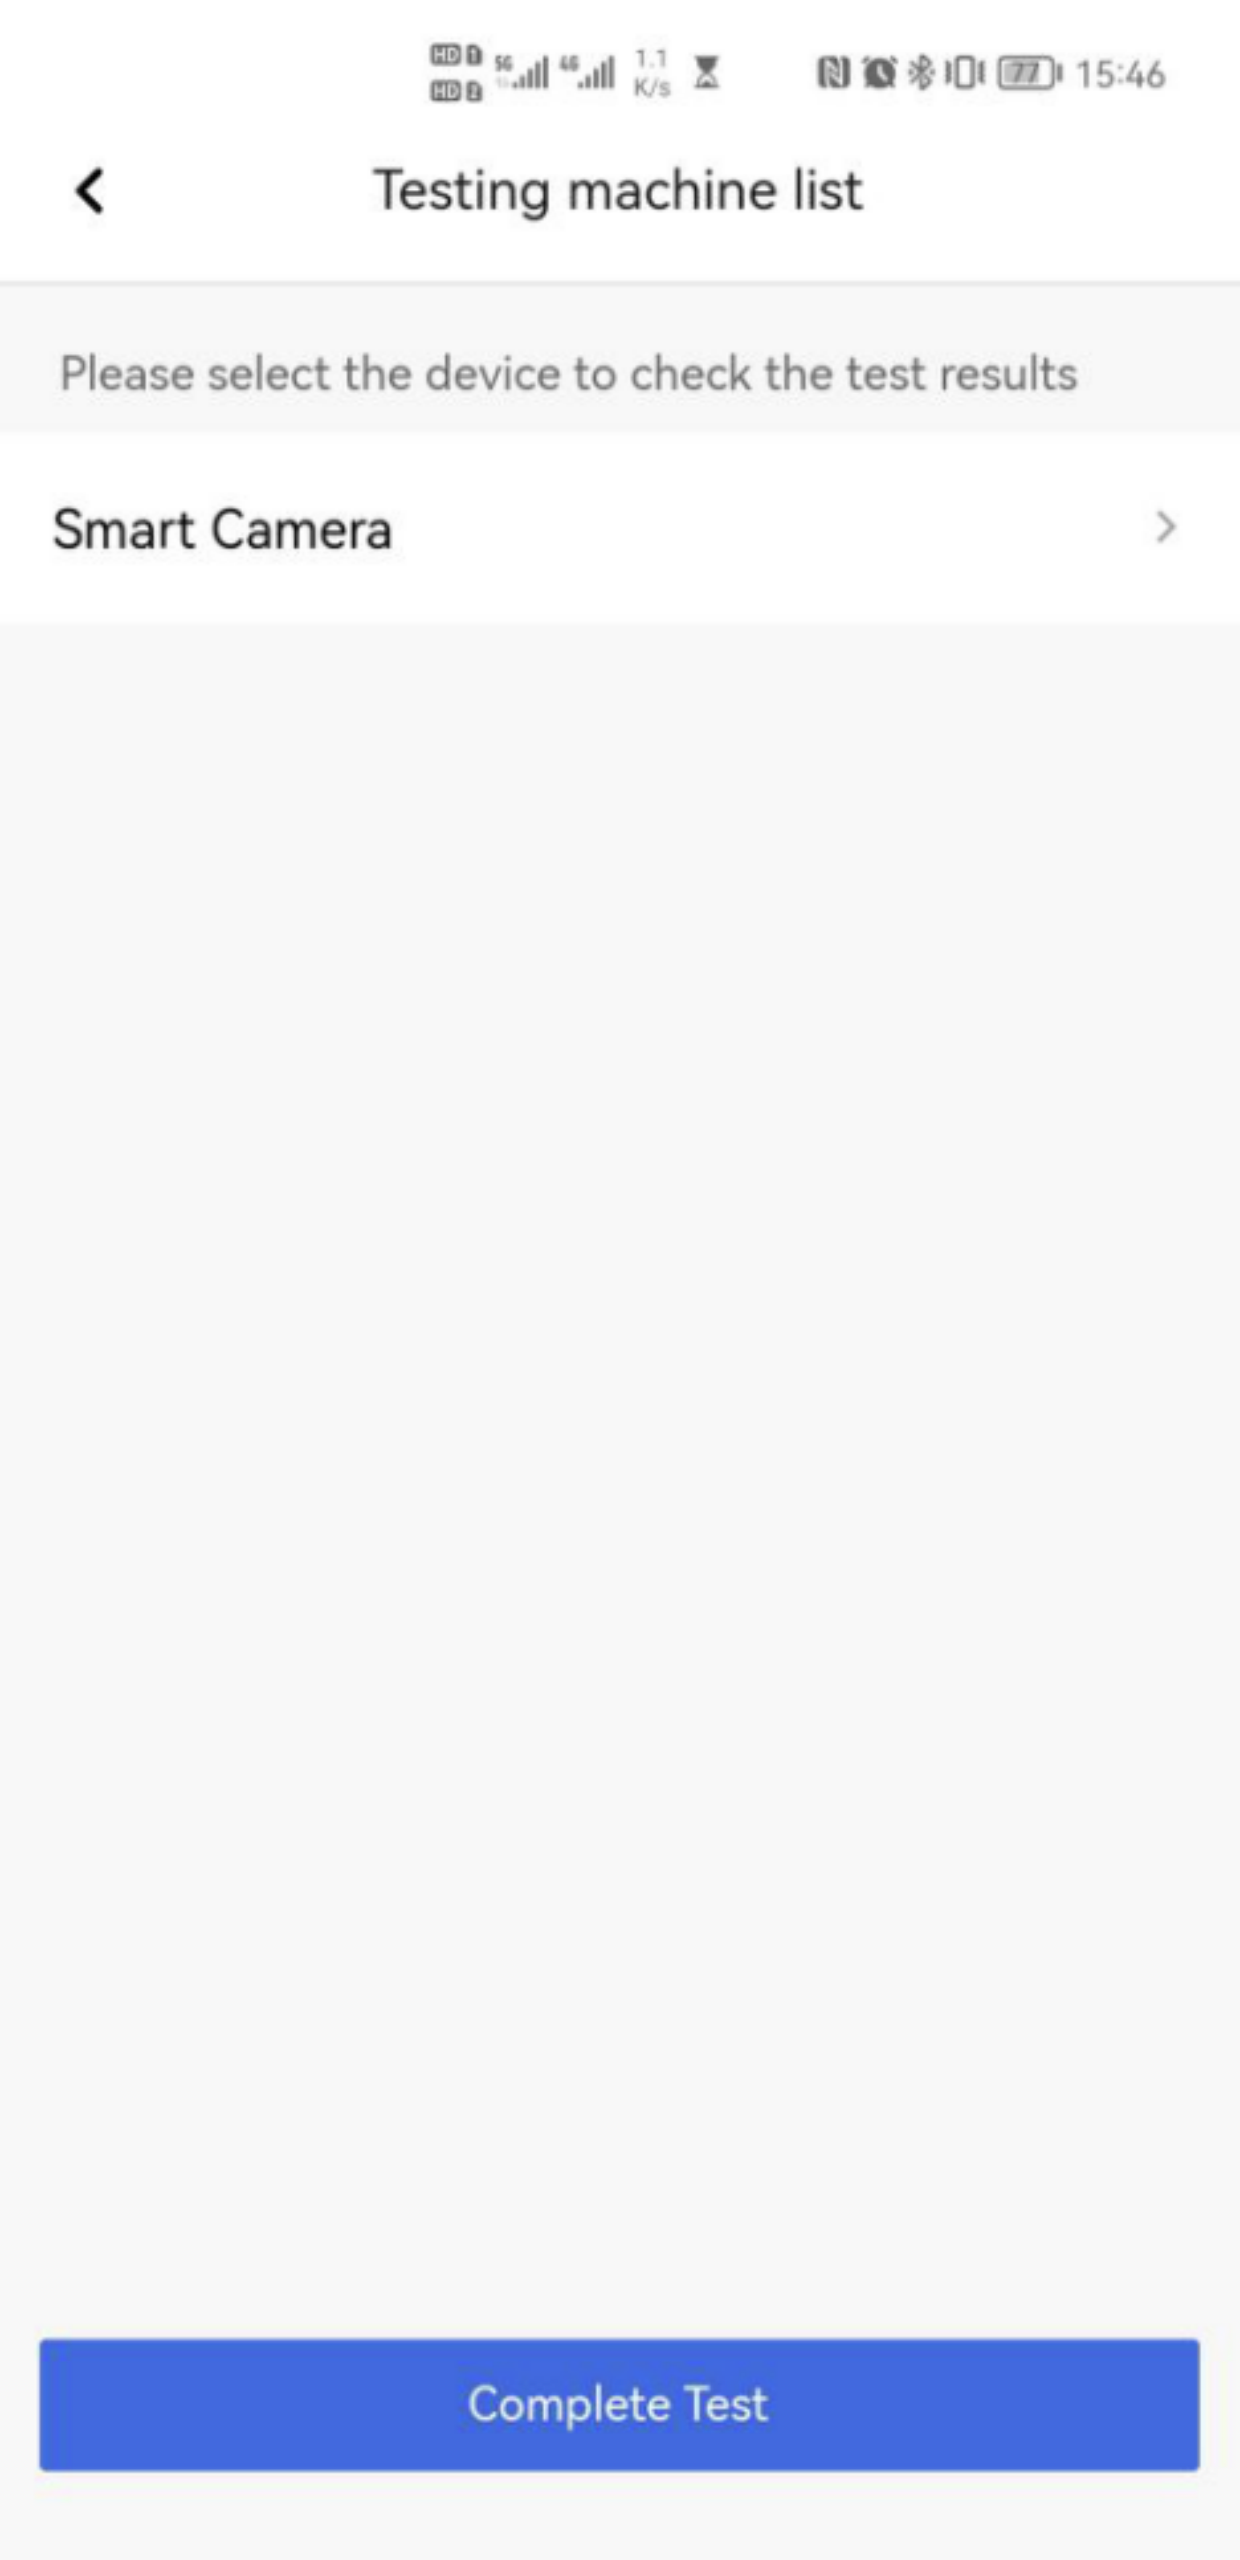
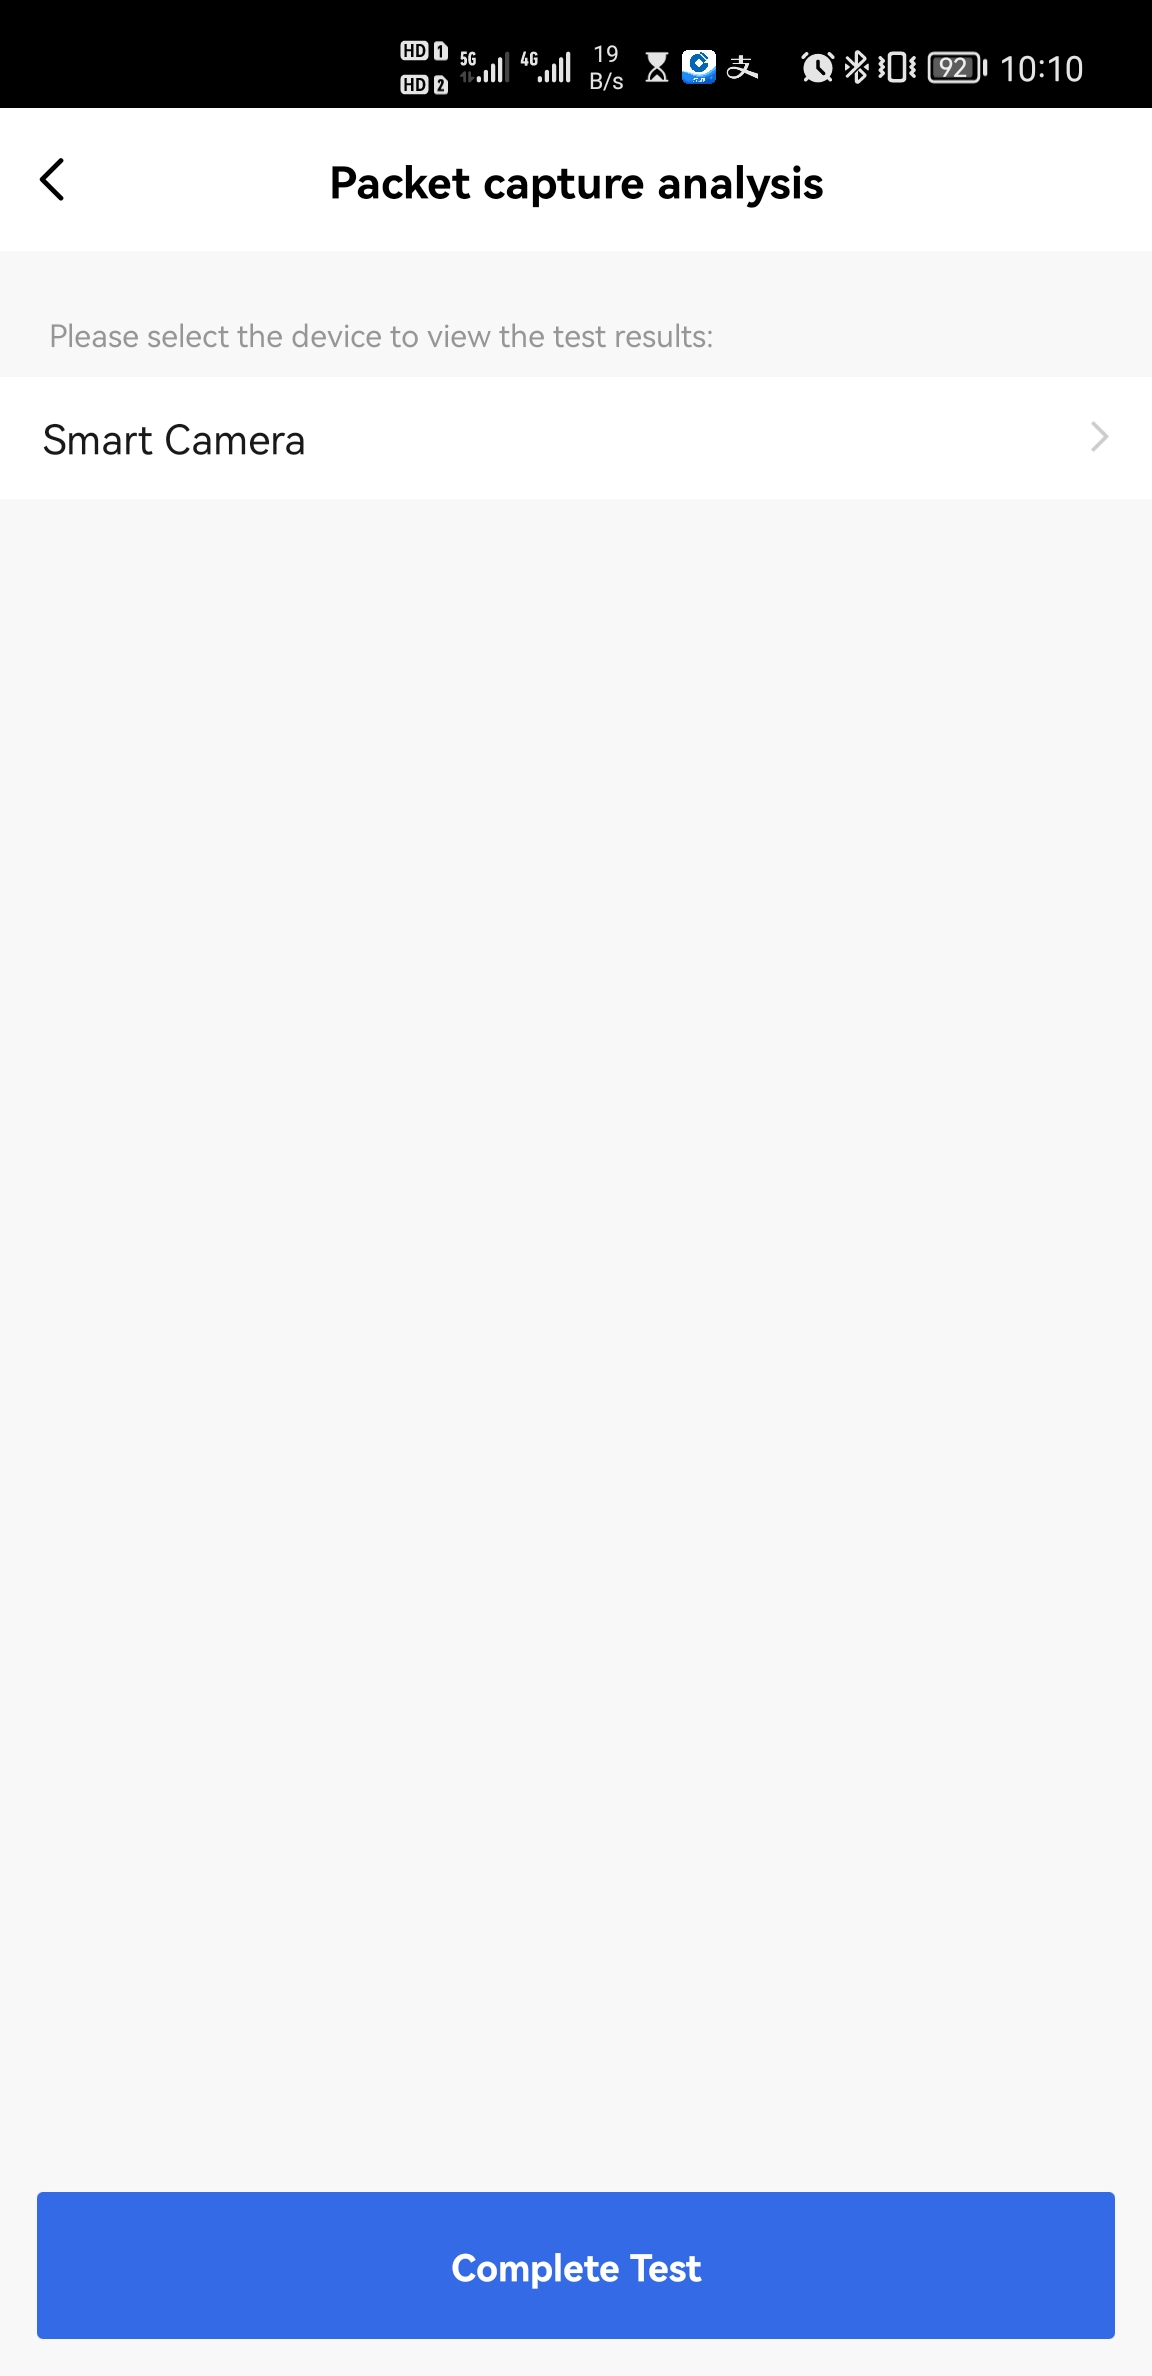
On the Testing Machine List page, you can view the test reports of all DUTs.
-
Tap a device and check out its report.
- If a DUT fails the security test, a Security Test Case Failed dialog box appears after you tap Generate Reports.
- If you tap Continue, no test reports will be displayed on Tuya Developer Platform for this DUT. You can tap > on the right side of the device icon to perform the security test again.

-
Tap Generate Detailed Test Report on IoT to sync the result of the security test to the Tuya Developer Platform.
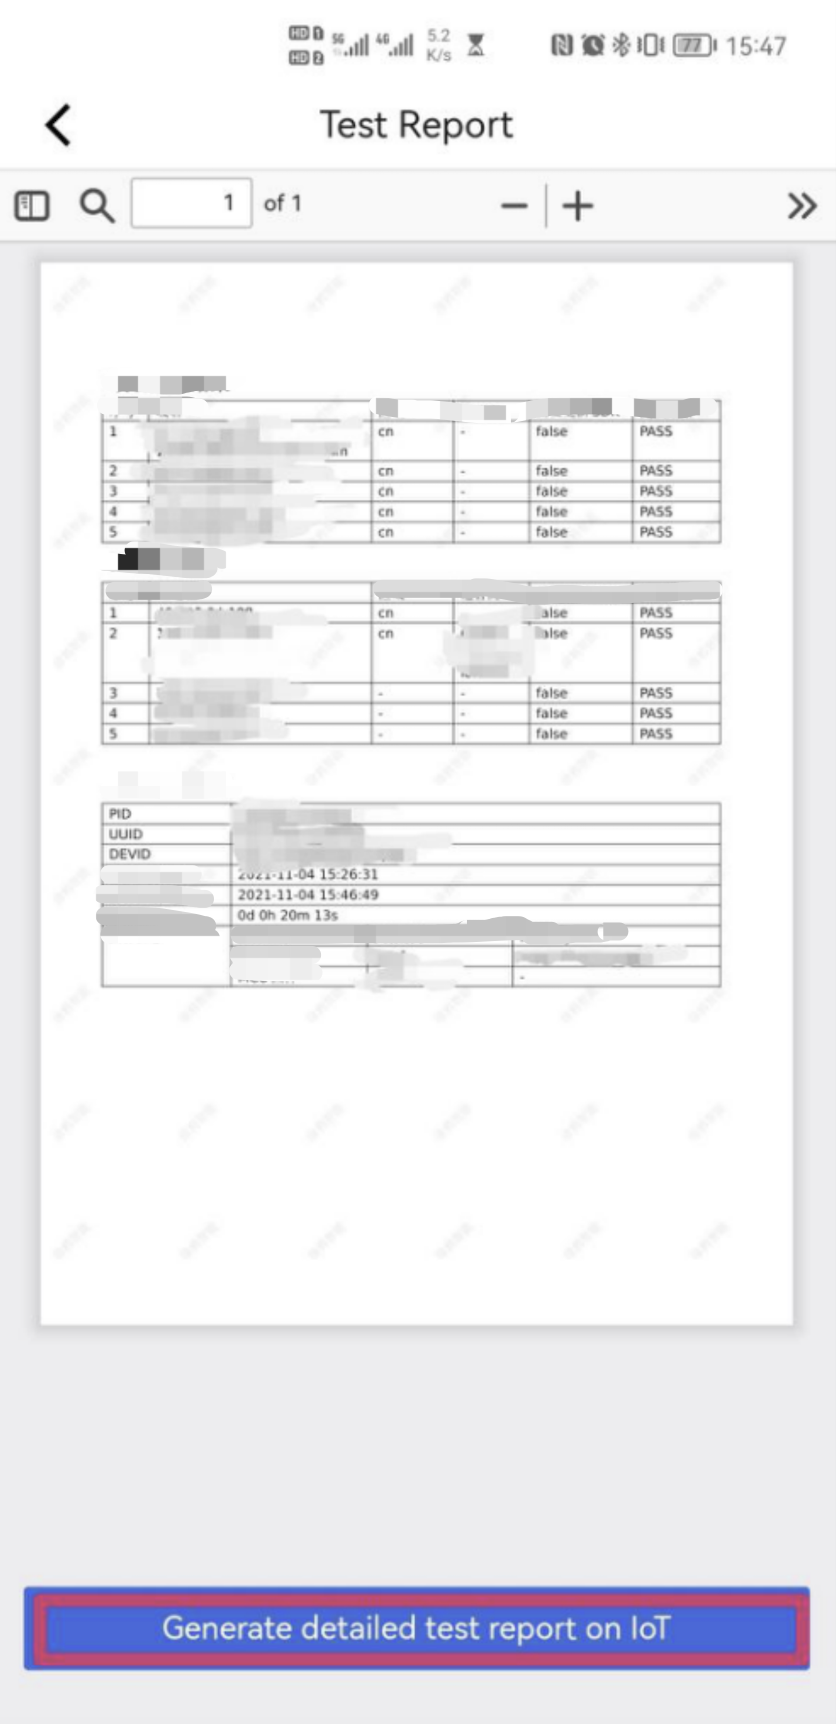
For devices that fail the security test, the Generate Detailed Test Report on IoT button will not be displayed at the bottom of the Test Report page.
-
Tap Complete Test to return to the Testing Machine List page.
View test report
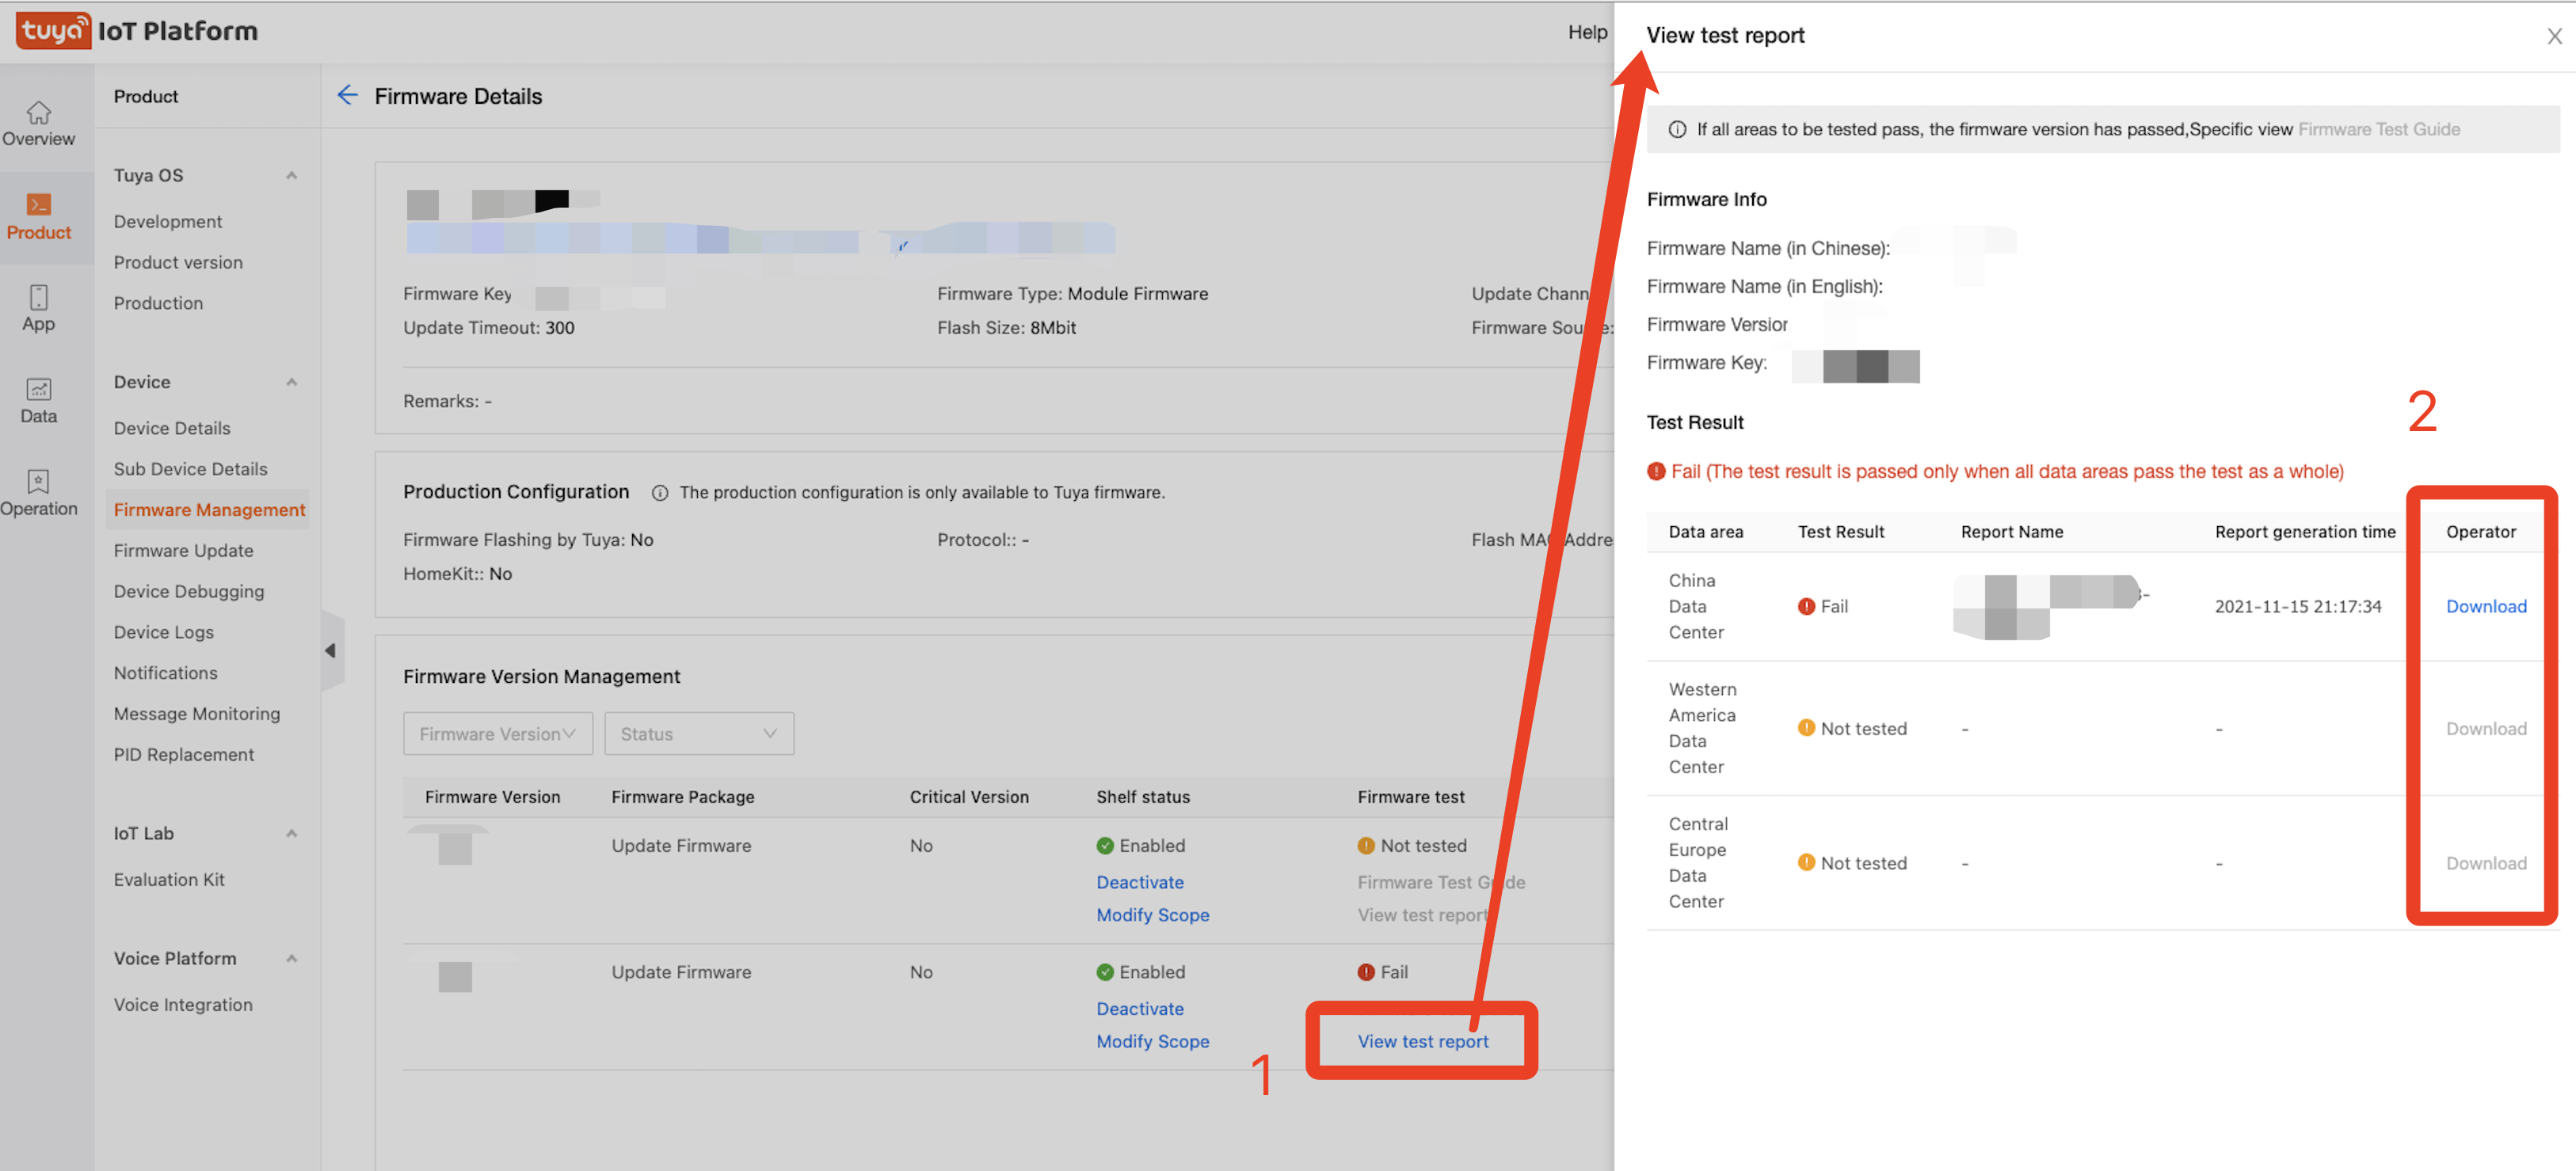
Log in to the Tuya Developer Platform. Click Product > Firmware Management. Select the target firmware and click View Test Report to check out the test report.
Is this page helpful?
YesFeedbackIs this page helpful?
YesFeedback


