Device Panel Initialization Guide
Functional introduction
The device panel initialization guide is displayed upon first entry to each device’s control panel. The guide can fulfill your needs for device onboarding and operational guidance by providing contextual instructions before users access panel functions.
To accommodate diverse smart device experiences, you can customize displayed content, including images, videos, miniapp cards, and miniapps. Trigger mechanisms can also be set for specific time windows, enabling personalized adjustments for various products. The settings will take effect immediately.

Configuration steps primarily include delivery methods, trigger timing, and content materials. The following section details the specific operational workflow.
Prerequisites
- You have created at least one product. For more information, see Create Products.
- Device panel initialization configuration is only supported in ODM v6.6.0 and later branches of Smart Life-type OEM apps. Configurations will be invalid for earlier versions.
Procedure
-
Log in to the Tuya Developer Platform.
-
On the homepage, find the Developer Console > Product Development tab and click Product Management.
-
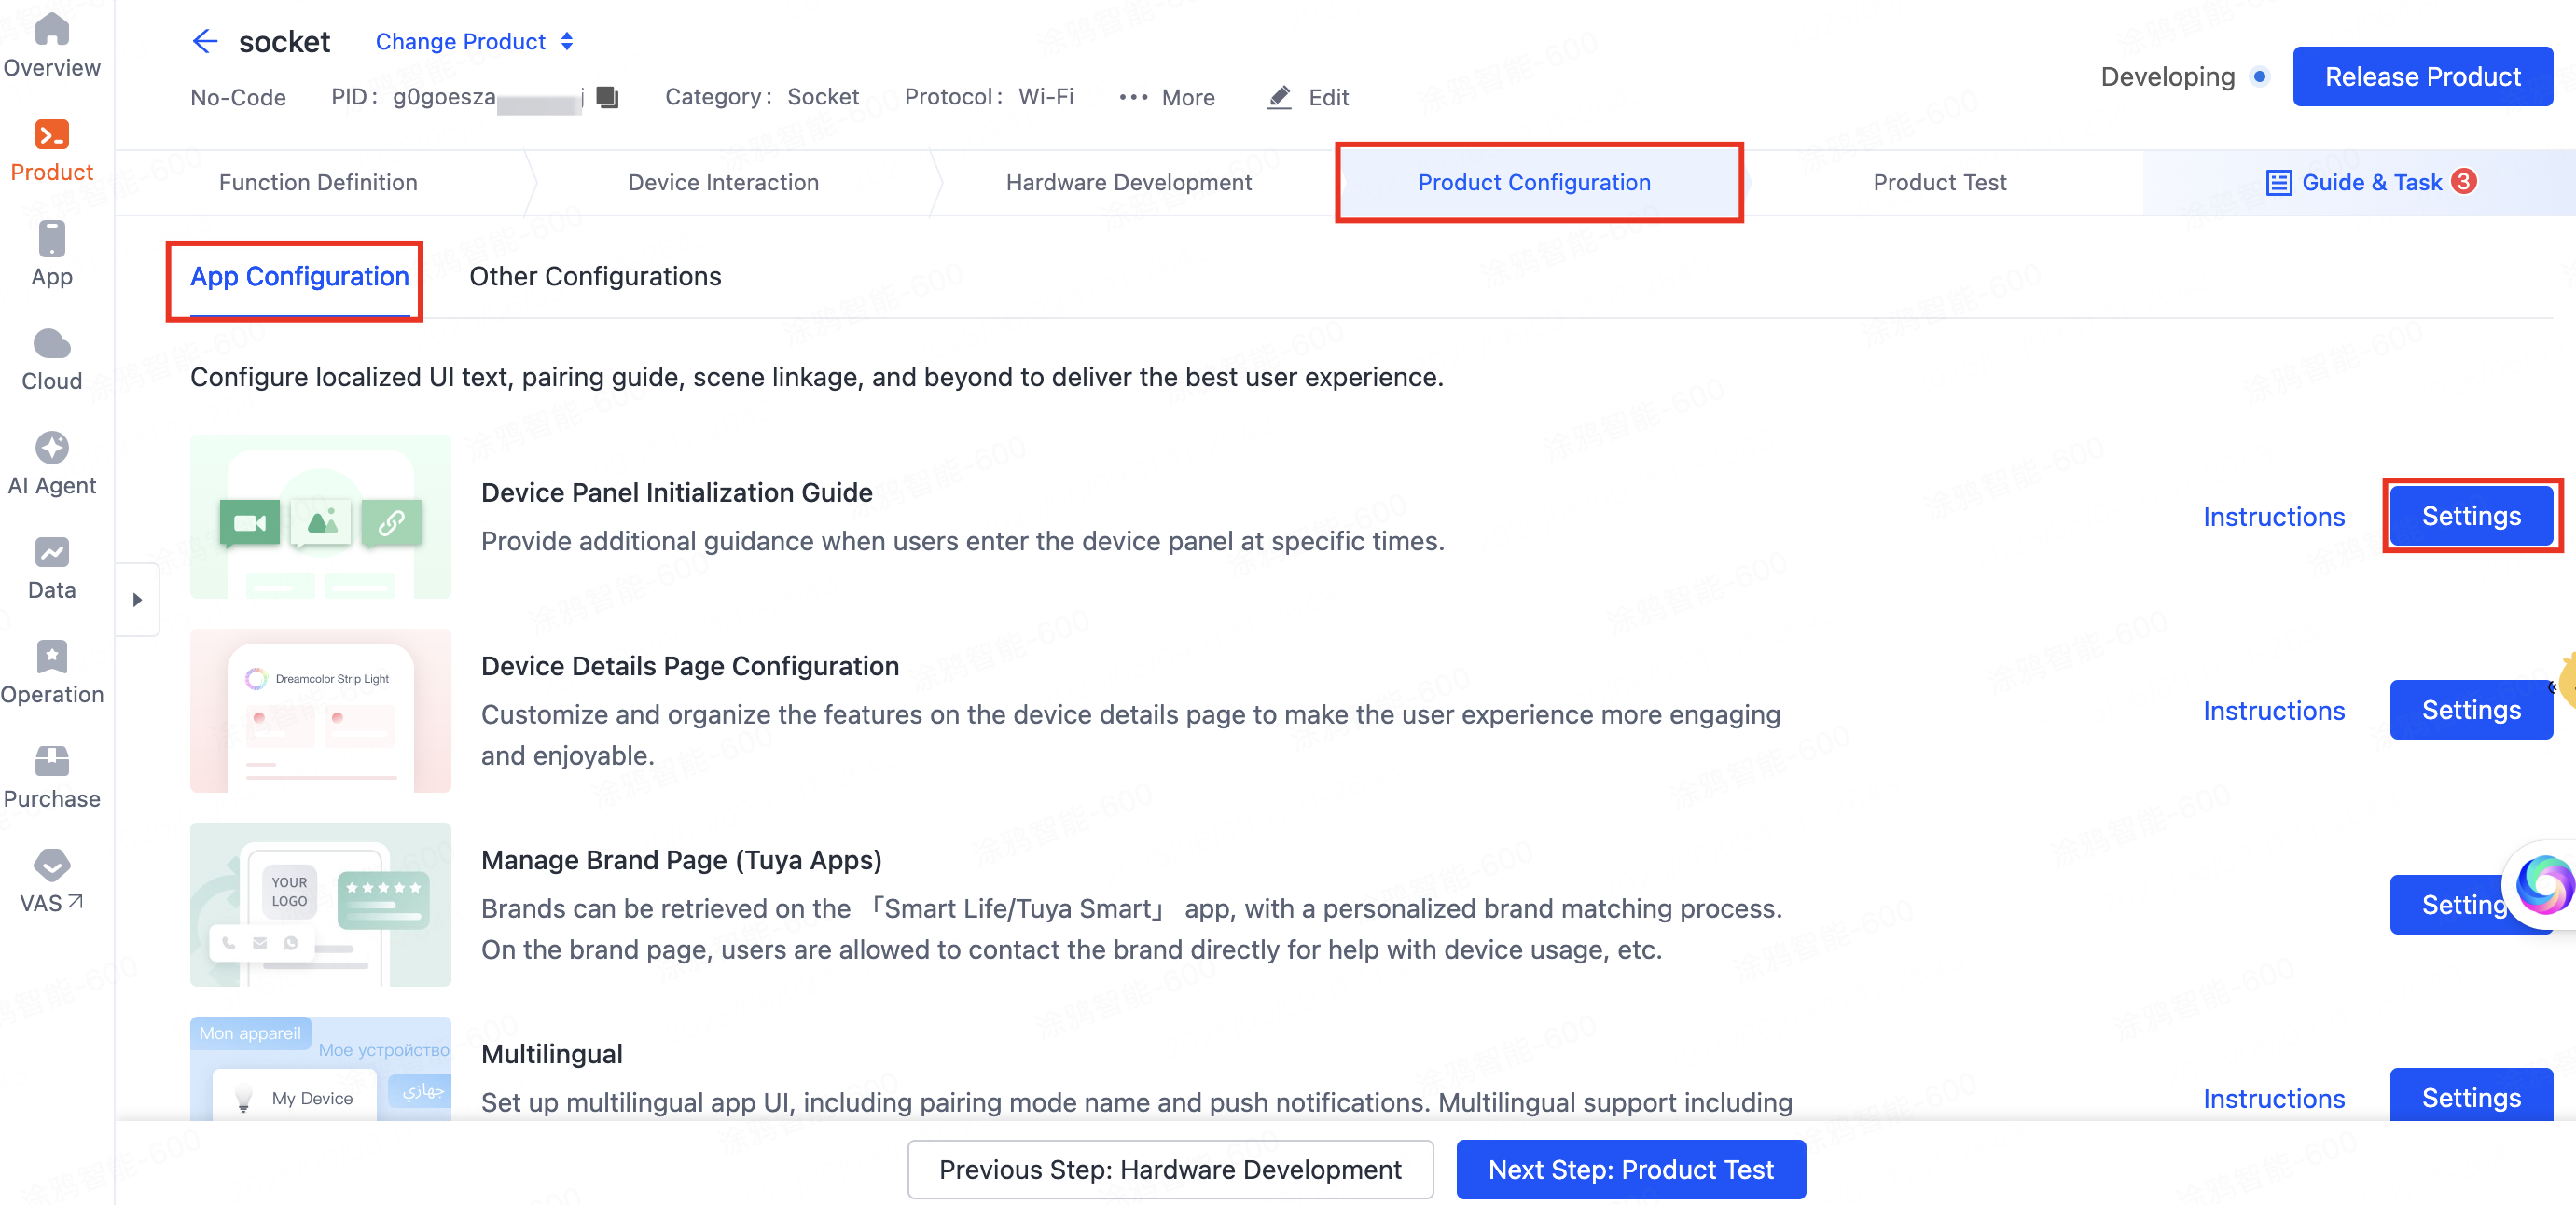
Find the desired product and click Develop in the Operation column. Go to Step 4 Product Configuration > App Configuration, find Device Panel Initialization Guide, and then click Settings to configure the trigger timing and delivery method.

Configure trigger timing
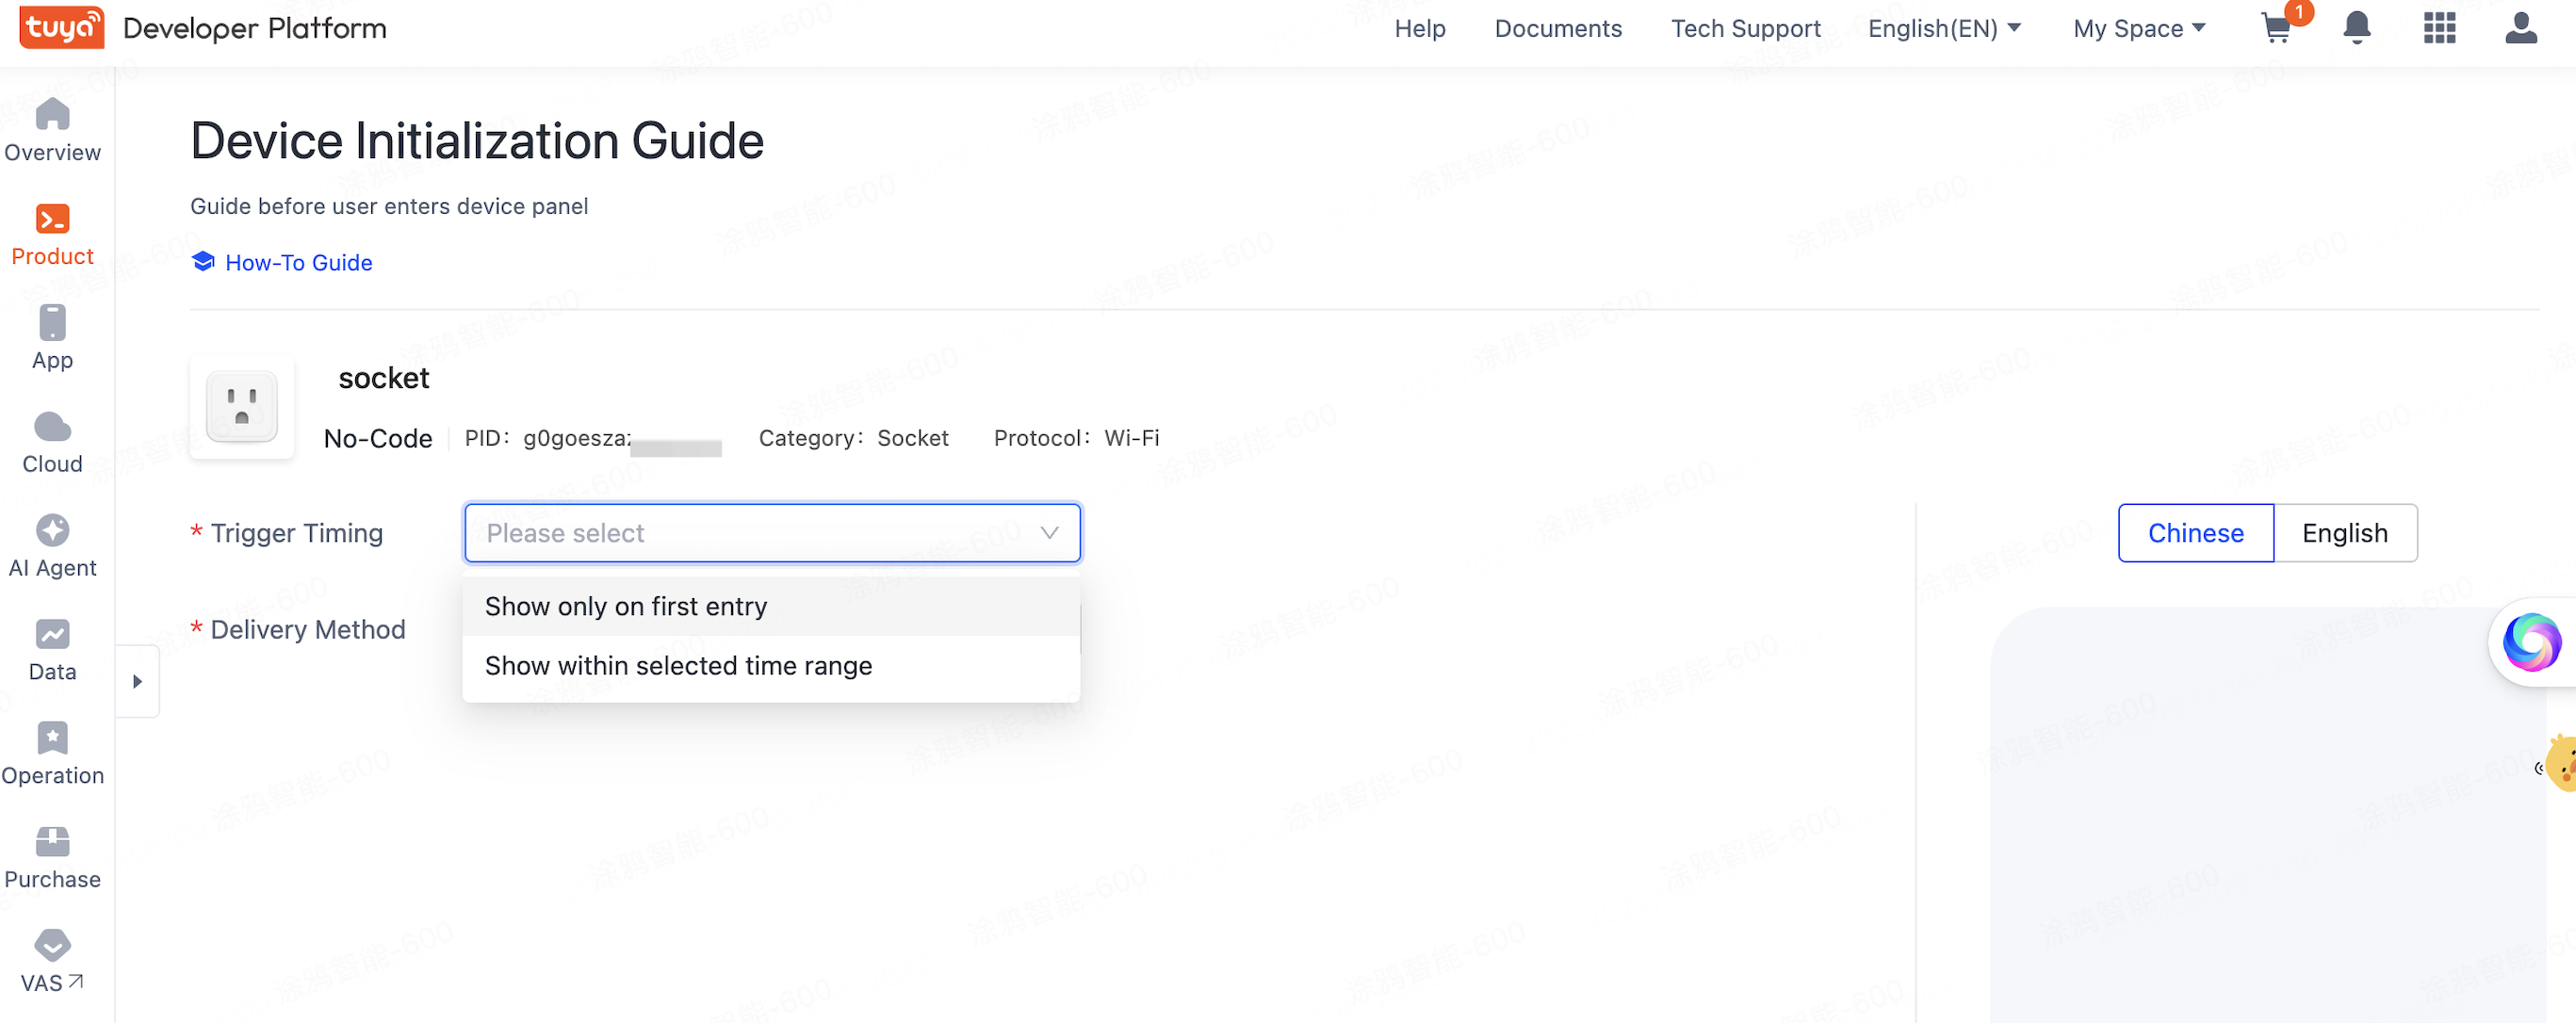
Trigger timing defines when the guide content will be displayed. There are two options: show only on first entry or show within selected time range. You can choose either of them.
-
Show only on first entry: When a user successfully pairs a device and enters the panel for the first time, the initialization content will be shown once and not again thereafter.
-
Show within selected time range: The initialization content will be shown every time a user enters the device panel within the specified time range.
Configure delivery methods
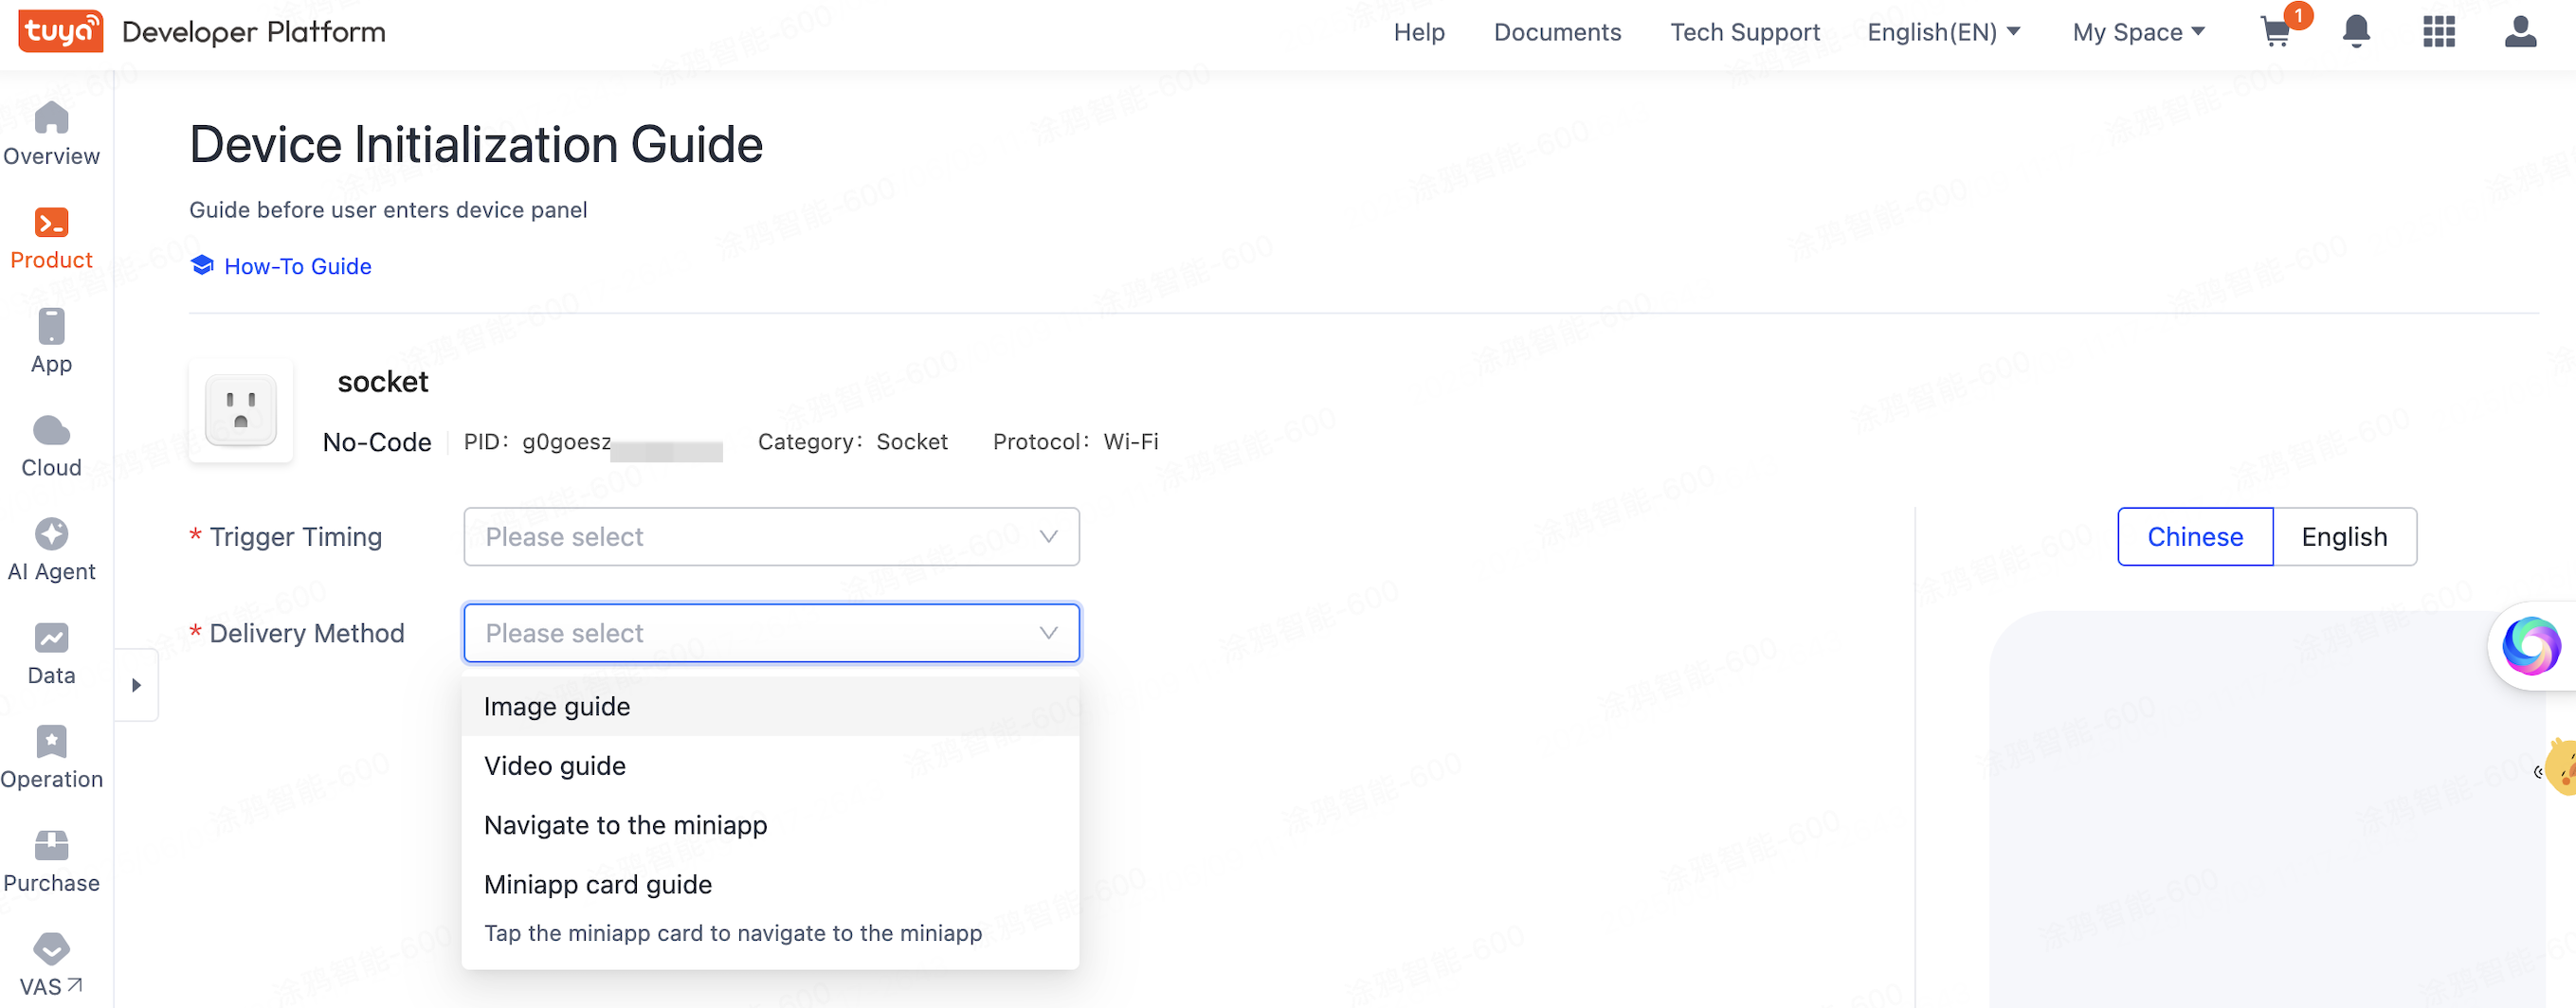
The delivery methods include images, videos, miniapps, and miniapp cards. Only one delivery method can be set for each device.
-
Image guide: Upload up to five PNG or GIF images with the dimensions of 274 × 363 pixels. Each image can be set with an individual hyperlink. When users tap the image, they will be redirected to the specified miniapp.
-
Video guide: Upload a video in MP4 format. The video can be set with a hyperlink. When users tap the video, they will be redirected to the specified miniapp.
-
Navigate to the miniapp: Enter the URL to a custom Tuya miniapp card. When users tap the miniapp card, they will be redirected to the specified miniapp.
-
Miniapp card guide: Enter the URL to a custom Tuya miniapp. Users will be redirected to your miniapp before navigating to the panel.
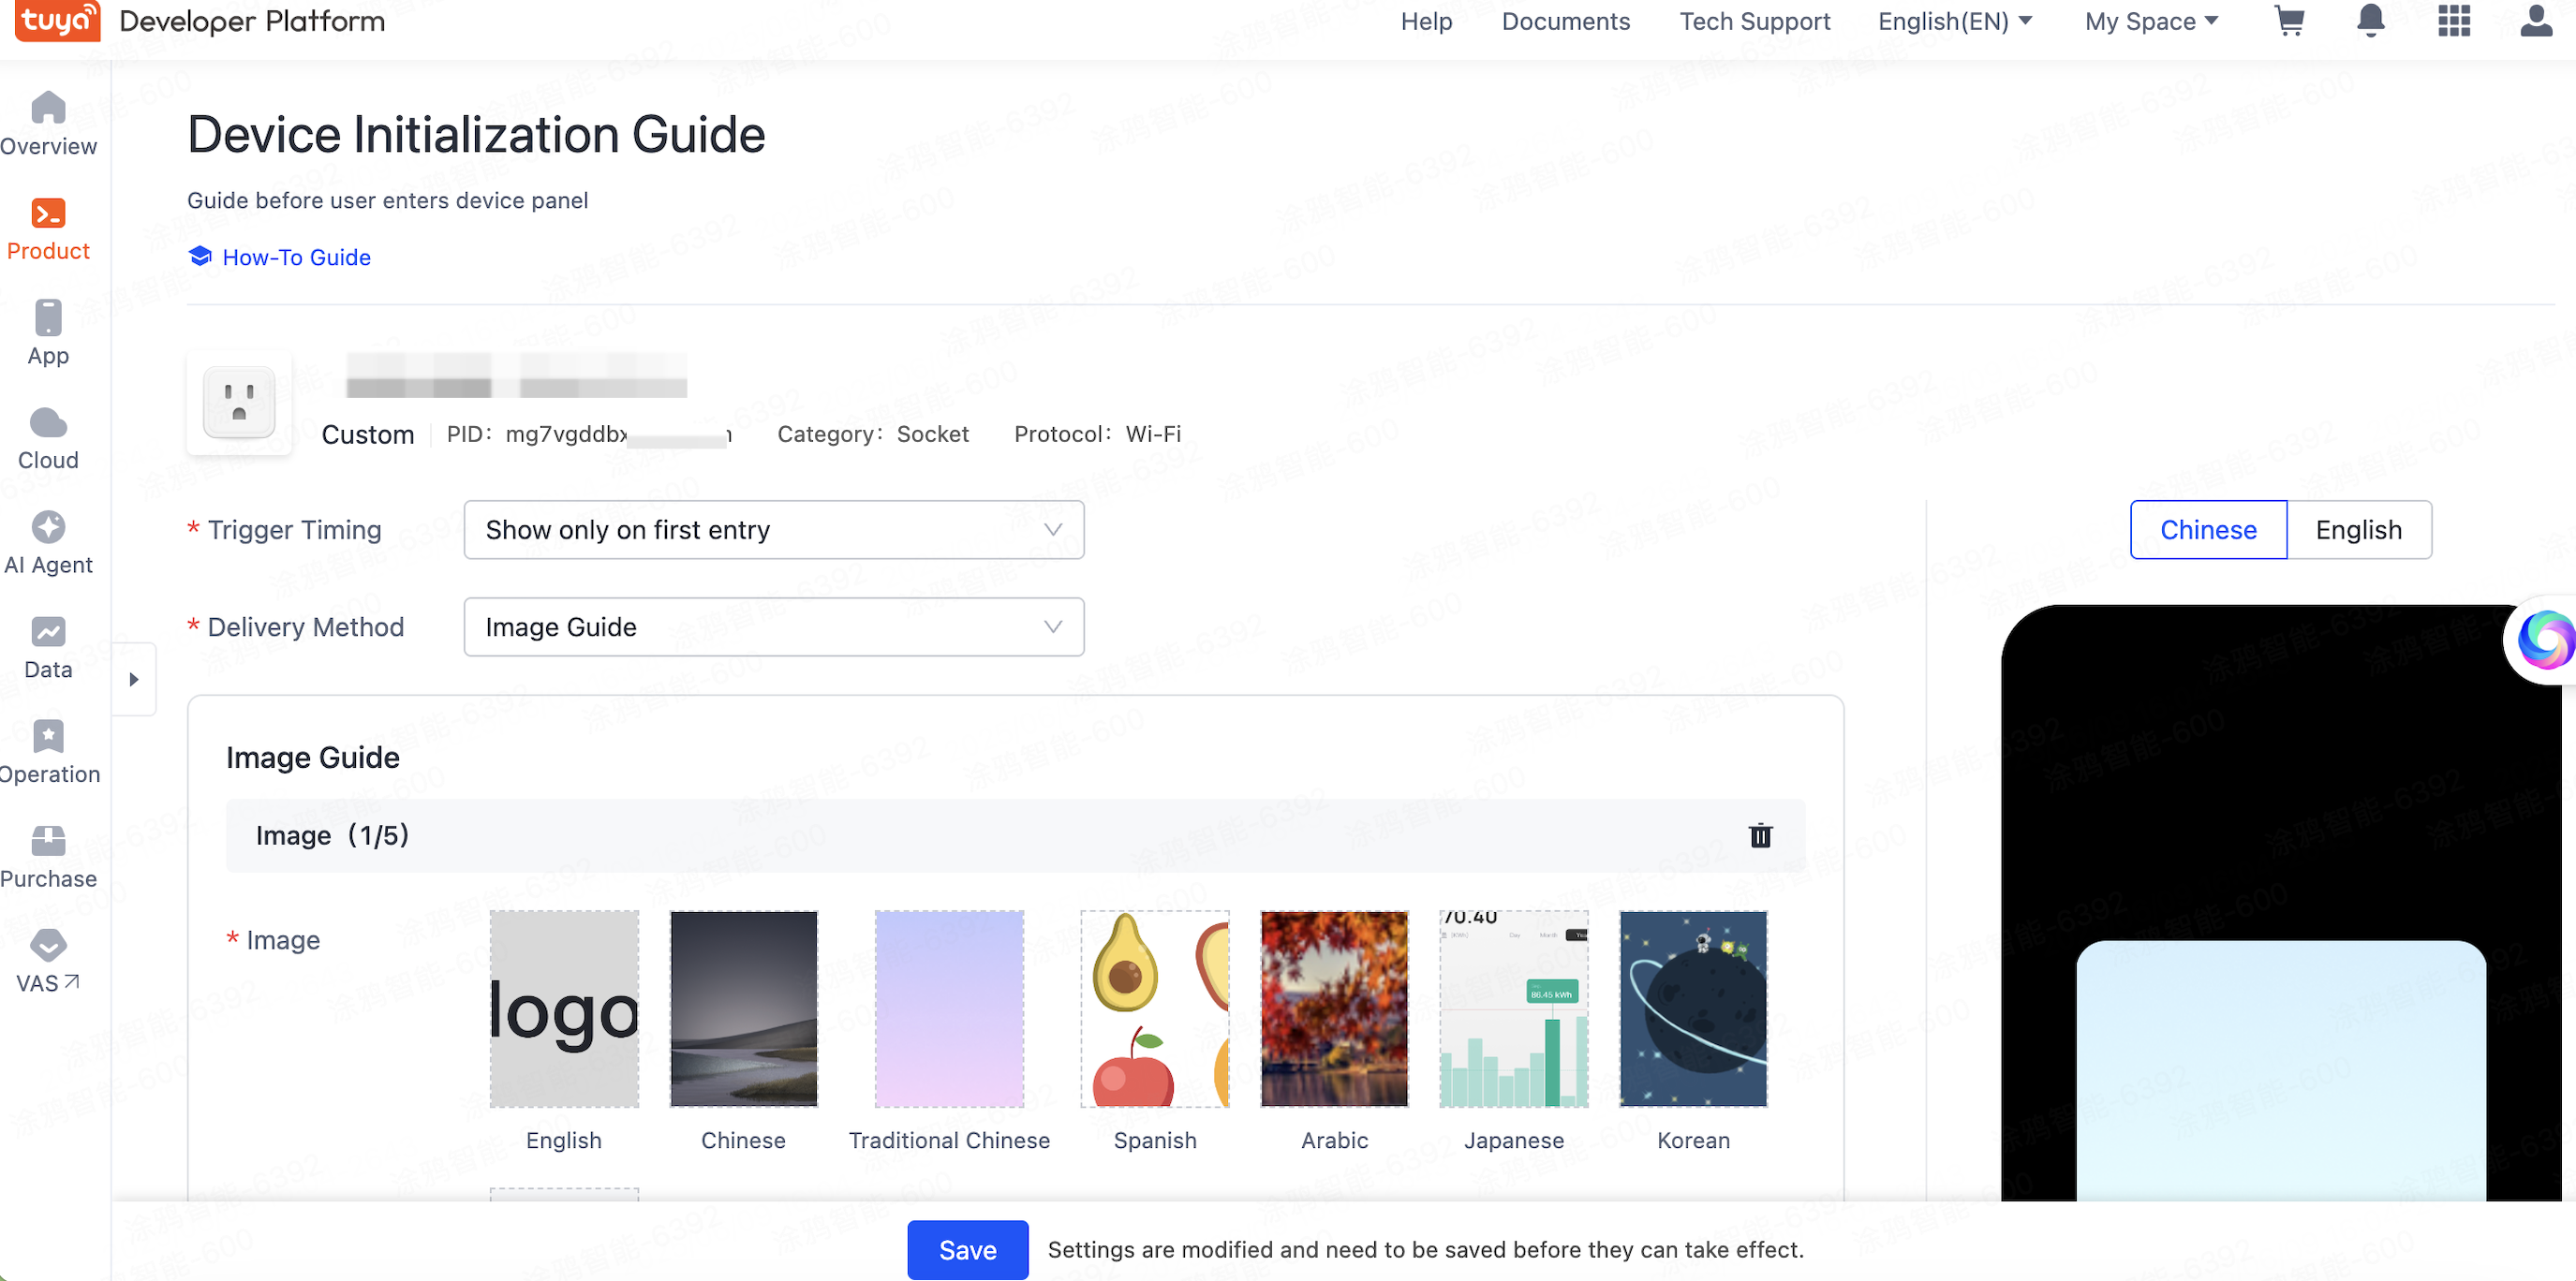
Configure delivery materials
After configuring the delivery methods and trigger timing, you can set up the content materials, such as images, videos, or miniapp URL, based on the selected delivery methods.
Release
-
After editing, click Save to officially apply the changes.
-
Scan the QR code with the Smart Life OEM app to add the device and see the configured effects.
Is this page helpful?
YesFeedbackIs this page helpful?
YesFeedback


