Develop with Node.js SDK
This topic describes how to develop a program to control Tuya-enabled devices based on the open capabilities and SDK of the Tuya Cloud Development Platform.
Prerequisites
- You have created a cloud project.
- You have added a device.
- You have set up the development environment for Node.js.
- You have configured node version manager (NVM).
Procedure
Step 1: Set up a development environment
This step is based on the Tuya-connector-Nodejs SDK. Tuya-connector helps you efficiently create cloud development projects regarding the OpenAPI or message subscription capabilities. You can put all the focus on business logic. Perform the following cloning steps:
-
Get the SDK address at Tuya-connector-Nodejs.
-
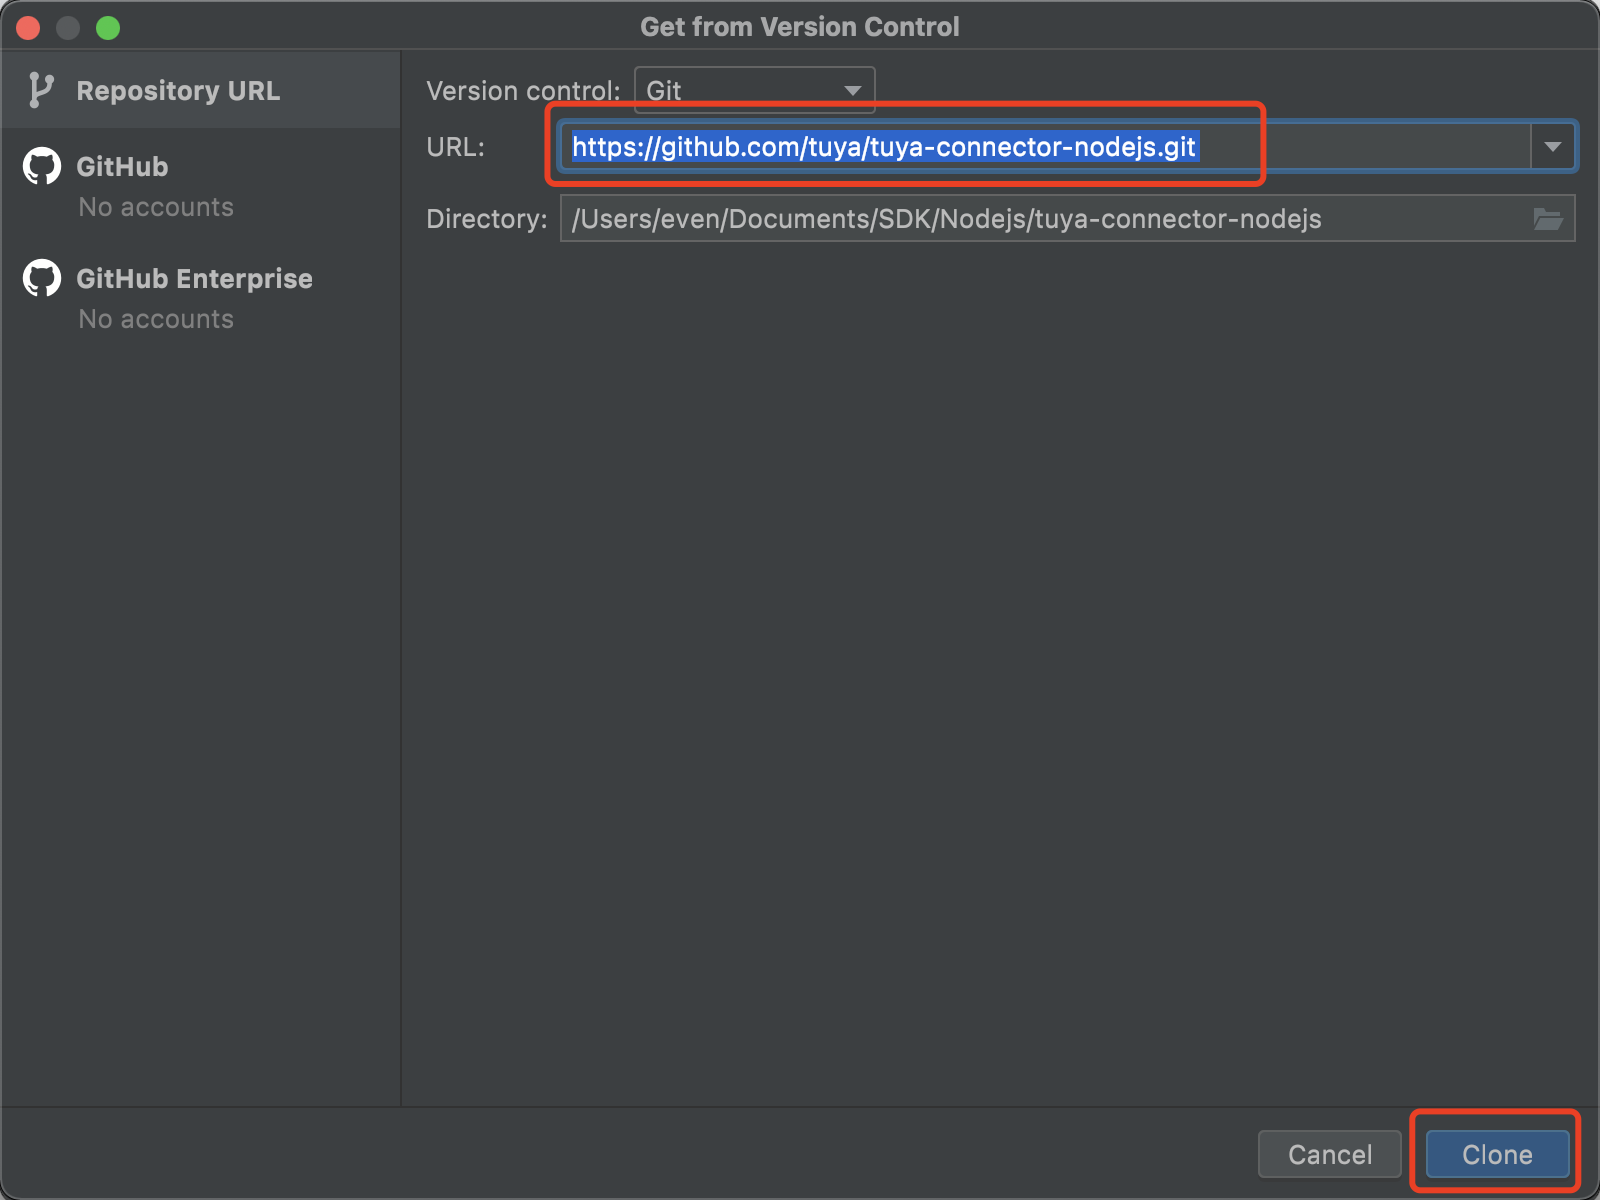
Go to Projects > Get from VCS > URL, enter the SDK URL, and then click Clone.
-
Choose View > Tool Windows > Terminal, open the terminal, and then install the dependency package. The following two methods are supported.
-
yarn add @tuya/tuya-connector-nodejs -
npm install @tuya/tuya-connector-nodejs
-
Step 2: Edit the profile
Before development, you need to configure environment variables in examples > index.ts.
-
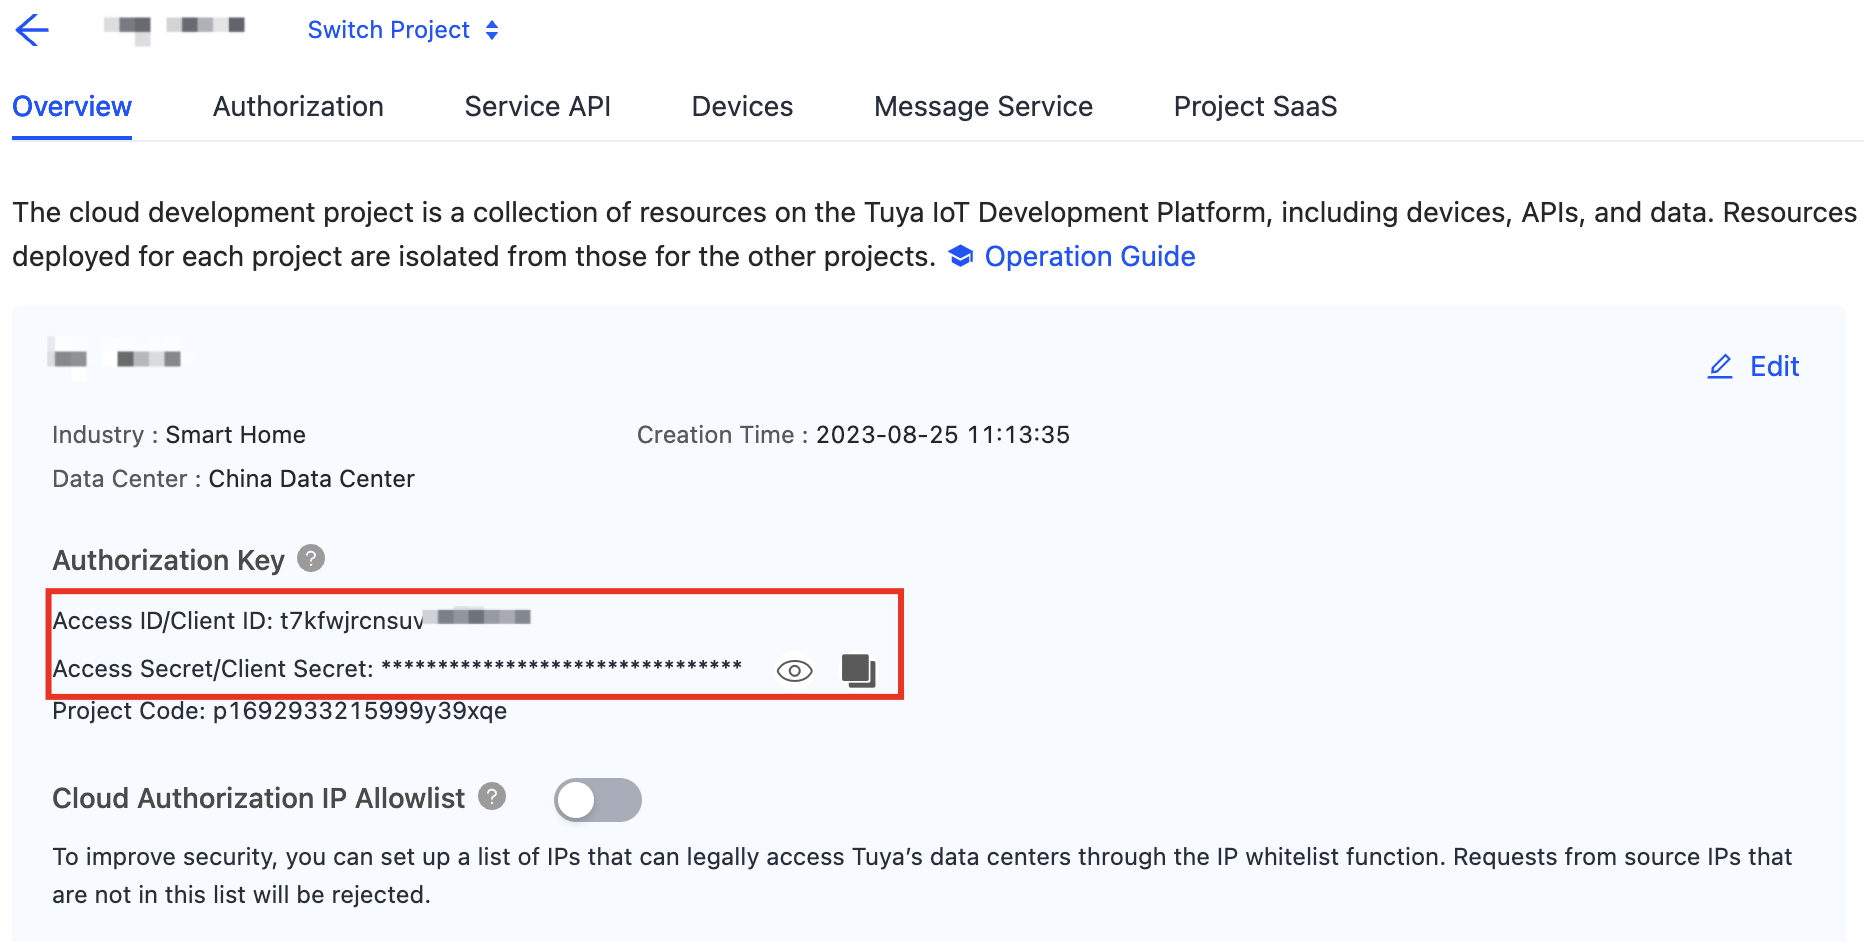
Go to the Tuya Developer Platform, find your cloud project, and then click Open Project in the Operation column. Click Overview and find the Authorization Key, including Access ID and Access Secret.
-
Configure environment variables in the
index.tsfile.-
baseUrl: the data center URL of the API request. -
accessKey: Enter the value of the Access ID in the Authorization Key section. -
secretKey: Enter the value of the Access Secret in the Authorization Key section.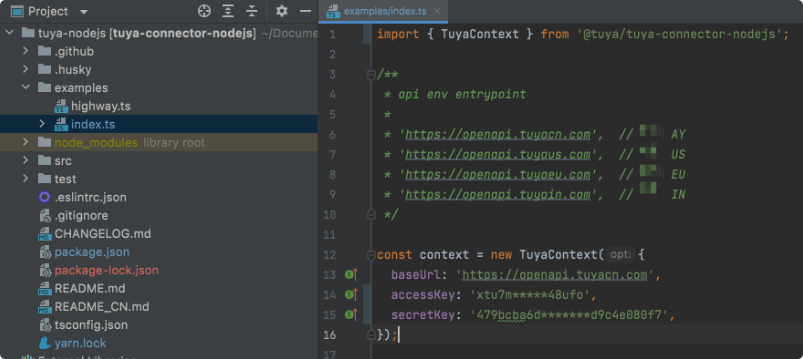
Sample code:
const context = new TuyaContext({ baseUrl: 'https://openapi.tuyacn.com', accessKey: 'xtu7m*****48ufo', secretKey: '479bcba6d*******d9c4e080f7', }); -
Step 3: Control the device
After the environment is ready, you can start your coding journey.
The strip lights are controlled in this example. The standard instruction for turning lights on or off is the switch_led. To control other devices, query the standard instruction set and modify the code.
-
Create OpenAPI interfaces.
Certain APIs are encapsulated in the SDK and can be called as needed.
Sample code:
const device_id = "vdevo162799080003567"; const devicedetail = await context.device.detail({ device_id: device_id, }); if(!devicedetail.success) { new Error(); } console.log("Device details:",devicedetail); -
Create a custom API.
tuya-connectorencapsulates common APIs, and declares the types of request and response parameters. You can customize additional API requests.const { data } = await context.request({ method: 'GET', path: '/v1.0/xx', body: {}, });Sample code:
  const commands = await context.request({
    path: `/v1.0/iot-03/devices/${device_id}/commands`,
    method: 'POST',
    body: {"commands":[{"code":"switch_led","value":true}]}
  });
  if(!commands.success) {
    new Error();
  }
  console.log("Execution resutl:",commands);
Complete sample code of index.ts
import { TuyaContext } from '@tuya/tuya-connector-nodejs'; const context = new TuyaContext({ baseUrl: 'https://openapi.tuyacn.com', accessKey: 'xtu7m*****48ufo', secretKey: '479bcba6d*******d9c4e080f7', }); const main = async () => { // Define the device ID const device_id = "vdev*******80003567"; // Query device details const devicedetail = await context.device.detail({ device_id: device_id, }); if(!devicedetail.success) { new Error(); } console.log("Device details:",devicedetail); // Send commands const commands = await context.request({ path: `/v1.0/iot-03/devices/${device_id}/commands`, method: 'POST', body: { "commands":[{"code":"switch_led","value":true}] } }); if(!commands.success) { new Error(); } console.log("Execution result:",commands); }; main().catch(err => { console.log(err); }); -
Perform debugging.
-
Compile the
.tsfile with the TypeScript compiler.
Use the terminal to enter the specified folder and compile the index.ts file.Sample code:
tsc index.ts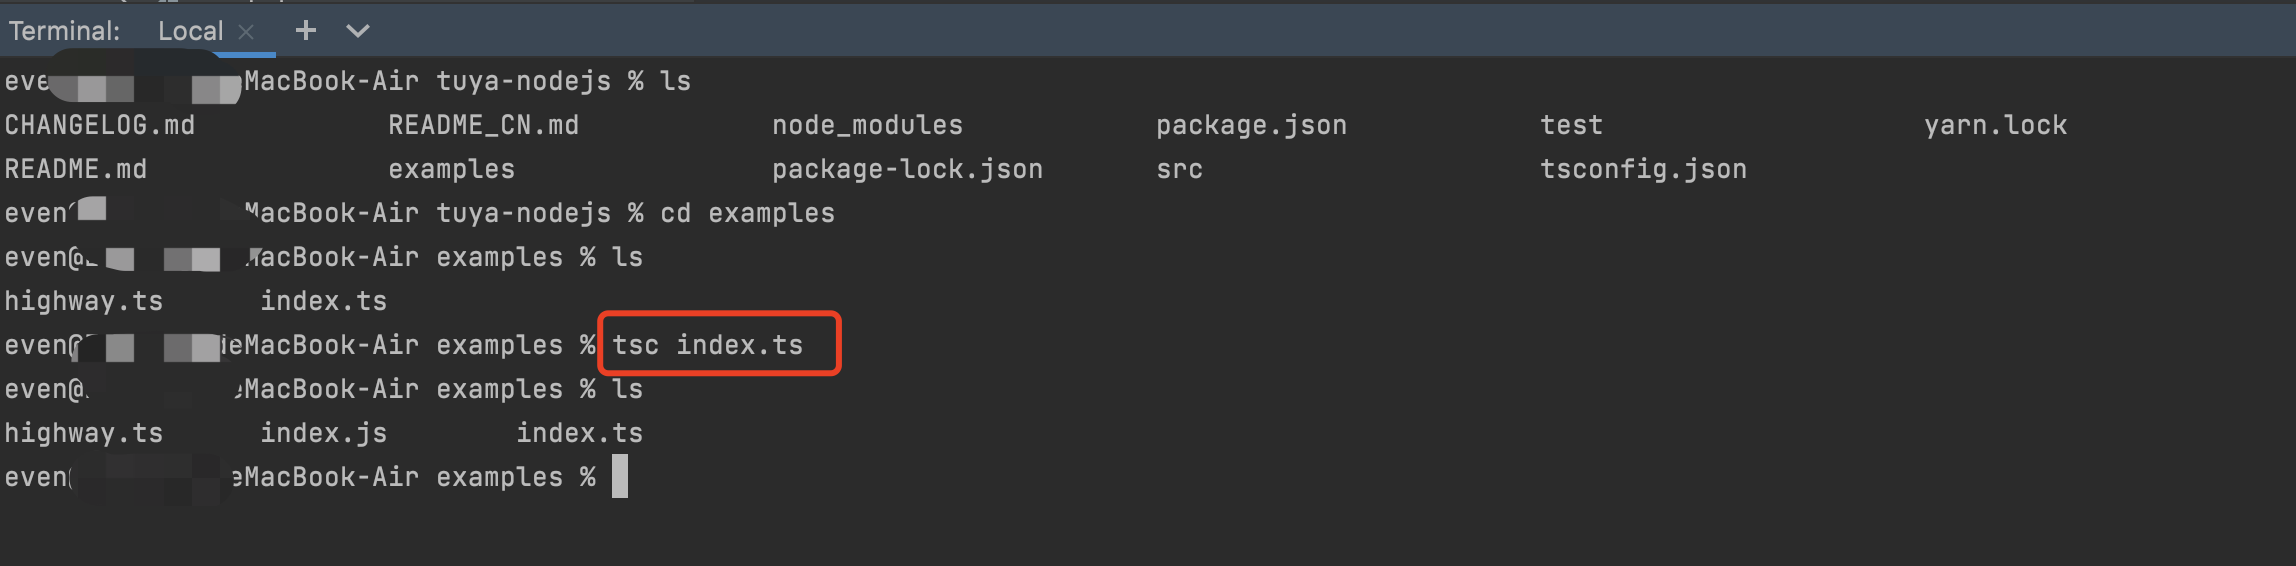
-
node runs the compiled
.jsfile.Sample code:
node index.js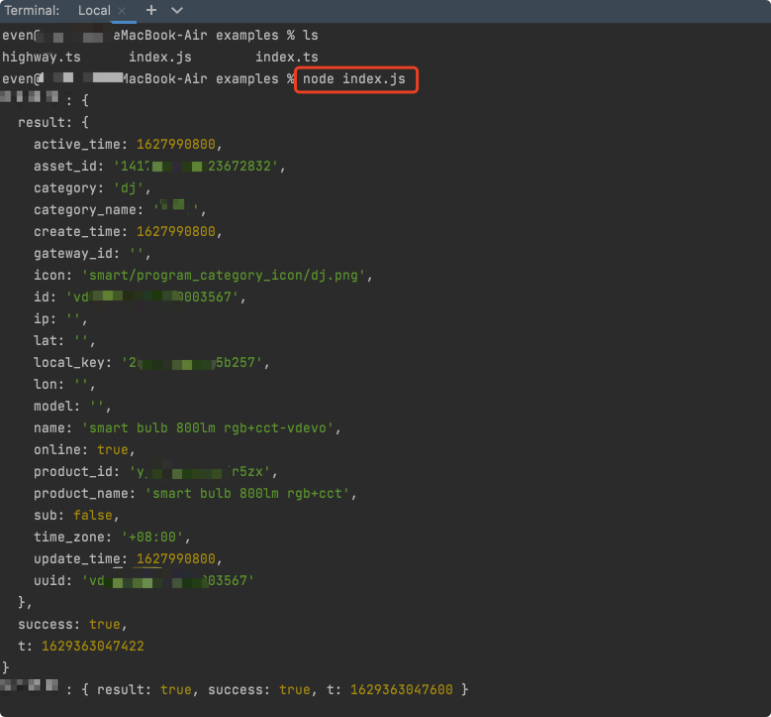
Execution result
even@*******deMacBook-Air examples % node index.js Device details: { result: { active_time: 1627990800, asset_id: '1417*******823672832', category: 'dj', category_name: 'Light source', create_time: 1627990800, gateway_id: '', icon: 'smart/program_category_icon/dj.png', id: 'vdev*******80003567', ip: '', lat: '', local_key: '25bfe*******3a5b257', lon: '', model: '', name: 'smart bulb 800lm rgb+cct-vdevo', online: true, product_id: 'yju2*******ujr5zx', product_name: 'smart bulb 800lm rgb+cct', sub: false, time_zone: '+08:00', update_time: 1627990800, uuid: 'vdev*******080003567' }, success: true, t: 1629363047422 } Execution result: {result: true, success: true, t: 1629363047600} -
(Optional) Use
ts-nodeto compile and run the index.ts file.You need to install ts-node.
Sample code:
ts-node index.ts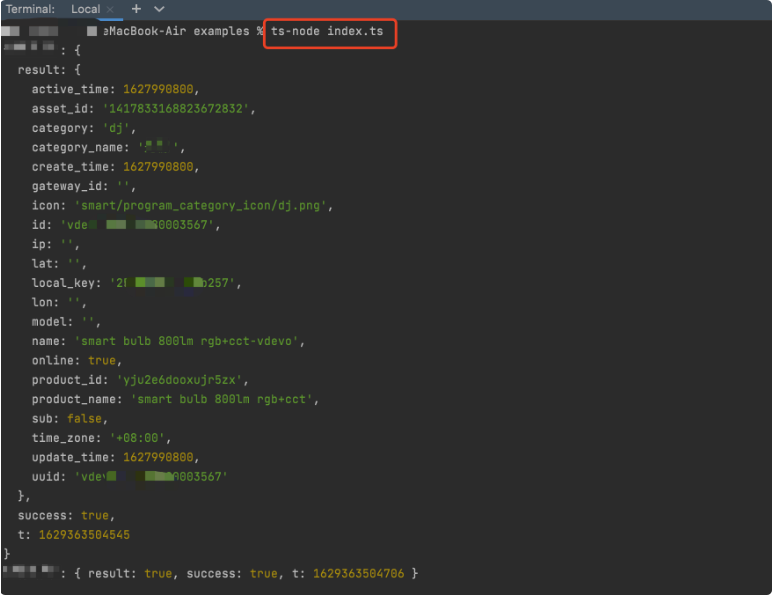
Execution result
even@*******deMacBook-Air examples % node index.js
Device details: {
  result: {
    active_time: 1627990800,
    asset_id: '1417*******823672832',
    category: 'dj',
    category_name: 'Light Source',
    create_time: 1627990800,
    gateway_id: '',
    icon: 'smart/program_category_icon/dj.png',
    id: 'vdev*******80003567',
    ip: '',
    lat: '',
    local_key: '25bfe*******3a5b257',
    lon: '',
    model: '',
    name: 'smart bulb 800lm rgb+cct-vdevo',
    online: true,
    product_id: 'yju2*******ujr5zx',
    product_name: 'smart bulb 800lm rgb+cct',
    sub: false,
    time_zone: '+08:00',
    update_time: 1627990800,
    uuid: 'vdev*******080003567'
  },
  success: true,
  t: 1629363504545
}
Execution result: {result: true, success: true, t: 1629363504706}
-
FAQs
When I made an API request, an error message was returned: 1106, permission deny. How to fix it?
You can fix the problem by following the instructions in How to resolve it if the calling interface has an error code: 1106, permission deny?
Is this page helpful?
YesFeedbackIs this page helpful?
YesFeedback


