Develop with Go SDK
Last Updated on : 2024-06-20 06:35:26download
This topic describes how to develop a program to control smart devices based on the open capabilities and SDK of the Tuya Developer Platform.
Prerequisites
- You have created a project.
- You have added a device.
- You have set up the development environment for Go.
Procedure
Step 1: Set up development environment
This step is based on the Tuya-connector-Go SDK. Tuya-connector helps you efficiently create cloud development projects regarding the OpenAPI or message subscription capabilities. You can put all the focus on business logic without taking care of server-side programming nor relational databases. Perform the following steps:
-
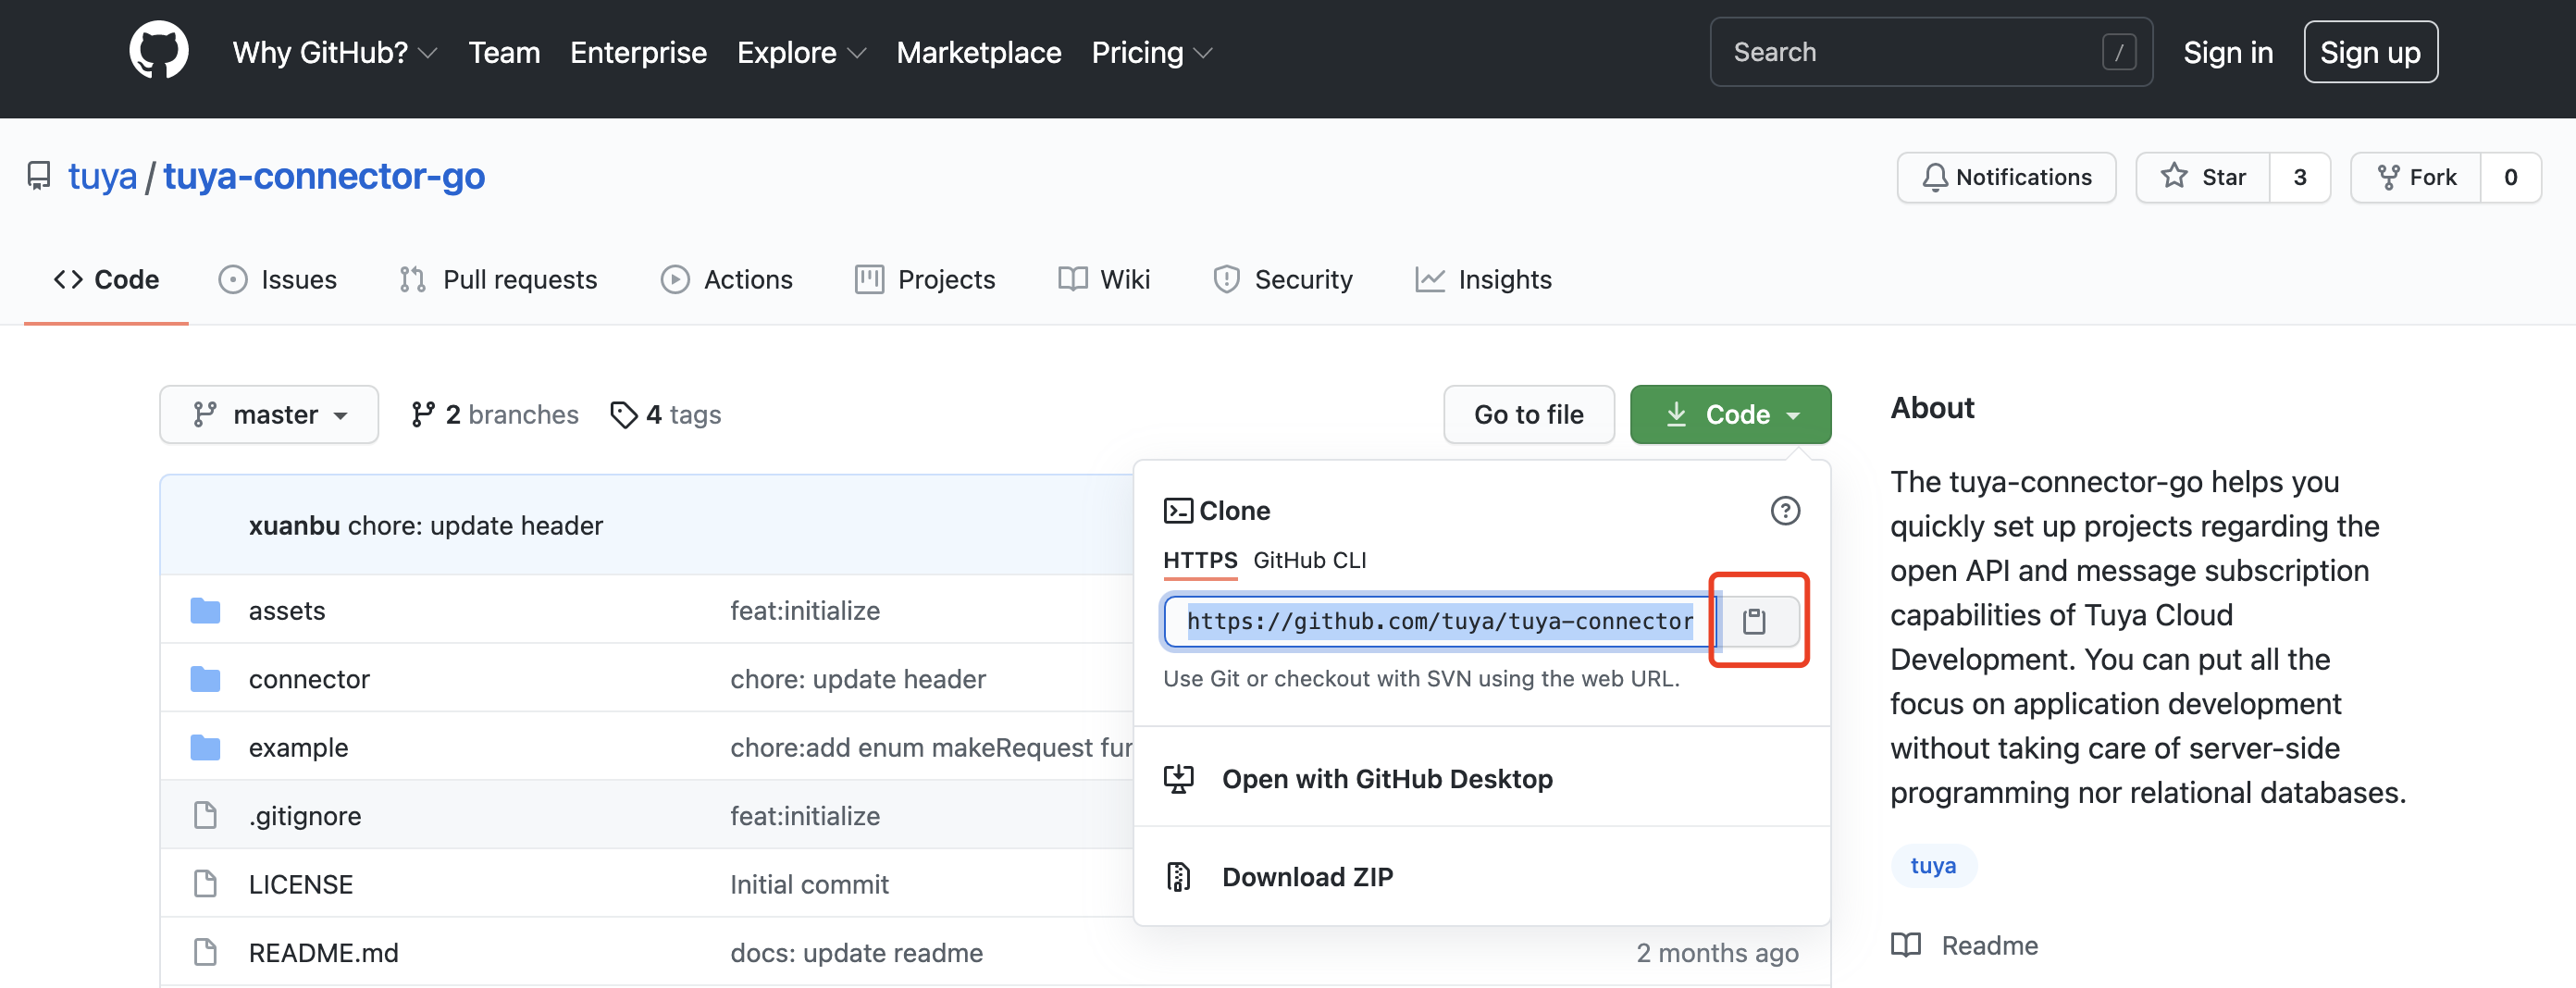
Get the SDK address at Tuya-connector-Go.
-
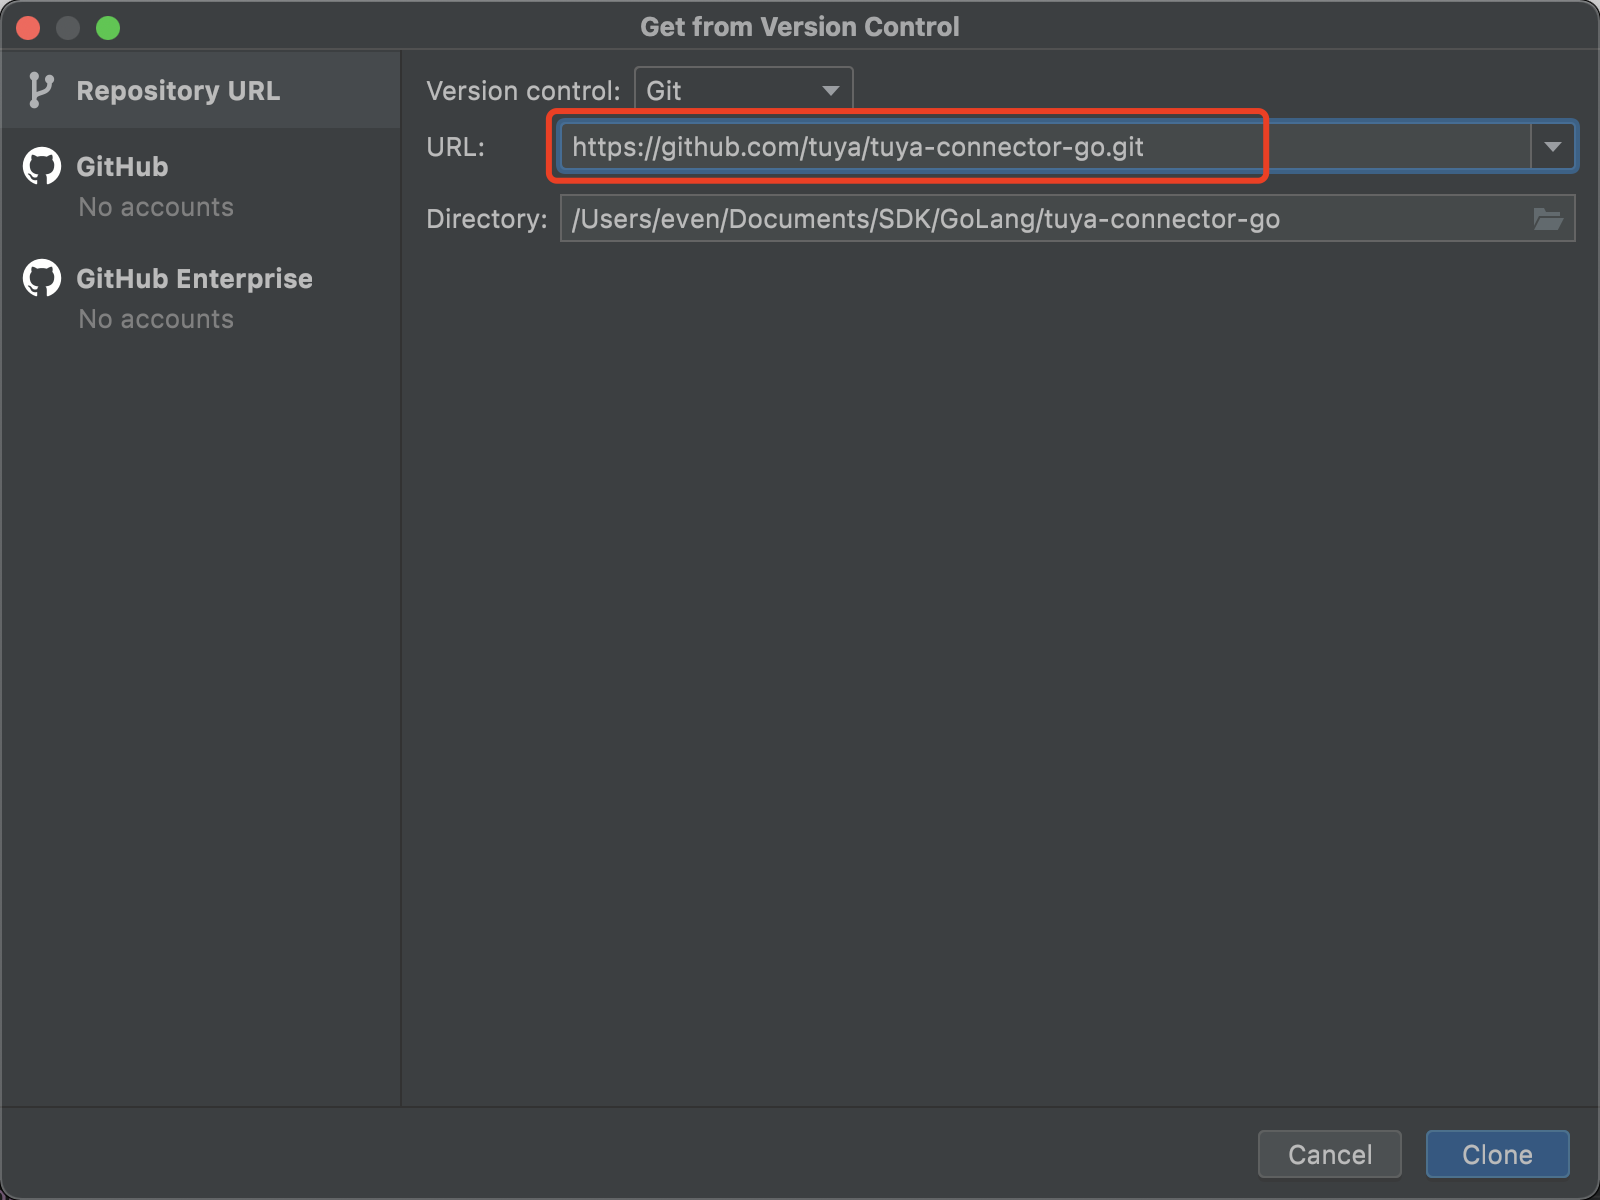
Go to Projects > Get from VCS > URL, enter the SDK address, and then click Clone.
-
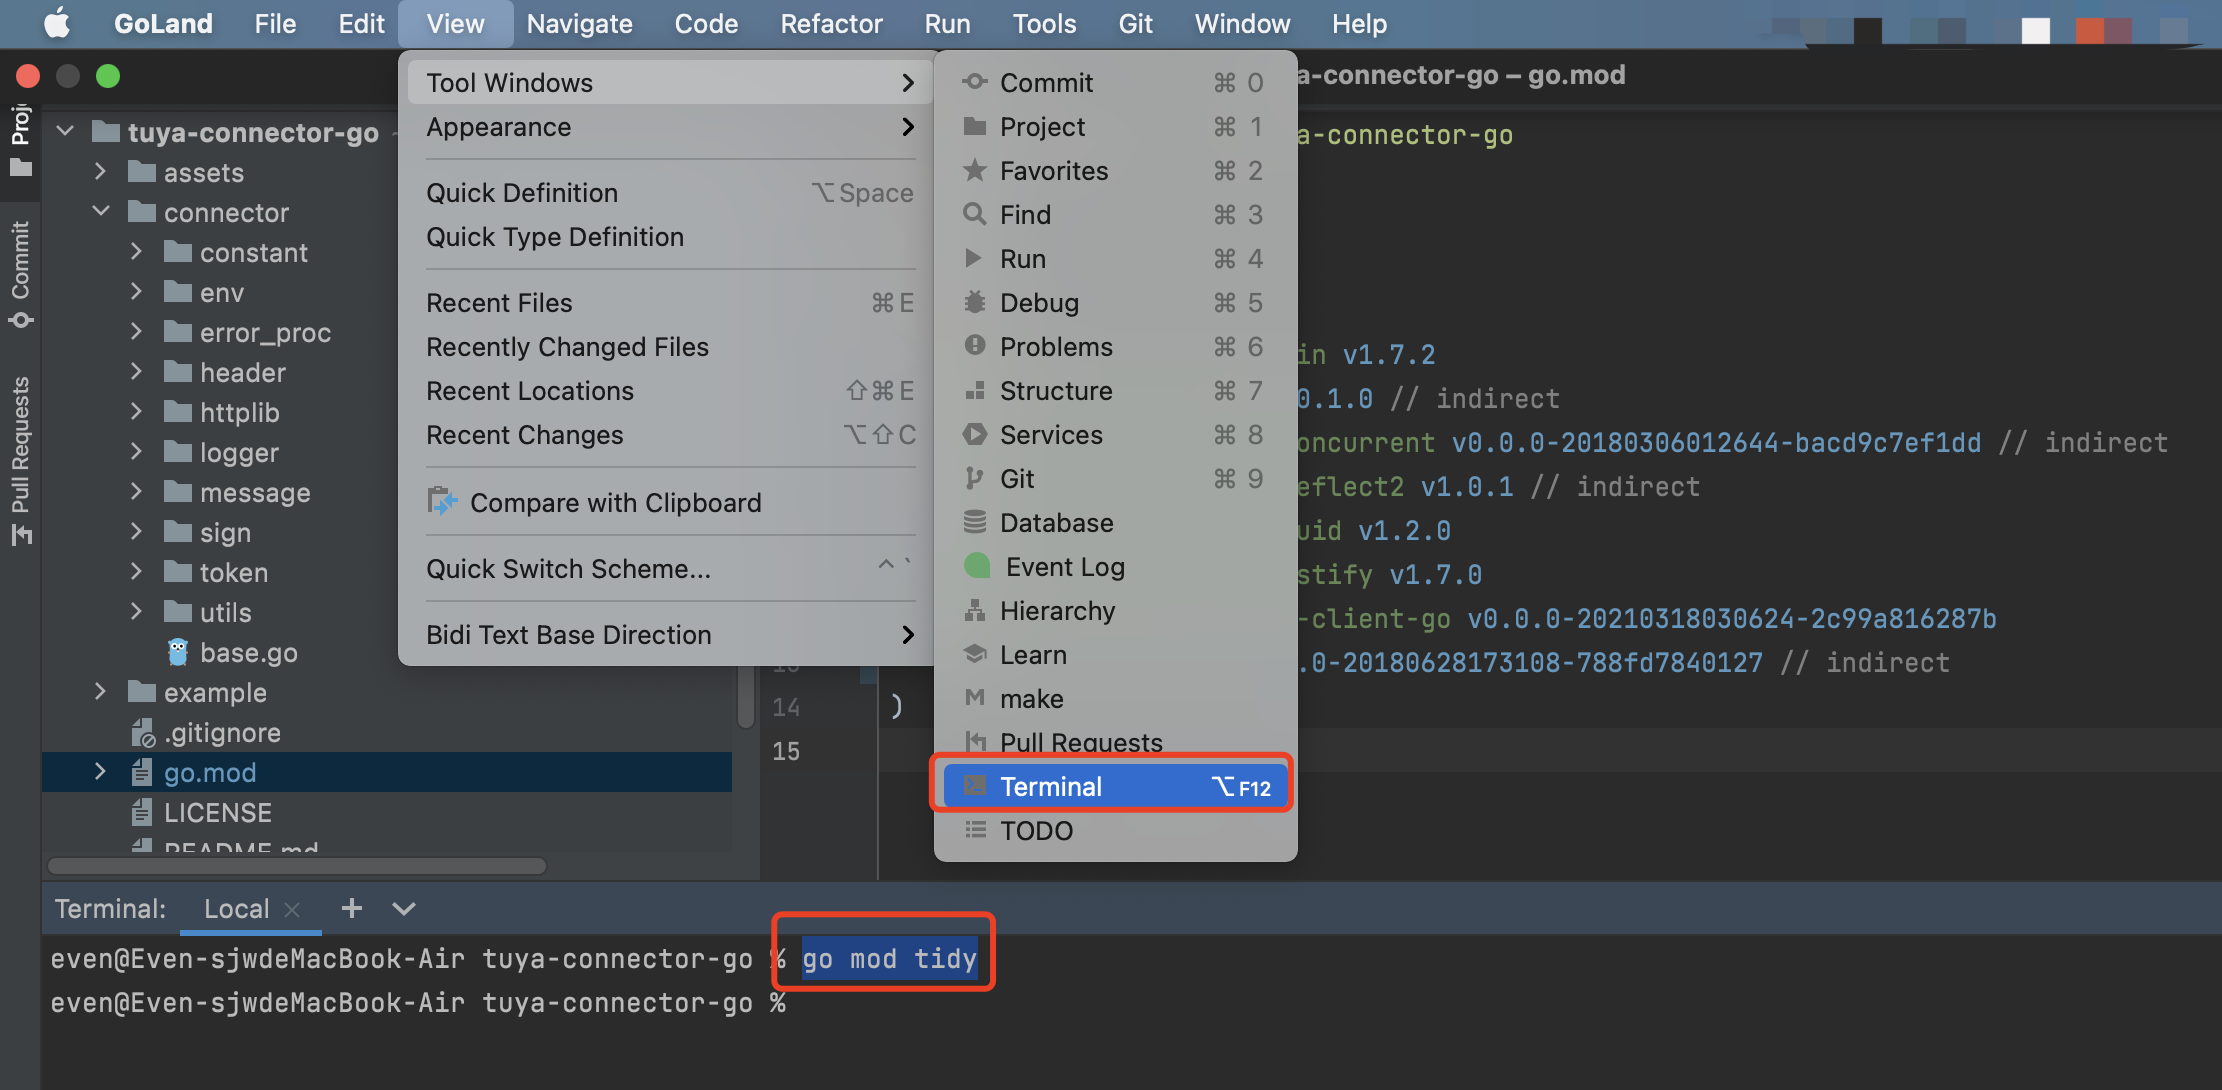
Choose View > Tool Windows > Terminal, open the terminal, and enter go mod tidy to download the dependency package. You can check the download status by viewing the go.mod file.
Step 2: Edit profile
Note: This topic uses custom environment variables.
Before development, you need to configure environment variables in example > main.go.
-
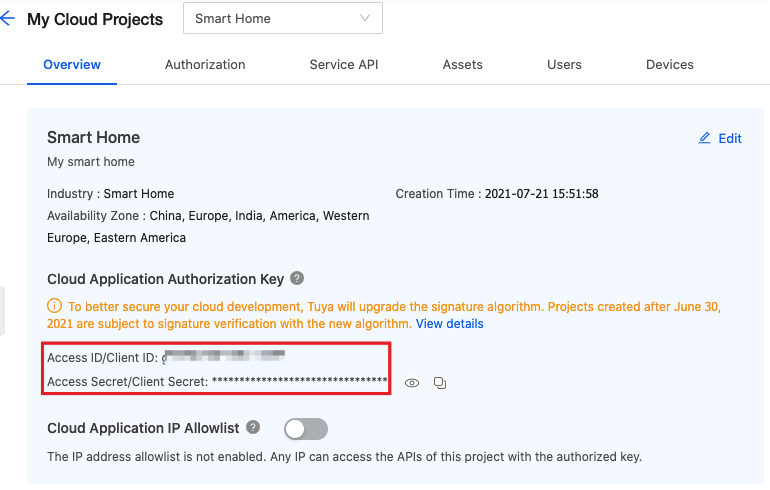
Go to the Tuya Developer Platform and select your cloud project. Click Overview and find the Cloud Application Authorization Key, including Access ID and Access Secret.
-
Configure environment variables in the
main.gofile.connector.InitWithOptions(env.WithApiHost(): the data center address of API requests.env.WithMsgHost(): the request address of message subscription.env.WithAccessID(): the Access ID in the authorization key.env.WithAccessKey(): the Access Secret in the authorization key.env.WithAppName(): the program name used to generate log files.
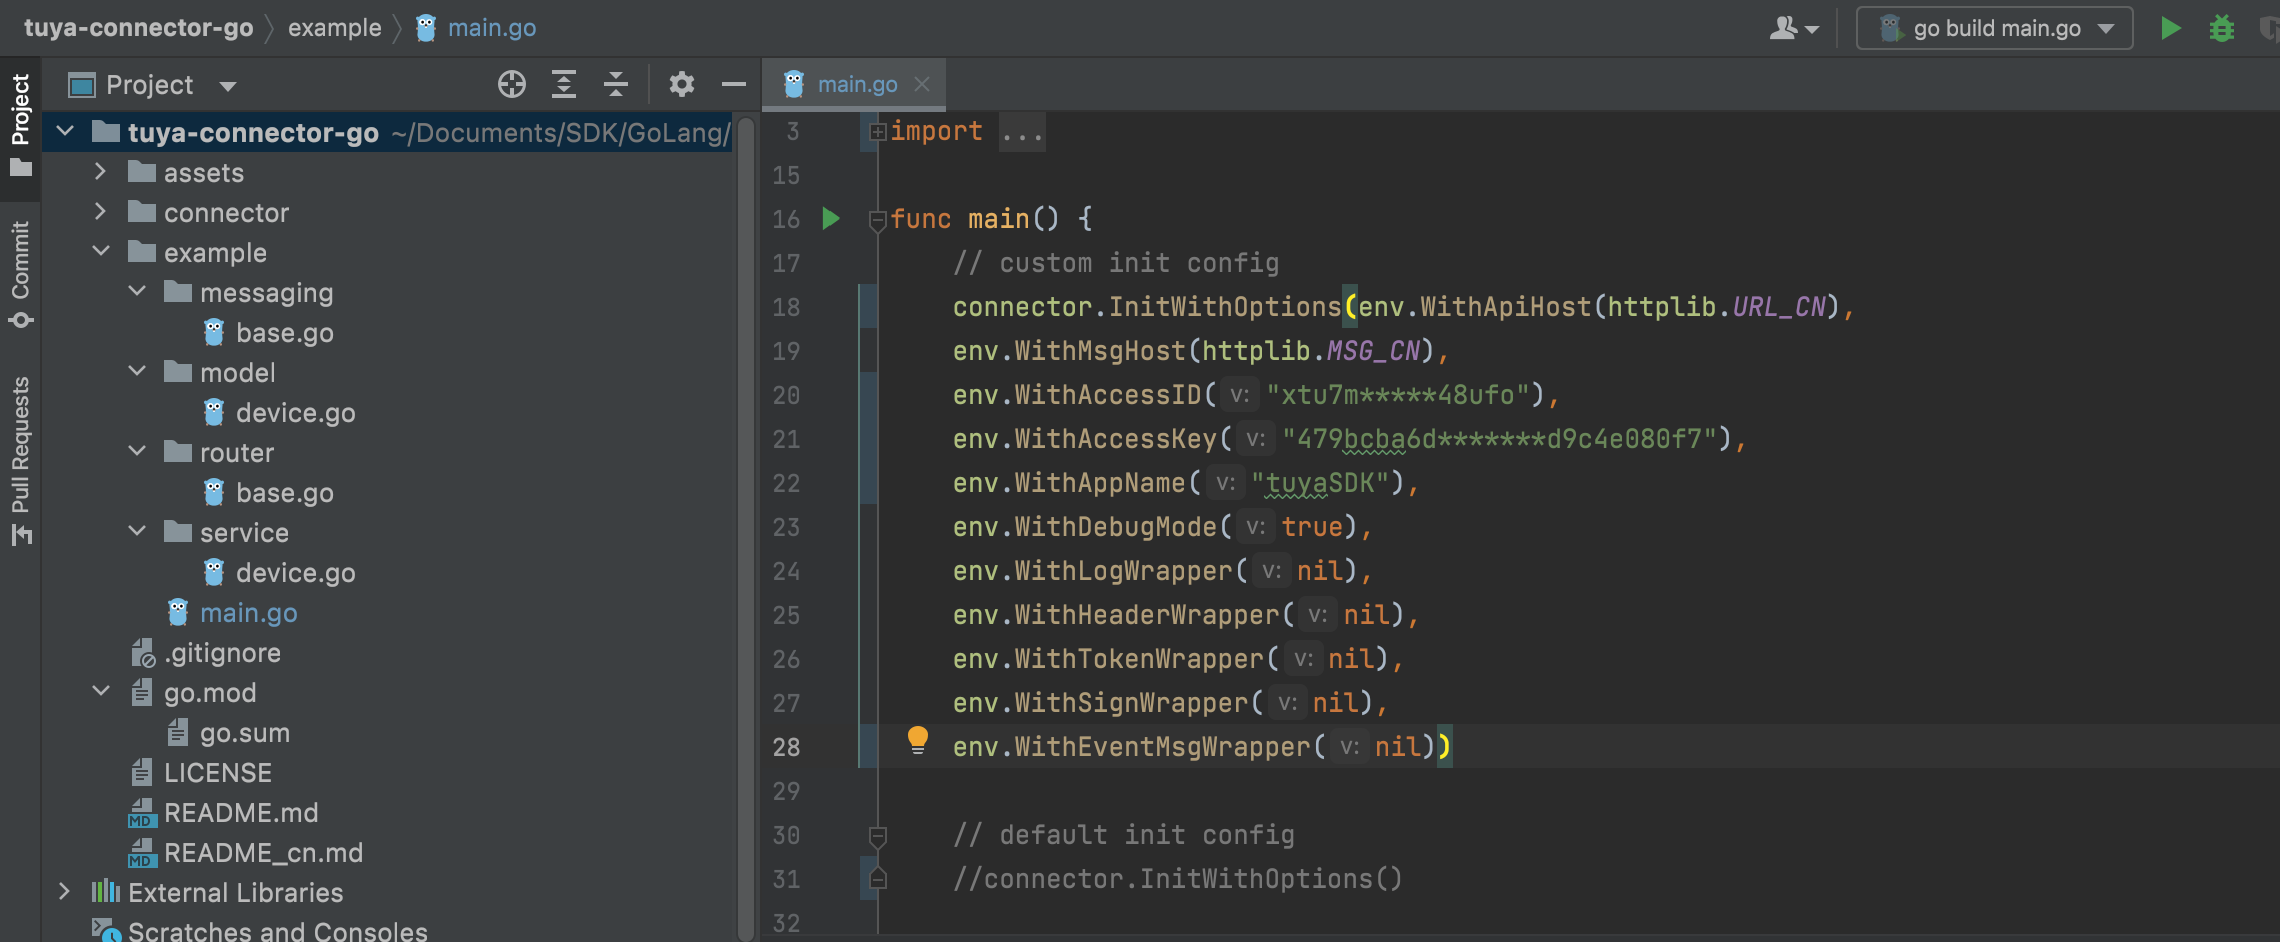
Sample code:
func main() { // Custom configuration connector.InitWithOptions(env.WithApiHost(httplib.URL_CN), env.WithMsgHost(httplib.MSG_CN), env.WithAccessID("xtu7m*****48ufo"), env.WithAccessKey("479bcba6d*******d9c4e080f7"), env.WithAppName("tuyaSDK"), env.WithDebugMode(true), env.WithLogWrapper(nil), env.WithHeaderWrapper(nil), env.WithTokenWrapper(nil), env.WithSignWrapper(nil), env.WithEventMsgWrapper(nil)) // Start the message subscription service go messaging.Listener() // Start the API service r := router.NewGinEngin() go r.Run("0.0.0.0:2021") watitSignal() } -
(Optional) Set environment variables, and read the configuration from the environment variables when the project starts. The default configuration is started in the project.
Environment variables:
export TUYA_API_HOST=https://xxxxx.com
export TUYA_ACCESSID=xxxxxx
export TUYA_ACCESSKEY=xxxxxxx
export TUYA_MSG_HOST=pulsar+ssl://xxxxxx
Project configuration:
func main() {
   // Default configuration
   connector.InitWithOptions()
   // Start the message subscription service
   go messaging.Listener()
   // Start the API service
   r := router.NewGinEngin()
   go r.Run("0.0.0.0:2021")
   watitSignal()
}
Step 3: Control device
After the environment is ready, you can start your coding journey.
Note: The strip lights are controlled in this example. The standard instruction for turning lights on or off is the
switch_led. If you want to control other devices, query the standard instruction set and modify the code.
-
Create OpenAPIs.
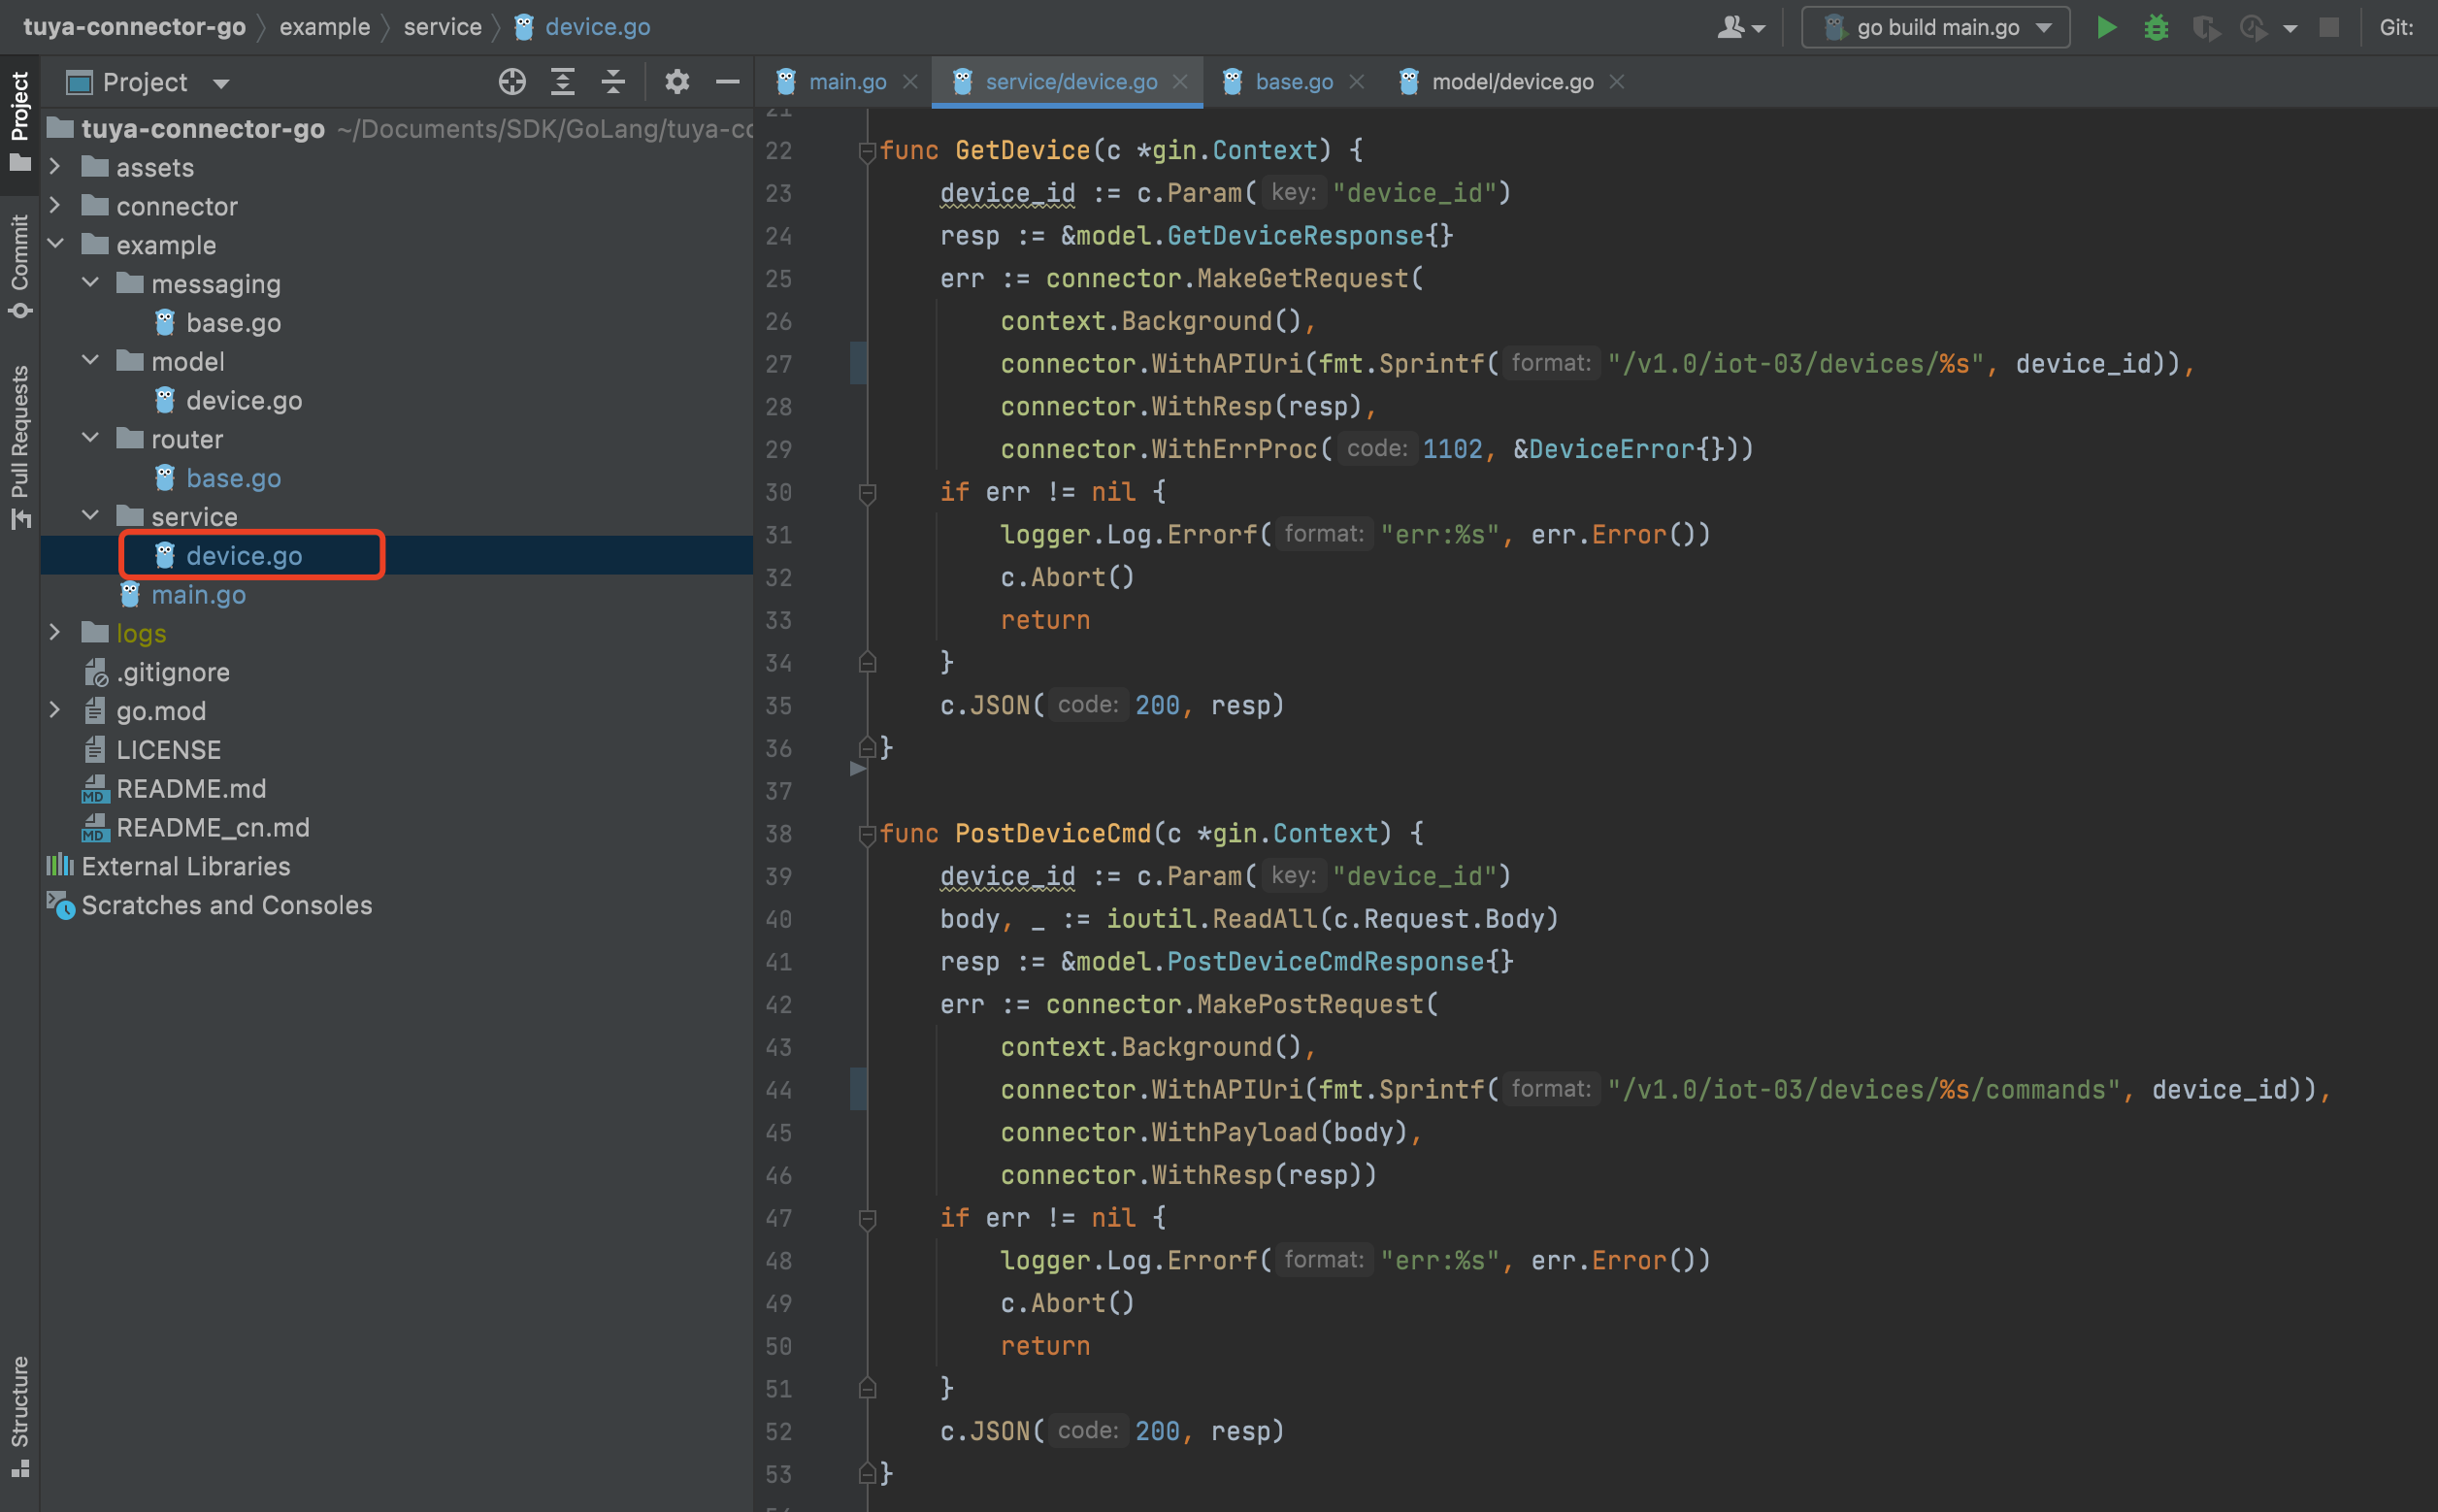
Sample code:
package service import ( "context" "fmt" "github.com/gin-gonic/gin" "github.com/tuya/tuya-connector-go/connector" "github.com/tuya/tuya-connector-go/connector/logger" "github.com/tuya/tuya-connector-go/example/model" "io/ioutil" ) type Response map[string]interface{} type DeviceError struct { } func (d *DeviceError) Process(ctx context.Context, code int, msg string) { logger.Log.Error(code, msg) } func GetDevice(c *gin.Context) { device_id := c.Param("device_id") resp := &model.GetDeviceResponse{} err := connector.MakeGetRequest( context.Background(), connector.WithAPIUri(fmt.Sprintf("/v1.0/iot-03/devices/%s", device_id)), connector.WithResp(resp), connector.WithErrProc(1102, &DeviceError{})) if err != nil { logger.Log.Errorf("err:%s", err.Error()) c.Abort() return } c.JSON(200, resp) } func PostDeviceCmd(c *gin.Context) { device_id := c.Param("device_id") body, _ := ioutil.ReadAll(c.Request.Body) resp := &model.PostDeviceCmdResponse{} err := connector.MakePostRequest( context.Background(), connector.WithAPIUri(fmt.Sprintf("/v1.0/iot-03/devices/%s/commands", device_id)), connector.WithPayload(body), connector.WithResp(resp)) if err != nil { logger.Log.Errorf("err:%s", err.Error()) c.Abort() return } c.JSON(200, resp) } -
Build the data structure returned by OpenAPI.
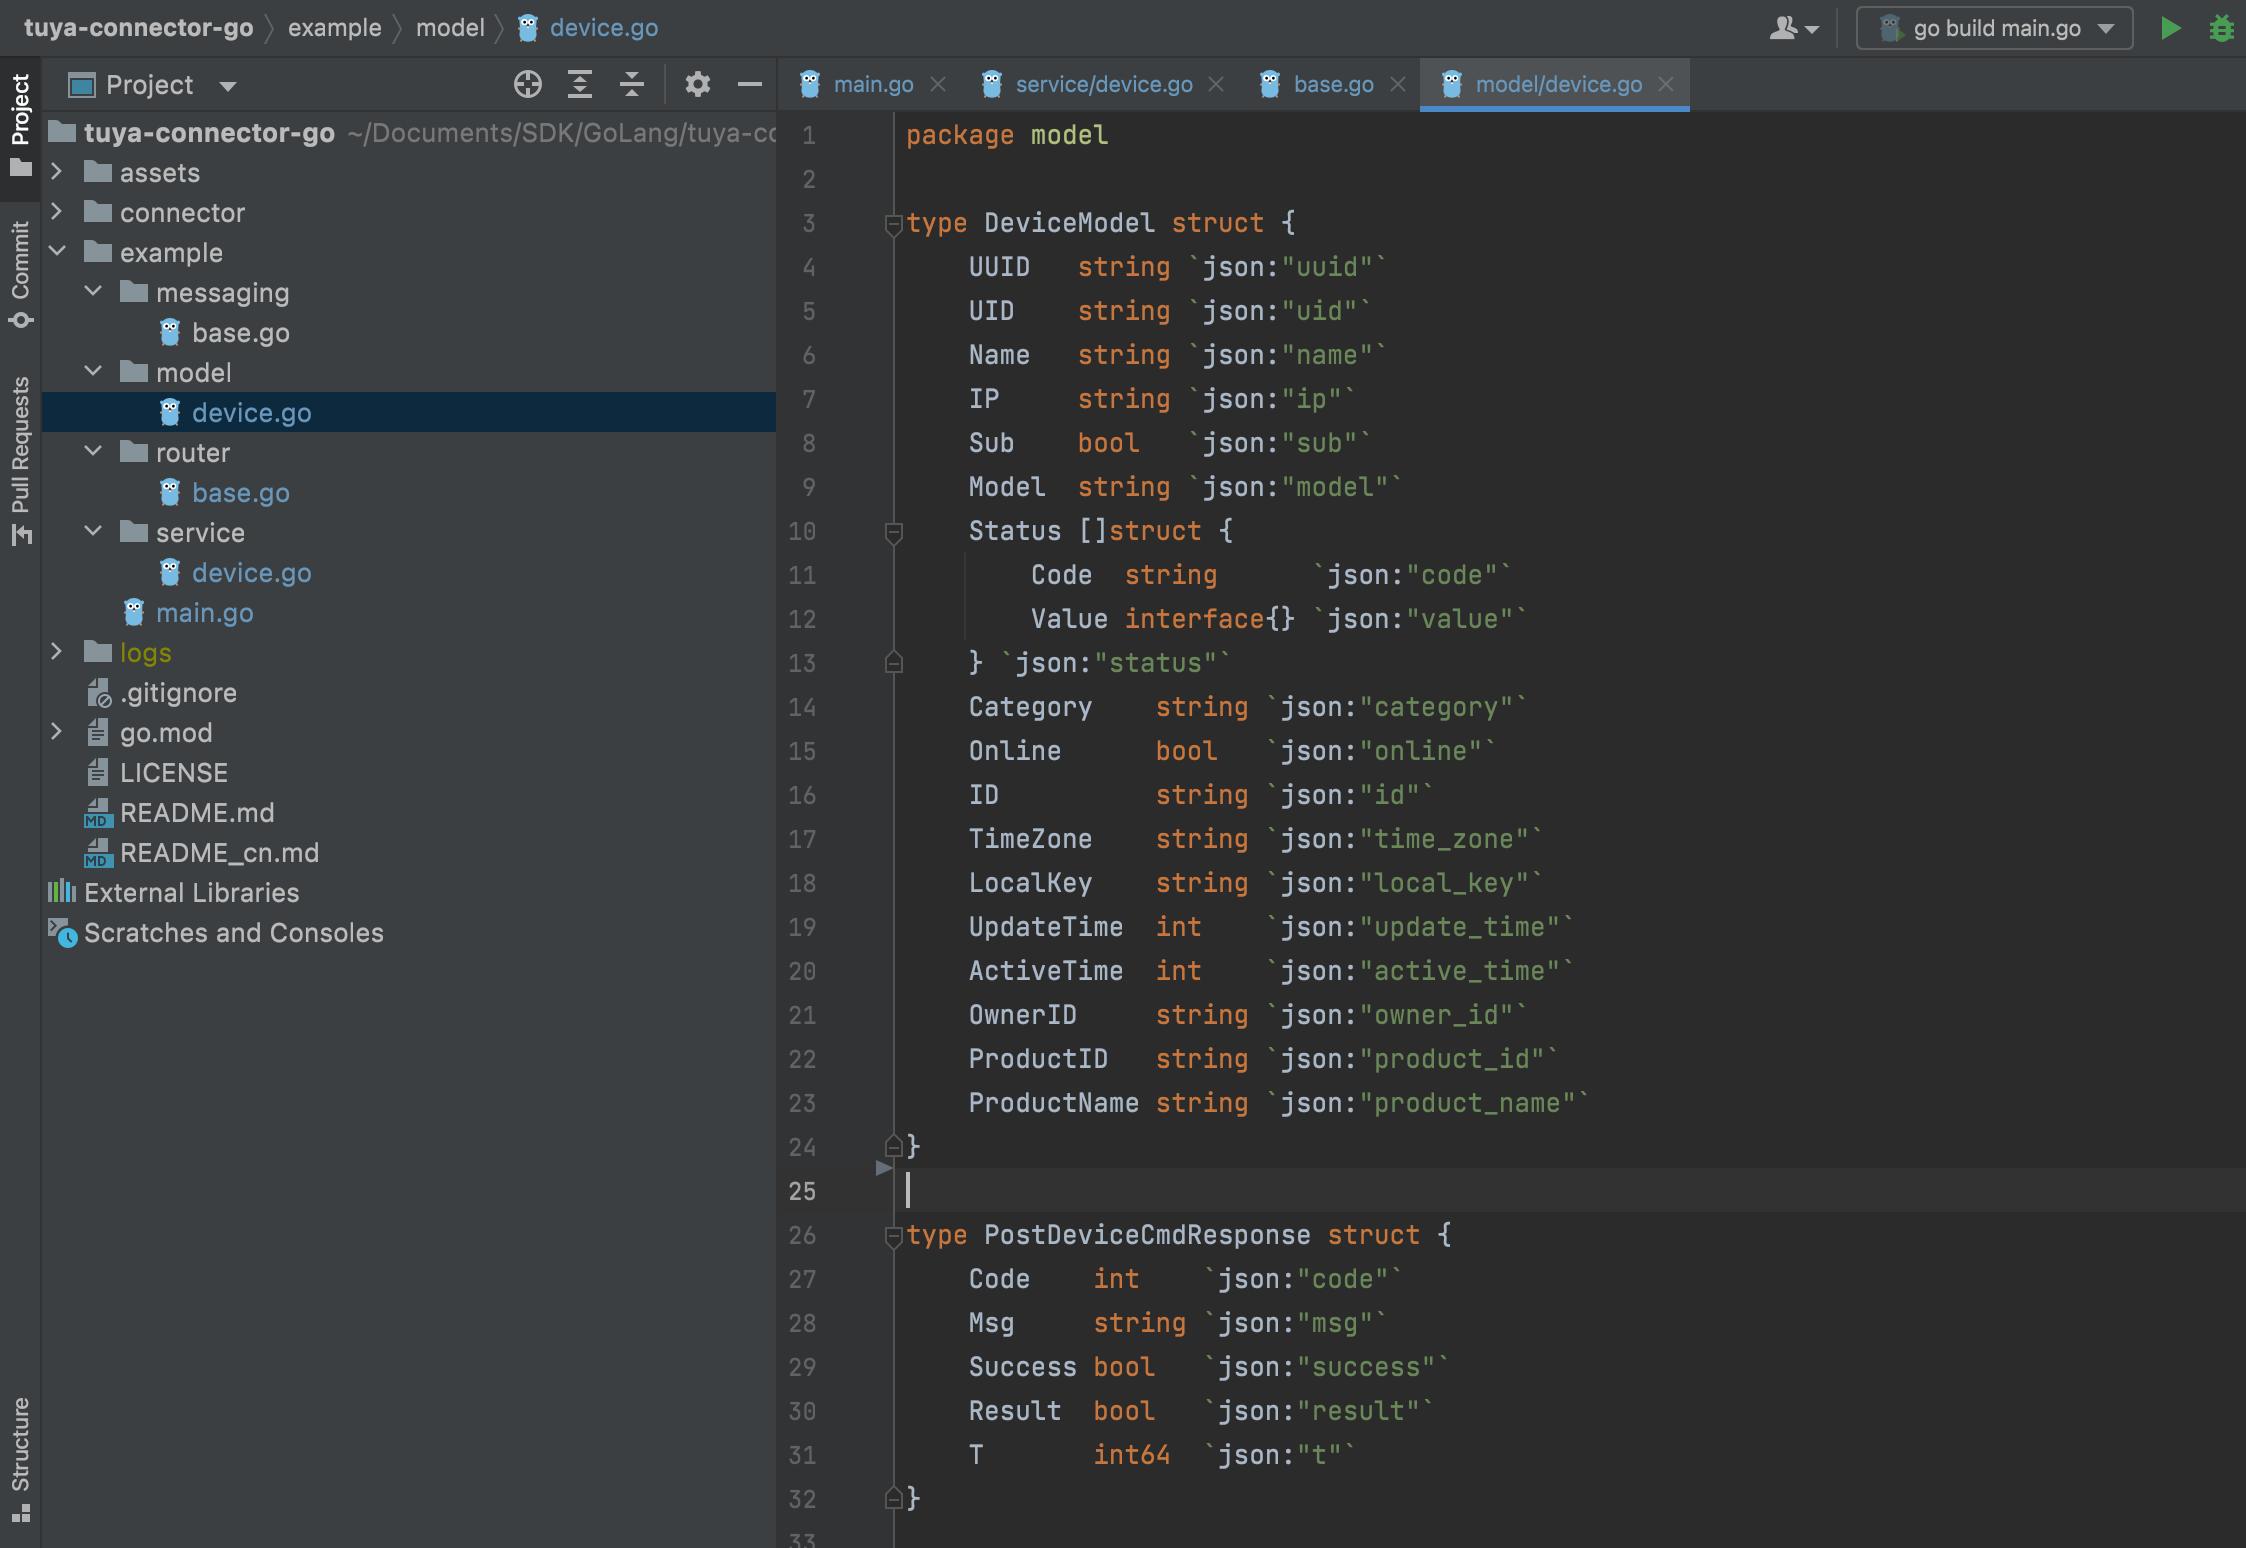
Sample code:
package model type DeviceModel struct { UUID string `json:"uuid"` UID string `json:"uid"` Name string `json:"name"` IP string `json:"ip"` Sub bool `json:"sub"` Model string `json:"model"` Status []struct { Code string `json:"code"` Value interface{} `json:"value"` } `json:"status"` Category string `json:"category"` Online bool `json:"online"` ID string `json:"id"` TimeZone string `json:"time_zone"` LocalKey string `json:"local_key"` UpdateTime int `json:"update_time"` ActiveTime int `json:"active_time"` OwnerID string `json:"owner_id"` ProductID string `json:"product_id"` ProductName string `json:"product_name"` } type GetDeviceResponse struct { Code int `json:"code"` Msg string `json:"msg"` Success bool `json:"success"` Result DeviceModel `json:"result"` T int64 `json:"t"` } type PostDeviceCmdResponse struct { Code int `json:"code"` Msg string `json:"msg"` Success bool `json:"success"` Result bool `json:"result"` T int64 `json:"t"` } -
Perform debugging.
-
Use
ginto create a route.
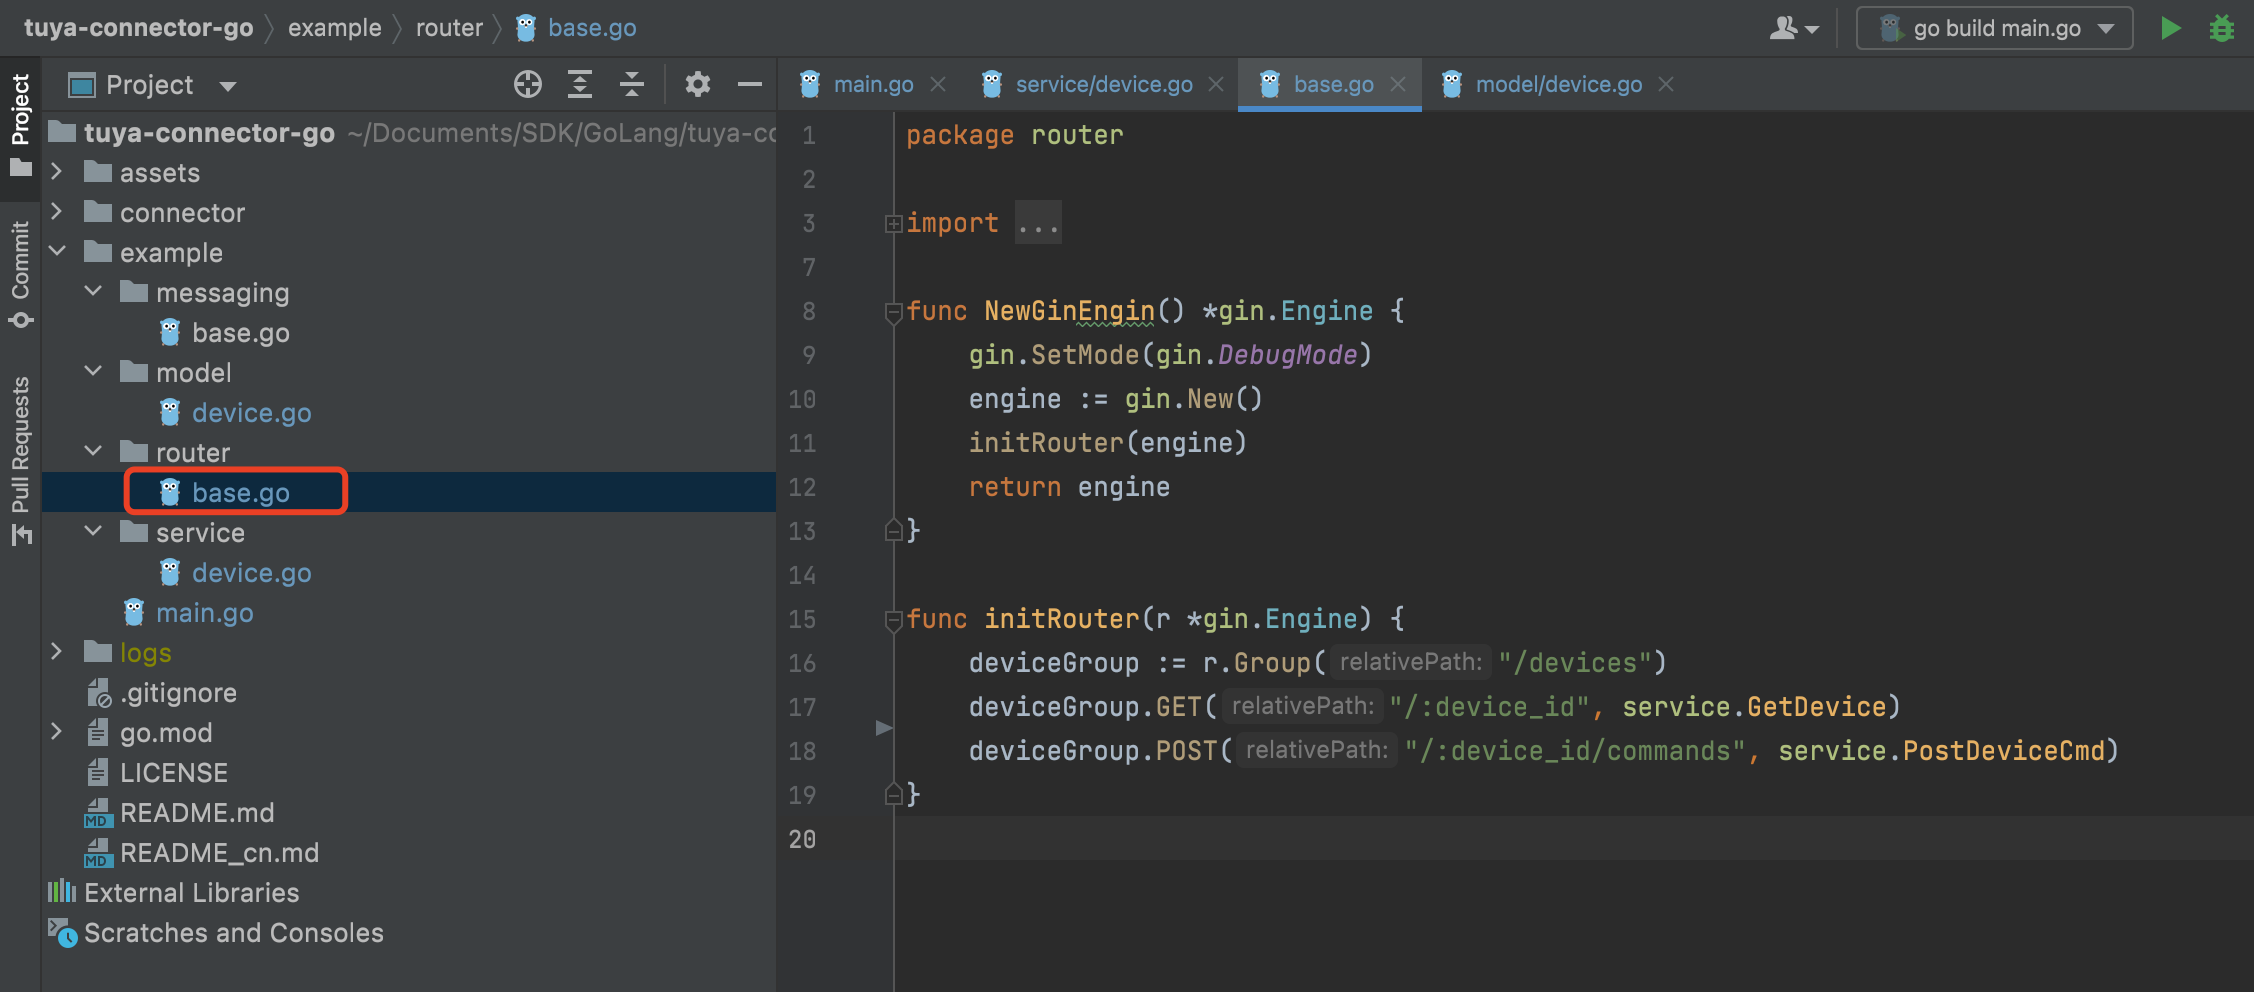
Sample code:
package router import ( "github.com/gin-gonic/gin" "github.com/tuya/tuya-connector-go/example/service" ) func NewGinEngin() *gin.Engine { gin.SetMode(gin.DebugMode) engine := gin.New() initRouter(engine) return engine } func initRouter(r *gin.Engine) { deviceGroup := r.Group("/devices") deviceGroup.GET("/:device_id", service.GetDevice) deviceGroup.POST("/:device_id/commands", service.PostDeviceCmd) } -
View results.
-
Get device information
With a browser, you can make API calls to get device information. In this example, Chrome browser is used.
The request address is http://127.0.0.1:2021/devices/{device ID}.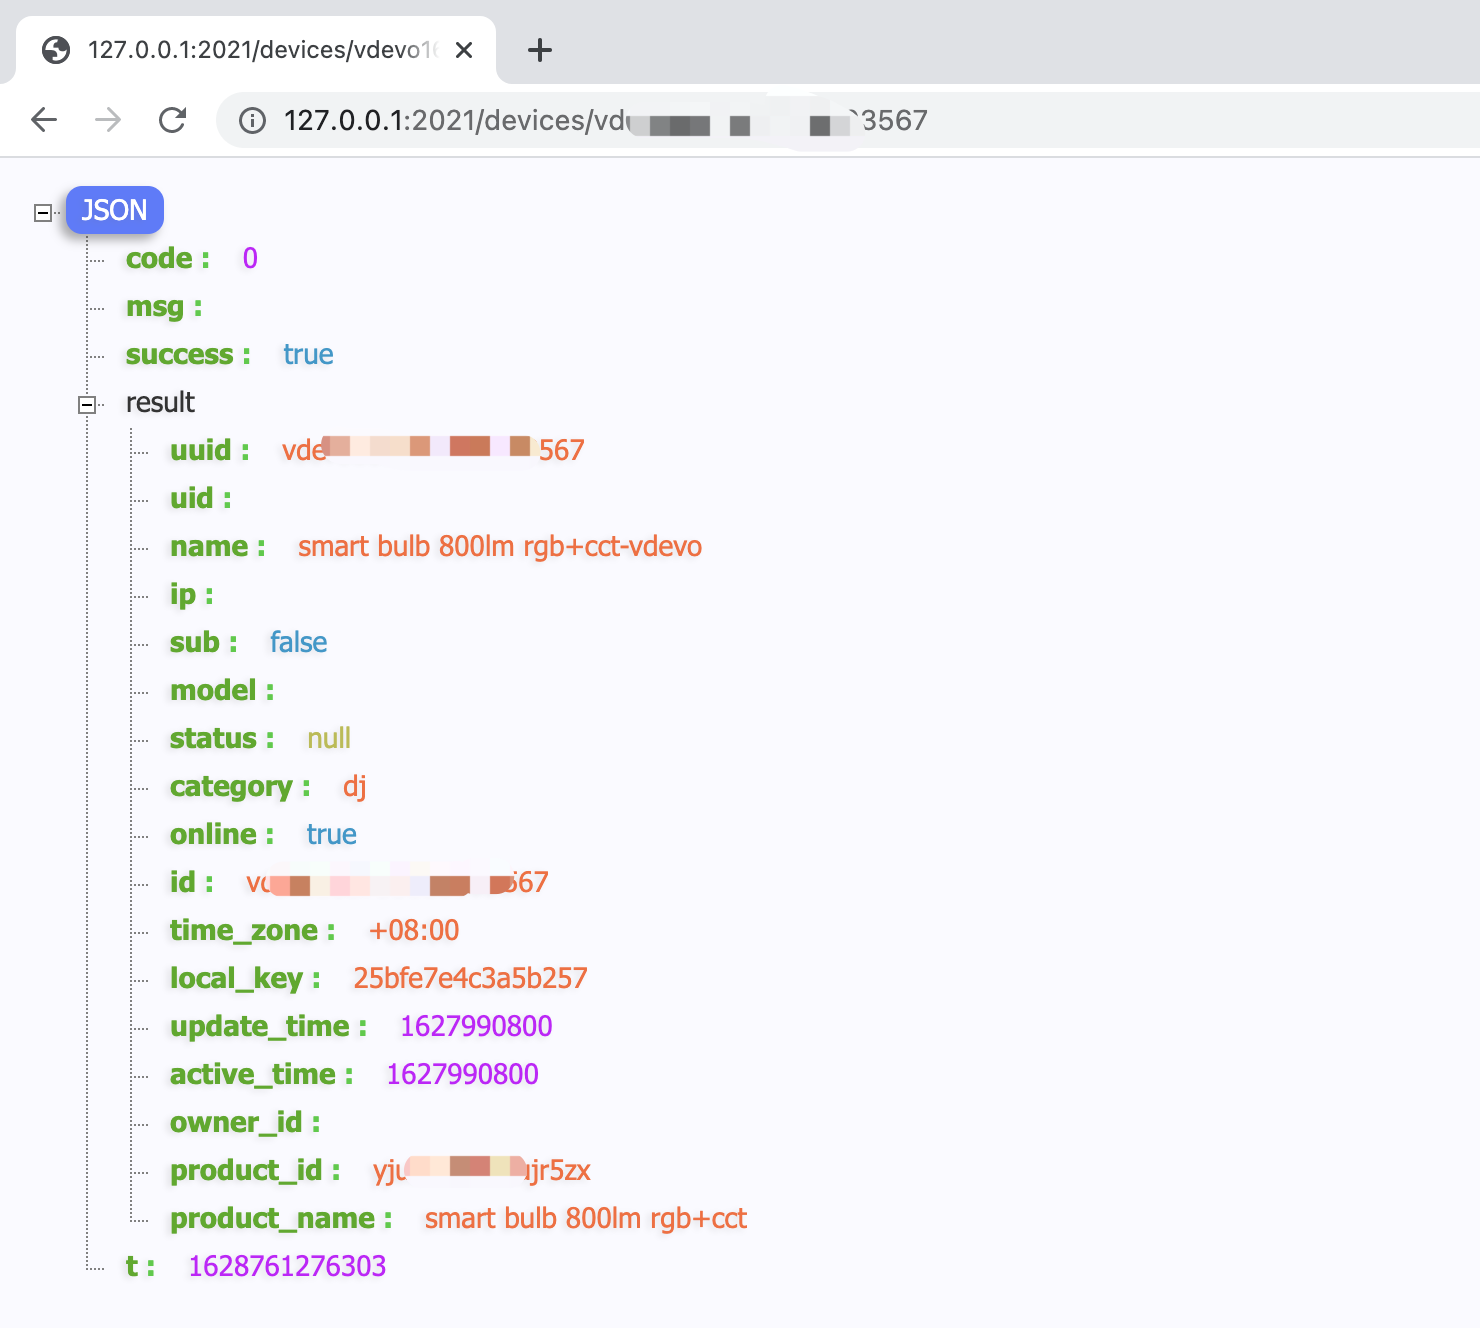
Program log printing:
```json /v1.0/iot-03/devices/vdev******03567 2021/08/12 17:41:16 2021-08-12 17:41:16 [connector/base.go:68] [INFO] -> [ProxyHttp] success req:&{GET https://openapi.tuyacn.com/v1.0/iot-03/devices/vdev******03567 0 0 map[Access_token:[452f6864c1c5b0cf88155ff59a8fde48] Client_id:[xtu7******zk48ufo] Content-Type:[application/json] Dev_channel:[SaaSFramework] Dev_lang:[golang] Nonce:[a92f488e-d54d-4809-bce2-2404fa95510b] Sign:[46199E5CDFC290FCDD9D1CF4C90AA9AE110B2BE7A26242C0B7CB4F7315AE7EF3] Sign_method:[HMAC-SHA256] T:[1628761276116]] <nil> <nil> 0 [] false map[] map[] <nil> map[] <nil> <nil> <nil> <nil>}, resp:&{Code:0 Msg: Success:true Result:{UUID:vdev******03567 UID: Name:smart bulb 800lm rgb+cct-vdevo IP: Sub:false Model: Status:[] Category:dj Online:true ID:vdev******03567 TimeZone:+08:00 LocalKey:25bfe7******b257 UpdateTime:1627990800 ActiveTime:1627990800 OwnerID: ProductID:yju2e*****jr5zx ProductName:smart bulb 800lm rgb+cct} T:1628761276303} ``` -
Send instructions
With the POST method, you can use the terminal to run the Curl command on macOS, or follow the
curlenvironment rules and run the CMD command on Windows.Run the command:
curl http://127.0.0.1:2021/devices/device ID/commands -d '{"commands":[{"code":"switch_led","value":true}]}'
Program log printing:
```json
/v1.0/iot-03/devices/vdev******03567/commands
2021/08/12 17:53:18 2021-08-12 17:53:18 [connector/base.go:74] [INFO] -> [ProxyHttp] success req:&{POST https://openapi.tuyacn.com/v1.0/iot-03/devices/vdev******03567/commands  0 0 map[Access_token:[452f6864c1c5b0cf88155ff59a8fde48] Client_id:[xtu7******zk48ufo] Content-Type:[application/json] Dev_channel:[SaaSFramework] Dev_lang:[golang] Nonce:[210a6d2d-dd8e-41c4-b993-bfdf7f4e9ae7] Sign:[7989C4B8A2FCFA1D44FDBBD2E7537202352645CDC1C9C90C62F4803EFE5ABC10] Sign_method:[HMAC-SHA256] T:[1628761998388]] {} <nil> 0 [] false  map[] map[] <nil> map[]   <nil> <nil> <nil> <nil>}, resp:&{Code:0 Msg: Success:true Result:true T:1628761998619}
```
-
-
Step 4: Publish and subscribe to messages
The code implements the interface for message publishing in the connector framework. The dispatcher features message ordering and data decryption. This allows you to create specific message types and publish messages based on Spring’s event mechanism.
Note: The Message Service is required to enable this feature. For more information, see Subscribe to API services.
-
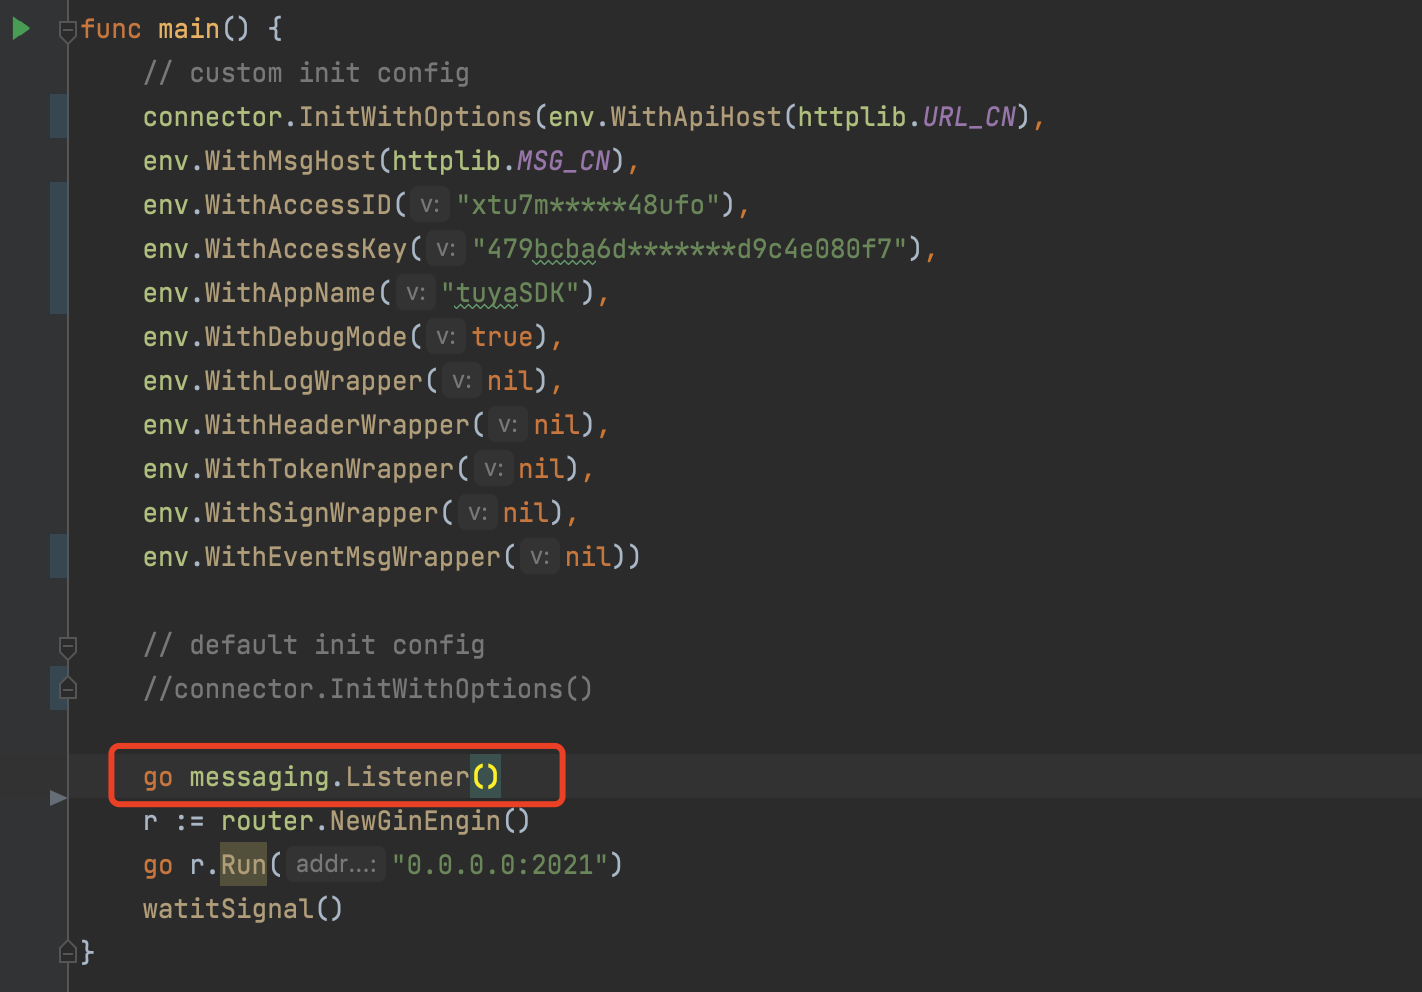
When initializing the application, add the go messaging.Listener() service.
-
Subscribe to message events
You need to add the specified EventMessage events. The framework includes all Tuya’s cloud message event types. The message data contains ciphertext messages and plaintext messages.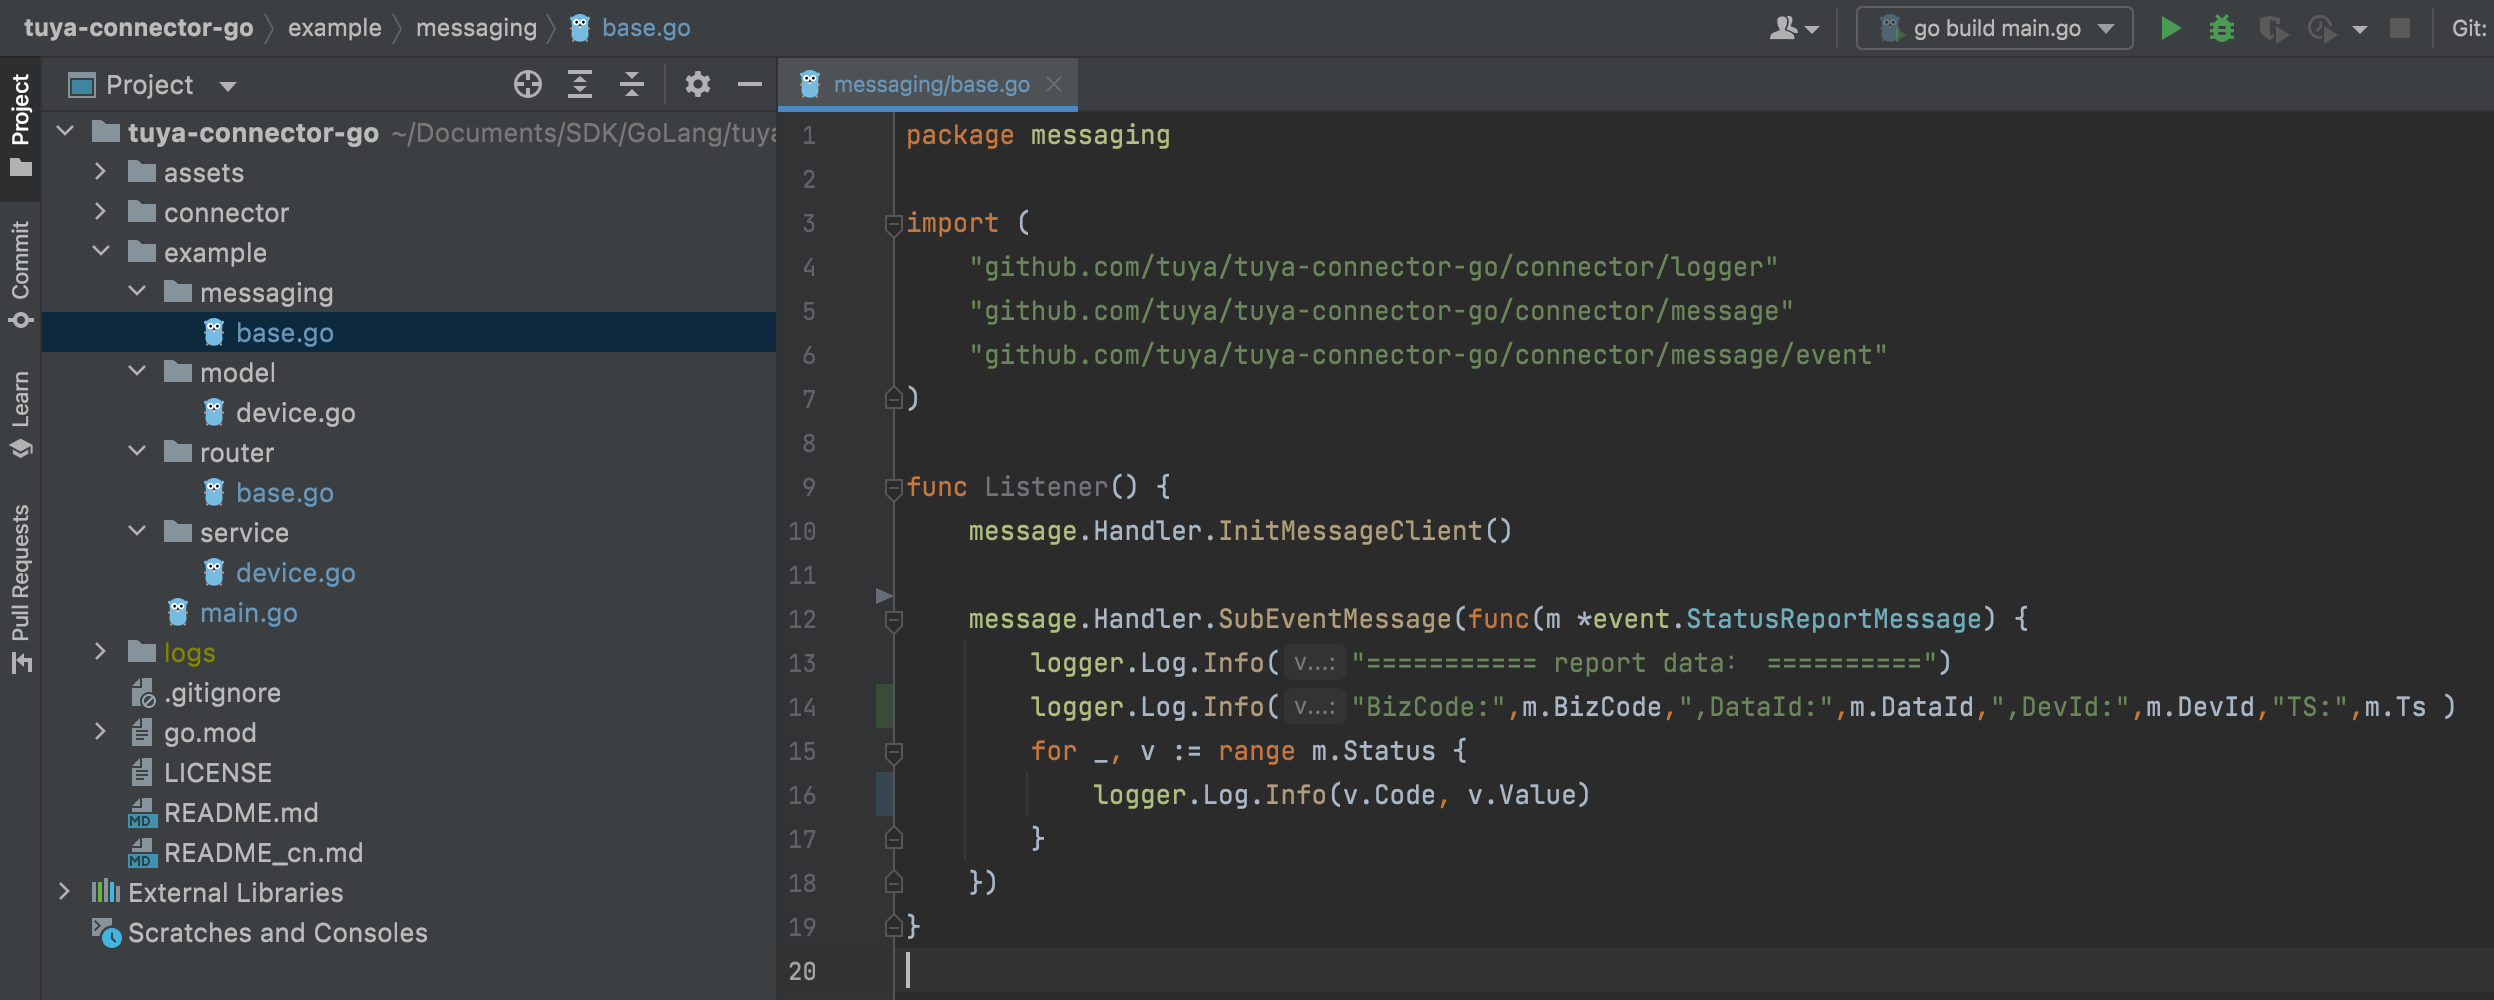
Sample code:
package messaging

import (
	"github.com/tuya/tuya-connector-go/connector/logger"
	"github.com/tuya/tuya-connector-go/connector/message"
	"github.com/tuya/tuya-connector-go/connector/message/event"
)

func Listener() {
	message.Handler.InitMessageClient()

	message.Handler.SubEventMessage(func(m *event.StatusReportMessage) {
		logger.Log.Info("=========== report data: ==========")
		logger.Log.Info("BizCode:",m.BizCode,",DataId:",m.DataId,",DevId:",m.DevId,"TS:",m.Ts )
		for _, v := range m.Status {
			logger.Log.Info(v.Code, v.Value)
		}
	})
}
Sample response
2021/08/12 18:06:55 2021-08-12 18:06:55 [./.:0] [DEBUG] -> consumer receive message, topic=persistent://xtu7******zk48ufo/out/event-partition-41
2021/08/12 18:06:55 2021-08-12 18:06:55 [message/consumer.go:50] [DEBUG] -> Handler trace info, msgID=ledgerId:29139952 entryId:20 partition:41  , topic=persistent://xtu7******zk48ufo/out/event-partition-41 , decode spend=7µs , Unactive spend=583ns , ConsumerID spend=583ns , HandlePayload spend=7.875µs , Ack spend=60.959µs , total spend=104.292µs
2021/08/12 18:06:55 2021-08-12 18:06:55 [reflect/value.go:337] [INFO] -> =========== report data: ==========
2021/08/12 18:06:55 2021-08-12 18:06:55 [reflect/value.go:337] [INFO] -> BizCode: statusReport ,DataId: 05af79e2-fb55-11eb-8396-02425b0322e7 ,DevId: vdev******03567 TS: 0
2021/08/12 18:06:55 2021-08-12 18:06:55 [reflect/value.go:337] [INFO] -> switch_led true
Conclusion
Based on the description of the SDK for Go on top of the Tuya Developer Platform, you can call device APIs to control smart devices and listen for device status. Thanks to the standard ecosystem of devices, you can extend this control method to all devices of Tuya’s ecosystem, and accelerate your SaaS development based on smart devices without regard to device differences.
Is this page helpful?
YesFeedbackIs this page helpful?
YesFeedback


