Add Virtual Device
At the beginning of development, if you have not purchased a 'Powered by Tuya' device, you can use the virtual device feature on the Tuya Developer Platform to try out the IoT-enabled product you have created.
Prerequisites
You have already created cloud projects and you have added assets.
Procedure
The asset management feature has been unavailable starting from June 20, 2023. We recommend that you build project SaaS to manage users under the project. If you still want to use this feature, go to the Cloud Project Asset Management.
-
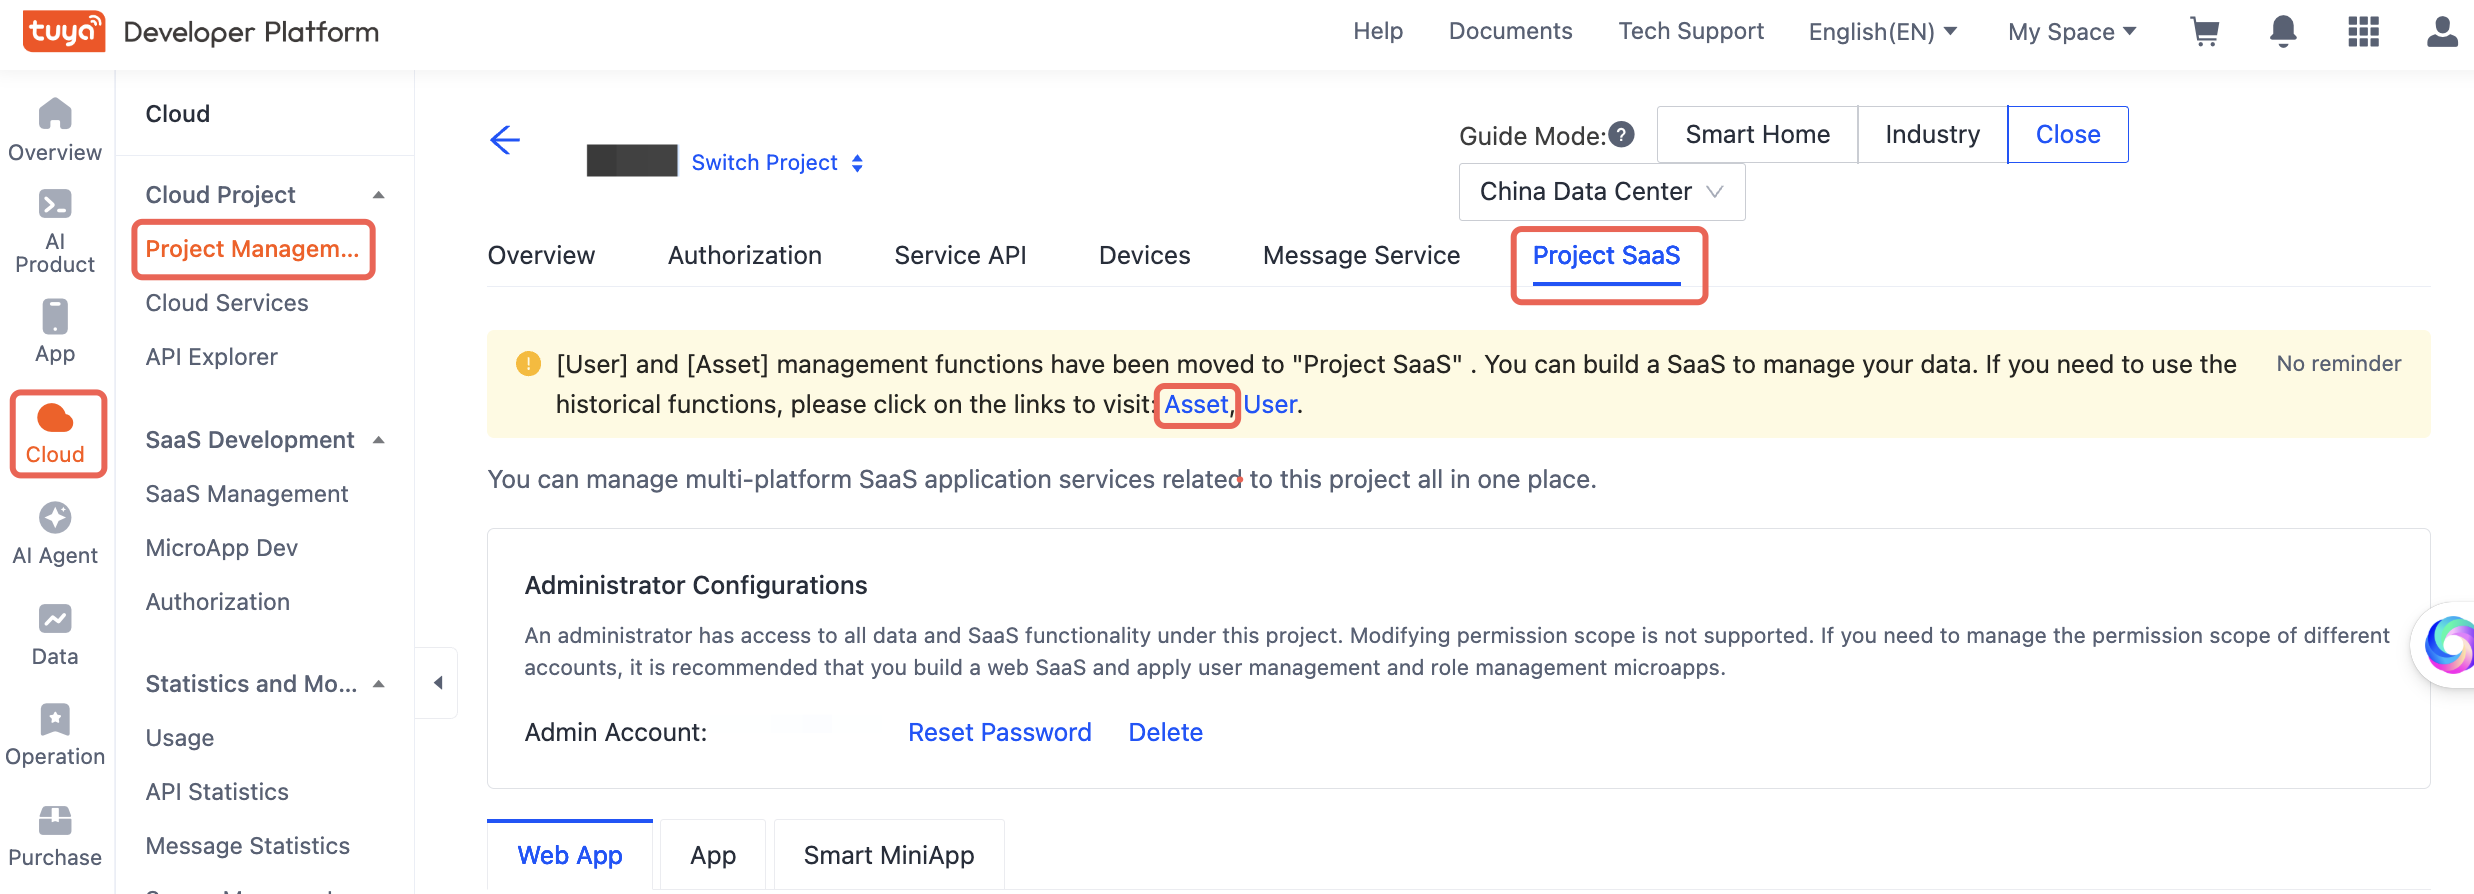
Log in to the Tuya Developer Platform. In the left navigation bar, click Cloud > Project Management, and then click the target project.
-
Click the Project SaaS tab on the top, and then you can see a prompt message about function migration. Click Asset in the prompt (or you can visit Cloud Project Asset Management) and then select the target asset on the Asset page.

-
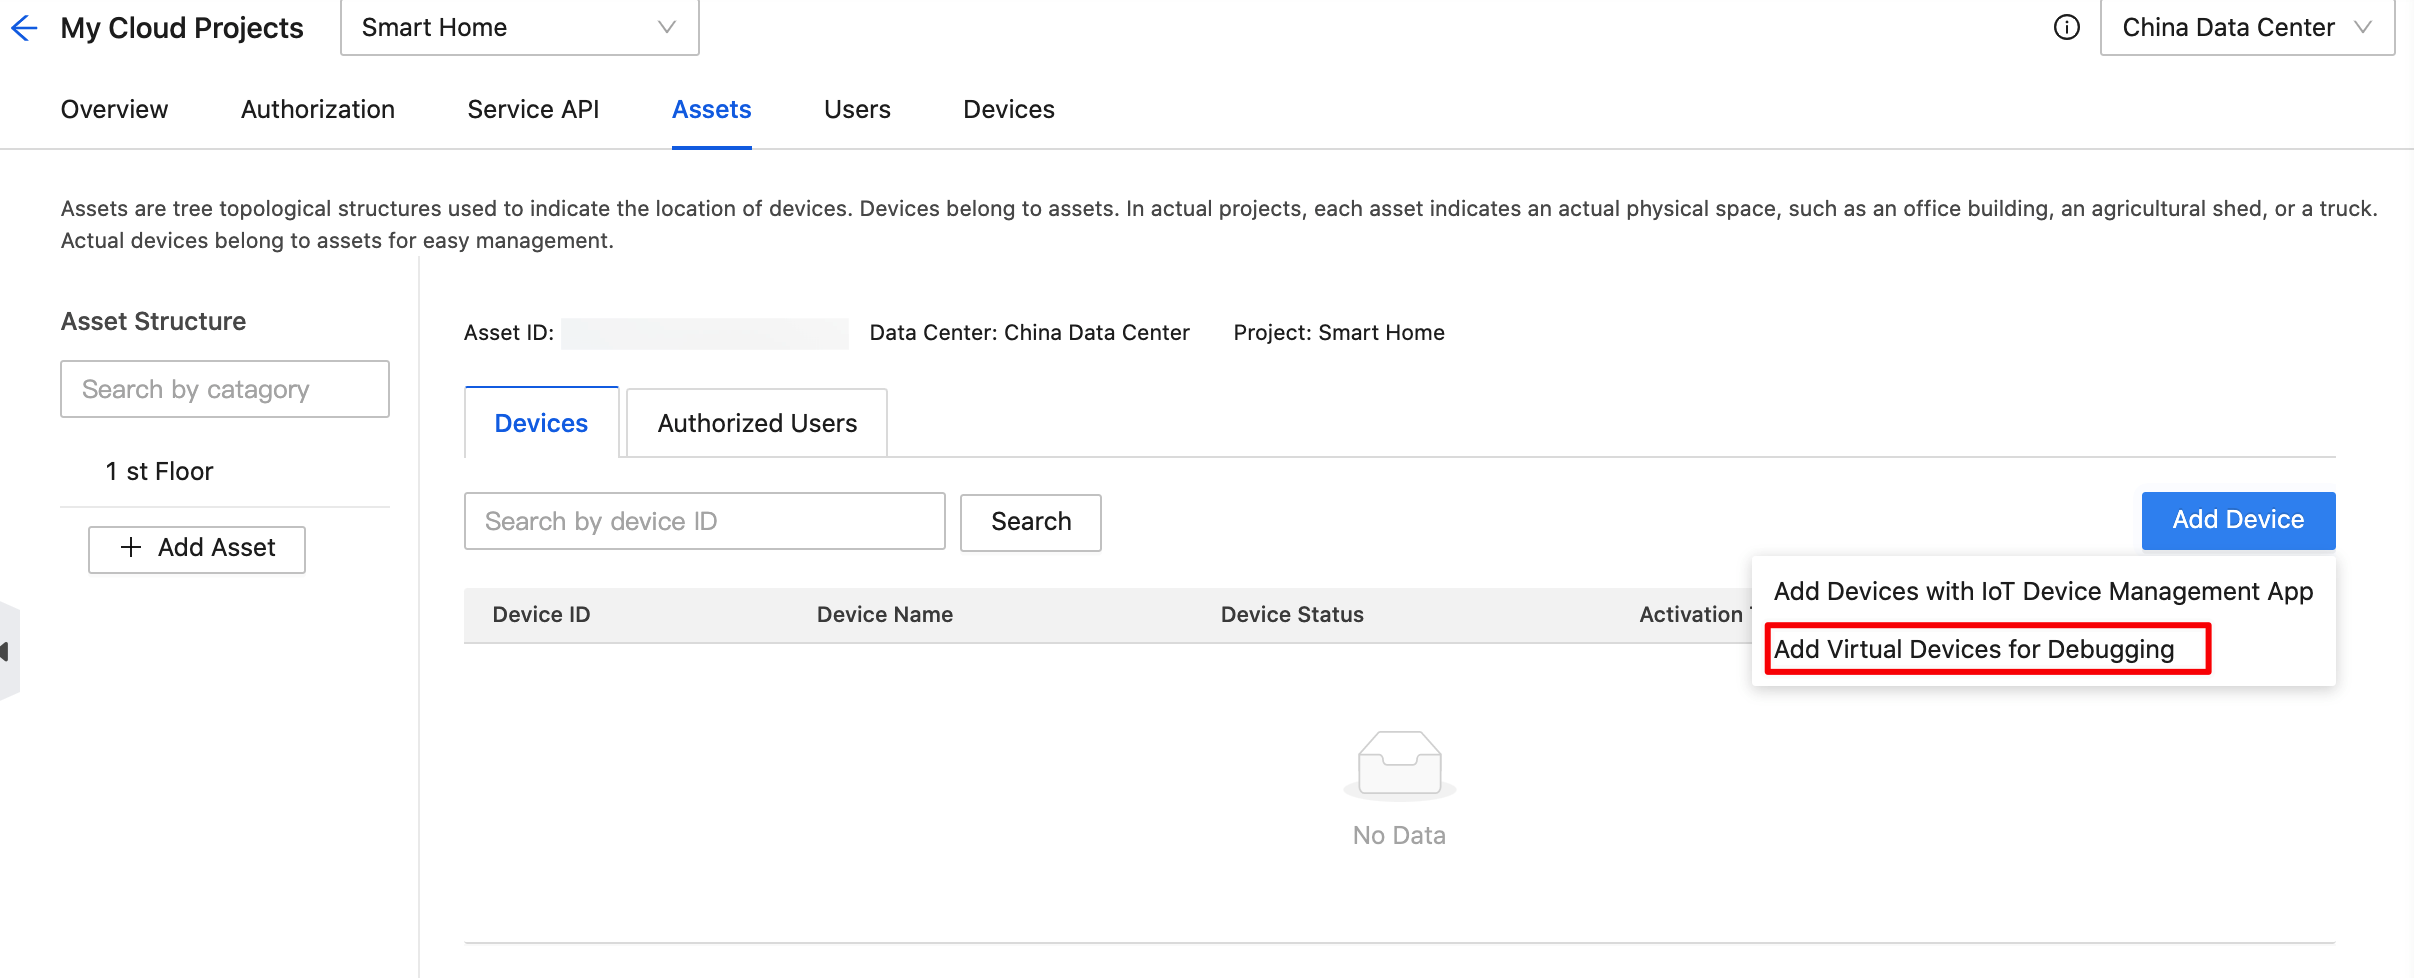
Place the pointer over Add Device and then select Add Virtual Devices for Debugging.
-
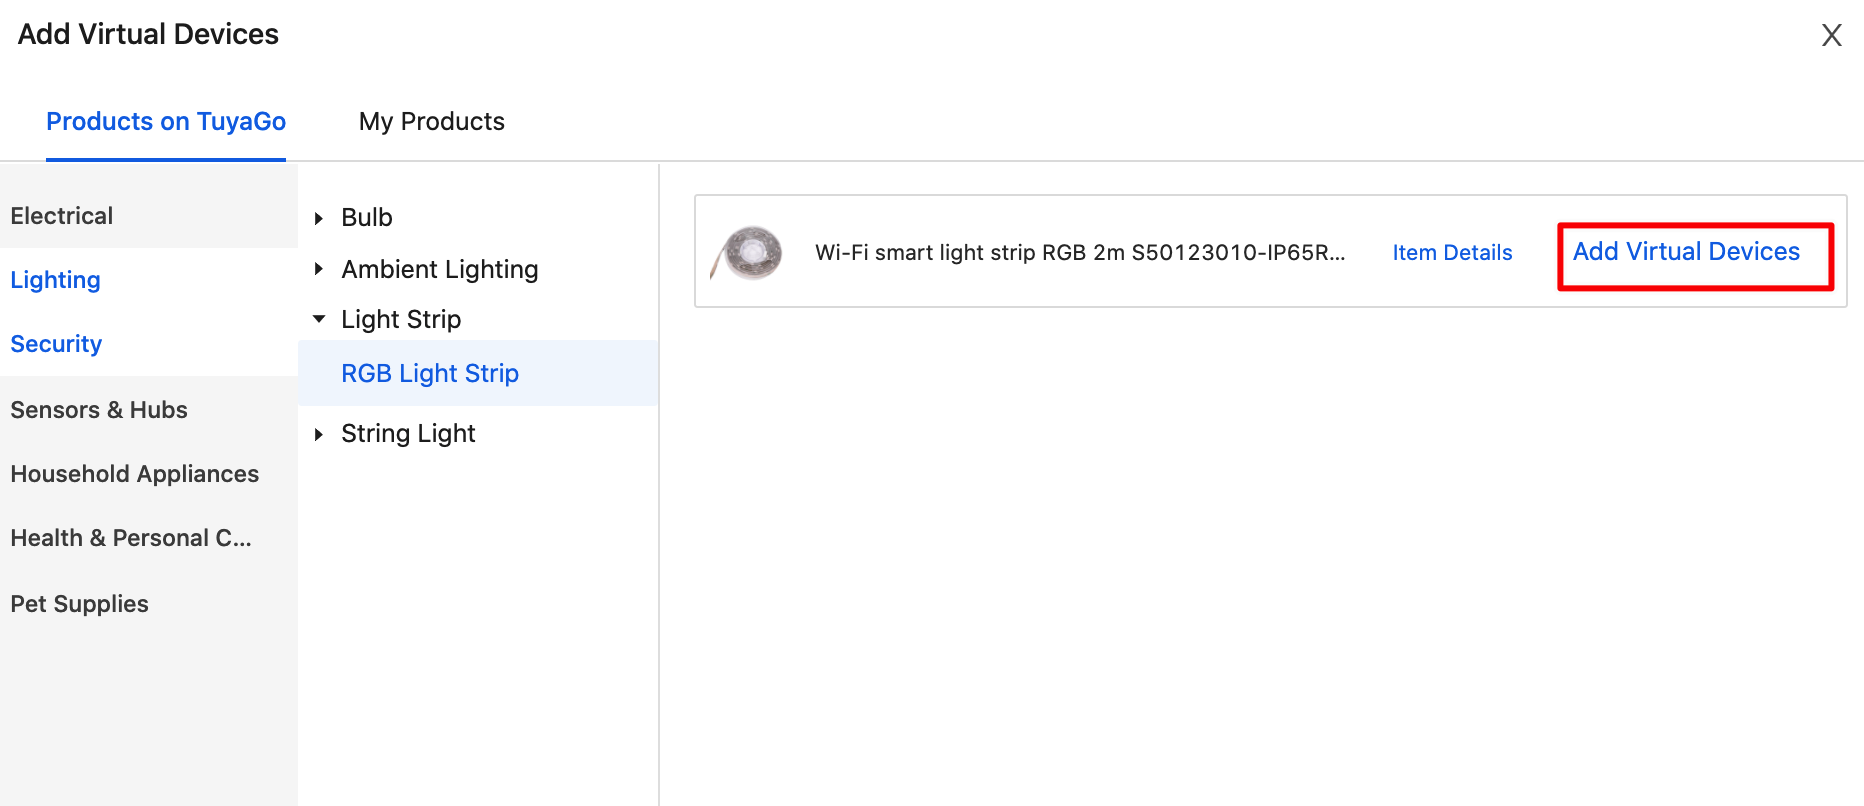
Among all products in Products on TuyaGo and My Products, select the target device and click Add Virtual Devices.
image.pngProducts on TuyaGo are the hot-selling 'Powered by Tuya' devices recommended by Tuya. You can click Item Details to navigate to the purchase page of the device. My Products are the products you have created on the Tuya Developer Platform. Before you get the actual product, you can use the virtual device for debugging.
-
After adding a virtual device, close the pane of Add Virtual Devices. You can view your added devices in Devices under the tab of Assets.
Next steps
After adding a device, you can click Debug Device to simulate your real business scenarios. You can send commands to control the device to check if it can run properly.
Alternatively, you can choose an SDK to develop IoT services.
Is this page helpful?
YesFeedbackIs this page helpful?
YesFeedback


