Cloud-to-Cloud Integration
This topic describes how to connect your smart devices to the Tuya Developer Platform through TuyaLink-based cloud-to-cloud integration.
Concepts
Cloud-to-Cloud Integration
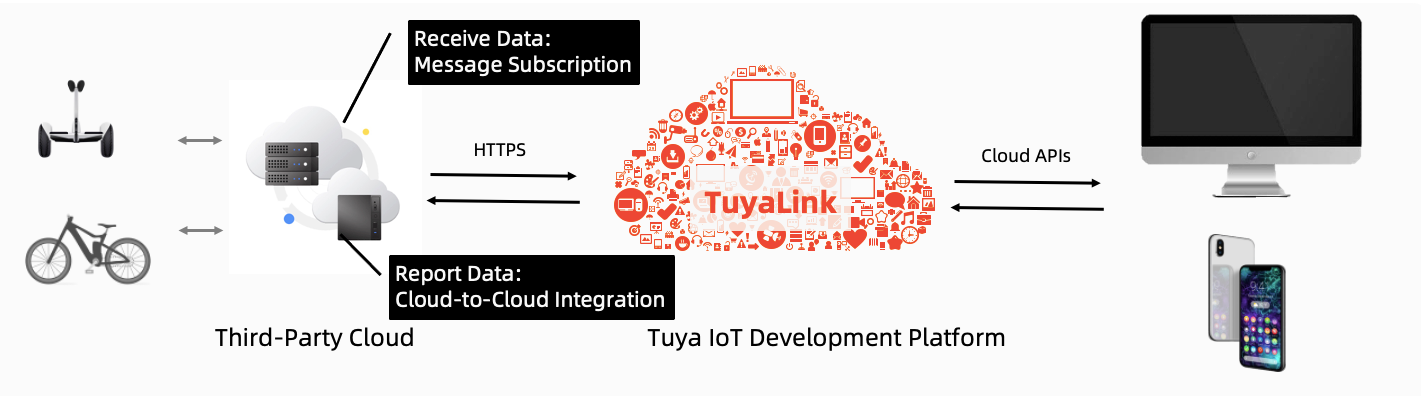
Cloud-to-cloud integration allows you to connect a full-fledged IoT ecosystem to the Tuya Developer Platform, without changes to existing hardware. The OpenAPI services and standardized frameworks help you implement system integration and interconnectivity and interoperability across various industries with cost efficiency. After integration, the devices can be controlled and managed by Tuya-based apps and SaaS applications.
Process
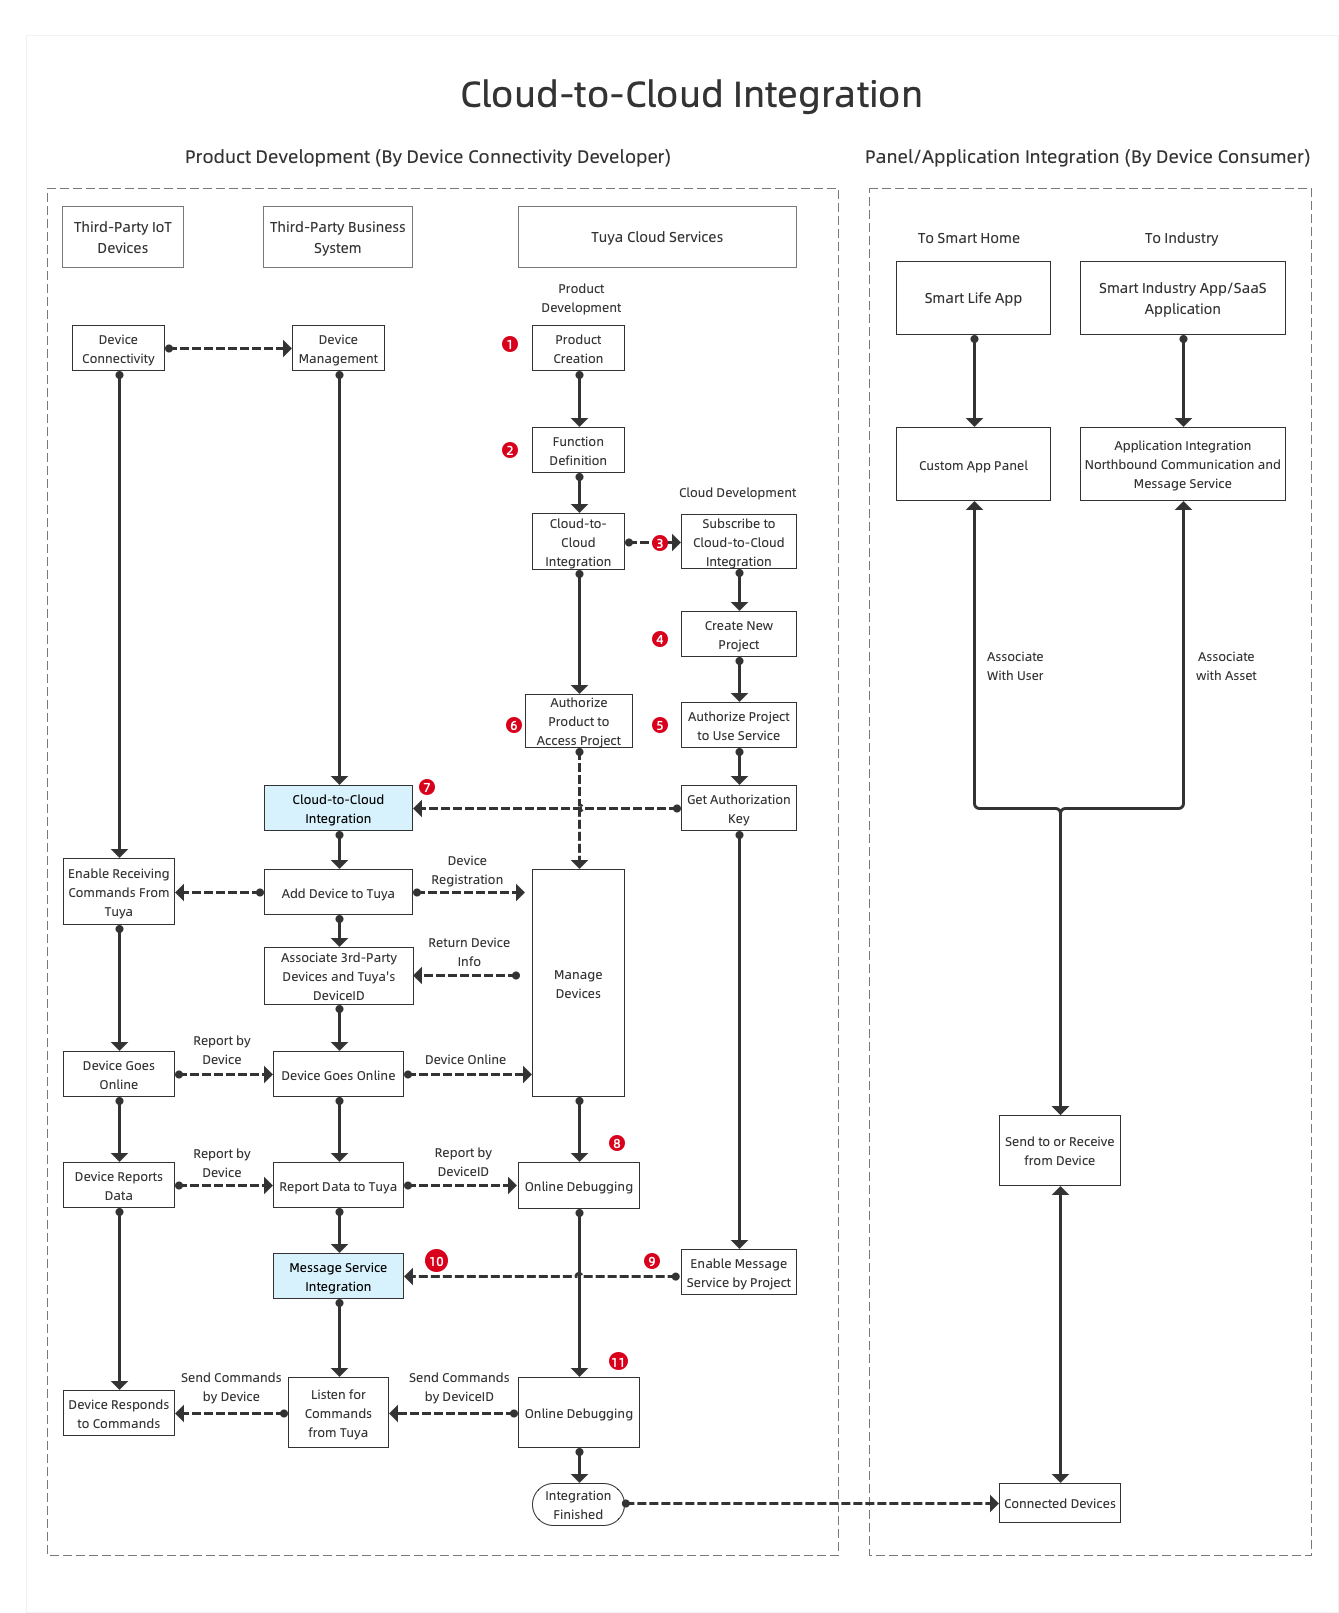
You create a cloud project and get the authorization key. Integrate the OpenAPI related to Cloud-to-Cloud Integration and Message Service into your cloud project. You can then use your existing business system to monitor the bidirectional messaging so as to manage the full lifecycle of connected device fleets.
Procedure
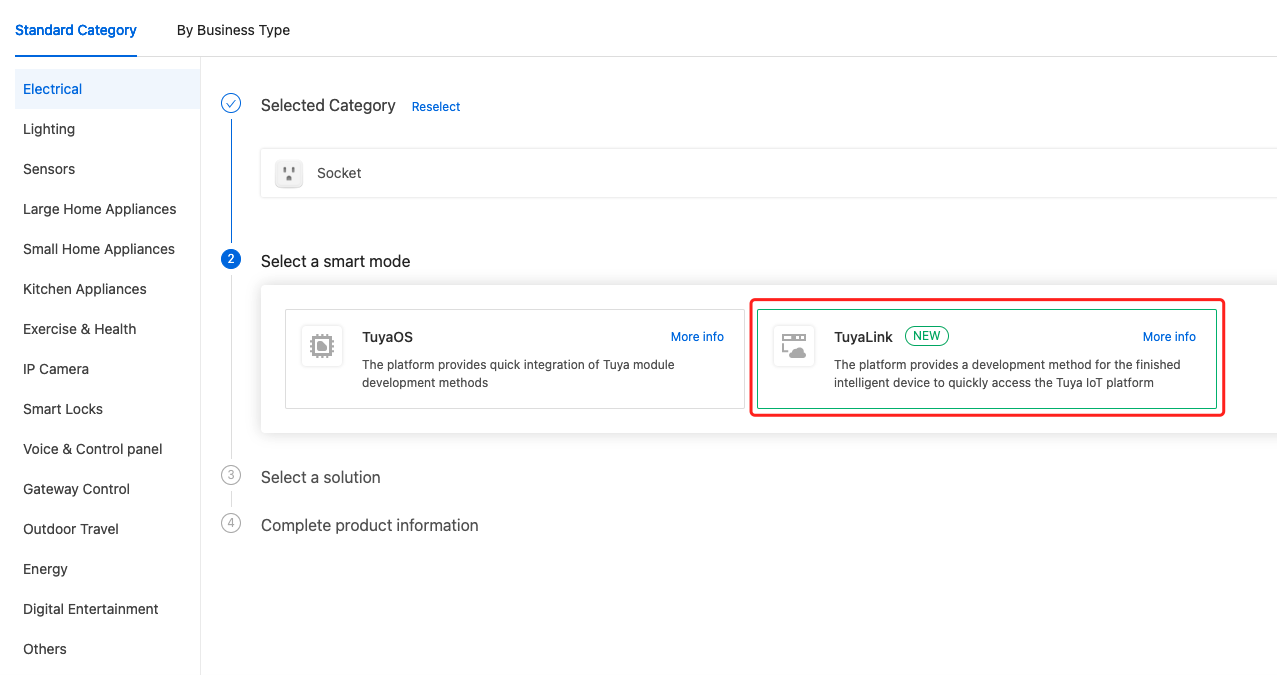
Step 1: Create product
When you create a product on the Tuya Developer Platform, choose TuyaLink for smart mode. For more information about the detailed processes of product creation, see Create Products.
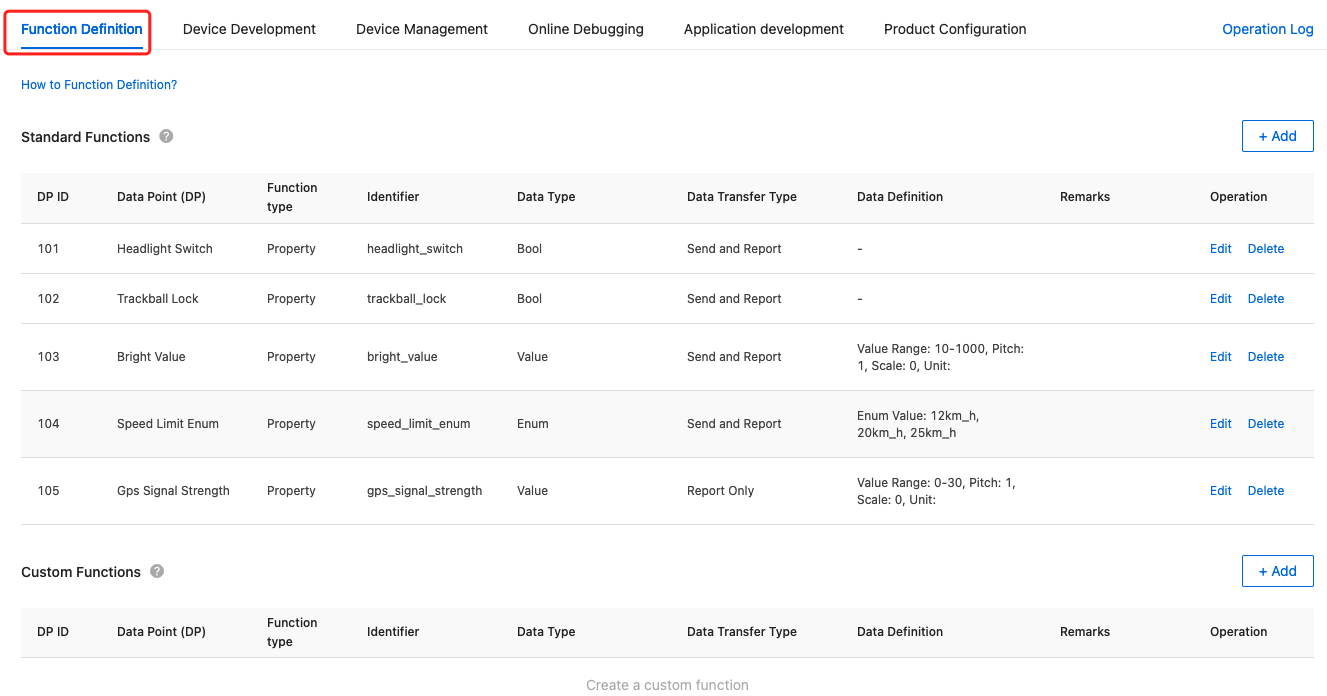
Step 2: Define functions
Add standard functions or create custom functions as needed. For more information, see Function Definition.
Step 3: Develop device
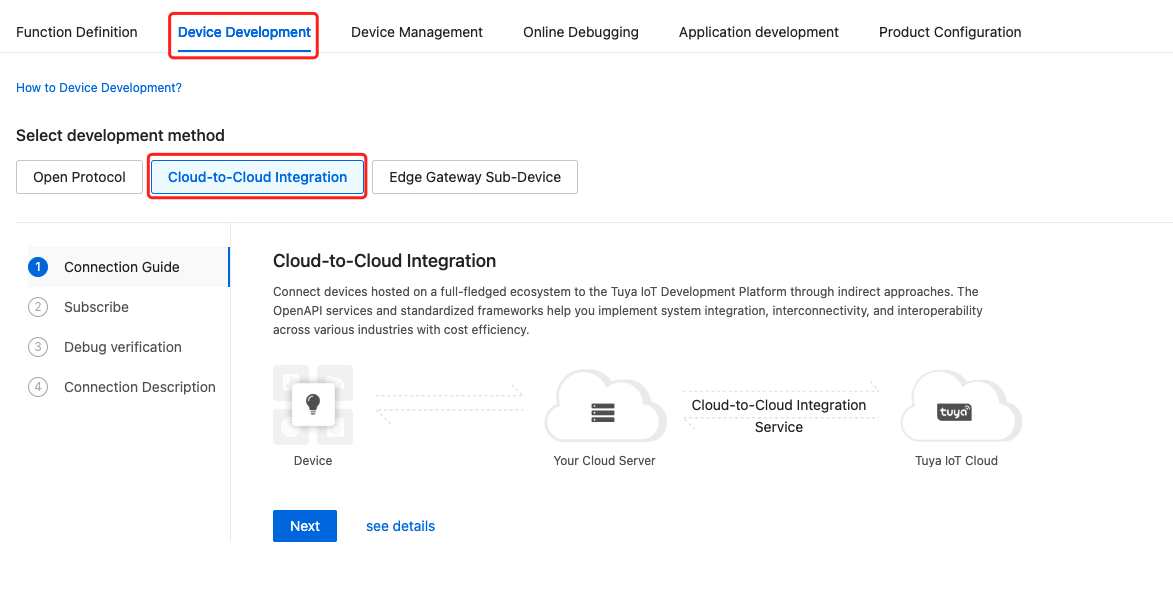
Complete the process as instructed on the Device Development page.
-
For Development Method, choose Cloud-to-Cloud Integration. You can click See Details to check out the documentation.
-
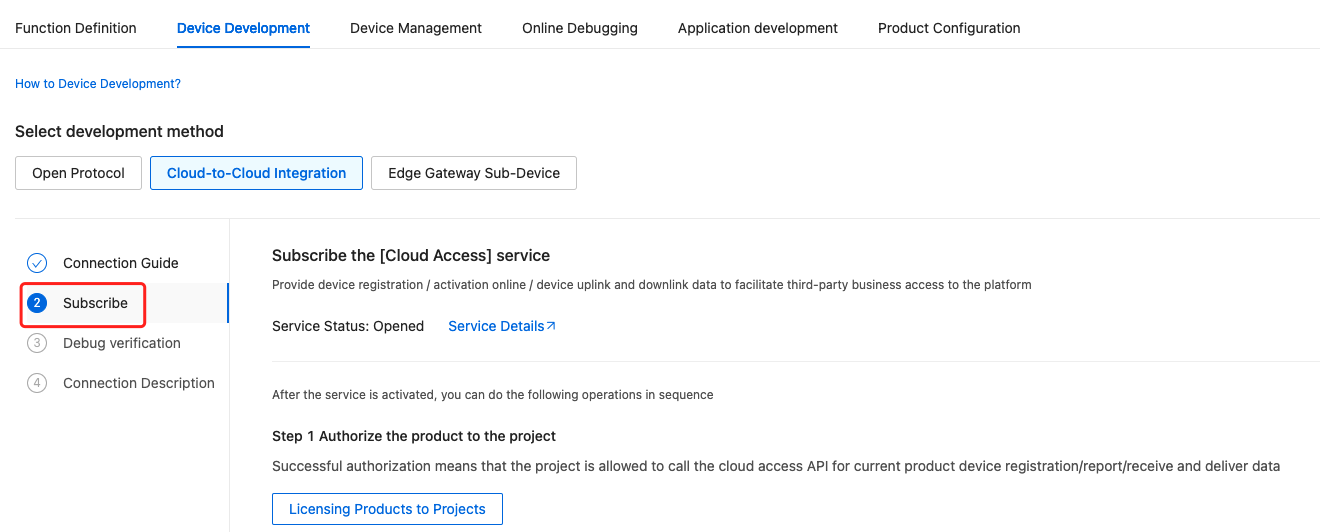
Subscribe to the Cloud-to-Cloud Integration Service.
Subscribe to the Device Cloud-to-Cloud Integration Service and authorize your cloud project to use this service.
The following figure demonstrates APIs related to cloud-to-cloud integration. For more information about the complete offering, see Cloud-to-Cloud Integration Service. Make sure you have subscribed to the service and completed project authorization.
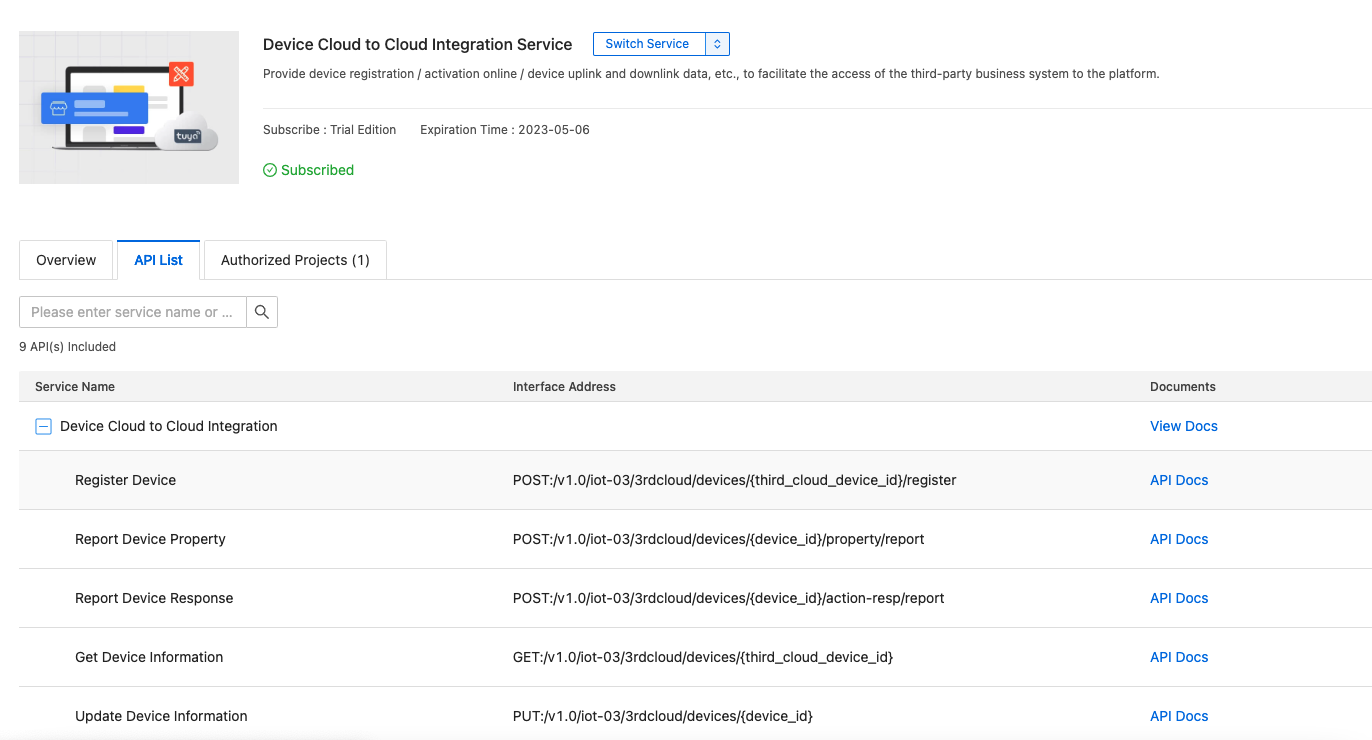
Cloud-to-Cloud Integration Service only provides device-to-cloud messaging. To enable cloud-to-device messaging, you need to complete application development.
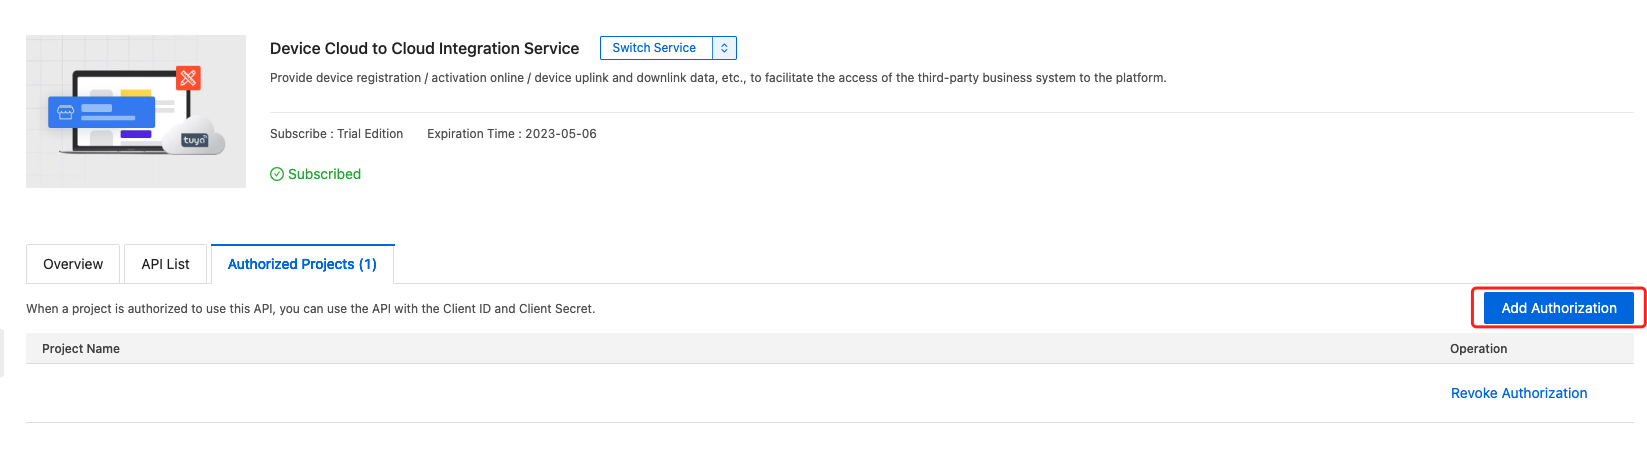
Authorize product to access project
After you subscribe to the Cloud-to-Cloud Integration Service and authorize your project to use this service, you need to authorize the target product to access this project. In this way, devices under this product are allowed to make API calls and send data to the cloud by using the authorization key. One product can be authorized to access up to two projects.
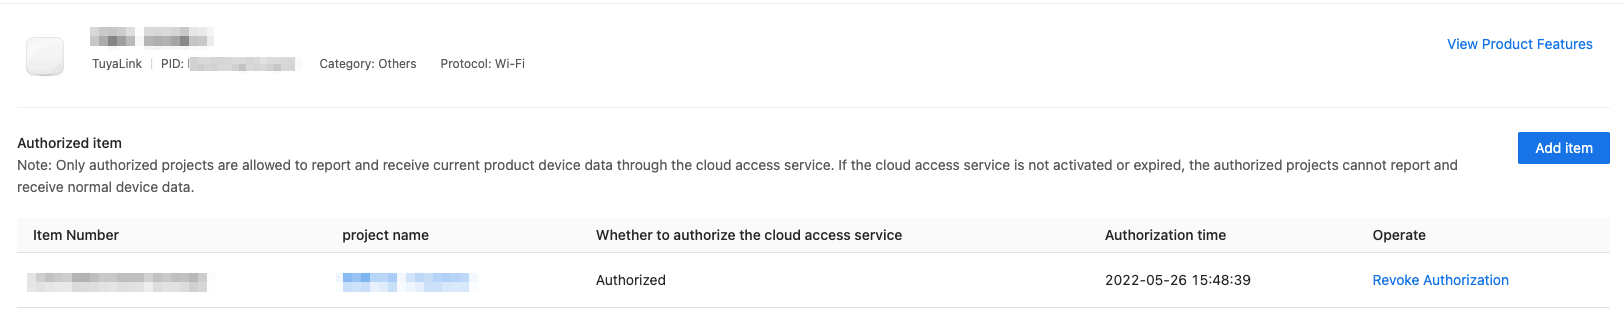
To enable device-to-cloud messaging, make sure you have authorized the target product to access the cloud project that is authorized to use the Cloud-to-Cloud Integration Service.
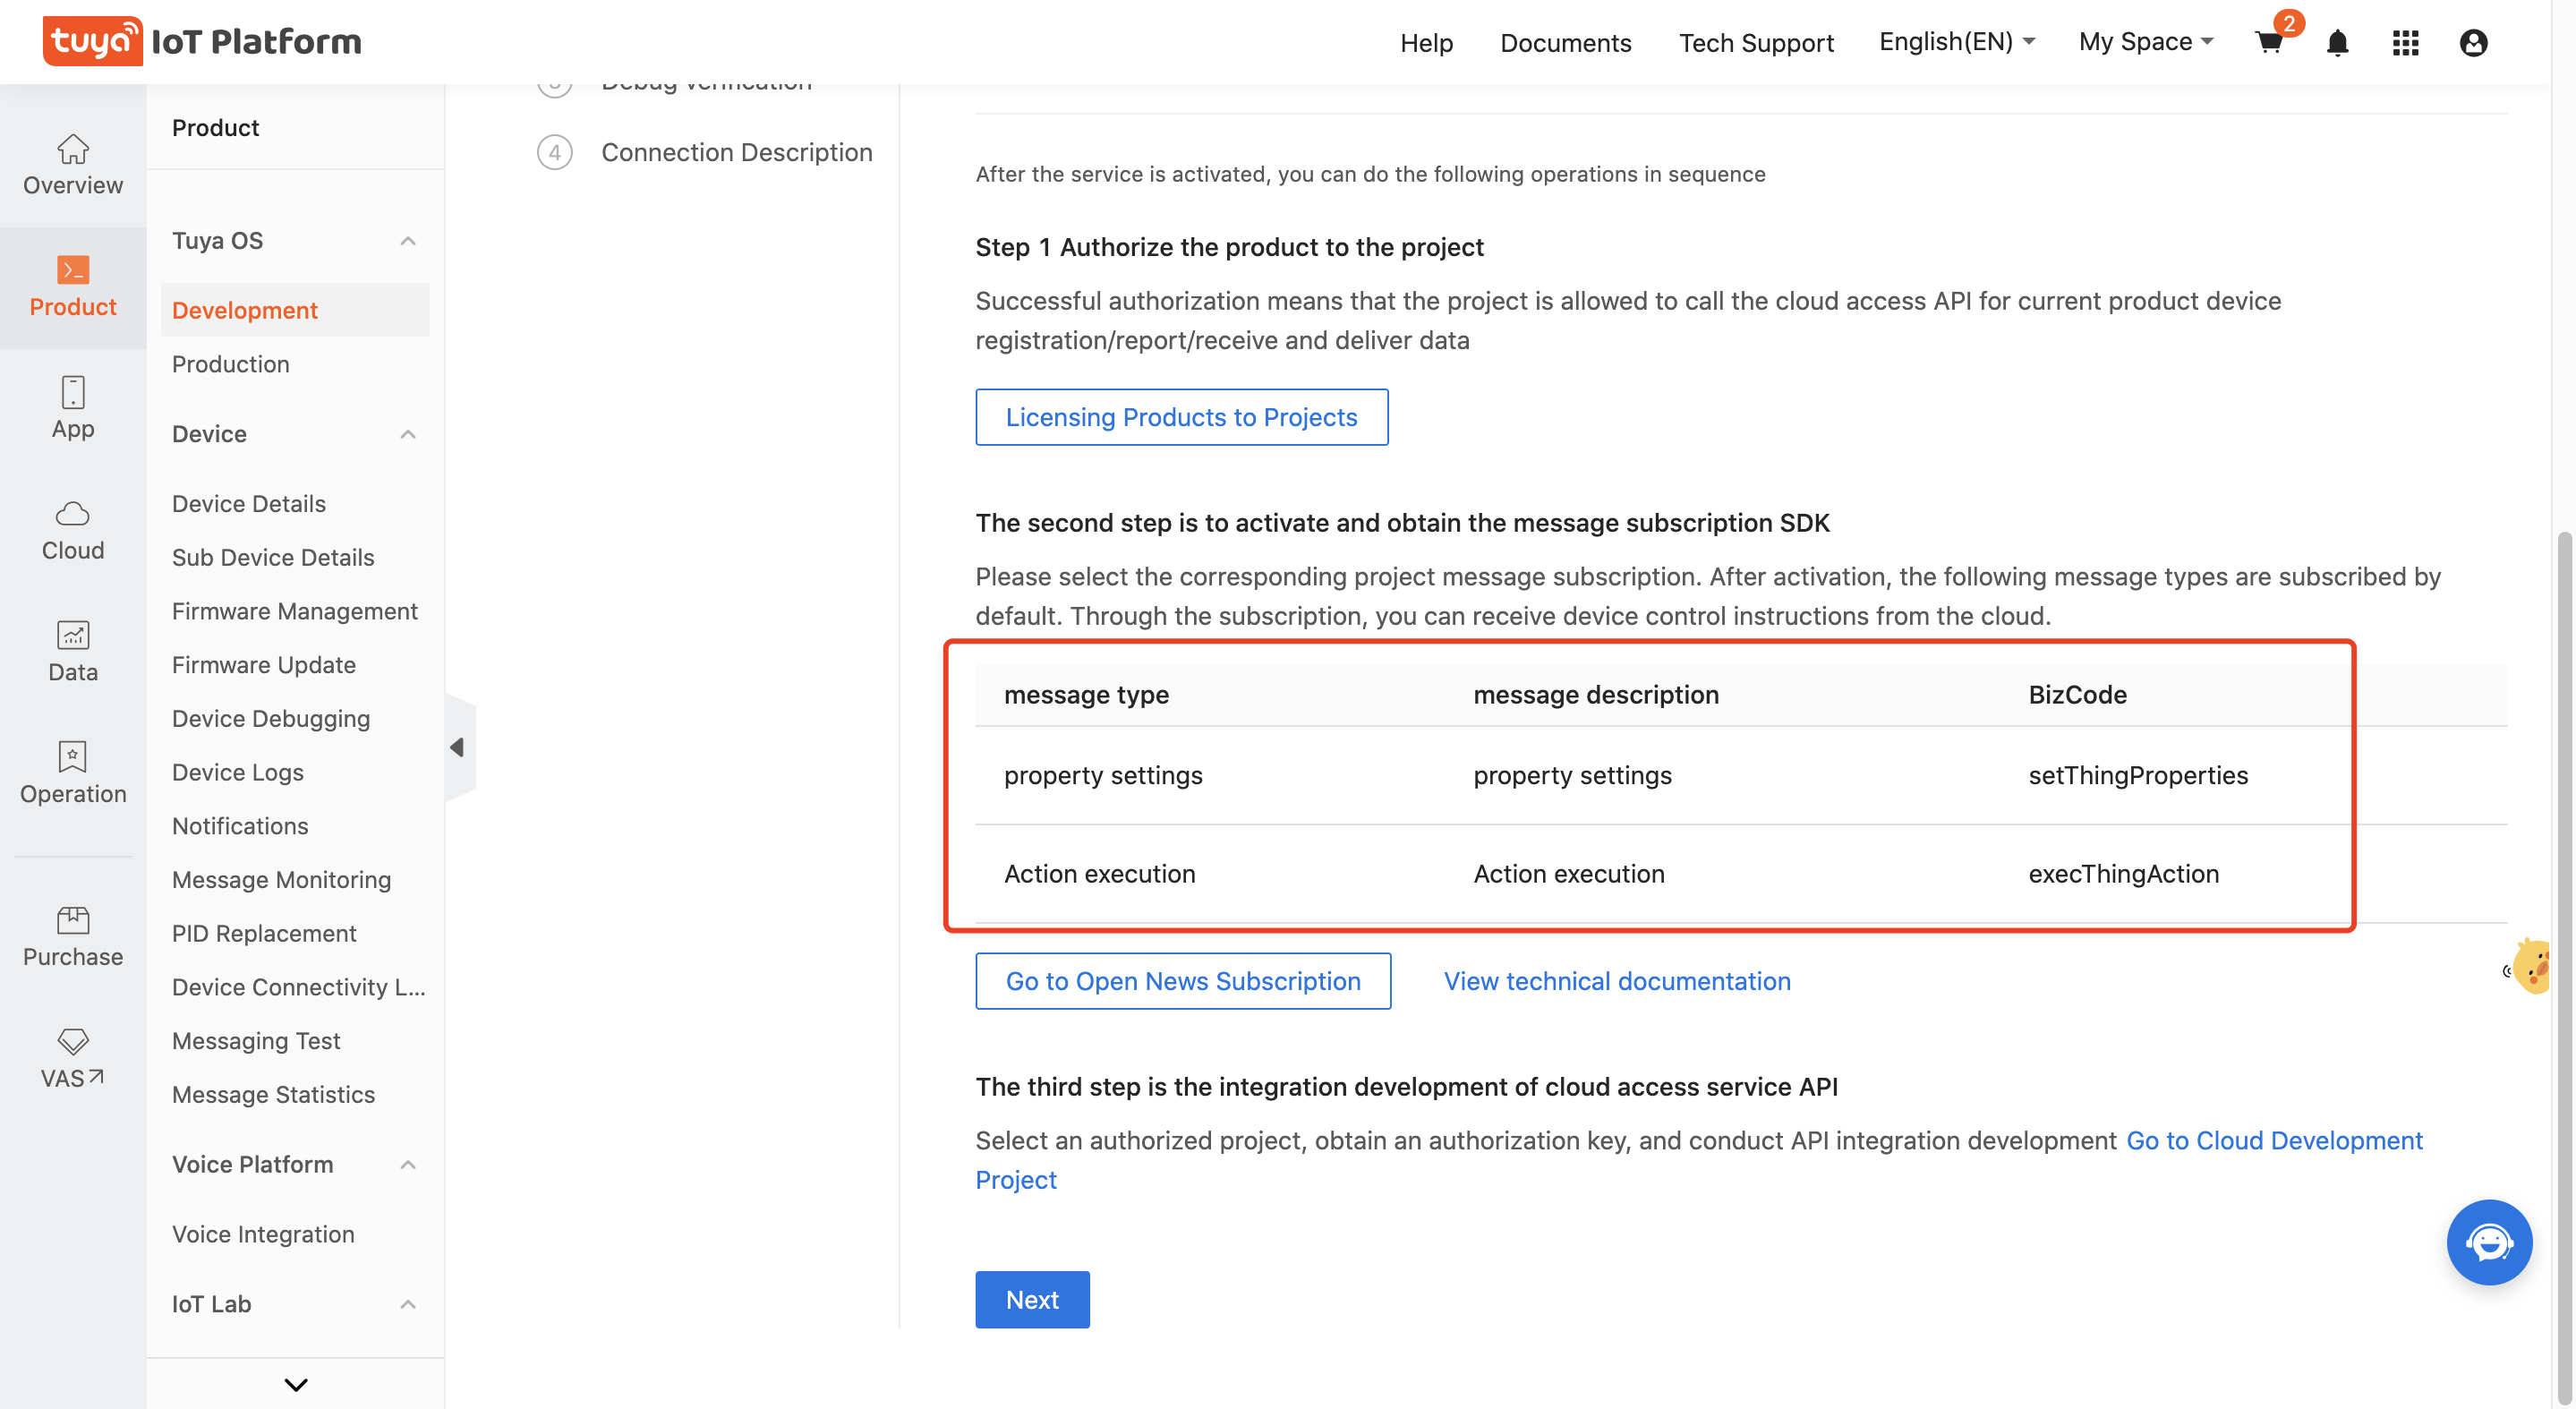
Enable message service and get messaging SDK
To enable your existing business system to receive commands from a Tuya-based mobile app or SaaS, you need to integrate the messaging SDK and subscribe to the
BizCodeof property settings and action execution.- Set a property:
setThingProperties - Perform an action:
execThingAction
Enable the message service as instructed on the page. For more information, see Message Queue.
Integrate with APIs
In the left navigation pane, Choose Cloud > Development > your project. On the Overview page, find the Authorization Key to perform API integration and development.

- Set a property:
-
Verify communication.
Verify device-to-cloud messaging
Before API integration, you can use the API Explorer to simulate device registration, device going online, and property reporting. The following steps show how to use API Explorer.
-
Open the Device Cloud to Cloud Integration Service. Click Debugging and select an authorized project.
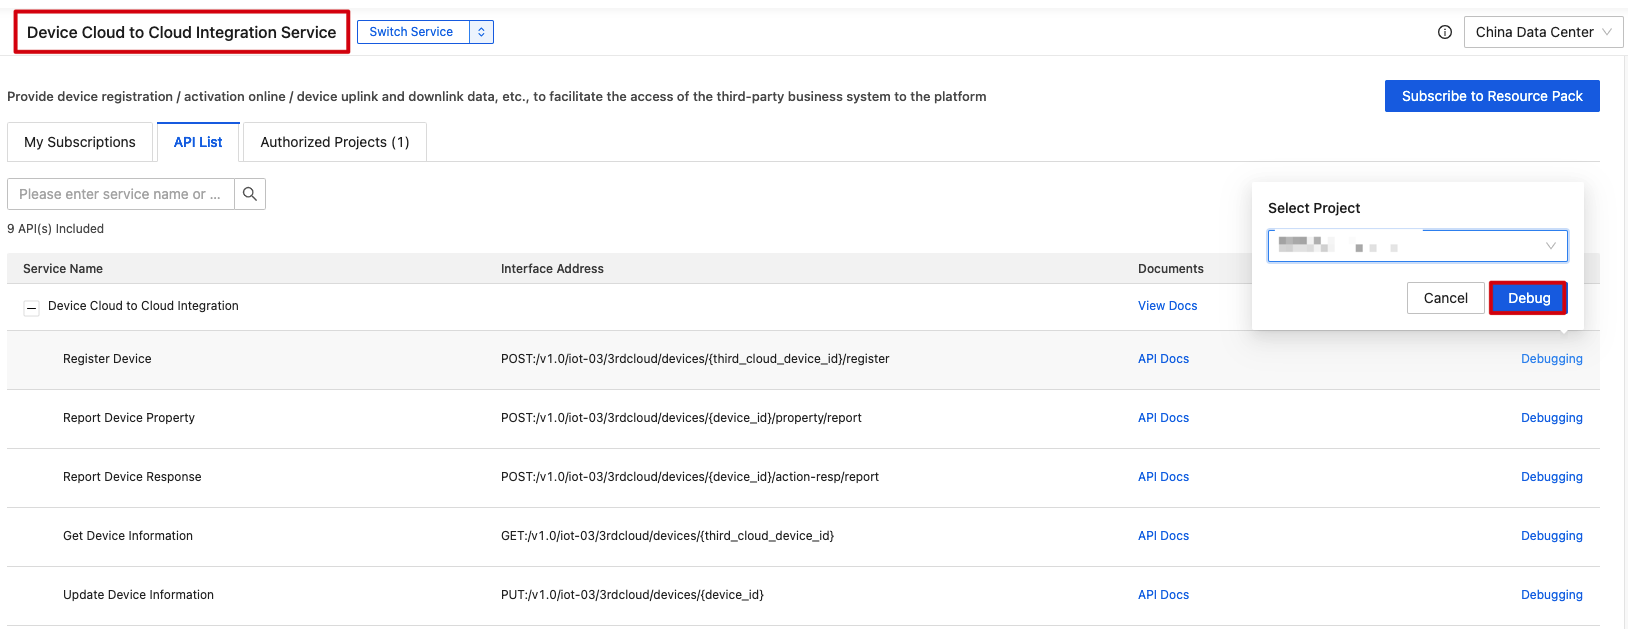
-
Before device registration, you need to purchase the Device Connectivity License and assign the license to the target product. For more information, see Device Connectivity License.

Enter the required parameters to complete device registration.
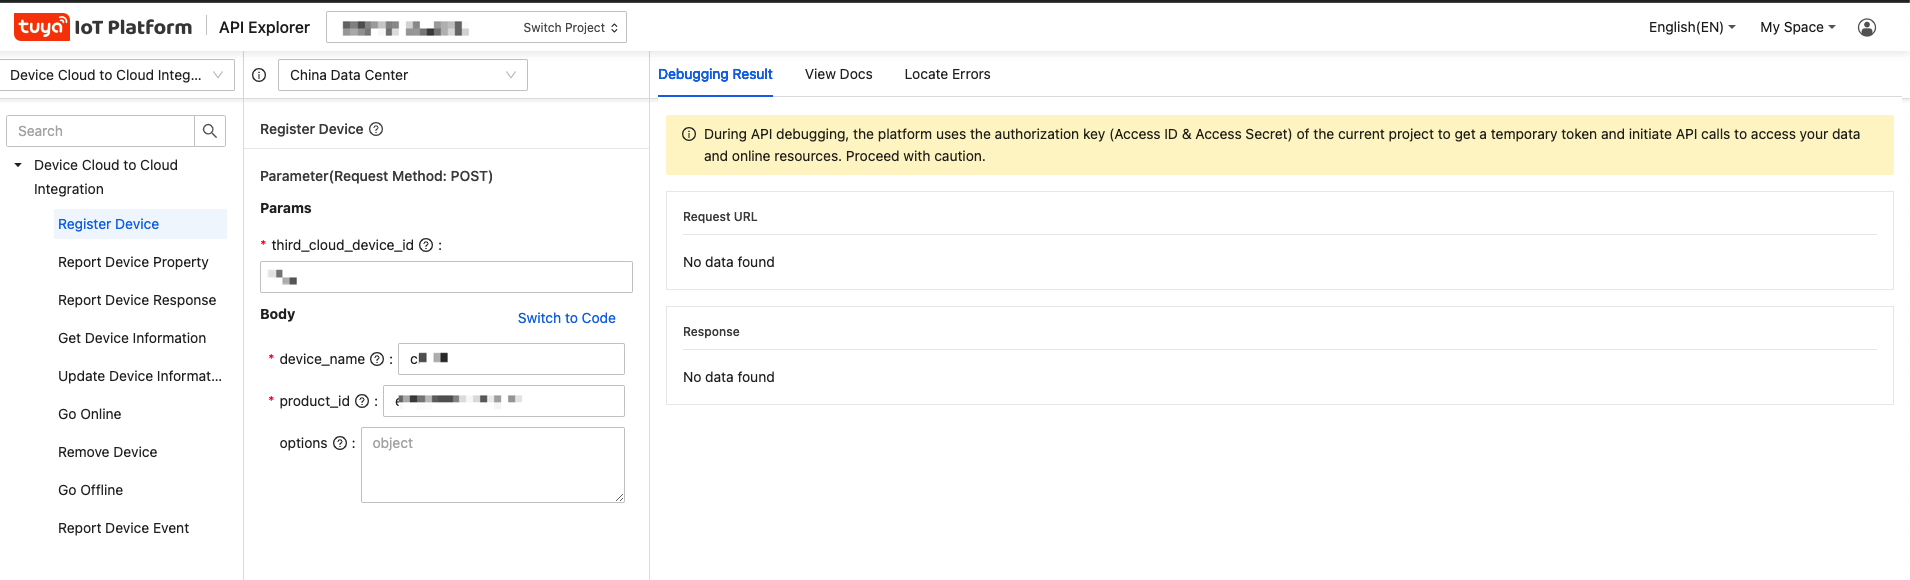
You will get the device ID used to make API calls for device going online and property reporting.

-
The device goes online after registration.
-
The device reports property values to the cloud. To check the result of property reporting visually, you can use Device Debugging or an app panel to verify the communication between the device and the cloud.
Open Device Debugging. You can send commands to the device by setting properties, and get the current property values. For more information, see Online Debugging.
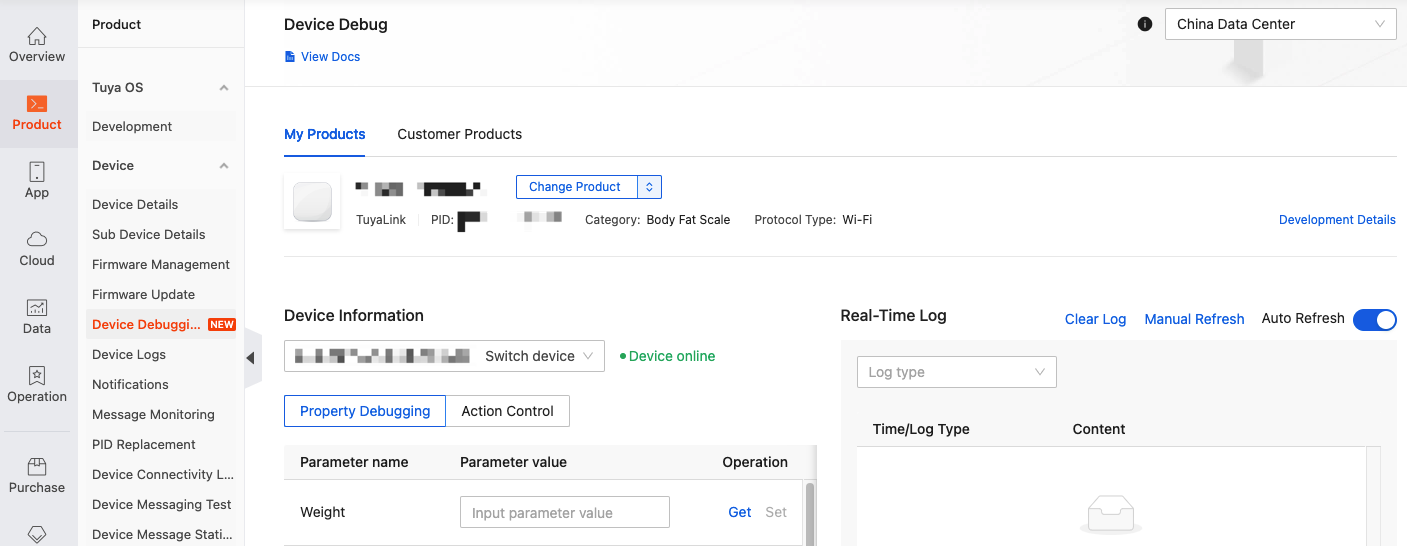
To debug devices, make sure you have registered them, and they are online. For more information, see Online Debugging.
Make an API to report a property value. For example, set
weightto20and click Submit Request.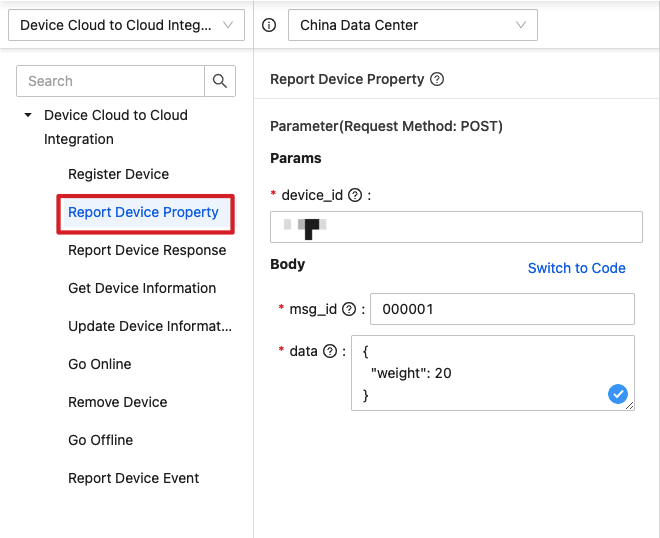
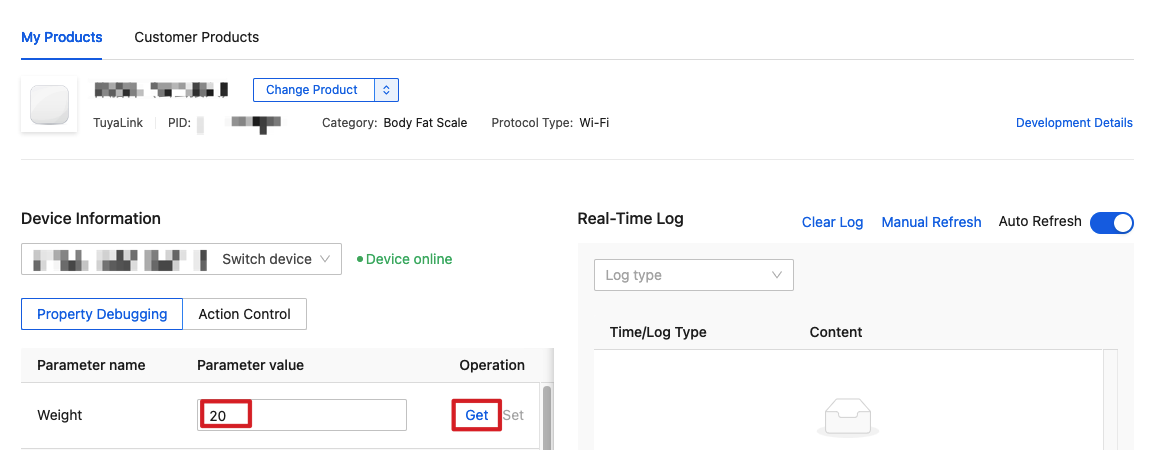
Go to Device Debugging and get the latest property value. The logs are displayed on the right screen.
Verify third-party cloud receiving messages from Tuya’s cloud services.
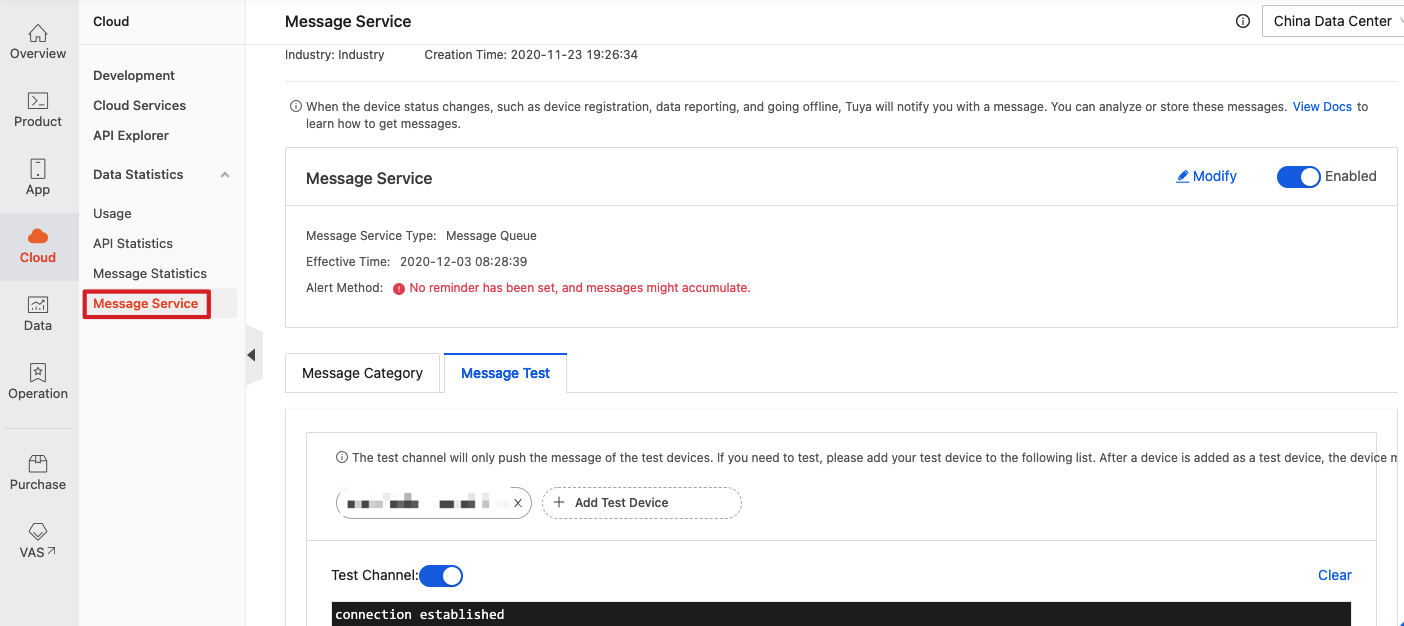
A third-party cloud receives messages from Tuya’s cloud services by integrating with the Message Service SDK. For more information, see Message Queue. You can use Message Service and Device Debugging to verify the functionality.
-
Open Message Service and enable this service. Under the Message Test tab, add a device for testing. If Tuya’s cloud service sends a message to the device, the data will be shown in the log window.
-
Open Device Debugging. Set a property value to simulate sending a command from the cloud to the device. For example, change the channel to
wifi. The downstream messaging is logged on the right screen.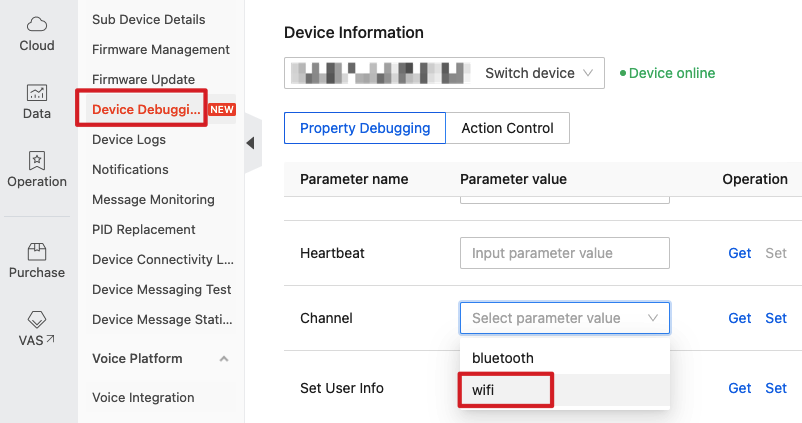
-
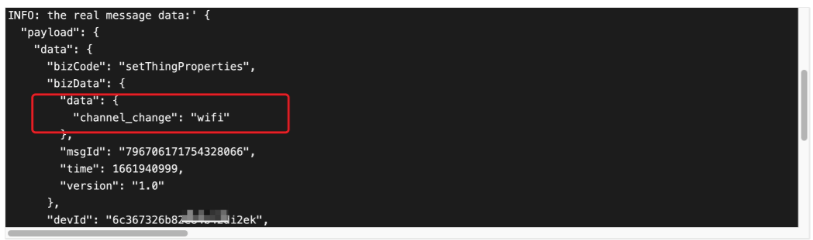
Open Message Service and check out the message received from the cloud.
This is the basic walkthrough of verifying bidirectional communication. In actual use, the third-party business system needs to integrate with the Cloud-to-Cloud Integration and Message Service as needed to implement messaging.
-
-
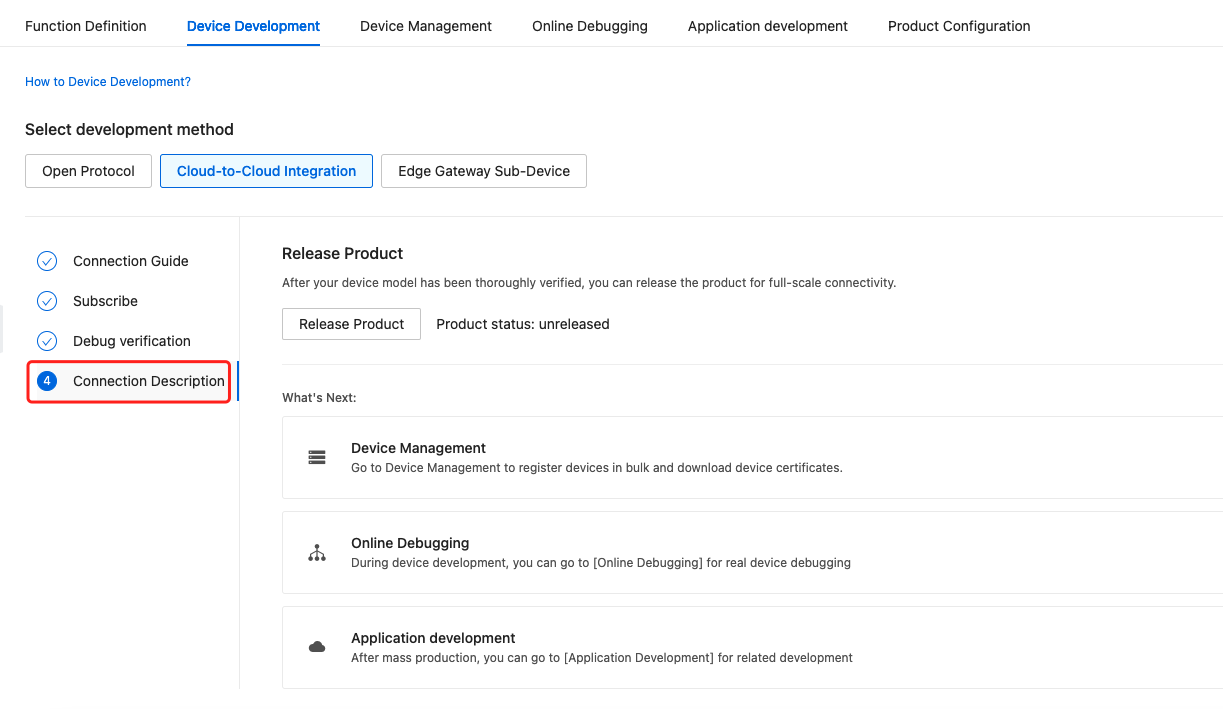
Release the product.
If the connectivity is verified and works, you can release the product. And then you can proceed to develop an application as needed.
Things to note
To ensure the availability of the connected devices, your existing business system should be updated to adapt to the cloud-to-cloud integration and provide a stable connection to your users.
Next step
For more information, see TuyaLink.
Is this page helpful?
YesFeedbackIs this page helpful?
YesFeedback


