Create an Email Plan
Once a user registers with an email address, you can push marketing emails to that address.
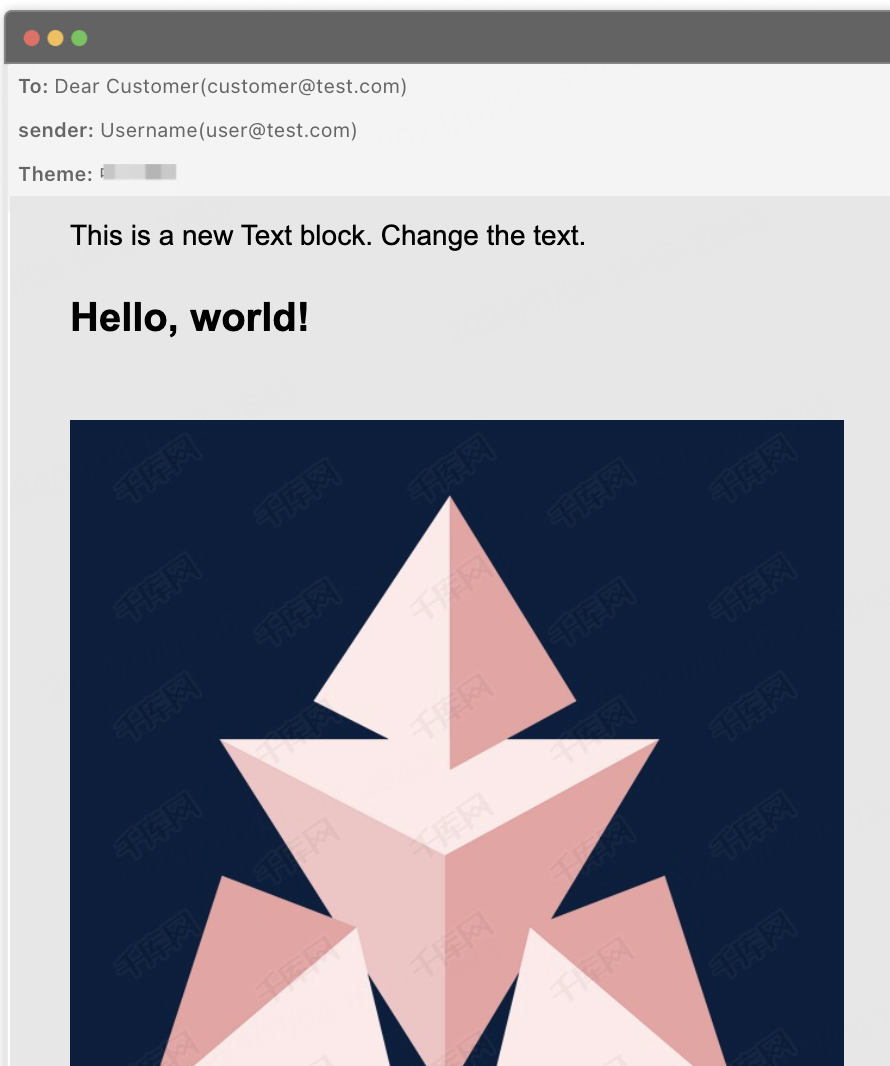
Appearance
Application scenarios
-
Welcome emails (for automated marketing campaigns)
-
Transaction confirmation emails
-
Emails to re-engage or retain inactive users
-
Holiday or birthday greetings
-
Promotional and special offers
-
Customer feedback and survey requests
-
Exclusive emails for VIP customers
Procedure
Entry
Log in to the SaaS platform. Go to Operation Plan > Operation Plan in the left navigation bar, and then click Create Operational Plan. In the Push Settings step, select Email for Delivery Channel. For more information, see Operation Plan Overview.
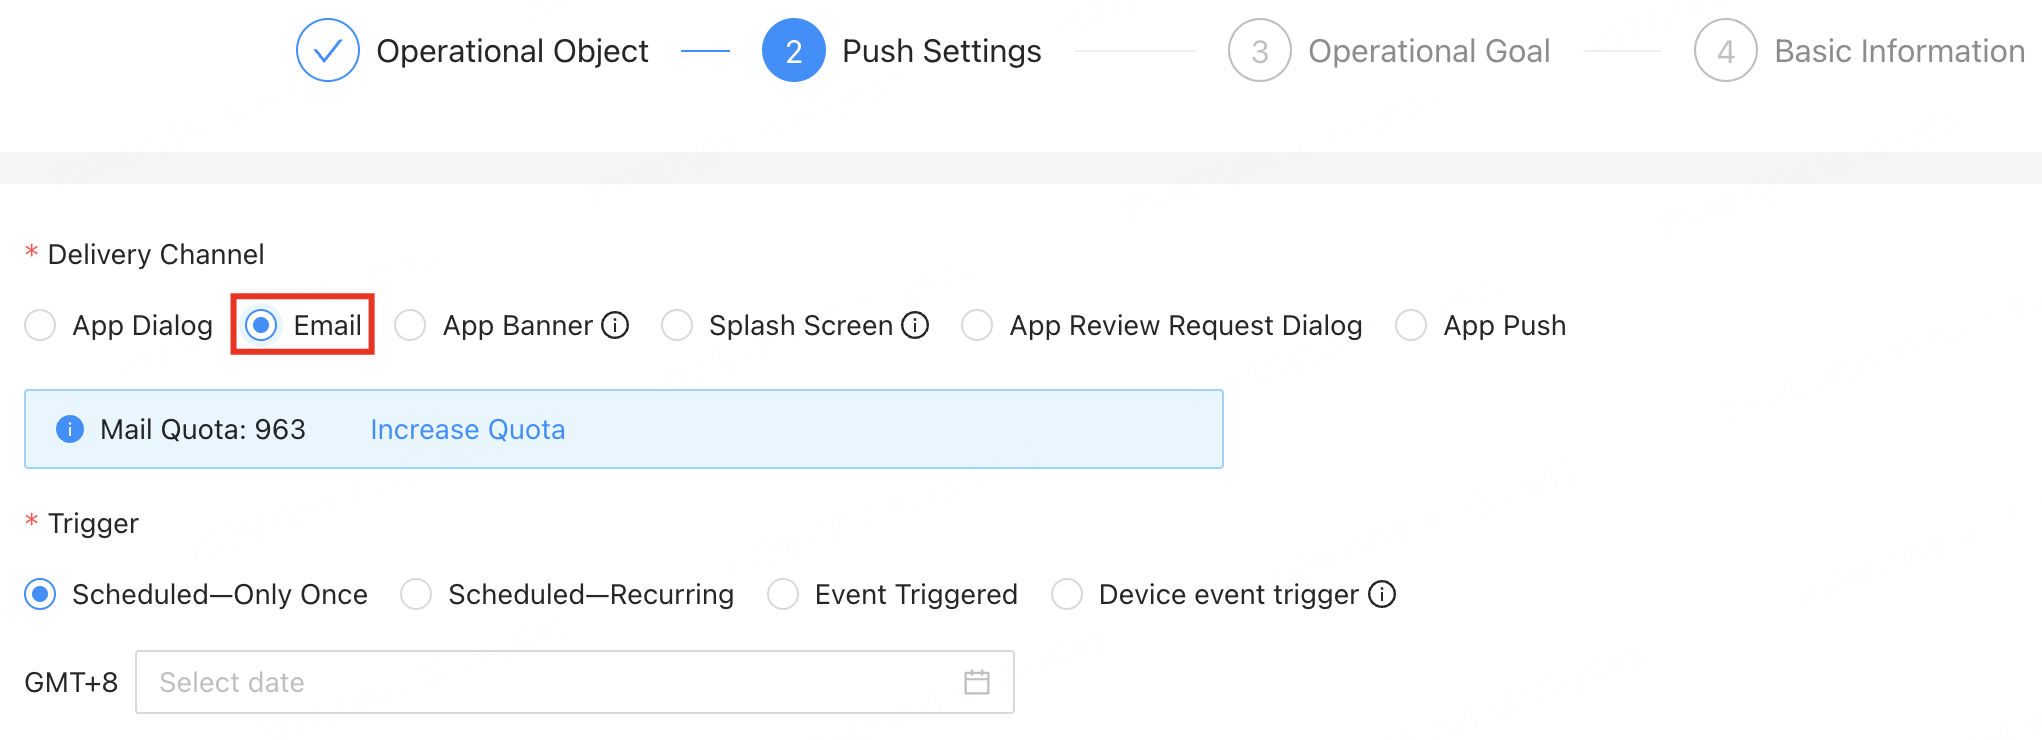
Trigger
-
Scheduled - Only Once: Sends emails to a user segment at a specified time. Once sent, no further emails are sent.
-
Scheduled - Recurring: Sends emails to a user segment at a specified time on a regular basis.
-
Event Triggered: Sends emails triggered by specific user actions in the app. You need to set the interval between emails. The minimum interval is one hour.
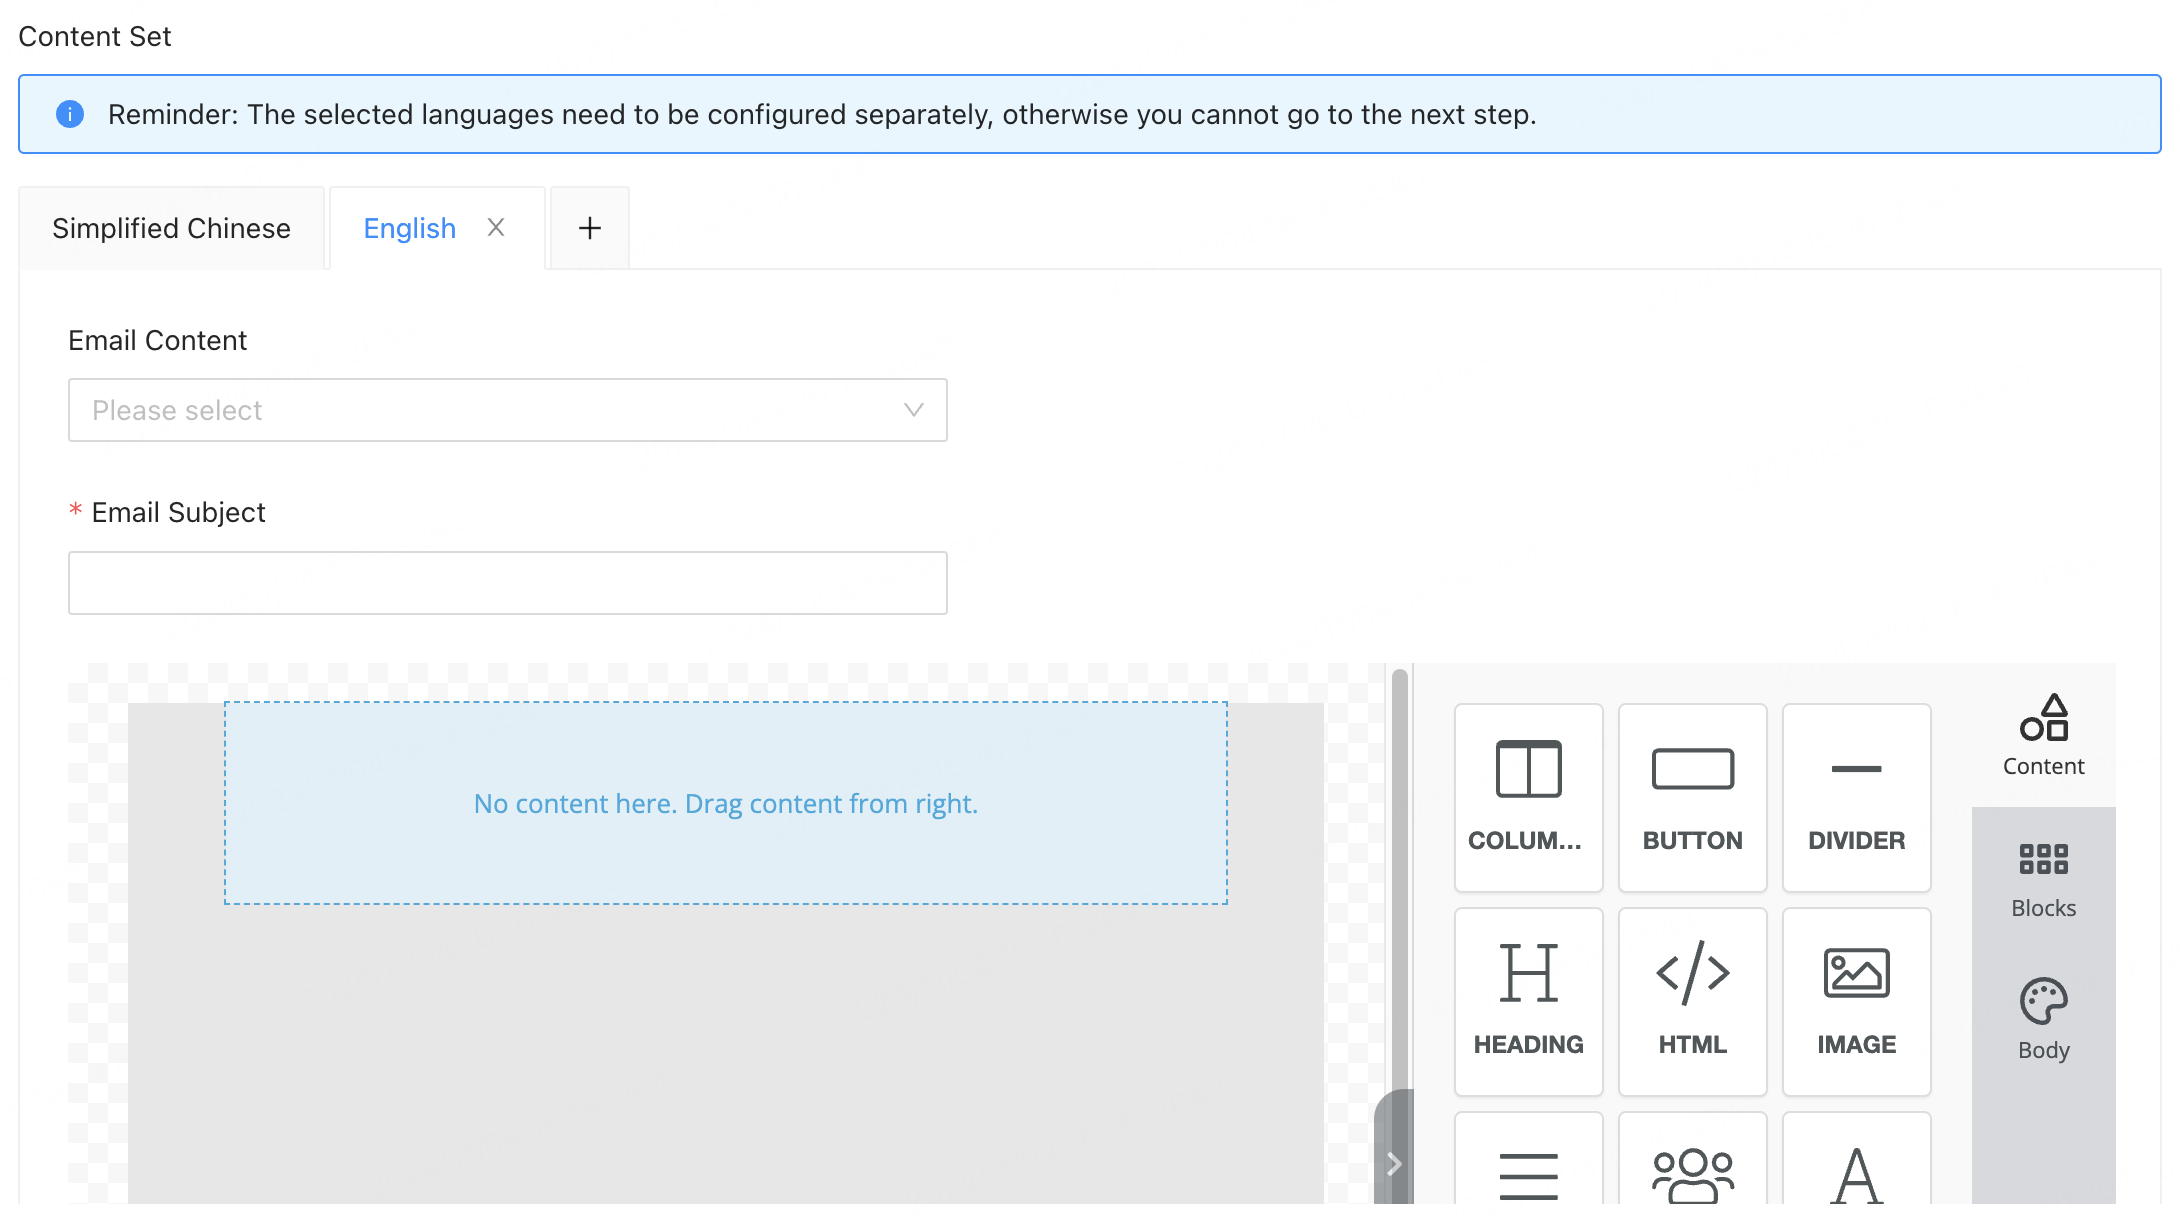
Content configuration
-
Email Content: You can use templates from the editor or import HTML files. This field is optional.
-
Email Subject: Accepts input in Chinese, English, and numbers.
-
Email Editor: If no content is provided, you can create an email directly in the editor. You can modify content created in the editor but not content imported from HTML files.
-
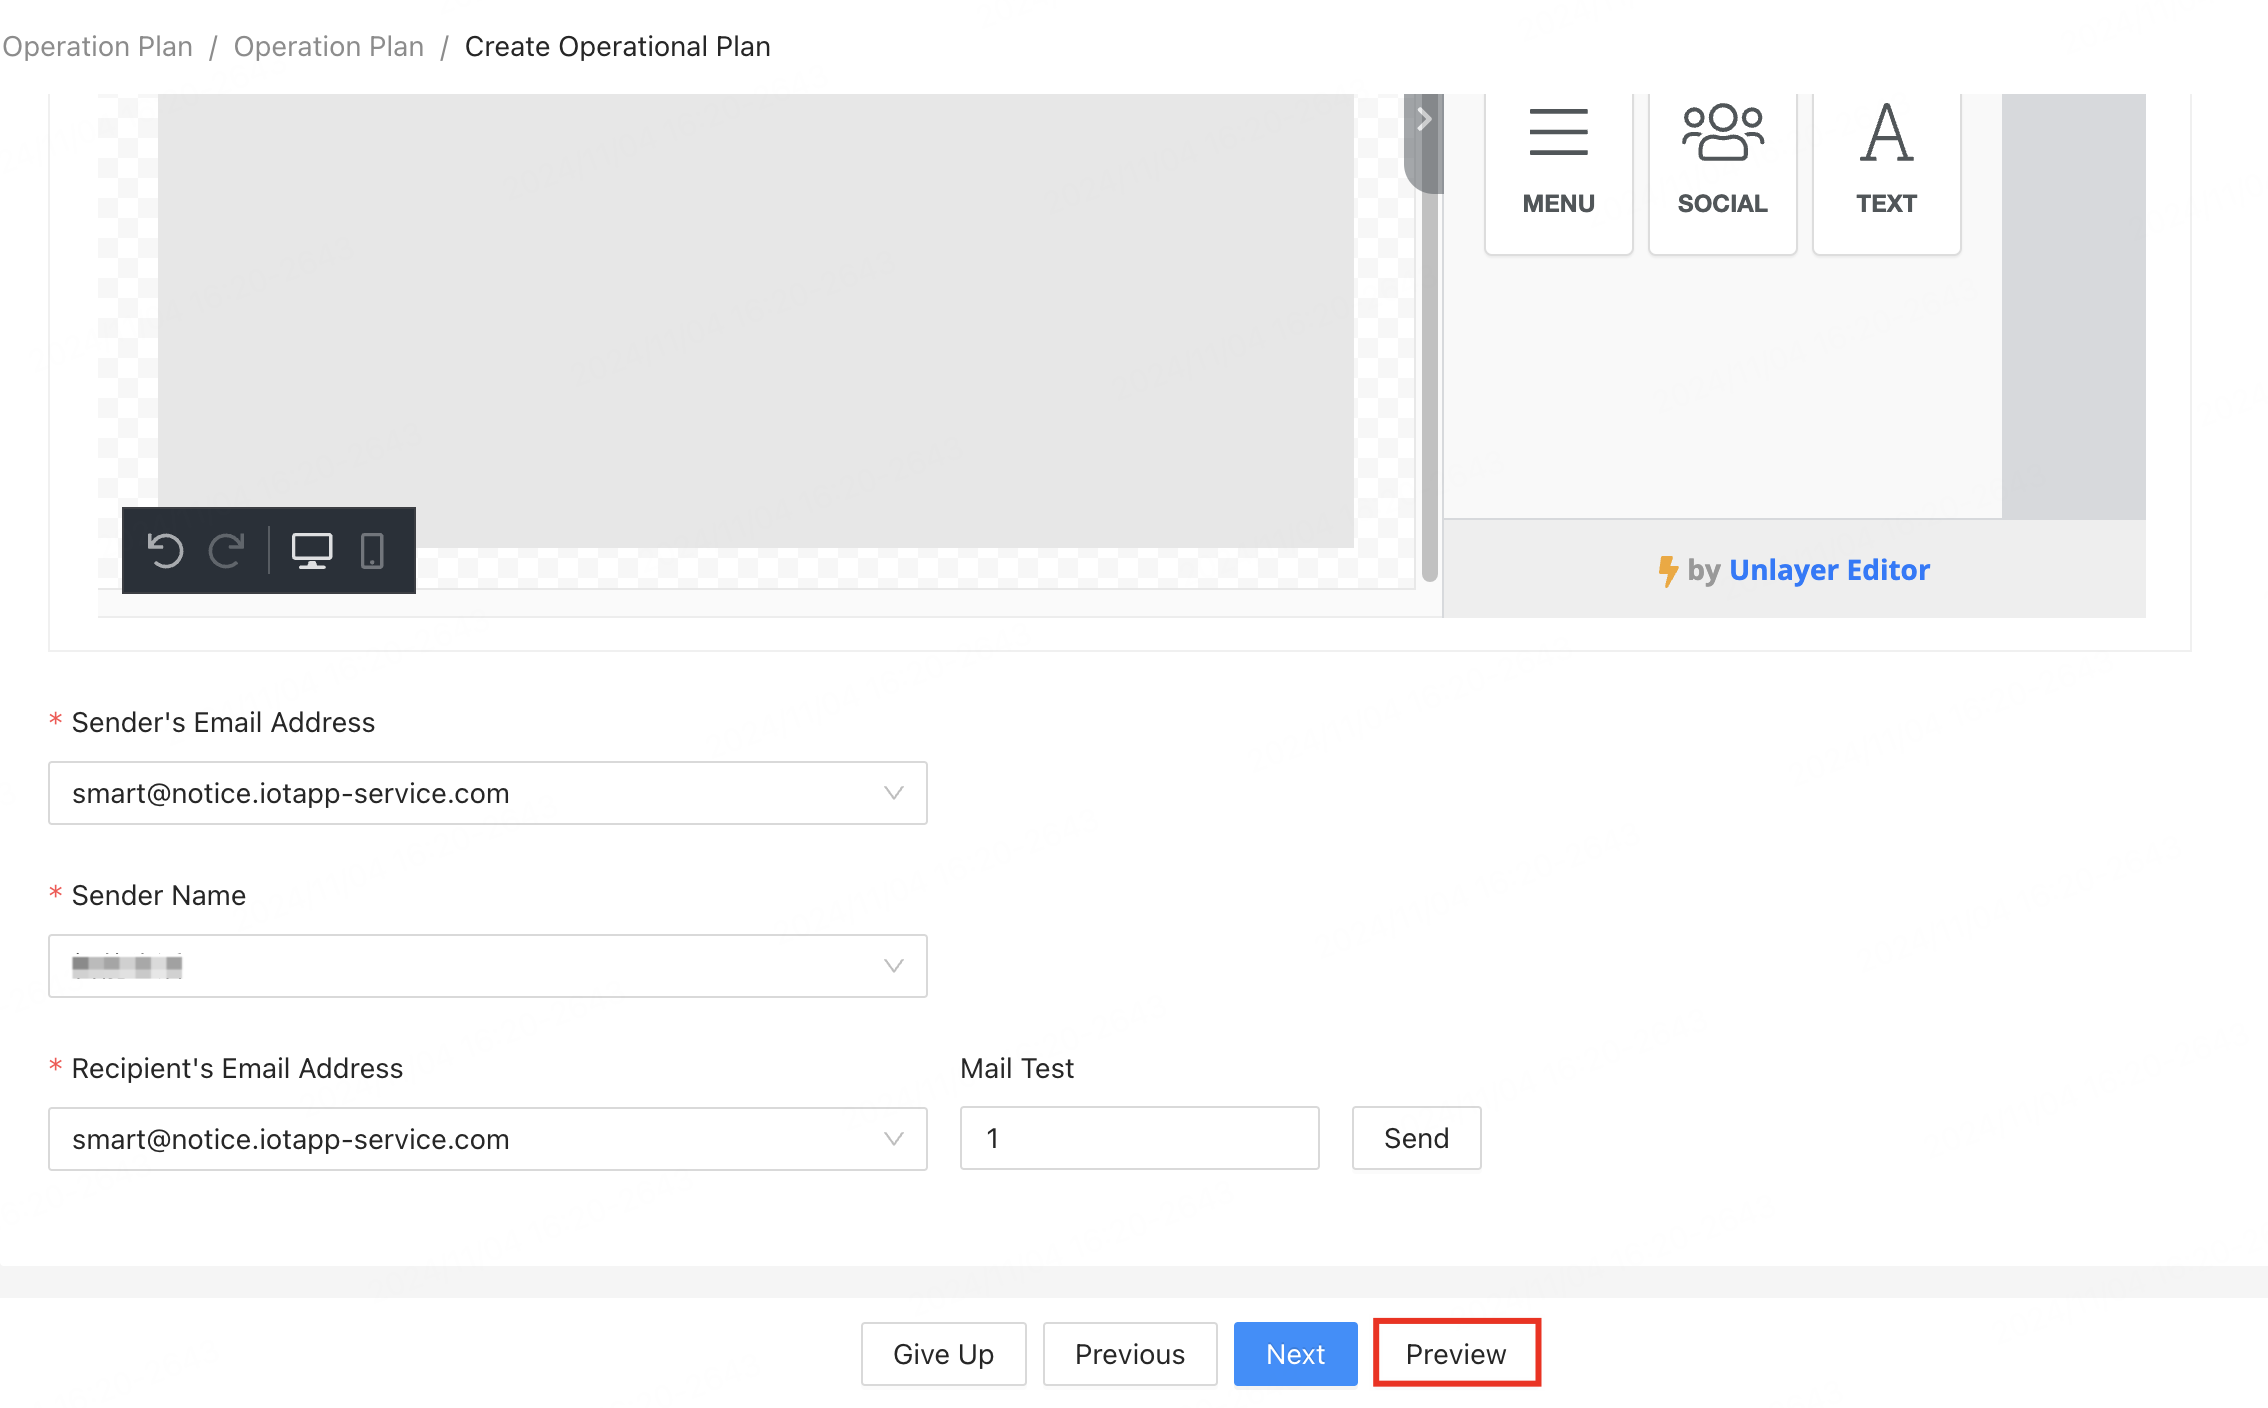
Sender’s Email Address: The sender’s email is fixed. To customize it, contact the product manager or operations staff.
-
Sender Name: The sender’s name is fixed. To customize it, contact the product manager or operations staff.
-
Recipient’s Email Address: The recipient’s email address is fixed. To customize it, contact the product manager or operations staff.

Multilingual configuration
You can configure email notifications for multiple languages to provide localized content to end users.
Hover over the + icon next to the language and select the desired language to generate the configuration.

-
The language of app notifications is determined by offline cleaned label data which is updated on T+1.
-
The app’s reported language must match the platform’s language settings. If not, the system will default to English (for data centers outside China) or Chinese (for data centers in China).
Frequency settings
To protect user experience, you need to set limits on the frequency of event-triggered emails. The options include:
-
Maximum triggers per user: Limits the number of emails a user can receive for a campaign.
-
Maximum daily triggers per user: Limits the number of emails a user can receive in one day.
-
Interval: Specifies the time interval between identical emails to the same user. The minimum interval is one hour.
-
Do-not-disturb time: Sets a time range based on the user’s time zone during which no emails are sent to the users. The start time must be earlier than the end time.

Email testing
After configuring and filling in all required email settings, you need to run a test.
- Testing is mandatory before you can proceed to the next step.
- Each email address can be tested a maximum of five times per day.
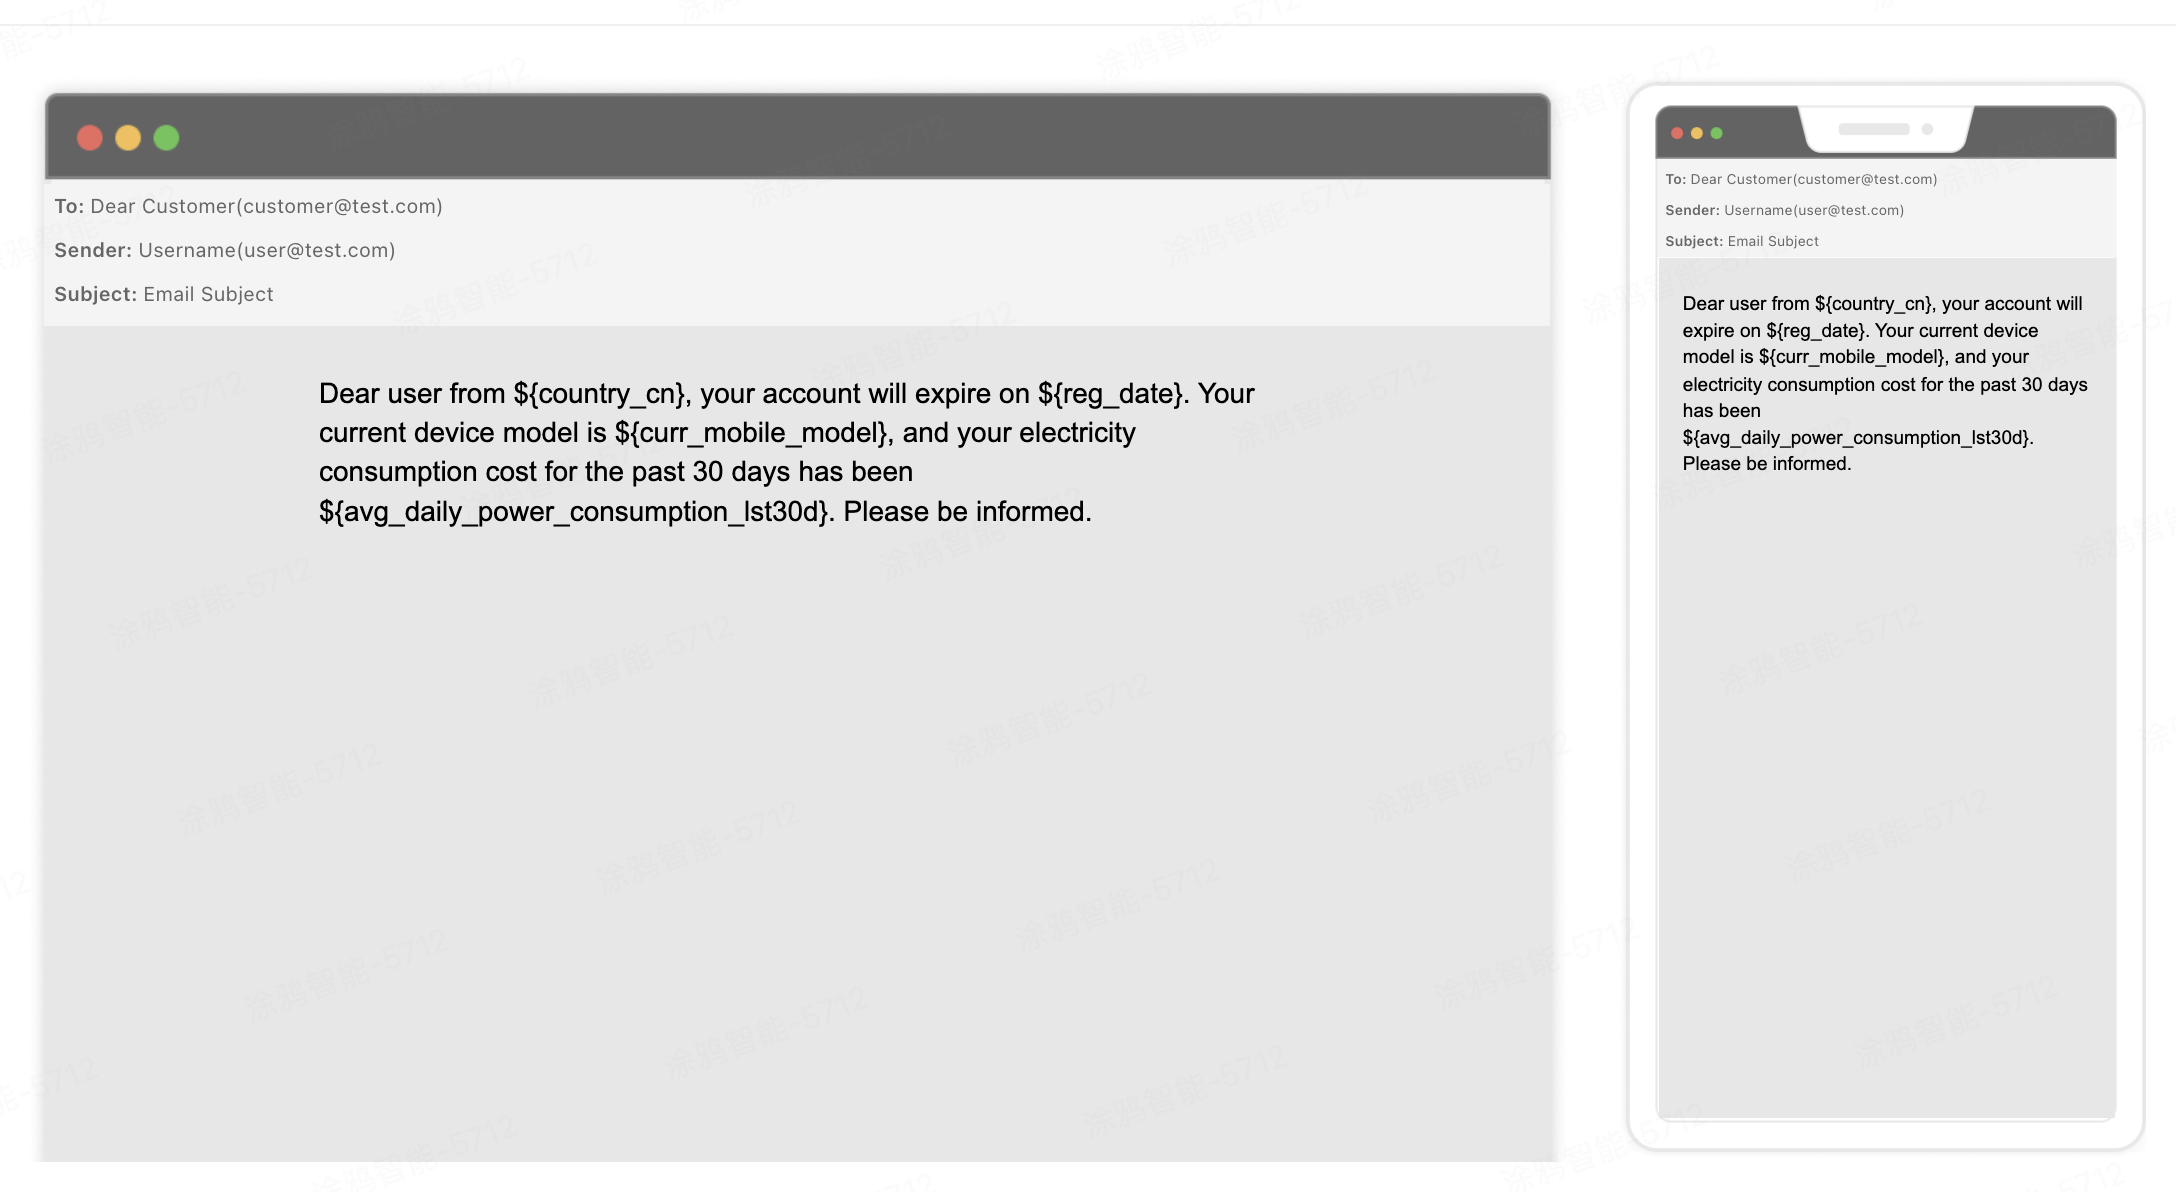
Email preview
After completing all required email settings, click Preview in the lower right corner to see how the email looks on PC and mobile devices.
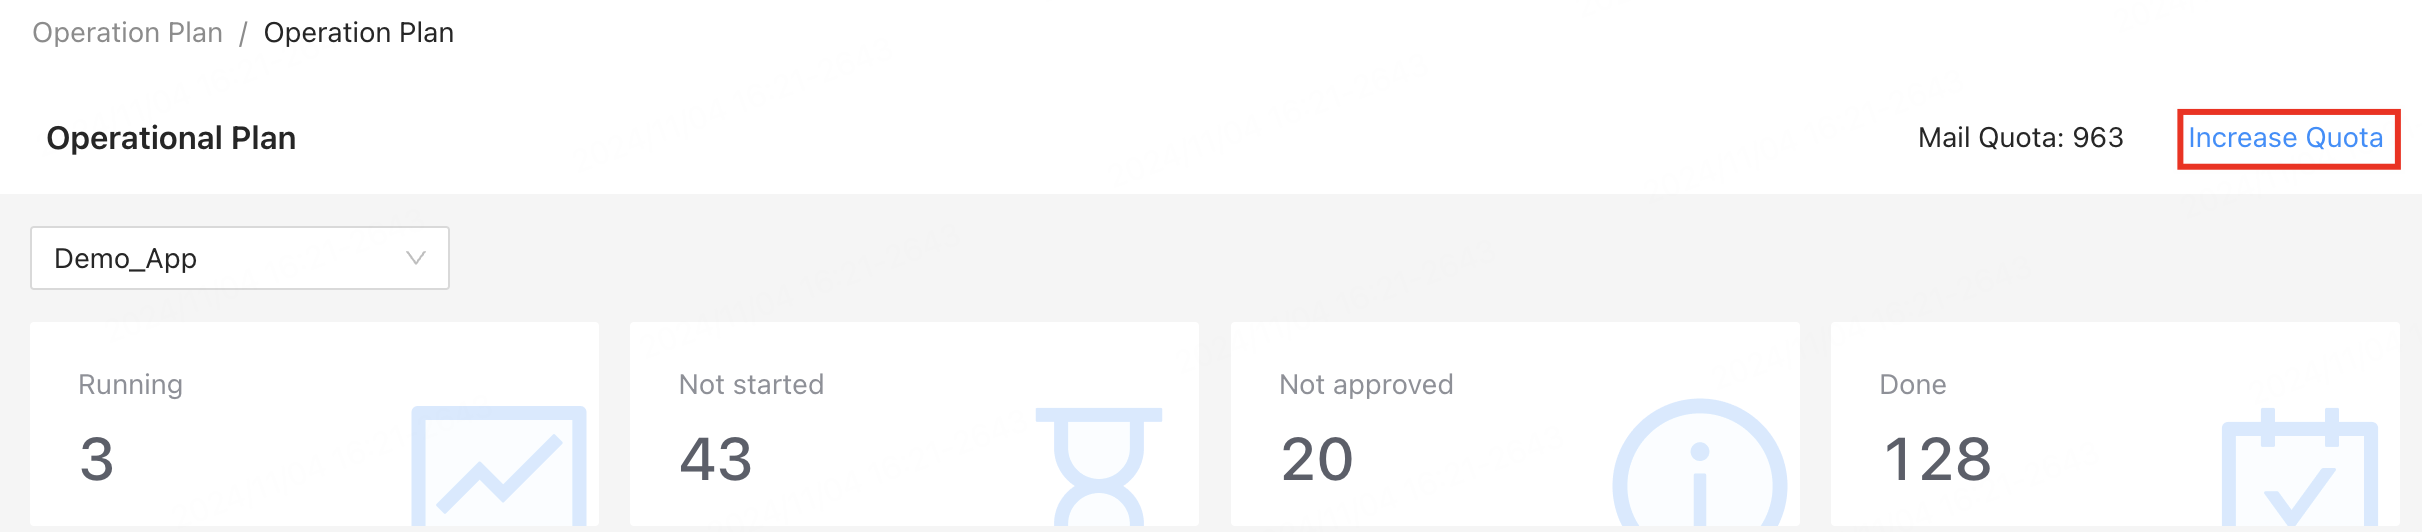
Email quota
The email quota defines the maximum number of emails you can send. All apps share this quota. You can click Increase Quota to purchase more if needed. Data centers have separate quotas.
If the quota is too low for a scheduled push, the emails will not be sent.
Email unsubscription
Emails cannot be delivered to addresses listed in the unsubscribed user list. For more information, see Unsubscribed User Management.
Custom email parameters
Custom parameters are placeholders in emails. When emails are sent, these placeholders are replaced with data specific to each user. By using parameters based on basic user information or user value data, you can improve email relevance and strengthen customer relationships.
Define custom parameters
Currently, two ways are available to pass custom parameters:
Method 1: Custom segments/predefined segments
Only certain user labels can be passed as custom parameters. The supported labels are as follows:
| Level-1 category | Label name | Custom parameter name | Support custom parameters |
|---|---|---|---|
| Basic information | Country/region (in Chinese) | country_cn | Yes |
| Basic information | Registration country/region (in Chinese) | country_cn_from_area_code | Yes |
| Basic information | Country/region (in English) | country_en | Yes |
| Basic information | Registration country/region (in English) | country_en_from_area_code | Yes |
| Basic information | Platform | curr_os | Yes |
| Basic information | App version | curr_app_ver | Yes |
| Basic information | Phone model | curr_mobile_model | Yes |
| Basic information | Registration time | reg_date | Yes |
| Basic information | Language | lang | Yes |
| User behavior | Expiration time of cloud storage | ipc_service_end_date | Yes |
| User behavior | Average daily power consumption in the past 30 days (kW·h) | avg_daily_power_consumption_lst30d | Yes |
| User behavior | Average daily power consumption in the past 7 days (kW·h) | avg_daily_power_consumption_lst7d | Yes |
| User value | Expiration time of the trial energy-saving service | free_energy_save_expire_date | Yes |
| User value | Expiration time of the paid energy-saving service | pay_energy_save_expire_date | Yes |
| User value | Expiration time of subscription to the cloud storage service | sub_ipc_service_end_date | Yes |
| User value | Expiration time of 4G service | 4g_service_end_date | Yes |
Method 2: Custom parameters for imported segments
In the segment import template, param1, param2, and param3 are custom parameters. You can define the values for these parameters, and the platform will store them for the associated user segment.

Edit email templates
When creating an email template or editing the email, you can add specific tags or code snippets as placeholders for custom parameters based on the target segment. These placeholders will help you personalize the content of your email.
Predefined segments or custom segments
If you select a predefined segment or custom segment, you can insert specific tags in the email template to reference the users’ relevant information. Example:
- Use
${reg_date}to show the user’s registration date. - Use
${user_name}to show the user’s name.
These placeholders will be replaced with actual values when the email is sent, enabling personalized content display.
Import segment
If using an imported segment with custom parameters param1, param2, and param3, you can use these parameters directly in the email content. Example:
- Use
${param1}to reference the value ofparam1in the imported data. - Use
${param2}to reference the value ofparam2.
- If the queried parameter value is empty, you can set a default value to prevent content loss.
- Use the
${param1:default value}format. When the value ofparam1is empty, the system will automatically use the default value as a placeholder. Example:${param1:undefined}: indicates that when the value ofparam1is empty, Undefined will be displayed.${param2:Welcome}: indicates that when the value ofparam2is empty, Welcome will be displayed.
Send emails
When you send an email, if a custom parameter is not empty, the placeholder is replaced with the corresponding value.
If an email contains unsupported custom parameters or labels, the email cannot be sent. This applies to both event-triggered and scheduled emails.

Operation data
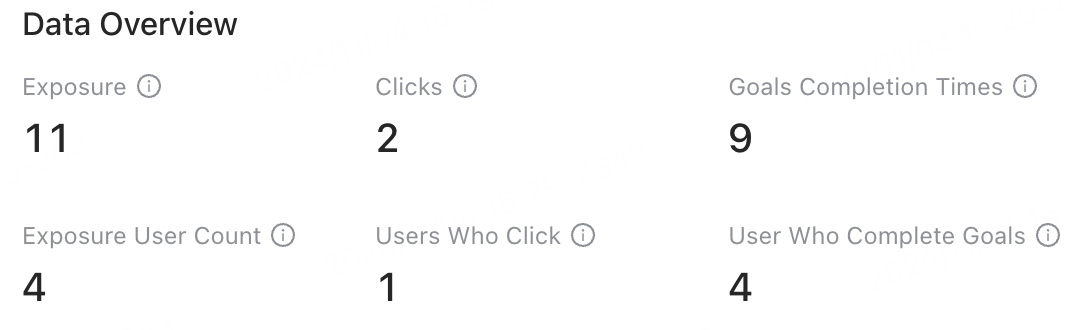
Data overview
| Indicator | Description |
|---|---|
| Exposure | The total number of emails delivered. |
| Exposure User Count | The total number of users reached by the emails. |
| Clicks | The number of times the email is clicked after delivery. |
| Users Who Click | The number of users who click the email after delivery. |
| Goals Completion Times | The total number of times the goal is achieved within the set time after the emails are delivered. |
| User Who Complete Goals | The total number of users who complete the goal within the set time after the emails are delivered. |
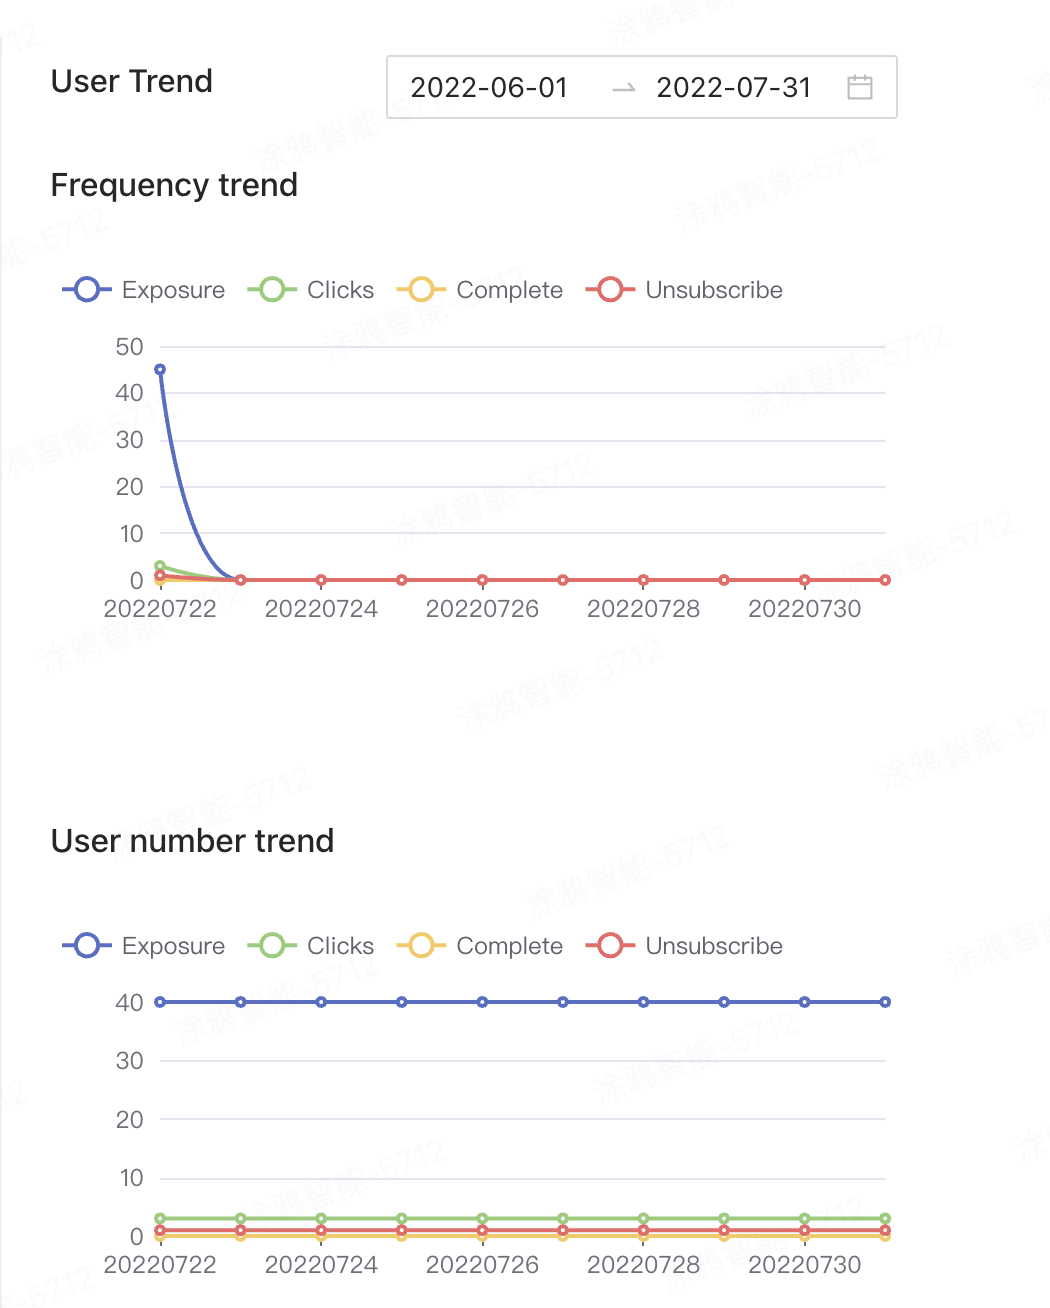
User trend
| Indicator | Description |
|---|---|
| Frequency trend | Displays daily new data for exposure, clicks, goals completion times, and unsubscribed users within the selected date range. |
| User number trend | Displays daily cumulative data for exposure user count, users who click, users who complete goals, and unsubscribed users within the selected date range. Daily new data is calculated by subtracting the previous day’s total from the current day’s total. |
FAQs
Q1: Why is the scheduled email not sent on T+1 even though it is triggered?
If exposure data for the email campaign is still 0 on T+1 or T+2, check whether the email quota has been exceeded, which could prevent the email from being sent.
Q2: Why do some users receive emails in the wrong language?
Email language is based on the user’s language label. If the user changes their system language or if the reported language does not match the platform’s data, the system will send English emails for data centers outside China and Chinese emails for data centers in China.
Q3: Will the quota be deducted for users who have unsubscribed or lack email addresses?
No. If the segment contains unsubscribed users or users without email addresses, the quota is not deducted. If an email fails to be sent, the undelivered email’s quota will be restored. This restoration may take up to one day.
Is this page helpful?
YesFeedbackIs this page helpful?
YesFeedback


